Category: AI Video

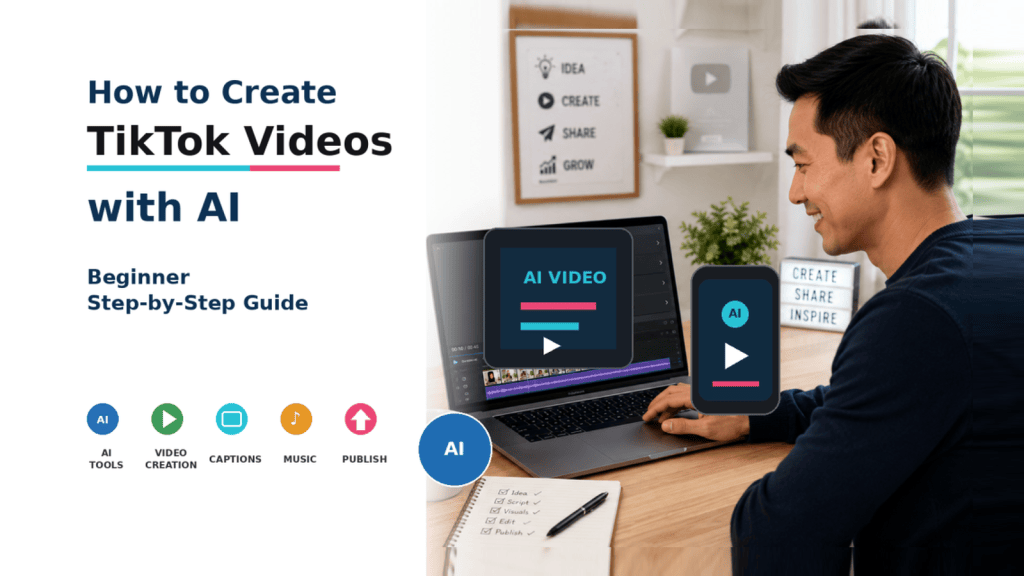
  • How to Create TikTok Videos with AI: Beginner Step-by-Step Guide (2026)

    How to Create TikTok Videos with AI: Beginner Step-by-Step Guide (2026)

    Estimated Reading Time: 18 minutes
    Last Updated: August 15, 2026

    Before Learning

    Before you begin, it helps to have one clear idea for the TikTok video you want to create. Your video can be educational, entertaining, promotional, instructional, or adapted from a longer video, article, tutorial, or other original content.

    You do not need advanced video-editing skills. AI tools can help you brainstorm ideas, draft a short script, plan scenes, create visuals, generate narration, prepare captions, and improve the editing workflow.

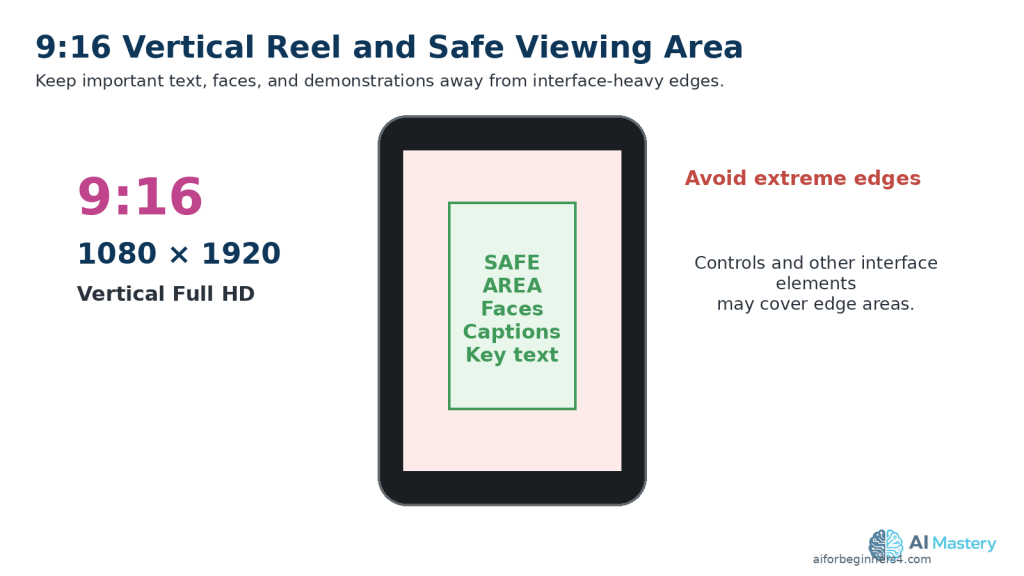
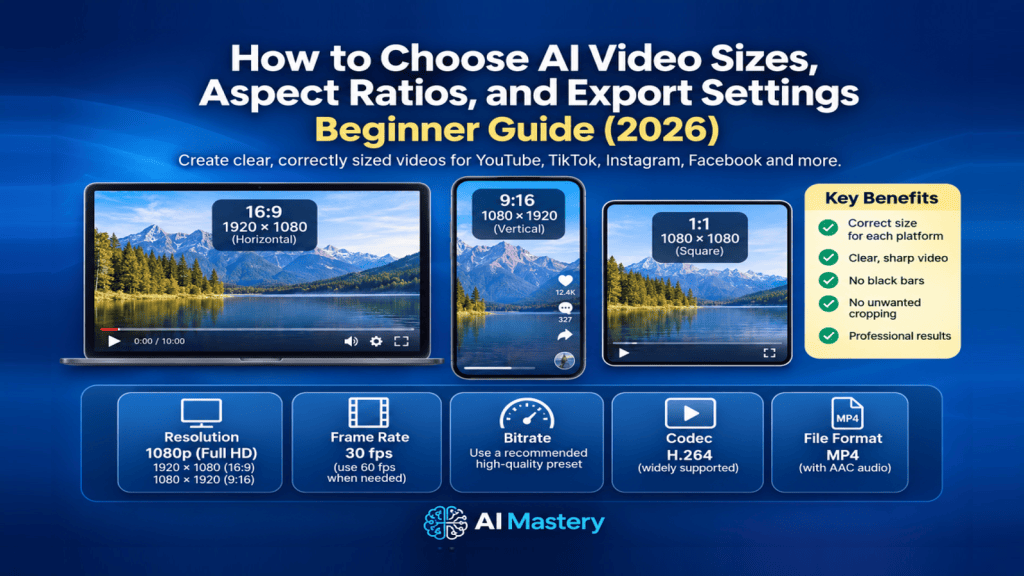
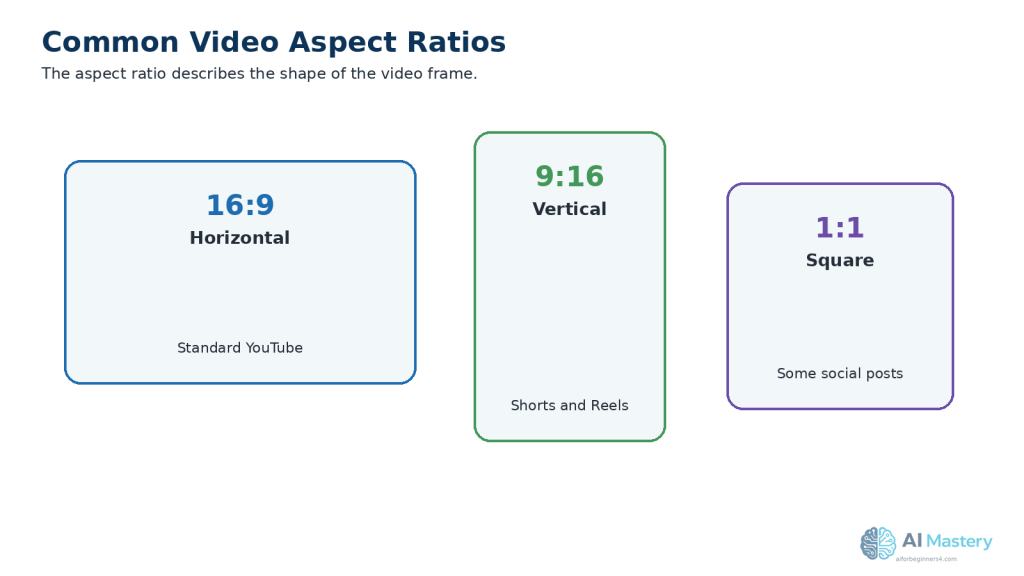
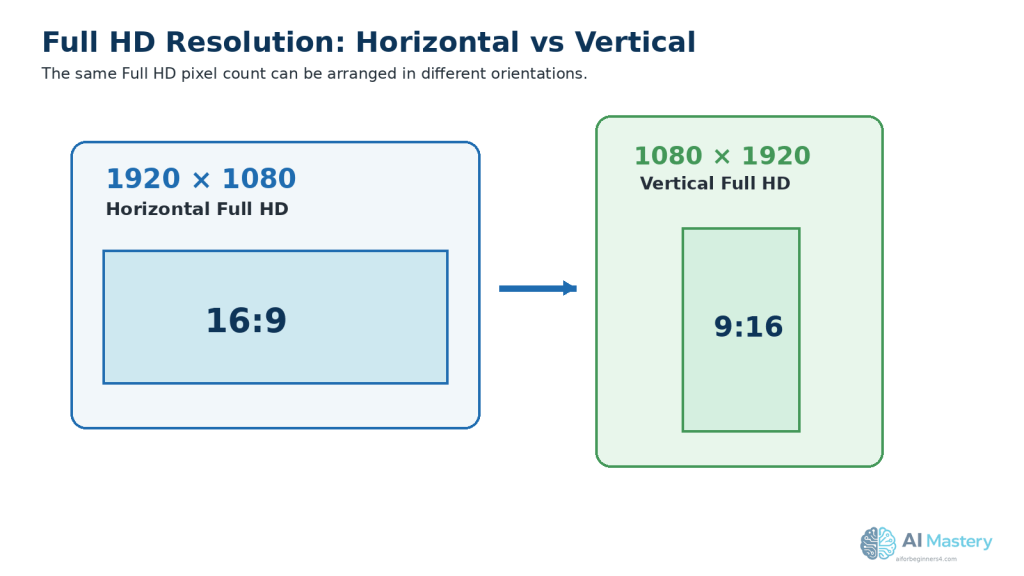
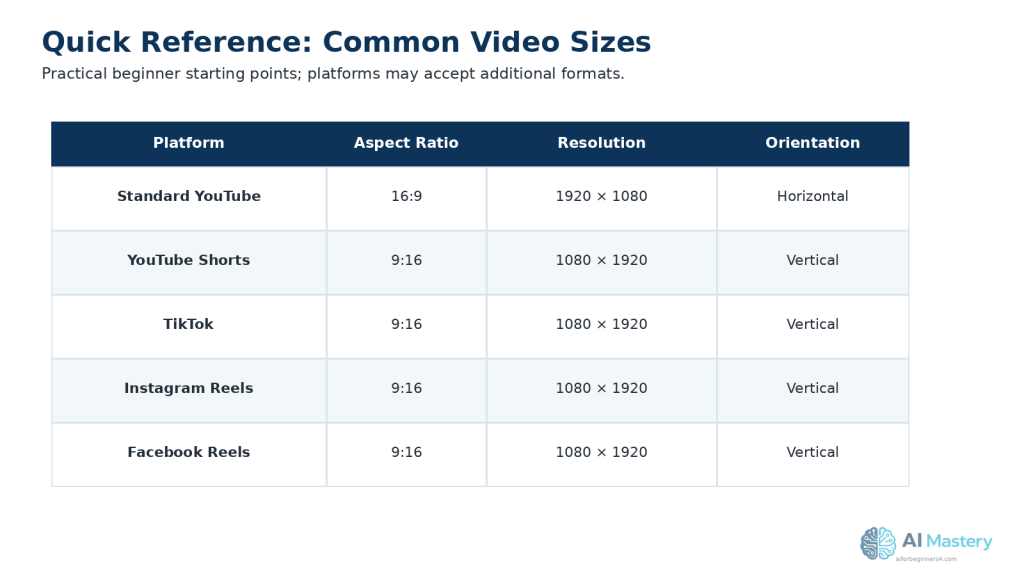
    For beginner-friendly vertical TikTok videos, a 9:16 vertical format at 1080 × 1920 pixels is a practical working size. TikTok recommends vertical 9:16 video for its full-screen viewing experience.

    TikTok currently allows videos recorded inside the app to be up to 10 minutes long and uploaded videos to be up to 60 minutes long. Your video does not need to be long simply because longer uploads are available; use only the time needed to communicate the idea clearly.

    If you use AI-generated or significantly AI-altered images, video, or audio, you should also review TikTok’s current AI-generated-content labeling requirements before publishing. TikTok provides a setting that lets creators label qualifying content as AI-generated.

    Music, photographs, video clips, voices, fonts, templates, and other assets may have separate licensing or permission requirements. For commercial content, TikTok recommends using music from its Commercial Music Library unless you have the necessary rights to other music.

    This guide will show you how to move from one simple idea to a finished TikTok video while keeping your source files, prompts, licences, permissions, clean master export, and publication records organized.

    What You’ll Learn

    By the end of this guide, you will know how to:

    · Choose one clear idea for a TikTok video.

    · Use AI to brainstorm video topics and create a simple content plan.

    · Write a short, focused TikTok script with AI assistance.

    · Create or prepare visuals for a vertical 9:16 layout.

    · Generate or record narration when needed.

    · Add readable captions and on-screen text.

    · Choose music and sound effects while checking usage rights.

    · Edit the video so the main idea is clear quickly.

    · Keep important text, faces, and graphics inside safe viewing areas.

    · Export a clean final version with suitable video settings.

    · Upload and publish the video on TikTok.

    · Review TikTok’s current AI-generated-content labeling requirements.

    · Keep your project files, prompts, licences, permissions, and clean master export for future reuse.

    Introduction

    TikTok is a short-form video platform where people discover educational, entertaining, promotional, and instructional content through a fast-moving vertical feed.

    AI can help with several parts of the TikTok video creation process. You can use it to generate ideas, outline a video, draft a script, create visuals, prepare narration, improve captions, and suggest editing changes.

    However, AI should support your work rather than replace your final judgment. Review every script, visual, voice, caption, and factual claim before publishing. Make sure you have appropriate rights or permission for any music, images, video clips, voices, fonts, templates, or other material that you did not create yourself.

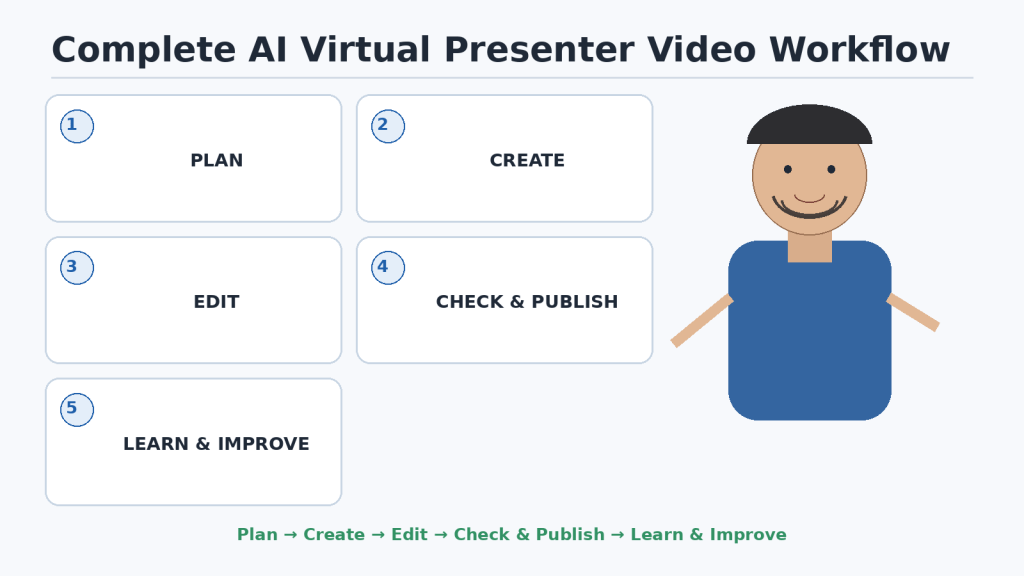
    A practical beginner workflow is to start with one clear idea, write a focused script, prepare vertical visuals, add clear narration and captions, edit the video carefully, and review the final export before uploading it to TikTok.
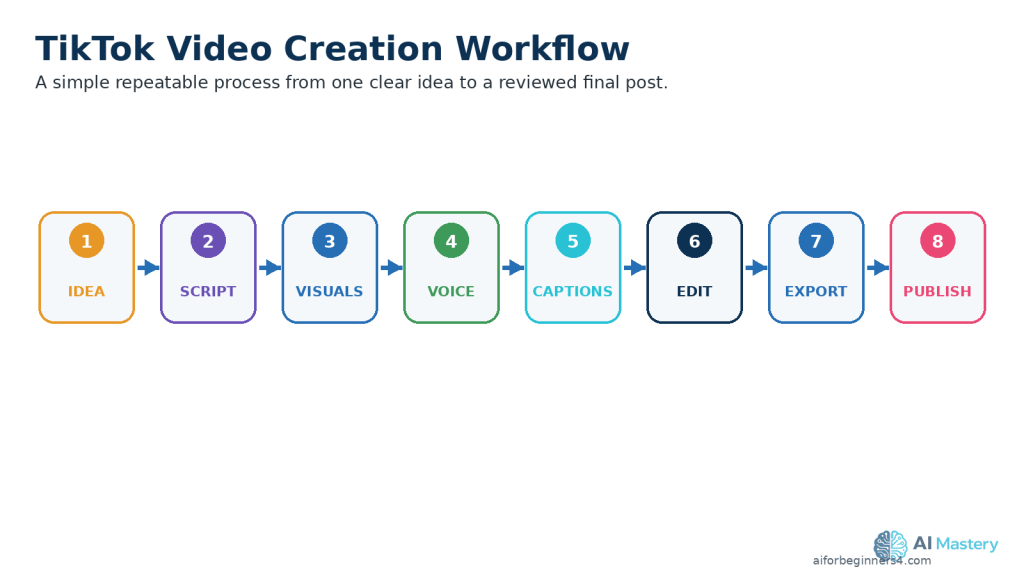
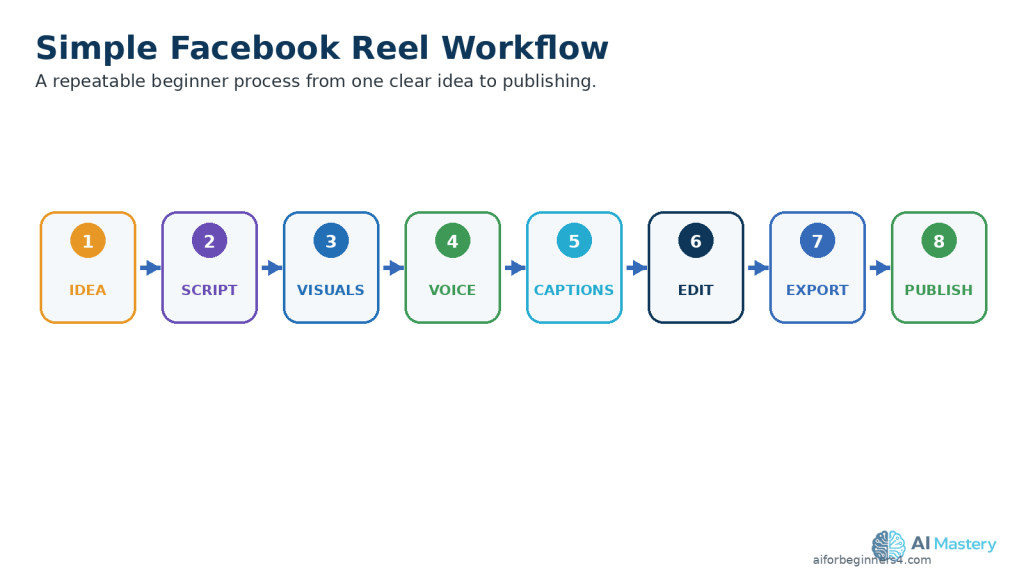
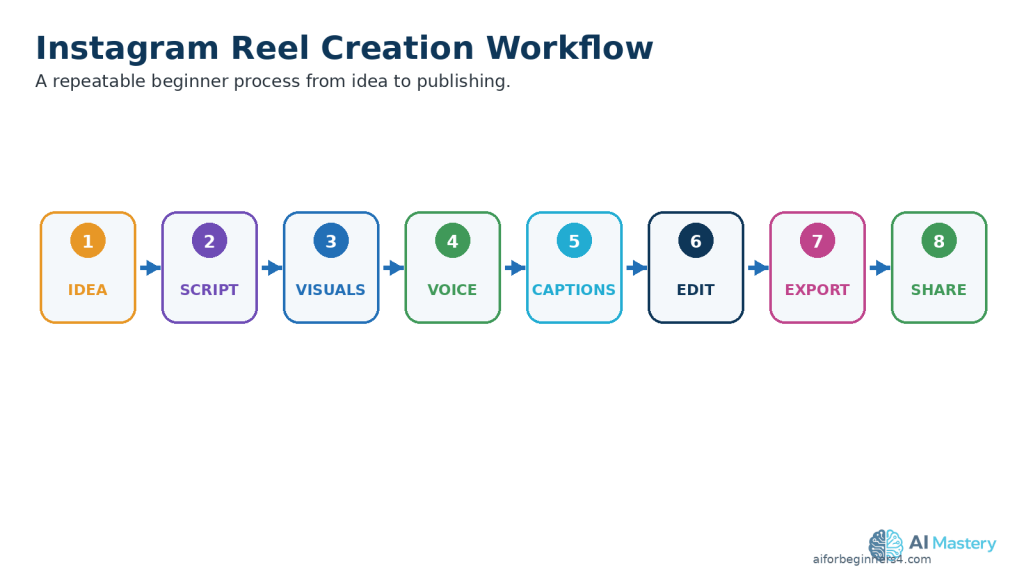
    Figure 1. A simple TikTok video workflow moves from one clear idea through scripting, visuals, narration, captions, editing, export, and publishing.

    Explanation: Reusing the same sequence for each video makes the production process easier to repeat, review, and improve.

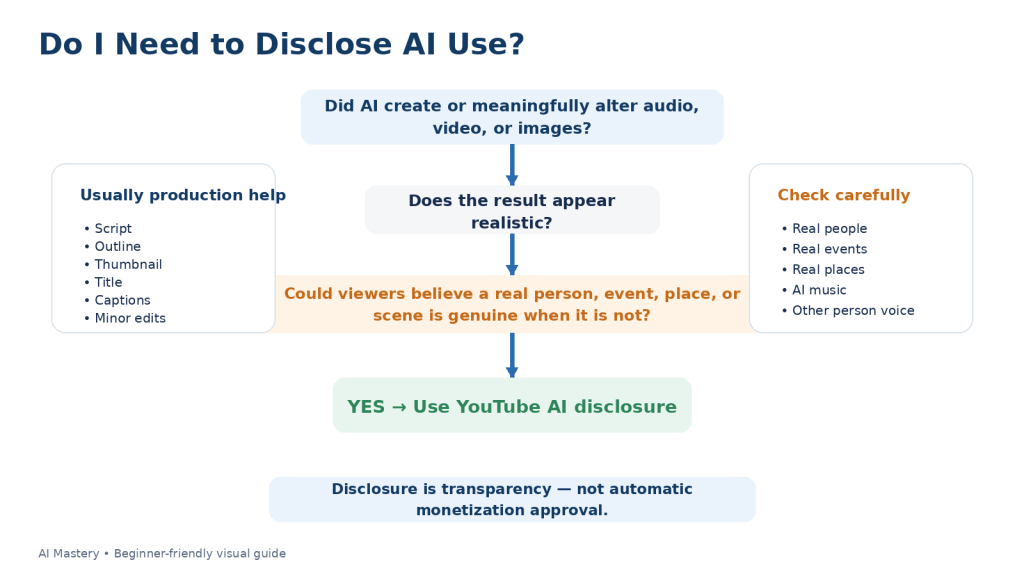
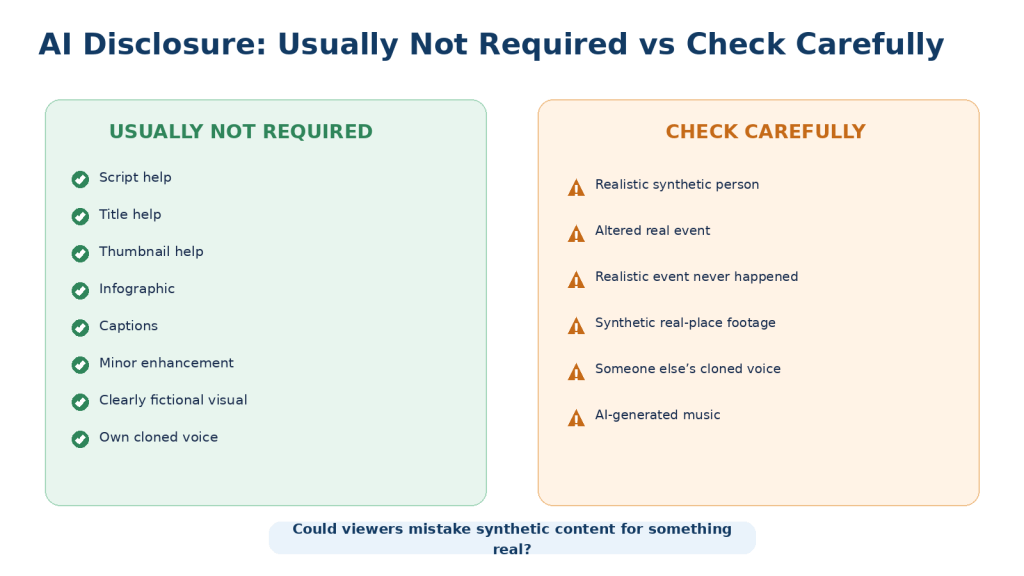
    If realistic AI-generated or significantly altered content could be mistaken for a real person, place, or event, review TikTok’s current AI-generated-content labeling requirements before publishing.

    What Are TikTok Videos?

    TikTok videos are posts that can combine video, sound, narration, captions, text, effects, and other visual elements. People use them for entertainment, tutorials, demonstrations, educational content, product information, personal stories, and many other purposes.

    TikTok currently allows uploaded videos to be up to 60 minutes long.

    For beginner short-form content, however, the goal is not to make the video as long as possible. Use only the time needed to explain the idea clearly.

    TikTok videos can work well for:

    · Quick tips.

    · Short tutorials.

    · Educational explanations.

    · Before-and-after examples.

    · Demonstrations.

    · Product or service information.

    · Lists and recommendations.

    · Faceless videos.

    · AI-assisted videos.

    · Clips adapted from longer original content.

    Recommended Beginner Format

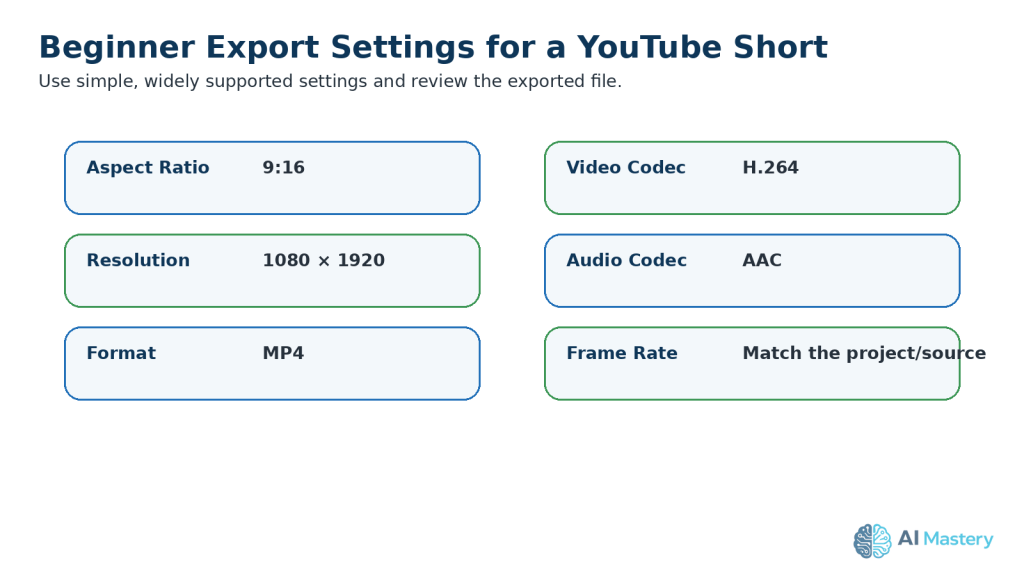
    For a phone-friendly TikTok video, a practical beginner format is:

    · Aspect ratio: 9:16

    · Resolution: 1080 × 1920 pixels

    · Orientation: Vertical

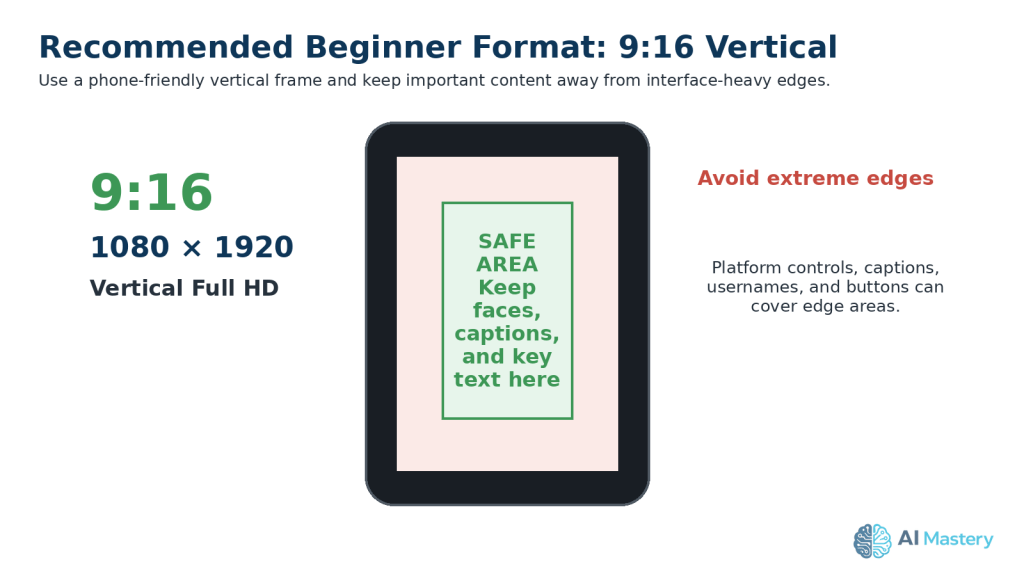
    TikTok’s current creative guidance recommends 9:16 vertical video and keeping important content inside the interface safe zone. TikTok for Business also recommends exporting at 1080 × 1920 or higher for clear full-screen playback.

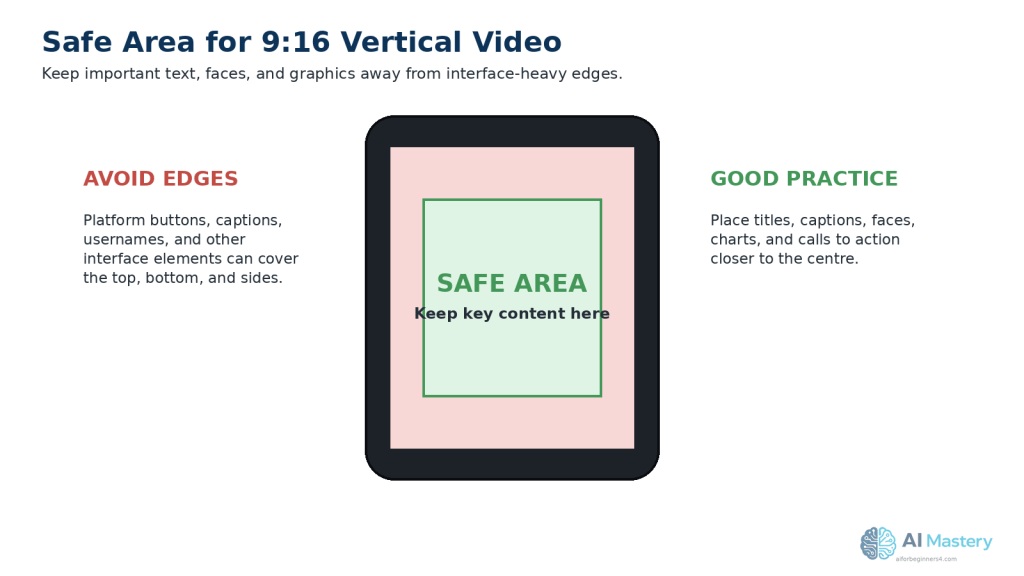
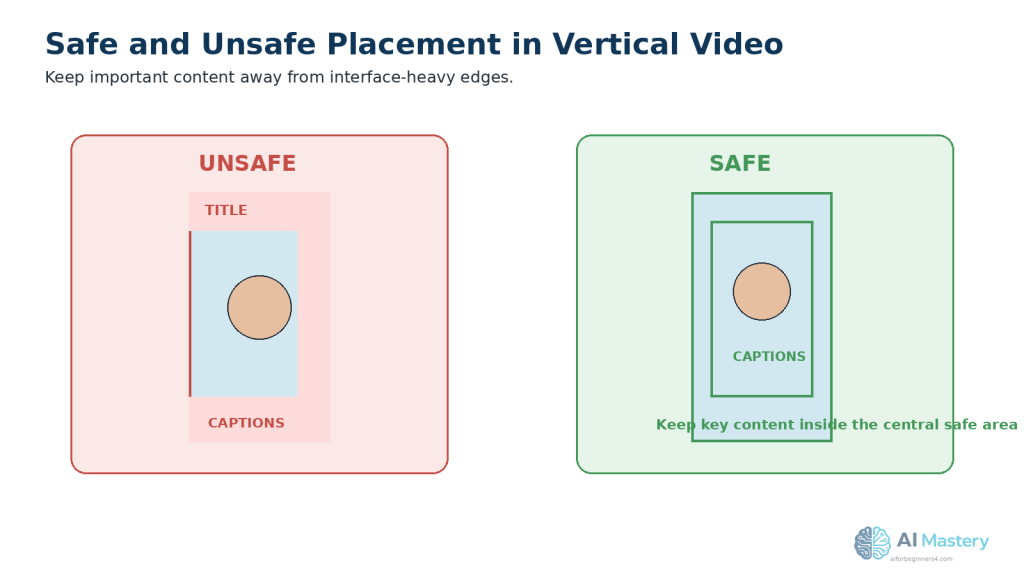
    Keep Important Content Inside the Safe Area

    TikTok places interface elements over parts of the video, including controls and text areas.

    Keep important elements such as:

    · Faces.

    · Captions.

    · Titles.

    · Demonstrations.

    · Screenshots.

    · Charts.

    · Important buttons.

    · Calls to action.

    away from the extreme edges of the frame.

    TikTok’s official creative guidance recommends keeping key information inside the safe zone so interface elements do not cover it.
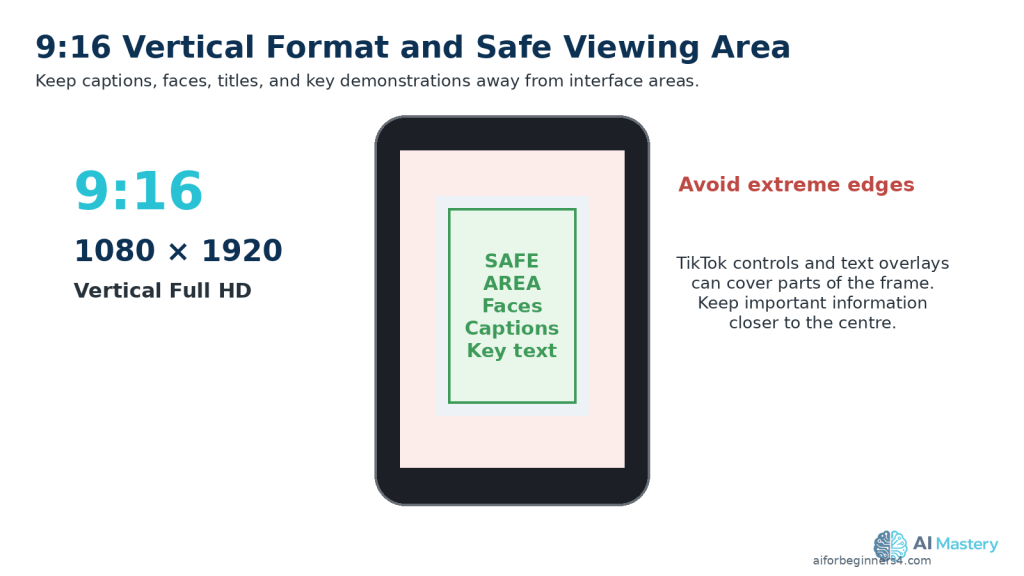
    Figure 2. A 9:16 vertical frame at 1080 × 1920 pixels is a practical beginner format, with key content kept away from interface areas.

    Explanation: Keep important faces, captions, titles, and demonstrations closer to the central viewing area so TikTok controls are less likely to cover them.

    Practical Example

    Suppose you want to create a TikTok video explaining one beginner AI tip.

    You could create a 1080 × 1920 vertical video, keep the main subject and important captions toward the central area, and zoom into any screen recording that viewers need to read.

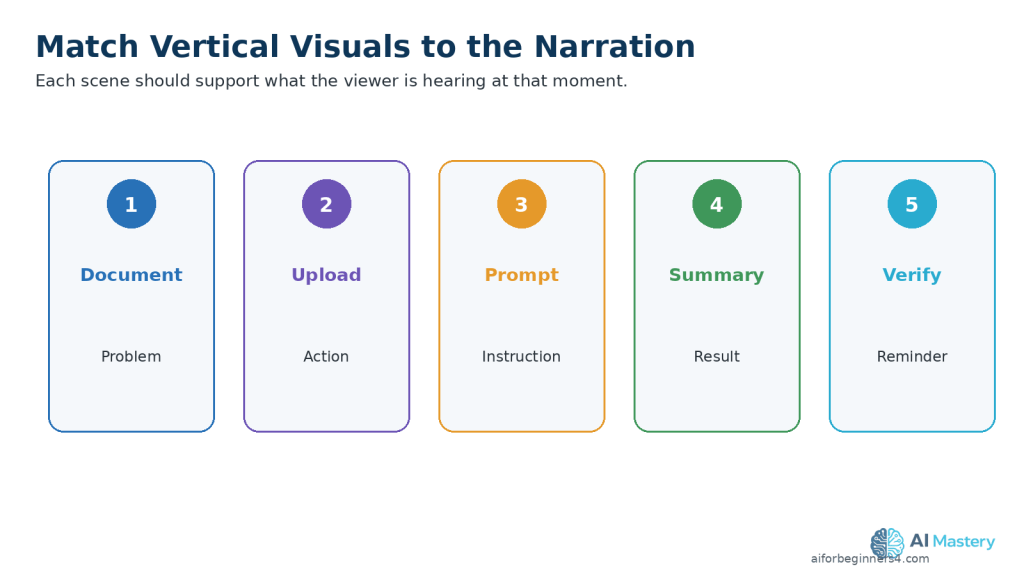
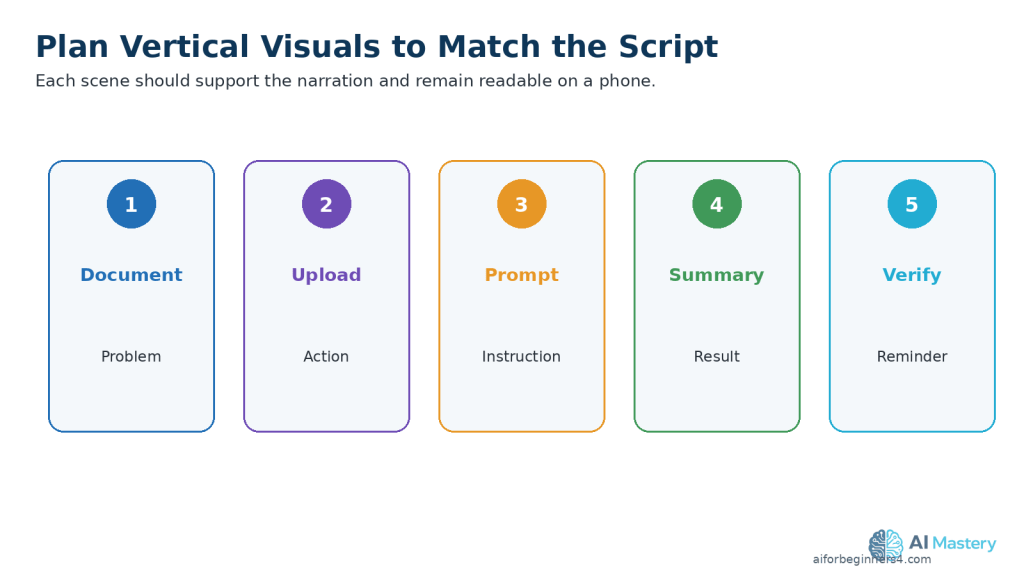
    For example, a short video about document summarization could show the original document, the upload step, a short AI prompt, the generated summary, and a final reminder to verify important information against the original document.

    Step 1: Choose One Clear Idea for Your TikTok Video

    A TikTok video is easier to understand when it focuses on one main idea. Trying to cover too many topics in one video can make the content feel rushed or confusing.

    Choose a topic that can be explained clearly, such as:

    · One beginner AI tip.

    · One useful AI tool.

    · One common mistake.

    · One short tutorial.

    · One quick comparison.

    · One before-and-after example.

    · One useful idea from a longer AI Mastery article.

    Use AI to Brainstorm TikTok Ideas

    You can ask an AI assistant to suggest video ideas based on your topic.

    Prompt:

    “Give me 10 beginner-friendly TikTok video ideas about using AI for everyday tasks. Keep each idea focused on one clear lesson.”

    Review the suggestions carefully and choose an idea that is useful, accurate, and appropriate for your audience.

    Keep the Topic Narrow

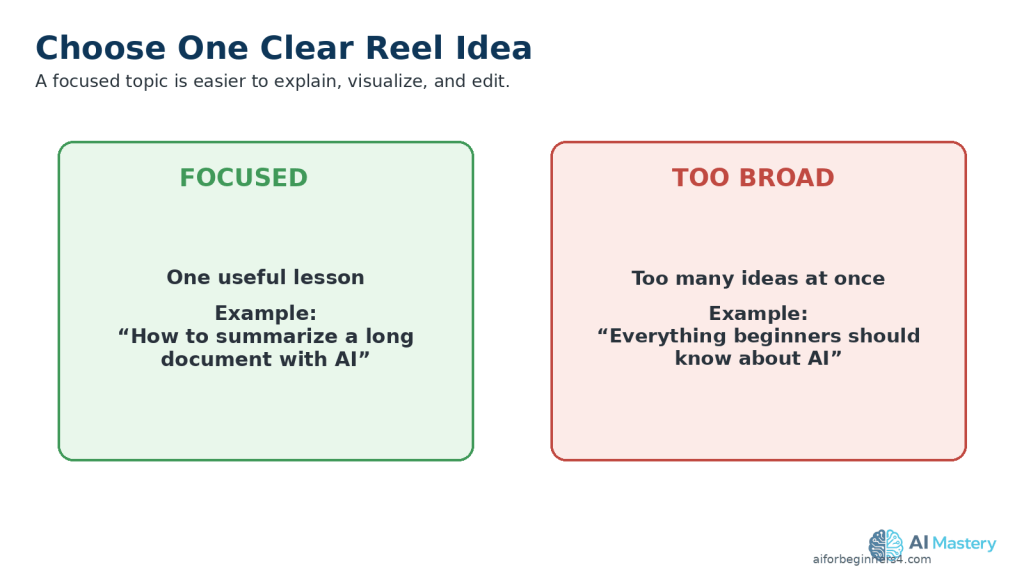
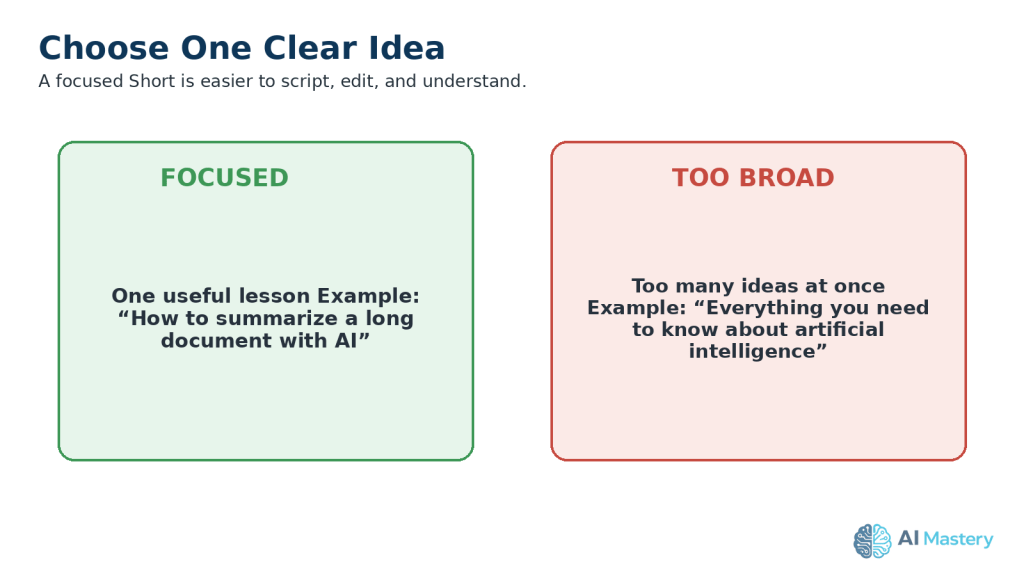
    Instead of creating a video called:

    “Everything Beginners Should Know About AI”

    choose something more specific, such as:

    “3 Ways AI Can Help You Save Time”

    or:

    “How to Summarize a Long Document with AI”

    A narrow topic makes it easier to write a clear script, choose suitable visuals, and keep the video focused.
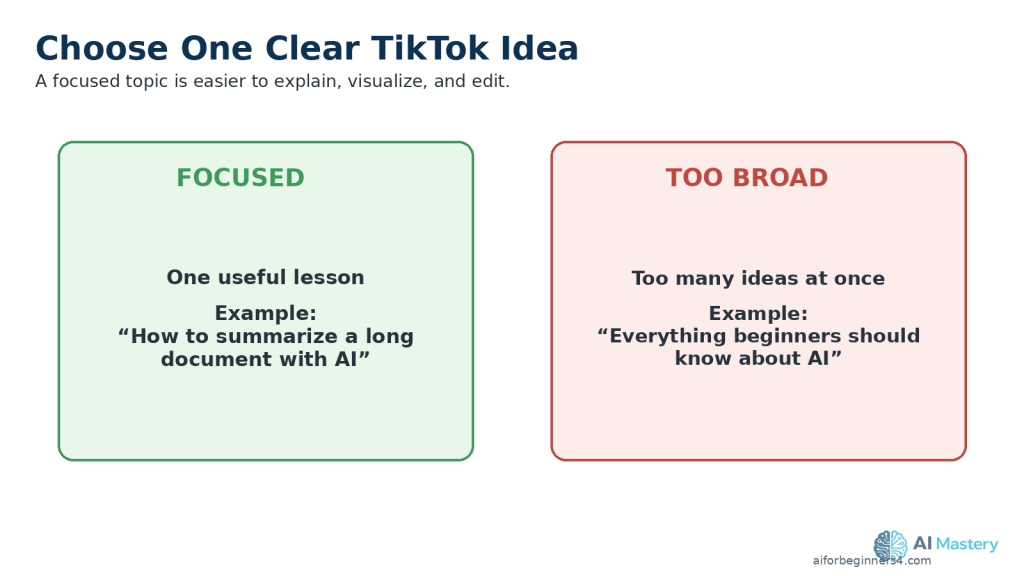
    Figure 3. One focused TikTok idea is easier to explain than a broad topic containing many unrelated points.

    Explanation: A narrow topic helps keep the script, visuals, and editing focused on one useful lesson.

    Practical Example

    If a longer AI Mastery article explains several document features, you could create one TikTok video about only document summarization.

    The video can show the problem, demonstrate the basic process, and finish with one clear reminder to review the AI-generated result against the original document.

    Step 2: Write a Short, Focused TikTok Script with AI

    A clear script helps keep your TikTok video organized and easy to follow. Even a short video benefits from having a simple beginning, main point, and ending.

    AI can help you turn your idea into a draft script, but you should review and improve the result before using it.

    Start with a Clear Prompt

    Give the AI assistant enough information about your topic, audience, and goal.

    Prompt:

    “Write a beginner-friendly TikTok script about how AI can help summarize a long document. Keep it clear, practical, and focused on one useful example. Use simple language and avoid hype.”

    Use a Simple Script Structure

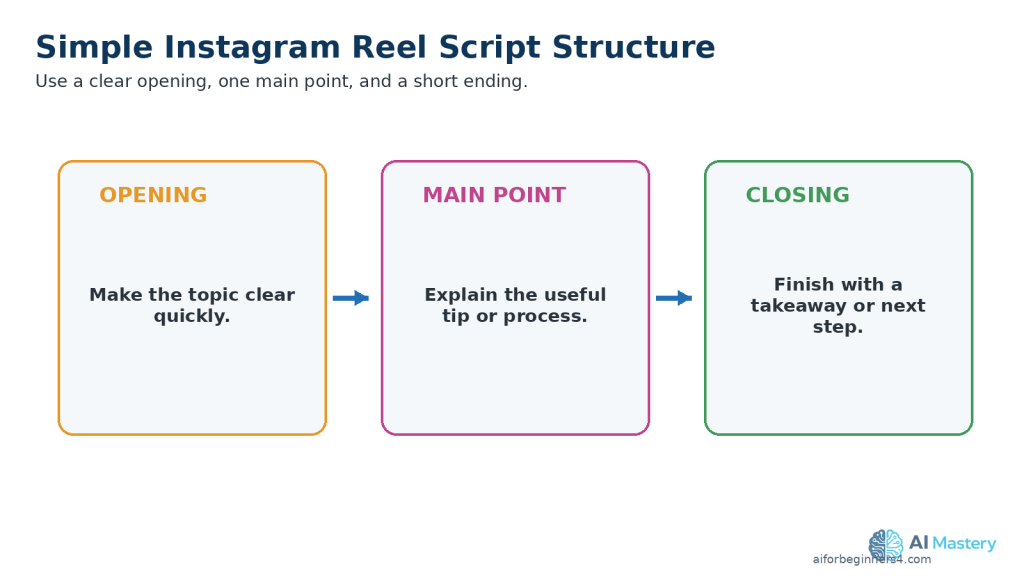
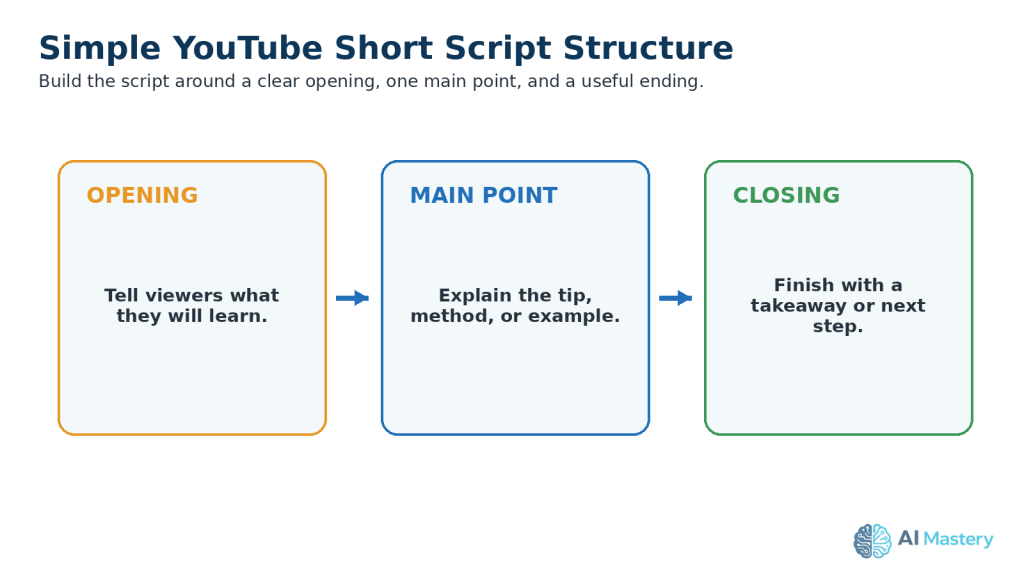
    A practical beginner structure is:
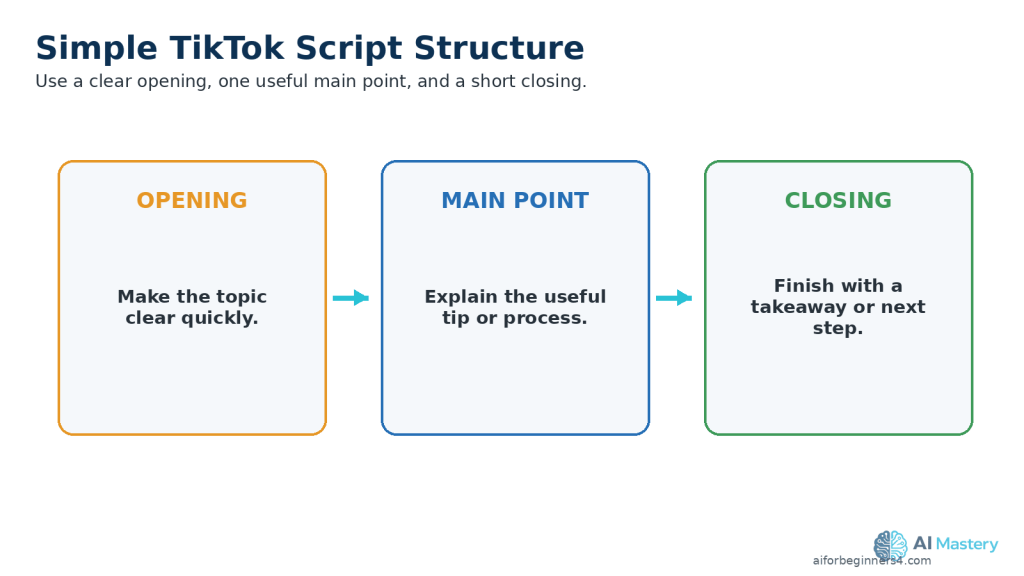
    Figure 4. A simple TikTok script can use a clear opening, one useful main point, and a short closing takeaway.

    Explanation: This structure helps the video reach useful information quickly without requiring a long introduction.

    1. Opening: Tell viewers quickly what the video is about.

    2. Main point: Explain the useful tip, process, or example.

    3. Closing: Finish with a short takeaway or next step.

    Make the Opening Clear

    Avoid spending too much time on a long introduction.

    Instead of:

    “Hello everyone, welcome back to another video.”

    you could begin with:

    “Have a long document to read? AI can help you create a short summary.”

    This tells viewers what the video is about immediately.

    Review the AI-Written Script

    Check the script for:

    · Factual accuracy.

    · Clear and simple language.

    · Unnecessary repetition.

    · Claims that sound exaggerated.

    · Instructions that may be outdated.

    · Difficult technical terms.

    · Information that does not support the video’s main idea.

    Do not assume that an AI-generated script is automatically correct.

    Practical Example

    For a TikTok video about summarizing a document with AI, the script could follow this simple sequence:

    1. Show the long document.

    2. Explain that an AI tool can help summarize it.

    3. Show the document being uploaded.

    4. Show a short summary prompt.

    5. Remind viewers to compare the summary with the original document.

    This gives viewers one clear lesson without trying to explain every document-analysis feature at once.

    Step 3: Create or Prepare Vertical Visuals

    Your visuals should support the script and make the TikTok video easy to understand on a phone screen.

    For most beginner projects, use a 9:16 vertical layout at 1080 × 1920 pixels.

    Choose Visuals That Match the Script

    Depending on your topic, you can use:

    · AI-generated images.

    · Licensed stock photos or stock video.

    · Screen recordings.

    · Charts or simple graphics.

    · Text-based slides.

    · Product or workspace footage.

    · Clips from a longer video you created.

    Use only visuals that help explain the main point.

    Keep Important Content Visible

    Keep important elements such as:

    · Faces.

    · Captions.

    · Titles.

    · Buttons.

    · Screenshots.

    · Charts.

    · Demonstrations.

    away from the extreme edges of the frame.

    TikTok interface elements can cover parts of a vertical video, so keep important information closer to the central viewing area.

    Make Screenshots Easy to Read

    If your TikTok video includes a computer or phone screenshot, avoid showing the entire screen when the important text becomes too small.

    Instead, crop or zoom into the area viewers need to see.

    For example, if you are demonstrating an AI prompt, show the prompt box clearly rather than displaying an entire browser window at a very small size.

    Review AI-Generated Visuals Carefully

    AI-generated images and video clips can contain mistakes such as:

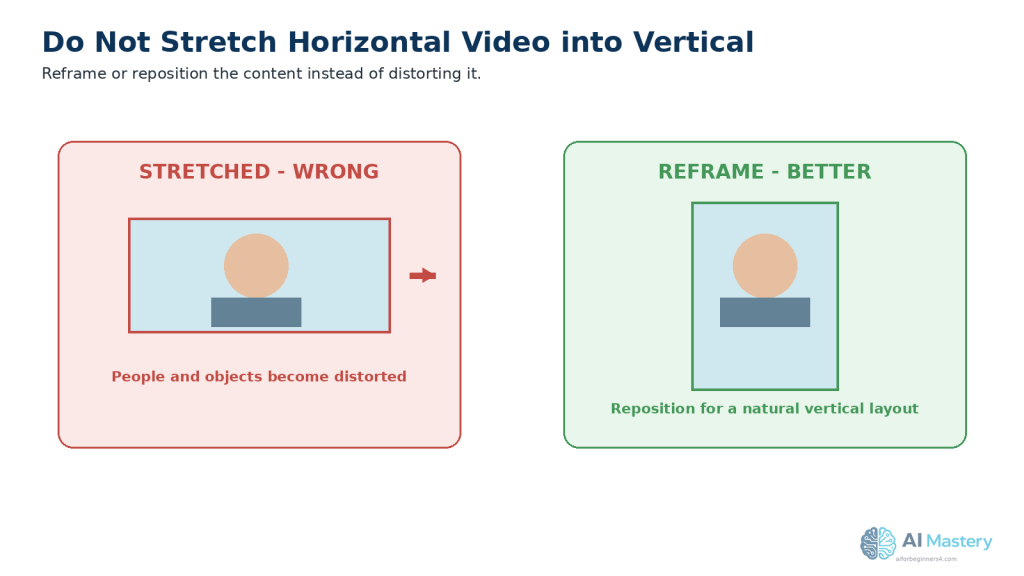
    · Distorted hands or objects.

    · Misspelled text.

    · Duplicate items.

    · Inconsistent people or clothing.

    · Incorrect interface elements.

    · Unrealistic details.

    Review every generated visual before adding it to the video.

    Check Licences and Permissions

    If you use stock footage, photographs, templates, fonts, graphics, or other assets that you did not create yourself, check the licence and commercial-use conditions before publishing.

    Do not assume that an image or video is free to reuse simply because it is available online.

    Practical Example

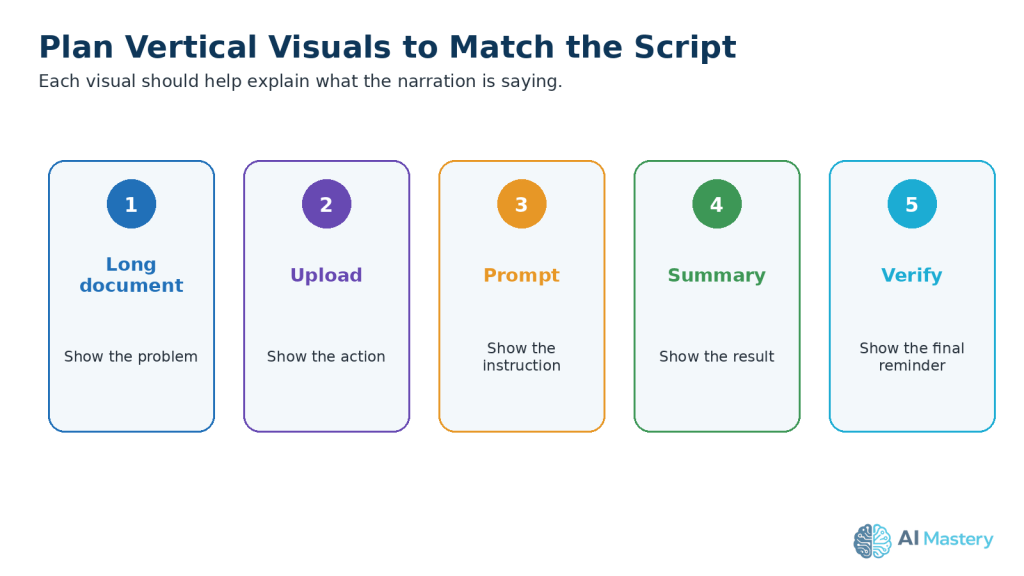
    For a TikTok video about summarizing a document with AI, you might use:

    1. A visual showing a long document.

    2. A screen recording of the document being uploaded.

    3. A close-up of the summary prompt.

    4. A simple visual showing the shorter AI-generated result.

    5. A final reminder to compare the summary with the original document.

    This creates a clear visual sequence that follows the script from beginning to end.
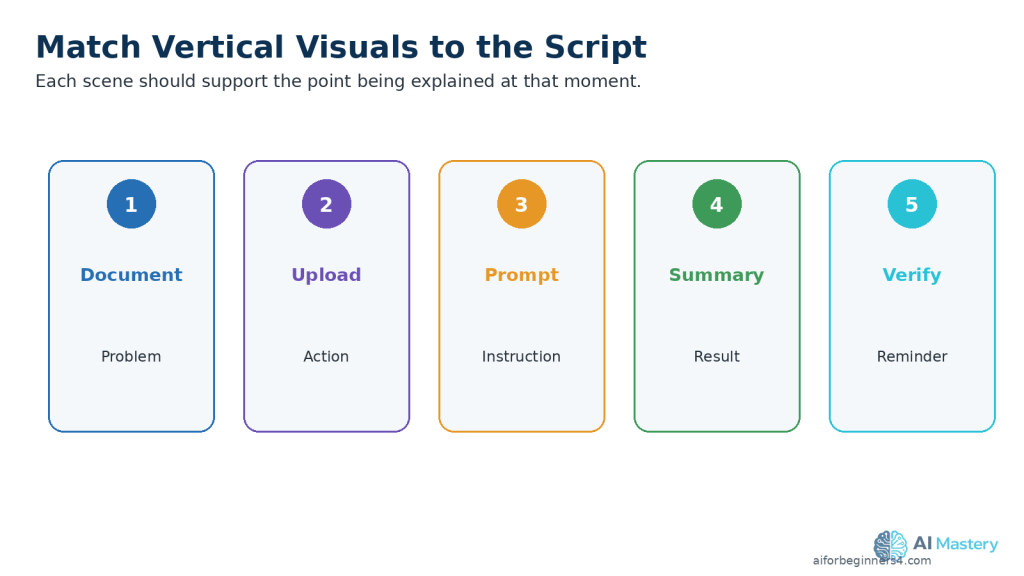
    Figure 5. Plan vertical visuals in the same order as the script so each scene supports the point being explained.

    Explanation: Matching scenes to the script helps viewers follow a demonstration on a small phone screen.

    Step 4: Add Narration or an AI Voice

    Narration can make a TikTok video easier to follow, especially when the video explains a process, gives a tip, or demonstrates a task.

    You can record your own voice or use an AI-generated voice when the tool and licence allow your intended use.

    Choose a Clear Voice

    The narration should be easy to understand and should match the pace of the visuals.

    A good voice-over should:

    · Speak clearly.

    · Avoid rushing.

    · Use natural pauses.

    · Match the tone of the topic.

    · Pronounce technical terms correctly.

    · Leave enough time for viewers to read important on-screen text.

    Review AI-Generated Narration

    If you use an AI voice, listen to the entire recording before adding it to the TikTok video.

    Check for:

    · Mispronounced names or technical terms.

    · Unnatural pauses.

    · Missing words.

    · Incorrect emphasis.

    · Audio that sounds too fast or too slow.

    · Sentences that do not match the visuals.

    Correct the script or regenerate the affected section when necessary.

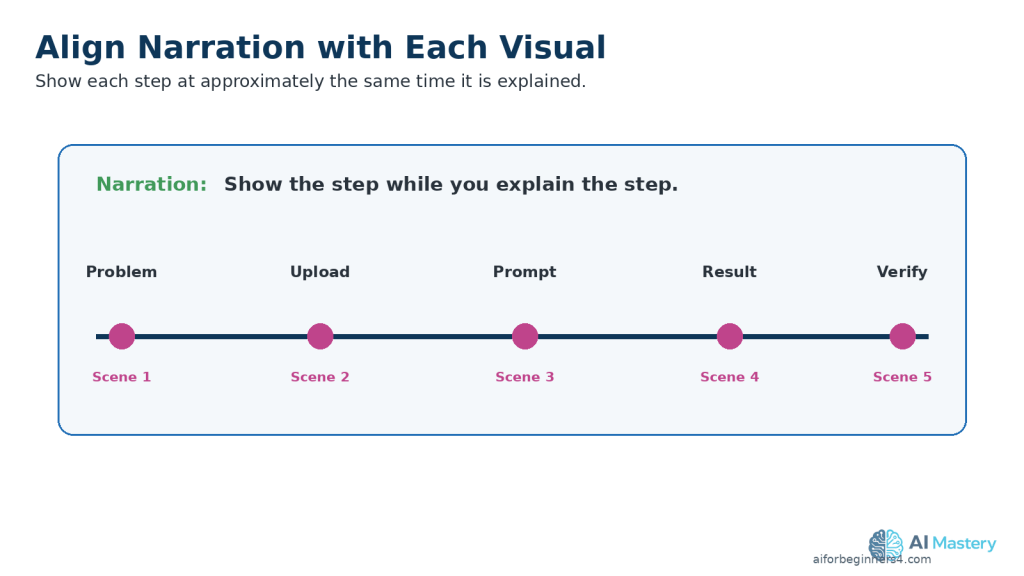
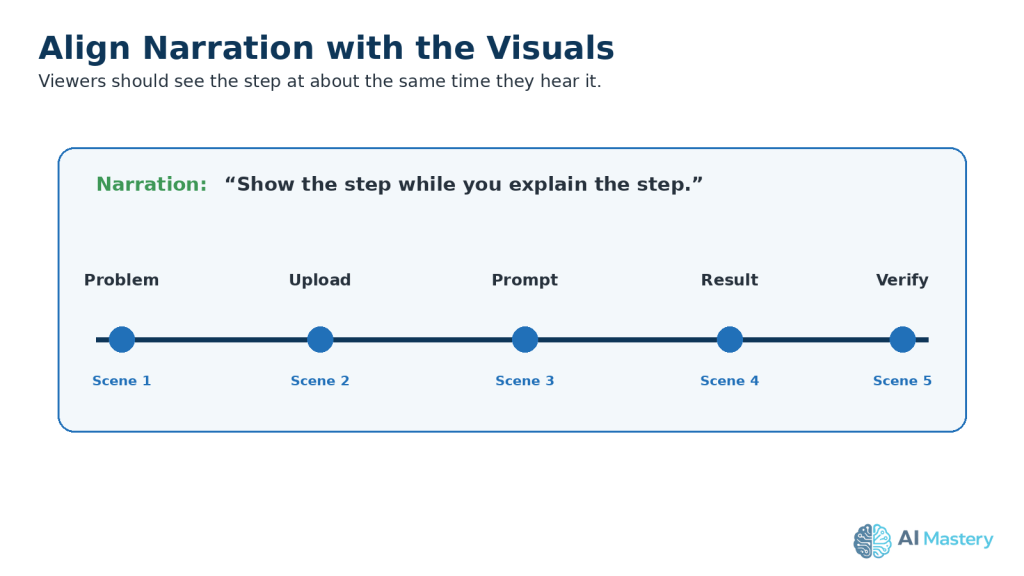
    Keep Narration and Visuals Aligned

    The visual shown on screen should support what the viewer is hearing.

    For example, if the narration says:

    “Upload your document to the AI tool.”

    the video should show the upload step at approximately the same time.

    This makes the video easier to understand.

    Protect Privacy and Get Permission

    Do not clone or imitate a real person’s voice without appropriate permission.

    If you use another person’s recording, make sure you have permission to use it and understand any licence or platform conditions that apply.

    Avoid using AI voices in ways that could falsely make viewers believe a real person said something they did not say.

    Practical Example

    For a TikTok video explaining document summarization, the narration could briefly guide the viewer through uploading a document, asking for a summary, and checking the result.

    Each visual can change as the narration moves to the next step, keeping the video clear and easy to follow.
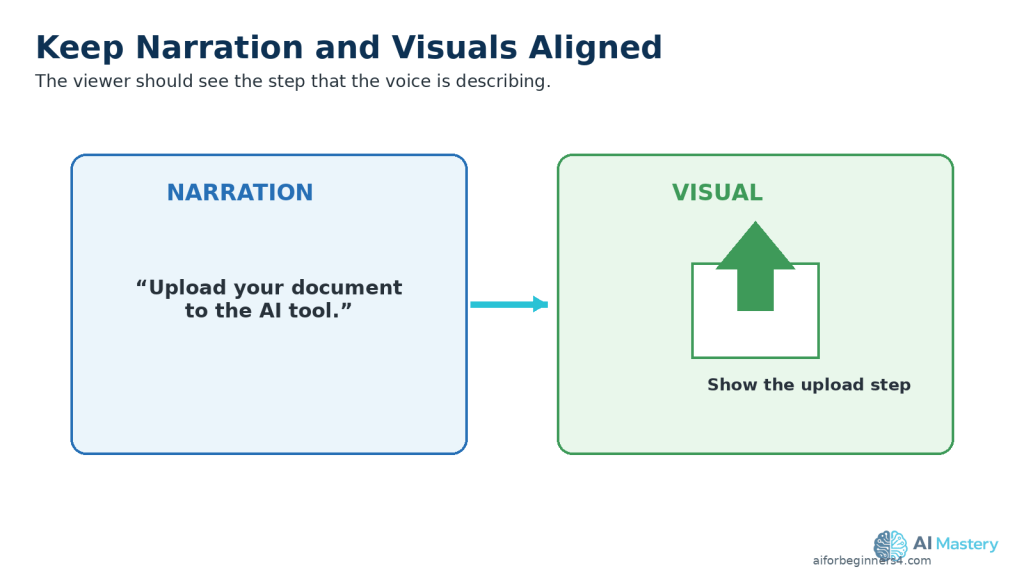
    Figure 6. Keep narration and visuals aligned so viewers see the step that the voice is describing.

    Explanation: When spoken instructions and visual actions match, the video becomes easier to follow.

    Step 5: Add Captions and On-Screen Text

    Captions and on-screen text can make a TikTok video easier to understand, especially when viewers are watching without sound.

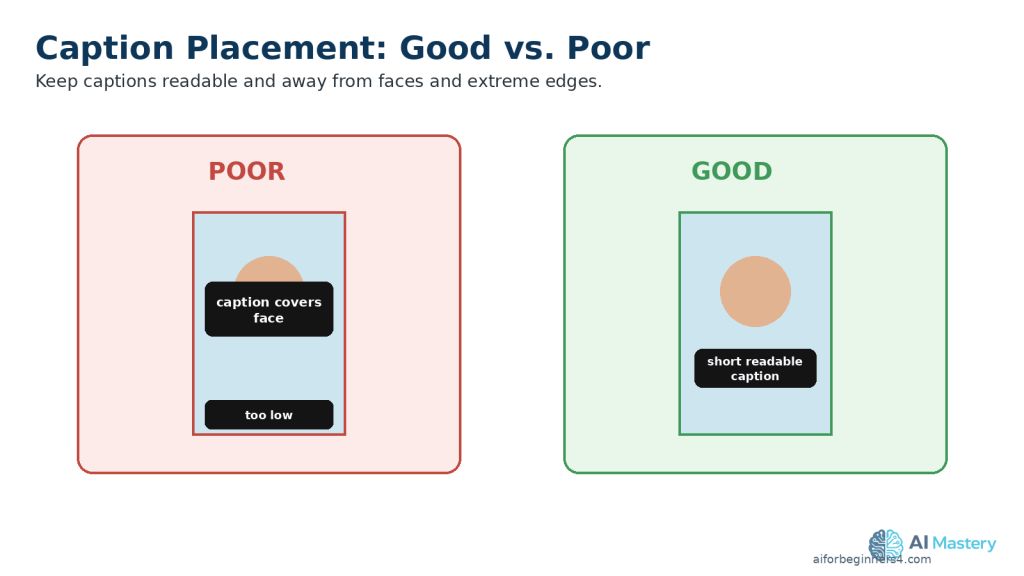
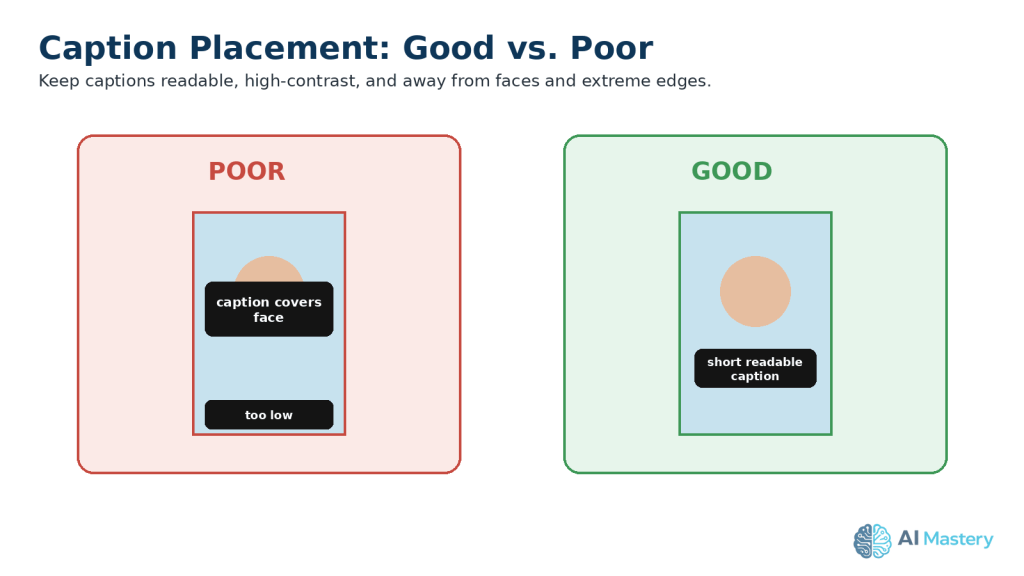
    Keep Captions Easy to Read

    Use captions that are:

    · Large enough to read on a phone.

    · Short and easy to scan.

    · High contrast against the background.

    · Timed closely with the spoken words.

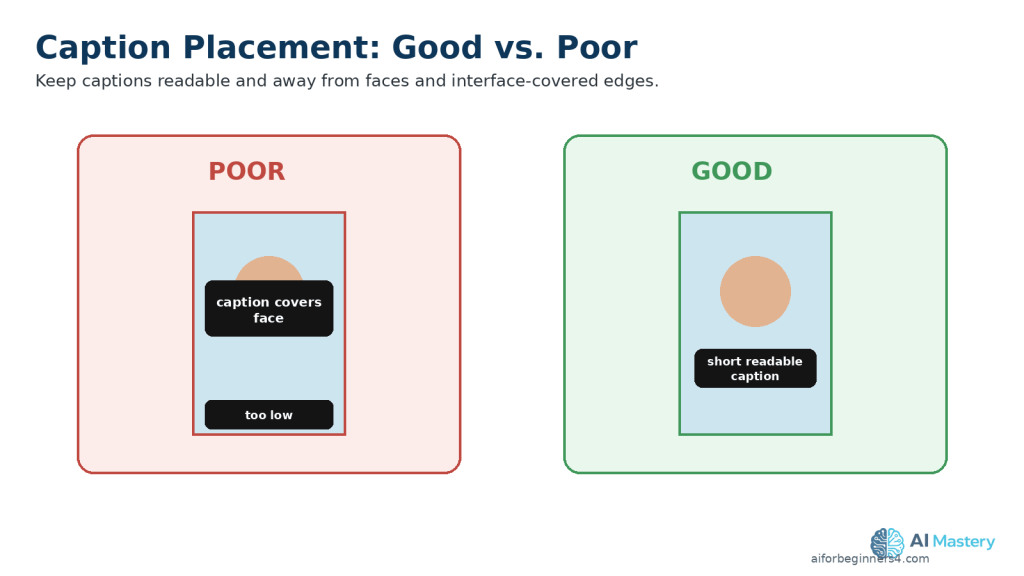
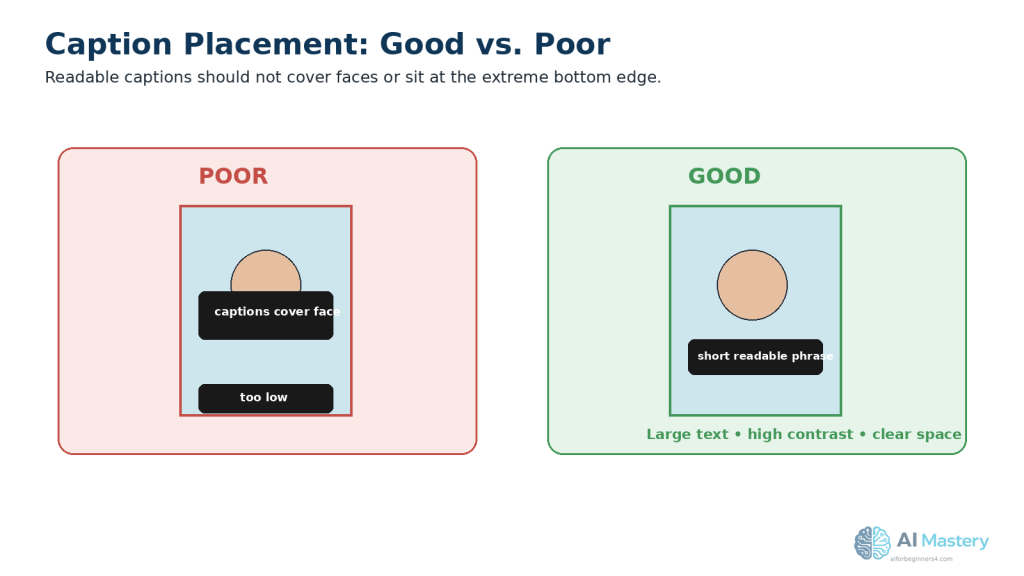
    · Positioned away from important faces, demonstrations, and other visual details.

    Avoid placing captions too close to the extreme edges of the frame, where TikTok interface elements may cover them.

    Use On-Screen Text Carefully

    On-screen text can highlight the most important information in the video.

    For example, you could show:

    “3 Steps to Summarize a Document with AI”

    near the beginning.

    Later, you could use short labels such as:

    · Step 1: Upload

    · Step 2: Ask for a Summary

    · Step 3: Review the Result

    Keep the wording simple. Too much text on screen at the same time can make the video difficult to follow.

    Check Spelling and Accuracy

    Review every caption and text element before exporting.

    Check for:

    · Spelling mistakes.

    · Missing words.

    · Incorrect punctuation.

    · Wrong names or technical terms.

    · Captions that appear too early or too late.

    · Text that does not match the narration.

    Accessibility

    Captions can help people who are deaf or hard of hearing, viewers watching without sound, and people who find written text easier to follow than narration alone.

    Do not rely only on colour to communicate important information. Use clear words, labels, or symbols as well.

    Practical Example

    If the narrator says:

    “Always check the AI-generated summary against the original document.”

    you could display:

    “Always verify the summary.”

    This reinforces the main lesson without overcrowding the screen.
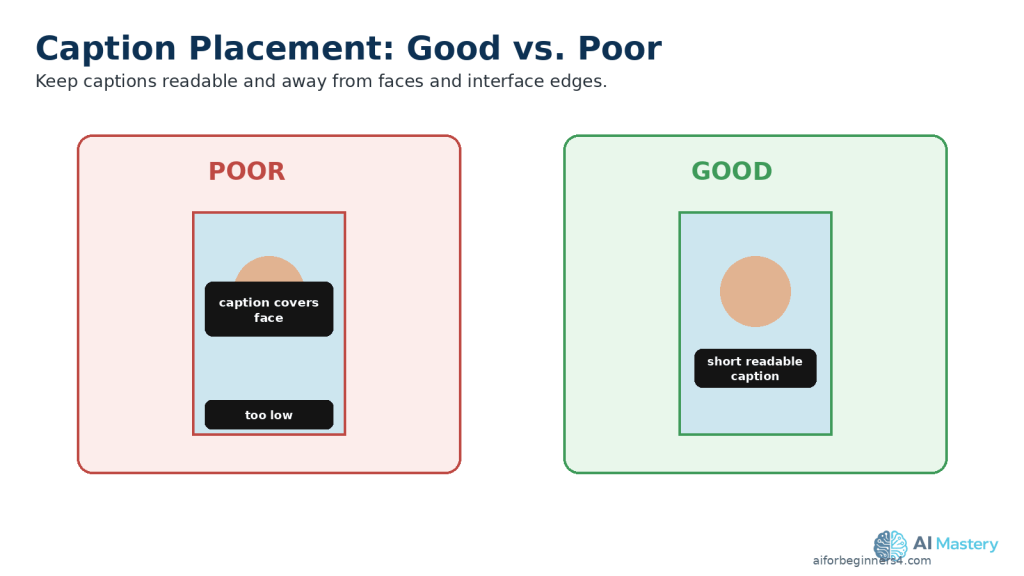
    Figure 7. Place captions where they remain readable without covering faces or sitting too close to interface edges.

    Explanation: Clear caption placement improves readability and accessibility while reducing the chance that TikTok controls will hide important text.

    Step 6: Add Music and Sound Effects Carefully

    Music and sound effects can make a TikTok video more engaging, but they should support the video rather than distract from the main message.

    Choose Music You Are Allowed to Use

    Do not assume that any song available online is automatically safe to use in a TikTok video.

    TikTok explains that copyright protects original works such as music and videos, and sounds may be removed when they violate copyright restrictions or TikTok’s rules.

    Be Extra Careful with Commercial Content

    If your TikTok video promotes a brand, product, or service, TikTok recommends using music from its Commercial Music Library (CML) because that music is cleared for commercial use on TikTok.

    Business Accounts do not have access to TikTok’s general music library because those songs are not cleared for commercial use.

    If you use music outside the Commercial Music Library for commercial content, make sure you have the necessary rights or permission.

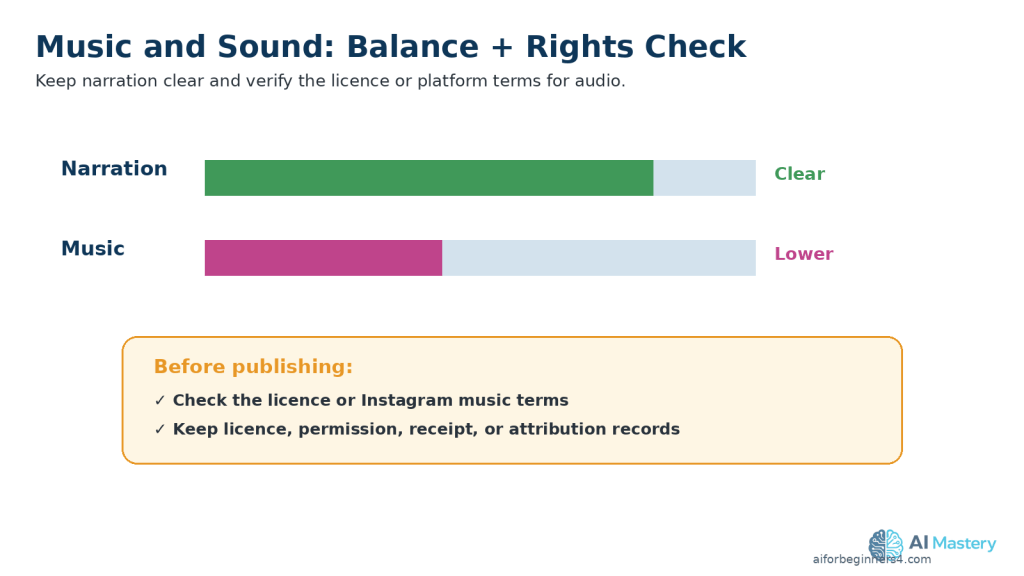
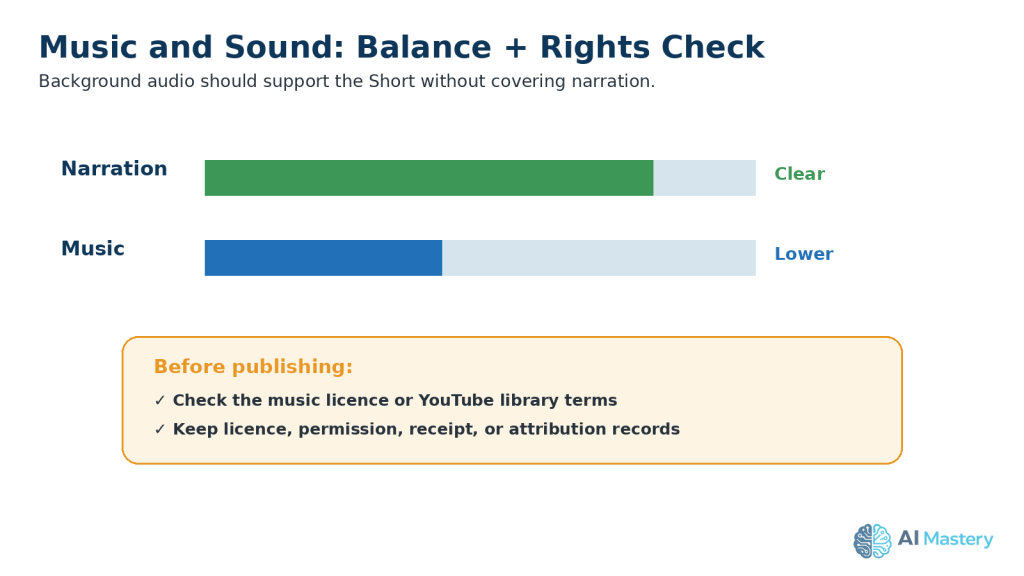
    Keep Music Below the Narration

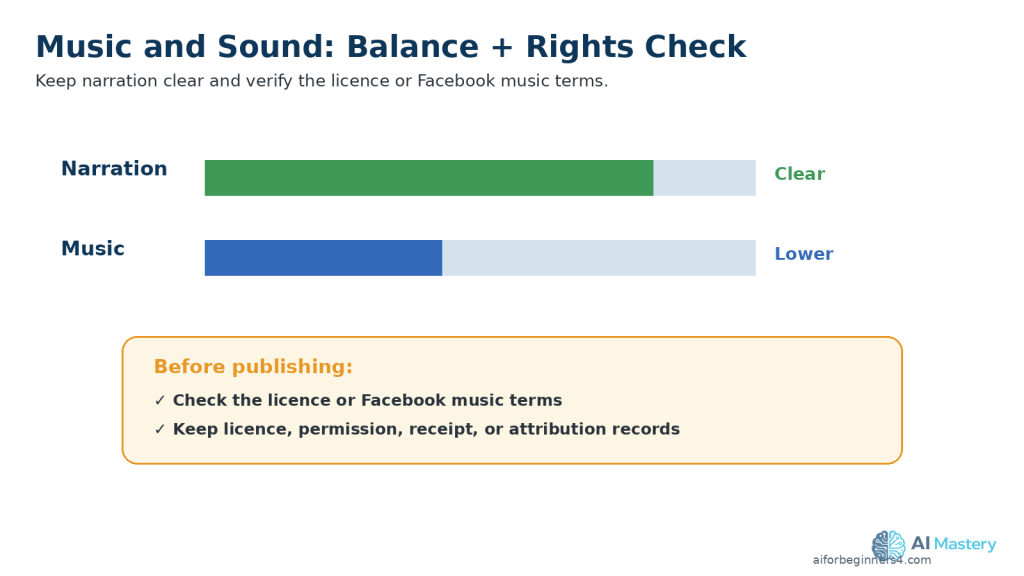
    If your TikTok video includes spoken narration, keep the background music at a lower volume so the voice remains easy to understand.

    Listen to the complete video and check that:

    · The narration is clear.

    · Music does not cover important words.

    · Sound effects are not unexpectedly loud.

    · Audio changes are smooth.

    · The beginning and ending do not contain sudden volume jumps.

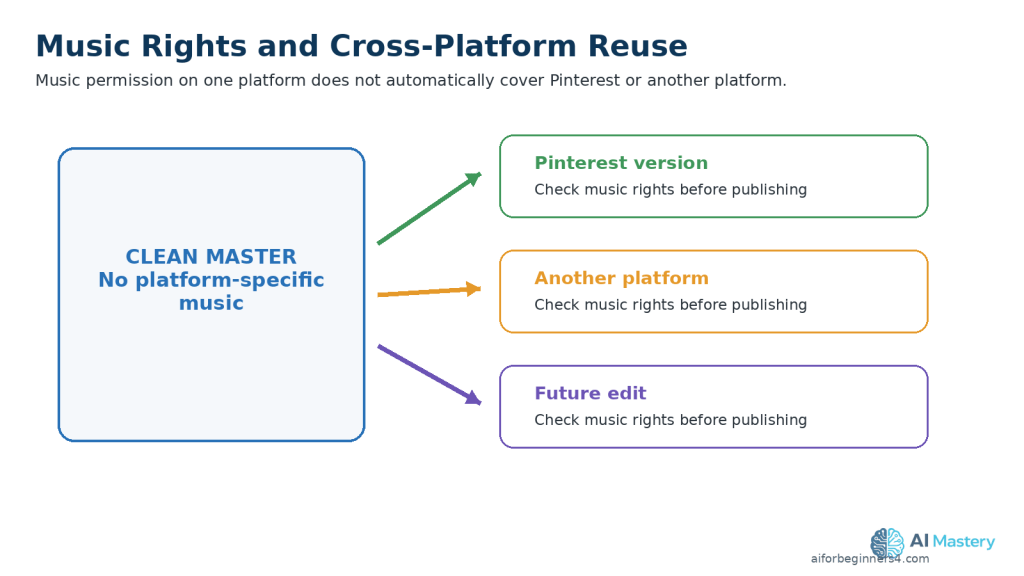
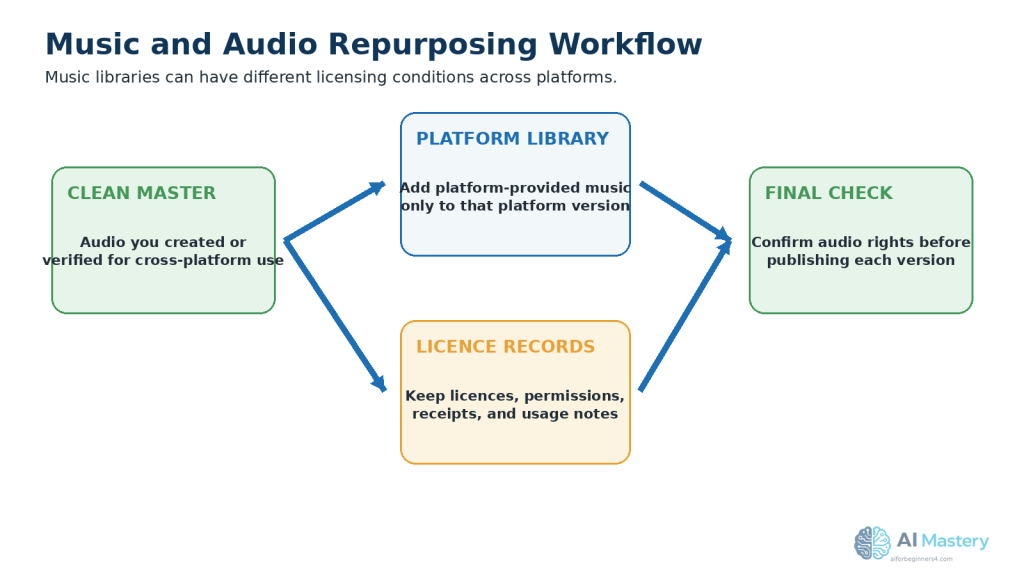
    Be Careful When Reusing Music on Other Platforms

    Music that is available for use on TikTok does not automatically mean you can use the same track on:

    · YouTube Shorts.

    · Instagram Reels.

    · Facebook Reels.

    · Pinterest.

    · Other websites or advertisements.

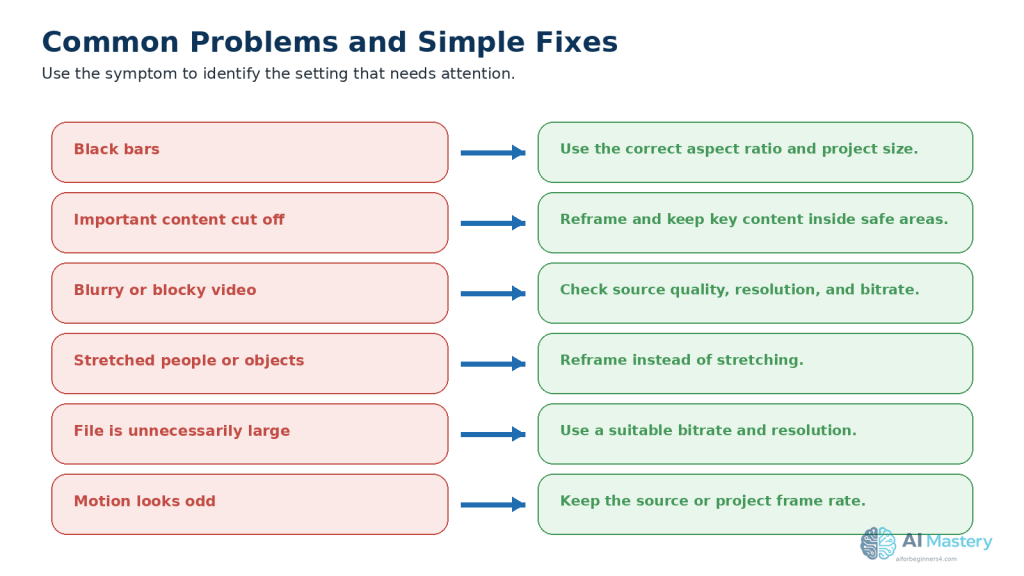
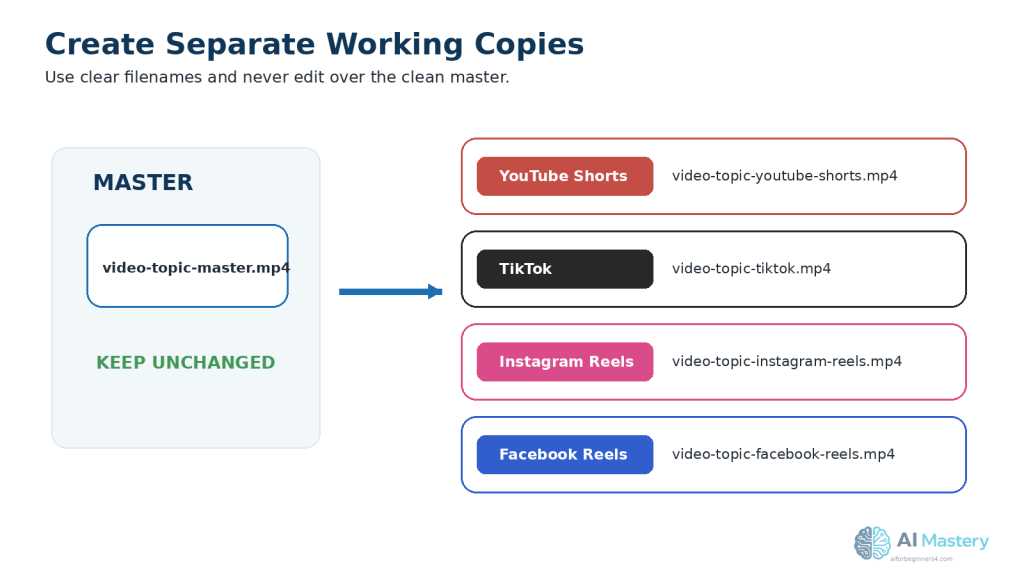
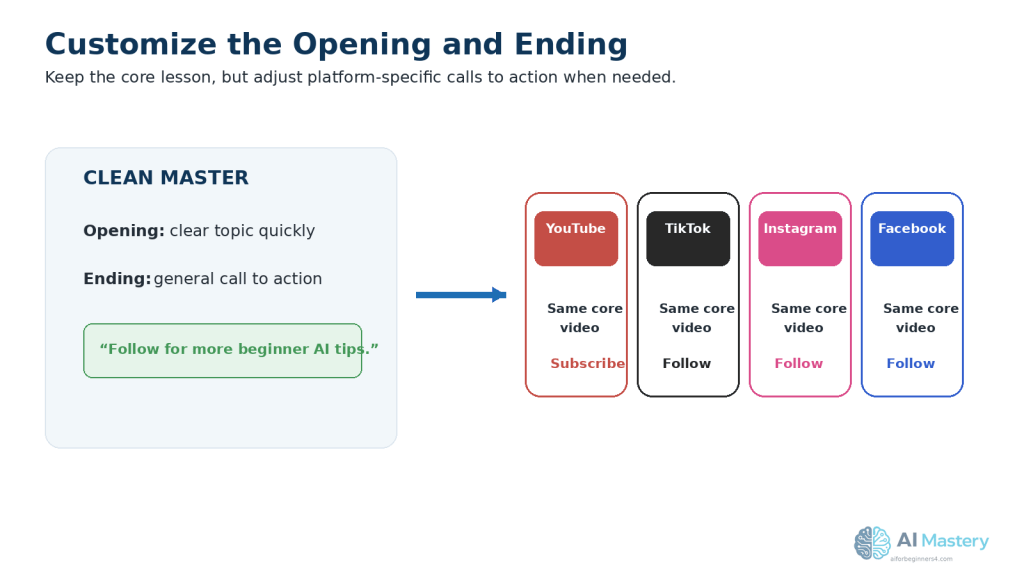
    A safer workflow is to keep a clean master video without platform-specific music and add suitable audio separately for each platform after checking the applicable rights.

    Keep Licensing Records

    If you use music or sound effects from outside TikTok, keep records such as:

    · The licence.

    · Permission from the rights holder.

    · A purchase receipt.

    · Attribution instructions.

    · A copy of the applicable usage conditions.

    This can help you confirm later where and how the audio may be used.
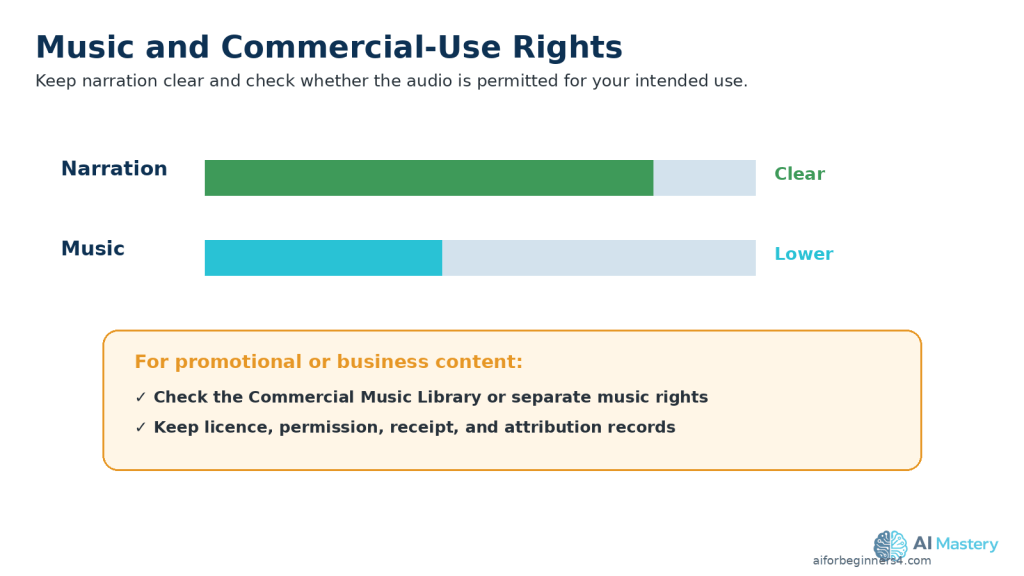
    Figure 8. Keep background music below narration and check commercial-use rights before publishing.

    Explanation: Music available for personal or platform use may have different conditions for promotional or business content.

    Practical Example

    For a beginner AI tutorial on TikTok, you might use quiet background music beneath the narration.

    Keep the voice clearly understandable throughout the video. If the TikTok post promotes a product, service, or business, check whether the music is from TikTok’s Commercial Music Library or whether you have separate permission for the commercial use.

    Step 7: Edit the TikTok Video for a Clear, Fast Flow

    A TikTok video should move quickly enough to keep viewers interested without making the information difficult to follow.

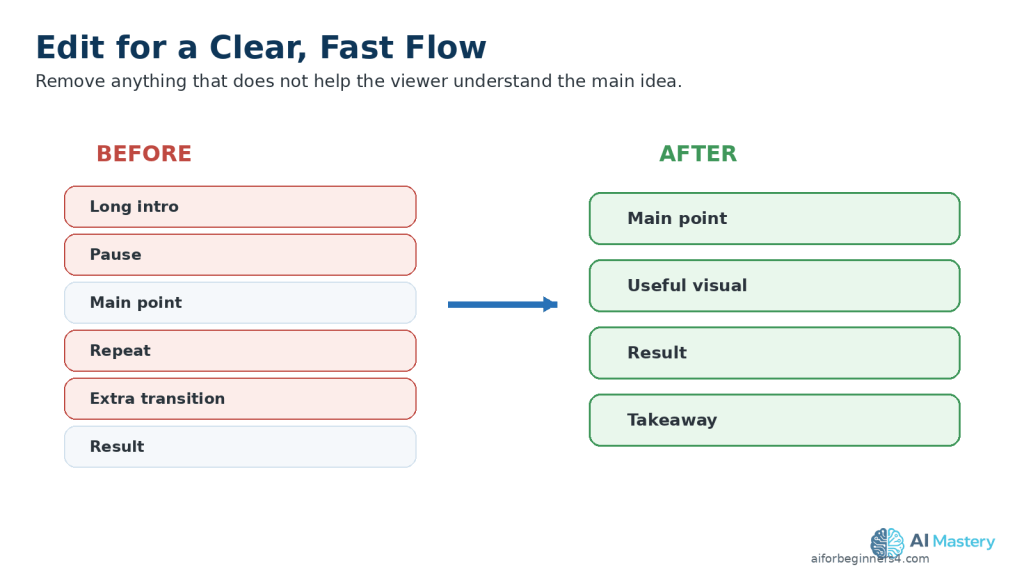
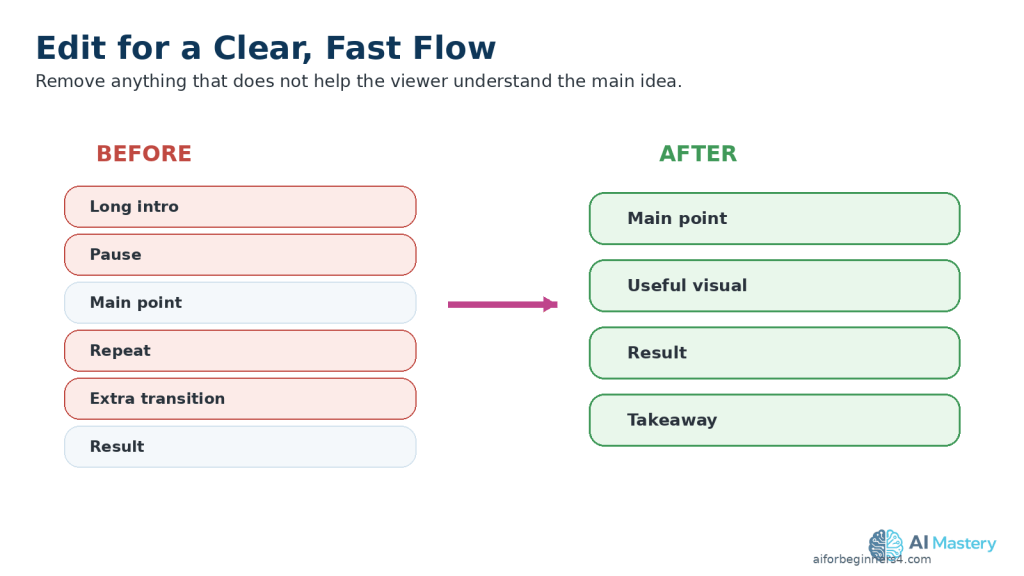
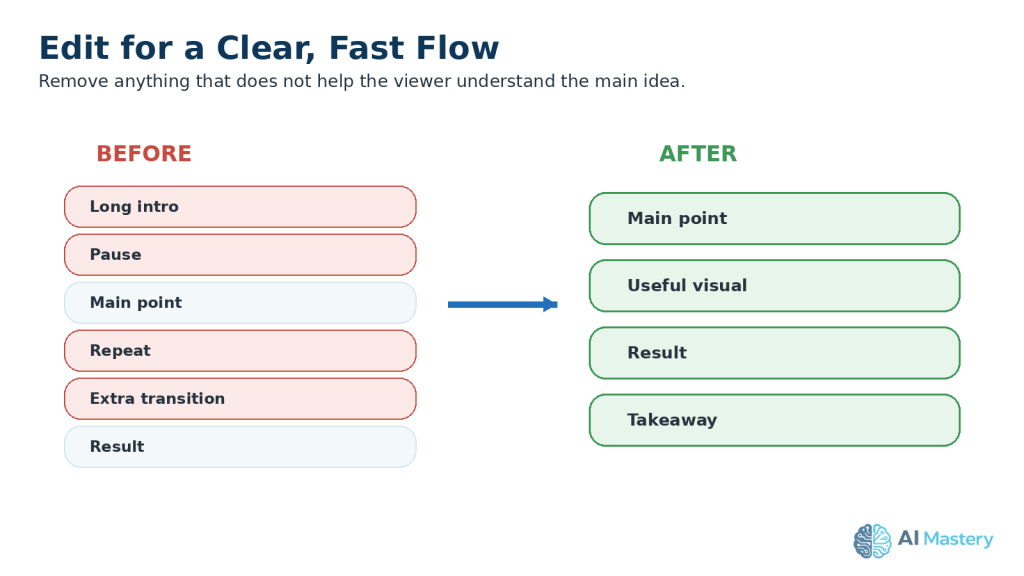
    Remove Unnecessary Parts

    Review the full video and remove:

    · Long pauses.

    · Repeated explanations.

    · Empty frames.

    · Slow introductions.

    · Unnecessary transitions.

    · Visuals that do not support the main point.

    The goal is to keep the video focused on one useful idea.

    Match the Editing to the Script

    Change visuals when the narration moves to a new point.

    For example:

    · Show the problem when the opening introduces it.

    · Show the AI tool when the script explains the tool.

    · Show the result when the narration describes the result.

    · Show the final takeaway at the end.

    This helps viewers understand the information without having to guess what each visual means.

    Keep Transitions Simple

    You do not need complicated effects between every scene.

    Simple cuts, gentle zooms, or basic fades are often enough for beginner tutorials.

    Too many effects can distract from the content.

    Keep Important Content Visible

    Check that captions, faces, screenshots, and important text remain clear throughout the video.

    If a scene contains small text, zoom into the relevant area instead of showing the entire screen at once.

    Keep important information away from areas that TikTok interface elements may cover.

    Practical Example

    For a TikTok video about summarizing a document with AI, the editing sequence might be:

    1. Show the long document.

    2. Show the upload step.

    3. Show the summary prompt.

    4. Show the shorter result.

    5. End with the reminder to verify the summary against the original.

    This creates a simple beginning-to-end flow without unnecessary scenes.
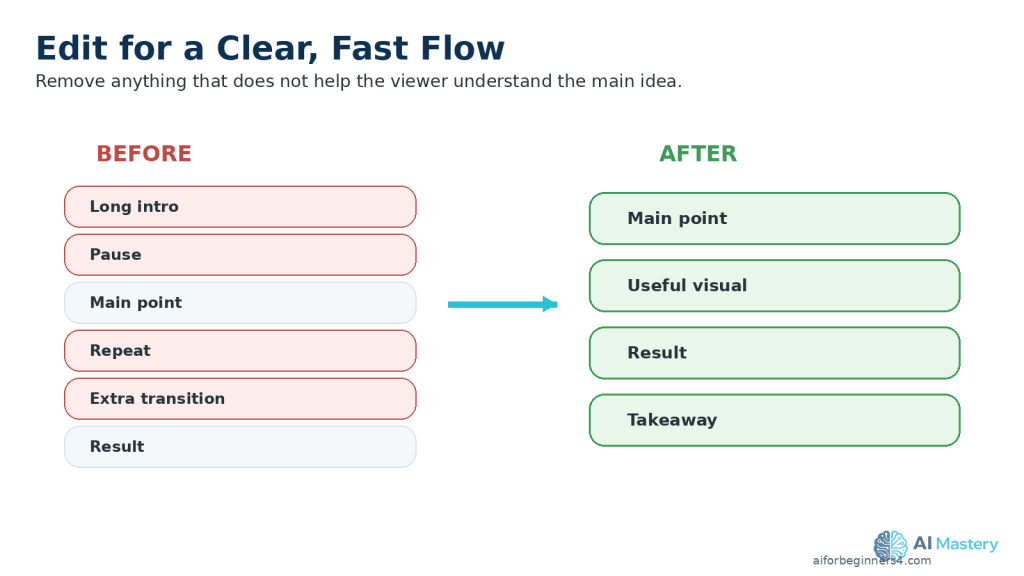
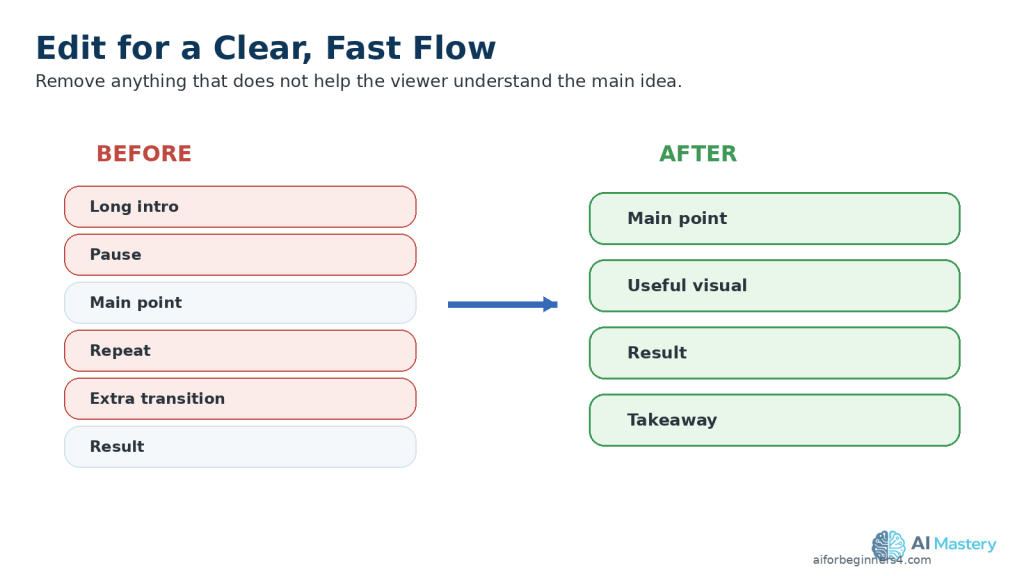
    Figure 9. Removing long pauses, repeated information, and distracting effects creates a clearer TikTok video.

    Explanation: Simple editing keeps attention on the lesson rather than unnecessary production effects.

    Step 8: Export and Review the Final TikTok Video

    When editing is complete, export the TikTok video as a separate final file. Keep your original editing project and clean master version so you can make corrections or prepare versions for other platforms later.

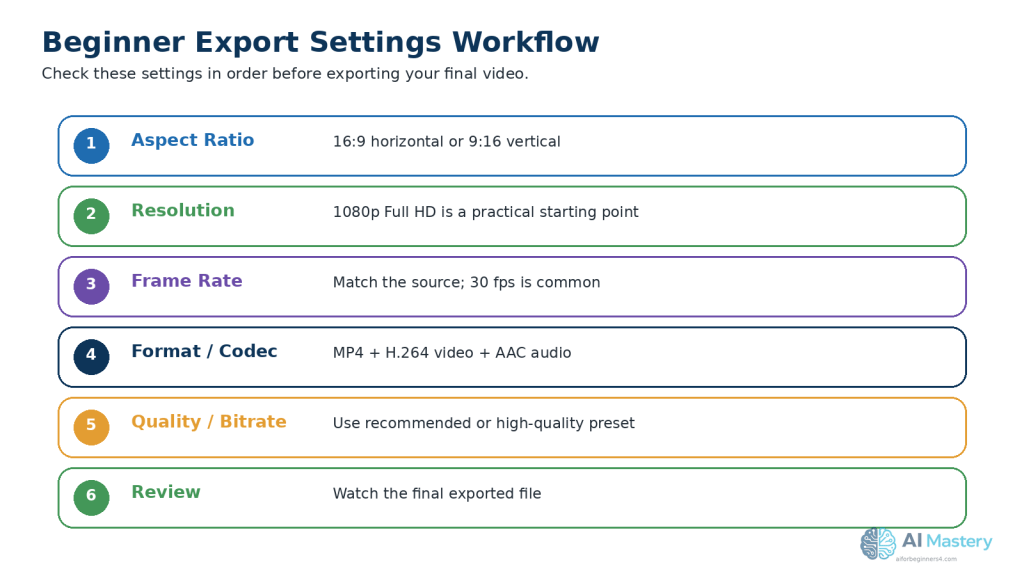
    Choose Practical Export Settings

    For a full-screen, phone-friendly TikTok video, a practical beginner starting point is:

    · Aspect ratio: 9:16

    · Resolution: 1080 × 1920 pixels

    · Orientation: Vertical

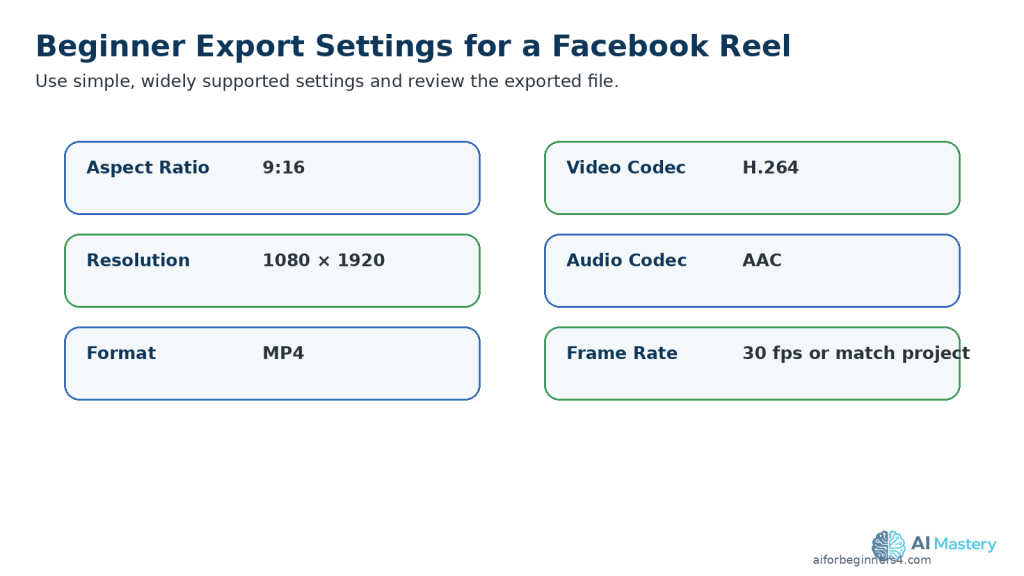
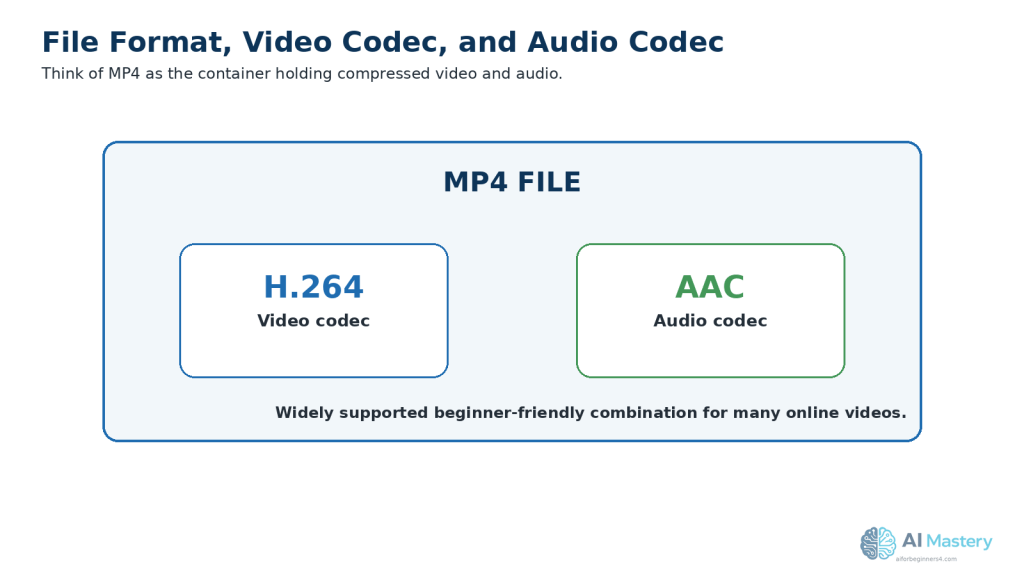
    · File format: MP4

    · Video codec: H.264

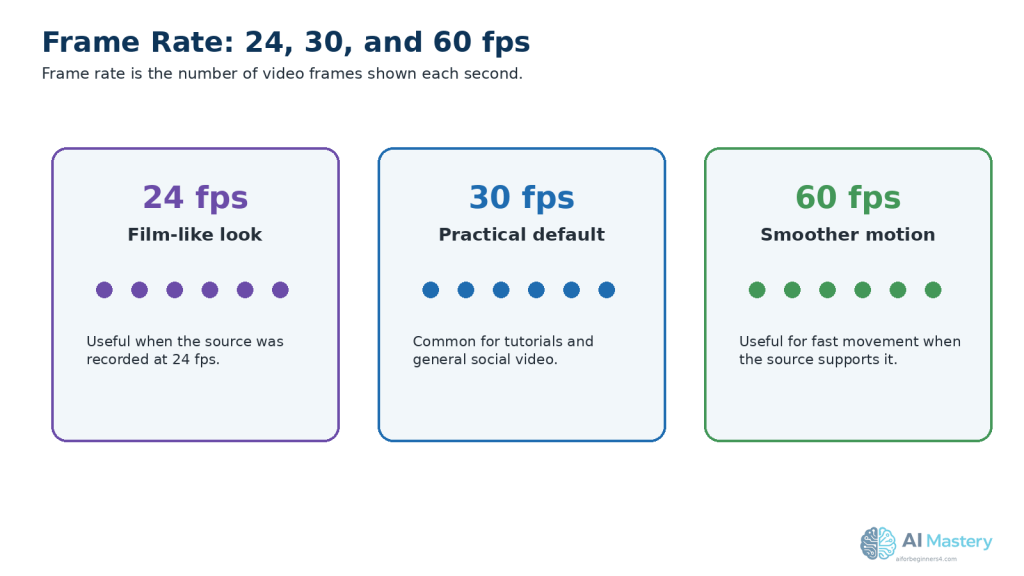
    · Frame rate: 30 fps is a practical choice for many beginner projects

    TikTok’s current creative guidance recommends 9:16 vertical video and at least 1080 × 1920 pixels for clear full-screen viewing.
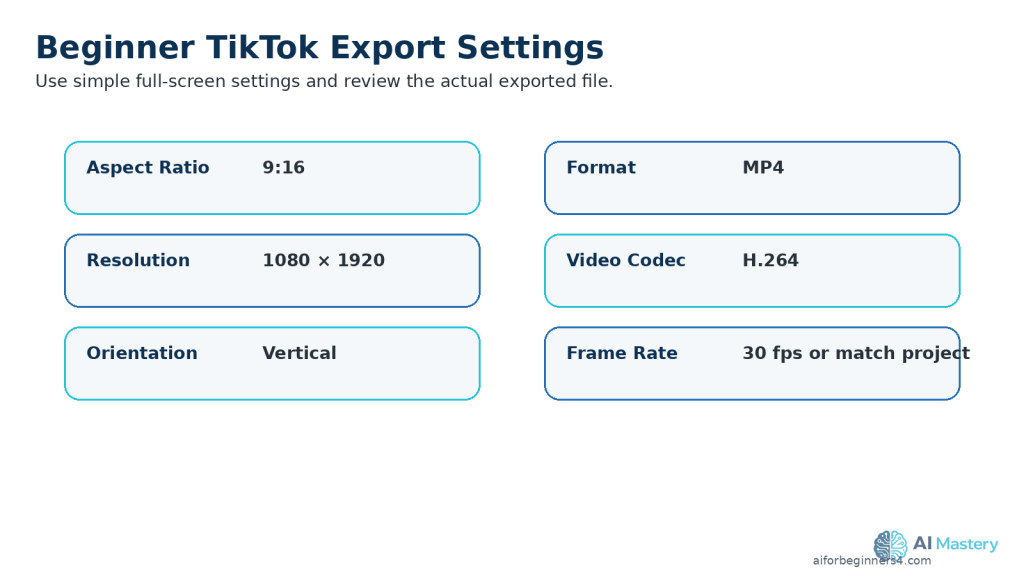
    Figure 10. Practical beginner export settings include 9:16, 1080 × 1920, vertical orientation, MP4, H.264, and a suitable frame rate.

    Explanation: Watch the actual exported file before uploading rather than relying only on the preview inside the video editor.

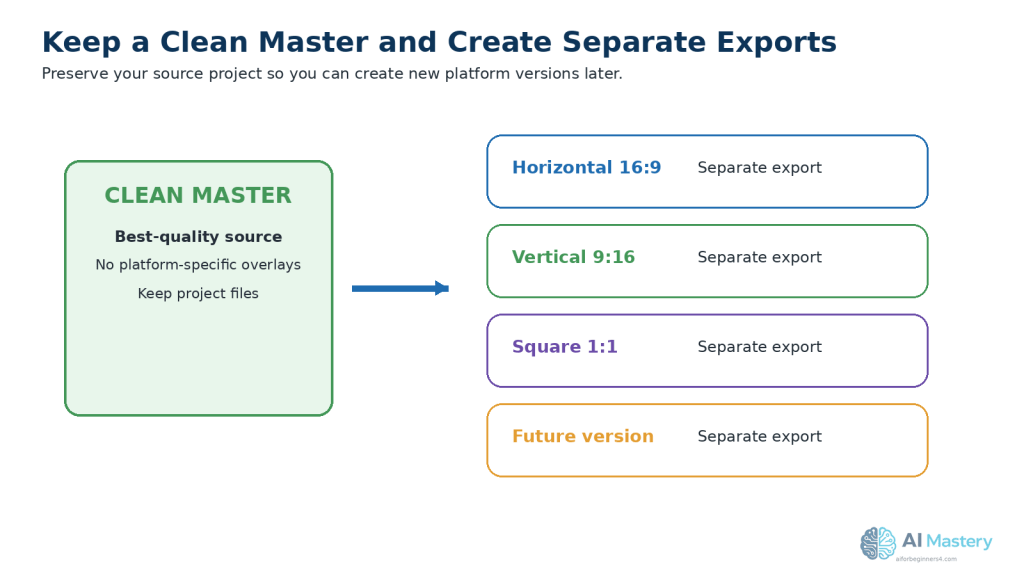
    Watch the Exported File Before Uploading

    Do not rely only on the preview inside your video editor.

    Open the actual exported video and watch it from beginning to end.

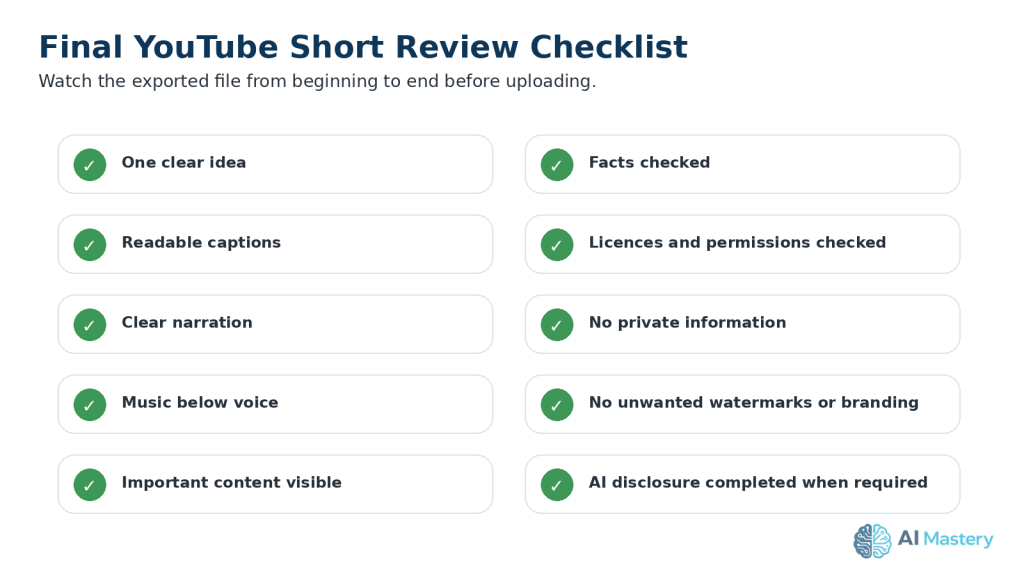
    Check for:

    · Blurry or pixelated video.

    · Cropped faces or important objects.

    · Captions that are difficult to read.

    · Text positioned too close to the edges.

    · Music that covers the narration.

    · Audio that is too loud or too quiet.

    · Missing scenes or blank frames.

    · Spelling mistakes.

    · Distorted AI-generated images.

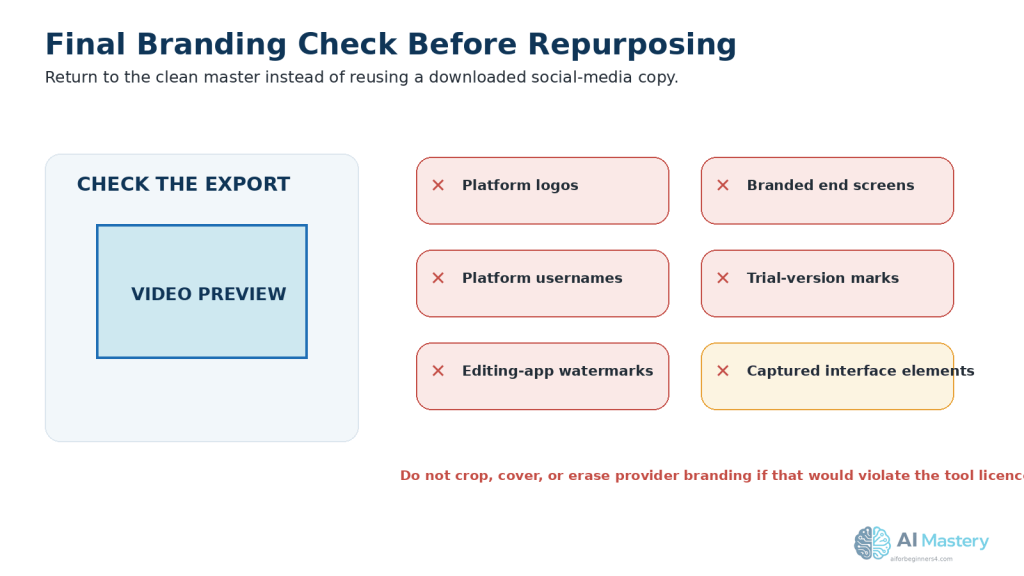
    · Unwanted logos, watermarks, usernames, or branded endings.

    · Private or confidential information.

    Check the Vertical Layout

    Watch the exported video on a phone if possible.

    Make sure that:

    · Important faces remain visible.

    · Captions are readable.

    · Demonstrations are large enough to understand.

    · Important text stays away from areas covered by TikTok controls.

    · The main subject remains clear in the vertical frame.

    TikTok’s official creative specifications recommend keeping important content inside the safe area so interface elements do not cover it.

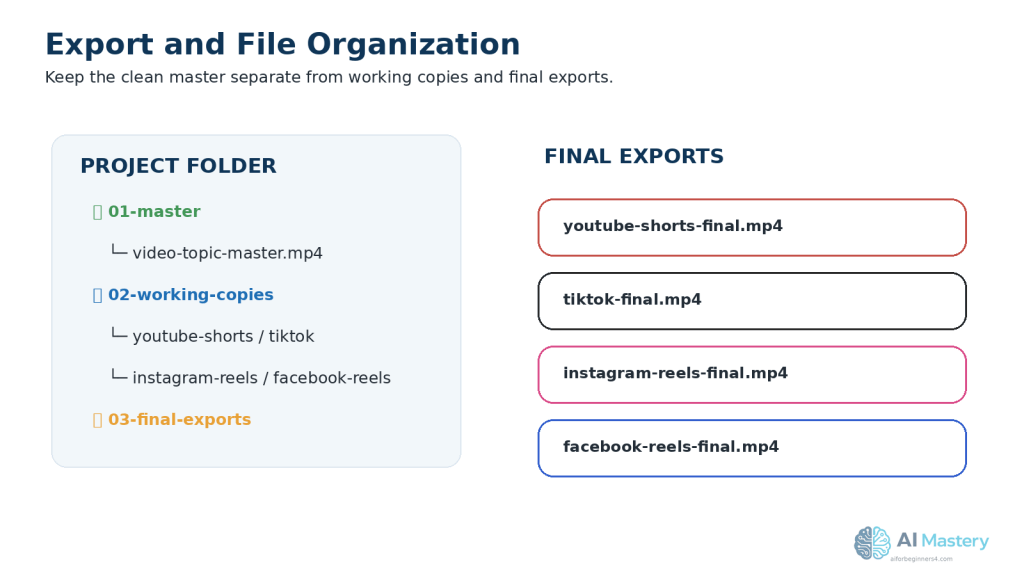
    Keep a Clean Master

    Save a clean master separately from the TikTok version.

    For example:

    · ai-document-summary-master.mp4

    · ai-document-summary-tiktok-final.mp4

    The clean master should avoid unnecessary platform-specific logos, usernames, downloaded watermarks, or platform-specific music when possible.

    This makes it easier to prepare another version later for YouTube Shorts, Instagram Reels, Facebook Reels, Pinterest, or another platform.

    Practical Example

    After exporting your document-summary TikTok video, watch the final MP4 on your computer and phone.

    If the captions are readable, the narration is clear, the important demonstration remains visible, and there are no unwanted watermarks or private details, the video is ready for the publishing step.

    Step 9: Upload and Publish the TikTok Video

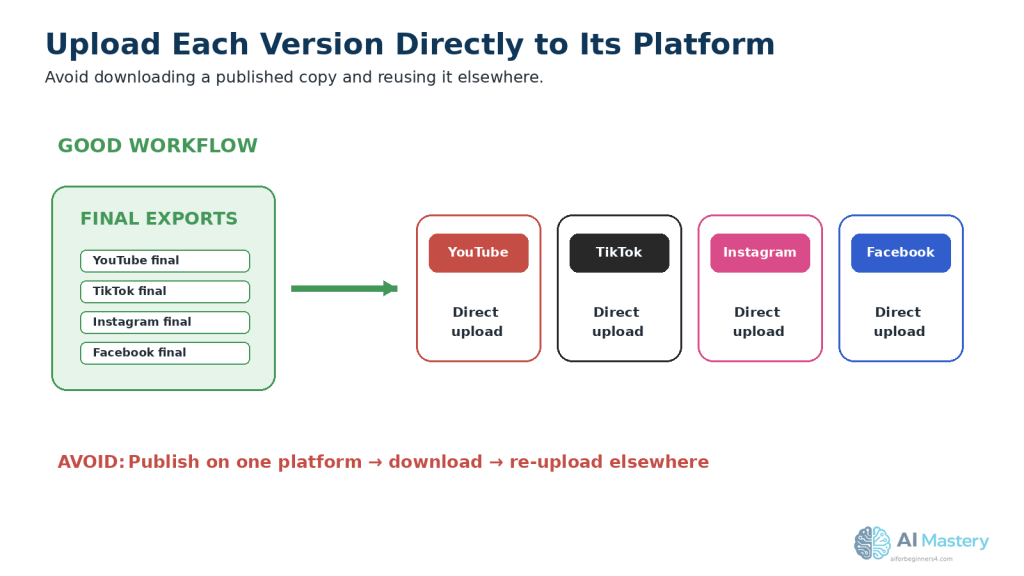
    When the final video has been reviewed, upload the clean TikTok version rather than a copy downloaded from another social media platform.

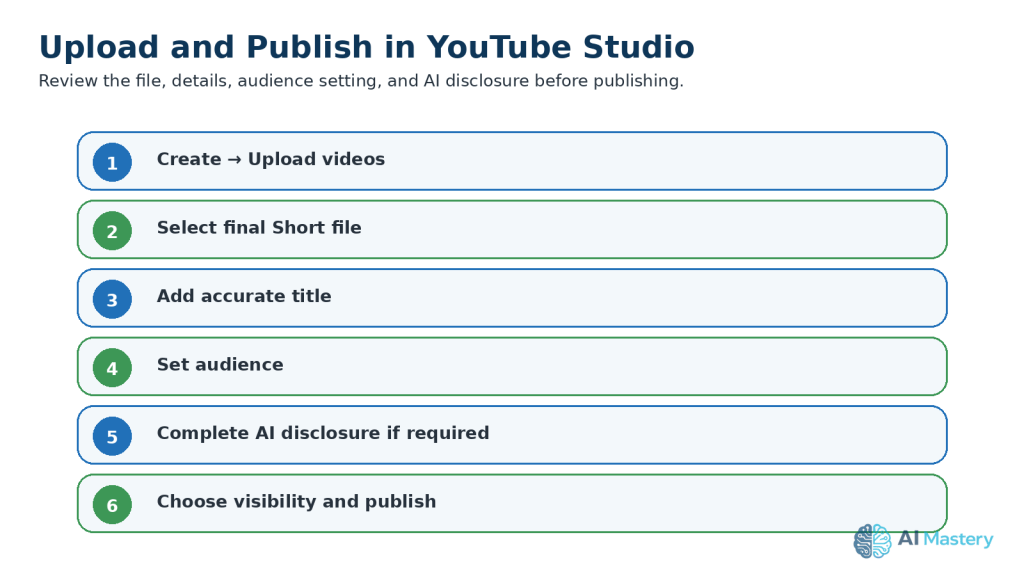
    TikTok currently lets you create or upload a video from the app, add editing elements, review posting options, and then publish the post. The exact buttons can change as TikTok updates its interface.

    Upload the Video

    A typical beginner workflow is:

    1. Open TikTok.

    2. Tap the Add post + button.

    3. Choose Upload and select your final video from your device.

    4. Review the video and make any necessary edits.

    5. Tap Next to reach the posting screen.

    6. Add a clear description.

    7. Choose a cover image if needed.

    8. Review the audience or privacy setting.

    9. Review comments, reuse, or other available post settings.

    10. Review any commercial-content settings if the video promotes a brand, product, or service.

    11. Review the AI-generated-content label when applicable.

    12. Check the complete post carefully.

    13. Publish when everything is correct.

    TikTok’s current Help Center confirms that uploaded videos can be selected from your device and that additional posting options are available before publication.

    Add a Clear Description

    Your description should accurately explain what the video is about.

    For example:

    Learn a simple way to summarize a long document with AI. Always compare important information with the original document before relying on the summary.

    Keep the wording natural and relevant to the actual video.

    Avoid exaggerated claims that promise results the video cannot support.

    Review the Audience and Privacy Setting

    TikTok lets you control who can view individual posts. The available choices can depend on whether your account is public or private and on other account settings.

    Before publishing, make sure the selected audience matches who you actually want to see the video.

    Review Comments and Content-Reuse Settings

    TikTok provides controls for comments and for ways other people may interact with or reuse your content. Available options can depend on your account and privacy settings.

    Review these settings rather than assuming the defaults are right for every video.

    Label AI-Generated Content When Required

    TikTok currently requires creators to label certain realistic AI-generated content and encourages labeling content that was completely generated or significantly edited with AI. TikTok provides a Creator labeled as AI-generated setting in the posting process.

    Pay particular attention when AI content:

    · Makes a real person appear to say something they did not say.

    · Changes a real person’s voice or appearance significantly.

    · Creates a realistic person, place, or event that did not exist.

    · Alters real footage beyond minor corrections.

    · Could reasonably be mistaken for authentic footage.

    TikTok may also automatically apply an AI-generated label when its systems detect qualifying AI-generated or AI-modified content.

    Review Commercial Content When Relevant

    If the TikTok video promotes your own business or another brand, product, or service, review TikTok’s current commercial-content disclosure settings before publishing. TikTok provides specific disclosure options for promotional content.

    This is separate from AI labeling. A video may require a commercial-content disclosure, an AI-generated-content label, both, or neither depending on what the video contains.
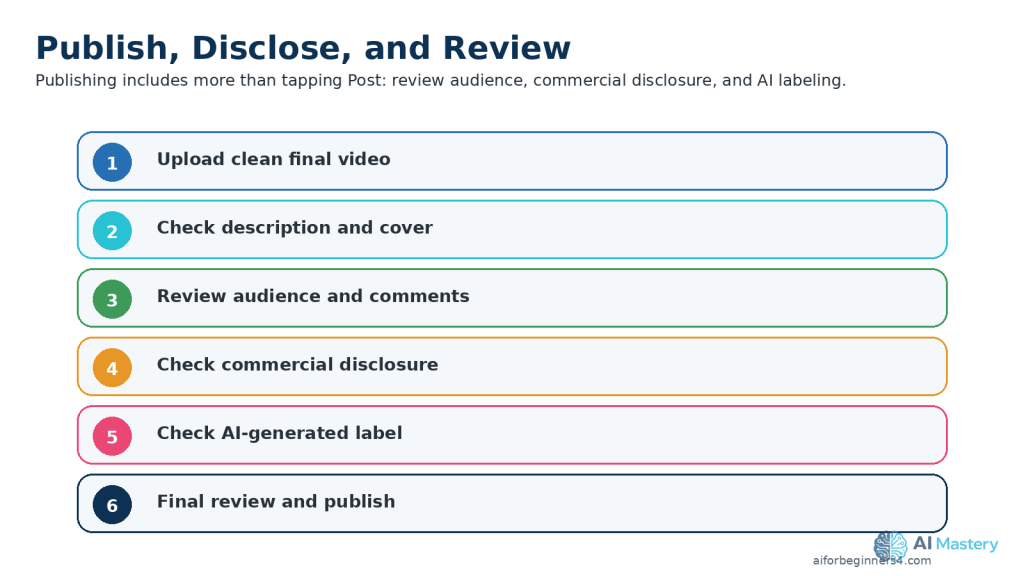
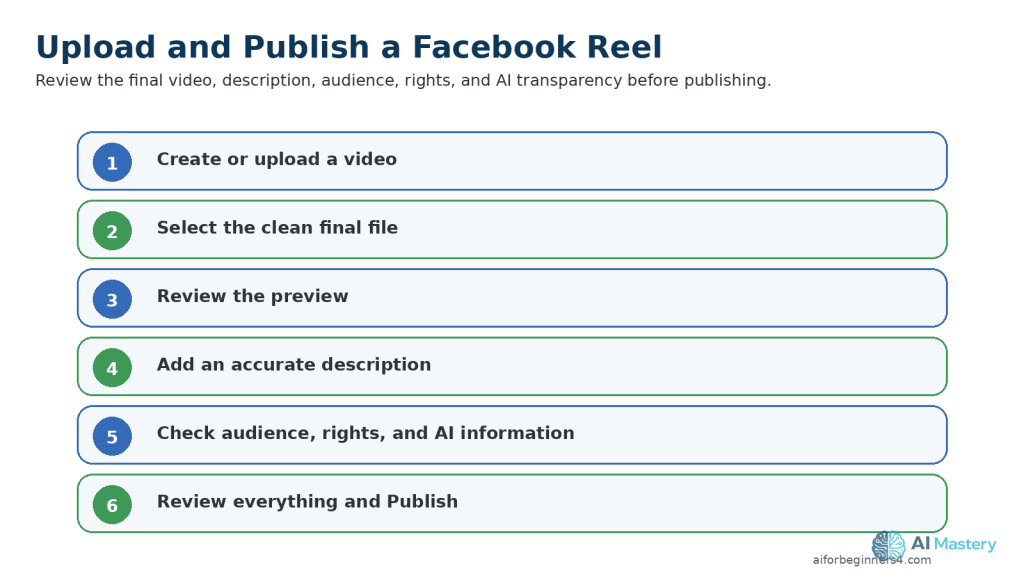
    Figure 11. Before publishing, review the video, description, audience, commercial-content disclosure, AI-generated-content label, and final post.

    Explanation: Commercial-content disclosure and AI-generated-content labeling are separate checks and may apply independently.

    Review Before Publishing

    Before publishing the TikTok video, check:

    · The correct video was selected.

    · The video displays properly in the vertical frame.

    · The description accurately matches the content.

    · Captions and important text remain readable.

    · Narration is clear.

    · Music and sound effects have appropriate usage rights.

    · Images, clips, fonts, voices, and other assets are properly licensed or permitted.

    · No private or confidential information appears.

    · No unwanted watermark, username, or platform branding remains.

    · The audience setting is correct.

    · Comment and reuse settings are appropriate.

    · Any commercial-content disclosure has been reviewed.

    · Any required AI-generated-content label has been applied.

    Practical Example

    Suppose your TikTok video uses an AI-generated illustration of a fictional office worker while explaining how to summarize a document.

    Before publishing, review the visual for obvious AI mistakes, check the captions and narration, verify your music and asset rights, choose the appropriate audience, and review TikTok’s current AI-generated-content labeling options.

    If the video realistically alters a real person’s appearance, voice, or actions, labeling becomes especially important because viewers could mistake the synthetic material for authentic content.

    Common Mistakes to Avoid When Creating TikTok Videos with AI

    Beginners can save time by avoiding several common problems that affect clarity, quality, licensing, privacy, or publishing.

    Common mistakes include:

    · Trying to explain too many ideas in one TikTok video.

    · Using a long introduction before reaching the main point.

    · Placing captions or important text too close to areas covered by TikTok interface elements.

    · Shrinking screenshots until the text becomes difficult to read.

    · Using music without checking whether the licence allows TikTok use.

    · Letting background music overpower the narration.

    · Publishing AI-generated information without checking factual accuracy.

    · Using a real person’s voice, image, or likeness without appropriate permission.

    · Uploading a downloaded copy from another platform instead of using a clean master export.

    · Leaving unwanted watermarks, usernames, logos, or branded endings in the video.

    · Using AI-generated visuals without checking for distorted objects, incorrect text, duplicated items, or unrealistic details.

    · Forgetting to review the audience and privacy settings.

    · Ignoring commercial-content disclosure requirements when promoting a brand, product, or service.

    · Skipping TikTok’s AI-generated-content labeling requirements when realistic synthetic or significantly altered content is involved.

    · Skipping the final review of the exported video.

    How to Avoid These Mistakes

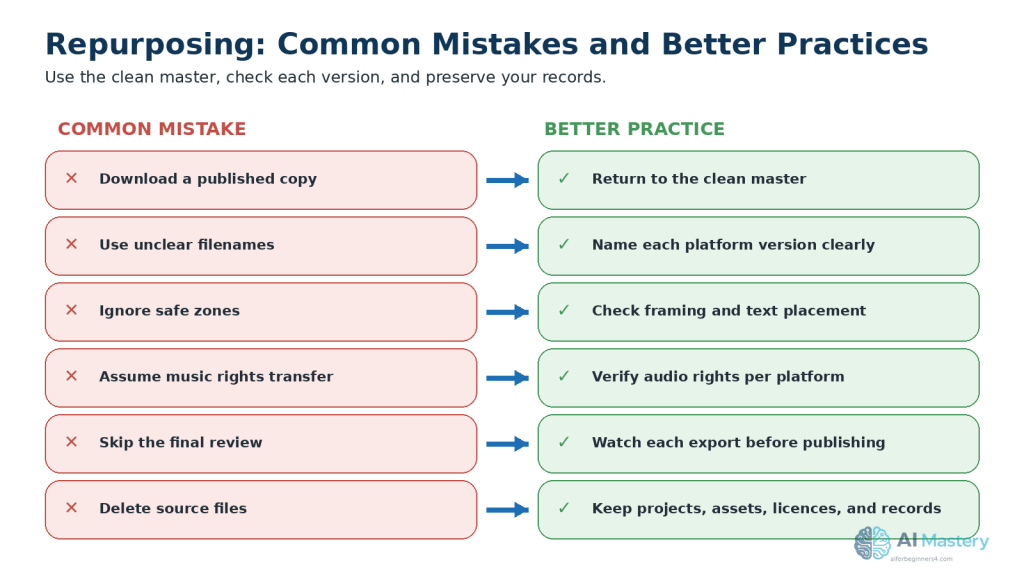
    Keep each TikTok video focused on one clear lesson and work from a clean master project.

    Before publishing, review the:

    · Script.

    · Visuals.

    · Captions.

    · Audio.

    · Music rights.

    · Asset licences.

    · Permissions.

    · Audience and privacy settings.

    · Commercial-content settings when applicable.

    · AI-generated content.

    · Final export.

    · Any required AI-generated-content label.

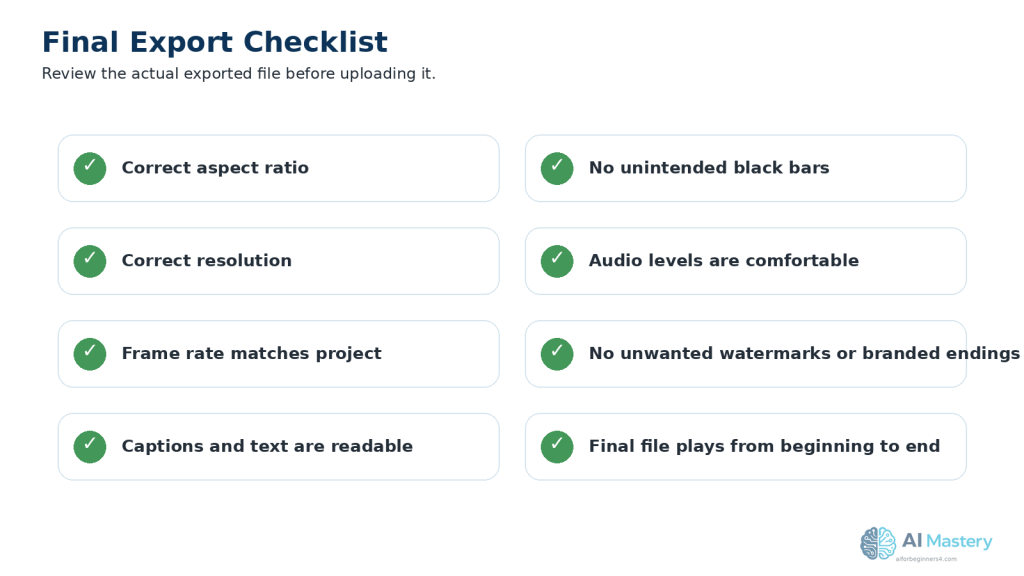
    If something is unclear, incorrect, poorly positioned, misleading, or not properly licensed, correct the project and export a new version before publishing.
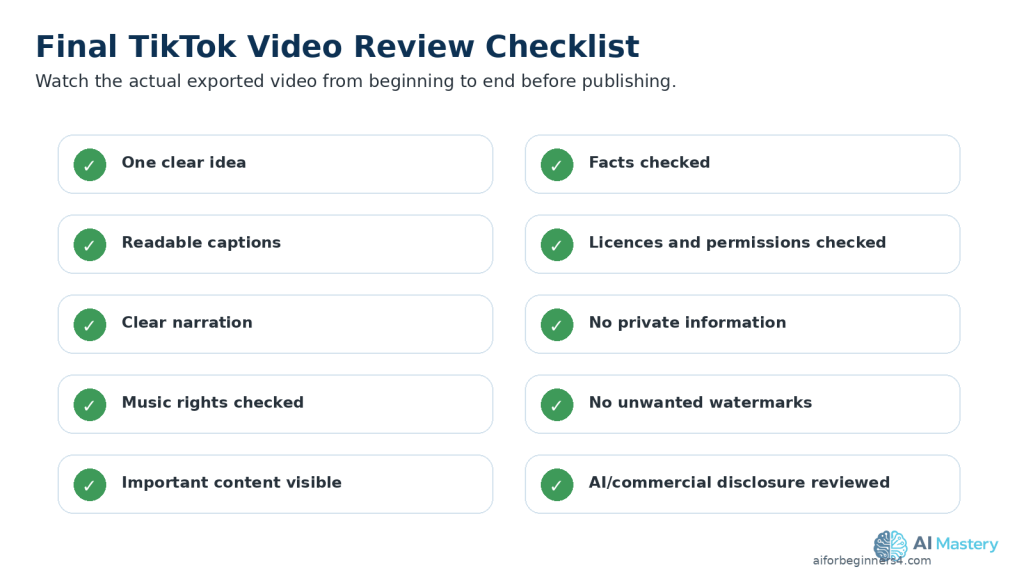
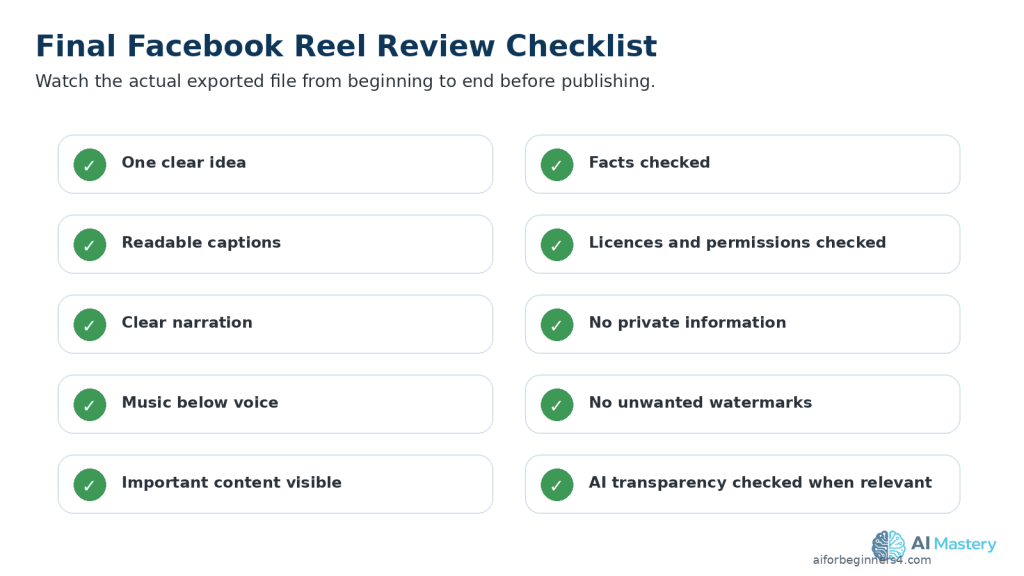
    Figure 12. A final checklist helps catch quality, licensing, privacy, branding, and disclosure problems before publication.

    Explanation: Watching the complete exported video from beginning to end is one of the most important final checks.

    Benefits of Creating TikTok Videos with AI

    AI can make the TikTok video workflow easier for beginners by helping with planning, writing, visuals, narration, captions, and editing.

    Key benefits include:

    · Faster idea generation: AI can suggest focused TikTok topics when you are not sure what to create.

    · Simpler script writing: AI can turn a basic idea into a short script that you can review and improve.

    · Easier visual planning: AI can suggest scenes, image ideas, screen recordings, text overlays, and simple shot sequences.

    · More accessible production: AI voices, captions, and editing assistance can help beginners create videos without advanced production skills.

    · Better organization: AI can help reduce a broad topic to one clear lesson that fits a TikTok video.

    · Easier repurposing: A TikTok video can be adapted from a longer video, article, tutorial, or clean master project.

    · More consistent workflow: Using the same planning, scripting, editing, and review process can make future videos easier to produce.

    · Useful learning support: AI can explain unfamiliar editing terms and suggest improvements while you are learning a new tool.

    · Cross-platform flexibility: A clean master can be adapted for YouTube Shorts, Instagram Reels, Facebook Reels, Pinterest, or other vertical-video platforms after checking each platform’s current requirements.

    · Support for faceless content: AI can help create scripts, visuals, narration, captions, and other elements without requiring you to appear on camera.

    AI is most useful when it supports your decisions rather than replacing them. Review the final script, visuals, audio, captions, facts, licences, permissions, privacy settings, and publishing choices before making the video public.

    Limitations of Creating TikTok Videos with AI

    AI can help with many parts of the TikTok video workflow, but it does not remove the need for careful human review.

    Common limitations include:

    · Factual errors: AI-generated scripts can contain incorrect, outdated, or misleading information.

    · Generic writing: AI may produce scripts that sound repetitive or similar to other content unless you revise them.

    · Visual inconsistencies: AI-generated images or video clips may contain distorted objects, unusual details, inconsistent characters, or misspelled text.

    · Voice limitations: AI narration can mispronounce names, sound unnatural, or use incorrect emphasis.

    · Licensing differences: AI tools, stock libraries, music services, templates, and fonts can have different rules for personal, commercial, or promotional use.

    · Platform changes: TikTok video specifications, editing features, music options, privacy controls, commercial-content settings, and AI-labeling methods can change over time.

    · Editing is still required: AI-generated material usually needs trimming, timing adjustments, caption checks, and final quality review.

    · Privacy risks: Uploading private documents, photographs, recordings, or personal information to an AI tool can create privacy concerns.

    · Disclosure may be required: Realistic AI-generated or significantly altered content may need labeling under TikTok’s current rules.

    · Commercial-use restrictions: Music or other assets that are allowed for personal content may not automatically be cleared for business or promotional use.

    · No guarantee of performance: AI can help improve the production workflow, but it cannot guarantee views, followers, engagement, sales, or other results.

    How to Reduce These Limitations

    Use AI as an assistant rather than treating its output as automatically finished.

    Verify important facts, review every generated visual and voice recording, check licences and permissions, protect private information, and watch the complete exported video before publishing.

    When TikTok changes a video feature, music option, privacy setting, commercial-content requirement, AI-labeling method, or other rule that affects your workflow, check the current official TikTok guidance before relying on older instructions.

    Common Myths About Creating TikTok Videos with AI

    Several common myths can make beginners expect too much from AI or create unnecessary publishing problems.

    Myth 1: AI Can Create a Perfect TikTok Video Automatically

    Reality: AI can help with ideas, scripts, visuals, narration, captions, and editing suggestions, but the final video still needs human review for accuracy, quality, timing, licensing, privacy, and publishing decisions.

    Myth 2: AI-Generated Images and Music Are Automatically Copyright-Free

    Reality: Rights and commercial-use conditions depend on the tool, licence, source material, and intended use.

    Always check the terms that apply to AI-generated images, music, stock footage, fonts, templates, voices, and other assets before publishing.

    Myth 3: Every AI-Assisted TikTok Video Needs the Same Label

    Reality: Using AI for brainstorming or minor script editing is different from publishing realistic AI-generated or significantly altered content.

    Review TikTok’s current AI-generated-content rules and apply the appropriate label when required.

    Myth 4: More Effects Make a TikTok Video More Professional

    Reality: Too many transitions, animations, text boxes, filters, or sound effects can distract viewers from the main idea.

    Clear visuals, readable captions, useful information, and simple editing are often more effective.

    Myth 5: The Same TikTok Video Can Be Uploaded Everywhere Without Changes

    Reality: You can start from the same clean master video, but other platforms can have different requirements for dimensions, safe areas, music rights, captions, branding, and disclosure.

    Prepare a separate final version for each platform instead of relying on a downloaded TikTok copy.

    Myth 6: AI Can Guarantee More Views or Followers

    Reality: AI can help improve your planning and production workflow, but it cannot guarantee views, followers, engagement, sales, or other results.

    Topic choice, usefulness, presentation, timing, audience interest, competition, and many other factors can affect performance.

    Frequently Asked Questions

    How Long Can a TikTok Video Be?

    TikTok currently allows videos recorded inside the app to be up to 10 minutes long and uploaded videos to be up to 60 minutes long.

    For beginner short-form content, use only the length needed to explain the idea clearly.

    What Size Should I Use for a TikTok Video?

    A practical beginner format is:

    · 1080 × 1920 pixels

    · 9:16 aspect ratio

    · Vertical orientation

    TikTok’s current creative guidance recommends 9:16 vertical video for full-screen viewing and 1080 × 1920 or higher for clear playback.

    Do I Need an Expensive AI Video Tool?

    No. You can start with simple tools for writing, visuals, narration, captions, and editing.

    Before choosing a free or paid tool, check whether it:

    · Adds watermarks.

    · Limits video resolution.

    · Limits export length.

    · Restricts commercial use.

    · Limits AI voices or generated media.

    Can I Create TikTok Videos Without Showing My Face?

    Yes. Faceless TikTok videos can use:

    · Screen recordings.

    · AI-generated visuals.

    · Licensed stock footage.

    · Text and graphics.

    · Charts.

    · Product or workspace footage.

    · Voice-over narration.

    Can I Use an AI Voice?

    Yes, when the AI voice tool and its licence allow your intended use.

    Review the narration carefully and avoid cloning or impersonating a real person’s voice without appropriate permission.

    Should I Add Captions?

    Captions are strongly recommended because they can improve understanding and accessibility. TikTok also provides auto-generated captions using speech-recognition technology.

    Always review automatic captions for spelling, timing, names, and technical terms before publishing.

    Can I Use Any Music I Find Online?

    No.

    If a TikTok post promotes a brand, product, or service, TikTok recommends using music from its Commercial Music Library because those tracks are pre-cleared for commercial use on TikTok. If you use other music, you need the necessary rights or permissions.

    Do I Need to Label AI-Generated TikTok Content?

    TikTok provides creator labels for content that was completely generated or significantly edited with AI, and it requires labeling for certain realistic AI-generated content. TikTok can also automatically apply AI-generated labels to some content.

    Review TikTok’s current AI-generated-content guidance before publishing realistic synthetic or significantly altered media.

    Can I Control Who Sees My TikTok Video?

    Yes. TikTok provides post visibility controls that let you choose who can see individual posts. The options available can depend on your account and privacy settings.

    Review the audience setting before publishing rather than relying automatically on the default.

    Can I Reuse the Same Video on TikTok, YouTube, Instagram, Facebook, or Pinterest?

    Yes, but start from your clean master video and prepare a separate version for each platform.

    Check:

    · Aspect ratio.

    · Safe areas.

    · Caption placement.

    · Music rights.

    · Video length.

    · Platform branding.

    · Commercial disclosures.

    · AI-generated-content requirements.

    TikTok’s interface can cover parts of a vertical video, so important information should remain within the appropriate safe area.

    Will AI Guarantee More TikTok Views or Followers?

    No.

    AI can help with ideas, scripts, visuals, narration, captions, and editing, but it cannot guarantee views, followers, engagement, sales, or other results.

    Key Takeaways

    Creating TikTok videos with AI becomes easier when you follow a simple, repeatable workflow.

    Remember these main points:

    · Start with one clear idea for each TikTok video.

    · Use AI to help brainstorm, outline, and draft the script, but always review the final wording.

    · Keep the script focused and make the topic clear near the beginning.

    · Use a 9:16 vertical format at 1080 × 1920 pixels for a phone-friendly full-screen layout.

    · Keep important captions, faces, titles, and demonstrations away from areas covered by TikTok interface elements.

    · Prepare visuals that are easy to understand on a small screen.

    · Use clear narration when it helps explain the content.

    · Add readable captions and on-screen text to improve understanding and accessibility.

    · Keep background music below the narration and verify that you have appropriate music rights.

    · For commercial content, review whether TikTok’s Commercial Music Library or separate music permissions are required.

    · Check licences and permissions for stock footage, images, fonts, templates, voices, music, and other third-party assets.

    · Review AI-generated visuals for distorted objects, incorrect text, duplicated items, or unrealistic details.

    · Edit out unnecessary pauses, repeated information, and distracting effects.

    · Export a clean final version and watch the complete file before uploading it.

    · Review the audience, privacy, comment, and reuse settings before publishing.

    · Review any commercial-content disclosure requirements when promoting a brand, product, or service.

    · Apply TikTok’s AI-generated-content label when required for realistic synthetic or significantly altered content.

    · Keep your clean master video, project files, prompts, licences, permissions, and final exports for future corrections or repurposing.

    AI can help make the production process faster, but the final quality, accuracy, licensing, privacy, accessibility, disclosure, and publishing decisions still require careful human review.

    Final Tip

    Keep your first TikTok videos simple.

    Choose one useful idea, explain it clearly, use readable visuals and captions, and review the complete exported video before publishing. You do not need complicated effects or advanced editing to create a useful TikTok video.

    As your workflow improves, keep your clean master files, prompts, licences, permissions, and final exports organized. This makes it easier to correct mistakes, update older videos, or repurpose successful content for YouTube Shorts, Instagram Reels, Facebook Reels, Pinterest, or other platforms later.

    Continue Learning

    If you want to continue building your AI video skills, these AI Mastery guides are useful next steps:

    · How to Repurpose One AI Video for YouTube Shorts, TikTok, Instagram Reels, and Facebook Reels: Beginner Guide (2026) — Learn how to adapt one clean master video for several social media platforms.

    · How to Choose AI Video Sizes, Aspect Ratios, and Export Settings: Beginner Guide (2026) — Learn how to choose practical dimensions, aspect ratios, frame rates, and export settings for vertical video.

    · How to Create YouTube Shorts with AI: Beginner Step-by-Step Guide (2026) — Learn how to create, edit, export, and publish short-form videos for YouTube.

    · How to Create Instagram Reels with AI: Beginner Step-by-Step Guide (2026) — Learn how to prepare and publish vertical AI-assisted videos for Instagram.

    · How to Create Facebook Reels with AI: Beginner Step-by-Step Guide (2026) — Learn how to create and publish AI-assisted vertical videos for Facebook.

    · How to Create Pinterest Video Pins with AI: Beginner Step-by-Step Guide (2026) — Learn how to create vertical video Pins with AI and publish them on Pinterest.

    · How to Create AI Virtual Presenter Videos for TikTok: Beginner Guide (2026) — Learn how to create TikTok videos using a fictional AI virtual presenter.

    · How to Edit AI-Generated Videos: Beginner Step-by-Step Guide (2026) — Learn how to trim clips, arrange scenes, improve pacing, and prepare a clean final video.

    · How to Add Voice, Music, and Captions to AI Videos: Beginner Step-by-Step Guide (2026) — Learn how to add narration, background music, sound effects, and readable captions.

    Sources and References

    The following official TikTok sources were checked for the current video-length limits, posting workflow, AI-generated-content labeling, music use, copyright, accessibility, privacy controls, commercial-content requirements, and vertical-video guidance used in this guide. TikTok features and policies can change, so important requirements should be checked again when TikTok announces an update or when you change your publishing workflow.

    TikTok Help Center — Camera Tools: TikTok explains that videos recorded inside TikTok can currently be up to 10 minutes, while uploaded videos can be up to 60 minutes.

    TikTok Help Center — Making a Post: TikTok explains the process for uploading or recording a video, reviewing it, and choosing posting options before publishing.

    TikTok Help Center — About AI-Generated Content: TikTok explains creator AI-generated-content labels, required labeling for certain realistic AI-generated content, and automatic labels that may be applied to qualifying content.

    TikTok Help Center — Commercial Use of Music on TikTok: TikTok recommends music from its Commercial Music Library when a post promotes a brand, product, or service because those tracks are pre-cleared for commercial use on TikTok.

    TikTok Help Center — Account Types on TikTok: TikTok explains Business Accounts and access to the Commercial Music Library for commercial use.

    TikTok Help Center — Copyright: TikTok explains copyright protections and its processes for copyright-related content and infringement reports.

    TikTok Help Center — Intellectual Property: TikTok provides information about intellectual-property rights, removals, and related resources.

    TikTok Help Center — Accessibility for Your Videos: TikTok explains accessibility features including automatically generated captions, which creators should review for accuracy.

    TikTok Help Center — Post Privacy Settings: TikTok provides controls for choosing who can see individual posts.

    TikTok Help Center — Manage Comments: TikTok provides controls for who can comment and for filtering and reviewing comments.

    TikTok Help Center — Promoting a Brand, Product, or Service: TikTok requires the content disclosure setting when a post promotes a brand, product, or service.

    TikTok Help Center — Editing TikTok Videos and Photos: TikTok explains built-in editing tools and how uploaded clips can be edited during the creation process.

    TikTok for Business — Video Advertising Guide for Small Businesses: TikTok for Business recommends 9:16 vertical video, keeping text and captions in safe zones, and exporting at 1080 × 1920 or higher for crisp full-screen playback.

    Important: This guide provides general educational information about AI video creation, copyright, licensing, privacy, disclosure, accessibility, and publishing. It is not legal advice. Verify that you have appropriate rights or permission for material you publish.
  • How to Create Pinterest Video Pins with AI: Beginner Step-by-Step Guide (2026)

    How to Create Pinterest Video Pins with AI: Beginner Step-by-Step Guide (2026)

    Estimated Reading Time: 18 minutes
    Last Updated: August 15, 2026

    Before Learning

    Before you begin, it helps to have one clear idea for the Pinterest video Pin you want to create. Your Pin can be educational, inspirational, promotional, or adapted from a longer video, article, tutorial, or other original content.

    You do not need advanced video-editing skills. AI tools can help you brainstorm ideas, write a short script, prepare visuals, generate narration, create captions, and improve the editing workflow.

    For a full-screen vertical video Pin, Pinterest currently recommends a 9:16 aspect ratio at 1080 × 1920 pixels. Pinterest also accepts several other aspect ratios, but 9:16 is a practical format when you want the video to fill a phone screen.

    Keep important text, captions, faces, and other key information away from areas that Pinterest may cover with interface elements. Pinterest provides safe-zone guidance for full-screen video Pins so important content remains visible on different devices.

    This guide will show you how to move from one simple idea to a finished Pinterest video Pin while keeping your source files, prompts, licences, permissions, clean master export, and publication records organized.

    What You’ll Learn

    By the end of this guide, you will know how to:

    · Choose one clear idea for a Pinterest video Pin.

    · Use AI to brainstorm Pin topics and create a simple content plan.

    · Write a short, focused script with AI assistance.

    · Create or prepare visuals for a vertical 9:16 layout.

    · Generate or record narration when needed.

    · Add readable captions and on-screen text.

    · Choose music and sound effects while checking usage rights.

    · Edit the video so the main idea is clear quickly.

    · Keep important text, faces, and graphics inside safe viewing areas.

    · Export a clean final version with suitable video settings.

    · Upload and publish the video Pin on Pinterest.

    · Review whether AI-generated content needs additional disclosure or labeling.

    · Keep your project files, prompts, licences, permissions, and clean master export for future reuse.

    Introduction

    Pinterest video Pins are videos that people can discover, save, and revisit while browsing Pinterest. They can use vertical, square, or other supported aspect ratios depending on the format. They can be used for tutorials, tips, demonstrations, product ideas, educational content, before-and-after examples, and many other visual topics.

    AI can help with several parts of the video Pin creation process. You can use it to generate ideas, outline the video, draft a short script, create visuals, prepare narration, improve captions, and suggest editing changes.

    However, AI should support your work rather than replace your final judgment. Review every script, visual, voice, caption, and factual claim before publishing. Make sure you have appropriate rights or permission for any music, images, video clips, voices, fonts, templates, or other material that you did not create yourself.

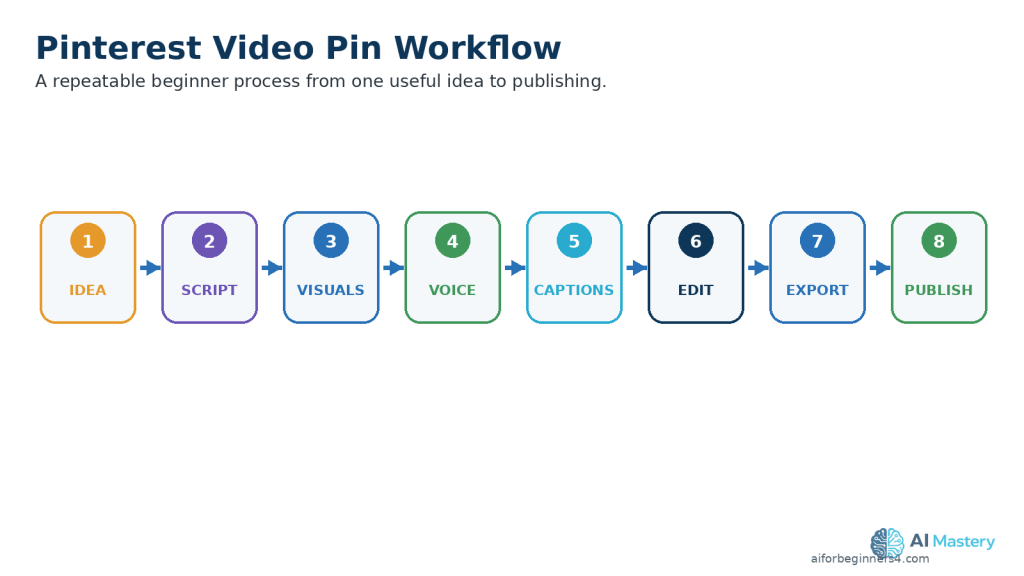
    A practical beginner workflow is to start with one clear idea, write a short script, prepare vertical visuals, add clear audio and captions, edit the video carefully, and review the final export before uploading it to Pinterest.

    Figure 1. A simple Pinterest video Pin workflow moves from one clear idea through scripting, visuals, audio, editing, export, and publishing.

    Explanation: Using the same sequence for each Pin makes the production process easier to repeat, review, and improve.

    What Are Pinterest Video Pins?

    Pinterest video Pins are Pins that use video instead of a single static image. They can be used for tutorials, demonstrations, ideas, educational content, product examples, and other visual topics that people can discover and save on Pinterest.

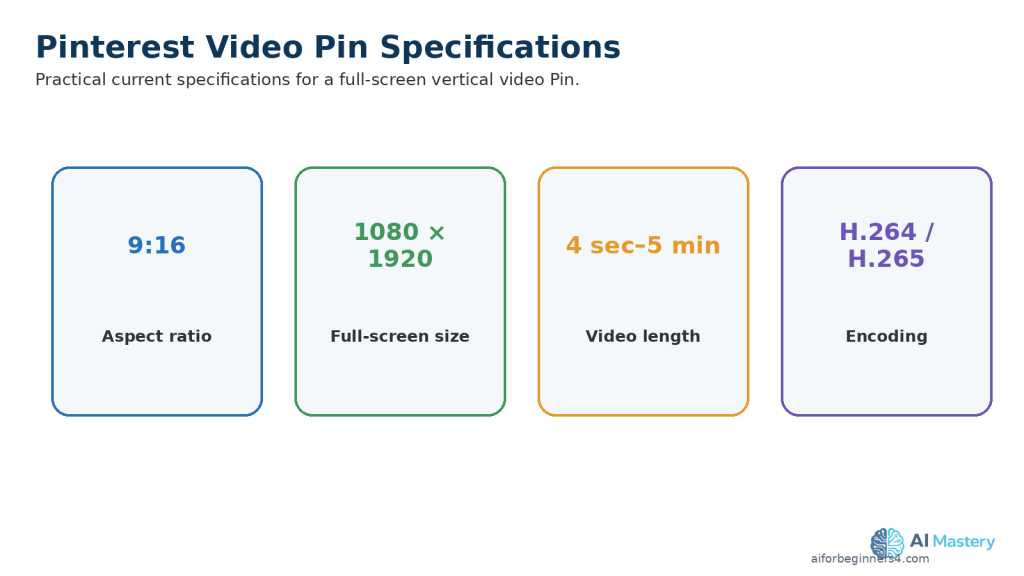
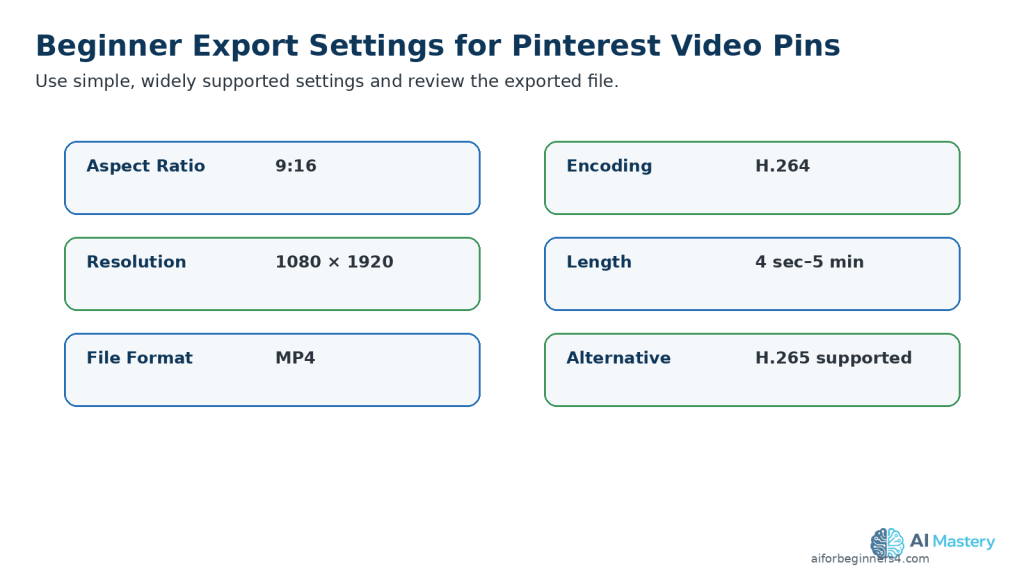
    Pinterest currently allows video Pins from 4 seconds up to 5 minutes long. Pinterest supports H.264 or H.265 video encoding.

    Figure 2. Current Pinterest video Pin specifications include 9:16 full-screen video at 1080 × 1920 pixels, 4 seconds to 5 minutes in length, and H.264 or H.265 encoding.

    Explanation: These settings provide a practical technical starting point for beginner full-screen vertical video Pins.

    Video Pins can work well for:

    · Quick tips.

    · Short tutorials.

    · Step-by-step demonstrations.

    · Before-and-after examples.

    · Educational explanations.

    · Product demonstrations.

    · Lists and recommendations.

    · Ideas adapted from longer articles or videos.

    Recommended Beginner Format

    For a full-screen video Pin, Pinterest recommends:

    · Aspect ratio: 9:16

    · Resolution: 1080 × 1920 pixels

    · Orientation: Vertical

    Pinterest also accepts other video aspect ratios, including 1:2, 2:3, 3:4, 4:5, and 1:1. For this beginner workflow, 9:16 is convenient because it fills a vertical phone screen and can also make repurposing easier for other vertical-video platforms.

    Keep Important Content Inside the Safe Area

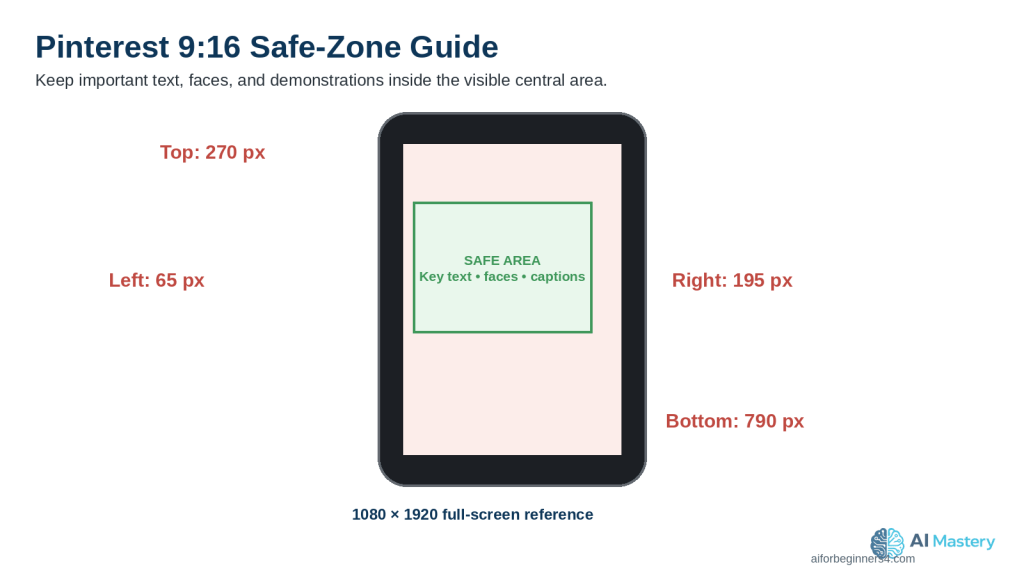
    Pinterest provides specific safe-zone guidance for full-screen 9:16 video Pins because interface elements can cover parts of the video.

    For a 1080 × 1920 full-screen video, Pinterest currently recommends keeping important content away from approximately:

    · Top: 270 pixels

    · Left: 65 pixels

    · Right: 195 pixels

    · Bottom: 790 pixels

    Keep important faces, captions, titles, demonstrations, and other key information inside the remaining visible area.

    Figure 3. Pinterest’s 9:16 safe-zone guidance keeps key creative elements away from the top, sides, and bottom areas that interface elements may cover.

    Explanation: For a 1080 × 1920 full-screen video Pin, Pinterest lists approximate safe-zone margins of 270 px top, 65 px left, 195 px right, and 790 px bottom.

    Practical Example

    Suppose you want to create a Pinterest video Pin explaining how to summarize a document with AI.

    You could create a 1080 × 1920 vertical video, keep the important demonstration near the centre, use large readable captions, and zoom into the part of the screen viewers need to understand.

    The video might show the document, the upload step, a short prompt, the AI-generated summary, and a final reminder to verify the result against the original document.

    Step 1: Choose One Clear Idea for Your Pinterest Video Pin

    A Pinterest video Pin is easier to understand when it focuses on one main idea. Trying to cover too many topics in one video can make the Pin feel rushed or confusing.

    Choose a topic that can be explained clearly, such as:

    · One beginner AI tip.

    · One useful AI tool.

    · One common mistake.

    · One short tutorial.

    · One simple before-and-after example.

    · One quick comparison.

    · One useful idea from a longer AI Mastery article.

    Use AI to Brainstorm Pin Ideas

    You can ask an AI assistant to suggest video Pin ideas based on your topic.

    Prompt:

    “Give me 10 beginner-friendly Pinterest video Pin ideas about using AI for everyday tasks. Keep each idea focused on one clear lesson.”

    Review the suggestions carefully and choose an idea that is useful, accurate, and appropriate for your audience.

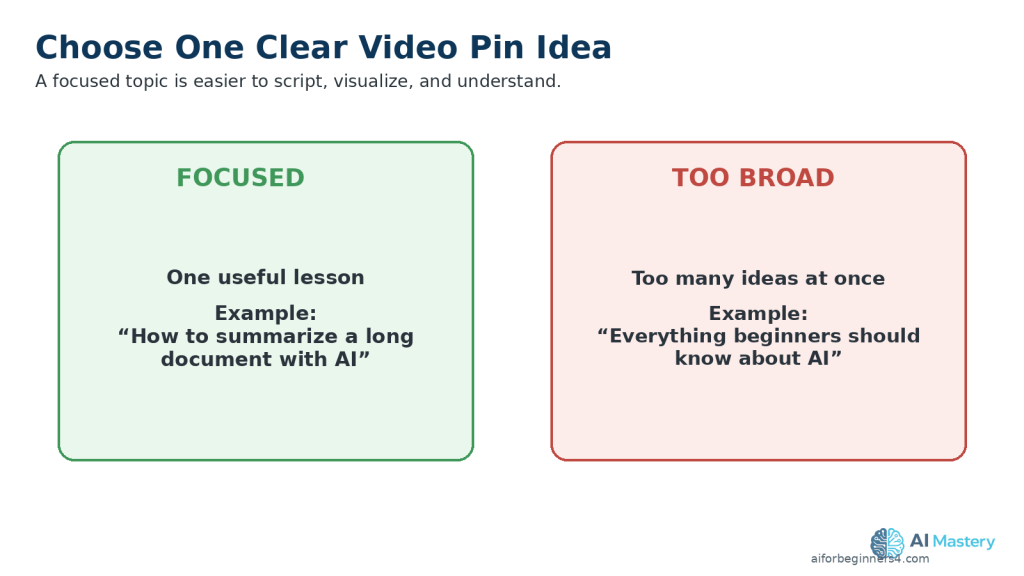
    Keep the Topic Narrow

    Instead of creating a video Pin called:

    “Everything Beginners Should Know About AI”

    choose something more specific, such as:

    “3 Ways AI Can Help You Save Time”

    or:

    “How to Summarize a Long Document with AI”

    A narrow topic makes it easier to write a clear script, choose suitable visuals, and keep the video focused.

    Figure 4. One focused Pinterest video Pin idea is easier to explain than a broad topic containing many unrelated points.

    Explanation: A narrow topic helps beginners keep the script, visuals, and editing focused on one useful lesson.

    Practical Example

    If a longer AI Mastery article explains several document features, you could create one Pinterest video Pin about only document summarization.

    The Pin can show the problem, demonstrate the basic process, and finish with one clear reminder to review the AI-generated result against the original document.

    Step 2: Write a Short, Focused Pinterest Video Pin Script with AI

    A clear script helps keep your Pinterest video Pin organized and easy to follow. Even a short video benefits from having a simple beginning, main point, and ending.

    AI can help you turn your idea into a draft script, but you should review and improve the result before using it.

    Start with a Clear Prompt

    Give the AI assistant enough information about your topic, audience, and goal.

    Prompt:

    “Write a beginner-friendly Pinterest video Pin script about how AI can help summarize a long document. Keep it clear, practical, and focused on one useful example. Use simple language and avoid hype.”

    Use a Simple Script Structure

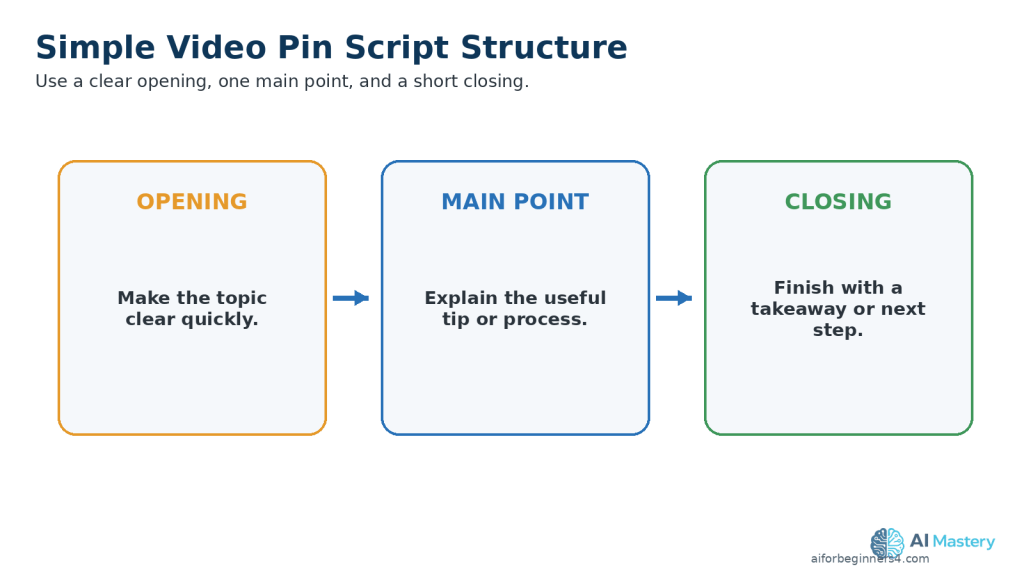
    A practical beginner structure is:

    Figure 5. A simple Pinterest video Pin script can use a clear opening, one main point, and a short closing takeaway.

    Explanation: This structure helps the video reach the useful information quickly without requiring a long introduction.

    1. Opening: Tell viewers quickly what the video is about.

    2. Main point: Explain the useful tip, process, or example.

    3. Closing: Finish with a short takeaway or next step.

    Make the Opening Clear

    Avoid spending too much time on a long introduction.

    Instead of:

    “Hello everyone, welcome back to another video.”

    you could begin with:

    “Have a long document to read? AI can help you create a short summary.”

    This tells viewers what the Pin is about immediately.

    Review the AI-Written Script

    Check the script for:

    · Factual accuracy.

    · Clear and simple language.

    · Unnecessary repetition.

    · Claims that sound exaggerated.

    · Instructions that may be outdated.

    · Difficult technical terms.

    · Information that does not support the video Pin’s main idea.

    Do not assume that an AI-generated script is automatically correct.

    Practical Example

    For a Pinterest video Pin about summarizing a document with AI, the script could follow this simple sequence:

    1. Show the long document.

    2. Explain that an AI tool can help summarize it.

    3. Show the document being uploaded.

    4. Show a short summary prompt.

    5. Remind viewers to compare the summary with the original document.

    This gives viewers one clear lesson without trying to explain every document-analysis feature at once.

    Step 3: Create or Prepare Vertical Visuals

    Your visuals should support the script and make the Pinterest video Pin easy to understand on a phone screen.

    For most beginner projects, use a 9:16 vertical layout at 1080 × 1920 pixels.

    Choose Visuals That Match the Script

    Depending on your topic, you can use:

    · AI-generated images.

    · Licensed stock photos or stock video.

    · Screen recordings.

    · Charts or simple graphics.

    · Text-based slides.

    · Product or workspace footage.

    · Clips from a longer video you created.

    Use only visuals that help explain the main point.

    Keep Important Content Visible

    Keep important elements such as:

    · Faces.

    · Captions.

    · Titles.

    · Buttons.

    · Screenshots.

    · Charts.

    · Demonstrations.

    away from areas that may be covered by Pinterest interface elements.

    For full-screen vertical video Pins, keep the most important information closer to the central viewing area rather than placing it near the extreme edges.

    Make Screenshots Easy to Read

    If your video Pin includes a computer or phone screenshot, avoid showing the entire screen when the important text becomes too small.

    Instead, crop or zoom into the part viewers need to see.

    For example, if you are demonstrating an AI prompt, show the prompt box clearly rather than displaying an entire browser window at a very small size.

    Review AI-Generated Visuals Carefully

    AI-generated images and video clips can contain mistakes such as:

    · Distorted hands or objects.

    · Misspelled text.

    · Duplicate items.

    · Inconsistent people or clothing.

    · Incorrect interface elements.

    · Unrealistic details.

    Review every generated visual before adding it to the video Pin.

    Check Licences and Permissions

    If you use stock footage, photographs, templates, fonts, graphics, or other assets that you did not create yourself, check the licence and commercial-use conditions before publishing.

    Do not assume that an image or video is free to reuse simply because it is available online.

    Practical Example

    For a Pinterest video Pin about summarizing a document with AI, you might use:

    1. A visual showing a long document.

    2. A screen recording of the document being uploaded.

    3. A close-up of the summary prompt.

    4. A simple visual showing the shorter AI-generated result.

    5. A final reminder to compare the summary with the original document.

    This creates a clear visual sequence that follows the script from beginning to end.

    Figure 6. Plan vertical visuals in the same order as the narration so each scene supports the current point.

    Explanation: Matching scenes to narration helps viewers follow the demonstration on a small phone screen.

    Step 4: Add Narration or an AI Voice

    Narration can make a Pinterest video Pin easier to follow, especially when the video explains a process, gives a tip, or demonstrates a task.

    You can record your own voice or use an AI-generated voice when the tool and licence allow your intended use.

    Choose a Clear Voice

    The narration should be easy to understand and should match the pace of the visuals.

    A good voice-over should:

    · Speak clearly.

    · Avoid rushing.

    · Use natural pauses.

    · Match the tone of the topic.

    · Pronounce technical terms correctly.

    · Leave enough time for viewers to read important on-screen text.

    Review AI-Generated Narration

    If you use an AI voice, listen to the entire recording before adding it to the video Pin.

    Check for:

    · Mispronounced names or technical terms.

    · Unnatural pauses.

    · Missing words.

    · Incorrect emphasis.

    · Audio that sounds too fast or too slow.

    · Sentences that do not match the visuals.

    Correct the script or regenerate the affected section when necessary.

    Keep Narration and Visuals Aligned

    The visual shown on screen should support what the viewer is hearing.

    For example, if the narration says:

    “Upload your document to the AI tool.”

    the video should show the upload step at approximately the same time.

    This makes the Pin easier to understand.

    Protect Privacy and Get Permission

    Do not clone or imitate a real person’s voice without appropriate permission.

    If you use another person’s recording, make sure you have permission to use it and understand any licence or platform conditions that apply.

    Avoid using AI voices in ways that could falsely make viewers believe a real person said something they did not say.

    Practical Example

    For a Pinterest video Pin explaining document summarization, the narration could briefly guide the viewer through uploading a document, asking for a summary, and checking the result.

    Each visual can change as the narration moves to the next step, keeping the video clear and easy to follow.

    Step 5: Add Captions and On-Screen Text

    Captions and on-screen text can make a Pinterest video Pin easier to understand, especially when viewers are watching without sound.

    Keep Captions Easy to Read

    Use captions that are:

    · Large enough to read on a phone.

    · Short and easy to scan.

    · High contrast against the background.

    · Timed closely with the spoken words.

    · Positioned away from important faces, demonstrations, and other visual details.

    Avoid placing important captions too close to the extreme edges of the frame, where interface elements may cover them.

    Use On-Screen Text Carefully

    On-screen text can highlight the most important information in the video Pin.

    For example, you could show:

    “3 Steps to Summarize a Document with AI”

    near the beginning.

    Later, you could use short labels such as:

    · Step 1: Upload

    · Step 2: Ask for a Summary

    · Step 3: Review the Result

    Keep the wording simple. Too much text on screen at the same time can make the video difficult to follow.

    Check Spelling and Accuracy

    Review every caption and text element before exporting.

    Check for:

    · Spelling mistakes.

    · Missing words.

    · Incorrect punctuation.

    · Wrong names or technical terms.

    · Captions that appear too early or too late.

    · Text that does not match the narration.

    Accessibility

    Captions can help people who are deaf or hard of hearing, viewers watching without sound, and people who find written text easier to follow than narration alone.

    Do not rely only on colour to communicate important information. Use clear words, labels, or symbols as well.

    Practical Example

    If the narrator says:

    “Always check the AI-generated summary against the original document.”

    you could display:

    “Always verify the summary.”

    This reinforces the main lesson without overcrowding the screen.

    Figure 7. Place captions where they remain readable without covering faces or sitting too close to interface-covered edges.

    Explanation: Clear caption placement supports accessibility and keeps important text visible.

    Step 6: Add Music and Sound Effects Carefully

    Music and sound effects can make a Pinterest video Pin more engaging, but they should support the video rather than distract from the main message.

    Choose Music You Are Allowed to Use

    Pinterest allows music to be added to Pins, but Pinterest states that all music is subject to licensing requirements regardless of how it is added. If a Pin contains music that you do not have permission to use, Pinterest may mute the audio. This can also apply to music already included in an uploaded video.

    Do not assume that a song is safe to use simply because you found it online or because it appeared in a video on another social media platform.

    Keep Music Below the Narration

    If your video Pin includes spoken narration, keep the background music at a lower volume so the voice remains easy to understand.

    Listen to the complete video and check that:

    · The narration is clear.

    · Music does not cover important words.

    · Sound effects are not unexpectedly loud.

    · Audio changes are smooth.

    · The beginning and ending do not contain sudden volume changes.

    Be Careful with Commercial or Promotional Pins

    Pinterest states that brands generally cannot promote Pins containing licensed music unless they have permission to use that music for the intended promotional purpose. This is especially important for advertising, sponsorships, paid partnerships, and other commercial uses.

    If you plan to promote a video Pin, check the music licence and Pinterest’s current advertising requirements before publishing or promoting it.

    Be Careful When Reusing Music from Other Platforms

    Music that you are allowed to use on Instagram, Facebook, TikTok, YouTube, or another service is not automatically licensed for Pinterest.

    Pinterest specifically notes that imported Instagram content can be muted when it contains music that the creator does not have permission to use on Pinterest.

    A safer workflow is to keep a clean master video without platform-specific music and add suitable audio separately for each platform after checking the applicable rights.

    Figure 8. Keep a clean master without platform-specific music and check audio rights separately for Pinterest and every other platform.

    Explanation: Music permission or availability on one platform does not automatically give permission to reuse the same track on another platform.

    Keep Licensing Records

    If you use music or sound effects from outside Pinterest, keep records such as:

    · The licence.

    · Permission from the rights holder.

    · A purchase receipt.

    · Attribution requirements.

    · A copy of the applicable usage conditions.

    Pinterest also advises users to obtain permission from copyright holders when using copyrighted material that they do not own.

    Practical Example

    Suppose your Pinterest video Pin explains how to summarize a document with AI.

    You could use quiet background music beneath the narration while keeping the spoken instructions clearly understandable.

    If you later adapt the same video for YouTube Shorts, Instagram Reels, Facebook Reels, or TikTok, return to your clean master and check whether the music licence permits use on that platform before publishing.

    Step 7: Edit the Pinterest Video Pin for a Clear, Fast Flow

    A Pinterest video Pin should move quickly enough to keep viewers interested without making the information difficult to follow.

    Remove Unnecessary Parts

    Review the full video and remove:

    · Long pauses.

    · Repeated explanations.

    · Empty frames.

    · Slow introductions.

    · Unnecessary transitions.

    · Visuals that do not support the main point.

    The goal is to keep the Pin focused on one useful idea.

    Match the Editing to the Script

    Change visuals when the narration moves to a new point.

    For example:

    · Show the problem when the opening introduces it.

    · Show the AI tool when the script explains the tool.

    · Show the result when the narration describes the result.

    · Show the final takeaway at the end.

    This helps viewers understand the information without having to guess what each visual means.

    Keep Transitions Simple

    You do not need complicated effects between every scene.

    Simple cuts, gentle zooms, or basic fades are often enough for beginner tutorials.

    Too many effects can distract from the content.

    Keep Important Content Visible

    Check that captions, faces, screenshots, and important text remain clear throughout the video.

    If a scene contains small text, zoom into the relevant area instead of showing the entire screen at once.

    Keep important information away from the areas that Pinterest may cover with interface elements.

    Practical Example

    For a Pinterest video Pin about summarizing a document with AI, the editing sequence might be:

    1. Show the long document.

    2. Show the upload step.

    3. Show the summary prompt.

    4. Show the shorter result.

    5. End with the reminder to verify the summary against the original.

    This creates a simple beginning-to-end flow without unnecessary scenes.

    Figure 9. Removing long pauses, repeated information, and distracting effects creates a clearer Pinterest video Pin.

    Explanation: Simple editing keeps attention on the lesson rather than on unnecessary production effects.

    Step 8: Export and Review the Final Pinterest Video Pin

    When editing is complete, export the video as a separate final file. Keep your original editing project and clean master version so you can make corrections or prepare versions for other platforms later.

    Choose Practical Export Settings

    For a full-screen, phone-friendly Pinterest video Pin, a practical beginner starting point is:

    · Aspect ratio: 9:16

    · Resolution: 1080 × 1920 pixels

    · Orientation: Vertical

    · Video encoding: H.264

    · File format: MP4

    Pinterest currently supports H.264 or H.265 video encoding and recommends 9:16 at 1080 × 1920 pixels for full-screen video Pins. Pinterest allows video Pins from 4 seconds up to 5 minutes long.

    Figure 10. Practical Pinterest video Pin export settings include 9:16, 1080 × 1920, MP4 with H.264 as a simple beginner choice, and a video length within Pinterest’s current limits.

    Explanation: Pinterest also supports H.265 encoding; always watch the actual exported file before uploading.

    Watch the Exported File Before Uploading

    Do not rely only on the preview inside your video editor.

    Open the actual exported video and watch it from beginning to end.

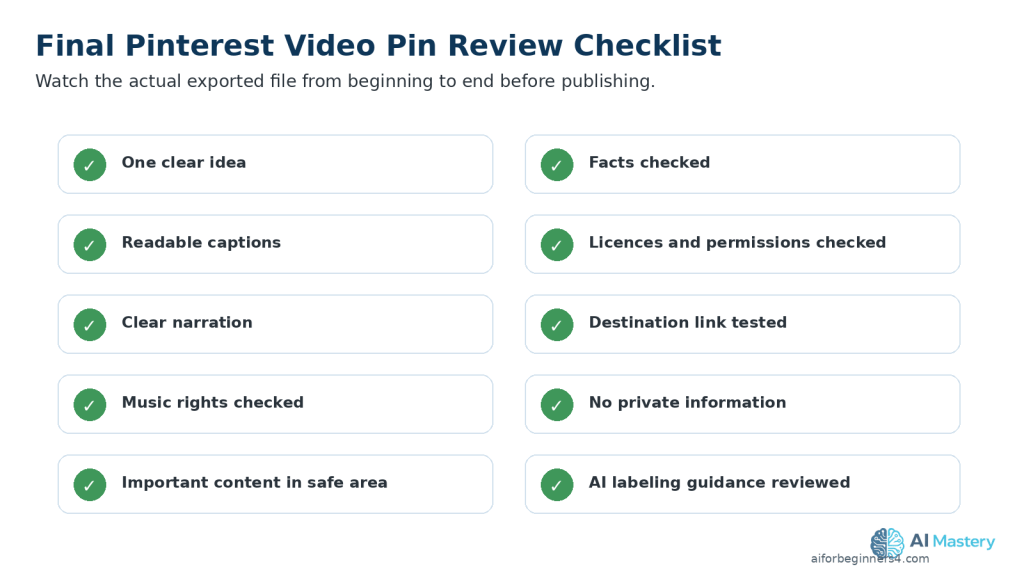
    Check for:

    · Blurry or pixelated video.

    · Cropped faces or important objects.

    · Captions that are difficult to read.

    · Text positioned too close to the edges.

    · Music that covers the narration.

    · Audio that is too loud or too quiet.

    · Missing scenes or blank frames.

    · Spelling mistakes.

    · Distorted AI-generated images.

    · Unwanted logos, watermarks, usernames, or branded endings.

    · Private or confidential information.

    Check the Vertical Layout

    Watch the exported video on a phone if possible.

    Make sure that:

    · Important faces remain visible.

    · Captions are readable.

    · Demonstrations are large enough to understand.

    · Important text remains inside the safe viewing area.

    · The main subject remains clear in the vertical frame.

    Pinterest provides safe-zone guidance for 9:16 full-screen video Pins because interface elements can cover parts of the video.

    Keep a Clean Master

    Save a clean master separately from the Pinterest version.

    For example:

    · ai-document-summary-master.mp4

    · ai-document-summary-pinterest-video-pin-final.mp4

    The clean master should avoid unnecessary platform-specific logos, usernames, downloaded watermarks, or platform-specific music when possible.

    This makes it easier to create another version later for YouTube Shorts, Instagram Reels, Facebook Reels, TikTok, or another platform.

    Practical Example

    After exporting your document-summary Pinterest video Pin, watch the final MP4 on your computer and phone.

    If the captions are readable, the narration is clear, the important demonstration remains visible, and there are no unwanted watermarks or private details, the video is ready for the publishing step.

    Step 9: Upload and Publish the Pinterest Video Pin

    When the final video has been reviewed, upload the clean Pinterest version rather than a copy downloaded from another social media platform.

    Pinterest’s exact publishing buttons and options can change over time, but the basic workflow is similar.

    Upload the Video Pin

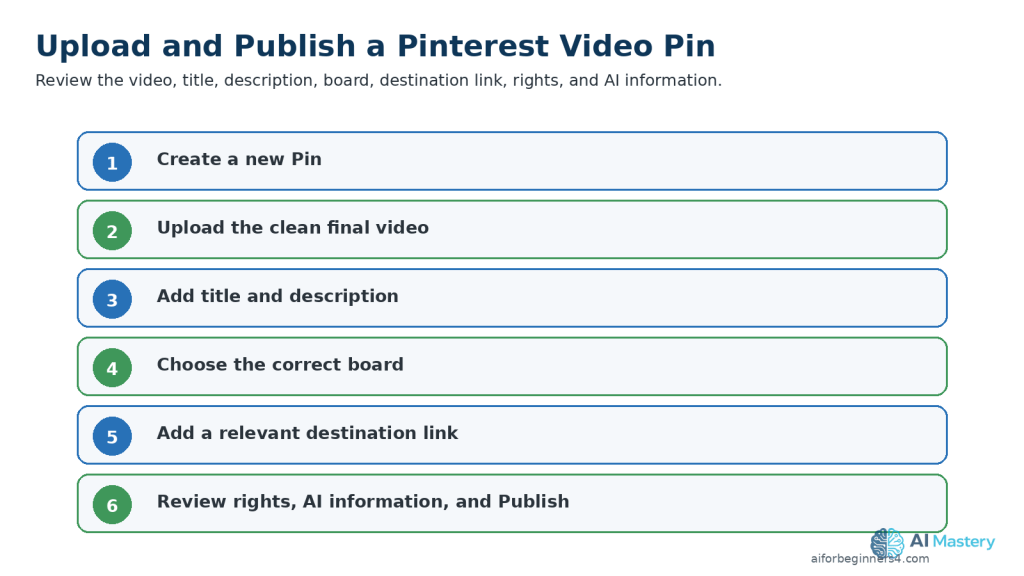
    A typical beginner workflow is:

    1. Open Pinterest.

    2. Choose the option to create a new Pin.

    3. Upload your final video file.

    4. Review the video preview.

    5. Add a clear title.

    6. Add a helpful description.

    7. Choose the most appropriate board.

    8. Add a destination link if the Pin should lead to a relevant webpage.

    9. Review any available topic, product, partnership, or promotional options that apply.

    10. Check the final Pin carefully.

    11. Publish when everything is correct.

    Figure 11. The Pinterest publishing workflow includes creating a Pin, uploading the clean final video, adding a title and description, choosing a board, adding a relevant destination link, and reviewing rights and AI information before publishing.

    Explanation: Exact button names can vary by device, account type, and Pinterest interface updates.

    The exact button names and available options may vary depending on whether you are using Pinterest on a computer, mobile device, personal account, or business account.

    Write a Clear Pin Title

    The title should explain what the viewer will learn or see.

    For example:

    How to Summarize a Long Document with AI

    Avoid vague titles that do not explain the Pin’s subject.

    Add a Helpful Description

    Your description can briefly explain the content and include relevant words that help people understand the Pin.

    For example:

    Learn a simple way to summarize a long document with AI. Upload the document, ask for a focused summary, and compare important information with the original before using the result.

    Write naturally for the reader rather than repeating the same keyword many times.

    Choose the Right Board

    Save the video Pin to a board that closely matches the topic.

    For example, an AI document tutorial could belong on a board such as:

    · AI for Beginners.

    · AI Productivity Tips.

    · ChatGPT Tutorials.

    · AI Tools.

    · Digital Productivity.

    Clear board organization can make your Pinterest content easier to manage and understand.

    Add a Relevant Destination Link

    If the video Pin supports an article, tutorial, product page, or other useful resource, you can add a relevant destination link when Pinterest provides that option.

    The linked page should match what the Pin promises.

    For example, a Pin about summarizing documents with AI could link to the complete AI Mastery tutorial about document summarization.

    Avoid using misleading links that send people to unrelated content.

    Review AI-Generated or AI-Altered Content

    Before publishing, review whether the video contains realistic AI-generated or significantly altered material that viewers could mistake for authentic people, places, or events.

    Pay particular attention when AI content:

    · Realistically represents a real person.

    · Alters what a real person appears to say or do.

    · Creates a realistic event that did not occur.

    · Significantly changes a real photograph or video.

    · Could reasonably be mistaken for authentic footage.

    Check Pinterest’s current AI-labeling guidance and consider a clear disclosure when this type of synthetic content could be mistaken for authentic footage.

    Review Before Publishing

    Before publishing the video Pin, check:

    · The correct video was selected.

    · The video displays properly.

    · The title accurately describes the content.

    · The description matches the video.

    · The correct board was selected.

    · The destination link works and is relevant.

    · Captions and important text remain readable.

    · Narration is clear.

    · Music and sound effects have appropriate usage rights.

    · Images, clips, fonts, voices, and other assets are properly licensed or permitted.

    · No private or confidential information appears.

    · No unwanted watermark, username, or platform branding remains.

    · Any appropriate AI-content disclosure or transparency option has been reviewed.

    Practical Example

    Suppose your Pinterest video Pin explains how to summarize a document with AI.

    You could title the Pin:

    How to Summarize a Document with AI

    Add a short description explaining the three basic steps, save it to an appropriate AI tutorial board, and link to the full related AI Mastery article if available.

    Before publishing, review the video, captions, narration, music rights, destination link, and any relevant AI-transparency requirements.

    Common Mistakes to Avoid When Creating Pinterest Video Pins with AI

    Beginners can save time by avoiding several common problems that affect clarity, quality, licensing, privacy, or publishing.

    Common mistakes include:

    · Trying to explain too many ideas in one video Pin.

    · Using a long introduction before reaching the main point.

    · Placing captions or important text too close to areas that Pinterest interface elements may cover.

    · Shrinking screenshots until the text becomes difficult to read.

    · Using music without checking whether the licence allows Pinterest use.

    · Letting background music overpower the narration.

    · Publishing AI-generated information without checking factual accuracy.

    · Using a real person’s voice, image, or likeness without appropriate permission.

    · Uploading a downloaded copy from another platform instead of using a clean master export.

    · Leaving unwanted watermarks, usernames, logos, or branded endings in the video.

    · Using AI-generated visuals without checking for distorted objects, incorrect text, or unrealistic details.

    · Adding a destination link that does not match the Pin.

    · Saving the Pin to an unrelated board.

    · Skipping the final review of the exported file.

    · Ignoring relevant AI-content transparency or disclosure requirements when realistic synthetic or altered content is used.

    How to Avoid These Mistakes

    Keep each video Pin focused on one clear lesson and work from a clean master project.

    Before publishing, review the:

    · Script.

    · Visuals.

    · Captions.

    · Audio.

    · Music rights.

    · Asset licences.

    · Permissions.

    · Pin title.

    · Description.

    · Board selection.

    · Destination link.

    · AI-generated content.

    · Final export.

    · Any applicable AI-content transparency or disclosure requirements.

    If something is unclear, incorrect, poorly positioned, misleading, or not properly licensed, correct the project and export a new version before publishing.

    Figure 12. A final checklist helps catch quality, licensing, privacy, linking, branding, and AI-labeling issues before publication.

    Explanation: Watching the complete exported video and testing the destination link are important final checks.

    Benefits of Creating Pinterest Video Pins with AI

    AI can make the Pinterest video Pin workflow easier for beginners by helping with planning, writing, visuals, narration, captions, and editing.

    Key benefits include:

    · Faster idea generation: AI can suggest focused Pin topics when you are not sure what to create.

    · Simpler script writing: AI can turn a basic idea into a short script that you can review and improve.

    · Easier visual planning: AI can suggest scenes, image ideas, screen recordings, text overlays, and simple shot sequences.

    · More accessible production: AI voices, captions, and editing assistance can help beginners create videos without advanced production skills.

    · Better organization: AI can help reduce a broad topic to one clear lesson that fits a video Pin.

    · Easier repurposing: A Pinterest video Pin can be adapted from a longer video, article, tutorial, or clean master project.

    · More consistent workflow: Using the same planning, scripting, editing, and review process can make future Pins easier to produce.

    · Useful learning support: AI can explain unfamiliar editing terms and suggest improvements while you are learning a new tool.

    · Cross-platform flexibility: A clean master can be adapted for Instagram Reels, YouTube Shorts, Facebook Reels, TikTok, or other vertical-video platforms after checking each platform’s current requirements.

    · Support for evergreen content: Pinterest content can remain useful beyond the day it is published, especially when the Pin answers a practical question or teaches a repeatable skill.

    AI is most useful when it supports your decisions rather than replacing them. Review the final script, visuals, audio, captions, facts, licences, permissions, links, and publishing choices before making the video Pin public.

    Limitations of Creating Pinterest Video Pins with AI

    AI can help with many parts of the Pinterest video Pin workflow, but it does not remove the need for careful human review.

    Common limitations include:

    · Factual errors: AI-generated scripts can contain incorrect, outdated, or misleading information.

    · Generic writing: AI may produce scripts that sound repetitive or similar to other content unless you revise them.

    · Visual inconsistencies: AI-generated images or video clips may contain distorted objects, unusual details, inconsistent characters, or misspelled text.

    · Voice limitations: AI narration can mispronounce names, sound unnatural, or use incorrect emphasis.

    · Licensing differences: AI tools, stock libraries, music services, templates, and fonts can have different rules for commercial use.

    · Platform changes: Pinterest video specifications, publishing tools, music options, account features, and disclosure methods can change over time.

    · Editing is still required: AI-generated material usually needs trimming, timing adjustments, caption checks, and final quality review.

    · Privacy risks: Uploading private documents, photographs, recordings, or personal information to an AI tool can create privacy concerns.

    · Link quality matters: AI can help write a Pin description, but it cannot ensure that a destination page is useful, accurate, current, or appropriate for the Pin.

    · Disclosure may be necessary: Realistic AI-generated or significantly altered content may require additional transparency depending on how it is presented and Pinterest’s current rules.

    · No guarantee of performance: AI can help improve the production workflow, but it cannot guarantee saves, clicks, followers, website traffic, sales, or other results.

    How to Reduce These Limitations

    Use AI as an assistant rather than treating its output as automatically finished.

    Verify important facts, review every generated visual and voice recording, check licences and permissions, protect private information, test destination links, and watch the complete exported video before publishing.

    When Pinterest changes a video specification, music option, publishing feature, disclosure method, or other requirement that affects your workflow, check the current official Pinterest guidance before relying on older instructions.

    Common Myths About Creating Pinterest Video Pins with AI

    Several common myths can make beginners expect too much from AI or create unnecessary publishing problems.

    Myth 1: AI Can Create a Perfect Pinterest Video Pin Automatically

    Reality: AI can help with ideas, scripts, visuals, narration, captions, and editing suggestions, but the final video still needs human review for accuracy, quality, timing, licensing, privacy, and publishing decisions.

    Myth 2: AI-Generated Images and Music Are Automatically Copyright-Free

    Reality: Rights and commercial-use conditions depend on the tool, licence, source material, and intended use.

    Always check the terms that apply to AI-generated images, music, stock footage, fonts, templates, voices, and other assets before publishing.

    Myth 3: More Effects Make a Pinterest Video Pin More Professional

    Reality: Too many transitions, animations, text boxes, or sound effects can distract from the main idea.

    Clear visuals, readable captions, simple editing, and useful information are usually more important than complicated effects.

    Myth 4: Every Pinterest Video Pin Needs an AI Voice

    Reality: Narration is optional.

    Depending on the topic, you can create an effective video Pin using:

    · On-screen text.

    · Captions.

    · Screen recordings.

    · Simple animations.

    · Demonstrations.

    · Music or sound effects when appropriately licensed.

    Use narration only when it genuinely helps explain the content.

    Myth 5: The Same Video Can Be Uploaded to Every Platform Without Changes

    Reality: You can start from the same clean master video, but each platform can have different requirements for dimensions, safe areas, music rights, captions, links, branding, and disclosure.

    Create a separate final version for Pinterest rather than simply downloading a video from another social media platform and uploading it unchanged.

    Myth 6: AI Can Guarantee More Saves, Clicks, or Followers

    Reality: AI can help improve your planning and production workflow, but it cannot guarantee saves, clicks, followers, website traffic, sales, or other results.

    The usefulness of the Pin, visual clarity, topic, title, description, destination link, audience interest, and many other factors can affect performance.

    Frequently Asked Questions

    How Long Can a Pinterest Video Pin Be?

    Pinterest currently allows video Pins from 4 seconds up to 5 minutes long.

    For beginner short-form content, use only the length needed to explain the idea clearly.

    What Size Should I Use for a Pinterest Video Pin?

    For a full-screen vertical video Pin, Pinterest recommends:

    · 1080 × 1920 pixels

    · 9:16 aspect ratio

    · Vertical orientation

    Pinterest also accepts other aspect ratios, including 1:2, 2:3, 3:4, 4:5, and 1:1.

    What Video Format Does Pinterest Support?

    Pinterest currently supports H.264 or H.265 video encoding.

    For a simple beginner workflow, an MP4 video using H.264 is a practical choice when your editing program provides it.

    Do I Need an Expensive AI Video Tool?

    No. Beginners can start with simple tools for writing, editing, captions, narration, and visuals.

    Before choosing a free or paid tool, check whether it:

    · Adds watermarks.

    · Limits video resolution.

    · Limits export length.

    · Restricts commercial use.

    · Places limits on AI voices or generated media.

    Can I Create Pinterest Video Pins Without Showing My Face?

    Yes.

    You can create faceless video Pins using:

    · Screen recordings.

    · AI-generated visuals.

    · Licensed stock footage.

    · Text and graphics.

    · Charts.

    · Product or workspace footage.

    · Voice-over narration.

    Can I Use an AI Voice?

    Yes, when the AI voice tool and its licence allow your intended use.

    Review the narration carefully and avoid cloning or impersonating a real person’s voice without appropriate permission.

    Should I Add Captions?

    Captions are strongly recommended.

    They can help viewers understand the video without sound and improve accessibility for people who are deaf or hard of hearing.

    Pinterest video Pins can also begin playing while people browse, so clear visual information and captions can help communicate the topic before someone opens the Pin.

    Can I Use Any Music I Find Online?

    No.

    Pinterest states that music is subject to licensing requirements regardless of how it is added. Pins containing music that the creator does not have permission to use may be muted.

    Check the music licence and keep appropriate permission or licensing records.

    Does Pinterest Label AI-Generated Content?

    Pinterest uses generative-AI disclosures for some content. Its current guidance explains that a disclosure may indicate that a Pin was modified with AI, contains an AI-generated person, or may have been modified with AI when Pinterest’s systems detect it.

    Review Pinterest’s current AI-labeling guidance before publishing realistic synthetic or significantly altered content.

    Can I Reuse the Same Video on Pinterest, Instagram, Facebook, YouTube, or TikTok?

    Yes, but start from your clean master video and prepare a separate final version for each platform.

    Check:

    · Aspect ratio.

    · Safe areas.

    · Caption placement.

    · Music rights.

    · Video length.

    · Platform branding.

    · Destination links.

    · AI-disclosure requirements.

    Pinterest’s own specifications include particular safe zones for full-screen 9:16 video Pins, so a layout prepared for another platform may need adjustment.

    Will AI Guarantee More Saves, Clicks, or Followers?

    No.

    AI can help with planning, writing, visuals, narration, and editing, but it cannot guarantee saves, clicks, followers, website traffic, sales, or other results.

    Key Takeaways

    Creating Pinterest video Pins with AI becomes easier when you follow a simple, repeatable workflow.

    Remember these main points:

    · Start with one clear idea for each video Pin.

    · Use AI to help brainstorm, outline, and draft the script, but always review the final wording.

    · Keep the script focused and make the topic clear near the beginning.

    · Use a 9:16 vertical format at 1080 × 1920 pixels when creating a full-screen, phone-friendly video Pin.

    · Keep important captions, faces, titles, and demonstrations inside Pinterest’s safe viewing area.

    · Prepare visuals that remain easy to understand on a small screen.

    · Use clear narration when it helps explain the content.

    · Add readable captions and on-screen text to improve understanding and accessibility.

    · Keep background music below the narration and verify that you have appropriate music rights.

    · Check licences and permissions for stock footage, images, fonts, templates, voices, music, and other third-party assets.

    · Review AI-generated visuals for distorted objects, incorrect text, duplicated items, or unrealistic details.

    · Edit out unnecessary pauses, repeated information, and distracting effects.

    · Export a clean final version and watch the complete file before uploading it.

    · Use an accurate title, description, board, and destination link when publishing.

    · Review Pinterest’s current AI-labeling or disclosure guidance when realistic synthetic or significantly altered content is involved.

    · Keep your clean master video, project files, prompts, licences, permissions, and final exports for future corrections or repurposing.

    AI can help make the production process faster, but the final quality, accuracy, licensing, privacy, accessibility, linking, and publishing decisions still require careful human review.

    Final Tip

    Keep your first Pinterest video Pins simple.

    Choose one useful idea, explain it clearly, use readable visuals and captions, and review the complete exported video before publishing. You do not need complicated effects or advanced editing to create a useful Pin.

    As your workflow improves, keep your clean master files, prompts, licences, permissions, destination links, and final exports organized. This makes it easier to correct mistakes, update older Pins, or repurpose successful videos for other platforms later.

    Continue Learning

    If you want to continue building your AI video skills, these AI Mastery guides are useful next steps:

    · How to Repurpose One AI Video for YouTube Shorts, TikTok, Instagram Reels, and Facebook Reels: Beginner Guide (2026) — Learn how to adapt one clean master video for several social media platforms.

    · How to Choose AI Video Sizes, Aspect Ratios, and Export Settings: Beginner Guide (2026) — Learn how to choose practical dimensions, frame rates, file formats, and export settings for vertical video.

    · How to Create YouTube Shorts with AI: Beginner Step-by-Step Guide (2026) — Learn how to create, edit, export, and publish short-form videos for YouTube.

    · How to Create Instagram Reels with AI: Beginner Step-by-Step Guide (2026) — Learn how to prepare and publish vertical AI-assisted videos for Instagram.

    · How to Create Facebook Reels with AI: Beginner Step-by-Step Guide (2026) — Learn how to create and publish AI-assisted vertical videos for Facebook.

    · How to Edit AI-Generated Videos: Beginner Step-by-Step Guide (2026) — Learn how to trim clips, arrange scenes, improve pacing, and prepare a clean final video.

    · How to Add Voice, Music, and Captions to AI Videos: Beginner Step-by-Step Guide (2026) — Learn how to add narration, background music, sound effects, and readable captions.

    Sources and References

    The following official Pinterest sources were checked for the current video Pin specifications, safe zones, music licensing, copyright, video playback, Pin creation, and generative-AI labeling information used in this guide. Pinterest features and policies can change, so important requirements should be checked again when Pinterest announces an update or when you change your publishing workflow.

    · Pinterest Help Center — Review Pin Specs: Pinterest provides current specifications for video Pins, including supported video encoding, video length, recommended full-screen dimensions, aspect ratios, and safe-zone measurements. For full-screen video, Pinterest recommends 9:16 at 1080 × 1920 pixels. Video Pins can currently be 4 seconds to 5 minutes long and use H.264 or H.265 encoding.

    · Pinterest Help Center — Using Music in Pins: Pinterest explains that music is subject to licensing requirements regardless of how it is added. Pins containing music that the creator does not have permission to use may be muted, and additional restrictions can apply to commercial or promoted Pins.

    · Pinterest Help Center — Gen AI Labels: Pinterest explains how it may add an AI modified label when its systems detect from available information that generative AI was used to create or modify a Pin.

    · Pinterest Help Center — AI at Pinterest: Pinterest provides additional information about its use of generative AI and its approach to labeling AI-generated or AI-modified content.

    · Pinterest Help Center — Copyright: Pinterest explains basic copyright principles and provides information about reporting material that infringes copyright. Creators should have appropriate rights or permission for copyrighted material they publish.

    · Pinterest Help Center — Manage Video Autoplay Settings: Pinterest explains that video Pins can appear in the home feed and search results and may play automatically depending on the viewer’s settings.

    · Pinterest Help Center — Design a Pin: Pinterest explains its Pin-creation tools, including options for recording and combining video clips when creating visual content.

    · Pinterest Help Center — Content Claiming Portal: Pinterest provides copyright owners with tools for identifying and managing matching images or videos that appear on Pinterest.

    Pinterest Help Center — Create a Pin from an Image or Video: Pinterest explains the current desktop and mobile workflow for creating a Pin from uploaded image or video files.

    Important: This guide provides general educational information about AI video creation, copyright, licensing, privacy, disclosure, and publishing. It is not legal advice. Always verify that you have appropriate rights or permission for music, photographs, video clips, voices, fonts, templates, and other material you publish.
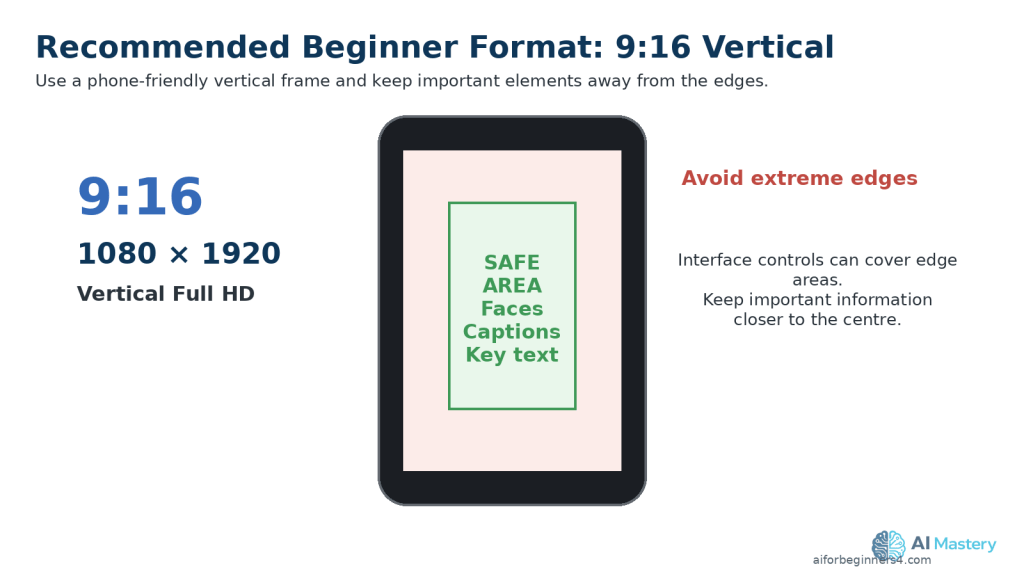
  • How to Create Facebook Reels with AI: Beginner Step-by-Step Guide (2026)

    How to Create Facebook Reels with AI: Beginner Step-by-Step Guide (2026)

    Estimated Reading Time: 18 minutes
    Last Updated: August 15, 2026

    Before Learning

    Before you begin, it helps to have one clear idea for the Facebook Reel you want to create. Your Reel can be educational, promotional, entertaining, or adapted from a longer video, article, tutorial, or other original content.

    You do not need advanced video-editing skills. AI tools can help you brainstorm ideas, write a short script, prepare vertical visuals, generate narration, create captions, and improve the editing workflow.

    For most beginner projects, a 9:16 vertical video at 1080 × 1920 pixels is a practical working format. Keep important text, captions, faces, and other key information away from the extreme edges because Facebook interface elements may cover parts of the video.

    This guide will show you how to move from one simple idea to a finished Facebook Reel while keeping your source files, prompts, licences, permissions, clean master export, and publication records organized.

    What You’ll Learn

    By the end of this guide, you will know how to:

    · Choose one clear idea for a Facebook Reel.

    · Use AI to brainstorm Reel topics and create a simple content plan.

    · Write a short, focused script with AI assistance.

    · Create or prepare visuals for a vertical 9:16 layout.

    · Generate or record narration when needed.

    · Add readable captions and on-screen text.

    · Choose music and sound effects while checking usage rights.

    · Edit the Reel so the opening quickly communicates the main topic.

    · Keep important text, faces, and graphics inside safe viewing areas.

    · Export a clean final version with suitable video settings.

    · Upload and publish the Reel on Facebook.

    · Review whether AI-content disclosure or other platform labels are required.

    · Keep your original project files, prompts, licences, permissions, and clean master export for future reuse.

    Introduction

    Facebook Reels are short-form videos designed for quick viewing in a vertical feed. They can be used for tutorials, tips, demonstrations, product explanations, educational content, behind-the-scenes clips, and many other types of posts.

    AI can help with several parts of the Reel-creation process. You can use it to generate ideas, outline a Reel, draft a script, create visuals, prepare narration, improve captions, and suggest editing changes.

    However, AI should support your work rather than replace your final judgment. Review every script, visual, voice, caption, and factual claim before publishing. Make sure you have appropriate rights or permission for any music, images, video clips, voices, fonts, templates, or other material that you did not create yourself.

    A practical beginner workflow is to start with one clear idea, write a short script, prepare vertical visuals, add clear audio and captions, edit the Reel carefully, and review the final export before uploading it to Facebook.

    Figure 1. A simple Facebook Reel workflow moves from one clear idea through scripting, visuals, audio, editing, export, and publishing.

    Explanation: Using the same sequence for each Reel makes the production process easier to repeat, review, and improve.

    What Are Facebook Reels?

    Facebook Reels are videos that appear in Facebook’s Reels experience. Meta changed Facebook’s video system so that all videos posted to Facebook are now shared as Reels, regardless of their length or orientation. This means a Facebook Reel is no longer limited to the older short-video format.

    Figure 2. Facebook now shares uploaded videos as Reels regardless of their length or orientation.

    Explanation: The newer Facebook video system unifies uploaded videos under the Reels experience, so a Reel is no longer limited to the older short-video format.

    Reels can be used for:

    · Quick tips.

    · Short tutorials.

    · Educational explanations.

    · Demonstrations.

    · Product or service information.

    · Behind-the-scenes videos.

    · Longer instructional videos.

    · Videos adapted from content you created for another platform.

    Recommended Beginner Format

    Even though Facebook now accepts videos of different lengths and orientations as Reels, a practical format for short-form, phone-friendly content is:

    · Aspect ratio: 9:16

    · Resolution: 1080 × 1920 pixels

    · Orientation: Vertical

    Meta recommends 9:16 for Reels placements because the vertical format can use the full phone screen.

    Keep Important Content Inside the Safe Area

    Facebook interface elements can cover parts of a vertical Reel.

    Keep important elements such as:

    · Faces.

    · Captions.

    · Titles.

    · Demonstrations.

    · Charts.

    · Calls to action.

    away from the extreme top, bottom, and sides of the frame.

    Meta’s safe-zone guidance recommends keeping key creative elements away from the edges of 9:16 Reels so interface controls are less likely to cover them.

    Practical Example

    Suppose you want to create a short Facebook Reel explaining one beginner AI tip.

    You could create a 1080 × 1920 vertical video, place the main subject near the centre, use large readable captions, and zoom into any screen recording that viewers need to read.

    Although Facebook can also accept other video orientations, using a clean 9:16 vertical master is convenient when you want to adapt the same original video for Instagram Reels, YouTube Shorts, or TikTok later.

    Figure 3. A 9:16 vertical frame at 1080 × 1920 pixels is a practical beginner format for short-form, phone-friendly Facebook Reels.

    Explanation: Keep important text, faces, and captions toward the central viewing area so interface controls are less likely to cover them.

    Step 1: Choose One Clear Idea for Your Facebook Reel

    A Facebook Reel is easier to understand when it focuses on one main idea. Trying to cover too many topics in one video can make the Reel feel rushed or confusing.

    Choose a topic that can be explained clearly, such as:

    · One beginner AI tip.

    · One useful AI tool.

    · One common mistake.

    · One short tutorial.

    · One quick comparison.

    · One simple before-and-after example.

    · One useful feature from a longer AI Mastery article.

    Use AI to Brainstorm Reel Ideas

    You can ask an AI assistant to suggest Reel ideas based on your topic.

    Prompt:

    “Give me 10 beginner-friendly Facebook Reel ideas about using AI for everyday tasks. Keep each idea focused on one clear lesson.”

    Review the suggestions carefully and choose an idea that is useful, accurate, and appropriate for your audience.

    Keep the Topic Narrow

    Instead of creating a Reel called:

    “Everything Beginners Should Know About AI”

    choose something more specific, such as:

    “3 Ways AI Can Help You Save Time”

    or:

    “How to Summarize a Long Document with AI”

    A narrow topic makes it easier to write a clear script, choose suitable visuals, and keep the Reel focused.

    Figure 4. One focused Facebook Reel idea is easier to explain than a broad topic containing many unrelated points.

    Explanation: A narrow topic helps beginners keep the script, visuals, and editing focused on one useful lesson.

    Practical Example

    If a longer AI Mastery article explains several document features, you could create one Facebook Reel about only document summarization.

    The Reel can show the problem, demonstrate the basic process, and finish with one clear reminder to review the AI-generated result against the original document.

    Step 2: Write a Short, Focused Facebook Reel Script with AI

    A clear script helps keep your Facebook Reel organized and easy to follow. Even a short Reel benefits from having a simple beginning, main point, and ending.

    AI can help you turn your idea into a draft script, but you should review and improve the result before using it.

    Start with a Clear Prompt

    Give the AI assistant enough information about your topic, audience, and goal.

    Prompt:

    “Write a beginner-friendly Facebook Reel script about how AI can help summarize a long document. Keep it clear, practical, and focused on one useful example. Use simple language and avoid hype.”

    Use a Simple Script Structure

    A practical beginner structure is:

    Figure 5. A simple Facebook Reel script can use a clear opening, one main point, and a short closing takeaway.

    Explanation: This structure helps the Reel reach the useful information quickly without requiring a long introduction.

    1. Opening: Tell viewers quickly what the Reel is about.

    2. Main point: Explain the useful tip, process, or example.

    3. Closing: Finish with a short takeaway or next step.

    Make the Opening Clear

    Avoid spending too much time on a long introduction.

    Instead of:

    “Hello everyone, welcome back to another video.”

    you could begin with:

    “Have a long document to read? AI can help you create a short summary.”

    This tells viewers what the Reel is about immediately.

    Review the AI-Written Script

    Check the script for:

    · Factual accuracy.

    · Clear and simple language.

    · Unnecessary repetition.

    · Claims that sound exaggerated.

    · Instructions that may be outdated.

    · Difficult technical terms.

    · Information that does not support the Reel’s main idea.

    Do not assume that an AI-generated script is automatically correct.

    Practical Example

    For a Facebook Reel about summarizing a document with AI, the script could follow this simple sequence:

    1. Show the long document.

    2. Explain that an AI tool can help summarize it.

    3. Show the document being uploaded.

    4. Show a short summary prompt.

    5. Remind viewers to compare the summary with the original document.

    This gives viewers one clear lesson without trying to explain every document-analysis feature at once.

    Step 3: Create or Prepare Vertical Visuals

    Your visuals should support the script and make the Facebook Reel easy to understand on a phone screen.

    For most beginner projects, use a 9:16 vertical layout at 1080 × 1920 pixels.

    Choose Visuals That Match the Script

    Depending on your topic, you can use:

    · AI-generated images.

    · Licensed stock photos or stock video.

    · Screen recordings.

    · Charts or simple graphics.

    · Text-based slides.

    · Product or workspace footage.

    · Clips from a longer video you created.

    Use only visuals that help explain the main point.

    Keep Important Content Visible

    Keep important elements such as:

    · Faces.

    · Captions.

    · Titles.

    · Buttons.

    · Screenshots.

    · Charts.

    · Demonstrations.

    away from the extreme top, bottom, and sides of the frame.

    Facebook interface elements can cover parts of the video, so important information should remain closer to the central viewing area.

    Make Screenshots Easy to Read

    If your Reel includes a computer or phone screenshot, avoid showing the entire screen when the important text becomes too small.

    Instead, crop or zoom into the area viewers need to see.

    For example, if you are demonstrating an AI prompt, show the prompt box clearly rather than displaying an entire browser window at a very small size.

    Review AI-Generated Visuals Carefully

    AI-generated images and video clips can contain mistakes such as:

    · Distorted hands or objects.

    · Misspelled text.

    · Duplicate items.

    · Inconsistent people or clothing.

    · Incorrect interface elements.

    · Unrealistic details.

    Review every generated visual before adding it to the Reel.

    Check Licences and Permissions

    If you use stock footage, photographs, templates, fonts, graphics, or other assets that you did not create yourself, check the licence and commercial-use conditions before publishing.

    Do not assume that an image or video is free to reuse simply because it is available online.

    Practical Example

    For a Facebook Reel about summarizing a document with AI, you might use:

    1. A visual showing a long document.

    2. A screen recording of the document being uploaded.

    3. A close-up of the summary prompt.

    4. A simple visual showing the shorter AI-generated result.

    5. A final reminder to compare the summary with the original document.

    This creates a clear visual sequence that follows the script from beginning to end.

    Figure 6. Plan vertical visuals in the same order as the narration so each scene supports the current point.

    Explanation: Matching scenes to narration helps viewers follow the demonstration on a small phone screen.

    Step 4: Add Narration or an AI Voice

    Narration can make a Facebook Reel easier to follow, especially when the video explains a process, gives a tip, or shows a demonstration.

    You can record your own voice or use an AI-generated voice when the tool and licence allow your intended use.

    Choose a Clear Voice

    The narration should be easy to understand and should match the pace of the visuals.

    A good voice-over should:

    · Speak clearly.

    · Avoid rushing.

    · Use natural pauses.

    · Match the tone of the topic.

    · Pronounce technical terms correctly.

    · Leave enough time for viewers to read important on-screen text.

    Review AI-Generated Narration

    If you use an AI voice, listen to the entire recording before adding it to the Reel.

    Check for:

    · Mispronounced names or technical terms.

    · Unnatural pauses.

    · Missing words.

    · Incorrect emphasis.

    · Audio that sounds too fast or too slow.

    · Sentences that do not match the visuals.

    Correct the script or regenerate the affected section when necessary.

    Keep Narration and Visuals Aligned

    The visual shown on screen should support what the viewer is hearing.

    For example, if the narration says:

    “Upload your document to the AI tool.”

    the Reel should show the upload step at approximately the same time.

    This makes the video easier to understand.

    Protect Privacy and Get Permission

    Do not clone or imitate a real person’s voice without appropriate permission.

    If you use another person’s recording, make sure you have permission to use it and understand any licence or platform conditions that apply.

    Avoid using AI voices in ways that could falsely make viewers believe a real person said something they did not say.

    Practical Example

    For a Facebook Reel explaining document summarization, the narration could briefly guide the viewer through uploading a document, asking for a summary, and checking the result.

    Each visual can change as the narration moves to the next step, keeping the Reel clear and easy to follow.

    Step 5: Add Captions and On-Screen Text

    Captions and on-screen text can make a Facebook Reel easier to understand, especially when viewers are watching without sound.

    Keep Captions Easy to Read

    Use captions that are:

    · Large enough to read on a phone.

    · Short and easy to scan.

    · High contrast against the background.

    · Timed closely with the spoken words.

    · Positioned away from important faces, demonstrations, and other visual details.

    Avoid placing captions at the extreme bottom or sides of the frame because Facebook interface elements can cover those areas.

    Use On-Screen Text Carefully

    On-screen text can highlight the most important information in the Reel.

    For example, you could show:

    “3 Steps to Summarize a Document with AI”

    near the beginning.

    Later, you could use short labels such as:

    · Step 1: Upload

    · Step 2: Ask for a Summary

    · Step 3: Review the Result

    Keep the wording simple. Too much text on screen at the same time can make the Reel difficult to follow.

    Check Spelling and Accuracy

    Review every caption and text element before exporting.

    Check for:

    · Spelling mistakes.

    · Missing words.

    · Incorrect punctuation.

    · Wrong names or technical terms.

    · Captions that appear too early or too late.

    · Text that does not match the narration.

    Accessibility

    Captions can help people who are deaf or hard of hearing, viewers watching without sound, and people who find written text easier to follow than narration alone.

    Do not rely only on colour to communicate important information. Use clear words, labels, or symbols as well.

    Practical Example

    If the narrator says:

    “Always check the AI-generated summary against the original document.”

    you could display:

    “Always verify the summary.”

    This reinforces the main lesson without overcrowding the screen.

    Figure 7. Place captions where they remain readable without covering faces or sitting too close to the edges.

    Explanation: Clear caption placement supports accessibility and reduces the chance that interface controls will hide important text.

    Step 6: Add Music and Sound Effects Carefully

    Music and sound effects can make a Facebook Reel more engaging, but they should support the video rather than distract from the main message.

    Choose Music You Are Allowed to Use

    Facebook lets creators add music or other audio to Reels through its audio tools. Meta also provides Sound Collection, which includes music and sound effects that can be used in Facebook Reels.

    Do not assume that any song you find online is safe to use.

    Meta explains that music use on Facebook is subject to agreements with music rights holders, and those agreements can place limits on how recorded music is used in videos and Reels.

    Keep Music Below the Narration

    If your Reel includes spoken narration, keep background music at a lower volume so the voice remains easy to understand.

    Listen to the complete Reel and check that:

    · The narration is clear.

    · Music does not cover important words.

    · Sound effects are not unexpectedly loud.

    · Audio changes are smooth.

    · The beginning and ending do not contain sudden volume jumps.

    Be Aware That Music Rights Can Change

    A track that is available today may not always remain available under the same conditions.

    Meta explains that if its rights to a song change, a Reel containing that song may later be muted.

    This is another reason to keep a clean master version of your video without platform-specific music.

    Be Careful When Reusing Music on Other Platforms

    Music that you can use in a Facebook Reel does not automatically mean you can use the same track in:

    · Instagram Reels.

    · YouTube Shorts.

    · TikTok.

    · Pinterest.

    · Other websites or advertisements.

    Return to your clean master and add suitable audio separately for each platform after checking the applicable rights.

    Keep Licensing Records

    If you use music or sound effects from outside Facebook, keep records such as:

    · The licence.

    · Permission from the rights holder.

    · A purchase receipt.

    · Attribution instructions.

    · A copy of the applicable usage conditions.

    This can help you confirm how the audio may be used later.

    Figure 8. Keep narration clear, background music lower, and verify the rights or licence for every audio source.

    Explanation: Music available through Facebook or another service may have different conditions for commercial or cross-platform use.

    Practical Example

    For a beginner AI tutorial Reel, you might use quiet background music beneath the narration.

    Keep the voice clearly understandable throughout the video. If you later adapt the Reel for YouTube Shorts or another platform, return to your clean master and confirm that the music licence also permits use on that platform before publishing.

    Step 7: Edit the Facebook Reel for a Clear, Fast Flow

    A Facebook Reel should move quickly enough to keep viewers interested without making the information difficult to follow.

    Remove Unnecessary Parts

    Review the full Reel and remove:

    · Long pauses.

    · Repeated explanations.

    · Empty frames.

    · Slow introductions.

    · Unnecessary transitions.

    · Visuals that do not support the main point.

    The goal is to keep the Reel focused on one useful idea.

    Match the Editing to the Script

    Change visuals when the narration moves to a new point.

    For example:

    · Show the problem when the opening introduces it.

    · Show the AI tool when the script explains the tool.

    · Show the result when the narration describes the result.

    · Show the final takeaway at the end.

    This helps viewers understand the information without having to guess what each visual means.

    Keep Transitions Simple

    You do not need complicated effects between every scene.

    Simple cuts, gentle zooms, or basic fades are often enough for beginner tutorials.

    Too many effects can distract from the content.

    Keep Important Content Visible

    Check that captions, faces, screenshots, and important text remain clear throughout the Reel.

    If a scene contains small text, zoom into the relevant area instead of showing the entire screen at once.

    Practical Example

    For a Facebook Reel about summarizing a document with AI, the editing sequence might be:

    1. Show the long document.

    2. Show the upload step.

    3. Show the summary prompt.

    4. Show the shorter result.

    5. End with the reminder to verify the summary against the original.

    This creates a simple beginning-to-end flow without unnecessary scenes.

    Figure 9. Removing long pauses, repeated information, and distracting effects creates a clearer Facebook Reel.

    Explanation: Simple editing keeps attention on the lesson rather than on unnecessary production effects.

    Step 8: Export and Review the Final Facebook Reel

    When editing is complete, export the Reel as a separate final video file. Keep your original editing project and clean master version so you can make corrections or prepare versions for other platforms later.

    Choose Practical Export Settings

    For a short-form, phone-friendly Facebook Reel, a practical beginner starting point is:

    · Aspect ratio: 9:16

    · Resolution: 1080 × 1920 pixels

    · Orientation: Vertical

    · File format: MP4

    · Video codec: H.264

    · Audio codec: AAC

    · Frame rate: 30 fps is a practical choice for many beginner projects.

    Meta recommends 9:16 for Reels placements because it can fill the vertical phone screen. Facebook’s video guidance also supports standard aspect ratios such as 9:16 for vertical video.

    Figure 10. Practical beginner export settings include 9:16, 1080 × 1920, MP4, H.264 video, AAC audio, and a suitable frame rate.

    Explanation: Watch the actual exported file before uploading rather than relying only on the preview inside the video editor.

    Watch the Exported File Before Uploading

    Do not rely only on the preview inside your video editor.

    Open the actual exported video and watch it from beginning to end.

    Check for:

    · Blurry or pixelated video.

    · Cropped faces or important objects.

    · Captions that are difficult to read.

    · Text positioned too close to the edges.

    · Music that covers the narration.

    · Audio that is too loud or too quiet.

    · Missing scenes or blank frames.

    · Spelling mistakes.

    · Distorted AI-generated images.

    · Unwanted logos, watermarks, usernames, or branded endings.

    · Private or confidential information.

    Check the Vertical Layout

    Watch the Reel on a phone if possible.

    Make sure that:

    · Important faces remain visible.

    · Captions are readable.

    · Demonstrations are large enough to understand.

    · Important text is not placed at the extreme top or bottom.

    · The main subject remains clear in the vertical frame.

    Meta’s safe-zone guidance recommends keeping important creative elements away from the edges of 9:16 Reels because interface controls can cover those areas.

    Keep a Clean Master

    Save a clean master separately from the Facebook version.

    For example:

    · ai-document-summary-master.mp4

    · ai-document-summary-facebook-reel-final.mp4

    The clean master should avoid unnecessary platform-specific logos, usernames, downloaded watermarks, or platform-specific music when possible.

    This makes it easier to create another version later for Instagram Reels, YouTube Shorts, TikTok, Pinterest, or another platform.

    Practical Example

    After exporting your document-summary Facebook Reel, watch the final MP4 on your computer and phone.

    If the captions are readable, the narration is clear, the important demonstration remains visible, and there are no unwanted watermarks or private details, the Reel is ready for the publishing step.

    Step 9: Upload and Publish the Facebook Reel

    When the final video has been reviewed, upload the clean Facebook version rather than a copy downloaded from another social media platform.

    Facebook now treats uploaded videos as Reels, so the exact posting flow can vary depending on whether you are using the Facebook app, a Page, a professional profile, or Meta Business Suite.

    Upload the Reel on Facebook

    A typical beginner workflow is:

    1. Open Facebook.

    2. Choose the option to create or upload a video or Reel.

    3. Select your final video file.

    4. Review the video preview.

    5. Add a clear description or caption.

    6. Add any music, text, or other Facebook features only if needed.

    7. Review the audience or privacy setting.

    8. Check whether any partnership, promotional, or branded-content options apply.

    9. Review any AI-content transparency or disclosure options that are available.

    10. Check the final post carefully.

    11. Publish when everything is correct.

    Figure 11. The Facebook publishing workflow includes selecting the clean final video, reviewing it, adding an accurate description, checking the audience, rights, and AI information, and publishing.

    Explanation: Exact buttons can vary by Facebook app, Page, professional profile, or Meta Business Suite, so check the current interface before publishing.

    The exact button names and available options can change as Facebook updates its interface.

    Add a Clear Description

    Your description should accurately explain what the Reel is about.

    For example:

    Learn a simple way to summarize a long document with AI. Always compare important information with the original document before using the summary.

    Avoid exaggerated or misleading claims simply to attract attention.

    Check the Audience and Privacy Settings

    Before publishing, review who can see the Reel.

    Depending on your account and posting method, Facebook may provide options for:

    · Public visibility.

    · Friends or followers.

    · Page audiences.

    · Professional or business audiences.

    · Other privacy or sharing controls.

    Choose the setting that matches the audience you actually want to reach.

    Review AI-Generated or AI-Altered Content

    Meta uses labels and technical signals to provide more information about some AI-generated or significantly AI-altered content across its platforms.

    Before publishing realistic AI-generated or heavily altered content, check the current AI-transparency options available in Facebook.

    Pay particular attention when AI content:

    · Realistically represents a person.

    · Alters what a real person appears to say or do.

    · Creates a realistic event that did not occur.

    · Significantly changes a real photograph or video.

    · Could reasonably be mistaken for authentic footage.

    If viewers could mistake synthetic content for real footage, clear disclosure is especially important.

    Review Before Publishing

    Before publishing the Reel, check:

    · The correct video was selected.

    · The video displays as intended.

    · The description accurately matches the content.

    · Captions and important text remain readable.

    · The narration is clear.

    · Music and sound effects have appropriate usage rights.

    · Images, clips, fonts, voices, and other assets are properly licensed or permitted.

    · No private or confidential information appears.

    · No unwanted watermark, username, or platform branding remains.

    · Any appropriate AI-content transparency or disclosure has been completed.

    Practical Example

    Suppose your Facebook Reel uses an AI-generated illustration of a fictional office worker while the narration explains how to summarize a document.

    Review the illustration for obvious AI mistakes, check the voice and captions, verify your asset licences, and review Facebook’s current AI-transparency options before publishing.

    If the Reel realistically makes a real person appear to say or do something that never happened, disclosure becomes particularly important because viewers could mistake the synthetic content for real footage.

    Common Mistakes to Avoid When Creating Facebook Reels with AI

    Beginners can save time by avoiding several common problems that affect clarity, quality, licensing, privacy, or publishing.

    Common mistakes include:

    · Trying to explain too many ideas in one Reel.

    · Using a long introduction before reaching the main point.

    · Placing captions or important text too close to the edges.

    · Shrinking screenshots until the text becomes difficult to read.

    · Using music without checking whether the licence allows Facebook use.

    · Letting background music overpower the narration.

    · Publishing AI-generated information without checking factual accuracy.

    · Using a real person’s voice, image, or likeness without appropriate permission.

    · Uploading a downloaded copy from another platform instead of using a clean master export.

    · Leaving unwanted watermarks, usernames, logos, or branded endings in the video.

    · Using AI-generated visuals without checking for distorted objects, incorrect text, or unrealistic details.

    · Forgetting to review privacy and audience settings.

    · Skipping the final review of the exported file.

    · Ignoring relevant AI-content transparency or disclosure requirements when realistic synthetic or altered content is used.

    How to Avoid These Mistakes

    Keep each Reel focused on one clear lesson and work from a clean master project.

    Before publishing, review the:

    · Script.

    · Visuals.

    · Captions.

    · Audio.

    · Music rights.

    · Asset licences.

    · Permissions.

    · Privacy and audience settings.

    · AI-generated content.

    · Final export.

    · Any applicable AI-content transparency or disclosure requirements.

    If something is unclear, incorrect, poorly positioned, or not properly licensed, correct the project and export a new version before publishing.

    Figure 12. A final checklist helps catch quality, licensing, privacy, branding, and AI-transparency problems before publication.

    Explanation: Watching the complete exported video from beginning to end is one of the most important final checks.

    Benefits of Creating Facebook Reels with AI

    AI can make the Facebook Reels workflow easier for beginners by helping with planning, writing, visuals, narration, captions, and editing.

    Key benefits include:

    · Faster idea generation: AI can suggest focused Reel topics when you are not sure what to create.

    · Simpler script writing: AI can turn a basic idea into a short script that you can review and improve.

    · Easier visual planning: AI can suggest scenes, image ideas, screen recordings, text overlays, and simple shot sequences.

    · More accessible production: AI voices, captions, and editing assistance can help beginners create videos without advanced production skills.

    · Better organization: AI can help reduce a broad topic to one clear lesson that fits a Reel.

    · Easier repurposing: A Facebook Reel can be adapted from a longer video, article, tutorial, or clean master project.

    · More consistent workflow: Using the same planning, scripting, editing, and review process can make future Reels easier to produce.

    · Useful learning support: AI can explain unfamiliar editing terms and suggest improvements while you are learning a new tool.

    · Cross-platform flexibility: A clean master can be adapted for Instagram Reels, YouTube Shorts, TikTok, or other vertical-video platforms after checking each platform’s current requirements.

    AI is most useful when it supports your decisions rather than replacing them. Review the final script, visuals, audio, captions, facts, licences, permissions, privacy settings, and publishing choices before making the Reel public.

    Limitations of Creating Facebook Reels with AI

    AI can help with many parts of the Facebook Reels workflow, but it does not remove the need for careful human review.

    Common limitations include:

    · Factual errors: AI-generated scripts can contain incorrect, outdated, or misleading information.

    · Generic writing: AI may produce scripts that sound repetitive or similar to other content unless you revise them.

    · Visual inconsistencies: AI-generated images or video clips may contain distorted objects, unusual details, inconsistent characters, or misspelled text.

    · Voice limitations: AI narration can mispronounce names, sound unnatural, or use incorrect emphasis.

    · Licensing differences: AI tools, stock libraries, music services, templates, and fonts can have different rules for commercial use.

    · Platform changes: Facebook features, music options, publishing tools, audience controls, and AI-transparency methods can change over time.

    · Editing is still required: AI-generated material usually needs trimming, timing adjustments, caption checks, and final quality review.

    · Privacy risks: Uploading private documents, photographs, recordings, or personal information to an AI tool can create privacy concerns.

    · Disclosure requirements: Some realistic AI-generated or significantly AI-altered content may require additional transparency or labeling.

    · No guarantee of performance: AI can help create a clearer Reel, but it cannot guarantee views, followers, engagement, sales, or other results.

    How to Reduce These Limitations

    Use AI as an assistant rather than treating its output as automatically finished.

    Verify important facts, review every generated visual and voice recording, check licences and permissions, protect private information, and watch the complete exported Reel before publishing.

    When Facebook changes a feature, music option, audience setting, disclosure method, or publishing requirement that affects your workflow, check the current official guidance before relying on older instructions.

    Common Myths About Creating Facebook Reels with AI

    Several common myths can make beginners expect too much from AI or use it in ways that create unnecessary problems.

    Myth 1: AI Can Create a Perfect Facebook Reel Automatically

    Reality: AI can help with ideas, scripts, visuals, narration, captions, and editing suggestions, but the final Reel still needs human review for accuracy, quality, timing, licensing, privacy, and platform requirements.

    Myth 2: Every AI-Generated Reel Must Be Labelled the Same Way

    Reality: AI transparency and labeling can depend on how the content was created and how realistic or significantly altered it is. Simple AI assistance with brainstorming or script editing is different from realistic synthetic media that viewers could mistake for authentic footage.

    Myth 3: AI-Generated Images and Music Are Automatically Copyright-Free

    Reality: Rights and commercial-use conditions depend on the tool, licence, source material, and intended use. Always check the terms that apply to the assets you use.

    Myth 4: More Effects Make a Facebook Reel More Professional

    Reality: Too many transitions, animations, text boxes, or sound effects can distract viewers. Clear visuals, readable captions, and simple editing are often more effective for beginner tutorials.

    Myth 5: Facebook Reels Must Always Be Very Short

    Reality: Facebook now treats uploaded videos as Reels, so a Reel is not limited to the older short-video format. For beginner short-form content, however, keeping the video focused and concise can still make it easier to understand.

    Myth 6: AI Can Guarantee More Views or Followers

    Reality: AI can help improve your workflow, but it cannot guarantee views, followers, engagement, sales, or other results. Audience interest, usefulness, presentation, timing, competition, and many other factors can affect performance.

    Frequently Asked Questions

    How Long Can a Facebook Reel Be?

    Facebook now treats uploaded videos as Reels, so Reels are no longer limited to the older short-video format.

    For beginner short-form content, use only the length needed to explain the idea clearly.

    What Size Should I Use for a Facebook Reel?

    A practical beginner format is 1080 × 1920 pixels with a 9:16 vertical aspect ratio.

    Do I Need an Expensive AI Video Tool?

    No. Beginners can start with simple tools for writing, editing, captions, narration, or visuals.

    Check whether a free plan adds watermarks, limits exports, restricts resolution, or has different commercial-use conditions.

    Can I Create a Facebook Reel Without Showing My Face?

    Yes. You can create faceless Reels using:

    · Screen recordings.

    · AI-generated visuals.

    · Licensed stock footage.

    · Text and graphics.

    · Charts.

    · Product footage.

    · Voice-over narration.

    Can I Use an AI Voice in a Facebook Reel?

    Yes, when the tool and licence allow your intended use.

    Review the narration carefully and avoid cloning or impersonating a real person’s voice without appropriate permission.

    Should I Add Captions?

    Captions are strongly recommended.

    They can help viewers who are watching without sound and improve accessibility for people who are deaf or hard of hearing.

    Can I Use Any Music I Find Online?

    No.

    Only use music when you have appropriate permission, a suitable licence, or access through Facebook under terms that allow your intended use.

    Do I Need to Disclose AI Use?

    It depends on how AI was used.

    Simple assistance with brainstorming, script writing, or minor editing is different from realistic AI-generated or significantly altered content that viewers could mistake for real people, events, or places.

    Check Facebook’s current AI-transparency or disclosure options before publishing realistic synthetic content.

    Can I Reuse the Same Reel on Instagram Reels, YouTube Shorts, or TikTok?

    Yes, but return to your clean master video and create a separate version for each platform.

    Check:

    · Aspect ratio.

    · Caption placement.

    · Music rights.

    · Safe areas.

    · Platform branding.

    · Disclosure requirements.

    before publishing each version.

    Will AI Guarantee More Views or Followers?

    No.

    AI can help with planning and production, but it cannot guarantee views, followers, engagement, sales, or other results.

    Key Takeaways

    Creating Facebook Reels with AI becomes easier when you follow a simple, repeatable workflow.

    Remember these main points:

    · Start with one clear idea for each Reel.

    · Use AI to help brainstorm, outline, and draft the script, but always review the final wording.

    · Keep the script focused and make the topic clear near the beginning.

    · Use a 9:16 vertical format for a phone-friendly layout when creating short-form content.

    · Prepare visuals that are easy to understand on a small screen.

    · Keep captions, titles, faces, and important information away from the extreme edges.

    · Use clear narration and make sure background music does not overpower the voice.

    · Check licences and permissions for music, stock footage, images, fonts, voices, templates, and other third-party assets.

    · Review AI-generated visuals for distorted objects, incorrect text, or unrealistic details.

    · Edit out unnecessary pauses, repeated information, and distracting effects.

    · Export a clean final version and watch the complete file before uploading.

    · Review Facebook’s current AI-transparency or disclosure options when realistic synthetic or significantly altered content is involved.

    · Keep your clean master video, project files, prompts, licences, permissions, and final exports for future corrections or repurposing.

    AI can help make the production process faster, but the final quality, accuracy, licensing, privacy, accessibility, and publishing decisions still require careful human review.

    Final Tip

    Keep your first Facebook Reels simple.

    Choose one useful idea, explain it clearly, use readable visuals and captions, and review the final video before publishing. You do not need complicated effects or advanced editing to create a useful Reel.

    As your workflow improves, keep your clean master files, prompts, licences, permissions, and final exports organized. This makes it easier to correct mistakes, update older videos, or repurpose successful Reels for other platforms later.

    Continue Learning

    If you want to continue building your AI video skills, these AI Mastery guides are useful next steps:

    · How to Repurpose One AI Video for YouTube Shorts, TikTok, Instagram Reels, and Facebook Reels: Beginner Guide (2026) — Learn how to adapt one clean master video into separate versions for several social media platforms.

    · How to Choose AI Video Sizes, Aspect Ratios, and Export Settings: Beginner Guide (2026) — Learn how to choose the correct dimensions, frame rate, file format, and export settings for vertical video.

    · How to Create YouTube Shorts with AI: Beginner Step-by-Step Guide (2026) — Learn how to create, edit, export, and publish short-form videos for YouTube.

    · How to Create Instagram Reels with AI: Beginner Step-by-Step Guide (2026) — Learn how to prepare and publish vertical AI-assisted videos for Instagram.

    · How to Create Faceless YouTube Videos with AI: Complete Beginner Step-by-Step Guide (2026) — Follow a complete workflow for planning, scripting, visuals, narration, editing, and publishing.

    · How to Edit AI-Generated Videos: Beginner Step-by-Step Guide (2026) — Learn how to trim clips, arrange scenes, improve pacing, and prepare a clean final video.

    · How to Add Voice, Music, and Captions to AI Videos: Beginner Step-by-Step Guide (2026) — Learn how to add narration, background music, sound effects, and readable captions.

    Sources and References

    The following official Facebook and Meta sources were checked for the current Reels format, vertical-video recommendations, safe areas, music, audience controls, copyright, and AI-transparency information used in this guide. Facebook features and policies can change, so important requirements should be checked again when Meta announces an update or when you change your publishing workflow.

    · Facebook Help Center — Create a Reel on Facebook: Facebook explains that its video experience has been unified and that videos posted to Facebook, except Stories and Live video, are now shared as Reels regardless of length or orientation.

    · Meta Business Help Center — Best Practices for Aspect Ratios Across Placements: Meta recommends a 9:16 vertical aspect ratio for Reels placements to make use of the full phone screen.

    · Meta Business Help Center — Safe Zones for Reels: Meta provides guidance for keeping important creative elements away from the edges of 9:16 Reels where interface controls may cover them.

    · Meta Business Help Center — Use Sound Collection for Reels on Facebook: Meta explains how its Sound Collection provides rights-cleared music and sound effects for Facebook Reels.

    · Facebook Help Center — About Music in Your Content on Facebook: Facebook explains that music use is subject to agreements with music rights holders and that videos or Reels may be restricted when music-use conditions are not met.

    · Meta Business Help Center — What Happens When Music Rights Change on Facebook: Meta explains that changes in music rights can affect previously published content, including Reels.

    · Facebook Help Center — Change Who Can See Your Reels: Facebook provides audience controls that let creators manage who can see their Reels.

    · Facebook Help Center — Intellectual Property and Copyright: Facebook states that users should not post content that violates another person’s intellectual-property rights and provides guidance for avoiding copyright infringement.

    · Meta — Our Approach to Labeling AI-Generated Content: Meta explains its use of AI info labels and technical signals to provide context about some AI-generated or significantly AI-modified images, video, and audio.

    · Meta — Transparency of AI-Generated Content: Meta confirmed in July 2026 that it continues to develop transparency measures for AI-generated content as synthetic media becomes increasingly difficult to distinguish from authentic media.

    Important: This guide provides general educational information about AI video creation, copyright, licensing, privacy, disclosure, and publishing. It is not legal advice. Always verify that you have appropriate rights or permission for music, photographs, video clips, voices, fonts, templates, and other material you publish.
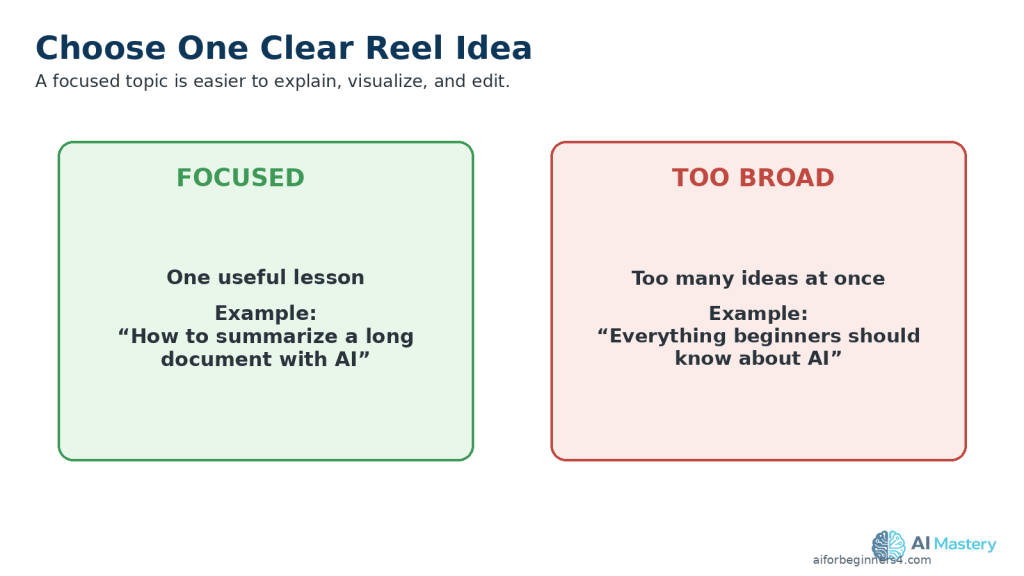
  • How to Create Instagram Reels with AI: Beginner Step-by-Step Guide (2026)

    How to Create Instagram Reels with AI: Beginner Step-by-Step Guide (2026)

    Estimated Reading Time: 18 minutes
    Last Updated: August 15, 2026

    Before Learning

    Before you begin, it helps to have one clear idea for the Instagram Reel you want to create. Your Reel can be educational, promotional, entertaining, or adapted from a longer video, article, tutorial, or other original content.

    You do not need advanced video-editing skills. AI tools can help you brainstorm ideas, write a short script, prepare vertical visuals, generate narration, create captions, and improve the editing workflow.

    For most beginner projects, a 9:16 vertical video at 1080 × 1920 pixels is a practical working format. Keep important text, captions, faces, and other key information away from the extreme edges because Instagram interface elements may cover parts of the video.

    This guide will show you how to move from one simple idea to a finished Instagram Reel while keeping your source files, prompts, licences, permissions, clean master export, and publication records organized.

    What You’ll Learn

    By the end of this guide, you will know how to:

    · Choose one clear idea for an Instagram Reel.

    · Use AI to brainstorm Reel topics and create a simple content plan.

    · Write a short, focused script with AI assistance.

    · Create or prepare visuals for a vertical 9:16 layout.

    · Generate or record narration when needed.

    · Add readable captions and on-screen text.

    · Choose music and sound effects while checking usage rights.

    · Edit the Reel so the opening quickly communicates the main topic.

    · Keep important text, faces, and graphics inside safe viewing areas.

    · Export a clean final version with suitable video settings.

    · Upload and publish the Reel on Instagram.

    · Review whether AI-content disclosure or other platform labels are required.

    · Keep your original project files, prompts, licences, permissions, and clean master export for future reuse.

    Introduction

    Instagram Reels are short-form videos designed for quick viewing in a vertical feed. They can be used for tutorials, tips, demonstrations, product explanations, educational content, behind-the-scenes clips, and many other types of posts.

    AI can help with several parts of the Reel-creation process. You can use it to generate ideas, outline a Reel, draft a script, create visuals, prepare narration, improve captions, and suggest editing changes.

    However, AI should support your work rather than replace your final judgment. Review every script, visual, voice, caption, and factual claim before publishing. Make sure you have appropriate rights or permission for any music, images, video clips, voices, fonts, templates, or other material that you did not create yourself.

    A practical beginner workflow is to start with one clear idea, write a short script, prepare vertical visuals, add clear audio and captions, edit the Reel carefully, and review the final export before uploading it to Instagram.

    Figure 1. A beginner Instagram Reel workflow moves from one clear idea through scripting, visuals, audio, editing, export, and sharing.

    Explanation: Following the same sequence for each Reel makes the process easier to repeat, review, and improve.

    What Are Instagram Reels?

    Instagram Reels are videos that you can create, edit, and share with your followers on Instagram. Instagram currently allows people to record and edit Reels of up to 20 minutes, although shorter videos may be more suitable when you want a quick, focused lesson or demonstration.

    Reels can include:

    · Recorded or uploaded video clips.

    · Music or original audio.

    · Text.

    · Effects.

    · Voice-over or text-to-speech.

    · Captions and other visual elements.

    Recommended Beginner Format

    For a full-screen vertical Reel, a practical beginner format is:

    · Aspect ratio: 9:16

    · Resolution: 1080 × 1920 pixels

    · Orientation: Vertical

    · Frame rate: 30 fps or higher

    Instagram accepts Reel aspect ratios from 1.91:1 through 9:16 and requires at least 30 fps and 720-pixel resolution. Meta recommends 9:16 for Reels because most people hold their phones vertically and this format can use the full screen.

    Keep Important Content Inside the Safe Area

    Instagram interface elements can cover parts of a vertical Reel. Keep important information such as:

    · Faces.

    · Captions.

    · Titles.

    · Demonstrations.

    · Charts.

    · Calls to action.

    away from the extreme top, bottom, and sides of the frame. Meta provides safe-zone guidance for 9:16 Reels so important creative elements are less likely to be covered by interface controls.

    Practical Example

    If you want to create a Reel explaining one beginner AI tip, you could use a 1080 × 1920 vertical project, keep the main subject near the centre, add large readable captions, and show only the screen area needed for the demonstration.

    This creates a simple phone-friendly layout while leaving room around the edges for Instagram interface elements.

    Figure 2. A 9:16 vertical frame at 1080 × 1920 pixels provides a practical full-screen Reel layout with space around the edges.

    Explanation: Keeping important text, faces, and captions toward the central viewing area reduces the chance that interface elements will cover them.

    Step 1: Choose One Clear Idea for Your Instagram Reel

    An Instagram Reel is easier to understand when it focuses on one main idea. Trying to cover too many topics in one Reel can make the video feel rushed or confusing.

    Choose a topic that can be explained clearly, such as:

    · One beginner AI tip.

    · One useful AI tool.

    · One common mistake.

    · One short tutorial.

    · One quick comparison.

    · One simple before-and-after example.

    · One useful feature from a longer AI Mastery article.

    Use AI to Brainstorm Reel Ideas

    You can ask an AI assistant to suggest Reel ideas based on your topic.

    Prompt:

    “Give me 10 beginner-friendly Instagram Reel ideas about using AI for everyday tasks. Keep each idea focused on one clear lesson.”

    Review the suggestions carefully and choose an idea that is useful, accurate, and appropriate for your audience.

    Keep the Topic Narrow

    Instead of creating a Reel called:

    “Everything Beginners Should Know About AI”

    choose something more specific, such as:

    “3 Ways AI Can Help You Save Time”

    or:

    “How to Summarize a Long Document with AI”

    A narrow topic makes it easier to write a clear script, choose suitable visuals, and keep the Reel focused.

    Figure 3. One focused Reel idea is easier to explain than a broad topic containing many unrelated points.

    Explanation: A narrow topic helps beginners keep the script, visuals, and editing focused on one useful lesson.

    Practical Example

    If a longer AI Mastery article explains several document features, you could create one Reel about only document summarization.

    The Reel can show the problem, demonstrate the basic process, and finish with one clear reminder to review the AI-generated result against the original document.

    Step 2: Write a Short, Focused Reel Script with AI

    A clear script helps keep your Instagram Reel organized and easy to follow. Even a short Reel benefits from having a simple beginning, main point, and ending.

    AI can help you turn your idea into a draft script, but you should review and improve the result before using it.

    Start with a Clear Prompt

    Give the AI assistant enough information about your topic, audience, and goal.

    Prompt:

    “Write a beginner-friendly Instagram Reel script about how AI can help summarize a long document. Keep it clear, practical, and focused on one useful example. Use simple language and avoid hype.”

    Use a Simple Script Structure

    A practical beginner structure is:

    Figure 4. A simple Instagram Reel script can use a clear opening, one main point, and a short closing takeaway.

    Explanation: This structure helps the Reel reach the useful information quickly without requiring a long introduction.

    1. Opening: Tell viewers quickly what the Reel is about.

    2. Main point: Explain the useful tip, process, or example.

    3. Closing: Finish with a short takeaway or next step.

    Make the Opening Clear

    Avoid spending too much time on a long introduction.

    Instead of:

    “Hello everyone, welcome back to another video.”

    you could begin with:

    “Have a long document to read? AI can help you create a short summary in minutes.”

    This tells viewers what the Reel is about immediately.

    Review the AI-Written Script

    Check the script for:

    · Factual accuracy.

    · Clear and simple language.

    · Unnecessary repetition.

    · Claims that sound exaggerated.

    · Instructions that may be outdated.

    · Difficult technical terms.

    · Information that does not support the Reel’s main idea.

    Do not assume that an AI-generated script is automatically correct.

    Practical Example

    For a Reel about summarizing a document with AI, the script could follow this simple sequence:

    1. Show the long document.

    2. Explain that an AI tool can help summarize it.

    3. Show the document being uploaded.

    4. Show a short summary prompt.

    5. Remind viewers to compare the summary with the original document.

    This gives viewers one clear lesson without trying to explain every document-analysis feature at once.

    Step 3: Create or Prepare Vertical Visuals

    Your visuals should support the script and make the Reel easy to understand on a phone screen.

    For most beginner Instagram Reels, use a 9:16 vertical layout at 1080 × 1920 pixels.

    Choose Visuals That Match the Script

    Depending on your topic, you can use:

    · AI-generated images.

    · Licensed stock photos or stock video.

    · Screen recordings.

    · Charts or simple graphics.

    · Text-based slides.

    · Product or workspace footage.

    · Clips from a longer video you created.

    Use only visuals that help explain the main point.

    Keep Important Content Visible

    Vertical video is narrower than a standard horizontal video. Keep important elements such as:

    · Faces.

    · Captions.

    · Titles.

    · Buttons.

    · Screenshots.

    · Charts.

    · Demonstrations.

    away from the extreme top, bottom, and sides of the frame.

    Instagram interface elements can cover parts of the video, so important information should remain closer to the central viewing area.

    Make Screenshots Easy to Read

    If your Reel includes a computer or phone screenshot, avoid showing the entire screen when the important text becomes too small.

    Instead, crop or zoom into the area viewers need to see.

    For example, if you are demonstrating an AI prompt, show the prompt box clearly rather than displaying an entire browser window at a very small size.

    Review AI-Generated Visuals Carefully

    AI-generated images and video clips can contain mistakes such as:

    · Distorted hands or objects.

    · Misspelled text.

    · Duplicate items.

    · Inconsistent people or clothing.

    · Incorrect interface elements.

    · Unrealistic details.

    Review every generated visual before adding it to the Reel.

    Check Licences and Permissions

    If you use stock footage, photographs, templates, fonts, graphics, or other assets that you did not create yourself, check the licence and commercial-use conditions before publishing.

    Do not assume that an image or video is free to reuse simply because it is available online.

    Practical Example

    For an Instagram Reel about summarizing a document with AI, you might use:

    1. A visual showing a long document.

    2. A screen recording of the document being uploaded.

    3. A close-up of the summary prompt.

    4. A simple visual showing the shorter AI-generated result.

    5. A final reminder to compare the summary with the original document.

    This creates a clear visual sequence that follows the script from beginning to end.

    Figure 5. Plan vertical visuals in the same order as the script so each scene supports the current point.

    Explanation: A simple scene sequence helps viewers follow the process on a small phone screen.

    Step 4: Add Narration or an AI Voice

    Narration can make an Instagram Reel easier to follow, especially when the video explains a process, gives a tip, or shows a demonstration.

    You can record your own voice or use an AI-generated voice when the tool and licence allow your intended use.

    Choose a Clear Voice

    The narration should be easy to understand and should match the pace of the visuals.

    A good voice-over should:

    · Speak clearly.

    · Avoid rushing.

    · Use natural pauses.

    · Match the tone of the topic.

    · Pronounce technical terms correctly.

    · Leave enough time for viewers to read important on-screen text.

    Review AI-Generated Narration

    If you use an AI voice, listen to the entire recording before adding it to the Reel.

    Check for:

    · Mispronounced names or technical terms.

    · Unnatural pauses.

    · Missing words.

    · Incorrect emphasis.

    · Audio that sounds too fast or too slow.

    · Sentences that do not match the visuals.

    Correct the script or regenerate the affected section when necessary.

    Keep Narration and Visuals Aligned

    The visual shown on screen should support what the viewer is hearing.

    For example, if the narration says:

    “Upload your document to the AI tool.”

    the Reel should show the upload step at approximately the same time.

    This makes the video easier to understand.

    Figure 6. Match narration and visuals so viewers see each step at approximately the same time they hear it.

    Explanation: Good timing makes demonstrations easier to follow and reduces confusion.

    Protect Privacy and Get Permission

    Do not clone or imitate a real person’s voice without appropriate permission.

    If you use another person’s recording, make sure you have permission to use it and understand any licence or platform conditions that apply.

    Avoid using AI voices in ways that could falsely make viewers believe a real person said something they did not say.

    Practical Example

    For a Reel explaining document summarization, the narration could briefly guide the viewer through uploading a document, asking for a summary, and checking the result.

    Each visual can change as the narration moves to the next step, keeping the Reel clear and easy to follow.

    Step 5: Add Captions and On-Screen Text

    Captions and on-screen text can make an Instagram Reel easier to understand, especially when viewers are watching without sound.

    Keep Captions Easy to Read

    Use captions that are:

    · Large enough to read on a phone.

    · Short and easy to scan.

    · High contrast against the background.

    · Timed closely with the spoken words.

    · Positioned away from important faces, demonstrations, and other visual details.

    Avoid placing captions at the extreme bottom or sides of the frame because Instagram interface elements can cover those areas.

    Use On-Screen Text Carefully

    On-screen text can highlight the most important information in the Reel.

    For example, you could show:

    “3 Steps to Summarize a Document with AI”

    near the beginning.

    Later, you could use short labels such as:

    · Step 1: Upload

    · Step 2: Ask for a Summary

    · Step 3: Review the Result

    Keep the wording simple. Too much text on screen at the same time can make the Reel difficult to follow.

    Check Spelling and Accuracy

    Review every caption and text element before exporting.

    Check for:

    · Spelling mistakes.

    · Missing words.

    · Incorrect punctuation.

    · Wrong names or technical terms.

    · Captions that appear too early or too late.

    · Text that does not match the narration.

    Accessibility

    Captions can help people who are deaf or hard of hearing, viewers watching without sound, and people who find written text easier to follow than narration alone.

    Do not rely only on colour to communicate important information. Use clear words, labels, or symbols as well.

    Practical Example

    If the narrator says:

    “Always check the AI-generated summary against the original document.”

    you could display:

    “Always verify the summary.”

    This reinforces the main lesson without overcrowding the screen.

    Figure 7. Place captions where they remain readable without covering faces or sitting too close to the edges.

    Explanation: Clear caption placement supports accessibility and improves readability on vertical screens.

    Step 6: Add Music and Sound Effects Carefully

    Music and sound effects can make an Instagram Reel more engaging, but they should support the video rather than distract from the main message.

    Choose Music You Are Allowed to Use

    You can use music available through Instagram when it is offered for your account and intended use, or use music from another source when you have the appropriate licence or permission.

    Music availability can vary by account type, location, track, and intended use. Some music that is available for personal content may have different restrictions for business or commercial use.

    Do not assume that music is safe to reuse simply because you found it online or because it appears in another creator’s Reel.

    Keep Music Below the Narration

    If your Reel includes spoken narration, keep the background music at a lower volume so the voice remains easy to understand.

    Listen to the complete Reel and check that:

    · The narration is clear.

    · Music does not cover important words.

    · Sound effects are not unexpectedly loud.

    · Audio changes are smooth.

    · The beginning and ending do not contain sudden volume jumps.

    Be Careful When Reusing Music on Other Platforms

    Music available inside Instagram does not automatically mean you have permission to use the same track in a YouTube Short, TikTok video, Facebook Reel, or another platform.

    If you plan to repurpose the video, keep a clean master version without platform-specific music when possible.

    You can then add suitable music separately for each platform after checking the applicable licence or usage conditions.

    Keep Licensing Records

    If you use music or sound effects from an external source, keep records such as:

    · The licence.

    · Permission from the rights holder.

    · A purchase receipt.

    · Attribution instructions.

    · A copy of the applicable usage conditions.

    This can help you confirm how the audio may be used later.

    Figure 8. Keep narration clear, background music lower, and verify the rights or licence for every audio source.

    Explanation: Music available under Instagram or another service may have different conditions for business, commercial, or cross-platform use.

    Practical Example

    For a beginner AI tutorial Reel, you might use quiet background music beneath the narration.

    The voice should remain clearly understandable throughout the video. If you later adapt the Reel for YouTube Shorts or another platform, return to the clean master and check the music rights again before publishing the new version.

    Step 7: Edit the Instagram Reel for a Clear, Fast Flow

    An Instagram Reel should move quickly enough to keep viewers interested without making the information difficult to follow.

    Remove Unnecessary Parts

    Review the full Reel and remove:

    · Long pauses.

    · Repeated explanations.

    · Empty frames.

    · Slow introductions.

    · Unnecessary transitions.

    · Visuals that do not support the main point.

    The goal is to keep the Reel focused on one useful idea.

    Match the Editing to the Script

    Change visuals when the narration moves to a new point.

    For example:

    · Show the problem when the opening introduces it.

    · Show the AI tool when the script explains the tool.

    · Show the result when the narration describes the result.

    · Show the final takeaway at the end.

    This helps viewers understand the information without having to guess what each visual means.

    Keep Transitions Simple

    You do not need complicated effects between every scene.

    Simple cuts, gentle zooms, or basic fades are often enough for beginner tutorials.

    Too many effects can distract from the content.

    Keep Important Content Visible

    Check that captions, faces, screenshots, and important text remain clear throughout the Reel.

    If a scene contains small text, zoom into the relevant area instead of showing the entire screen at once.

    Practical Example

    For a Reel about summarizing a document with AI, the editing sequence might be:

    1. Show the long document.

    2. Show the upload step.

    3. Show the summary prompt.

    4. Show the shorter result.

    5. End with the reminder to verify the summary against the original.

    This creates a simple beginning-to-end flow without unnecessary scenes.

    Figure 9. Removing long pauses, repeated information, and distracting effects creates a clearer Reel.

    Explanation: Simple editing keeps attention on the lesson rather than on unnecessary production effects.

    Step 8: Export and Review the Final Instagram Reel

    When editing is complete, export the Reel as a separate final video file. Keep your original editing project and clean master version so you can make corrections or prepare versions for other platforms later.

    Choose Practical Export Settings

    For most beginner Instagram Reels, a practical starting point is:

    · Aspect ratio: 9:16

    · Resolution: 1080 × 1920 pixels

    · Orientation: Vertical

    · File format: MP4

    · Video codec: H.264

    · Audio codec: AAC

    · Frame rate: Keep the same frame rate used in your original footage or editing project when possible.

    Instagram Reels are designed for vertical viewing, and Meta recommends keeping important creative elements away from interface-heavy edges when using a 9:16 Reel layout.

    Figure 10. Practical beginner export settings include 9:16, 1080 × 1920, MP4, H.264 video, AAC audio, and a frame rate matched to the project when possible.

    Explanation: Open and watch the exported file itself before uploading rather than relying only on the editor preview.

    Watch the Exported File Before Uploading

    Do not rely only on the preview inside your video editor.

    Open the actual exported video and watch it from beginning to end.

    Check for:

    · Blurry or pixelated video.

    · Cropped faces or important objects.

    · Captions that are difficult to read.

    · Text positioned too close to the edges.

    · Music that covers the narration.

    · Audio that is unexpectedly loud or quiet.

    · Missing scenes or blank frames.

    · Spelling mistakes.

    · Distorted AI-generated images.

    · Unwanted logos, watermarks, usernames, or branded endings.

    · Private or confidential information.

    Check the Vertical Layout

    Watch the Reel on a phone if possible.

    Make sure that:

    · Important faces remain visible.

    · Captions are readable.

    · Demonstrations are large enough to understand.

    · Important text is not placed at the extreme top or bottom.

    · The main subject remains clear in the vertical frame.

    Meta specifically advises keeping key creative elements away from the edges of 9:16 Reels because platform controls can cover those areas.

    Keep a Clean Master

    Save a clean master separately from the Instagram version.

    For example:

    · ai-document-summary-master.mp4

    · ai-document-summary-instagram-reel-final.mp4

    The clean master should avoid unnecessary platform-specific logos, usernames, or downloaded watermarks.

    This makes it easier to create another version later for YouTube Shorts, TikTok, Facebook Reels, or another platform.

    Practical Example

    After exporting your document-summary Reel, watch the final MP4 on your computer and phone.

    If the captions are readable, the narration is clear, the important demonstration remains visible, and there are no unwanted watermarks or private details, the Reel is ready for the publishing step.

    Step 9: Upload and Publish the Instagram Reel

    When the final video has been reviewed, upload the clean Instagram version rather than a copy downloaded from another social media platform.

    Instagram lets you create a Reel from the Instagram app and add existing photos or video clips from your device. The exact button names can change as Instagram updates its interface.

    Upload the Reel in Instagram

    A typical beginner workflow is:

    1. Open Instagram.

    2. Tap Create or the + button.

    3. Choose Reel.

    4. Select your final vertical video from your device.

    5. Review or trim the video if necessary.

    6. Add captions, music, text, or other Instagram features only if you need them.

    7. Tap Next.

    8. Add a clear caption and any other required information.

    9. Choose the sharing and audience options available to your account.

    10. Review everything carefully.

    11. Tap Share when the Reel is ready.

    Figure 11. The Instagram publishing workflow includes selecting the final video, reviewing it, adding a caption, checking settings and rights, and sharing.

    Explanation: Exact button names can change, so review the current Instagram interface before publishing.

    Instagram also provides tools for creating, editing, and managing Reels, although the exact options available can vary by account and app version.

    Add a Clear Caption

    Your caption should accurately explain what the Reel is about.

    For example:

    Learn a simple way to summarize a long document with AI. Always compare important information with the original document before using the summary.

    Avoid exaggerated or misleading claims simply to attract attention.

    Check Sharing and Privacy Settings

    Before publishing, review who can see and interact with the Reel.

    Your available sharing options can depend on your account and privacy settings. Instagram also provides controls related to sharing, remixing, and reuse of Reels.

    If you are publishing professional or business content, also check whether any partnership, promotional, or branded-content requirements apply.

    Review AI-Generated or AI-Altered Content

    Meta uses AI info labels to provide additional context about some AI-generated or AI-modified content on Instagram, Facebook, and Threads. Meta may identify AI content through technical signals or information supplied when content is uploaded.

    Before publishing realistic AI-generated or significantly AI-altered content, check the current disclosure options available in Instagram.

    Pay particular attention when AI content:

    · Realistically represents a person.

    · Alters what a real person appears to say or do.

    · Creates a realistic event that did not occur.

    · Significantly changes a real photograph or video.

    · Could reasonably be mistaken for authentic footage.

    Meta continues to develop its AI-content transparency and labeling approach, so these requirements and labels can change.

    Review Before Publishing

    Before tapping Share, check:

    · The correct video was selected.

    · The Reel is displayed vertically as intended.

    · The caption accurately describes the content.

    · Captions and important text remain readable.

    · The narration is clear.

    · Music and sound effects have appropriate usage rights.

    · Images, video clips, fonts, voices, and other assets are properly licensed or permitted.

    · No private or confidential information appears.

    · No unwanted watermark, username, or platform branding remains.

    · Any appropriate AI-content information or disclosure has been completed.

    Practical Example

    Suppose your Reel uses an AI-generated illustration of a fictional office worker while the narration explains how to summarize a document.

    Review the illustration for obvious AI mistakes, check the voice and captions, verify your asset licences, and check Instagram’s current AI disclosure options before publishing.

    If instead you create a realistic AI video that makes a real person appear to perform an action that never happened, transparency becomes particularly important because viewers could mistake the synthetic content for real footage.

    Common Mistakes to Avoid When Creating Instagram Reels with AI

    Beginners can save time by avoiding several common problems that affect clarity, quality, licensing, privacy, or publishing.

    Common mistakes include:

    · Trying to explain too many ideas in one Reel.

    · Using a long introduction before reaching the main point.

    · Placing captions or important text too close to the edges.

    · Shrinking screenshots until the text becomes difficult to read.

    · Using music without checking whether the licence allows Instagram use.

    · Letting background music overpower the narration.

    · Publishing AI-generated information without checking factual accuracy.

    · Using a real person’s voice, image, or likeness without appropriate permission.

    · Uploading a downloaded copy from another platform instead of using a clean master export.

    · Leaving unwanted watermarks, usernames, logos, or branded endings in the video.

    · Using AI-generated visuals without checking for distorted objects, incorrect text, or unrealistic details.

    · Forgetting to review privacy settings and sharing options.

    · Skipping the final review of the exported file.

    · Ignoring relevant AI-content disclosure or labeling requirements when realistic synthetic or altered content is used.

    How to Avoid These Mistakes

    Keep each Reel focused on one clear lesson and work from a clean master project.

    Before publishing, review the:

    · Script.

    · Visuals.

    · Captions.

    · Audio.

    · Music rights.

    · Asset licences.

    · Permissions.

    · Privacy settings.

    · AI-generated content.

    · Final export.

    · Any applicable disclosure or labeling requirements.

    If something is unclear, incorrect, poorly positioned, or not properly licensed, correct the project and export a new version before publishing.

    Figure 12. A final checklist helps catch quality, licensing, privacy, branding, and AI-transparency problems before publication.

    Explanation: Watching the actual exported video from beginning to end is one of the most important final checks.

    Benefits of Creating Instagram Reels with AI

    AI can make the Instagram Reels workflow easier for beginners by helping with planning, writing, visuals, narration, captions, and editing.

    Key benefits include:

    · Faster idea generation: AI can suggest focused Reel topics when you are not sure what to create.

    · Simpler script writing: AI can turn a basic idea into a short script that you can review and improve.

    · Easier visual planning: AI can suggest scenes, image ideas, screen recordings, text overlays, and simple shot sequences.

    · More accessible production: AI voices, captions, and editing assistance can help beginners create videos without advanced production skills.

    · Better organization: AI can help reduce a broad topic to one clear lesson that fits a Reel.

    · Easier repurposing: A Reel can be adapted from a longer video, article, tutorial, or clean master project.

    · More consistent workflow: Using the same planning, scripting, editing, and review process can make future Reels easier to produce.

    · Useful learning support: AI can explain unfamiliar editing terms and suggest improvements when you are learning a new tool.

    AI is most useful when it supports your decisions rather than replacing them. Review the final script, visuals, audio, captions, facts, licences, permissions, privacy settings, and publishing choices before making the Reel public.

    Limitations of Creating Instagram Reels with AI

    AI can help with many parts of the Instagram Reels workflow, but it does not remove the need for careful human review.

    Common limitations include:

    · Factual errors: AI-generated scripts can contain incorrect, outdated, or misleading information.

    · Generic writing: AI may produce scripts that sound repetitive or similar to other content unless you revise them.

    · Visual inconsistencies: AI-generated images or video clips may contain distorted objects, unusual details, inconsistent characters, or misspelled text.

    · Voice limitations: AI narration can mispronounce names, sound unnatural, or use incorrect emphasis.

    · Licensing differences: AI tools, stock libraries, music services, templates, and fonts can have different rules for commercial use.

    · Platform changes: Instagram features, music options, upload settings, labels, and publishing tools can change over time.

    · Editing is still required: AI-generated material usually needs trimming, timing adjustments, caption checks, and final quality review.

    · Privacy risks: Uploading private documents, photographs, recordings, or personal information to an AI tool can create privacy concerns.

    · Disclosure requirements: Some realistic AI-generated or significantly AI-altered content may require additional transparency or labeling.

    · No guarantee of performance: AI can help create a clearer Reel, but it cannot guarantee views, followers, engagement, sales, or other results.

    How to Reduce These Limitations

    Use AI as an assistant rather than treating its output as automatically finished.

    Verify important facts, review every generated visual and voice recording, check licences and permissions, protect private information, and watch the complete exported Reel before publishing.

    When Instagram changes a feature, music option, disclosure method, or publishing requirement that affects your workflow, check the current official guidance before relying on older instructions.

    Common Myths About Creating Instagram Reels with AI

    Several common myths can make beginners expect too much from AI or use it in ways that create unnecessary problems.

    Myth 1: AI Can Create a Perfect Instagram Reel Automatically

    Reality: AI can help with ideas, scripts, visuals, narration, captions, and editing suggestions, but the final Reel still needs human review for accuracy, quality, timing, licensing, privacy, and platform requirements.

    Myth 2: Every AI-Generated Reel Must Be Labelled the Same Way

    Reality: AI transparency and labeling can depend on how the content was created and how realistic or significantly altered it is. Simple AI assistance with brainstorming or script editing is different from realistic synthetic media that could be mistaken for real footage.

    Myth 3: AI-Generated Images and Music Are Automatically Copyright-Free

    Reality: Rights and commercial-use conditions depend on the tool, licence, source material, and intended use. Always check the terms that apply to the assets you use.

    Myth 4: More Effects Make a Reel More Professional

    Reality: Too many transitions, animations, text boxes, or sound effects can distract viewers. Clear visuals, readable captions, and simple editing are often more effective for beginner tutorials.

    Myth 5: Instagram Reels Must Be Extremely Fast

    Reality: A Reel should be concise and easy to follow, but viewers still need enough time to understand the information and read important captions.

    Myth 6: AI Can Guarantee More Views or Followers

    Reality: AI can help improve your workflow, but it cannot guarantee views, followers, engagement, sales, or other results. Audience interest, usefulness, presentation, timing, competition, and many other factors can affect performance.

    Frequently Asked Questions

    How Long Can an Instagram Reel Be?

    Instagram currently allows Reels of up to 20 minutes, although shorter videos are often easier to keep focused and suitable for quick viewing.

    What Size Should I Use for an Instagram Reel?

    A practical beginner format is 1080 × 1920 pixels with a 9:16 vertical aspect ratio.

    Do I Need an Expensive AI Video Tool?

    No. Beginners can start with simple tools for writing, editing, captions, narration, or visuals.

    Check whether a free plan adds watermarks, limits exports, restricts resolution, or has different commercial-use conditions.

    Can I Create an Instagram Reel Without Showing My Face?

    Yes. You can create faceless Reels using:

    · Screen recordings.

    · AI-generated visuals.

    · Licensed stock footage.

    · Text and graphics.

    · Charts.

    · Product footage.

    · Voice-over narration.

    Can I Use an AI Voice in an Instagram Reel?

    Yes, when the tool and licence allow your intended use.

    Review the narration carefully and avoid cloning or impersonating a real person’s voice without appropriate permission.

    Should I Add Captions?

    Captions are strongly recommended.

    They can help viewers who are watching without sound and improve accessibility for people who are deaf or hard of hearing.

    Can I Use Any Music I Find Online?

    No.

    Only use music when you have appropriate permission, a suitable licence, or access through Instagram under terms that allow your intended use.

    Do I Need to Disclose AI Use?

    It depends on how AI was used.

    Simple assistance with brainstorming, script writing, or minor editing is different from realistic AI-generated or significantly altered content that viewers could mistake for real people, events, or places.

    Check Instagram’s current AI labeling and disclosure options before publishing realistic synthetic content.

    Can I Reuse the Same Reel on YouTube Shorts, TikTok, or Facebook Reels?

    Yes, but return to your clean master video and create a separate version for each platform.

    Check:

    · Aspect ratio.

    · Caption placement.

    · Music rights.

    · Safe areas.

    · Platform branding.

    · Disclosure requirements.

    before publishing each version.

    Will AI Guarantee More Views or Followers?

    No.

    AI can help with planning and production, but it cannot guarantee views, followers, engagement, sales, or other results.

    Key Takeaways

    Creating Instagram Reels with AI becomes easier when you follow a simple, repeatable workflow.

    Remember these main points:

    · Start with one clear idea for each Reel.

    · Use AI to help brainstorm, outline, and draft the script, but always review the final wording.

    · Keep the script focused and make the topic clear near the beginning.

    · Use a 9:16 vertical format for a full-screen phone-friendly layout.

    · Prepare visuals that are easy to understand on a small screen.

    · Keep captions, titles, faces, and important information away from the extreme edges.

    · Use clear narration and make sure background music does not overpower the voice.

    · Check licences and permissions for music, stock footage, images, fonts, voices, templates, and other third-party assets.

    · Review AI-generated visuals for distorted objects, incorrect text, or unrealistic details.

    · Edit out unnecessary pauses, repeated information, and distracting effects.

    · Export a clean final version and watch the complete file before uploading.

    · Review Instagram’s current AI-content labeling or disclosure options when realistic synthetic or significantly altered content is involved.

    · Keep your clean master video, project files, prompts, licences, permissions, and final exports for future corrections or repurposing.

    AI can help make the production process faster, but the final quality, accuracy, licensing, privacy, accessibility, and publishing decisions still require careful human review.

    Final Tip

    Keep your first Instagram Reels simple.

    Choose one useful idea, explain it clearly, use readable visuals and captions, and review the final video before publishing. You do not need complicated effects or advanced editing to create a useful Reel.

    As your workflow improves, keep your clean master files, prompts, licences, permissions, and final exports organized. This makes it easier to correct mistakes, update older videos, or repurpose successful Reels for other platforms later.

    Continue Learning

    If you want to continue building your AI video skills, these AI Mastery guides are useful next steps:

    · How to Repurpose One AI Video for YouTube Shorts, TikTok, Instagram Reels, and Facebook Reels: Beginner Guide (2026) — Learn how to adapt one clean master video into separate versions for several social media platforms.

    · How to Choose AI Video Sizes, Aspect Ratios, and Export Settings: Beginner Guide (2026) — Learn how to choose the correct dimensions, frame rate, file format, and export settings for vertical video.

    · How to Create YouTube Shorts with AI: Beginner Step-by-Step Guide (2026) — Learn how to create, edit, export, and publish short-form videos for YouTube.

    · How to Create Faceless YouTube Videos with AI: Complete Beginner Step-by-Step Guide (2026) — Follow a complete workflow for planning, scripting, visuals, narration, editing, and publishing.

    · How to Edit AI-Generated Videos: Beginner Step-by-Step Guide (2026) — Learn how to trim clips, arrange scenes, improve pacing, and prepare a clean final video.

    · How to Add Voice, Music, and Captions to AI Videos: Beginner Step-by-Step Guide (2026) — Learn how to add narration, background music, sound effects, and readable captions.

    · How to Create AI Virtual Presenter Videos for TikTok: Beginner Guide (2026) — Learn how a fictional AI presenter can be used in short-form vertical video workflows.

    Sources and References

    The following official Instagram and Meta sources were checked for the Reel length, dimensions, music, intellectual-property, and AI-transparency information used in this guide. Instagram features and policies can change, so important requirements should be checked again when Meta announces an update or when you change your publishing workflow.

    · Instagram Help Center — Record a Reel on Instagram: Instagram explains that Reel clips can currently add up to 20 minutes.

    · Instagram Help Center — Reel Size and Aspect Ratios: Instagram states that uploaded Reels can use aspect ratios from 1.91:1 through 9:16 and should have at least 30 frames per second and the required minimum resolution.

    · Instagram Help Center — Access to the Licensed Music Library: Instagram explains that access to licensed music can vary and provides information about music available for commercial purposes through Meta’s Sound Collection.

    · Instagram Help Center — How to Use Music in Videos: Instagram provides guidance about using music while respecting Meta’s agreements with music rights holders.

    · Instagram Help Center — What Audio You Can Use in a Reel: Instagram explains options for original and licensed audio used in Reels.

    · Instagram Help Center — Intellectual Property: Instagram states that users should post only content that does not violate another person’s intellectual-property rights.

    · Meta — Our Approach to Labeling AI-Generated Content: Meta explains its approach to identifying and labeling AI-generated or significantly AI-modified content across Instagram, Facebook, and Threads.

    · Meta — Transparency of AI-Generated Content: Meta confirmed in July 2026 that it continues to work on identifying and labeling AI-generated content as realistic synthetic media becomes more difficult to distinguish from authentic media.

    Important: This guide provides general educational information about AI video creation, copyright, licensing, privacy, disclosure, and publishing. It is not legal advice. Always verify that you have appropriate rights or permission for music, photographs, video clips, voices, fonts, templates, and other material you publish.
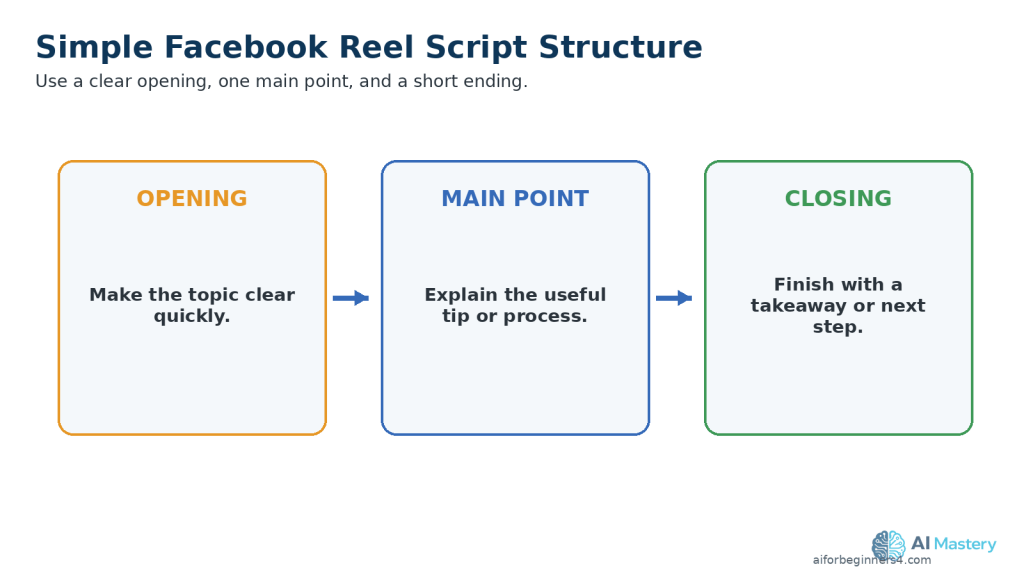
  • How to Create YouTube Shorts with AI: Beginner Step-by-Step Guide (2026)

    How to Create YouTube Shorts with AI: Beginner Step-by-Step Guide (2026)

    Estimated Reading Time: 18 minutes
    Last Updated: August 15, 2026

    Before Learning

    Before you begin, it helps to have a basic idea for the short video you want to create. Your idea can be educational, entertaining, promotional, or based on a longer video that you want to turn into a shorter version.

    You do not need advanced video-editing skills. AI tools can help you plan the topic, write a short script, create or improve visuals, generate narration, add captions, and prepare the video for YouTube Shorts.

    For most beginner projects, a 9:16 vertical video at 1080 × 1920 pixels is a practical working format. Keep important text, captions, faces, and other key content away from the extreme edges so YouTube interface elements are less likely to cover them.

    This guide will show you how to move from a simple idea to a finished YouTube Short while keeping your original project files, source material, licences, permissions, and clean master export organized.

    What You’ll Learn

    By the end of this guide, you will know how to:

    · Choose a clear idea for a YouTube Short.

    · Use AI to brainstorm topics and create a simple video plan.

    · Write a short, focused script with AI assistance.

    · Create or prepare visuals that work well in a vertical format.

    · Generate or record narration when needed.

    · Add readable captions and on-screen text.

    · Choose suitable music and sound effects while checking usage rights.

    · Edit the video so the opening quickly communicates the topic.

    · Keep important content inside safe viewing areas.

    · Review the final export for quality, captions, audio, branding, and unwanted watermarks.

    · Upload the finished video as a YouTube Short.

    · Use YouTube’s AI-content disclosure tools when applicable.

    · Keep your project files, prompts, licences, permissions, and clean master export for future reuse.

    Introduction

    YouTube Shorts are short-form videos designed for quick viewing on phones and other devices. They can be used for tutorials, tips, demonstrations, product explanations, educational content, and many other types of videos.

    AI can help with several parts of the process. You can use it to generate ideas, outline a Short, draft a script, create visuals, prepare narration, improve captions, and suggest editing changes.

    However, AI should support your work rather than replace your final judgment. Review every script, visual, voice, caption, and factual claim before publishing. Make sure you have permission to use any music, images, video clips, voices, fonts, or other material that you did not create yourself.

    A successful beginner workflow is to start with one simple idea, create a short script, prepare vertical visuals, add clear audio and captions, edit the video carefully, and review the final export before uploading it to YouTube.

    Figure 1. A simple YouTube Shorts workflow moves from one clear idea through scripting, visuals, audio, editing, export, and publishing.

    Explanation: Following the same basic sequence for each Short makes the production process easier to repeat and review.

    What Are YouTube Shorts?

    YouTube Shorts are short-form videos that appear in YouTube’s Shorts experience. YouTube currently categorizes square or vertical videos of up to three minutes as Shorts when they meet its requirements.

    Shorts are designed for quick viewing and work especially well for:

    · Quick tips.

    · Short tutorials.

    · Before-and-after examples.

    · Simple demonstrations.

    · Short educational explanations.

    · Highlights from longer videos.

    · Lists and recommendations.

    · Answers to common questions.

    Recommended Beginner Format

    For a full-screen vertical Short, a practical beginner format is:

    · Aspect ratio: 9:16

    · Resolution: 1080 × 1920 pixels

    · Orientation: Vertical

    YouTube can also accept square Shorts, but a 9:16 vertical layout makes good use of a phone screen and is convenient when the video may later be adapted for other vertical platforms.

    Figure 2. A 9:16 vertical frame at 1080 × 1920 pixels is a practical beginner format for a full-screen YouTube Short.

    Explanation: Keeping important text, faces, and captions toward the centre reduces the chance that interface elements will cover them.

    Practical Example

    Instead of creating a ten-minute tutorial about five beginner AI tools, you could create a Short that explains one useful tool in less than three minutes.

    The Short can focus on one clear idea, show the most important steps, and direct viewers to your longer guide or website if they want more detail.

    Step 1: Choose One Clear Idea for Your YouTube Short

    A YouTube Short works best when it focuses on one main idea. Trying to explain too many things in a short video can make it feel rushed or confusing.

    Choose a topic that can be understood quickly, such as:

    · One beginner AI tip.

    · One useful AI tool.

    · One common mistake.

    · One simple comparison.

    · One short tutorial.

    · One quick answer to a common question.

    · One useful feature from a longer AI Mastery article.

    Use AI to Brainstorm Ideas

    You can ask an AI assistant to suggest Short ideas based on your topic.

    For example:

    Prompt:
    “Give me 10 beginner-friendly YouTube Shorts ideas about using AI for everyday tasks. Keep each idea focused on one clear lesson.”

    Review the suggestions carefully and choose an idea that is useful, accurate, and suitable for your audience.

    Keep the Topic Narrow

    Instead of creating a Short called:

    “Everything You Need to Know About AI”

    choose something more specific, such as:

    “3 Ways Beginners Can Use AI to Save Time”

    or:

    “How to Summarize a Long Document with AI”

    A narrow topic makes it easier to write a clear script, choose useful visuals, and keep the video focused.

    Figure 3. One focused idea is usually easier to explain in a Short than a broad topic containing many unrelated points.

    Explanation: A narrow topic helps beginners keep the script, visuals, and editing focused on one useful lesson.

    Practical Example

    If your longer video explains ten AI tools, you could create a separate Short about just one of those tools.

    The Short can explain what the tool does, show one useful example, and encourage interested viewers to learn more from your longer content.

    Step 2: Write a Short, Focused Script with AI

    A YouTube Short usually works better when the script is simple, direct, and focused on one main message.

    AI can help you turn your idea into a short script, but you should review the result carefully before using it.

    Start with a Clear Prompt

    Give the AI assistant enough information to understand the topic, audience, and style you want.

    For example:

    Prompt:
    “Write a beginner-friendly YouTube Short script about how AI can help summarize a long document. Keep it clear, practical, and focused on one useful example. Use simple language and avoid hype.”

    Use a Simple Script Structure

    A useful beginner structure is:

    Figure 4. A simple Short script can use an opening, one main point, and a closing takeaway.

    Explanation: This structure helps the video reach the useful information quickly without requiring a long introduction.

    1. Opening: Quickly tell viewers what they will learn.

    2. Main point: Explain the useful tip, method, or example.

    3. Closing: Finish with a short takeaway or next step.

    Keep the Opening Direct

    The first few seconds should make the topic clear.

    Instead of:

    “Hello everyone, welcome back to another video.”

    you could begin with:

    “Have a long document you do not want to read page by page? AI can help you create a quick summary.”

    This gets to the topic faster.

    Review the AI-Written Script

    Check the script for:

    · Factual accuracy.

    · Clear language.

    · Unnecessary repetition.

    · Claims that sound exaggerated or unsupported.

    · Instructions that may be outdated.

    · Words that are difficult for beginners.

    · Information that does not fit the Short’s main topic.

    Do not assume that an AI-generated script is automatically correct.

    Practical Example

    For a Short about summarizing documents, your script might explain one simple workflow:

    1. Upload the document to an AI tool that supports file analysis.

    2. Ask for a short summary of the main points.

    3. Review the summary against the original document.

    4. Correct anything important before using or sharing it.

    This gives the viewer one clear lesson without trying to explain every document-analysis feature at once.

    Step 3: Create or Prepare Vertical Visuals

    Your visuals should support the script and make the main idea easy to understand on a phone screen.

    For a typical YouTube Short, use a 9:16 vertical layout. A practical working size is 1080 × 1920 pixels.

    Choose Visuals That Match the Script

    Depending on your topic, you can use:

    · AI-generated images.

    · Stock photos or stock video.

    · Screen recordings.

    · Charts or simple graphics.

    · Text-based slides.

    · Product or workspace footage.

    · Clips from a longer video you created.

    Use only visuals that genuinely help explain the point.

    Keep Important Content Visible

    Vertical video is narrower than standard horizontal video. Keep important elements such as:

    · Faces.

    · Captions.

    · Titles.

    · Buttons.

    · Screenshots.

    · Charts.

    · Demonstrations.

    away from the extreme top, bottom, and sides of the frame.

    This reduces the chance that YouTube interface elements will cover important information.

    Make Screenshots Easy to Read

    If you include a computer screenshot, do not shrink the entire screen until the text becomes too small.

    Instead, crop or zoom into the part viewers need to see.

    For example, if you are demonstrating an AI prompt, show the prompt box clearly rather than displaying the entire browser window at a tiny size.

    Check Licences and Permissions

    If you use stock footage, photographs, templates, fonts, music-related graphics, or other assets you did not create yourself, check the licence and commercial-use conditions before publishing.

    Do not assume that an image or video is free to reuse simply because you found it online.

    Practical Example

    For a Short about summarizing a document with AI, you might use:

    Figure 5. Plan vertical visuals in the same order as the script so each scene supports the current point.

    Explanation: A simple scene sequence helps viewers follow the process on a small vertical screen.

    1. A visual of a long document.

    2. A screen recording showing the document being uploaded.

    3. A close-up of the summary prompt.

    4. A simple visual showing the shorter summary result.

    5. A final reminder to review the AI-generated summary against the original document.

    Step 4: Add Narration or an AI Voice

    Narration can make a YouTube Short easier to follow, especially when the video explains a process, gives a tip, or shows a demonstration.

    You can record your own voice or use an AI-generated voice when the tool and licence allow your intended use.

    Choose a Clear Voice

    The narration should be easy to understand and should match the pace of the visuals.

    A good voice-over should:

    · Speak clearly.

    · Avoid rushing.

    · Use natural pauses.

    · Match the tone of the topic.

    · Pronounce technical terms correctly.

    · Leave enough time for viewers to read important on-screen text.

    Review AI-Generated Narration

    If you use an AI voice, listen to the entire recording before adding it to the video.

    Check for:

    · Mispronounced names or technical terms.

    · Unnatural pauses.

    · Missing words.

    · Incorrect emphasis.

    · Audio that sounds too fast or too slow.

    · Sentences that do not match the visuals.

    Correct the script or regenerate the affected section when necessary.

    Keep the Narration and Visuals Aligned

    The visual shown on screen should support what the viewer is hearing.

    For example, if the narration says:

    “Upload your document to the AI tool.”

    the video should show the upload step at approximately the same time.

    This makes the Short easier to understand.

    Figure 6. Match narration and visuals so viewers see each step at approximately the same time they hear it.

    Explanation: Good timing reduces confusion and makes demonstrations easier to follow.

    Protect Privacy and Get Permission

    Do not clone or imitate a real person’s voice without appropriate permission.

    If you use recordings from another person, make sure you have permission to use them and understand any licence or platform conditions that apply.

    Practical Example

    For a Short explaining document summarization, the narration could briefly guide the viewer through uploading a document, asking for a summary, and checking the result.

    Each visual can change as the narration moves to the next step, keeping the video clear and easy to follow.

    Step 5: Add Captions and On-Screen Text

    Captions and on-screen text can make a YouTube Short easier to understand, especially when viewers are watching without sound.

    Keep Captions Easy to Read

    Use captions that are:

    · Large enough to read on a phone.

    · Short and easy to scan.

    · High contrast against the background.

    · Timed closely with the spoken words.

    · Positioned away from important faces, demonstrations, and other visual details.

    Avoid placing captions at the extreme bottom or sides of the screen because YouTube interface elements may cover those areas.

    Use On-Screen Text Carefully

    On-screen text can highlight the most important point in the video.

    For example, you could show:

    “3 Steps to Summarize a Document with AI”

    near the beginning of the Short.

    Later, you might show short labels such as:

    · Step 1: Upload

    · Step 2: Ask for a Summary

    · Step 3: Review the Result

    Keep text simple. Too many words on screen at the same time can make a Short difficult to follow.

    Check Spelling and Accuracy

    Review all captions and text before exporting the video.

    Check for:

    · Spelling mistakes.

    · Missing words.

    · Incorrect punctuation.

    · Wrong names or technical terms.

    · Captions that appear too early or too late.

    · Text that does not match the narration.

    Accessibility

    Captions can help people who are deaf or hard of hearing, viewers watching without sound, and people who find written text easier to follow than narration alone.

    Do not rely only on color to communicate important information. Use clear words, labels, or symbols as well.

    Practical Example

    If the narrator says, “Always check the AI-generated summary against the original document,” display a short caption such as:

    “Always verify the summary.”

    This reinforces the main lesson without overcrowding the screen.

    Figure 7. Place captions where they remain readable without covering faces or sitting too close to interface-heavy edges.

    Explanation: Clear caption placement improves readability and accessibility, especially on phones.

    Step 6: Add Music and Sound Effects Carefully

    Music and sound effects can make a YouTube Short more engaging, but they should support the video rather than overpower the narration or distract from the main message.

    Choose Music You Are Allowed to Use

    YouTube provides music through the Shorts Audio Library and royalty-free music and sound effects through the YouTube Audio Library. YouTube states that music availability and the amount of a track you can use in a Short can vary by song.

    You can also use music that you created yourself or music from another source when its licence allows your intended use.

    Do not assume that music is safe to use simply because you found it online.

    Keep Music Below the Narration

    If your Short includes spoken narration, keep the background music at a lower volume so the voice remains easy to understand.

    Listen to the complete video with headphones or speakers and check that:

    · The narration is clear.

    · Music does not cover important words.

    · Sound effects are not unexpectedly loud.

    · Audio changes are smooth.

    · The beginning and ending do not contain sudden volume jumps.

    Be Careful with Longer Shorts

    YouTube explains that music use in Shorts depends on the selected track, and some songs may allow more usable time than others. YouTube also notes special copyright restrictions for certain Shorts longer than one minute, so check the music information shown in YouTube before publishing.

    Keep Licensing Records

    If you use music or sound effects from outside YouTube, keep a copy of the licence, permission, receipt, or other record that explains how you are allowed to use the audio.

    If attribution is required, follow the licence instructions carefully.

    Figure 8. Keep narration clear, background music lower, and verify the rights or licence for every audio source.

    Explanation: Music available under one set of terms may not automatically be permitted in another editing or publishing workflow.

    Practical Example

    For a short AI tutorial, you might use quiet background music during the introduction and demonstration while keeping the narration clearly louder.

    If you later repurpose the Short for another platform, return to your clean master video and confirm that the music licence also permits use on that platform rather than assuming YouTube music rights automatically apply elsewhere.

    Step 7: Edit the YouTube Short for a Clear, Fast Flow

    A YouTube Short should move quickly enough to keep the viewer interested without making the information difficult to follow.

    Remove Unnecessary Parts

    Review the full video and remove:

    · Long pauses.

    · Repeated explanations.

    · Empty frames.

    · Slow introductions.

    · Unnecessary transitions.

    · Visuals that do not support the main point.

    The goal is to keep the Short focused on one useful idea.

    Match the Editing to the Script

    Change visuals when the narration moves to a new point.

    For example:

    · Show the problem when the opening introduces it.

    · Show the AI tool when the script explains the tool.

    · Show the result when the narration describes the result.

    · Show the final takeaway at the end.

    This helps the viewer understand the information without having to guess what each visual means.

    Keep Transitions Simple

    You do not need complicated effects between every scene.

    Simple cuts, gentle zooms, or basic fades are often enough for beginner tutorials.

    Too many effects can distract from the content.

    Keep Important Content Visible

    Check that captions, faces, screenshots, and important text remain clear throughout the video.

    If a scene contains small text, zoom into the relevant area instead of showing the entire screen at once.

    Practical Example

    For a Short about summarizing a document with AI, the editing sequence might be:

    1st Show the long document.

    2nd Show the upload step.

    3rd Show the summary prompt.

    4th Show the shorter result.

    5th End with the reminder to verify the summary against the original.

    This creates a simple beginning-to-end flow without unnecessary scenes.

    Figure 9. Removing long pauses, repeated information, and distracting effects creates a clearer editing flow.

    Explanation: Simple editing can keep attention on the lesson rather than on unnecessary production effects.

    Step 8: Export and Review the Final YouTube Short

    When your editing is complete, export the Short as a separate final video file. Keep your original editing project and clean master version unchanged so you can make corrections or create another version later.

    Choose Practical Export Settings

    For many beginner YouTube Shorts, a practical starting point is:

    · Aspect ratio: 9:16

    · Resolution: 1080 × 1920 pixels

    · File format: MP4

    · Video codec: H.264

    · Audio codec: AAC

    · Frame rate: Keep the same frame rate used in your original footage or project whenever possible.

    YouTube recommends H.264 video encoding and advises uploading video using the same frame rate at which it was recorded.

    Figure 10. Beginner-friendly export settings include a 9:16 frame, 1080 × 1920 resolution, MP4, H.264 video, and AAC audio.

    Explanation: Keep the frame rate matched to the project or source when possible and review the exported file before uploading.

    Watch the Exported File Before Uploading

    Do not rely only on the preview inside your video editor. Open the actual exported video and watch it from beginning to end.

    Check for:

    · Blurry or pixelated video.

    · Cropped faces, screenshots, or text.

    · Captions that are difficult to read.

    · Audio that is too loud or too quiet.

    · Music that covers the narration.

    · Missing scenes or blank frames.

    · Spelling mistakes.

    · Unwanted logos, watermarks, usernames, or branded endings.

    · Private or confidential information that should not appear publicly.

    Check the Video Length and Shape

    YouTube currently allows Shorts uploads of up to three minutes when the video uses a square or vertical aspect ratio.

    A Short does not need to use the full three minutes. Use only the time needed to explain the idea clearly.

    Keep a Clean Master

    Save the clean master separately from the final YouTube export.

    For example:

    · ai-document-summary-master.mp4

    · ai-document-summary-youtube-short-final.mp4

    This makes it easier to correct the video later or create versions for TikTok, Instagram Reels, Facebook Reels, or another platform.

    Practical Example

    After exporting your document-summary Short, watch the final MP4 file on your computer or phone.

    If the captions are readable, the narration is clear, the important screen recording remains visible, and no unwanted watermark or branding appears, the video is ready for the next publishing step.

    Step 9: Upload and Publish the YouTube Short

    When the final video has been reviewed, upload it directly to YouTube from your clean export rather than using a copy downloaded from another social media platform.

    YouTube Studio currently allows creators to upload square or vertical Shorts of up to three minutes from a computer.

    Upload the Short in YouTube Studio

    1. Sign in to YouTube Studio.

    2. Click Create.

    3. Choose Upload videos.

    4. Select your final YouTube Short video file.

    5. Add a clear title.

    6. Complete the audience and other required settings.

    7. Review the video details.

    8. Choose the appropriate visibility setting.

    9. Publish the Short when everything is correct.

    Figure 11. The YouTube Studio upload workflow includes the final file, title, audience setting, disclosure review, visibility, and publishing.

    Explanation: Complete the required details carefully before making the Short public.

    YouTube recommends keeping titles accurate and placing the most important words near the beginning because viewers may see only part of a title.

    Add a Clear Title and Description

    The title should tell viewers what the Short is about without exaggerating what they will see.

    For example:

    How to Summarize a Long Document with AI

    A short description can explain the main topic and provide useful information or a relevant link when appropriate.

    Avoid misleading titles, descriptions, or claims simply to attract clicks.

    Check the Audience Setting

    YouTube asks creators to indicate whether content is made for children.

    Choose the setting based on the actual intended audience and content of the video rather than guessing from the video format.

    Disclose Realistic AI-Generated or Altered Content When Required

    YouTube requires creators to disclose certain realistic content that has been meaningfully altered or generated using AI.

    Examples include content that:

    · Makes a real person appear to say or do something they did not actually say or do.

    · Alters footage of a real event or place in a meaningful way.

    · Creates a realistic-looking event or scene that did not actually occur.

    YouTube may display a Made with AI or similar disclosure to give viewers more context about how certain content was created.

    Using AI simply to help write a script, brainstorm ideas, or make minor production improvements does not necessarily mean every video requires the same disclosure. Check YouTube’s current disclosure guidance for the type of AI content you created.

    Review Before Publishing

    Before making the Short public, check:

    · The correct video file was uploaded.

    · The title matches the actual content.

    · The description is accurate.

    · The audience setting is correct.

    · Any required AI disclosure has been completed.

    · Captions and important text remain visible.

    · The video does not contain private information.

    · Music, images, video clips, voices, and other assets are properly licensed or permitted.

    · No unwanted watermark, logo, username, or branded ending appears.

    Practical Example

    If your Short uses an AI-generated fictional illustration and AI-assisted script but does not realistically depict a real person or event, review YouTube’s disclosure requirements before deciding whether a label is necessary.

    If the Short realistically makes a real person appear to say something they never said, disclosure is required under YouTube’s altered or synthetic-content policy.

    Common Mistakes to Avoid When Creating YouTube Shorts

    Beginners can save time by avoiding a few common problems that affect clarity, quality, licensing, or publishing.

    Common mistakes include:

    · Trying to explain too many ideas in one Short.

    · Using a long introduction before getting to the main point.

    · Placing captions or important text too close to the edges.

    · Shrinking screenshots until the text becomes difficult to read.

    · Using music without checking whether the licence allows YouTube use.

    · Letting background music overpower the narration.

    · Publishing AI-generated information without checking factual accuracy.

    · Using a real person’s voice, image, or likeness without appropriate permission.

    · Uploading a downloaded copy from another platform instead of using a clean master export.

    · Leaving unwanted watermarks, logos, usernames, or branded endings in the video.

    · Skipping the final review of the exported file.

    · Forgetting required AI-content disclosure when realistic synthetic or altered content is used.

    How to Avoid These Mistakes

    Keep each Short focused on one clear lesson, use a clean master project, and review the final exported video before uploading it.

    Check the script, visuals, captions, audio, licences, permissions, privacy, and any required disclosure. If something is unclear or incorrect, fix the project and export a new version before publishing.

    Figure 12. A final checklist helps catch quality, licensing, privacy, branding, and disclosure problems before publication.

    Explanation: Watching the actual exported file from beginning to end is one of the most important final checks.

    Benefits of Creating YouTube Shorts with AI

    Using AI can make the YouTube Shorts workflow faster and easier, especially for beginners who need help with planning, writing, visuals, narration, or captions.

    Key benefits include:

    · Faster idea generation: AI can help suggest focused topics when you are not sure what to create.

    · Simpler script writing: AI can turn a basic idea into a short, structured script that you can review and improve.

    · Easier visual planning: AI can help suggest scenes, image ideas, text overlays, and simple shot sequences.

    · More accessible production: AI voices, captions, and editing assistance can help beginners create videos without advanced production skills.

    · Better organization: AI can help turn a longer topic into one clear lesson that fits a Short.

    · Easier repurposing: A Short can be adapted from a longer video, article, tutorial, or clean master project.

    · More consistent workflow: Using the same planning, scripting, editing, and review process can make future Shorts easier to produce.

    · Useful learning support: AI can explain unfamiliar editing terms, suggest improvements, and help beginners understand each production step.

    AI is most useful when it supports your decisions rather than replacing them. Review the final script, visuals, audio, captions, facts, licences, and publishing settings before making the Short public.

    Limitations of Creating YouTube Shorts with AI

    AI can help with many parts of the YouTube Shorts workflow, but it does not remove the need for human review and careful editing.

    Common limitations include:

    · Factual errors: AI-generated scripts can contain incorrect, outdated, or misleading information.

    · Generic writing: AI may produce scripts that sound repetitive or similar to other content unless you revise them.

    · Visual inconsistencies: AI-generated images or video clips may contain distorted objects, unusual details, or inconsistent characters.

    · Voice limitations: AI narration can mispronounce names, sound unnatural, or use the wrong emphasis.

    · Licensing differences: AI tools, stock libraries, music services, and templates can have different rules for commercial use.

    · Platform changes: YouTube features, limits, disclosure requirements, and publishing options can change over time.

    · Editing is still required: AI-generated material usually needs trimming, timing adjustments, caption checks, and final quality review.

    · Privacy risks: Uploading private documents, photographs, recordings, or personal information to an AI tool can create privacy concerns.

    · Disclosure requirements: Some realistic AI-generated or altered content may require disclosure on YouTube.

    · No guarantee of performance: AI can help produce a clearer Short, but it cannot guarantee views, subscribers, engagement, or monetization.

    How to Reduce These Limitations

    Use AI as an assistant rather than treating its output as automatically finished.

    Verify important facts, review every generated visual and voice recording, check licences and permissions, protect private information, and watch the complete exported Short before publishing.

    When YouTube changes a feature or policy that affects your workflow, check the current official guidance before relying on older settings or instructions.

    Common Myths About Creating YouTube Shorts with AI

    Several common myths can make beginners expect too much from AI or use it in ways that create unnecessary problems.

    Myth 1: AI Can Create a Perfect YouTube Short Automatically

    Reality: AI can help with ideas, scripts, visuals, narration, captions, and editing suggestions, but the final Short still needs human review for accuracy, quality, timing, licensing, privacy, and platform requirements.

    Myth 2: Every AI-Generated Short Must Be Labelled the Same Way

    Reality: YouTube’s disclosure requirements depend on how AI was used and whether the content realistically alters or creates people, events, or places in a way viewers could mistake for reality. AI-assisted brainstorming or script editing does not automatically create the same disclosure requirement as realistic synthetic media.

    Myth 3: AI-Generated Images and Music Are Automatically Copyright-Free

    Reality: Rights and commercial-use conditions depend on the tool, licence, source material, and platform. Always check the terms that apply to the assets you use.

    Myth 4: More Effects Make a Short More Professional

    Reality: Too many transitions, animations, text boxes, or sound effects can distract viewers. Clear visuals, readable captions, and simple editing are often more effective for beginner tutorials.

    Myth 5: A YouTube Short Must Be Extremely Fast

    Reality: A Short should be concise, but viewers still need enough time to understand the information. Fast editing is not useful if captions cannot be read or the explanation becomes difficult to follow.

    Myth 6: AI Can Guarantee More Views or Subscribers

    Reality: AI can help improve your workflow, but it cannot guarantee views, subscribers, engagement, or monetization. Audience interest, usefulness, presentation, competition, timing, and many other factors can affect performance.

    Frequently Asked Questions

    How Long Can a YouTube Short Be?

    YouTube currently allows qualifying square or vertical Shorts of up to three minutes. A Short does not need to use the full available time; use only the length needed to explain the idea clearly.

    Do I Need an Expensive AI Video Tool?

    No. Beginners can start with simple tools for writing, editing, captions, narration, or visuals. Choose tools based on the features you actually need and check whether free plans add watermarks, restrict exports, or limit commercial use.

    Can I Make a YouTube Short Without Showing My Face?

    Yes. You can create a faceless Short using screen recordings, AI-generated visuals, licensed stock footage, text, narration, charts, or simple graphics.

    Can I Use an AI Voice in a YouTube Short?

    Yes, when the tool and licence allow your intended use. Review the narration carefully and avoid cloning or impersonating a real person’s voice without appropriate permission.

    Should I Add Captions?

    Captions are strongly recommended because they can help viewers understand the video when sound is unavailable or difficult to hear. They also improve accessibility for people who are deaf or hard of hearing.

    Can I Use Copyrighted Music in a Short?

    Only when you have appropriate permission or the music is provided under terms that allow your intended use. Music available inside YouTube may have specific conditions, so check the information attached to the track.

    Do I Need to Disclose AI Use?

    It depends on how AI was used. YouTube requires disclosure for certain realistic synthetic or meaningfully altered content that viewers could mistake for real people, events, or places. Simple AI assistance with brainstorming, script editing, or similar production tasks does not automatically create the same disclosure requirement.

    Can I Reuse the Same Short on TikTok, Instagram Reels, or Facebook Reels?

    Yes, but return to your clean master video and create a separate export for each platform. Check framing, captions, music rights, safe areas, platform branding, and disclosure requirements before publishing each version.

    Will Using AI Guarantee More Views?

    No. AI can help with planning and production, but it cannot guarantee views, subscribers, engagement, or monetization. The usefulness of the topic, presentation, audience interest, competition, timing, and other factors can affect performance.

    Key Takeaways

    Creating YouTube Shorts with AI becomes easier when you follow a simple, repeatable workflow.

    Remember these main points:

    · Start with one clear idea for each Short.

    · Use AI to help brainstorm, outline, and draft the script, but always review the final wording.

    · Keep the script concise and make the topic clear in the opening seconds.

    · Use a 9:16 vertical format for a full-screen phone-friendly layout.

    · Prepare visuals that are easy to understand on a small screen.

    · Keep captions, titles, faces, and important information away from the extreme edges.

    · Use clear narration and make sure music does not overpower the voice.

    · Check licences and permissions for music, stock footage, images, fonts, voices, and other third-party assets.

    · Edit out unnecessary pauses, repeated information, and distracting effects.

    · Export a clean final version and watch the entire file before uploading.

    · Use YouTube’s AI-content disclosure tools when realistic synthetic or meaningfully altered content requires disclosure.

    · Keep your clean master video, project files, prompts, licences, permissions, and final exports for future corrections or repurposing.

    AI can help make the production process faster, but the final quality, accuracy, licensing, privacy, and publishing decisions still require careful human review.

    Final Tip

    Keep your first YouTube Shorts simple.

    Choose one useful idea, explain it clearly, use readable visuals and captions, and review the final video before publishing. You do not need complicated effects or advanced editing to create a useful Short.

    As your workflow improves, keep your clean master files, prompts, licences, permissions, and final exports organized. This makes it easier to correct mistakes, update older videos, or repurpose successful Shorts for other platforms later.

    Continue Learning

    If you want to continue building your AI video skills, these AI Mastery guides are useful next steps:

    · How to Repurpose One AI Video for YouTube Shorts, TikTok, Instagram Reels, and Facebook Reels: Beginner Guide (2026) — Learn how to adapt one clean master video into separate versions for several social media platforms.

    · How to Choose AI Video Sizes, Aspect Ratios, and Export Settings: Beginner Guide (2026) — Learn how to choose the correct dimensions, frame rate, file format, and export settings for different video platforms.

    · How to Create Faceless YouTube Videos with AI: Complete Beginner Step-by-Step Guide (2026) — Follow a complete workflow for planning, creating, editing, and publishing faceless YouTube videos.

    · How to Create YouTube Thumbnails, Titles, and Descriptions with AI (2026) — Learn how to prepare the publishing elements that support your YouTube videos.

    · YouTube Copyright and Licensing for AI Videos: Beginner Guide (2026) — Learn how to check music, images, footage, voices, and other assets before publishing.

    · Reused Content, AI Disclosure, and YouTube Monetization for Faceless Videos: Beginner Guide (2026) — Learn about reused content, realistic AI disclosure, and monetization considerations.

    · How to Use YouTube Studio and YouTube Analytics for Faceless Channels: Beginner Guide (2026) — Learn how to manage published videos and understand basic performance information.

    Sources and References

    The following official YouTube sources were checked for the Shorts length, upload process, music, export settings, copyright, and AI-disclosure information in this guide. YouTube features and policies can change, so important requirements should be checked again when YouTube announces an update or when you change your publishing workflow.

    · YouTube Help — Understand Three-Minute YouTube Shorts: YouTube explains that qualifying square or vertical videos of up to three minutes can be categorized as Shorts.

    · YouTube Help — Upload YouTube Shorts: YouTube provides the current computer upload process and states that Shorts uploads can be square or vertical and up to three minutes long.

    · YouTube Help — Recommended Upload Encoding Settings: YouTube provides recommendations for video encoding and advises uploading content using the same frame rate at which it was recorded.

    · YouTube Help — Music Eligibility for YouTube Shorts: YouTube explains how music from the Shorts Audio Library can be used and notes that the amount of usable music can depend on the selected track.

    · YouTube Help — Use Music and Sound Effects from the Audio Library: YouTube explains how creators can use music and sound effects from the YouTube Audio Library and review applicable attribution requirements.

    · YouTube Help — Disclosing Use of Generative AI Content: YouTube explains when creators are expected to disclose AI-generated or meaningfully AI-altered content and provides an AI-use setting in YouTube Studio.

    · YouTube Help — Understanding “How This Content Was Made” Disclosures: YouTube explains labels that can appear when content has been meaningfully altered or synthetically generated.

    · YouTube Help — Impersonation Policy: YouTube explains that AI disclosure does not permit creators to impersonate people or entities in ways that violate its policies.

    YouTube Help — Tips for Thumbnails and Titles: YouTube recommends accurate, concise titles and advises placing important words near the beginning.

    Important: This guide provides general educational information about AI video creation, copyright, licensing, disclosure, and publishing. It is not legal advice. Always verify that you have appropriate rights or permission for music, images, video clips, voices, fonts, and other material you publish.
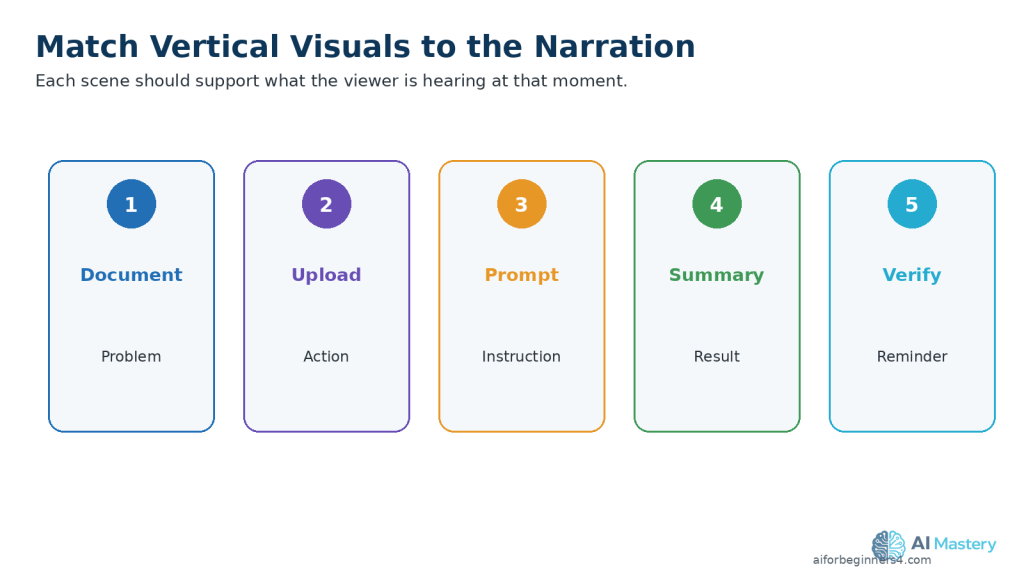
  • How to Choose AI Video Sizes, Aspect Ratios, and Export Settings: Beginner Guide (2026)

    How to Choose AI Video Sizes, Aspect Ratios, and Export Settings: Beginner Guide (2026)

    Estimated Reading Time: 24 minutes
    Last Updated: August 15, 2026

    Before Learning

    Before you begin, it helps to understand that a video can have the same content but look very different depending on its size, shape, and export settings.

    A vertical video made for a phone screen usually needs different dimensions from a traditional horizontal YouTube video. Choosing the wrong settings can cause black bars, unwanted cropping, blurry text, or important content being placed outside the visible area.

    In this guide, you will learn the basic video sizes, aspect ratios, resolution choices, and export settings beginners need for common social media platforms. You do not need advanced video-editing knowledge to follow along.

    The exact requirements and recommendations of platforms can change over time. This guide will use current official platform guidance, and you should recheck important settings when a platform announces an update or when you begin using a new video format.

    What You’ll Learn

    By the end of this guide, you will know how to:

    • Understand the difference between video dimensions, resolution, and aspect ratio.
    • Choose between common formats such as 16:9, 9:16, and 1:1.
    • Select suitable video sizes for YouTube, YouTube Shorts, TikTok, Instagram Reels, Facebook Reels, and other common platforms.
    • Understand what 1080p, 1920 × 1080, and 1080 × 1920 mean.
    • Choose beginner-friendly export settings for clear video and good file size.
    • Understand basic terms such as frame rate, bitrate, codec, and file format.
    • Avoid black bars, unwanted cropping, blurry text, and stretched video.
    • Keep important text, captions, and subjects inside safe viewing areas.
    • Export separate versions when different platforms need different settings.
    • Keep a clean master video so you can create new platform versions later.

    Introduction

    Choosing the correct video size and export settings is an important part of creating videos for YouTube, TikTok, Instagram, Facebook, and other platforms.

    A video can look clear and professional in your editing program but appear cropped, stretched, blurry, or surrounded by black bars after uploading if the dimensions or aspect ratio are not suitable for the platform.

    The good news is that beginners do not need to understand every technical video setting. A small number of common formats and export choices cover most everyday video projects.

    In this guide, you will learn how to choose practical settings for horizontal videos, vertical short-form videos, and square videos. You will also learn what terms such as resolution, aspect ratio, frame rate, bitrate, codec, and file format mean in simple language.

    The goal is not to memorize every number. Instead, you will learn how to recognize the most common settings and choose a reliable option for the type of video you want to publish.

    What Is an Aspect Ratio?

    An aspect ratio describes the shape of a video frame. It compares the width of the video with its height.

    For example:

    • 16:9 is a wide horizontal format commonly used for standard YouTube videos and computer screens.
    • 9:16 is a tall vertical format commonly used for YouTube Shorts, TikTok, Instagram Reels, and Facebook Reels.
    • 1:1 is a square format that can still be useful for some social media posts.

    The first number represents the width, and the second number represents the height.

    Why Aspect Ratio Matters

    If the aspect ratio does not match the type of video you are creating, the platform or editing program may crop the picture, add empty space, or display the video in a way you did not expect.

    For example, placing a 16:9 horizontal video inside a 9:16 vertical project may leave large empty areas or require part of the original video to be cropped.

    Practical Example

    A standard horizontal YouTube video may use 16:9, while a short vertical version of the same content may use 9:16.

    The main information can stay the same, but the visual arrangement may need to change so important subjects, captions, and text remain visible in the narrower vertical frame.

    Figure 1. Common video aspect ratios: 16:9 horizontal, 9:16 vertical, and 1:1 square.

    Aspect ratio describes the shape of the frame. Choose the shape that matches the type of video you are creating.

    What Is Video Resolution?

    Video resolution describes how many pixels are used to create the picture. Pixels are the tiny points of color that make up a digital image.

    A common video resolution is 1920 × 1080 pixels, often called 1080p or Full HD.

    In this example:

    • 1920 is the number of pixels across the width.
    • 1080 is the number of pixels down the height.

    For a vertical video, the same Full HD resolution is often written as 1080 × 1920 pixels because the frame is taller than it is wide.

    Why Resolution Matters

    Higher resolution can make a video look sharper, especially when it contains text, screenshots, charts, or detailed images.

    However, higher resolution can also create larger files and require more storage, processing power, and upload time. Choosing an extremely high resolution is not always necessary for a beginner project.

    For many everyday social media videos, 1080p provides a good balance between image quality and manageable file size.

    Practical Example

    A standard horizontal Full HD video may use:

    1920 × 1080 pixels

    A vertical Full HD video may use:

    1080 × 1920 pixels

    Both contain the same number of pixels overall, but the orientation and aspect ratio are different.

    Figure 2. Full HD can be arranged as 1920 × 1080 horizontal or 1080 × 1920 vertical.

    Resolution describes pixel dimensions, while aspect ratio describes the shape of the frame.

    What Is Frame Rate?

    Frame rate describes how many individual images, or frames, are shown every second in a video. It is usually written as fps, which means frames per second.

    Common frame rates include:

    • 24 fps — often used for a film-like appearance.
    • 30 fps — a common choice for tutorials, social media videos, presentations, and general online video.
    • 60 fps — useful when smoother motion is important, such as sports, gaming, or fast demonstrations.

    Which Frame Rate Should Beginners Use?

    For many AI Mastery tutorials and everyday social media videos, 30 fps is a simple and practical starting point.

    If your original video was recorded or generated at another frame rate, it is usually better to keep that frame rate unless you have a specific reason to change it.

    Changing frame rates unnecessarily can sometimes make motion look less smooth or cause duplicated or removed frames.

    Practical Example

    If you record a screen tutorial at 30 fps, you can normally keep the project and final export at 30 fps.

    If you record fast-moving footage at 60 fps, keeping the final export at 60 fps may preserve smoother movement, provided the platform and your editing workflow support it.

    Figure 3. Common frame rates include 24, 30, and 60 frames per second.

    For many beginner tutorials, 30 fps is a practical starting point. Keeping the source frame rate avoids unnecessary conversion.

    What Is Bitrate?

    Bitrate describes how much video data is used each second. It is commonly measured in megabits per second, written as Mbps.

    A higher bitrate can preserve more detail, but it also creates a larger video file. A very low bitrate can make the video look blurry, blocky, or less detailed, especially when there is movement or small text on the screen.

    Why Bitrate Matters

    Bitrate works together with resolution, frame rate, and the video codec. A 1080p video usually needs more data than a much smaller video if you want to maintain similar visual quality.

    Using the highest possible bitrate is not always necessary. Social media platforms normally process and compress uploaded videos, so an extremely large file may take longer to export and upload without producing a noticeable improvement for viewers.

    Which Bitrate Should Beginners Use?

    For beginners, it is usually easiest to use the recommended, standard, or high-quality preset provided by a reputable video editor rather than manually entering a bitrate.

    If your editing program asks you to choose between options such as Low, Recommended, and High, start with Recommended unless you have a specific reason to change it.

    Practical Example

    If a 1080p tutorial looks clear when exported with your editor’s recommended quality setting, increasing the bitrate dramatically may only make the file larger.

    If small text, screen recordings, or moving details look blurry after export, check the bitrate and overall export quality before assuming the original video is the problem.

    Figure 4. Bitrate affects both video detail and file size.

    A recommended or high-quality preset usually gives beginners a better balance than choosing the lowest or highest bitrate automatically.

    What Are Video Codecs and File Formats?

    A file format is the container used to store a video file. A common example is MP4.

    A codec is the method used to compress and store the video and audio inside that file. Compression helps reduce file size while trying to preserve good picture and sound quality.

    Common Beginner-Friendly Choice

    For many online videos, a practical beginner combination is:

    • File format: MP4
    • Video codec: H.264
    • Audio codec: AAC

    This combination is widely supported by video editors, web browsers, mobile devices, and major social media platforms.

    Why Codecs Matter

    Two videos can both be saved as MP4 files but use different codecs inside them. One may work correctly on a platform while another may need to be converted before uploading.

    A codec also affects:

    • File size.
    • Video quality.
    • Export time.
    • Playback compatibility.
    • How efficiently the video can be uploaded and processed.

    Practical Example

    If your video editor offers an export option such as MP4 with H.264, this is often a straightforward choice for a standard 1080p social media video.

    You usually do not need to change advanced codec settings unless the platform, editing program, or project has a specific requirement.

    Figure 5. MP4 is a common file container that can hold H.264 video and AAC audio.

    The file format and codecs work together to affect compatibility, quality, and file size.

    Recommended Video Sizes for YouTube

    YouTube supports several video shapes, but the best choice depends on whether you are creating a standard YouTube video or a YouTube Short.

    Standard YouTube Videos

    For a traditional horizontal YouTube video, a reliable beginner choice is:

    • Aspect ratio: 16:9
    • Resolution: 1920 × 1080 pixels
    • Orientation: Horizontal
    • Common name: 1080p Full HD

    YouTube identifies 16:9 as the standard aspect ratio for viewing on computers. The YouTube player can also adapt to other aspect ratios, including vertical and square videos.

    A 1920 × 1080 video works well for tutorials, demonstrations, screen recordings, educational videos, interviews, and other standard YouTube content.

    YouTube Shorts

    For a YouTube Short, a practical beginner choice is:

    • Aspect ratio: 9:16
    • Resolution: 1080 × 1920 pixels
    • Orientation: Vertical
    • Common name: Vertical Full HD

    YouTube currently classifies videos of up to three minutes with a square or vertical aspect ratio as Shorts when they meet its Shorts requirements.

    Although YouTube also accepts square Shorts, 9:16 makes better use of a vertically held phone screen and is a convenient format when the same video may later be adapted for TikTok, Instagram Reels, or Facebook Reels.

    Practical Example

    If you create a full YouTube tutorial in 1920 × 1080, you can later make a vertical Short in 1080 × 1920.

    Do not simply rotate or stretch the horizontal video. Reframe the important content so faces, demonstrations, captions, and text fit naturally inside the vertical layout.

    Figure 6. Reframing preserves natural proportions when adapting horizontal video to a vertical layout.

    Stretching distorts people, objects, text, and graphics. Reposition or crop thoughtfully instead.

    Recommended Video Size for TikTok

    TikTok is designed mainly for vertical viewing on smartphones. For beginners, a practical format is:

    • Aspect ratio: 9:16
    • Resolution: 1080 × 1920 pixels
    • Orientation: Vertical
    • Common name: Vertical Full HD

    TikTok for Business recommends 9:16 vertical video, at least 720p resolution, and keeping important content inside the interface safe zone.

    Why 1080 × 1920 Is a Good Beginner Choice

    Although lower resolutions may be accepted, 1080 × 1920 pixels gives you a clear Full HD vertical video and is a convenient size for editing text, captions, screen recordings, and other visual details.

    Using 9:16 also allows the video to make good use of the vertical phone screen rather than appearing as a small horizontal video surrounded by unused space. TikTok specifically recommends vertical 9:16 creative for its full-screen viewing experience.

    Keep Important Content Inside the Safe Area

    TikTok places interface elements over parts of the video. These can include buttons, captions, account information, and other controls.

    Keep important elements such as:

    • Faces.
    • Titles.
    • Captions.
    • Demonstrations.
    • Charts.
    • Calls to action.

    away from the extreme edges of the frame. TikTok recommends keeping important content within its UI safe zone.

    Practical Example

    If you create a TikTok video at 1080 × 1920 pixels, place the main subject and important text closer to the central viewing area.

    A caption placed directly against the bottom or right edge may look correct in your editing program but could be partly covered by TikTok interface controls after publishing.

    Recommended Video Size for Instagram Reels

    Instagram Reels supports several aspect ratios, but Meta recommends 9:16 for Reels so the video can use the full vertical phone screen. Instagram also states that Reels should have a minimum frame rate of 30 fps and a minimum resolution of 720 pixels.

    For beginners, a practical choice is:

    • Aspect ratio: 9:16
    • Resolution: 1080 × 1920 pixels
    • Orientation: Vertical
    • Frame rate: 30 fps or higher

    Why 1080 × 1920 Works Well

    A 1080 × 1920 video gives you a Full HD vertical frame with enough detail for captions, demonstrations, and other on-screen elements.

    Although Instagram can accept lower resolutions, starting with 1080 × 1920 gives you more room to preserve clarity before the platform processes the uploaded video.

    Keep Important Content Away from the Edges

    Meta recommends keeping important text and visual elements away from areas that may be covered by interface controls in Reels.

    Keep important elements such as:

    • Faces.
    • Captions.
    • Titles.
    • Demonstrations.
    • Charts.
    • Calls to action.

    closer to the central viewing area rather than placing them directly against the top, bottom, or sides.

    Practical Example

    If you create an Instagram Reel at 1080 × 1920 pixels, keep the main subject near the centre and leave extra space around captions and titles.

    This makes it less likely that Instagram interface elements will cover important information after the Reel is published.

    Recommended Video Size for Facebook Reels

    Facebook Reels supports multiple video shapes, but Meta recommends 9:16 for Reels because it fills a vertically held phone screen. Meta’s current Facebook Reels guidance recommends 1080p resolution and supports common modern video codecs.

    For beginners, a practical choice is:

    • Aspect ratio: 9:16
    • Resolution: 1080 × 1920 pixels
    • Orientation: Vertical
    • Frame rate: 30 fps is a practical starting point

    Why 9:16 Works Well for Facebook Reels

    A 9:16 video uses the full vertical screen more effectively than a horizontal video. Meta recommends 9:16 for Reels placements to capture the full screen.

    Using 1080 × 1920 pixels also gives you a clear Full HD vertical video that is suitable for captions, text, demonstrations, and other educational content.

    Keep Important Content Inside the Safe Area

    Meta advises keeping important text and visual elements away from the top, bottom, and sides of 9:16 Reel content because interface elements can cover those areas.

    Keep important elements such as:

    • Faces.
    • Captions.
    • Titles.
    • Demonstrations.
    • Charts.
    • Calls to action.

    closer to the central viewing area.

    Practical Example

    If you create a Facebook Reel at 1080 × 1920 pixels, keep your main subject and captions inside the central part of the frame.

    This reduces the chance that Facebook interface controls will cover important information after the Reel is published.

    Figure 7. A central safe area helps keep important content away from interface-heavy edges.

    Safe-area planning is especially important for captions, faces, titles, charts, and calls to action in vertical videos.

    Quick Reference: Common Video Sizes

    The following settings are practical beginner starting points for the platforms covered in this guide. They are not the only formats each platform may accept.

     Standard YouTube video: 16:9, 1920 × 1080 pixels, horizontal. YouTube identifies 16:9 as its standard computer-viewing aspect ratio.

     YouTube Shorts: 9:16, 1080 × 1920 pixels, vertical is a practical Full HD choice.

    • TikTok: 9:16, 1080 × 1920 pixels, vertical is a practical choice. TikTok recommends 9:16 vertical video, at least 720p, and keeping important content inside the interface safe zone.
    • Instagram Reels: 9:16, 1080 × 1920 pixels, vertical is a practical choice. Instagram accepts Reel aspect ratios up to 9:16 and requires at least 30 fps and 720-pixel minimum resolution.
    • Facebook Reels: 9:16, 1080 × 1920 pixels, vertical is a practical choice. Meta recommends 9:16 for Reels and recommends 1080p resolution for Facebook Reels.

    Remember the Difference Between Requirement and Recommendation

    A platform may accept several video sizes while still recommending a particular format for better full-screen viewing.

    For example, Instagram accepts more than one Reel aspect ratio, but 9:16 is convenient for full-screen vertical content. TikTok also recommends 9:16 for its vertical viewing experience.

    For beginners creating one vertical video that may later be adapted for several short-form platforms, 1080 × 1920 pixels at 9:16 is a useful working format. It gives you a Full HD vertical canvas while still allowing you to make platform-specific adjustments before publishing.

    Figure 8. Practical beginner video-size starting points for standard YouTube videos and common short-form platforms.

    Platform requirements can change, so treat these as practical working settings and confirm current official guidance when needed.

    How to Choose Export Settings in Your Video Editor

    When your video is finished, the final step is to export it as a video file. Most editing programs show several options, but beginners usually need to check only a few important settings.

    Step 1: Check the Aspect Ratio and Resolution

    Make sure the project matches the type of video you want to publish.

    For example:

    • Horizontal YouTube video: 16:9 at 1920 × 1080 pixels.
    • Vertical short-form video: 9:16 at 1080 × 1920 pixels.

    Do not stretch a horizontal video into a vertical shape. Reframe or reposition the content instead.

    Step 2: Check the Frame Rate

    Use the same frame rate as your main project or original footage whenever possible.

    For many tutorials and general social media videos, 30 fps is a practical choice.

    If your project was created at 60 fps, you can normally export at 60 fps when smoother motion is useful and your platform supports it.

    Step 3: Choose the File Format and Codec

    For many beginner projects, a practical choice is:

    • File format: MP4
    • Video codec: H.264
    • Audio codec: AAC

    These settings provide broad compatibility and are commonly available in video-editing programs.

    Step 4: Choose the Quality or Bitrate

    If your editor provides simple options such as Low, Recommended, or High, start with Recommended or the normal high-quality preset.

    Avoid choosing an extremely low-quality setting simply to reduce the file size. Small captions, screen recordings, and detailed graphics may become difficult to read.

    Step 5: Check the Audio

    Make sure the final video contains clear narration and that music or sound effects do not overpower the speaker.

    If your editor provides a normal AAC audio preset, beginners can usually leave the advanced audio settings at their recommended values.

    Step 6: Export and Review the Final File

    After exporting, watch the actual video file from beginning to end before uploading it.

    Check for:

    • Blurry or pixelated video.
    • Cropped faces or text.
    • Black bars that you did not intend to include.
    • Captions that are difficult to read.
    • Audio that is too loud or too quiet.
    • Missing scenes or unexpected blank frames.
    • Unwanted logos, watermarks, or branded endings.

    If something looks wrong, correct the editing project and export a new file rather than trying to repair the already exported video.

    Figure 9. A simple export workflow helps beginners check the most important settings in the right order.

    Check aspect ratio, resolution, frame rate, format, codec, bitrate, audio, and the final exported file before publishing.

    Common Mistakes When Choosing Video Sizes and Export Settings

    Beginners often run into problems because several video settings look similar but control different things.

    Common mistakes include:

    • Choosing the correct resolution but the wrong aspect ratio.
    • Stretching a horizontal video to make it vertical.
    • Cropping a video without checking whether important content was removed.
    • Exporting at a much lower resolution than the original project.
    • Changing the frame rate unnecessarily.
    • Choosing an extremely low bitrate to reduce file size.
    • Placing captions or important text too close to the edges.
    • Using settings from one platform without checking whether they suit another platform.
    • Exporting over the clean master file instead of creating a separate final version.
    • Uploading the video without watching the exported file first.

    How to Avoid These Mistakes

    Start by deciding where the video will be published. Then choose the aspect ratio, resolution, and orientation that fit that type of video.

    Keep your original project and clean master file unchanged. Create separate exports when you need different horizontal, vertical, or platform-specific versions.

    Before publishing, watch the final exported file on a phone or computer and check the framing, captions, picture quality, sound, and important visual elements.

    Figure 10. Common video problems often point directly to an aspect-ratio, resolution, bitrate, framing, or frame-rate issue.

    Use the visible symptom to decide which setting or editing choice to check first.

    Benefits of Choosing the Correct Video Settings

    Using suitable video sizes and export settings can improve both the viewing experience and your editing workflow.

    Key benefits include:

    • Better picture quality: Correct resolution and bitrate help preserve sharp text, images, and video details.
    • Correct screen fit: The right aspect ratio reduces unwanted black bars, stretching, or excessive cropping.
    • Clearer captions and graphics: Proper dimensions give you enough space to position text where viewers can read it.
    • Fewer editing problems: Starting with the correct project size reduces the amount of reframing needed later.
    • More consistent results: Using reliable export settings makes it easier to produce similar quality across several videos.
    • Easier repurposing: A well-organized master project can be adapted into horizontal and vertical versions more efficiently.
    • More manageable files: Appropriate export settings can provide good quality without creating unnecessarily large video files.
    • Faster troubleshooting: When you understand the basic settings, it becomes easier to identify why a video looks blurry, stretched, cropped, or incorrectly shaped.

    Choosing the correct settings from the beginning can save time because you are less likely to need repeated exports or major corrections before publishing.

    Limitations of Video Sizes and Export Settings

    Even when you choose suitable settings, some limitations can still affect how a video looks after publishing.

    Common limitations include:

    • Platform compression: Social media platforms usually compress uploaded videos, which can slightly reduce image quality.
    • Different device screens: A video may look slightly different on phones, tablets, monitors, and televisions.
    • Platform interface overlays: Buttons, captions, usernames, and other controls may cover parts of a vertical video.
    • File-size limits: Higher resolution, higher frame rate, and higher bitrate can create larger files.
    • Slower exports: High-quality settings may take longer to process on an older or less powerful computer.
    • Longer uploads: Large video files can take more time to upload, especially with a slower internet connection.
    • Source-quality limits: Exporting a low-quality original video at a higher resolution does not restore missing detail.
    • Different platform processing: The same uploaded file may not look exactly the same after each platform processes it.

    How to Reduce These Limitations

    Start with the best-quality source material you reasonably have and keep a clean master project before creating final exports.

    Use appropriate settings rather than automatically choosing the highest available resolution or bitrate. For many beginner projects, Full HD provides a practical balance between quality, file size, export time, and compatibility.

    Always review the final exported file before publishing. After uploading, also check the published version when possible to make sure captions, text, framing, picture quality, and audio still look correct.

    Common Myths About Video Sizes and Export Settings

    Several common myths can make video settings seem more complicated than they really are.

    Myth 1: Higher Resolution Always Means Better Video

    Reality: Higher resolution can preserve more detail, but it also creates larger files and requires more processing power. If the original video is low quality, exporting it at a much higher resolution will not recreate missing detail.

    Myth 2: 4K Is Necessary for Every Social Media Video

    Reality: Many beginner projects work very well at 1080p Full HD. Higher resolutions may be useful for some projects, but they are not automatically required for clear social media videos.

    Myth 3: A 1920 × 1080 Video Can Be Turned into 1080 × 1920 by Stretching It

    Reality: Stretching changes the shape of people, objects, text, and graphics. A horizontal video should be reframed, cropped, repositioned, or redesigned for a vertical layout instead.

    Myth 4: The Highest Bitrate Setting Is Always the Best Choice

    Reality: A very high bitrate can create a much larger file without producing a noticeable improvement for viewers. A recommended or suitable high-quality preset is usually a better starting point.

    Myth 5: Changing 30 fps Video to 60 fps Automatically Makes It Smoother

    Reality: Increasing the export frame rate does not create genuine extra motion detail that was never captured in the original footage. Keeping the original or project frame rate is usually more reliable.

    Myth 6: If a Video Looks Good in the Editor, It Will Look the Same After Publishing

    Reality: Social media platforms process uploaded videos and add interface elements around or over them. Always check the final exported file and, when possible, review the published version as well.

    Frequently Asked Questions

    What Is the Best Video Resolution for Beginners?

    For many beginner projects, 1080p Full HD is a practical choice. Use 1920 × 1080 pixels for horizontal video and 1080 × 1920 pixels for vertical video.

    What Is the Difference Between 16:9 and 9:16?

    16:9 is a wide horizontal format commonly used for standard YouTube videos. 9:16 is a tall vertical format commonly used for short-form videos such as YouTube Shorts, TikTok, Instagram Reels, and Facebook Reels.

    Should I Export Every Video at 60 fps?

    No. If your project or original footage uses 30 fps, exporting at 30 fps is usually appropriate. Use 60 fps when smoother motion is useful and your source material was created or recorded at that frame rate.

    Is MP4 a Good Video Format for Social Media?

    Yes. MP4 with H.264 video and AAC audio is a widely supported combination and is a practical starting point for many online video projects.

    Should I Always Choose the Highest Bitrate?

    No. A very high bitrate can make the file much larger without producing a noticeable improvement. Start with your editor’s recommended or high-quality preset unless you have a specific reason to change it.

    Why Does My Vertical Video Have Black Bars?

    Black bars can appear when the video’s aspect ratio does not match the project or viewing area. For example, placing a horizontal 16:9 video inside a vertical 9:16 project without reframing it can leave unused space.

    Can I Use the Same 1080 × 1920 Video on Several Platforms?

    Yes. A 1080 × 1920, 9:16 vertical video is a useful starting format for several short-form platforms. However, check each platform version separately for safe areas, captions, music, text placement, and other platform-specific details before publishing.

    Should I Keep My Original Video Project?

    Yes. Keep the original editing project, clean master video, source files, prompts, licences, permissions, and final exports. This makes it much easier to correct mistakes or create new versions later.

    Figure 11. Keep one clean master and create separate exports for different formats or platforms.

    Preserving the source project makes future corrections, repurposing, and new platform versions much easier.

    Key Takeaways

    Choosing the correct video size and export settings becomes much easier when you focus on a few basic ideas.

    Remember these main points:

    • 16:9 is a common horizontal format for standard YouTube videos.
    • 9:16 is a common vertical format for YouTube Shorts, TikTok, Instagram Reels, and Facebook Reels.
    • 1920 × 1080 pixels is a common Full HD horizontal resolution.
    • 1080 × 1920 pixels is a common Full HD vertical resolution.
    • 30 fps is a practical frame rate for many tutorials and general social media videos.
    • MP4 with H.264 video and AAC audio is a widely supported beginner-friendly export combination.
    • Use your editor’s recommended or high-quality bitrate preset unless you have a specific reason to change it.
    • Do not stretch a horizontal video to make it vertical. Reframe or reposition the content instead.
    • Keep important text, captions, faces, and demonstrations away from the extreme edges of vertical videos.
    • Watch the final exported file before uploading it.
    • Keep your clean master project and original source files so you can create new versions later.

    You do not need to memorize every technical setting. Start with a reliable format, understand what each setting controls, and adjust only when your project or publishing platform requires something different.

    Figure 12. A final export checklist catches common problems before upload.

    Review the actual exported file, not only the editing timeline, because some issues appear only after export.

    Final Tip

    Choose the simplest settings that meet the needs of your video and publishing platform.

    For many beginner projects, 1080p Full HD, the correct aspect ratio, a suitable frame rate, and a standard MP4 export are enough to produce a clear result.

    Avoid changing advanced settings simply because higher numbers appear better. The best export is the one that preserves good quality, fits the platform correctly, and remains easy for you to edit, store, upload, and reuse later.

    Continue Learning

    If you want to continue building your AI video skills, these AI Mastery guides are useful next steps:

    Sources and References

    The following official sources were checked for the video-size, aspect-ratio, resolution, frame-rate, codec, export, and safe-area information in this guide. Platform requirements and recommendations can change, so specifications should be checked again when a platform announces an update or when you begin using a new video format.

    Platform specifications are not permanent. Check official guidance when you first use a platform, when you change your video workflow, or when a platform announces updated requirements.

  • How to Repurpose One AI Video for YouTube Shorts, TikTok, Instagram Reels, and Facebook Reels: Beginner Guide (2026)

    How to Repurpose One AI Video for YouTube Shorts, TikTok, Instagram Reels, and Facebook Reels: Beginner Guide (2026)

    Estimated Reading Time: 18 minutes
    Last Updated: August 14, 2026

    Before Learning

    Before you begin, it helps to have one finished video that you can use as your main source video. This can be a video you created with AI, edited yourself, or produced using a combination of AI tools and regular video-editing software.

    You do not need four completely different videos for YouTube Shorts, TikTok, Instagram Reels, and Facebook Reels. In this guide, you will learn how to start with one clean master video and adapt separate versions for each platform.

    What You’ll Learn

    By the end of this guide, you will know how to:

    · Prepare one clean master video before repurposing it.

    · Adapt the same video for YouTube Shorts, TikTok, Instagram Reels, and Facebook Reels.

    · Reframe or crop the video for vertical viewing without cutting off important content.

    · Adjust captions, text, music, and other elements for each platform.

    · Export a separate clean version for each platform.

    · Avoid carrying another platform’s watermark, logo, or branded ending into your new version.

    · Keep your original project files and master export so you can make future versions more easily.

    Introduction

    Repurposing a video means taking one finished video and creating new versions of it for different platforms. Instead of starting from the beginning every time, you reuse the main content while adjusting the format, framing, captions, length, and other details when needed.

    This can save time and help you publish the same core idea across YouTube Shorts, TikTok, Instagram Reels, and Facebook Reels. However, you should not simply upload the exact same exported file everywhere. Each platform can display video differently, and text or important visual elements may be cropped or covered by interface controls.

    A better approach is to keep one clean master video and create a separate export for each platform. This also makes it easier to avoid unwanted watermarks, logos, branded endings, or other elements from one platform appearing on another.

    Figure 1. One clean master video can be adapted into separate versions for YouTube Shorts, TikTok, Instagram Reels, and Facebook Reels.

    Keeping the master unchanged gives you a reliable source for future edits and exports.

    What Does It Mean to Repurpose a Video?

    Repurposing does not mean simply uploading the same video file to every social media platform. It means using the same main content as your starting point and making a version that fits each platform better.

    For example, you may keep the same narration, main visuals, and message while changing the crop, text position, captions, music, opening seconds, or ending. You may also shorten or rearrange parts of the video if one platform works better with a faster or shorter version.

    The most important idea is to keep one clean master version of your video before making platform-specific copies. This gives you a reliable original that does not contain another platform’s watermark, logo, interface elements, or branded ending.

    Practical example: You create one 60-second vertical video about three beginner AI tools. From that master video, you can make separate versions for YouTube Shorts, TikTok, Instagram Reels, and Facebook Reels without rebuilding the entire video four times.

    Why Start with a Clean Master Video?

    A clean master video is the best-quality version of your finished video before you adapt it for individual social media platforms. It should contain the main visuals, narration, captions, music, and edits you want to keep, but it should not include a platform-specific watermark, logo, username overlay, or branded ending.

    Keeping a clean master makes repurposing easier because you can return to the original whenever you need another version. For example, if you later want to create a Pinterest Video Pin or another short-form version, you do not have to download one of your already-published videos and edit it again.

    A master video also helps protect video quality. Downloading a published video from a social platform and then editing and exporting it again can reduce quality because the video may already have been compressed.

    Keep the clean master video in a clearly named folder together with the original editing project, narration files, images, music licences, permissions, prompts, and other source files you may need later.

    Example: Instead of downloading your TikTok version to create a YouTube Short, open your clean master project and export a new YouTube version from it.

    Step 1: Prepare Your Master Video for Repurposing

    Before creating versions for different platforms, check that your clean master video is complete and ready to reuse. It is easier to fix problems now than after you have created several separate exports.

    Check the master video for:

    · Clear narration or dialogue.

    · Correct spelling in captions and on-screen text.

    · Images and video clips that are sharp enough to use.

    · Music and sound effects at comfortable levels.

    · No unwanted platform logos, watermarks, usernames, or branded endings.

    · No private information that should not appear publicly.

    · Permission or suitable licences for music, stock footage, photographs, fonts, and other assets you did not create yourself.

    · Important text and subjects positioned so they can still be seen if the video needs to be reframed.

    Figure 2. Check the clean master for quality, privacy, licensing, and visible content before creating platform copies.

    Fixing problems in the master first prevents the same problem from appearing in several exports.

    Watch the entire master video from beginning to end before making your platform versions. Pay special attention to the first few seconds, because the opening should quickly make it clear what the video is about.

    Practical example: If your master video contains a title placed very close to the bottom edge, move it higher before creating your platform versions. Interface buttons, captions, or other controls may cover text placed too close to an edge.

    Step 2: Use a Vertical Format for the Four Platforms

    For this repurposing workflow, use a 9:16 vertical video as your main working format. This tall format is well suited to phone screens and is supported for YouTube Shorts, TikTok, Instagram Reels, and Facebook Reels. YouTube accepts square or vertical videos for Shorts, while Instagram supports several Reel aspect ratios; Meta and TikTok specifically recommend 9:16 for full-screen vertical viewing.

    A common 9:16 video size is 1080 × 1920 pixels. We will cover video dimensions and export settings in more detail in the next AI Mastery guide, so for now the important point is to work vertically rather than creating a separate horizontal video for each short-form platform.

    When converting an existing horizontal video to vertical, do not simply crop the middle automatically and assume everything will remain visible. Check every scene. A person, product, screenshot, chart, or important text may be cut off when the frame becomes narrower.

    Keep important subjects and on-screen text away from the extreme top, bottom, and sides of the frame. Social platforms place interface elements over videos, and TikTok specifically advises keeping key information within its safe zone.

    Practical example: If a horizontal scene shows a person on the left and a laptop demonstration on the right, a simple centre crop may remove one of them. You may need to reposition the scene, zoom differently, or show the person and laptop in separate shots.

    Figure 3. Reframing a 16:9 video for 9:16 viewing may require repositioning rather than a simple centre crop.

    Check each scene so important people, text, screenshots, and demonstrations remain visible.

    Step 3: Create a Separate Version for Each Platform

    Once your clean master video is ready, make a separate copy for each platform instead of editing the master file directly.

    Create four working versions:

    · YouTube Shorts

    · TikTok

    · Instagram Reels

    · Facebook Reels

    Give each version a clear filename so you do not accidentally upload the wrong file later. For example:

    · video-topic-youtube-shorts.mp4

    · video-topic-tiktok.mp4

    · video-topic-instagram-reels.mp4

    · video-topic-facebook-reels.mp4

    Figure 4. Create clearly named working copies for each platform while keeping the clean master unchanged.

    Clear filenames reduce the risk of editing or uploading the wrong version.

    Keep your original clean master unchanged. If you make a mistake while editing one platform version, you can return to the master and create a fresh copy.

    Practical example: If you add TikTok-specific text or change the opening of the TikTok version, those changes should remain only in the TikTok copy. Your YouTube Shorts, Instagram Reels, and Facebook Reels versions can be adjusted separately.

    This simple file system also makes it easier to keep track of your final exports, thumbnails, captions, and publication records.

    Step 4: Reframe Each Video Carefully

    Even when all four versions use a vertical format, you should check the framing of every scene before exporting. A crop that looks good in one part of the video may cut off important content in another part.

    Watch each platform version from beginning to end and check that:

    · Faces and important subjects remain fully visible.

    · On-screen text is not too close to the edges.

    · Captions do not cover important visual details.

    · Screenshots and demonstrations are large enough to read on a phone.

    · Charts, lists, and graphics are not cropped.

    · Important information is not placed at the very top or bottom of the frame where platform controls may appear.

    Figure 5. Keep important subjects, captions, and text inside a central safe area in vertical video.

    Platform controls can cover content near the top, bottom, and sides.

    If a scene does not fit well vertically, do not force it into a simple centre crop. You can reposition the image, zoom in or out, split the scene into two shots, or use a background behind the original footage.

    Practical example: A computer screen recording may contain useful information across the entire horizontal screen. Instead of shrinking the whole screen until the text becomes unreadable, crop into the important area and move to another area when the narration changes.

    Step 5: Adjust Captions and On-Screen Text

    Captions and on-screen text can make short videos easier to follow, especially when viewers are watching without sound. However, text that looks good in your editing program may be partly covered by buttons, usernames, descriptions, or other platform controls after publishing.

    Keep important text away from the extreme top, bottom, and sides of the video. Place it closer to the central viewing area whenever possible.

    Use captions that are:

    · Large enough to read on a phone.

    · Easy to distinguish from the background.

    · Broken into short, readable phrases.

    · Timed closely with the spoken words.

    · Positioned so they do not cover faces, demonstrations, or other important information.

    Figure 6. Good captions are readable, high-contrast, and positioned away from faces and interface-heavy edges.

    Caption placement affects both accessibility and readability on small screens.

    Do not overcrowd the screen with several text boxes at the same time. A short video is usually easier to understand when viewers can focus on one main message at a time.

    Accessibility: Captions are especially helpful for people who are deaf or hard of hearing, people watching with the sound turned off, and viewers who may have difficulty understanding the narration.

    Practical example: If your captions sit at the very bottom of the master video, move them slightly higher before exporting your platform versions. This can reduce the chance that platform controls cover them.

    Step 6: Check Music and Audio Before Reusing the Video

    Before uploading the same video to several platforms, check the music, sound effects, and other audio included in your master video. Permission to use music on one platform does not automatically mean that you can reuse that music on every other platform.

    For example, YouTube offers music through its Shorts Audio Library and Audio Library, Instagram provides licensed audio and Meta Sound Collection, and TikTok has its own music options, including a Commercial Music Library for certain commercial content. These libraries operate under their own licensing conditions.

    Figure 7. Keep cross-platform audio rights clear and add platform-specific music only where its licence allows.

    Music available inside one platform does not automatically carry the same rights elsewhere.

    The safest workflow for repurposing is to keep a clean master version with audio that you created yourself or that you have verified you are allowed to use across the platforms where you plan to publish. If you want to use music supplied by a particular platform, consider adding that music separately when preparing the version for that platform.

    Warning: Do not assume that a song is copyright-free simply because you can select it inside a social media app. For example, Instagram describes licensed audio as copyrighted audio available through its library, and YouTube explains that music rights can affect how a video may be used.

    Keep a copy of any music licence, permission, receipt, or other record that explains how you are allowed to use an audio track. Licensing conditions and platform music features can change, so check the relevant terms when you first use a music source, when your plan or usage changes, or when the provider announces an update.

    Practical example: If you add a song from TikTok after uploading your TikTok version, keep that song out of your clean master video. Use the clean master again when creating the YouTube Shorts, Instagram Reels, and Facebook Reels versions.

    Step 7: Avoid Platform Watermarks, Logos, and Branded Endings

    When you repurpose a video, start from your clean master file rather than downloading a version that has already been published on another social media platform.

    A downloaded or previously exported version may contain a platform watermark, username, logo, branded ending, or other element that you do not want in the next version.

    Before exporting each platform version, check the entire video for:

    · Platform names or logos that were added automatically.

    · Watermarks from editing or AI video tools.

    · Usernames or account names that belong only to another platform.

    · Branded ending screens added by an app or template.

    · Trial-version marks or export restrictions.

    · Unwanted text or interface elements captured in screen recordings.

    Figure 8. Review every export for platform logos, usernames, watermarks, branded endings, and captured interface elements.

    Return to the clean master instead of reusing a downloaded social-media copy.

    If your editing or AI tool adds branding to free exports, check whether the tool provides a legitimate way to remove it. Do not crop, cover, or erase a provider’s watermark if doing so would violate the tool’s licence or terms.

    Keep your clean master video free from platform-specific branding. Then create separate exports for YouTube Shorts, TikTok, Instagram Reels, and Facebook Reels.

    Practical example: If you publish a video on TikTok and later want to make a YouTube Short, return to your clean master project instead of downloading the TikTok version and uploading that file to YouTube.

    Step 8: Adjust the Opening and Ending for Each Platform

    The main content of your video can stay the same, but the opening and ending may need small changes for each platform.

    Check the first few seconds carefully. A viewer should quickly understand what the video is about without needing a long introduction. Remove unnecessary pauses, blank frames, or lengthy opening graphics that delay the main point.

    You can also adjust the final message depending on where the video will be published. For example, avoid ending every version with instructions that only make sense on one platform.

    Instead of saying something platform-specific such as “Subscribe to my YouTube channel” in every version, you could use a more general message in the clean master, such as:

    · Follow for more beginner AI tips.

    · Save this video for later.

    · Share this with someone learning about AI.

    · Visit aiforbeginners4.com for more beginner guides.

    Figure 9. Keep the core lesson but adjust the opening or call to action when a platform-specific version needs it.

    Small platform-specific changes can improve relevance without rebuilding the entire video.

    Then, if appropriate, customize the final message in each platform version.

    Practical example: Your YouTube Shorts version could mention subscribing, while your TikTok or Instagram version could use a more suitable follow message. The educational content itself does not need to be recreated.

    Keep these changes in the individual platform copies and leave your clean master unchanged.

    Step 9: Export a Separate Final File for Each Platform

    When you finish editing, export a separate final video file for each platform. Do not overwrite your clean master video.

    Use clear filenames so you can immediately tell which file belongs to which platform. For example:

    · video-topic-youtube-shorts-final.mp4

    · video-topic-tiktok-final.mp4

    · video-topic-instagram-reels-final.mp4

    · video-topic-facebook-reels-final.mp4

    Figure 10. Organize the master, working copies, and final exports in separate folders.

    Good organization makes corrections, publishing, and future repurposing easier.

    Before uploading, watch each exported file from beginning to end. Check the picture, audio, captions, text placement, opening, ending, and overall quality.

    Also check that the exported video does not accidentally contain another platform’s watermark, username, logo, editing-app branding, or unwanted end screen.

    If you use your own small creator or business mark, keep it unobtrusive and away from important text, captions, faces, and platform interface areas. A small mark can help identify the original source, but it does not prevent someone from copying the video.

    Keep the final exports in a separate folder from your master project. This makes it easier to find the correct file when you are ready to publish.

    Practical example: After completing your four versions, your project folder might contain one clean master video and four clearly labelled final exports. If you later need to make a correction, return to the editing project or clean master rather than editing a downloaded social-media copy.

    Step 10: Upload Each Version Directly to Its Platform

    When your four final video files are ready, upload each one directly to the platform it was prepared for. Avoid publishing on one platform, downloading that published copy, and then using the downloaded file on the next platform.

    Uploading your clean platform-specific exports helps you preserve better video quality and reduces the chance of carrying unwanted watermarks, usernames, logos, or other platform-specific elements into another version.

    Figure 11. Upload each clean platform-specific export directly instead of downloading and reusing a published copy.

    Direct uploads reduce quality loss and unwanted platform branding.

    Before you publish each video, check:

    · You selected the correct platform-specific file.

    · The title, caption, or description matches the platform and video.

    · Any links or calls to action are correct.

    · Captions and important text remain visible in the preview.

    · The thumbnail or cover frame looks appropriate when the platform allows you to choose one.

    · Required AI-content disclosures or labels are completed when applicable.

    · No private or confidential information appears in the video or description.

    Do not assume that the same caption or description must be copied word-for-word across all four platforms. You can keep the main message consistent while adjusting the wording for the audience and features of each platform.

    Practical example: The educational video itself may stay almost identical across all four platforms, but the YouTube Shorts title, TikTok caption, Instagram Reel caption, and Facebook Reel description can be prepared separately.

    Common Mistakes to Avoid When Repurposing Videos

    Repurposing can save time, but a few common mistakes can make the finished videos look less professional or create unnecessary problems.

    Common mistakes include:

    · Downloading a published video from one platform and uploading that copy to another platform.

    · Leaving another platform’s watermark, username, logo, or branded ending in the video.

    · Cropping a horizontal video without checking whether faces, text, screenshots, or other important details were cut off.

    · Placing captions or important text too close to the edges of the screen.

    · Using music on several platforms without checking whether the licence allows that use.

    · Exporting over the clean master video instead of creating separate platform versions.

    · Reusing exactly the same call to action even when it refers to features available only on one platform.

    · Uploading the wrong platform-specific file because the filenames are unclear.

    · Forgetting to watch the final exported video before publishing.

    · Deleting the original project files after publishing.

    Figure 12. Replace common repurposing mistakes with a clean-master, platform-specific workflow.

    A simple repeatable workflow improves organization, quality, and licensing awareness.

    How to Avoid These Mistakes

    Keep one clean master video, create clearly named copies for each platform, and perform a final review of every exported file before uploading it.

    Keep your original project, source files, licences, permissions, and final exports together so you can correct or repurpose the video again later.

    Benefits of Repurposing One Video

    Repurposing one video for several platforms can make content creation more efficient without requiring you to create every video from the beginning.

    Key benefits include:

    · Saves time: You can reuse the same main idea, narration, and visuals instead of rebuilding the entire video.

    · Reduces editing work: Most changes involve reframing, captions, text placement, audio, or platform-specific details.

    · Keeps your message consistent: Viewers on different platforms receive the same main information.

    · Makes planning easier: One finished video can become several publishing opportunities.

    · Helps you reach different audiences: Some people mainly use YouTube, while others may prefer TikTok, Instagram, or Facebook.

    · Makes corrections easier: Keeping a clean master allows you to fix a problem once and create new exports when needed.

    · Improves file organization: Separate platform versions make it easier to identify what has been published and where.

    · Supports future reuse: Your clean master can later be adapted for another platform or format without starting again.

    Repurposing works best when the original video is well organized and the platform versions are treated as separate exports rather than identical copies.

    Limitations of Repurposing One Video

    Repurposing can save time, but one video will not always work perfectly on every platform without changes.

    Common limitations include:

    · Different viewing layouts: Text or subjects that look correct in one version may be partly covered or cropped on another platform.

    · Different audiences: A style that performs well with one audience may not interest viewers on another platform.

    · Music restrictions: Audio that is permitted on one platform may not be licensed for use elsewhere.

    · Different platform features: Calls to action, captions, covers, descriptions, and publishing options can vary.

    · Quality loss: Repeatedly downloading, editing, and re-exporting published videos can reduce visual quality.

    · Extra checking is still required: Each final version needs to be reviewed before publishing.

    How to Reduce These Limitations

    Keep a clean master video and create a separate working copy for each platform. Make only the changes that are genuinely needed, such as reframing, repositioning text, changing music, or adjusting the opening and ending.

    Repurposing should reduce unnecessary work, not eliminate the final quality check.

    Common Myths About Repurposing Videos

    Repurposing is useful, but several common myths can lead beginners to make poor editing or publishing decisions.

    Myth 1: Repurposing Means Uploading the Exact Same File Everywhere

    Reality: A clean master video can be the starting point, but each platform version may need small changes to framing, captions, text placement, audio, opening, ending, or description.

    Myth 2: A Vertical Video Will Automatically Look Good on Every Platform

    Reality: Even when the video uses a 9:16 format, platform controls can cover different areas of the screen. Important text, captions, and subjects should still be checked in each version.

    Myth 3: Music Available on One Platform Can Be Used Anywhere

    Reality: Music libraries and licences can differ between platforms. Always verify that you have permission to use the audio in each place where you plan to publish it.

    Myth 4: Downloading a Published Video Is the Best Way to Reuse It

    Reality: Returning to the clean master is usually better because a downloaded version may contain platform branding, watermarks, usernames, or reduced video quality.

    Myth 5: Repurposing Means You Never Need to Edit Again

    Reality: Repurposing reduces repeated work, but every final version still needs a quality check before publication.

    Frequently Asked Questions

    Can I Upload the Same Video to YouTube Shorts, TikTok, Instagram Reels, and Facebook Reels?

    Yes, you can reuse the same main video content, but it is better to create a separate version for each platform. Check the framing, captions, text placement, audio, opening, ending, and other platform-specific details before publishing.

    Should I Download My TikTok Video and Upload It to YouTube Shorts?

    It is better to return to your clean master video instead. A downloaded TikTok version may include a watermark, username, platform branding, or reduced video quality.

    Do I Need to Create Four Completely Different Videos?

    No. The purpose of repurposing is to reuse the same main content. You normally keep the core message, narration, and visuals while making only the adjustments needed for each platform.

    Should I Keep a Copy Without Music?

    Keeping a clean version without platform-specific music can be useful. You can then add suitable music separately when preparing each platform version, especially when music licensing conditions differ.

    Can I Use My Own Logo or Watermark on All Four Versions?

    Yes, you can use a small creator or business mark on your own original video. Keep it unobtrusive and away from captions, faces, important information, and areas where platform controls may appear.

    A watermark can help identify the source of your content, but it does not guarantee that other people cannot copy the video.

    What Should I Keep After Publishing?

    Keep your clean master video, editing project, source files, final platform exports, prompts, licences, permissions, and publication records. These files make future corrections and repurposing much easier.

    Key Takeaways

    Repurposing one video across several platforms can save time while keeping your main message consistent.

    Remember these main points:

    · Start with one clean master video.

    · Keep the master free from platform-specific watermarks, usernames, logos, and branded endings.

    · Create separate versions for YouTube Shorts, TikTok, Instagram Reels, and Facebook Reels.

    · Check framing, captions, text placement, music, opening, and ending in every version.

    · Use clear filenames so you do not confuse your exports.

    · Return to the clean master instead of downloading a published social-media copy.

    · Verify licences and permissions for music, stock footage, images, fonts, and other third-party assets.

    · Keep your original project files, prompts, licences, permissions, master export, and publication records.

    · Review every final export before publishing.

    Repurposing works best when you reuse the main content while still giving each platform version a careful final check.

    Final Tip

    Create once, but publish carefully.

    A well-organized clean master video can become several platform-specific versions without requiring you to rebuild the entire project. The time-saving benefit comes from reusing your strongest work while making only the adjustments each platform genuinely needs.

    Before publishing any version, watch the final exported file from beginning to end. Check the framing, captions, audio, text placement, branding, licences, and overall quality.

    Keeping your master video, source files, project files, permissions, licences, and final exports organized will make future updates and repurposing much easier.

    Continue Learning

    If you want to continue building your AI video skills, these AI Mastery guides are useful next steps:

    · Best AI Video Tools for Beginners: Complete Guide (2026) — Learn about beginner-friendly tools for creating AI videos.

    · How to Edit AI-Generated Videos: Beginner Step-by-Step Guide (2026) — Learn how to improve clips, timing, transitions, and overall video quality.

    · How to Add Voice, Music, and Captions to AI Videos: Beginner Step-by-Step Guide (2026) — Learn how to add narration, audio, and accessible captions.

    · How to Create Faceless YouTube Videos with AI: Complete Beginner Step-by-Step Guide (2026) — Follow a complete workflow for creating faceless YouTube videos.

    · How to Create YouTube Thumbnails, Titles, and Descriptions with AI (2026) — Learn how to prepare the publishing elements that support your videos.

    · How to Create an AI Virtual Presenter for YouTube Videos: Beginner Guide (2026) — Learn how to create videos using a fictional AI presenter.

    · How to Create AI Virtual Presenter Videos for TikTok: Beginner Guide (2026) — Learn how to adapt virtual-presenter videos for TikTok.

    Sources and References

    The following official sources were checked for the platform, video-format, music, safe-zone, and AI-disclosure information in this guide. Platform features and policies can change, so check the relevant official guidance when you first use a feature, when your account or plan changes, or when a platform announces an update.

    · YouTube Help — Upload YouTube Shorts: YouTube explains that Shorts uploads can use a square or vertical aspect ratio and can be up to three minutes long.

    · YouTube Help — Disclosing Use of Generative AI Content: YouTube explains when creators should disclose content that is AI-generated or meaningfully altered.

    · YouTube Help — Use Music and Sound Effects from the Audio Library: YouTube explains how its Audio Library works, including licensing and attribution requirements for certain tracks.

    · TikTok Support — About AI-Generated Content: TikTok explains its AI-generated-content labels and when creators are required to label realistic AI-generated images, audio, or video.

    · TikTok for Business — Creative Best Practices: TikTok recommends vertical 9:16 video and advises keeping important content within the interface safe zone.

    · TikTok Support — Commercial Use of Music on TikTok: TikTok explains that commercial content should use appropriately licensed music and recommends its Commercial Music Library for commercial uses.

    · Instagram Help — Reel Size and Aspect Ratios: Instagram explains the supported aspect ratios and minimum technical requirements for Reels.

    · Meta Business Help — Best Practices for Aspect Ratios: Meta recommends 9:16 vertical video for Reels placements to use the full mobile screen.

    · Meta Business Help — Safe Zones for Reels: Meta advises keeping important text and visual elements away from areas that may be covered by interface elements.

    · Meta Business Help — Sound Collection: Meta provides information about music and sound effects available through its Sound Collection for Facebook and Instagram content.

    Important: This guide provides general educational information about video creation, licensing, and platform practices. It is not legal advice. Always verify that you have the necessary rights or permissions for music, images, video clips, fonts, voices, and other material you publish.
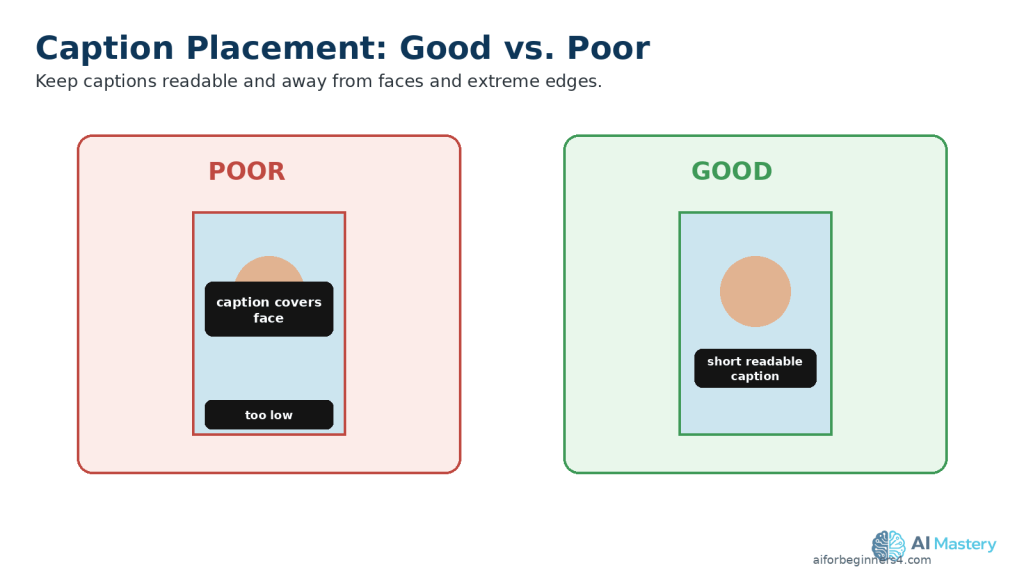
  • How to Create an AI Virtual Presenter for YouTube Videos: Beginner Guide (2026)

    How to Create an AI Virtual Presenter for YouTube Videos: Beginner Guide (2026)

    Estimated reading time: 28 minutes

    Last updated: August 8, 2026

    Introduction

    An AI virtual presenter is a digitally generated host that can appear on screen and speak a script. You may also see terms such as AI avatar, virtual avatar, AI presenter, digital presenter, AI host, virtual character, or AI personality. In this guide, the main term is AI virtual presenter.

    A virtual presenter can be a fictional, consistent host with its own appearance, clothing, voice, speaking style, background, and personality. It can appear throughout a video or only in selected scenes. For many educational channels, a hybrid format works well: Presenter → Demonstration → Presenter → Supporting Visual → Presenter.

    An AI presenter is different from a fully faceless video, but the two approaches can work together. The presenter can introduce the lesson or explain difficult points, while screen recordings, diagrams, AI images, stock footage, and charts show the details that viewers actually need to see.

    The goal is not to fool viewers into believing that a synthetic person is real. The goal is to create a clear, useful, consistent presentation while respecting permission, privacy, copyright, licensing, accessibility, factual accuracy, AI-disclosure rules, and platform policies.

    Using an AI presenter does not automatically prevent YouTube monetization, and it does not guarantee monetization either. YouTube still evaluates channels under its current Partner Program and monetization policies, including rules addressing reused and inauthentic or mass-produced content. The presenter is only one production tool; useful research, original writing, relevant visuals, editing, captions, accuracy, and human review still matter.

    Before Learning

    • Decide why the video needs a presenter before choosing a tool.

    • Choose whether the presenter will be fictional, based on you, or based on another authorized person.

    • Define the presenter’s role before designing appearance.

    • Keep the first character simple and easy to reproduce.

    • Prioritize consistency over complexity.

    • Save a master character reference image and character-profile document.

    • Treat the voice as part of the character identity.

    • Do not clone another person’s recognizable voice without appropriate permission.

    • Realistic synthetic presenters may require platform disclosure depending on the final result and current rules.

    • Use an original, reviewed script rather than letting the avatar read unverified material.

    • Plan where the presenter should appear and where supporting visuals are better.

    • Expect lip-sync and motion to need review; short clips are easier to correct.

    • Preserve source files, prompts, settings, licence records, permissions, and master exports.

    • Check the current commercial-use and privacy conditions of the tools you actually use.

    • Remember that AI-generated assets are not automatically copyright-free or unrestricted.

    • Keep human review in the workflow and begin with one small test video.

    Beginner Rule: Simple Character → Consistent Appearance → Clear Voice → Useful Script → Short Presenter Clips → Supporting Visuals → Human Review.

    What You’ll Learn

    • How to choose the right type of virtual presenter

    • How to design a fictional character and personality

    • How to keep appearance consistent

    • How to compare avatar tools

    • How to choose and test the voice

    • How to write natural spoken scripts

    • How to generate and review the first presenter clip

    • How to improve lip-sync, expressions, and gestures

    • How to use backgrounds and supporting visuals

    • How to edit, caption, and make the video easier to access

    • How to check privacy, permission, copyright, licensing, YouTube disclosure, and monetization considerations

    • How to avoid common mistakes and build a repeatable workflow

    Overall workflow: Choose Presenter Role → Design Character → Create Character → Choose Voice → Write Script → Generate Presenter Clips → Create Supporting Visuals → Edit → Add Captions → Check Rights and Disclosure → Review → Publish → Analyze → Improve.

    How to Choose the Right Type of AI Virtual Presenter

    Common Presenter Types

    • Ready-made AI avatar: fastest starting point, but less unique.

    • Custom fictional AI presenter: an original character designed for your channel.

    • AI presenter based on yourself: useful for a digital twin, but it involves personal images, video, voice, and privacy considerations.

    • Presenter based on another real person: use only with appropriate authorization and provider-supported consent.

    • Realistic human-looking presenter: professional-looking but may need additional disclosure review.

    • Stylized character: clearly fictional and sometimes easier to distinguish from real footage.

    • Talking-head presenter: usually chest-up or waist-up and simple for beginners.

    • Full-body presenter: allows more movement but can introduce more visual errors.

    • Hybrid presenter: appears only in selected scenes while other visuals take over when they teach better.

    Recommended beginner combination: Fictional + Consistent + Talking-Head + Used for Selected Scenes.

    Example: Alex is a fictional beginner AI instructor. He is an adult male with short dark hair, a blue business-casual shirt, a calm and patient personality, a clear moderate voice, chest-up framing, and a clean modern technology workspace. He appears for introductions, explanations, warnings, transitions, and summaries, while demonstrations and detailed visuals fill the screen when needed.

    • Does the presenter fit the channel topic?

    • Will the character be easy to reproduce?

    • Is the voice appropriate for the audience?

    • Will viewers understand that the character is fictional when necessary?

    • Can the presenter be combined with supporting visuals instead of staying on screen constantly?

    Figure 1. Beginners can choose between ready-made avatars, custom fictional presenters, stylized characters, talking-head presenters, and hybrid videos that combine a presenter with other visuals.

    Explanation: A fictional talking-head presenter used only when helpful is a practical starting point for many beginner educational videos.

    How to Design a Fictional AI Personality and Character Profile

    A consistent presenter begins with a written character profile. The profile gives you a repeatable description that can be reused across image, avatar, voice, and video tools.

    1. Choose the presenter’s role.

    2. Define the target audience.

    3. Choose three to five simple personality traits.

    4. Define the speaking style.

    5. Describe the main appearance.

    6. Choose a simple clothing style.

    7. Choose a consistent background style.

    8. Define normal facial expressions.

    9. Define restrained gestures.

    10. Give the presenter a name if useful.

    11. Write down what should not change.

    12. Create a master character profile.

    13. Create a master image prompt.

    14. Generate several reference images.

    15. Choose one master reference image.

    16. Save the original prompt, tool, model, date, and important settings.

    17. Create a consistency folder for approved assets.

    18. Use a short approval checklist for every new scene.

    19. Allow controlled variation only when intentional.

    20. Avoid deliberately making the fictional character resemble a real identifiable person.

    Example character profile: Name: Alex. Role: Beginner AI tutorial presenter. Audience: Complete beginners learning AI tools. Personality: Calm, friendly, patient, professional. Speaking style: Clear, moderate pace, short explanations. Appearance: Fictional adult male, approximately 35–45, short dark hair, neatly trimmed beard. Clothing: Blue or navy business-casual. Framing: Chest-up. Background: Clean modern technology workspace. Purpose: Introductions, difficult explanations, warnings, transitions, and summaries.

    A reusable prompt formula is: Role + Audience + Personality + Appearance + Clothing + Voice Style + Background + Purpose.

    Figure 2. A consistent AI virtual presenter begins with a simple character profile covering the presenter’s role, audience, personality, appearance, voice, background, and purpose.

    Explanation: Saving the profile, master prompt, and reference images makes it easier to reproduce the same character later.

    How to Create and Keep a Consistent AI Presenter Appearance

    1. Create one approved master image.

    2. Save it at good quality.

    3. Use it as the main reference whenever the tool allows.

    4. Keep the core character description stable.

    5. Separate fixed traits from flexible traits.

    6. Keep clothing within a small approved range.

    7. Keep age appearance stable.

    8. Use similar camera framing for recurring presenter scenes.

    9. Keep lighting broadly consistent.

    10. Use related background styles.

    11. Create a small approved reference set rather than dozens of conflicting references.

    12. Use the same written character profile in every tool.

    13. Do not rely on the character name alone.

    14. Compare the face carefully.

    15. Check hands and body shape when visible.

    16. Avoid unnecessary full-body views until the workflow is reliable.

    17. Use a standard presenter position for common layouts.

    18. Use a simple or transparent background when it improves editing flexibility.

    19. Generate shorter clips so weak sections can be replaced.

    20. Review consistency before editing.

    21. Use an approval checklist.

    22. Save approved clips separately from tests.

    23. Record the settings that worked.

    24. Expect some variation because generative systems do not always reproduce a character identically.

    Character drift means the presenter gradually changes between generations. The face, hair, age, clothing, body proportions, or overall style may shift even when the prompt looks similar.

    How to Avoid This Mistake: Return to the master character profile, master reference image, approved clothing range, voice profile, and background style. Compare every new result with the master instead of using the previous generation as the only reference.

    Workflow: Master Character Profile → Master Reference Image → Approved Reference Set → Generate New Presenter Scene → Compare With Master → Approve or Regenerate → Save Approved Clip.

    Figure 3. A consistent AI presenter workflow uses a master profile, reference image, approved views, and a compare-before-approval step.

    Explanation: Generative tools can introduce character drift. Compare every new scene with the approved master rather than relying on memory.

    How to Choose an AI Avatar or Virtual Presenter Tool

    Do not choose an avatar platform only because a demonstration looks realistic. Compare the complete workflow you need.

    • Fictional or ready-made avatar support

    • Character consistency

    • Lip-sync quality

    • Natural or custom voice options

    • Voice consistency and pronunciation controls

    • Expressions and gestures

    • Background options

    • 16:9 landscape support

    • Export resolution and download options

    • Watermark conditions

    • Generation minutes, credits, or usage limits

    • Commercial-use conditions

    • Avatar and voice restrictions

    • Consent procedures for real-person avatars

    • Privacy, storage, deletion, and training controls

    • Editing workflow and ease of use

    Current examples include HeyGen, Synthesia, and D-ID. HeyGen supports stock and digital-twin-style avatar workflows and current consent procedures for video-based Digital Twins. Synthesia supports stock and personal avatars, with live consent requirements for personal-avatar creation and custom voice cloning. D-ID Studio supports talking-avatar video creation from avatars, scripts, audio, and selectable voices. Canva also offers third-party avatar apps such as HeyGen and D-ID; third-party terms can apply separately.

    Use these examples to understand what features to compare, not as a permanent ranking. Features, plans, prices, limits, and terms can change.

    A Simple Tool Test

    1. Choose two or three suitable tools.

    2. Use the same fictional presenter concept.

    3. Use the same short script.

    4. Choose similar voice and framing settings.

    5. Generate a short test clip.

    6. Compare face consistency, voice, lip-sync, gestures, and background.

    7. Check export quality and watermark conditions.

    8. Review privacy, consent, and commercial-use terms.

    9. Record the real amount of time or credits used.

    10. Choose the tool that best fits your actual workflow.

    Beginner Rule: Do not ask only, “Which tool is best?” Ask, “Which tool gives me the consistent presenter, voice, rights, privacy, export quality, and workflow I need?”

    Figure 4. Choosing an AI virtual presenter tool involves more than visual realism; beginners should also compare consistency, voice, lip-sync, export options, privacy, consent, usage limits, and commercial-use conditions.

    Explanation: Test the same fictional presenter and script in a few suitable tools before committing to a workflow. Current terms and features can change.

    How to Choose and Create the Voice for Your AI Virtual Presenter

    The voice is part of the character identity. Viewers may forgive small visual imperfections more easily than a voice that is difficult to understand, too fast, robotic, inconsistent, or repeatedly mispronounced.

    Choose the Voice Type

    • Built-in synthetic voice: usually the simplest beginner option for a fictional presenter.

    • Your own authorized voice clone: more personal, but it involves biometric voice data and provider-specific consent and privacy controls.

    • Another authorized person’s voice: use only with appropriate permission and a provider workflow that supports authorized creation.

    A fictional presenter does not need a cloned real voice. Start with a built-in synthetic voice unless a custom voice clearly improves the project.

    Match the Voice to the Character and Audience

    • Choose a voice that fits the presenter’s apparent age, role, personality, and teaching style.

    • For beginner education, prioritize clear pronunciation, moderate speed, calm delivery, and short explanations.

    • Test the same paragraph with several voices so the comparison is fair.

    • Include difficult words such as software names, acronyms, dates, numbers, and technical terms.

    • Use pronunciation controls or script adjustments where available.

    • Write with punctuation and short sentences to create natural pauses.

    • Read the script aloud before generation.

    • Keep the approved voice consistent across videos.

    • Save the exact voice name or ID, language, speed, style, and pronunciation notes.

    Do not clone a recognizable person’s voice merely because audio is publicly available. Public access is not the same as permission. Review provider consent rules, privacy practices, and commercial-use conditions before creating or publishing a voice clone.

    Commercial-use rights can differ by provider and plan. For example, ElevenLabs currently states that its paid plans include a commercial licence subject to its terms and the user holding the necessary intellectual-property rights, while content created outside a paid subscription does not receive the same commercial licence. Check the current official terms for your exact account and intended use.

    Recommended workflow: Built-In Synthetic Voice → Test Clarity and Pronunciation → Test With Avatar → Check Commercial-Use Conditions → Save Voice Settings → Reuse Consistently.

    Figure 5. A reliable AI-presenter voice workflow includes choosing the voice type, testing pronunciation and clarity, checking it with the avatar, confirming permission and usage conditions, and saving the approved settings.

    Explanation: A built-in synthetic voice is often a simple starting point. Voice cloning adds consent and privacy responsibilities.

    How to Write a Script That Sounds Natural With an AI Virtual Presenter

    A good AI presenter cannot rescue a weak script. Write for speaking and listening, not only for reading.

    1. Start with the viewer’s question.

    2. Define the result the viewer should achieve.

    3. Write a short opening that explains what the video covers.

    4. Use short sentences.

    5. Keep one main idea per sentence.

    6. Use everyday spoken language rather than unnecessarily formal wording.

    7. Read every paragraph aloud.

    8. Use punctuation to create natural pauses.

    9. Break long narration into manageable presenter clips.

    10. Mark presenter scenes in the production script.

    11. Mark screen recordings, diagrams, examples, and warnings separately.

    12. Use the presenter for introductions, explanations, warnings, transitions, and summaries.

    13. Use demonstrations or detailed visuals when the viewer needs to see exact information.

    14. Avoid making the presenter read every word already shown on screen.

    15. Use natural transitions between sections.

    16. Use occasional questions and practical examples.

    17. Explain technical terms immediately.

    18. Remove jargon, filler, and repetition.

    19. Write numbers and acronyms in a form the selected voice pronounces clearly.

    20. Separate facts, requirements, and recommendations.

    21. Remove unsupported promises and guarantees.

    22. Keep a full production script and a presenter-only script when helpful.

    23. Generate a short test before approving the full narration.

    24. Keep the presenter’s personality consistent across videos.

    Recommended formula: Introduce the Idea → Explain It Simply → Give an Example → Show the Best Supporting Visual → Summarize the Point → Transition to the Next Section.

    Beginner Rule: Short + Clear + Conversational + Visual + Easy to Regenerate.

    Figure 6. A natural AI-presenter script uses short spoken explanations, practical examples, supporting visuals, clear transitions, and manageable presenter clips.

    Explanation: Writing for speech rather than only for reading can improve narration, lip-sync, captions, and editing.

    How to Generate Your First Talking AI Presenter Clip

    Different avatar platforms use different menus, but the basic workflow is similar: Choose Presenter → Add Script → Choose Voice → Set Video Format → Generate → Review → Regenerate if Needed.

    1. Use a 30–60 second real test script first.

    2. Open the platform’s video-creation area.

    3. Choose the approved presenter rather than creating a new character.

    4. Check face, hair, age appearance, clothing, character, and framing.

    5. Choose 16:9 landscape for a normal YouTube tutorial unless you are creating vertical content.

    6. Paste only the words the presenter should speak.

    7. Check spelling, punctuation, names, numbers, and difficult words.

    8. Select the approved voice profile.

    9. Preview the voice when the tool allows.

    10. Choose a simple background.

    11. Position the presenter so captions and supporting visuals will fit.

    12. Start with chest-up or waist-up framing.

    13. Use restrained motion settings.

    14. Choose sufficient output quality for evaluation.

    15. Generate the test clip.

    16. Watch the complete clip.

    17. Mute the clip and review visual consistency and movement.

    18. Listen without focusing on the visuals and review clarity, pronunciation, timing, and volume.

    19. Review voice, face, lip-sync, movement, and script together.

    20. Check facial expressions, head movement, hands, background, and any unwanted text or logos.

    21. Confirm the spoken information is factually correct.

    22. Approve, edit, or regenerate according to the seriousness of the problem.

    23. Save approved clips with clear versioned filenames.

    24. Keep rejected tests separate.

    25. Record the settings that worked.

    26. Generate the remaining presenter scenes as shorter clips.

    Beginner Rule: Create One Short Clip → Review It Carefully → Fix the Workflow → Then Continue.

    Figure 7. A short AI-presenter test clip lets you check the character, voice, lip-sync, movement, script, and video settings before generating the rest of the presenter scenes.

    Explanation: Testing a short clip first can prevent the same pronunciation, consistency, animation, or formatting problem from being repeated throughout the video.

    How to Improve Lip-Sync, Facial Expressions, and Gestures

    The goal is not maximum movement. The goal is natural movement that supports the explanation.

    1. Review the final render rather than judging only an unfinished preview.

    2. Watch the mouth around long words, technical terms, names, numbers, and pauses.

    3. Check pronunciation before assuming a problem is lip-sync.

    4. Break difficult sentences into shorter lines.

    5. Add natural pauses.

    6. Use expressions that match the meaning.

    7. Do not change emotion every sentence.

    8. Use expression, gesture, or gaze controls selectively when the platform offers them.

    9. Keep tutorial gestures small.

    10. Match gestures to the script.

    11. Use reliable preset gestures when they work better than improvised motion.

    12. Avoid repeating the same gesture too often.

    13. Cut away to supporting visuals when presenter motion becomes repetitive.

    14. Treat presenter footage as A-roll and use screen recordings, images, diagrams, or charts as supporting B-roll.

    15. Check eye direction and blinking.

    16. Check head movement for excessive nodding or strange tilts.

    17. Inspect hands carefully when they are visible.

    18. Avoid complex object interaction until the workflow is reliable.

    19. Use full-body movement only when it genuinely helps.

    20. Keep the presenter away from important text, interface controls, and captions.

    21. Compare movement style and energy across several clips.

    22. Regenerate only the weak section instead of the complete video.

    23. Do not chase perfect realism when a tiny imperfection does not affect understanding.

    24. Review serious problems more strictly than minor ones.

    25. Check at normal viewing size and on more than one screen when possible.

    26. Keep human review as the final decision.

    Beginner Rule: Less Motion + Better Timing is usually better than Constant Motion + Maximum Expression.

    Figure 8. AI-presenter clips should be reviewed for lip-sync, facial expression, eye direction, head movement, hand gestures, and overall body movement before they are approved for editing.

    Explanation: More animation is not automatically better. Restrained movement that matches the script usually works better for educational videos.

    How to Create Backgrounds and Supporting Visuals for an AI Presenter Video

    An AI presenter should not be the only thing viewers see. Educational videos usually become clearer when the host is combined with screen recordings, AI images, stock footage, diagrams, charts, screenshots, text labels, and examples.

    1. Choose a simple main presenter background.

    2. Keep the background style consistent across the channel.

    3. Leave open space beside the presenter for information.

    4. Plan for captions near the bottom of the frame.

    5. Use screen recordings for exact software steps.

    6. Use screenshots when motion is unnecessary.

    7. Remove private information before recording screens.

    8. Use AI images for concepts that are difficult to photograph, while clearly contextualizing realistic synthetic scenes.

    9. Use stock footage only under appropriate licence conditions.

    10. Use diagrams for workflows and relationships.

    11. Use charts only when accurate data adds value.

    12. Keep on-screen text short and large.

    13. Do not repeat every spoken word on screen.

    14. Use visual changes to support pacing without changing scenes too quickly.

    15. Match supporting visuals to the narration.

    16. Use B-roll to support the main presenter footage.

    17. Keep the presenter visible when direct communication helps and hide it when another visual is more important.

    18. Use picture-in-picture only when it adds value.

    19. Keep presenter size and layout consistent.

    20. Use a small consistent colour palette and readable fonts.

    21. Check font and template licences for commercial use.

    22. Avoid decorative logo use that could imply endorsement.

    23. Use real people’s images only with appropriate rights and context.

    24. Use reference images responsibly and avoid copying protected characters or another creator’s distinctive presenter.

    25. Keep assets organized with clear filenames and source records.

    26. Review every supporting visual for factual accuracy and accessibility.

    27. Create a scene plan before editing.

    A simple decision rule is: What should the viewer see while hearing this? Choose the presenter for direct communication, a screen recording for exact steps, a diagram for a process, an image or stock clip for illustration, and a checklist or text card for a point that needs to be remembered.

    Figure 9. AI-presenter videos are usually more useful when the virtual host is combined with screen recordings, diagrams, AI images, stock footage, and other supporting visuals.

    Explanation: Choose the visual that best explains each part of the lesson and keep layouts, captions, privacy checks, and licensing records consistent.

    How to Edit an AI Virtual Presenter Video

    Editing combines the separate presenter clips, narration, demonstrations, diagrams, images, music, and captions into one coherent lesson.

    1. Create an organized project folder.

    2. Open a 16:9 landscape editing project for a normal YouTube tutorial.

    3. Import approved assets and keep rejected tests separate.

    4. Build the main timeline from the script or storyboard.

    5. Place presenter clips in the correct order.

    6. Trim unnecessary silence without making speech feel rushed.

    7. Fix obvious presenter-to-presenter framing jumps.

    8. Place supporting visuals over presenter narration when they explain the point better.

    9. Use full-screen screen recordings for detailed demonstrations.

    10. Zoom carefully into small interface controls when necessary.

    11. Use arrows, circles, and highlights sparingly.

    12. Show diagrams when the narration discusses them.

    13. Leave static visuals on screen long enough to read.

    14. Use gentle motion on static images only when useful.

    15. Keep transitions simple and consistent.

    16. Review pacing from beginning to end.

    17. Remove repeated information.

    18. Keep important warnings visible long enough to understand.

    19. Check presenter consistency across all clips.

    20. Use standard presenter-centre, presenter-left, presenter-right, full-screen demonstration, and full-screen diagram layouts.

    21. Balance voice levels across clips.

    22. Keep narration above music and sound effects.

    23. Use only properly licensed music and sound effects.

    24. Add captions and correct names, technical terms, numbers, dates, punctuation, and timing.

    25. Keep captions readable and away from important information.

    26. Check accessibility, private information, generated text, and factual accuracy.

    27. Review the complete video without editing, then perform separate visual, audio, caption, and rights/privacy passes.

    28. Export a review copy and test it outside the editor.

    29. Check on desktop and phone when possible.

    30. Make final corrections and create a clearly named master export.

    31. Keep the editing project and source files for future updates.

    Common Editing Principle: The Information Determines the Visual. If the presenter is best, show the presenter. If a screen recording or diagram is clearer, show that instead.

    Figure 10. Editing an AI-presenter video combines presenter clips with demonstrations, diagrams, images, audio, and captions while checking pacing, accuracy, accessibility, privacy, and licensing.

    Explanation: The presenter should be one part of the visual storytelling rather than remaining on screen continuously.

    How to Add Music, Captions, and Accessibility to an AI Presenter Video

    The main accessibility goal is to make the presenter easy to hear, easy to understand, and easy to follow. Background music is optional.

    1. Decide whether background music genuinely helps.

    2. Keep music below the presenter’s voice.

    3. Avoid music that competes with speech.

    4. Lower or remove music during difficult explanations.

    5. Use sound effects only when they have a clear purpose.

    6. Check music and sound-effect licences and save the records.

    7. Add captions to spoken tutorials.

    8. Remember that decorative on-screen text is not a substitute for captions.

    9. Use YouTube Studio or another suitable caption workflow to add captions.

    10. Treat automatic captions as a starting point and review them manually.

    11. Check technical terms, names, numbers, dates, and timing carefully.

    12. Keep caption segments manageable and readable.

    13. Maintain strong contrast and avoid covering the presenter or important controls.

    14. Use closed captions for normal YouTube accessibility and short on-screen text only as additional emphasis.

    15. Consider a transcript when it helps viewers search or review the lesson.

    16. Do not communicate important meaning through colour alone.

    17. Use strong contrast and large on-screen text.

    18. Do not rely only on the presenter pointing; describe the exact control or location.

    19. Narrate important visual information.

    20. Consider whether formal audio description or another alternative is needed when important visual information is not already conveyed in the audio.

    21. Use specific instructions instead of vague phrases such as “click here.”

    22. Explain diagrams in the narration.

    23. Avoid rapid flashing and unnecessary motion.

    24. Give viewers enough time to read.

    25. Use clear section changes.

    26. Keep audio levels consistent.

    27. Correct synthetic-voice problems that reduce understanding.

    28. Test the video without sound, then listen without concentrating on the visuals.

    29. Review the video on a phone.

    30. Plan accessibility during scripting and visual design instead of adding it only at the end.

    WCAG 2.2 includes captions for prerecorded synchronized media at Level A and also addresses alternatives or audio description for important visual information. This article provides general accessibility guidance; applicable legal requirements depend on the specific creator, organization, audience, and jurisdiction.

    Figure 11. Accessible AI-presenter videos use clear narration, carefully reviewed captions, readable visuals, strong contrast, specific instructions, and multiple ways to understand important information.

    Explanation: Accessibility should be considered during scripting, visual planning, captioning, and final review rather than added only after editing is complete.

    Privacy, Permission, Copyright, and Responsible Use for AI Virtual Presenters

    Before publishing, check four separate areas: Privacy → Permission → Copyright and Licensing → Responsible AI Use. A technically impressive video can still have serious problems in any of these areas.

    1. Start with an original fictional presenter when possible.

    2. Do not deliberately imitate a recognizable celebrity, politician, creator, customer, or private person without appropriate authorization.

    3. Do not assume that a public photograph gives permission to create an avatar or digital twin.

    4. Be especially careful with realistic likenesses. YouTube allows people to request removal of realistic altered or synthetic content that looks or sounds like them.

    5. Get appropriate permission before creating a digital version of a real person and keep permission records.

    6. Treat children and their images with additional care.

    7. Never use a virtual presenter for deceptive impersonation, false endorsements, invented statements, or fake participation.

    8. Remember that disclosure does not provide permission to impersonate someone.

    9. Review whether realistic synthetic content requires YouTube disclosure.

    10. Understand that disclosure is transparency, not a copyright licence or permission to use a person’s identity.

    11. Clearly contextualize synthetic scenes when viewers could mistake them for real events.

    12. Protect personal information and upload only what a workflow genuinely requires.

    13. Review avatar-provider storage, deletion, training, and privacy controls.

    14. Treat voice recordings as identity-related data and do not upload another person’s voice casually.

    15. Check copyright separately from permission to use a person’s likeness.

    16. Review every music, stock, image, font, template, icon, voice, and background asset in the final video.

    17. Do not assume editing or AI transformation removes copyright.

    18. Do not assume educational use automatically qualifies as fair use; copyright exceptions depend on the facts and jurisdiction.

    19. Use original or properly licensed music and stock assets.

    20. Check Creative Commons and attribution conditions when applicable.

    21. Check AI-tool commercial-use conditions for the exact service, feature, account, and intended use.

    22. Avoid claiming exclusive rights without understanding the relevant terms and law.

    23. Avoid protected characters and distinctive copies of another creator’s presenter.

    24. Make the presenter add real educational or communication value.

    25. Avoid mass-producing nearly identical presenter videos.

    26. Keep human review, fact-checking, and source verification in the workflow.

    27. Do not invent expert credentials for a fictional presenter.

    28. Use extra care for health, legal, financial, emergency, political, or other high-stakes topics.

    29. Do not fabricate testimonials or realistic fake interviews.

    30. Keep creation, permission, licence, disclosure, and publication records.

    Beginner Rule: Ask four separate questions: Can I create it? Do I have the right and permission to use it? Could it mislead someone? Have I reviewed what I am publishing?

    Figure 12. Responsible AI-presenter publishing requires separate checks for identity, permission, privacy, copyright, licences, factual accuracy, disclosure, original value, and record-keeping.

    Explanation: The ability to generate an AI presenter does not automatically provide permission to publish every resulting asset.

    YouTube AI Disclosure and Monetization for Virtual Presenter Videos

    Using an AI virtual presenter does not automatically prevent a YouTube channel from being monetized. YouTube currently distinguishes between using AI as a production tool and publishing content that is repetitive, mass-produced, reused without sufficient original contribution, misleading, or otherwise policy-violating.

    YouTube currently requires creators to disclose meaningfully altered or synthetically generated content that appears realistic under its disclosure criteria. Its May 2026 clarification emphasizes photorealistic content such as a real person appearing to do or say something they did not, altered footage of a real event or place, or a realistic scene that did not actually occur.

    1. Review the final appearance rather than assuming “fictional” always means no disclosure.

    2. Use YouTube Studio’s current AI-use setting when the content meets the disclosure criteria.

    3. Understand that disclosure may produce viewer-facing information such as “Made with AI.”

    4. Do not treat disclosure as a penalty; it is a transparency mechanism.

    5. Remember that disclosure does not grant rights to another person’s face, voice, or copyrighted content.

    6. Meet YouTube Partner Program eligibility requirements and understand that eligibility allows you to apply but does not guarantee approval.

    7. Use a consistent presenter while making each video genuinely different and useful.

    8. Avoid a workflow that mass-produces generic scripts with the same avatar, background, and minimal editing.

    9. Add meaningful human contribution through research, structure, rewriting, examples, demonstrations, fact-checking, and editing.

    10. Do not simply have the avatar read third-party articles, product descriptions, or other creators’ scripts with little original explanation.

    11. Do not create nearly identical videos by changing only a few words.

    12. Remember that repeated intros, outros, colours, and presenter branding are not the same as repetitive main content.

    13. Do not use an avatar overlay to disguise reused footage.

    14. Check copyright/licensing and monetization as separate questions.

    15. Do not depend on the avatar itself to provide originality.

    16. Make the channel purpose clear and maintain reasonable quality across the channel library.

    17. Review older videos periodically for outdated facts, weak disclosure, or quality problems.

    18. Do not promise monetization.

    19. Check the current Earn section and official YPP documentation when preparing to apply.

    20. Keep disclosure and production records for important videos.

    21. Do not hide qualifying realistic synthetic content and do not label every minor AI-assisted action as if it were the same type of disclosure.

    22. Recheck current rules after major platform updates or major changes to your production method.

    A useful test is: If I replaced the virtual presenter with my own voice and simple graphics, would the lesson still contain useful information? If yes, the value likely comes from the research, teaching, examples, structure, and explanation rather than from the novelty of the avatar alone.

    Figure 13. Responsible AI-presenter publishing combines original value, appropriate AI disclosure, rights and permission checks, protection against repetitive mass production, human review, and saved production records.

    Explanation: AI assistance does not automatically prevent monetization, but YPP requirements and monetization policies still apply; eligibility does not guarantee approval.

    Complete Step-by-Step AI Virtual Presenter Video Workflow

    1. Choose one clear video topic.

    2. Research the topic using reliable current sources.

    3. Define where the presenter will appear.

    4. Open the approved character profile and reference assets.

    5. Select the approved voice and test new terminology.

    6. Write a clear, original, spoken script.

    7. Create a scene plan describing what the viewer hears and sees.

    8. Generate a 30–60 second presenter test.

    9. Review face, voice, pronunciation, lip-sync, gestures, hands, background, and accuracy.

    10. Generate the remaining presenter clips as manageable scenes.

    11. Create the supporting screen recordings, AI images, diagrams, screenshots, charts, and licensed stock footage.

    12. Organize all project files.

    13. Build the editing timeline.

    14. Improve pacing and remove repetition.

    15. Add music and sound only when useful and properly licensed.

    16. Add and manually correct captions.

    17. Perform an accessibility review.

    18. Perform a privacy review.

    19. Perform a copyright and licensing review.

    20. Review the presenter for impersonation and permission risk.

    21. Check YouTube AI disclosure.

    22. Check originality and monetization-policy risks.

    23. Watch the complete video as a final human review.

    24. Export a review copy and test it outside the editor.

    25. Correct confirmed problems.

    26. Create the final master export and publishing package.

    27. Upload privately or unlisted first when practical for a final check.

    28. Publish.

    29. Review YouTube Studio and Analytics after meaningful data develops.

    30. Use what you learn to improve the next video.

    The complete workflow in one line: Topic → Research → Presenter Plan → Character → Voice → Script → Scene Plan → Test Clip → Presenter Clips → Supporting Visuals → Edit → Audio → Captions → Accessibility → Privacy → Copyright → Permission → AI Disclosure → Originality Review → Human Review → Export → Publishing Package → Upload → Publish → Analytics → Improve.

    The easiest five-stage version is: Plan → Create → Edit → Check and Publish → Learn and Improve.

    Figure 14. The complete AI virtual-presenter workflow moves through planning, creation, editing, rights and policy checks, publishing, and Analytics-based improvement.

    Explanation: Beginners can simplify the process into five stages: Plan, Create, Edit, Check and Publish, then Learn and Improve.

    Common AI Virtual Presenter Mistakes Beginners Should Avoid

    Mistake 1: Creating the entire video before testing the presenter

    How to Avoid This Mistake: Generate a 30–60 second test first and approve the character, voice, lip-sync, framing, background, and motion.

    Mistake 2: Changing the character in every video

    How to Avoid This Mistake: Keep a master character profile, prompt, reference image, clothing range, framing, and approved voice.

    Mistake 3: Using only the character name as the prompt

    How to Avoid This Mistake: Reuse the complete character description and reference image.

    Mistake 4: Choosing a presenter only because it looks realistic

    How to Avoid This Mistake: Compare consistency, voice, lip-sync, export, privacy, rights, and ease of use.

    Mistake 5: Making the presenter too complicated

    How to Avoid This Mistake: Start with simple clothing, background, framing, and gestures.

    Mistake 6: Making the presenter look like a real person

    How to Avoid This Mistake: Create an original fictional appearance instead of deliberately imitating an identifiable person.

    Mistake 7: Cloning someone else’s voice without permission

    How to Avoid This Mistake: Use a built-in synthetic voice, your own authorized clone, or another properly authorized voice.

    Mistake 8: Choosing the voice without testing real script

    How to Avoid This Mistake: Test technical terms, numbers, dates, acronyms, and names before long generation.

    Mistake 9: Changing the voice between clips

    How to Avoid This Mistake: Save and reuse the approved voice settings.

    Mistake 10: Ignoring pronunciation

    How to Avoid This Mistake: Keep a pronunciation list and test difficult words.

    Mistake 11: Writing long formal sentences

    How to Avoid This Mistake: Use short spoken sentences, natural pauses, and everyday language.

    Mistake 12: Making the avatar speak for the entire video

    How to Avoid This Mistake: Switch to screen recordings, diagrams, examples, and other visuals when they teach better.

    Mistake 13: Keeping the presenter visible during detailed software steps

    How to Avoid This Mistake: Use full-screen demonstrations when viewers need to see controls clearly.

    Mistake 14: Using too many gestures

    How to Avoid This Mistake: Use restrained movement that supports meaning.

    Mistake 15: Ignoring hands

    How to Avoid This Mistake: Regenerate, reduce gestures, or use chest-up framing when hands are visibly distorted.

    Mistake 16: Trying to make every clip perfect

    How to Avoid This Mistake: Fix problems that affect understanding or are noticeably distracting; do not waste credits on tiny invisible defects.

    Mistake 17: Using busy backgrounds

    How to Avoid This Mistake: Use clean backgrounds with room for text and captions.

    Mistake 18: Covering important information with the presenter

    How to Avoid This Mistake: Use consistent left/right layouts and give the teaching visual enough space.

    Mistake 19: Forgetting caption space

    How to Avoid This Mistake: Plan caption placement before finalizing the scene layout.

    Mistake 20: Using tiny on-screen text

    How to Avoid This Mistake: Use large labels and check on mobile.

    Mistake 21: Trusting automatic captions without review

    How to Avoid This Mistake: Correct the complete caption track manually.

    Mistake 22: Making music too loud

    How to Avoid This Mistake: Keep narration clearly above music.

    Mistake 23: Using unlicensed music or stock assets

    How to Avoid This Mistake: Check and save licence records before publishing.

    Mistake 24: Assuming AI-generated means copyright-free

    How to Avoid This Mistake: Check input rights, provider terms, and third-party assets separately.

    Mistake 25: Assuming a paid plan gives unlimited rights

    How to Avoid This Mistake: Review the exact service, feature, plan, and intended use.

    Mistake 26: Uploading private information in screen recordings

    How to Avoid This Mistake: Prepare the screen before recording and inspect the footage before publishing.

    Mistake 27: Using AI-generated visuals without checking them

    How to Avoid This Mistake: Inspect spelling, labels, numbers, logos, and factual details.

    Mistake 28: Treating a realistic synthetic scene as evidence

    How to Avoid This Mistake: Provide clear context when generated material could be mistaken for a real event.

    Mistake 29: Forgetting AI disclosure

    How to Avoid This Mistake: Include a disclosure check in the publishing checklist.

    Mistake 30: Believing disclosure gives permission

    How to Avoid This Mistake: Check consent, privacy, copyright, licensing, and impersonation separately.

    Mistake 31: Giving a fictional presenter fake credentials

    How to Avoid This Mistake: Describe the character accurately and rely on verifiable sources rather than invented authority.

    Mistake 32: Publishing AI-generated facts without verification

    How to Avoid This Mistake: Fact-check important information before final generation.

    Mistake 33: Mass-producing almost identical videos

    How to Avoid This Mistake: Give each video its own research, purpose, examples, demonstrations, and useful conclusions.

    Mistake 34: Believing the avatar alone makes the video original

    How to Avoid This Mistake: Original value should come from the complete production, not only the character.

    Mistake 35: Automating the entire publishing process without human review

    How to Avoid This Mistake: Keep human review for facts, script, visuals, captions, privacy, rights, and disclosure.

    Mistake 36: Failing to save source files

    How to Avoid This Mistake: Preserve scripts, clips, references, captions, project files, licences, permissions, and master exports.

    Mistake 37: Naming files poorly

    How to Avoid This Mistake: Use article/topic/scene/version filenames instead of final-final-new names.

    Mistake 38: Changing too many variables at once

    How to Avoid This Mistake: Change one important variable and compare the result.

    Mistake 39: Buying several tools before testing

    How to Avoid This Mistake: Complete one short end-to-end project first.

    Mistake 40: Expecting the first video to be perfect

    How to Avoid This Mistake: Improve the workflow one video at a time.

    Beginner Rule: Test Small → Review → Correct → Generate More → Edit → Check Everything → Publish.

    Figure 15. Common AI-presenter mistakes include skipping early tests, allowing character or voice inconsistency, overusing the avatar, neglecting captions and privacy, failing to check rights, and mass-producing similar videos without sufficient review.

    Explanation: A short test-and-review cycle can prevent many problems before they spread through the entire production.

    Benefits and Limitations of Using an AI Virtual Presenter

    Benefits

    • You can remain off camera while still using a visible host.

    • You may reduce the need for a traditional camera, lighting, and recording-space setup.

    • A saved character can create a recognizable channel identity.

    • Short presenter clips can be replaced without re-recording an entire human presentation.

    • Reusable presenter layouts and templates can speed future editing.

    • A fictional host can separate the teaching role from the creator’s personal identity.

    • Presenter clips can work well with faceless workflows and supporting visuals.

    • Some workflows can make updates and multilingual versions easier to produce.

    Limitations

    Limitation 1: The presenter may still look artificial

    How to Reduce This Limitation: Use short clips, restrained motion, careful review, and supporting visuals.

    Limitation 2: Character appearance may drift

    How to Reduce This Limitation: Use master references, consistent prompts, and approval checks.

    Limitation 3: Voice quality can vary

    How to Reduce This Limitation: Test difficult words and review every final narration.

    Limitation 4: Lip-sync is not always perfect

    How to Reduce This Limitation: Use moderate pace, shorter sentences, and correct pronunciation.

    Limitation 5: Full-body motion creates more opportunities for errors

    How to Reduce This Limitation: Begin with chest-up or waist-up framing.

    Limitation 6: The presenter can become repetitive

    How to Reduce This Limitation: Alternate presenter footage with demonstrations, diagrams, and examples.

    Limitation 7: Tools may cost money or consume credits

    How to Reduce This Limitation: Test one short video before paying for multiple plans.

    Limitation 8: Tool features and plans can change

    How to Reduce This Limitation: Check current official information at key workflow changes and periodically.

    Limitation 9: You can become dependent on one provider

    How to Reduce This Limitation: Keep prompts, references, source files, voice records, and master exports outside the service when possible.

    Limitation 10: Commercial-use conditions require checking

    How to Reduce This Limitation: Review the exact feature and intended use.

    Limitation 11: Digital twins create additional privacy considerations

    How to Reduce This Limitation: Use fictional assets when a real-person twin is unnecessary and review data controls before uploading personal material.

    Limitation 12: AI can deliver incorrect information convincingly

    How to Reduce This Limitation: Fact-check the script before final generation.

    Limitation 13: AI does not replace good teaching

    How to Reduce This Limitation: Prioritize useful topics, accurate research, clear scripts, and helpful visuals.

    Limitation 14: The presenter does not guarantee engagement or monetization

    How to Reduce This Limitation: Measure actual performance and follow current platform rules.

    Limitation 15: Editing and accessibility work are still required

    How to Reduce This Limitation: Keep captions, audio, rights, privacy, and accessibility checks in the normal workflow.

    Limitation 16: Synthetic realism can confuse viewers

    How to Reduce This Limitation: Use appropriate platform disclosure and additional context when needed.

    Beginner Rule: Think of an AI virtual presenter as one video-creation tool, not the entire video-creation system.

    Figure 16. AI virtual presenters can reduce filming requirements and provide a consistent host, but they still require careful review for appearance, voice, rights, privacy, accessibility, accuracy, and overall usefulness.

    Explanation: Use a virtual presenter when it solves a communication or production need rather than simply because the technology is available.

    Common Myths About AI Virtual Presenters

    Myth 1: “An AI presenter creates the whole video for me”

    Reality: It automates part of presentation; research, review, editing, captions, rights checks, and publishing work remain.

    Myth 2: “The more realistic the presenter, the better the video”

    Reality: Clarity, usefulness, consistency, and teaching quality matter more than maximum realism.

    Myth 3: “A fictional presenter never needs disclosure”

    Reality: The final realistic appearance and current platform criteria determine the disclosure question.

    Myth 4: “If I disclose AI, I can copy a real person”

    Reality: Disclosure does not replace permission, privacy, copyright, or impersonation rules.

    Myth 5: “Anything publicly available online can be used to build my avatar”

    Reality: Public availability is not permission to create a digital version of a person or reuse protected source material.

    Myth 6: “I can clone any voice because AI generated it”

    Reality: Use authorized voices and provider-supported consent workflows.

    Myth 7: “Paying for the AI tool gives unlimited rights”

    Reality: A subscription still operates under provider terms and third-party rights.

    Myth 8: “AI-generated images and videos are automatically copyright-free”

    Reality: Inputs, references, characters, stock assets, music, fonts, and provider terms can still matter.

    Myth 9: “Changing someone else’s content with AI makes it mine”

    Reality: Transformation does not automatically remove underlying rights.

    Myth 10: “Educational use automatically means fair use”

    Reality: Copyright exceptions depend on the facts and applicable law.

    Myth 11: “A virtual presenter automatically makes reused content original”

    Reality: Original value should come from research, explanation, structure, examples, commentary, and editing.

    Myth 12: “YouTube does not monetize AI presenter channels”

    Reality: AI use itself is not an automatic disqualifier; the complete channel must satisfy current monetization policies.

    Myth 13: “Using an AI presenter guarantees monetization”

    Reality: No presenter format guarantees YPP approval, views, subscribers, or revenue.

    Myth 14: “Reaching YPP numbers means automatic acceptance”

    Reality: Eligibility allows an application; YouTube still reviews the channel.

    Myth 15: “The same presenter makes every video repetitive”

    Reality: Consistent branding is different from mass-producing substantially similar main content.

    Myth 16: “The presenter should stay on screen throughout the entire video”

    Reality: Use the presenter only where direct communication helps.

    Myth 17: “More gestures make an avatar look more human”

    Reality: Restrained, meaningful movement usually works better in tutorials.

    Myth 18: “Perfect lip-sync is required”

    Reality: Fix distracting problems, but do not chase invisible imperfections.

    Myth 19: “A good AI voice does not need captions”

    Reality: Voice clarity and caption accessibility solve different needs.

    Myth 20: “Automatic captions are always accurate”

    Reality: Technical terms, names, dates, and numbers often need manual correction.

    Myth 21: “AI translation means no language review is needed”

    Reality: Fluent output can still contain wrong meaning, terminology, or pronunciation.

    Myth 22: “A professional-looking presenter must be accurate”

    Reality: Appearance does not verify facts.

    Myth 23: “AI presenters can replace all screen recordings”

    Reality: Exact software steps are usually clearer when the interface itself is shown.

    Myth 24: “More AI tools always produce a better video”

    Reality: More tools can increase cost, complexity, inconsistency, and licensing work.

    Myth 25: “I need expensive subscriptions before I test the idea”

    Reality: Test the end-to-end workflow before committing to multiple plans.

    Myth 26: “A saved character prompt guarantees identical results”

    Reality: Stronger consistency comes from prompt + reference images + settings + human comparison.

    Myth 27: “The platform will remember my character forever”

    Reality: Keep your own copies of prompts, references, voice information, and approved outputs.

    Myth 28: “Source files are unnecessary after publication”

    Reality: Source files make future corrections, updates, and rights reviews possible.

    Myth 29: “AI presenter videos require no human creativity”

    Reality: Topic choice, research, explanation, character design, visual selection, editing, and quality control remain creative decisions.

    Myth 30: “An AI presenter is always better than a faceless or human presenter”

    Reality: Choose the format that best serves the topic and production needs.

    Beginner Rule: Avoid extreme claims. AI virtual presenters can be useful production tools, but responsible videos still depend on good content, appropriate rights, current platform rules, accessibility, transparency, and human review.

    Figure 17. Common myths about AI virtual presenters often confuse technical capability with quality, permission, copyright, disclosure, accessibility, or monetization.

    Explanation: AI presenters can simplify some production tasks, but they do not remove the need for research, rights checks, captions, disclosure decisions, platform compliance, or human review.

    Frequently Asked Questions About AI Virtual Presenters

    1. What is an AI virtual presenter?

    A digitally generated character that appears on screen and speaks a script. It may be realistic or stylized and may also be called an AI avatar, digital presenter, virtual host, or AI personality.

    2. Is an AI virtual presenter the same as a faceless YouTube video?

    Not exactly. A faceless video can use narration and supporting visuals without a host. An AI-presenter video adds a digital host, often only in selected scenes.

    3. Do I need to show the presenter throughout the video?

    No. Use the presenter for direct communication and switch to demonstrations, diagrams, charts, screenshots, or examples when those visuals teach better.

    4. Should a beginner create a fictional presenter or copy a real person?

    A fictional presenter is usually simpler because it reduces many likeness, impersonation, permission, and privacy concerns.

    5. Can I create an AI presenter that looks like me?

    Some services support personal avatars or digital twins. Review consent, privacy, storage, deletion, and voice requirements before uploading personal material.

    6. Can I create a presenter that looks like another person?

    Do not use another person’s recognizable likeness without appropriate authorization.

    7. Can I clone another person’s voice?

    Use a recognizable real voice only with appropriate authorization. Built-in synthetic voices are simpler for fictional presenters.

    8. Do I need to clone a voice at all?

    No. A built-in synthetic voice is enough for many beginner workflows.

    9. How do I keep the presenter consistent?

    Use a master profile, master prompt, reference images, approved voice settings, standard framing, and a compare-before-approval check.

    10. Why does the presenter sometimes look different?

    Generative systems can introduce variation. Regenerate scenes with major drift and keep reference assets stable.

    11. What camera framing is easiest?

    Chest-up or waist-up is usually practical because it reduces full-body and hand-animation problems.

    12. How long should a presenter clip be?

    There is no universal length, but shorter clips are easier to review and replace. A 30–60 second first test is practical.

    13. What if lip-sync is not perfect?

    Small imperfections may be acceptable if they are not distracting. Check pronunciation and pace before regenerating.

    14. How can I make AI speech sound natural?

    Use short sentences, clear punctuation, moderate speed, natural pauses, and a pronunciation list.

    15. Do I need an expensive avatar tool?

    No. Test a small project and compare the features, rights, privacy, export quality, and limits you actually need.

    16. Should I use one tool or several?

    Use the simplest workflow that reliably accomplishes the job. Additional tools add flexibility but also cost and complexity.

    17. Can I use ChatGPT to help write the script?

    Yes, as writing assistance. Review the final script for accuracy, repetition, natural speech, unsupported claims, and appropriate warnings.

    18. Can I combine the presenter with screen recordings?

    Yes. This is often one of the clearest formats for tutorials.

    19. Do AI-presenter videos need captions?

    Captions are strongly recommended for educational videos, and automatic captions should be reviewed and corrected.

    20. Do I have to disclose that the presenter is AI-generated?

    Review YouTube’s current rules for meaningfully altered or synthetically generated content that appears realistic and use the AI-use setting when required.

    21. Will YouTube penalize my channel just because I use an AI presenter?

    AI use by itself is not the same as violating monetization policy. The complete channel must still provide sufficient original value and follow current policies.

    22. Can an AI-presenter channel be monetized?

    Potentially yes, but there is no guaranteed approval. The channel must meet current eligibility and monetization requirements.

    23. Does using the same presenter make every video repetitive?

    Not by itself. The content of each video should still be meaningfully different and useful.

    24. Does an AI presenter guarantee more views?

    No. Viewer response depends on topic, title, thumbnail, script, pacing, usefulness, audience interest, and many other factors.

    25. Can my fictional presenter have a name and personality?

    Yes. Keep the role and personality consistent, but do not invent deceptive real-world credentials.

    26. Should I tell viewers the presenter is fictional?

    Clear context can improve transparency when a realistic presentation could reasonably be mistaken for a real person.

    27. Should I create several presenters?

    Usually not at first. One consistent presenter is easier to manage. Add more only when a real series, language, or teaching need justifies it.

    28. How should I organize presenter files?

    Keep character profile, prompts, reference images, voice settings, approved clips, scripts, licences, permissions, project files, and master exports together with clear filenames.

    29. What is the easiest beginner workflow?

    Create one fictional presenter → choose one authorized voice → write one short script → generate a 30–60 second test → review → create short scenes → add supporting visuals → edit and caption → check rights, privacy, accuracy, and disclosure → human review → publish.

    30. What is the most important thing to remember?

    The presenter is not the main source of value. Useful information, clear explanation, relevant visuals, responsible publishing, and human review are the foundation.

    Figure 18. Beginners commonly ask about presenter consistency, voice cloning, lip-sync, captions, AI disclosure, monetization, and how much of the video should actually show the virtual host.

    Explanation: The simplest starting approach is usually one original fictional presenter, one authorized consistent voice, short tested presenter clips, useful supporting visuals, and careful human review.

    Key Takeaways

    • An AI virtual presenter is a digital host that can speak a script and appear in selected video scenes.

    • An original fictional presenter is usually the simplest beginner choice.

    • Save a master character profile, prompt, reference image, approved voice, and standard framing.

    • Built-in synthetic voices are often easier than voice cloning.

    • Do not clone a recognizable voice or copy a real person’s likeness without appropriate authorization.

    • Write for speaking and listening using short sentences and natural pauses.

    • Generate a 30–60 second test before creating the complete video.

    • Review face consistency, voice, pronunciation, lip-sync, expressions, gestures, hands, background, and script accuracy.

    • Use the presenter only when it helps; use screen recordings, diagrams, images, charts, and stock footage when they teach better.

    • Add and review captions, keep music below narration, and design visuals with accessibility in mind.

    • Check privacy, copyright, licences, permissions, and factual accuracy separately.

    • The ability to generate an asset does not automatically give permission to publish it.

    • Review YouTube’s current AI-disclosure criteria for realistic synthetic content.

    • AI use does not automatically prevent monetization and does not guarantee it.

    • Avoid mass-producing nearly identical low-value videos.

    • Human review should remain part of every important stage.

    • Keep source files, prompts, licences, permissions, master exports, and publication records.

    • Use analytics and viewer feedback to improve future videos.

    • The complete beginner workflow can be remembered as Plan → Create → Edit → Check and Publish → Learn and Improve.

    The presenter supports the lesson. The presenter is not the lesson.

    Final Tip

    Do not try to build the perfect AI virtual presenter before publishing your first video. Start with one fictional presenter, one consistent voice, one short test script, one 30–60 second presenter clip, and one complete beginner video.

    After the first project, improve only what the evidence shows needs improvement. You may discover that the presenter should appear less often, the voice needs slower pacing, the background should be simpler, more screen recordings are needed, gestures should be reduced, captions need more space, or presenter clips should be shorter.

    Keep your character profile, master prompt, reference images, voice settings, scripts, approved clips, licences, permissions, project files, and final exports organized from the beginning.

    Most importantly: A good AI virtual presenter should make the lesson easier to understand. If the presenter becomes more important than the information, simplify the production. Use AI to support your teaching, not to replace careful research, clear explanations, responsible publishing, and human review.

    Continue Learning

    How to Create Faceless YouTube Videos with AI: Complete Beginner Step-by-Step Guide (2026)

    Use this guide to understand the complete faceless-video workflow and how presenter-led scenes can fit inside it.

    How to Create Storyboards and Plan Scenes for Faceless YouTube Videos with AI: Beginner Guide (2026)

    Use this guide to decide what viewers should see during each part of the video.

    How to Create Visuals for Faceless YouTube Videos with AI Images, Stock Footage, and Screen Recordings: Beginner Guide (2026)

    Use this guide to create and organize the supporting visuals that appear between presenter scenes.

    How to Create AI Videos from Text: Beginner Step-by-Step Guide (2026)

    Use this guide when you need short generated video scenes from written prompts.

    Best AI Video Tools for Beginners: Complete Guide (2026)

    Use this guide to compare beginner-friendly AI video tools and choose a suitable tool for your video-creation workflow.

    How to Add Voice, Music, and Captions to AI Videos: Beginner Step-by-Step Guide (2026)

    Use this guide for additional voice, music, caption, permission, licensing, and responsible-use guidance.

    How to Use YouTube Studio and YouTube Analytics for Faceless Channels: Beginner Guide (2026)

    Use this guide after publishing to review performance and improve the next video.

    Recommended learning order: Plan the Video → Create the Storyboard → Create the Presenter → Create Supporting Visuals → Generate Presenter and AI Video Clips → Edit → Add Voice, Music, and Captions → Check Rights, Privacy, Accessibility, and Disclosure → Publish → Review Analytics.

    Sources and References

    Sources reviewed: August 8, 2026. AI-avatar features, voice options, subscription conditions, privacy controls, licensing terms, YouTube monetization rules, AI-disclosure requirements, and platform interfaces can change. Check current official information when first choosing a tool, changing plans or features, receiving an important policy update, beginning commercial use, working with another person’s face or voice, and periodically as part of an established workflow.

    1. HeyGen — Quick Avatar Video

    Open official source

    Used in this article for: Avatar-video workflow, format, script, voice, motion, and output settings.

    2. HeyGen — Avatar Looks Explained

    Open official source

    Used in this article for: Avatar variations such as backgrounds, outfits, positions, and camera angles.

    3. HeyGen — Avatar Voice FAQ

    Open official source

    Used in this article for: Avatar voice selection, troubleshooting, pacing, and generation considerations.

    4. HeyGen — Recording Your Consent Video

    Open official source

    Used in this article for: Consent requirement for video-based Digital Twin creation.

    5. HeyGen — Digital Twin FAQ

    Open official source

    Used in this article for: Digital Twin creation, avatar slots, looks, and related controls.

    6. Synthesia — AI Avatars

    Open official source

    Used in this article for: Stock and personal avatar types and current avatar capabilities.

    7. Synthesia — Personal Avatars

    Open official source

    Used in this article for: Personal avatar creation and live consent requirements.

    8. Synthesia — Custom Voices

    Open official source

    Used in this article for: Custom voice creation, live consent, voice management, and deletion.

    9. Synthesia — Script

    Open official source

    Used in this article for: Script entry, voice selection, languages, and script-related controls.

    10. D-ID — Generate a Video in Studio

    Open official source

    Used in this article for: Avatar, script or audio, voice preview, and generation workflow.

    11. D-ID — Select a Voice for an Avatar

    Open official source

    Used in this article for: Voice selection and preview in D-ID Studio.

    12. ElevenLabs — Publishing Generated Content

    Open official source

    Used in this article for: Current commercial-licence guidance and rights responsibilities.

    13. Canva — HeyGen AI Avatars

    Open official source

    Used in this article for: Third-party HeyGen avatar app availability inside Canva.

    14. Canva — D-ID AI Avatars

    Open official source

    Used in this article for: Third-party D-ID avatar app availability inside Canva.

    15. YouTube — Disclosing Use of Generative AI Content

    Open official source

    Used in this article for: Current altered or synthetic content disclosure requirements and AI-use setting.

    16. YouTube — Updates to AI Content Disclosure and Labels

    Open official source

    Used in this article for: May 27, 2026 clarification focusing on meaningfully altered or generated photorealistic content.

    17. YouTube — How This Content Was Made Disclosures

    Open official source

    Used in this article for: Viewer-facing disclosure types including Made with AI.

    18. YouTube — Impersonation Policy

    Open official source

    Used in this article for: Rules against deceptive impersonation of people and channels.

    19. YouTube — Protecting Your Identity

    Open official source

    Used in this article for: Privacy complaint process for realistic altered or synthetic likenesses.

    20. YouTube — Channel Monetization Policies

    Open official source

    Used in this article for: YPP monetization policies including inauthentic and reused content.

    21. YouTube — Partner Program Overview and Eligibility

    Open official source

    Used in this article for: Eligibility and channel review for the YouTube Partner Program.

    22. YouTube — Add Subtitles and Captions

    Open official source

    Used in this article for: Adding caption tracks in YouTube Studio.

    23. YouTube — Automatic Captions

    Open official source

    Used in this article for: Automatic captioning and recommendation to review and correct errors.

    24. YouTube — Edit or Remove Captions

    Open official source

    Used in this article for: Editing caption text and timing.

    25. YouTube — Caption Display Settings

    Open official source

    Used in this article for: Viewer caption font, colour, size, opacity, background, and edge controls.

    26. W3C — WCAG 2.2

    Open official source

    Used in this article for: Current Web Content Accessibility Guidelines 2.2.

    27. W3C — Captions (Prerecorded)

    Open official source

    Used in this article for: WCAG 2.2 Success Criterion 1.2.2 for prerecorded captions.

    28. W3C — Audio Description or Media Alternative (Prerecorded)

    Open official source

    Used in this article for: Guidance for important visual information in prerecorded synchronized media.

    This article provides general educational information. It is not legal advice. For important copyright, privacy, licensing, contractual, medical, financial, or other professional questions, obtain appropriate advice for the relevant situation and jurisdiction.

  • How to Use YouTube Studio and YouTube Analytics for Faceless Channels: Beginner Guide (2026)

    How to Use YouTube Studio and YouTube Analytics for Faceless Channels: Beginner Guide (2026)

    Estimated reading time: 24 minutes

    Last updated: August 8, 2026

    Introduction

    YouTube Studio is the main management area for a YouTube channel. It is where creators manage videos, review comments, change channel settings, check notices, and open YouTube Analytics. YouTube Analytics is the measurement area that helps you understand how viewers discover, choose, watch, and return to your content.

    For a faceless channel, Analytics can be especially useful because improvement does not depend on appearing on camera. You can study topics, titles, thumbnails, narration, visuals, editing, audience retention, traffic sources, Shorts performance, and viewer feedback without showing your face.

    The goal is not to chase perfect numbers. The goal is to create a repeatable improvement cycle: Publish → Measure → Understand → Improve → Publish Again.

    YouTube began gradually rolling out an updated YouTube Studio experience in July 2026, so your Analytics page may look different from older tutorials or screenshots. Focus on the name and purpose of each report rather than memorizing one exact screen position.

    This article provides general educational information. It does not guarantee views, subscribers, recommendations, monetization, or business results. YouTube features, metrics, and policies can change, so check current official guidance when a feature changes, when YouTube sends an update notice, and periodically as part of your publishing workflow.

    Before Learning

    Before opening Analytics, understand a few simple principles.

    • YouTube Studio manages the channel; YouTube Analytics measures performance.

    • Begin with a question, not with a random number.

    • Compare reasonably similar videos, formats, lengths, and time periods.

    • Allow data time to develop. Small samples can change quickly.

    • One video is not automatically a reliable pattern.

    • Analytics shows viewer behaviour, not a viewer’s private thoughts or exact reasons.

    • Use comments and human review to add context to performance data.

    • Avoid universal benchmark claims such as one perfect CTR or retention percentage.

    • Review Shorts separately from long-form videos because the viewing experience and metrics differ.

    • Save important performance records so you can compare changes over time.

    • Protect private Analytics, revenue, account, and viewer information when sharing screenshots or exports.

    A useful beginner rule is: What does this metric measure? What other information do I need? Is this a repeated pattern worth acting on?

    What You’ll Learn

    • How to open and navigate YouTube Studio.

    • How to use the Dashboard without becoming distracted by constant updates.

    • How to open channel-level and individual-video Analytics.

    • How to understand the Analytics Overview.

    • How to interpret views, watch time, average view duration, impressions, and CTR.

    • How to read audience-retention patterns.

    • How to understand traffic sources and viewer discovery.

    • How to use Audience reports, including new, casual, and regular viewers.

    • How to compare videos fairly and use Advanced Mode.

    • How to review Shorts Analytics separately.

    • How to combine comments with performance data.

    • How to use Analytics to plan future videos.

    • How to build a simple monthly review routine.

    • Common mistakes, benefits, limitations, myths, and frequently asked questions.

    The core workflow is: Discovery → Choice → Watch → Stay or Leave → Return.

    How to Open and Navigate YouTube Studio

    Open YouTube Studio on a Computer

    1. Sign in to the Google Account connected to your YouTube channel.

    2. Open YouTube Studio.

    3. Use the left navigation to choose the area you need.

    The exact menu can vary by account, permissions, region, feature rollout, and future updates. Common areas include Dashboard, Content, Analytics, Community, Subtitles, Content detection, Earn, Customization, and Audio Library.

    • Dashboard: Quick overview of recent channel activity and items that may need attention.

    • Content: Manage videos, Shorts, visibility, details, and publishing status.

    • Analytics: Review channel and video performance.

    • Community: Review and manage comments and community activity.

    • Subtitles: Manage captions and subtitle tracks.

    • Earn: Review monetization information when available to your channel.

    • Customization: Manage channel appearance and basic channel presentation.

    • Audio Library: Find YouTube-provided music and sound effects under the current terms shown in Studio.

    When you open an individual video from Content, you can also access video-specific details, Analytics, Editor, comments, subtitles, and copyright-related information where available.

    For privacy, do not publish screenshots that reveal email addresses, private revenue, client information, private viewer information, or other confidential data.

    Figure 1. YouTube Studio uses its main navigation to give creators access to areas such as Dashboard, Content, and Analytics.

    Explanation: This is an illustrative navigation guide rather than a screenshot. Use it to understand the purpose of the main areas; exact wording and positions may change as YouTube updates Studio.

    How to Use the YouTube Studio Dashboard

    The Dashboard is useful for a quick channel check. It can surface recent content, channel activity, comments, notices, and other information YouTube wants the creator to see.

    Use the Dashboard to answer: What needs attention? Use Analytics to answer: What happened, and what can I learn?

    Do not refresh the Dashboard constantly. Early rankings and Realtime movements can change as more viewer activity arrives and YouTube validates data.

    A Practical Dashboard Routine

    • Check important notices.

    • Look for obvious publishing or processing problems.

    • Review recent comments that may report errors.

    • Notice unusual changes, but investigate them in Analytics before changing strategy.

    The Dashboard should help you manage your channel, not make you react emotionally to every movement in a metric.

    Figure 2. The YouTube Studio Dashboard provides a quick overview of recent channel activity, content performance, notices, and other information that may need attention.

    Explanation: Use the Dashboard for a quick check. Open Analytics when you need deeper information about discovery, engagement, audience behaviour, or the performance of one particular video.

    How to Open YouTube Analytics for Your Channel and Individual Videos

    Channel Analytics

    1. Open YouTube Studio.

    2. Select Analytics from the left menu.

    3. Choose the date range and report that matches your question.

    Channel Analytics helps you look for broad patterns across multiple videos, formats, traffic sources, and audience reports.

    Individual-Video Analytics

    1. Open YouTube Studio.

    2. Select Content.

    3. Choose the video you want to investigate.

    4. Open Analytics for that video.

    Use the second path to investigate one particular video.

    Figure 3. Channel Analytics shows broader performance patterns, while individual-video Analytics helps investigate one specific upload.

    Explanation: Use channel Analytics to identify patterns and individual-video Analytics to investigate one upload in more detail. The figure is illustrative; exact Studio layout may vary.

    Always check the selected date range. A video can look very different over its first 24 hours, first week, first 28 days, or lifetime. Some reports also contain limited or estimated data, especially when the audience is small.

    How to Understand the YouTube Analytics Overview

    The Overview tab gives a high-level summary of channel or video performance. Depending on the level and account, it can include views, watch time, subscribers, Realtime activity, typical performance, and other cards.

    Use Overview to find the next question. For example, if views changed sharply, ask whether the change came from Search, Browse, Suggested videos, external traffic, Shorts Feed, or another source.

    Do not use this workflow: See One Number → Assume the Cause → Change Everything.

    Use this instead: See a Number → Ask a Question → Open the Relevant Report → Compare → Review the Video → Decide.

    Figure 4. The YouTube Analytics Overview provides a high-level summary that can help creators identify which performance areas deserve closer investigation.

    Explanation: Use Overview to notice patterns, then open the detailed report that matches the question. This figure is illustrative rather than a copy of the current YouTube interface.

    How to Understand Views, Watch Time, and Average View Duration

    Views

    Views describe viewing activity. A view is useful, but it does not tell you how long someone watched or how they discovered the video.

    Watch Time

    Watch time is the total amount of time viewers spent watching. A video can have fewer views but still create more watch time if viewers stay longer.

    Average View Duration

    Average view duration summarizes the average amount of time watched per view. Video length affects how you interpret it, so compare similar content rather than chasing one universal number.

    High CTR with weak viewing can mean the packaging attracted clicks but the video did not meet viewer expectations. Strong average viewing with limited impressions can lead to a different question about discovery.

    Before making a decision, ask: What other metric do I need before I decide why this happened?

    Figure 5. Views, watch time, and average view duration describe different parts of viewer behaviour and are more useful when interpreted together.

    Explanation: Views measure viewing activity, watch time measures total viewing time, and average view duration summarizes how long viewers watched per view. Compare them with similar videos and use retention for deeper investigation.

    How to Understand Impressions and Impressions Click-Through Rate

    An impression is an eligible occasion when YouTube shows a registered thumbnail on a surface that counts toward the impressions metric. Not every view comes from a counted impression.

    Impressions click-through rate, or CTR, measures how often viewers watched after seeing a registered impression. YouTube notes that CTR varies by content, audience, and where the impression was shown. There is no single CTR target that guarantees success.

    A video can receive more impressions and views while CTR falls because the thumbnail is being shown to a broader audience. That is why CTR should be read together with impression volume, views, watch time, retention, and traffic sources.

    Think of the viewer journey as: Shown → Chosen → Watched.

    Figure 6. Impressions describe opportunities to see a thumbnail, click-through rate describes the decision to watch, and engagement metrics help explain what happened after the click.

    Explanation: Interpret impressions and CTR together with views, watch time, and retention. A high CTR alone does not guarantee strong viewing or future recommendations.

    Record important title or thumbnail changes with the date. Otherwise, later Analytics may be difficult to interpret because you may forget what changed.

    How to Understand Audience Retention

    Audience retention helps you see where viewers continue watching, gradually leave, replay a section, skip ahead, or stop watching. YouTube provides the report at individual-video level, and retention data can take time to process.

    Common Retention Patterns

    • A relatively flat section can mean viewers continued watching at a steady rate.

    • A gradual decline is normal in many videos as some viewers leave over time.

    • A spike can appear when viewers rewatch or share a section, but it is not automatically proof that the section was excellent.

    • A dip can appear when viewers skip or leave, but you still need to inspect what happened in the video.

    • The intro report can help you study the beginning of a video, including the first 30 seconds when the report is available.

    Do not use: See a Dip → Panic → Rebuild the Entire Channel.

    Use: Find Change → Watch Part → Ask Why → Choose Improvement → Test Again.

    Figure 7. Audience-retention patterns can help identify where viewers continue watching, gradually leave, replay content, skip ahead, or stop watching.

    Explanation: A retention graph shows where viewer behaviour changed, not the exact reason. Review the corresponding section, comments, visuals, narration, and pacing before deciding what to improve.

    How to Understand Traffic Sources and How Viewers Find Your Videos

    Traffic-source reports help explain how viewers discovered your content. Common sources can include YouTube Search, Browse features, Suggested videos, channel pages, playlists, end screens, cards, notifications, external sources, direct or unknown traffic, and the Shorts Feed.

    Search traffic can reveal search terms when enough reportable data is available. External reports may identify websites or apps, but low-volume details can be limited for privacy and reporting reasons.

    Do not assume that every detailed row must add exactly to the headline total. YouTube can limit low-volume detailed information even while the activity contributes to broader totals.

    Traffic-source reports are most valuable when they help you understand the complete viewer journey.

    Figure 8. YouTube viewers can discover videos through several sources, including Search, Browse features, Suggested videos, channel pages, playlists, external websites, and notifications.

    Explanation: Combine traffic sources with CTR, watch time, and retention to understand what happened after discovery. Shorts can have a different discovery pattern through the Shorts Feed.

    Do not buy views or traffic. Artificial engagement can create misleading data and can create separate policy problems.

    How to Understand the Audience Tab and Your Viewers

    The Audience tab helps you understand who is actively watching. YouTube currently defines monthly audience as the total unique viewers who watched your content during the previous 28 days. It is recalculated daily as a rolling 28-day measure.

    New, Casual, and Regular Viewers

    • New viewers watched your content for the first time in the selected period.

    • Casual viewers watched your channel at least once per month for one to five months in the past year.

    • Regular viewers watched at least once per month for more than six months in the past year.

    YouTube states that these audience segments do not directly affect reach or monetization. A low regular-viewer percentage can be normal, especially for newer channels, trending content, and channels that mainly publish Shorts.

    Other Audience reports can include when viewers are on YouTube, device type, age, gender, geography, subtitle languages, watch time from subscribers, what your audience watches, channels your audience watches, and formats your viewers watch. Some information can be limited when reporting thresholds are not met.

    Use Audience information together with Traffic Sources + Retention + Comments + Topic Performance.

    Figure 9. YouTube’s Audience reports can help creators understand new, casual, and regular viewers together with other audience patterns.

    Explanation: Audience information can guide planning, but it does not guarantee reach, growth, or monetization. Use it to understand active viewers and repeated interests without stereotyping individuals.

    How to Compare Videos and Identify Useful Performance Patterns

    Comparisons are most useful when the videos are reasonably similar. Compare the same format, related topics, similar lengths, and comparable time periods whenever possible.

    • Compare first 24 hours with first 24 hours.

    • Compare first 7 days with first 7 days.

    • Compare first 28 days with first 28 days.

    • Separate Shorts from long-form unless the question genuinely requires a cross-format comparison.

    Advanced Mode can compare videos, groups, playlists, time periods, and metrics. Custom groups can contain up to 500 videos, playlists, or channels, and creators can save up to 50 reports under current YouTube guidance.

    Useful comparison questions include whether certain topics, editing styles, video lengths, or traffic sources repeatedly behave differently. However, correlation is not proof of cause.

    YouTube itself recommends treating Analytics as an ongoing cycle of reviewing data, identifying insights, and applying what you learn.

    Figure 10. Fair video comparisons use similar content, comparable time periods, and several relevant metrics to identify repeated performance patterns.

    Explanation: Treat comparisons as evidence for testing, not proof that one factor caused the result. One unusually strong or weak video is not automatically a reliable pattern.

    How to Use Advanced Mode Without Becoming Overwhelmed

    Advanced Mode gives you deeper control over content, dates, breakdowns, metrics, filters, comparisons, charts, saved reports, and exports. You do not need to use all of these at once.

    Use this simple sequence: Content → Date → Metric → Comparison.

    1. Write one question.

    2. Choose the relevant video, group, playlist, or channel.

    3. Choose a fair date range.

    4. Select only the metrics needed for the question.

    5. Add a comparison or filter only if it helps answer the question.

    6. Write down one useful insight and one possible test.

    YouTube currently allows groups of up to 500 videos, playlists, or channels, saved reports up to 50, and export of the current view. Downloaded reports can have row limits, so check current Help guidance when exporting large datasets.

    If you use AI to analyze an exported report, tell the AI to use only the supplied data, identify possible patterns, preserve uncertainty, and not invent missing metrics or claim causation.

    That is enough to make Advanced Mode useful without allowing Analytics to take over your entire content-creation process.

    Figure 11. Advanced Mode is easier to use when you begin with one question and select only the content, dates, metrics, comparisons, and filters needed to investigate it.

    Explanation: A focused question is more useful than collecting every available metric. Finish with one insight and one practical improvement to test.

    How to Review Shorts Analytics Separately

    Shorts should usually be analyzed separately from long-form videos because the viewer experience is different. Current Shorts reports can include Views, Engaged views, Shown in feed, Stayed to watch, average view duration, average percentage viewed, traffic sources, likes, subscribers, and remix information where available.

    Starting March 31, 2025, YouTube changed Shorts views so a view counts when a Short starts to play or replay, with no minimum watch-time requirement. The previous Shorts view methodology remains available as Engaged views, which reflects occasions where viewers chose to continue watching.

    YouTube states that YPP eligibility and Shorts ad revenue sharing continue to use Engaged views rather than the broader public Shorts view count.

    Shown in feed describes how often the Short appeared in the Shorts Feed. Stayed to watch describes the percentage of occasions viewers stayed rather than swiping away. For Shorts, average view duration and average percentage viewed are based on engaged viewing behaviour.

    Do not compare every Short with a viral hit or rely on one fixed Stayed-to-watch benchmark. Compare similar Shorts and look for repeated patterns.

    A useful Shorts strategy focuses on real viewer behaviour and repeated patterns, not one headline number.

    Figure 12. Shorts Analytics is easier to understand when you separate feed exposure, the decision to stay or swipe, engaged viewing, viewing duration, and later viewer actions.

    Explanation: Since the 2025 view-count change, combine the public Views metric with Engaged views, Stayed to watch, viewing duration, traffic sources, and other relevant signals.

    AI-assisted Shorts still require human review, factual checking, licensing checks, and AI disclosure when YouTube’s current rules require it. Do not mass-produce repetitive Shorts simply because one format performed well.

    How to Use Comments and Viewer Feedback With Analytics

    Analytics shows what viewers did. Comments show what some viewers chose to say. Neither source is complete by itself.

    • Use comments to find repeated questions.

    • Look for reports of confusing explanations, unreadable text, audio problems, caption errors, factual mistakes, or missing steps.

    • Verify factual corrections before changing the article or video.

    • Do not treat one negative comment as representative of the entire audience.

    YouTube provides comment moderation controls such as holding potentially inappropriate comments, blocked words, link controls, hidden users, and moderation permissions. Comments with blocked words or links can be held for review for up to 60 days under current guidance.

    YouTube has also been rolling out AI-assisted ways to find and manage comments by broader topic or meaning. Availability can vary, so do not assume every channel sees the same tool.

    If you use AI to summarize comments, remove unnecessary personal information and tell the AI to organize only real comments you provide. Do not invent viewer feedback.

    Use: Analytics + Viewer Feedback + Human Review.

    Figure 13. Comments can provide useful context for Analytics when repeated viewer feedback is compared with actual performance data and a human review of the video.

    Explanation: Analytics describes behaviour, comments add context, and human review checks what actually happened in the content. Together they can support measured improvements.

    How to Use YouTube Analytics to Plan Your Next Videos

    Analytics can help you plan future content by showing repeated performance patterns, Search terms, audience interests, strong entry videos, returning-viewer behaviour, and topic requests in comments.

    The Trends tab can help you explore searches and content gaps, although some insights are limited by country, language, device, and available data. YouTube’s Inspiration tools can also suggest ideas, titles, thumbnails, and outlines with AI, but YouTube warns that AI-generated suggestions may be inaccurate or inappropriate and should be reviewed.

    Use a three-signal rule before choosing a topic: Analytics + Viewer Need + Channel Fit.

    • Analytics: Is there evidence that viewers care about this topic or related questions?

    • Viewer Need: Does the video solve a clear problem or provide a useful result?

    • Channel Fit: Does the topic belong naturally within the purpose of your channel?

    Use successful videos as evidence for useful principles, not as a reason to copy the same video repeatedly. If an older video is still useful but has outdated instructions, consider updating or replacing it rather than only creating another version.

    The goal is to use real viewer behaviour to make your next content decision more informed.

    Figure 14. Analytics-based content planning combines performance patterns, Search terms, audience interests, viewer feedback, and relevant trends before choosing the next useful topic.

    Explanation: Use several signals, confirm viewer need and channel fit, add original value, and choose one improvement to test in the next video.

    How to Build a Simple Monthly YouTube Analytics Review Routine

    A monthly review gives enough structure to learn without spending every day watching numbers. Choose a consistent day each month and use the same basic sequence.

    1. Open YouTube Studio and Analytics.

    2. Choose a consistent date range.

    3. Record your main channel numbers.

    4. Identify the strongest videos and content types.

    5. Investigate unusual increases or declines.

    6. Review impressions and CTR.

    7. Review watch time and average view duration.

    8. Open retention for important videos.

    9. Review traffic sources.

    10. Review Audience reports.

    11. Review Shorts separately.

    12. Read useful viewer comments.

    13. Review any experiments you ran.

    14. Compare similar videos.

    15. Use Advanced Mode only when a deeper question requires it.

    16. Write three lessons.

    17. Choose one to three improvements.

    18. Plan the next useful content.

    19. Save the review record.

    20. Back up important exports and notes.

    A simple monthly scorecard can contain six headings: Performance, Discovery, Engagement, Audience, Content, and Feedback. Finish with Next Month.

    If you can answer these three questions, your review has done its job: What changed? What did I learn? What will I test next?

    Figure 15. A monthly YouTube Analytics review turns performance data into a small number of useful lessons, improvements, and future content ideas.

    Explanation: You do not need every metric every day. A repeatable routine helps you record, compare, investigate, learn, and choose practical improvements.

    Common YouTube Analytics Mistakes Beginners Should Avoid

    Mistake 1: Looking Only at Views

    Views are important, but they do not explain discovery, viewing duration, retention, or audience behaviour.

    How to Avoid This Mistake: Check the metric group that matches the question.

    Mistake 2: Treating CTR as a Universal Score

    CTR varies by audience, content, and where the impression appeared.

    How to Avoid This Mistake: Compare your own similar videos and include impressions and traffic source context.

    Mistake 3: Blaming the Thumbnail for Weak Viewing

    A thumbnail can affect the choice to watch but cannot explain what happened after the click.

    How to Avoid This Mistake: Check retention, watch time, and the actual video before changing packaging.

    Mistake 4: Treating Every Retention Dip as Bad

    A dip only shows that behaviour changed.

    How to Avoid This Mistake: Watch the corresponding section and look for repeated evidence.

    Mistake 5: Treating Every Spike as Success

    A spike may reflect replay, sharing, confusion, or another behaviour.

    How to Avoid This Mistake: Review the video section before interpreting it.

    Mistake 6: Comparing Shorts With Long Videos

    The formats use different viewer experiences and some different metrics.

    How to Avoid This Mistake: Compare similar content whenever possible.

    Mistake 7: Confusing Shorts Views With Engaged Views

    Since March 31, 2025, public Shorts Views and Engaged views measure different things.

    How to Avoid This Mistake: Check the metric name before comparing performance or monetization-related progress.

    Mistake 8: Drawing Conclusions From Tiny Samples

    A few viewers can change a percentage dramatically.

    How to Avoid This Mistake: Check the underlying sample size and allow more data to develop.

    Mistake 9: Treating Missing Data as Zero

    Some detailed data is hidden when reporting thresholds are not met.

    How to Avoid This Mistake: Label it as unavailable or limited rather than inventing a zero.

    Mistake 10: Comparing Different Time Periods

    Lifetime versus first seven days is not a fair comparison.

    How to Avoid This Mistake: Use comparable windows.

    Mistake 11: Comparing Unrelated Topics or Formats

    Topic and viewer intent affect metrics.

    How to Avoid This Mistake: Group similar content before comparing.

    Mistake 12: Treating Correlation as Cause

    Two changes happening together do not prove one caused the other.

    How to Avoid This Mistake: Use careful wording and repeat tests.

    Mistake 13: Changing Too Many Things at Once

    If you change title, thumbnail, intro, length, and editing together, later results are hard to interpret.

    How to Avoid This Mistake: Change one meaningful variable at a time when practical.

    Mistake 14: Reacting to Every Daily Change

    Normal performance moves from day to day.

    How to Avoid This Mistake: Use a scheduled review routine.

    Mistake 15: Explaining Everything as “the Algorithm”

    That phrase hides the actual question.

    How to Avoid This Mistake: Check impressions, traffic sources, CTR, retention, and viewer response.

    Mistake 16: Refreshing Realtime Constantly

    Realtime is estimated and can differ from final counts.

    How to Avoid This Mistake: Use it for awareness, not final conclusions.

    Mistake 17: Copying Another Creator’s Numbers

    Another channel has different viewers, history, topics, and traffic sources.

    How to Avoid This Mistake: Use your own comparable history as the main reference.

    Mistake 18: Copying a Successful Video Repeatedly

    One strong result does not guarantee the same result again.

    How to Avoid This Mistake: Reuse principles, not repetitive content.

    Mistake 19: Ignoring Lower-View Videos

    A lower-view video may still have strong engagement or serve an important audience need.

    How to Avoid This Mistake: Review several metrics and the purpose of the video.

    Mistake 20: Deleting a Weak Video Too Quickly

    Early data may be incomplete.

    How to Avoid This Mistake: Investigate accuracy, search potential, and viewer value before deleting.

    Mistake 21: Ignoring Viewer Feedback Because Metrics Look Strong

    Metrics do not reveal every technical or factual problem.

    How to Avoid This Mistake: Read repeated comments and review the actual video.

    Mistake 22: Assuming Analytics Proves Viewer Satisfaction

    Analytics measures behaviour, not every feeling or reason.

    How to Avoid This Mistake: Treat satisfaction as something you infer cautiously from several signals.

    Mistake 23: Chasing Only Higher Numbers

    A higher number is not always better without context.

    How to Avoid This Mistake: Ask what the metric measures and whether it supports the viewer goal.

    Mistake 24: Buying Views, Subscribers, or Engagement

    Artificial activity can create misleading data and policy risk.

    How to Avoid This Mistake: Build real viewer interest through useful content.

    Mistake 25: Treating Advanced Mode as Automatic Strategy

    Advanced Mode gives more data, not automatic decisions.

    How to Avoid This Mistake: Begin with one question and end with one test.

    Mistake 26: Tracking Too Many Metrics

    Too many metrics can create analysis paralysis.

    How to Avoid This Mistake: Track the small group that supports your current goal.

    Mistake 27: Assuming Past Analytics Guarantees the Future

    Viewer interests and platform conditions can change.

    How to Avoid This Mistake: Use past data as evidence for the next test, not as a promise.

    A better mindset is: What does this metric measure? What other information do I need? Is there a repeated pattern worth acting on?

    Beginner Rule: Observe → Ask → Compare → Verify → Improve. Do not use: See Number → Panic → Change Everything.

    Analytics works best when it helps you make calmer, more informed decisions about your content.

    Figure 16. Common Analytics mistakes include relying on one metric, comparing unsuitable content, reacting to small samples, changing too many variables, and treating past performance as a guarantee.

    Explanation: Use relevant signals, context, repeated patterns, viewer feedback, and human review. Make measured improvements rather than reacting to every number.

    Benefits of Using YouTube Studio and Analytics for a Faceless Channel

    YouTube Studio and YouTube Analytics can help you manage a faceless channel more systematically. The main benefit is being able to make decisions using actual viewer behaviour instead of guessing.

    Benefit 1: See What Is Actually Happening

    Use measurable information such as views, watch time, discovery, audience, and content performance instead of relying only on feelings.

    Benefit 2: Identify Stronger Content Patterns

    Repeated performance across several similar videos can help you recognize useful topics and formats.

    Benefit 3: Understand Discovery

    Traffic sources help you learn whether viewers arrive through Search, Browse, Suggested videos, external links, playlists, or other paths.

    Benefit 4: See What Happens After the Click

    CTR explains the choice to watch; watch time and retention help explain what happened next.

    Benefit 5: Improve Video Structure

    Retention can point you toward introductions, explanations, pacing, demonstrations, or visuals that deserve review.

    Benefit 6: Learn More About Your Audience

    Audience reports provide useful patterns about active viewers, devices, geographies, and related interests when enough data exists.

    Benefit 7: Build Content for Returning Viewers

    Series and related tutorials can help viewers continue learning even when the channel is faceless.

    Benefit 8: Improve Titles and Thumbnails Carefully

    Use impressions, CTR, views, and post-click viewing behaviour together instead of redesigning packaging because of personal preference alone.

    Benefit 9: Find Problems Earlier

    Analytics and comments can reveal technical, discovery, pacing, or clarity issues before you repeat them across many videos.

    Benefit 10: Learn From Strong Videos Without Copying Them

    Study principles such as topic relevance, clearer packaging, stronger intros, and useful traffic sources rather than duplicating one upload.

    Benefit 11: Compare Videos More Fairly

    Advanced Mode can help compare similar content, groups, time periods, and metrics.

    Benefit 12: Keep Better Records

    Exports and monthly notes make it easier to remember what changed and what you tested.

    Benefit 13: Make Focused Improvements

    Analytics can narrow a broad problem into a more specific test, such as shortening an introduction.

    Benefit 14: Reduce Random Content Decisions

    Combine Analytics, Search questions, viewer comments, channel fit, and research before choosing topics.

    Benefit 15: Understand Active Audience Size Better

    Monthly audience and unique viewers provide context beyond subscriber count.

    Benefit 16: Discover Videos Reaching New Audiences

    Unique-viewer information can help identify videos that reached people beyond the existing subscriber base.

    Benefit 17: Support Accessibility Improvements

    Viewer behaviour and comments can reveal unreadable text, caption problems, pacing issues, or confusing demonstrations.

    Benefit 18: Manage Shorts Separately

    Separate analysis prevents long-form expectations from being applied to Shorts incorrectly.

    Benefit 19: Create a Repeatable Learning Process

    Publish → Measure → Review → Learn → Improve → Publish Again.

    Benefit 20: Base Decisions on Your Own Channel

    Your own comparable history is usually more useful than an unsupported universal benchmark.

    Benefit 21: Avoid Overreacting to One Metric

    Different reports answer different questions, which makes one-number panic less likely.

    Benefit 22: Make the Workflow More Efficient

    Focus work where there is evidence of a meaningful issue rather than changing everything.

    Benefit 23: See Beyond Subscriber Count

    Discovery, engagement, audience, and content reports give a broader picture than subscribers alone.

    Benefit 24: Improve Without Showing Your Face

    You can study topics, narration, visuals, pacing, titles, thumbnails, and audience interests without appearing on camera.

    Benefit 25: Make Decisions More Calmly

    Analytics can replace “I have no idea what happened” with “Here are the areas I should investigate.”

    Analytics Still Does Not Guarantee Success

    Analytics cannot guarantee more views, more subscribers, viral performance, monetization approval, a successful topic, a successful thumbnail, or future recommendation exposure. It is a measurement and learning system, not a promise.

    A simple benefits summary is: understand performance, find discovery patterns, study engagement, understand audience behaviour, compare videos, improve packaging, identify content ideas, review Shorts separately, use comments, keep records, test improvements, and make better-informed decisions.

    The main benefit is not More Data. It is Better Questions and Better-Informed Decisions.

    Figure 17. YouTube Studio and Analytics can help faceless creators understand performance, audience behaviour, discovery, content patterns, and areas for future improvement.

    Explanation: The value of Analytics comes from turning viewer behaviour into useful questions and measured decisions. It can support improvement but cannot guarantee future views, subscribers, monetization, or growth.

    Limitations of YouTube Analytics

    YouTube Analytics is useful, but it has limits. It can help you understand measurable viewer behaviour and identify patterns, but it cannot tell you everything about why a viewer made a particular decision or guarantee what will happen next.

    Use Analytics as Evidence — Not as Perfect Knowledge.

    Limitation 1: Analytics Cannot Read a Viewer’s Mind

    It can show where behaviour changed, but not the exact private reason a viewer clicked, left, replayed, or returned.

    How to Reduce This Limitation: Use Analytics to identify where something happened, then review the content and comments to investigate why.

    Limitation 2: Some Analytics Data Is Limited

    YouTube limits some detailed data when reporting thresholds are not met.

    How to Reduce This Limitation: Do not invent missing information; label it unavailable or limited.

    Limitation 3: Detailed Rows May Not Add Up to the Total

    Low-volume details may be hidden even though activity contributes to totals.

    How to Reduce This Limitation: Treat visible rows as the reportable breakdown, not every individual action.

    Limitation 4: Small Channels May Have Very Little Data

    New channels may not yet have stable audience, demographic, traffic, or retention patterns.

    How to Reduce This Limitation: Combine early data with research and content review while more activity develops.

    Limitation 5: Small Samples Can Produce Unstable Percentages

    A few views can change CTR, retention, or conversion percentages dramatically.

    How to Reduce This Limitation: Check the underlying sample size before making major decisions.

    Limitation 6: Some Metrics Are Estimates

    Unique viewers and some other values are estimates rather than exact counts of identified people.

    How to Reduce This Limitation: Describe them as estimates.

    Limitation 7: Realtime Data Is Not Final Data

    YouTube says Realtime activity shows estimates of potential view activity.

    How to Reduce This Limitation: Use Realtime for early awareness, not final conclusions.

    Limitation 8: Some Reports Need Processing Time

    Audience-retention and other reports can take time to populate.

    How to Reduce This Limitation: Allow processing time before a detailed review.

    Limitation 9: Revenue Information Can Be Delayed or Adjusted

    Estimated revenue is not the same as finalized payment information.

    How to Reduce This Limitation: Use finalized financial reports when accounting accuracy matters.

    Limitation 10: Analytics Cannot Prove Cause and Effect

    A change in thumbnail, views, and CTR occurring together does not prove exact causation.

    How to Reduce This Limitation: Repeat comparable tests and use cautious wording.

    Limitation 11: Different Videos Attract Different Audiences

    Topic, length, intent, traffic, and format affect performance.

    How to Reduce This Limitation: Compare reasonably similar content.

    Limitation 12: Metric Definitions Can Change

    Historical comparisons can become difficult when YouTube changes a metric, as happened with Shorts views in 2025.

    How to Reduce This Limitation: Check current definitions before long-term comparisons.

    Limitation 13: The Studio Interface Can Change

    YouTube began gradually rolling out an updated Studio experience in July 2026.

    How to Reduce This Limitation: Learn the purpose of reports, not only button positions.

    Limitation 14: Some Reports Are Not Available Everywhere

    Desktop and mobile can show different levels of detail.

    How to Reduce This Limitation: Use desktop Studio when deeper analysis is needed.

    Limitation 15: Analytics Cannot Fact-Check Your Video

    Strong performance does not prove the information is correct.

    How to Reduce This Limitation: Verify important claims separately.

    Limitation 16: Analytics Cannot Confirm Copyright Permission

    Views and retention do not prove that music, images, footage, fonts, templates, or voices are properly licensed.

    How to Reduce This Limitation: Keep separate rights and licence records.

    Limitation 17: Analytics Cannot Decide Whether AI Disclosure Is Required

    Disclosure is a publishing-policy question, not an Analytics metric.

    How to Reduce This Limitation: Review current YouTube disclosure guidance.

    Limitation 18: Good Analytics Does Not Guarantee Monetization

    Performance and YouTube Partner Program review are separate matters.

    How to Reduce This Limitation: Treat monetization compliance as a separate workflow.

    Limitation 19: Analytics Cannot Guarantee Future Views

    Past performance is not a promise of future recommendations or audience interest.

    How to Reduce This Limitation: Use past data to inform the next test.

    Limitation 20: A Successful Pattern Can Stop Working

    Viewer interests, search demand, software, and YouTube features can change.

    How to Reduce This Limitation: Review performance periodically.

    Limitation 21: Analytics Can Encourage Overreaction

    Frequent checking can make ordinary movement feel important.

    How to Reduce This Limitation: Use scheduled reviews and a clear reason for changes.

    Limitation 22: Analytics Can Create Analysis Paralysis

    Creators can spend more time measuring than creating.

    How to Reduce This Limitation: Finish each review with one main insight and one useful action.

    Limitation 23: Automated Tools Cannot Give a Guaranteed Explanation

    AI can organize supplied Analytics but cannot know exactly what viewers thought.

    How to Reduce This Limitation: Ask AI for patterns and questions, not certainty about motives.

    Limitation 24: AI Analysis Is Only as Good as the Data You Provide

    Missing context can make an AI comparison weak.

    How to Reduce This Limitation: Provide relevant metrics and tell the AI not to invent missing data.

    Limitation 25: Analytics Exports Can Contain Private Information

    Reports may contain revenue, audience, and business data.

    How to Reduce This Limitation: Remove unnecessary private information and review the receiving service’s privacy controls before sharing.

    Limitation 26: Analytics Does Not Replace Human Review

    A graph cannot understand your teaching goal, script, and visual choices the way a careful creator can.

    How to Reduce This Limitation: Use Data + Video Review + Viewer Feedback + Judgment.

    A better way to think about Analytics is: Analytics will show me where I should ask better questions.

    Beginner Rule: Measure → Recognize the Limits → Investigate → Compare → Make a Careful Decision.

    YouTube Analytics is a powerful measurement tool, but it works best when combined with context, human judgment, current information, and repeated evidence.

    Figure 18. YouTube Analytics has important limitations, including estimated or limited data, processing delays, changing metrics, incomplete explanations of viewer behaviour, and no guarantee of future results.

    Explanation: Combine performance data with adequate sample sizes, comparable videos, viewer feedback, human review, and current YouTube guidance before making major decisions.

    Myths About YouTube Analytics and Channel Performance

    Many unofficial rules turn complicated viewer behaviour into simple formulas. Current YouTube guidance describes search and discovery as personalized systems based on performance and viewer interests, not one secret metric.

    Myth 1: “A High CTR Guarantees More Views”

    Reality: CTR matters, but it does not guarantee continued impressions or strong post-click viewing.

    Myth 2: “There Is One Perfect CTR for Every Channel”

    Reality: CTR varies by content, audience, and where the impression was shown.

    Myth 3: “High Audience Retention Guarantees Recommendations”

    Reality: Retention is useful, but recommendations use multiple viewer and content signals.

    Myth 4: “YouTube Only Cares About Watch Time”

    Reality: YouTube describes its systems as trying to connect viewers with content they are likely to watch and enjoy, including satisfaction-related signals.

    Myth 5: “Longer Videos Always Perform Better”

    Reality: Length should match the viewer need. Unnecessary length can reduce clarity.

    Myth 6: “Short Videos Cannot Succeed”

    Reality: YouTube does not state that one ordinary video format or length is automatically preferred.

    Myth 7: “If Views Drop, YouTube Is Punishing My Channel”

    Reality: A decline can have many explanations, including topic demand, competition, traffic changes, or viewer response.

    Myth 8: “The Algorithm Likes or Hates My Channel”

    Reality: That wording hides the measurable question. Check discovery, choice, viewing, and audience data instead.

    Myth 9: “Every New Video Gets the Same Fixed Test Audience”

    Reality: YouTube does not document one universal fixed test number for every upload.

    Myth 10: “Fewer Impressions Automatically Means a Bad Video”

    Reality: Low impressions raise a discovery question, not an automatic quality conclusion.

    Myth 11: “Every View Comes From a Counted Impression”

    Reality: Some discovery paths do not count as registered thumbnail impressions.

    Myth 12: “A Viral Video Shows Exactly What I Should Make Forever”

    Reality: One exceptional result is evidence to investigate, not a permanent formula.

    Myth 13: “More Uploads Automatically Mean More Growth”

    Reality: Publishing frequency does not replace originality, usefulness, accuracy, and viewer value.

    Myth 14: “You Must Upload Every Day”

    Reality: YouTube does not require one universal daily schedule for discovery.

    Myth 15: “Subscribers Determine How Many Views Every Video Should Get”

    Reality: Subscribers are not the same as active viewers.

    Myth 16: “If People Watch, the Information Must Be Accurate”

    Reality: Performance does not fact-check content.

    Myth 17: “Strong Analytics Means a Video Is Copyright-Safe”

    Reality: Analytics and copyright permission are separate issues.

    Myth 18: “Good Performance Guarantees Monetization”

    Reality: Monetization uses separate eligibility and policy review.

    Myth 19: “AI-Generated Videos Are Automatically Suppressed”

    Reality: YouTube’s discovery guidance does not describe AI use by itself as an automatic suppression rule; originality, value, policy compliance, and viewer response still matter.

    Myth 20: “AI Analytics Tools Can Tell Me Exactly Why My Video Failed”

    Reality: AI can identify possible patterns in supplied data but cannot know each viewer’s thoughts.

    Myth 21: “One Bad Video Damages Every Future Video”

    Reality: One weak upload does not permanently determine the performance of all future content.

    Myth 22: “Changing a Thumbnail Always Resets the Video”

    Reality: YouTube explains that performance can change because viewers interact differently with new packaging, not because of a simple automatic reset.

    Myth 23: “Tags Are the Main Secret to Getting Recommended”

    Reality: Current discovery guidance focuses much more broadly on relevance, performance, and viewer personalization.

    Myth 24: “There Is a Secret Analytics Number That Makes a Video Viral”

    Reality: There is no official Viral Score metric.

    Myth 25: “Analytics Can Predict My Next Video”

    Reality: Analytics can inform the next choice but cannot predict future performance with certainty.

    When you hear a claim such as “YouTube always does X,” ask whether it is an official current rule, whether it applies to all formats, whether it is only a pattern, and whether several other factors could explain the result.

    Beginner Rule: Avoid Secret Formula Thinking. Use Viewer Behaviour + Reliable Evidence + Repeated Patterns + Human Judgment.

    The purpose of YouTube Analytics is not to uncover a hidden trick. It is to help you understand your content and audience well enough to make better-informed decisions.

    Figure 19. Common YouTube Analytics myths often turn complicated viewer behaviour into unsupported fixed rules or guaranteed formulas.

    Explanation: Use current official guidance, several relevant metrics, repeated patterns, and human judgment instead of algorithm hacks or one supposedly perfect number.

    Frequently Asked Questions (FAQ)

    1. Do I need to understand every YouTube Analytics metric?

    No. Start with views, watch time, average view duration, impressions, CTR, retention, traffic sources, and Audience reports. Use Advanced Mode only when a specific question needs more detail.

    2. How often should I check YouTube Analytics?

    Use a brief post-publishing check for obvious problems, then allow data to develop. A structured monthly review is usually more useful than constant refreshing.

    3. Why does my Analytics page look different from tutorials online?

    YouTube began gradually rolling out an updated Studio experience in July 2026, and layouts also differ by device, account, and feature availability.

    4. What is the difference between channel Analytics and video Analytics?

    Channel Analytics shows broad patterns across the channel. Video Analytics investigates one particular upload.

    5. Is a higher number of views always better?

    More views means more viewing activity, but you still need watch time, retention, traffic, and other context to understand quality and viewer behaviour.

    6. What is a good YouTube click-through rate?

    There is no single number that every video must achieve. Compare similar videos on your own channel and include impressions and traffic-source context.

    7. Why can CTR fall while views increase?

    A video can reach a broader audience as impressions grow. CTR may decline while total views still increase.

    8. Why do total views not equal impressions multiplied by CTR?

    Not every view comes from a registered thumbnail impression.

    9. Why is audience-retention information missing?

    The report may still be processing or there may not be enough reportable activity.

    10. Does every retention drop mean my video is bad?

    No. A drop tells you where behaviour changed. Review the corresponding part before deciding why.

    11. Why are some Audience reports missing?

    YouTube limits some detailed reports when reporting thresholds are not met.

    12. What does monthly audience mean?

    It is the rolling 28-day total of unique viewers who watched your content, recalculated daily.

    13. Are unique viewers exact?

    No. YouTube treats unique viewers as an estimate.

    14. Should I compare Shorts with long-form videos?

    Usually not directly. Compare Shorts with similar Shorts and long-form tutorials with similar long-form tutorials.

    15. What is the difference between Shorts Views and Engaged views?

    Since March 31, 2025, Shorts Views count starts and replays. Engaged views retain the earlier meaningful-view methodology for viewers who chose to continue watching.

    16. Do many Shorts views guarantee monetization progress?

    No. YouTube states that YPP eligibility and Shorts ad revenue sharing continue to use Engaged views, and monetization has separate eligibility and policy requirements.

    17. Should I delete a video because it performs poorly during the first few days?

    Usually not based on early performance alone. Check accuracy, traffic, CTR, retention, search potential, and viewer value first.

    18. Should I change my thumbnail whenever CTR drops?

    No. CTR changes with impressions, audience, and traffic sources. Change packaging for a clear reason, not every movement.

    19. Can Analytics tell me exactly why a video performed badly?

    No. It shows measurable behaviour. You still need content review, viewer feedback, and cautious interpretation.

    20. Can ChatGPT or another AI analyze my YouTube Analytics?

    Yes, if you provide the data. Ask it to identify patterns without inventing missing information or claiming certainty about cause.

    21. Is it safe to upload an Analytics export to an AI tool?

    Review the file first. Remove unnecessary private, revenue, client, viewer, or commercially sensitive information and check the AI provider’s current privacy controls.

    22. Does strong Analytics mean my video is copyright-safe?

    No. Rights, licences, permissions, and attribution are separate responsibilities.

    23. Does good Analytics guarantee YouTube monetization?

    No. YPP eligibility and channel policy review are separate from performance metrics.

    24. Does Analytics tell me whether AI disclosure is required?

    No. Use current YouTube altered or synthetic content disclosure guidance.

    25. Why do videos receive fewer views than the channel has subscribers?

    Subscribers are not the same as active viewers. Many subscribers may not watch every upload, while non-subscribers may watch.

    26. Why do detailed Analytics rows not add to the total?

    Low-volume details can be limited for privacy and reporting thresholds while still contributing to broader totals.

    27. Is Advanced Mode necessary for beginners?

    No. Use standard Analytics first, then Advanced Mode for a specific comparison or deeper question.

    28. What is the most important YouTube Analytics metric?

    There is no single most important metric. Use the metric group that answers your question.

    29. Can Analytics guarantee that my next video will perform well?

    No. It can make the next decision better informed, but it cannot guarantee future views, CTR, recommendations, subscribers, or monetization.

    30. What should a complete beginner focus on first?

    Use the viewer journey: Discovery → Choice → Watch → Stay or Leave → Return. Connect each stage to only a few relevant metrics.

    The most useful beginner question is: What happened, what should I investigate, and what one useful improvement should I test next?

    Key Takeaways

    • YouTube Studio is the main channel-management area; Analytics is the measurement area.

    • Begin with a question, not a random metric.

    • Use the viewer journey: Discovery → Choice → Watch → Stay or Leave → Return.

    • Views, watch time, average view duration, impressions, CTR, retention, traffic sources, and audience reports answer different questions.

    • Do not judge a video from one metric.

    • Retention shows where viewer behaviour changes, not the exact reason.

    • Traffic sources explain how viewers found content.

    • Monthly audience and unique viewers provide context beyond subscriber count.

    • New, casual, and regular viewer groups are planning signals and do not directly determine reach or monetization.

    • Compare similar videos and comparable time periods.

    • Use Advanced Mode for focused questions, not for collecting every available number.

    • Review Shorts separately and distinguish Views from Engaged views.

    • Comments can add context to Analytics but do not represent every viewer.

    • A monthly review can turn data into a small number of useful lessons and tests.

    • Some data is estimated, delayed, or limited.

    • Analytics cannot verify factual accuracy, copyright permission, AI disclosure, or monetization eligibility.

    • Avoid fixed benchmarks, secret formulas, and algorithm-hack claims.

    • Strong past performance does not guarantee future results.

    • Use Analytics to improve useful, accurate, original, accessible, and responsibly published content.

    A simple workflow is: Publish → Measure → Review → Understand → Improve → Publish Again.

    Final Tip

    Do not use YouTube Analytics to search for a perfect number. Use it to answer one practical question at a time.

    • Are viewers finding the video?

    • Are they choosing it when they see it?

    • Are they staying after they start watching?

    • Where do they leave?

    • Which topics bring viewers back?

    • What one thing should I improve next?

    A simple rule for beginners is: One Question → One Useful Metric Group → One Improvement → Test Again.

    Keep your focus on Useful Content + Accurate Information + Original Value + Viewer Understanding + Responsible Publishing. Then use Analytics as your feedback system.

    Continue Learning

    YouTube Analytics becomes more useful when it is connected to the complete faceless-video workflow. Continue with these related AI Mastery guides:

    Article 066 — Reused Content, AI Disclosure, and Monetization for Faceless Videos: Beginner Guide (2026)

    Review monetization, reused content, repetitive content, AI disclosure, and channel-review requirements.

    Article 065 — YouTube Copyright and Licensing for AI Videos: Beginner Guide (2026)

    Learn how copyright, licences, music, stock assets, AI-generated material, and permissions affect publishing.

    Article 064 — How to Create YouTube Thumbnails, Titles, and Descriptions with AI: Beginner Guide (2026)

    Review the elements that influence whether viewers notice and choose your videos.

    Article 063 — How to Edit Faceless YouTube Videos and Audio: Beginner Guide (2026)

    Improve pacing, structure, visuals, narration, and editing using lessons from retention.

    Article 062 — How to Create Visuals for Faceless YouTube Videos with AI Images, Stock Footage, and Screen Recordings: Beginner Guide (2026)

    Create clearer and more useful visuals.

    Article 061 — How to Create Storyboards and Plan Scenes for Faceless YouTube Videos with AI: Beginner Guide (2026)

    Use storyboarding to plan visual flow before editing.

    Article 021 — How to Add Voice, Music, and Captions to AI Videos: Beginner Step-by-Step Guide (2026)

    Improve narration, audio, music, and captions while considering accessibility and licensing.

    Use the series as an improvement map: Weak CTR → review thumbnails and titles. Early retention drop → review scripts, openings, and editing. Confusing demonstrations → review visuals. Audio complaints → review voice, music, and captions. Copyright concerns → review licensing. Monetization questions → review Article 066.

    Article 067 completes the planned Faceless YouTube Video Creation Series by showing how to use real channel performance information to improve the workflow covered throughout the earlier articles.

    Sources and References

    The following official YouTube sources were reviewed for this article on August 8, 2026. YouTube Studio, Analytics reports, metric definitions, and interface layouts can change. Check current official guidance when first using a feature, after important update notices, and periodically.

    1. Get started with YouTube Analytics — Channel and video Analytics, Overview, Content, Reach, Engagement, Audience, Revenue, Trends, and current Studio notes.

    2. Learn how to use Advanced mode for analytics reports — Advanced Mode access, comparisons, groups, filters, metrics, saved reports, exports, and July 2026 Studio rollout note.

    3. Measure key moments for audience retention — Audience-retention access, interpretation, segments, and comparisons with videos of similar length.

    4. Understand your YouTube content performance — Content performance, traffic sources, retention, and Shorts content reports.

    5. Check your YouTube impressions and watch time — Impressions, CTR, and how impressions lead to views and watch time.

    6. Impressions & click-through-rate FAQs — CTR definition, contextual interpretation, and why not every view is tied to a counted impression.

    7. Understand your YouTube audience — Monthly audience and Audience reports such as devices, geography, watch time from subscribers, and related viewing.

    8. Understand new, casual, & regular viewers — Definitions of new, casual, and regular viewers and the statement that these segments do not directly affect reach or monetization.

    9. Understand your unique viewers data — Unique-viewer estimates and comparison guidance.

    10. Understand limited data in YouTube Analytics — Reporting thresholds and reasons detailed Analytics information can be limited.

    11. Get started creating YouTube Shorts — March 31, 2025 Shorts view-count change, Engaged views, and YPP/revenue-sharing measurement.

    12. How engagement metrics are counted — Realtime activity as an estimate of potential view activity.

    13. Learn about comment settings — Comment moderation, blocked words, links, held comments, and review periods.

    14. Explore trends on YouTube — Trends tab, searches, breakout videos, and availability limitations.

    15. Explore the Inspiration tab on YouTube — AI-assisted ideas, titles, thumbnails, outlines, and YouTube’s warning that generated suggestions can be inaccurate or inappropriate.

    16. Search & discovery tips — Performance, relevance, and viewer personalization in search and discovery.

    17. YouTube performance FAQ & Troubleshooting — Performance questions, title and thumbnail changes, discovery, and viewer response.

    18. Creator updates — Recent YouTube creator-feature updates, including community and comment changes.

    Important Note: This article provides general educational information and is not legal, financial, or professional advice.

  • Reused Content, AI Disclosure, and YouTube Monetization for Faceless Videos: Beginner Guide (2026)

    Reused Content, AI Disclosure, and YouTube Monetization for Faceless Videos: Beginner Guide (2026)

    Estimated reading time: 23 minutes

    Last updated: August 8, 2026

    Introduction

    A faceless YouTube channel can use AI for research assistance, script planning, narration, images, video clips, editing, captions, thumbnails, and titles. Using AI does not automatically prevent a channel from being monetized.

    What matters is how the finished content is created, how original and useful it is, whether it follows YouTube’s monetization policies, and whether required AI disclosures are completed. YouTube’s current monetization policy says monetized content should be original and authentic. It also restricts content that is highly repetitive, generic, template-driven, or mass-produced without enough creative, educational, or entertainment value.

    YouTube clarified this area in July 2025 by renaming its previous repetitious-content policy to inauthentic content. The current detailed policy also uses the heading Generic or Repetitive Content. The clarification did not create a blanket ban on AI videos, and YouTube stated that its separate reused-content policy did not change.

    Reused content: Generally concerns material that already exists elsewhere and is republished without enough meaningful original contribution.

    Inauthentic content: Concerns content that is repetitive, generic, template-based, or mass-produced with too little meaningful variation or creator value.

    These ideas are related but not identical. A channel can use licensed material and still have a monetization problem if the finished videos do not add enough original value. A channel can also create every asset itself and still look mass-produced if dozens of videos are nearly interchangeable.

    AI disclosure is another separate issue. YouTube requires disclosure for realistic AI-generated or meaningfully altered content in situations such as making a real person appear to say or do something they did not, changing footage of a real event or place, or creating a realistic scene that did not actually occur. Ordinary production assistance such as script help, titles, thumbnails, captions, and minor technical improvements is treated differently under YouTube’s current guidance.

    YouTube also states that properly disclosing qualifying AI-generated or altered content does not by itself limit a video’s audience or affect its eligibility to earn money. Disclosure is therefore a transparency step, not an automatic demonetization button.

    The goal of this guide is not to teach you how to beat YouTube’s monetization review. It is to help you build a faceless channel that is original, useful, transparent, carefully reviewed, and designed for real viewers rather than mass production.

    Core principle: Faceless does not mean effortless, and AI-assisted does not mean automatic. A strong channel still needs human judgment, factual review, responsible AI use, and a clear reason for viewers to watch.

    Before Learning

    Before learning about reused content, AI disclosure, and monetization, understand that YouTube evaluates more than whether a video was created with AI. For a faceless channel, three separate questions matter:

    • Is the content sufficiently original and useful?

    • Does the channel follow YouTube monetization policies?

    • Does realistic altered or AI-generated content need disclosure?

    These questions should not be treated as though they mean the same thing. Copyright permission, monetization originality, and AI disclosure each need their own check.

    Faceless Does Not Mean Low Quality

    A faceless video does not need to show the creator on camera. You can still create substantial original value through research, original explanations, original scripts, fact-checking, useful examples, narration, thoughtful editing, custom graphics, purposeful stock footage, AI-generated visuals, screen recordings, comparisons, tutorials, and commentary.

    AI Is a Tool, Not the Finished Strategy

    AI can help with brainstorming, outlining, drafting, image creation, voice generation, editing assistance, captions, titles, and thumbnails. However, simply combining generated pieces does not automatically create a strong video. You still need to decide what the video should teach, who it is for, which facts are correct, which examples are useful, which visuals support the narration, what should be removed, and whether the final video feels repetitive.

    Copyright and Monetization Are Different Checks

    Copyright review: Do I have the right or permission needed to use the material?

    Monetization review: Does the channel meet YouTube’s standards for original, authentic, valuable content?

    A video may use correctly licensed music, stock footage, images, and attribution and still not necessarily qualify for monetization. Likewise, an original video can still have a copyright problem if it includes unlicensed material.

    Do Not Build the Channel Around Automation Alone

    Avoid designing the entire workflow around Prompt → Generate → Upload → Repeat with almost no human review. Before publishing, review script accuracy, originality, narration, visual relevance, factual claims, editing, repetition, AI errors, copyright and licences, required disclosures, and viewer usefulness.

    A Simple Beginner Workflow

    Use this sequence: Choose Useful Topic → Research → Create Original Script → Review Facts → Create or Licence Visuals → Add Narration → Edit Meaningfully → Check Copyright → Check AI Disclosure → Review Quality → Publish.

    What You’ll Learn

    By the end of this guide, you should understand how YouTube evaluates faceless and AI-assisted channels for originality, authenticity, disclosure, and monetization. You will learn how to:

    • Understand reused content and inauthentic content.

    • Recognize the difference between reused material and repetitive or mass-produced content.

    • Understand why copyright permission does not automatically guarantee monetization.

    • Understand why using AI does not automatically prevent monetization.

    • Add meaningful research, explanation, examples, editing, and commentary.

    • Avoid creating large numbers of near-duplicate videos from one template.

    • Review AI-generated scripts, narration, images, and video for quality and accuracy.

    • Understand when realistic altered or synthetic content may require disclosure.

    • Recognize ordinary AI assistance that generally does not require altered-content disclosure.

    • Understand that proper AI disclosure does not automatically prevent monetization.

    • Understand how YouTube reviews a channel as a whole.

    • Review your channel before applying to the YouTube Partner Program.

    • Keep records showing research, scripts, editing, prompts, sources, licences, and human contributions.

    Central idea: Original value matters more than whether your face appears on camera.

    What YouTube Means by Reused Content

    YouTube uses the term reused content for channels that repurpose content already available on YouTube or another online source without enough original commentary, substantive modification, educational value, or entertainment value. The simplest beginner interpretation is: using someone else’s material is not automatically the problem; the problem is using it without adding enough meaningful original value of your own.

    Reused content can involve material from other YouTube videos, social media, television, movies, news footage, podcasts, music, websites, online compilations, and other creators. The practical question is: What did you add that makes the finished video meaningfully different and valuable to viewers?

    Permission Does Not Automatically Solve Reused Content

    YouTube explicitly separates reused-content review from copyright enforcement. Permission can answer whether you are allowed to use something, but it does not automatically answer whether the finished channel adds enough original value for monetization.

    Editing Alone May Not Be Enough

    Cropping, resizing, changing playback speed, adding captions, replacing a voice, adding background music, or applying a filter can improve presentation. These changes do not automatically create meaningful original value. The stronger contribution comes from commentary, analysis, teaching, original examples, demonstrations, storytelling, and substantive editing.

    Reading an Article With an AI Voice Can Be a Problem

    A common weak workflow is: copy an online article, put it into an AI voice generator, add stock footage, and publish. A stronger workflow is to research reliable sources, understand the subject, write your own explanation, add examples, verify facts, create or licence visuals, and edit the video around a clear teaching purpose.

    A Good Beginner Test

    Ask: If I removed all the borrowed material, what original value would remain? Would the video still contain your explanation, research, examples, teaching, story, commentary, or conclusions? If almost nothing original remains, the video may depend too heavily on reused material.

    Also ask: Why should someone watch my version instead of the original? Good answers include: mine explains it for beginners, compares several sources, demonstrates a process, corrects outdated information, adds practical examples, or analyzes strengths and limitations. “Mine has a different AI voice” is a weak answer.

    Figure 1. Small technical changes are different from adding meaningful original commentary, education, analysis, or creative value.

    Explanation: YouTube’s reused-content review looks beyond simple technical edits. Faceless creators should make their own contribution clear through original writing, explanation, examples, commentary, demonstrations, or substantive creative editing.

    What YouTube Means by Inauthentic Content

    YouTube renamed its previous repetitious-content policy to inauthentic content in July 2025. Its current monetization page explains that monetized channels should avoid highly repetitive material where videos feel interchangeable, appear to be produced from a template, or fail to deliver meaningful creative, educational, or other value.

    This is not the same as saying “AI content is banned.” YouTube’s current policy specifically allows creative tools, including AI, to assist with unique characters, narratives, scripts, and background visuals when the final product demonstrates creative vision and meaningful viewer value. The policy also specifically warns against AI-generated content made from generic or unoriginal templates that gives the impression of mass production without the creator’s authentic insights or perspective.

    Similar Formatting Is Allowed

    You can keep consistent branding, including an intro, outro, fonts, colour palette, caption style, narrator, and transitions. YouTube’s current examples say the same intro and outro can be used when the bulk of the content is different. A recognizable series format is also acceptable when each video has a distinct focus, concept, or storyline.

    Useful distinction: Repeat the branding, not the substance.

    A Simple Test for Repetition

    Open five videos from your channel and imagine watching them one after another. Could a viewer easily tell why each video deserves to exist separately? Check whether each one has its own purpose, information, examples, demonstrations, analysis, and conclusion. If the videos feel almost interchangeable, the substance needs more variation.

    Figure 2. Consistent branding can support a series, while repeated substance with only minor changes can make videos feel mass-produced.

    Explanation: YouTube allows similar formats when each video’s substance provides meaningful variation and viewer value. AI-assisted channels should use templates for efficiency without allowing the actual content to become interchangeable.

    Reused Content vs Inauthentic Content: What’s the Difference?

    Reused content: Focuses on material from other sources and asks what meaningful original value you added.

    Inauthentic content: Focuses on repetitive, generic, template-driven, or mass-produced videos and asks whether each upload has meaningful variation and viewer value.

    A channel can have reused-content concerns without being mass-produced. For example, five videos built mainly from copied clips with minimal commentary can raise a reused-content issue even though there are only five videos.

    A channel can also look inauthentic without reusing other people’s videos. If every script, image, voice, and edit is generated for your channel but the same automated template produces hundreds of interchangeable videos, the channel can still raise repetition and mass-production concerns.

    A channel can potentially raise both concerns at once. For example, automatically compiling third-party social clips into dozens of near-identical videos can create both a reused-material problem and a repetitive-production problem.

    Figure 3. Reused content focuses on insufficient original contribution to existing material, while inauthentic content focuses on repetitive or mass-produced videos with too little meaningful variation.

    Explanation: A faceless channel should address both risks. Use third-party material only as support for meaningful original value, and make sure each video contains its own useful substance rather than becoming another version of the same automated template.

    Can Faceless YouTube Videos Be Monetized?

    Yes. A faceless YouTube channel can potentially qualify for monetization. YouTube’s published monetization policies do not require every creator to show their face on camera. The focus is on whether the channel meets eligibility requirements and follows monetization policies for original, authentic, policy-compliant content.

    A faceless channel can use voiceover, screen recordings, stock footage, AI-generated images, AI-generated video, animation, graphics, slides, licensed music, and a synthetic narrator. The important issue is what original value the channel provides and whether the finished content follows the applicable rules.

    Current Standard YPP Ad-Revenue Eligibility

    As of August 8, 2026, YouTube’s standard ad-revenue route generally requires 1,000 subscribers plus either 4,000 valid public watch hours in the previous 12 months or 10 million valid public Shorts views in the previous 90 days. Other YPP requirements also apply, and the channel still undergoes review. Watch hours from Shorts views in the Shorts Feed do not count toward the 4,000-hour route.

    YouTube also has an expanded YPP in eligible regions that can provide earlier access to certain fan-funding and Shopping features at lower thresholds. Those lower thresholds do not automatically unlock full advertising revenue sharing. Because requirements can change, check the current Earn section in YouTube Studio before applying.

    Important: Eligibility threshold reached means eligible to apply under the applicable route; it does not mean automatic monetization approval.

    Figure 4. A strong faceless video demonstrates original research, writing, explanation, purposeful visuals, meaningful editing, human review, and policy compliance.

    Explanation: Faceless presentation does not determine monetization eligibility by itself. The more important questions are whether the channel meets YouTube’s requirements and consistently creates original, authentic content that provides real value to viewers.

    Can AI-Generated and AI-Assisted YouTube Videos Be Monetized?

    Yes, potentially. YouTube’s current policy does not contain a blanket ban on AI-assisted creation. Instead, it evaluates whether the final product is original, authentic, satisfying to viewers, and not generic or mass-produced. YouTube’s monetization examples specifically allow creative tools to help with unique characters, narratives, script editing, and original background visuals when the creator’s creative vision remains clear.

    There Is No Published “Percentage of AI” Rule

    YouTube does not publish a universal percentage such as “50% human” or “30% AI” that guarantees monetization. Trying to calculate an imaginary human-to-AI percentage is less useful than asking whether the finished video shows research, creative direction, meaningful editing, accurate information, and viewer value.

    AI Narration Can Be Part of the Workflow

    A synthetic voice does not automatically make a channel ineligible. A carefully researched and rewritten tutorial using synthetic narration is very different from an automated system that reads copied web pages across hundreds of near-identical videos.

    AI Persona Safety on Sensitive Topics

    YouTube’s current monetization policy contains a specific restriction for channels that use AI-generated personas presenting themselves as human experts giving advice on sensitive topics such as health, legal issues, finances, or politics. These channels are not allowed to monetize under the current policy. For educational channels, avoid presenting a synthetic doctor, lawyer, financial adviser, or political expert in a way that viewers could mistake for a real human professional.

    Figure 5. AI can assist with video creation while human research, direction, review, disclosure decisions, and policy compliance remain important.

    Explanation: YouTube does not treat every AI-assisted video as ineligible. The stronger approach is to use AI inside a deliberate creative process that produces original value and accurately discloses realistic synthetic content when required.

    How to Add Meaningful Human Contribution to AI-Assisted Videos

    Human contribution does not require appearing on camera. It can be demonstrated through research, writing, teaching, commentary, fact-checking, original examples, screen demonstrations, visual planning, editing, storytelling, quality control, and final judgment.

    Start With a Human-Chosen Purpose

    Before opening an AI tool, decide what the viewer should learn, understand, or be able to do after watching. A clear purpose gives the video direction before AI begins generating material.

    Research the Topic Yourself

    For information that can change, check authoritative sources such as official product documentation, platform help pages, governments, standards organizations, and original research. This is especially important for software features, prices, subscription conditions, policies, copyright, privacy, commercial-use rules, monetization requirements, and AI disclosure requirements.

    Use AI Drafts as Starting Points

    Review AI drafts for accuracy, repetition, generic wording, missing explanations, unsupported claims, outdated information, awkward examples, and unnecessary sections. Rewrite the material so it reflects your own teaching purpose and audience.

    Add Original Examples and Commentary

    Examples turn general advice into something beginners can recognize. Commentary should explain, compare, correct, or add context rather than merely restating what viewers can already see.

    Make Editing Decisions Yourself

    Meaningful editing includes removing unnecessary sections, rearranging scenes, adjusting pacing, replacing weak visuals, highlighting important points, correcting narration, improving captions, adding explanatory graphics, and removing repeated information.

    Keep Evidence of Your Work

    For important videos, save topic notes, research sources, outlines, prompts, AI drafts, revised scripts, final scripts, screen recordings, graphics, narration, editing projects, licence records, disclosure decisions, and final exports. These records do not guarantee monetization; they support a consistent, accountable production process.

    Figure 6. Meaningful human contribution can appear throughout an AI-assisted workflow through research, rewriting, examples, editing, verification, and final judgment.

    Explanation: A faceless creator does not need to appear on camera to show meaningful involvement. The finished video should reflect deliberate human decisions rather than being a largely automatic combination of generated assets.

    When YouTube Requires AI Disclosure

    YouTube requires creators to disclose certain AI-generated or meaningfully AI-altered content when it appears realistic. The purpose is to help viewers understand when something they are watching or hearing may not represent what actually happened.

    The three main situations to remember are realistic content that makes a real person appear to say or do something they did not, meaningfully alters footage of a real event or real place, or generates a realistic scene that did not actually occur.

    Realistic Synthetic People, Places, and Events

    Examples can include a realistic synthetic public figure making a statement they never made, a real event altered to show an incident that did not happen, or realistic AI footage of a disaster approaching a real city when that event did not occur. Realistic AI content is not evidence that an event happened.

    AI-Generated Music

    YouTube’s current disclosure guidance lists AI-generated music among examples that require disclosure. Disclosure does not replace the need to check the music tool’s licence, commercial-use conditions, and any restrictions on source material or voice imitation.

    Voice Cloning

    YouTube currently treats cloning your own voice for ordinary voiceovers or dubbing differently from cloning another person’s voice. If synthetic audio makes another real person appear to say something they did not say, disclosure and additional privacy, consent, impersonation, and legal considerations can apply. Disclosure is not permission to imitate someone.

    How to Disclose in YouTube Studio

    1. Open YouTube Studio and begin uploading the video.

    2. Find the current Attributes or AI use area in the upload workflow.

    3. Select the appropriate option if the content meets YouTube’s disclosure requirements.

    4. Complete the remaining video details and publish when your other checks are finished.

    Interface wording and placement can change. Follow the current labels shown in your own YouTube Studio account.

    Figure 7. YouTube generally requires disclosure when AI creates or meaningfully alters realistic content that could affect what viewers believe actually happened.

    Explanation: Not every use of AI requires disclosure. Ordinary production assistance and minor edits are treated differently from realistic synthetic people, events, places, voices, and other meaningful alterations. Always check current YouTube guidance when your use is unclear.

    When YouTube AI Disclosure Is Generally Not Required

    YouTube’s current examples distinguish realistic altered or synthetic media from ordinary production assistance and minor edits. Script help, outline creation, title assistance, thumbnail assistance, infographics, caption generation, routine video repair, voice or audio repair, idea generation, and cloning your own voice for ordinary narration are among examples that generally do not require the altered-content disclosure for that reason alone.

    Clearly unrealistic synthetic content is also treated differently from photorealistic content that viewers could mistake for reality. A flat-design infographic, cartoon robot, or obviously fictional fantasy scene does not create the same transparency concern as realistic synthetic footage of a real person or event.

    Important: The amount of AI used is not the only issue. A short synthetic clip can still require disclosure if it realistically makes a real person appear to do something they did not. Conversely, a fully AI-generated but clearly fictional animation may not require the same disclosure for that reason alone.

    Figure 8. Ordinary AI production assistance is generally treated differently from realistic synthetic people, events, places, voices, and AI-generated music.

    Explanation: The disclosure decision should be based on what AI actually created or changed. Faceless creators do not need to label every routine AI-assisted task, but realistic synthetic material should be reviewed carefully against YouTube’s current disclosure rules.

    Does AI Disclosure Affect YouTube Monetization?

    Using YouTube’s AI disclosure does not automatically prevent a video from earning money. YouTube currently states that disclosing qualifying altered or synthetic content does not by itself limit the video’s audience or affect its eligibility to earn money.

    AI disclosure check: Does this realistic altered or synthetic content need transparency disclosure?

    Monetization check: Does this video and channel meet YouTube’s broader standards for original, authentic, policy-compliant content?

    A disclosed video can still have reused-content or repetition problems. Disclosure does not convert copied material into original content, does not give copyright permission, and does not solve privacy or impersonation issues. It also does not guarantee monetization.

    Repeated failure to disclose qualifying realistic synthetic content can create enforcement problems. YouTube’s responsible-AI guidance says consistent failure to disclose can lead to actions that may include content removal or suspension from YPP.

    Best approach: Create better content and disclose accurately when required. Do not hide qualifying AI use because you believe the label automatically causes demonetization.

    Figure 9. AI disclosure and monetization are separate checks: proper disclosure does not automatically prevent earnings, and disclosure alone does not guarantee monetization.

    Explanation: Creators should disclose qualifying realistic synthetic content accurately while separately ensuring that their videos remain original, authentic, useful, properly licensed, and compliant with YouTube’s monetization policies.

    How YouTube Reviews a Channel for Monetization

    Reaching the YouTube Partner Program eligibility thresholds does not automatically mean a channel will be monetized. YouTube says qualifying channels are reviewed as a whole, using automated systems and human reviewers, to determine whether they follow YPP policies.

    YouTube says reviewers may focus on representative areas such as the channel’s main theme, most-viewed videos, newest videos, videos producing a large share of watch time, titles, thumbnails, descriptions, and the About section. Reviewers may also examine other parts of the channel when needed.

    Older and Popular Videos Still Matter

    Do not assume that only your newest uploads matter. Older high-performing videos can still represent the channel. Review videos that receive many views or generate a large share of watch time for reused material, weak transformation, misleading metadata, licensing issues, or missing AI disclosure.

    Titles, Thumbnails, and Descriptions Matter

    Metadata should accurately represent the content. Avoid misleading income promises, fake events, fabricated screenshots, or realistic synthetic thumbnails that imply something happened when it did not. Descriptions should clearly summarize the video and include required attribution or useful source information where appropriate.

    Passing Review Is Not Permanent Permission to Ignore Policies

    YouTube continues checking channels after they enter YPP. Do not build strong original videos for the application and then switch to low-quality automated production afterward. Maintain the same originality, disclosure, copyright, and quality standards after approval.

    Figure 10. YouTube may examine several representative parts of a channel when evaluating monetization eligibility rather than relying on only one video.

    Explanation: Faceless creators should review their complete channel before applying. Most-viewed videos, recent uploads, high-watch-time content, metadata, and the channel’s overall purpose should consistently demonstrate original and authentic work.

    How to Prepare a Faceless Channel Before Applying for Monetization

    Before applying, review your faceless channel as though you were seeing it for the first time. Reaching the thresholds allows an eligible creator to apply; it does not guarantee acceptance.

    1. Check the current Earn section in YouTube Studio for your eligibility and available features.

    2. Review the channel’s main purpose and make sure the overall theme is clear.

    3. Review your most-viewed videos for originality, rights, disclosure, and quality.

    4. Review your newest videos to make sure they represent your current production standard.

    5. Review videos generating a major share of watch time.

    6. Check third-party material for reused-content concerns and meaningful original contribution.

    7. Compare several videos for repetitive, generic, or mass-produced patterns.

    8. Identify what AI contributed and what human direction you added.

    9. Check realistic AI-generated or altered material for disclosure requirements.

    10. Check copyright and licensing for music, stock, images, fonts, templates, clips, and AI assets.

    11. Review titles, thumbnails, descriptions, and the About section for accuracy and clarity.

    12. Confirm you have not artificially inflated views, subscribers, likes, watch time, or ad impressions.

    13. Review Shorts as well as long-form videos.

    14. Correct obvious problems before applying instead of relying on cosmetic changes.

    15. Create a monetization review record for important videos and save evidence of your production process.

    16. Check for active Community Guidelines strikes and follow the current application instructions shown in YouTube Studio.

    17. Maintain the same quality standards after approval.

    Practical audit idea: If you have many uploads, begin with your three most-viewed videos, three newest videos, high-watch-time videos not already included, and several videos representing the channel’s main theme. This is an internal review method, not an official YouTube formula.

    Figure 11. Preparing for YouTube monetization involves reviewing the complete channel, not simply reaching an eligibility number.

    Explanation: A faceless creator should check originality, reused and inauthentic content, copyright, AI disclosure, metadata, and overall quality before applying. Reaching YouTube’s eligibility thresholds allows an eligible channel to enter the application process, but approval still depends on policy review.

    Common Monetization Mistakes Faceless AI Creators Should Avoid

    Mistake 1: Believing faceless channels cannot be monetized

    Reality: YouTube’s policies focus on originality, authenticity, and compliance rather than requiring an on-camera creator.

    How to Avoid This Mistake: Demonstrate your contribution through original research, scripts, commentary, demonstrations, editing, and fact-checking.

    Mistake 2: Believing all AI videos are automatically demonetized

    Reality: YouTube does not impose a blanket ban on AI-assisted creation. The larger concern is generic, repetitive, or mass-produced content without enough original value.

    How to Avoid This Mistake: Use AI inside a human-directed workflow rather than as an automatic publishing system.

    Mistake 3: Mass-producing nearly identical videos

    Reality: Different titles do not make near-identical substance meaningfully different.

    How to Avoid This Mistake: Give each video topic-specific research, examples, demonstrations, and conclusions.

    Mistake 4: Treating an AI draft as a finished script

    Reality: AI output can be generic, repetitive, outdated, or inaccurate.

    How to Avoid This Mistake: Review and rewrite every important script before recording.

    Mistake 5: Reading someone else’s article with an AI voice

    Reality: Changing presentation does not automatically make the underlying content original.

    How to Avoid This Mistake: Research the topic and write your own explanation with examples and context.

    Mistake 6: Adding an AI voice to another creator’s video

    Reality: A new narrator alone does not automatically create meaningful original value.

    How to Avoid This Mistake: Build the video around your own commentary, analysis, teaching, or story.

    Mistake 7: Assuming permission guarantees monetization

    Reality: Copyright permission and reused-content monetization review are separate.

    How to Avoid This Mistake: Ask both: Do I have permission? and Did I add meaningful original value?

    Mistake 8: Assuming licensed stock footage guarantees monetization

    Reality: A licence answers usage rights, not whether the finished channel is original and authentic enough for YPP.

    How to Avoid This Mistake: Use stock as support for original narration, explanations, examples, and editing.

    Mistake 9: Using random AI clips without a clear narrative

    Reality: Impressive clips do not automatically create a coherent or useful video.

    How to Avoid This Mistake: Plan scenes around the script and use each visual for a reason.

    Mistake 10: Thinking AI disclosure automatically causes demonetization

    Reality: YouTube says proper disclosure does not by itself affect eligibility to earn money.

    How to Avoid This Mistake: Disclose qualifying content accurately and review monetization separately.

    Mistake 11: Failing to disclose realistic synthetic content

    Reality: Hiding required disclosure can create larger policy problems.

    How to Avoid This Mistake: Check realistic people, voices, events, places, and AI-generated music before publishing.

    Mistake 12: Thinking disclosure gives permission

    Reality: Disclosure is transparency, not copyright permission or consent.

    How to Avoid This Mistake: Review privacy, consent, copyright, licensing, and impersonation separately.

    Mistake 13: Presenting synthetic footage as real evidence

    Reality: Realistic AI footage can be mistaken for genuine evidence even when it depicts an event that never occurred.

    How to Avoid This Mistake: Clearly identify synthetic reconstructions when viewers could otherwise be misled.

    Mistake 14: Ignoring older videos before applying

    Reality: YouTube reviews the channel as a whole and may focus on older high-performing content.

    How to Avoid This Mistake: Audit important older videos as well as new uploads.

    Mistake 15: Focusing only on subscriber numbers

    Reality: YPP thresholds allow an eligible channel to apply, but approval still requires policy review.

    How to Avoid This Mistake: Prepare the channel, not just the metrics.

    Mistake 16: Buying views, subscribers, or watch time

    Reality: YouTube prohibits artificially inflating engagement.

    How to Avoid This Mistake: Build genuine audience activity rather than purchasing or manipulating engagement.

    Mistake 17: Assuming Shorts are exempt

    Reality: Shorts monetization is still subject to channel monetization policies.

    How to Avoid This Mistake: Apply originality, copyright, disclosure, and quality checks to Shorts too.

    Mistake 18: Using AI only to increase volume

    Reality: More uploads do not fix weak originality or mass-production problems.

    How to Avoid This Mistake: Use AI to improve research, drafting, accessibility, and editing instead of multiplying low-value videos.

    Mistake 19: Assuming YPP approval is permanent

    Reality: YouTube continues checking monetized channels for compliance.

    How to Avoid This Mistake: Maintain originality, fact-checking, copyright, disclosure, and quality standards after approval.

    Mistake 20: Trying to find a shortcut around the rules

    Reality: Cosmetic workarounds do not replace genuine viewer value.

    How to Avoid This Mistake: Ask how to make the video more useful and original rather than how little you can change.

    Figure 12. Common monetization mistakes usually come from weak originality, excessive automation, misunderstanding disclosure, or treating eligibility thresholds as guaranteed approval.

    Explanation: A safer faceless-video workflow focuses on genuine viewer value, meaningful human contribution, accurate disclosure, proper rights, and consistent quality across the complete channel.

    Benefits of a Careful AI-Assisted Monetization Workflow

    Clearer original contribution

    Research, writing, commentary, examples, demonstrations, editing, and fact-checking make the creator’s role easier to recognize.

    Lower reused-content risk

    A structured workflow encourages you to ask what meaningful value you are adding to third-party material.

    Lower repetition risk

    Comparing videos makes it easier to notice when scripts, examples, or visual sequences are becoming interchangeable.

    Better AI disclosure decisions

    A disclosure checkpoint reduces the chance of forgetting realistic synthetic people, events, places, voices, or AI-generated music.

    Better copyright control

    Keeping rights review separate from monetization review helps you verify music, stock, images, fonts, templates, and clips before publication.

    Stronger fact-checking

    A formal review step gives you time to verify names, dates, features, policies, prices, and statistics.

    Better viewer trust

    Accurate, transparent, clearly explained videos help viewers understand what is real, illustrative, or synthetic.

    More consistent quality

    A checklist lets you repeat your quality process without repeating the actual substance of every video.

    Easier channel audits

    Records make it easier to identify videos with missing licences, weak originality, repetitive patterns, or disclosure questions.

    More sustainable growth

    A workflow built around usefulness, originality, rights, disclosure, and review is more sustainable than simply increasing upload volume.

    Important limitation: A careful workflow can reduce avoidable mistakes, but it cannot guarantee YPP acceptance, continued monetization, a particular number of views, or a particular income level.

    Figure 13. A careful monetization workflow can improve originality, consistency, disclosure, rights management, quality control, and record keeping.

    Explanation: The purpose of a structured workflow is to reduce avoidable problems and make high-quality production easier to repeat. It does not guarantee YouTube Partner Program approval or future earnings.

    Limitations of AI-Assisted Monetization Checks

    Limitation 1: You cannot guarantee YouTube approval

    Self-review can prepare a channel but cannot replace YouTube’s actual YPP decision.

    How to Reduce This Limitation: Treat your review as preparation, not approval.

    Limitation 2: Some policy decisions require judgment

    There is no universal formula for exactly how much commentary, editing, or variation is enough.

    How to Reduce This Limitation: Make your original research and creative contribution substantial and obvious.

    Limitation 3: There is no guaranteed originality percentage

    YouTube does not publish a universal percentage of original, reused, human, or AI material that guarantees approval.

    How to Reduce This Limitation: Judge the video by its viewer value instead of trying to calculate a percentage.

    Limitation 4: AI cannot officially decide monetization

    An AI assistant can review scripts and patterns but cannot approve a channel for YPP.

    How to Reduce This Limitation: Use AI as a review assistant, not as an official authority.

    Limitation 5: One video cannot represent the whole channel

    A single excellent video does not prove the entire channel is ready.

    How to Reduce This Limitation: Review a representative group of popular, recent, and high-watch-time videos.

    Limitation 6: Copyright permission does not predict monetization

    A licence can be valid while the finished channel still lacks enough original value.

    How to Reduce This Limitation: Perform separate rights and monetization reviews.

    Limitation 7: Disclosure does not predict monetization

    Correct disclosure is important but does not prove originality or authenticity.

    How to Reduce This Limitation: Treat transparency and monetization as separate checks.

    Limitation 8: Policies and interfaces can change

    Terminology, examples, thresholds, and YouTube Studio controls can evolve.

    How to Reduce This Limitation: Check official guidance before applying, after policy notices, when changing workflows, and periodically.

    Limitation 9: Good records do not guarantee approval

    Records support your process but do not force YouTube to approve a channel.

    How to Reduce This Limitation: Use records to improve quality and accountability.

    Limitation 10: High views or high production cost do not prove compliance

    Popularity and expense do not determine whether a video meets monetization rules.

    How to Reduce This Limitation: Audit successful videos just as carefully as other uploads.

    Limitation 11: No copyright claim does not prove YPP eligibility

    Copyright enforcement and reused-content monetization review are separate systems.

    How to Reduce This Limitation: Do not use the absence of a claim as your monetization test.

    Limitation 12: Passing review does not end future review

    YPP participation remains subject to ongoing policy compliance.

    How to Reduce This Limitation: Keep using the same quality-control process after approval.

    This article provides general educational information, not legal, financial, or professional advice. Important copyright, licensing, privacy, contractual, or other legal questions may require advice from a qualified professional in the relevant jurisdiction.

    Figure 14. Monetization checks can reduce avoidable mistakes, but they cannot guarantee YouTube Partner Program approval or replace ongoing policy review.

    Explanation: Creators control their research, originality, rights checks, disclosure decisions, and production quality. YouTube retains the final monetization decision, and policies can change over time.

    Myths About Faceless YouTube, AI, and Monetization

    Myth 1: Faceless YouTube channels cannot be monetized

    Reality: YouTube’s monetization policies focus on original, authentic, policy-compliant content, not on requiring every creator to appear on camera.

    Myth 2: YouTube banned AI videos in 2025

    Reality: The July 2025 update clarified and renamed the repetitious-content policy; it did not create a blanket ban on AI videos.

    Myth 3: Every AI-generated video is inauthentic content

    Reality: AI use by itself is not the test. Generic, repetitive, mass-produced content without enough creator value is the concern.

    Myth 4: AI voices automatically prevent monetization

    Reality: A synthetic narrator does not by itself determine monetization. The script, explanation, editing, research, and overall channel still matter.

    Myth 5: A human voice automatically makes a video original

    Reality: Reading someone else’s article or transcript in your own voice may still lack sufficient original value.

    Myth 6: Permission from the original creator guarantees monetization

    Reality: Permission and reused-content monetization review are separate.

    Myth 7: Paying for stock footage guarantees monetization

    Reality: A stock licence answers usage rights, not whether the final channel is sufficiently original and authentic.

    Myth 8: Reused content simply means copyright infringement

    Reality: Reused-content review is a separate monetization concept and can apply even when permission exists.

    Myth 9: No copyright claim means the video is safe for monetization

    Reality: A channel can have no copyright claim and still raise reused-content or repetition concerns.

    Myth 10: Changing the voice makes reused footage original

    Reality: Replacing narration is only one change and may not add meaningful original value.

    Myth 11: Captions, cropping, and music are enough transformation

    Reality: Technical edits do not automatically create substantive commentary, education, or analysis.

    Myth 12: Reused content and inauthentic content are the same

    Reality: Reused content focuses on insufficient contribution to existing material; inauthentic content focuses on repetitive or mass-produced material.

    Myth 13: Using the same template always prevents monetization

    Reality: Consistent branding can be acceptable when the main substance of each video is meaningfully different.

    Myth 14: Different titles mean different content

    Reality: A title change does not create meaningful variation when the underlying videos are nearly identical.

    Myth 15: Uploading more videos always improves monetization chances

    Reality: High volume can create problems if quality, originality, or meaningful variation declines.

    Myth 16: There is a secret allowed percentage of AI content

    Reality: YouTube does not publish a universal AI percentage that guarantees approval.

    Myth 17: There is a fixed safe percentage of reused footage

    Reality: YouTube focuses on meaningful original contribution rather than a universal percentage formula.

    Myth 18: Every use of AI must be disclosed

    Reality: YouTube distinguishes realistic altered or synthetic content from ordinary production assistance.

    Myth 19: AI-assisted scripts always require disclosure

    Reality: Script help is generally treated as production assistance rather than realistic altered-content disclosure.

    Myth 20: Clearly fictional AI art is treated like a realistic deepfake

    Reality: YouTube’s disclosure focus is on realistic synthetic or meaningfully altered content that viewers could mistake for reality.

    Myth 21: AI disclosure automatically demonetizes a video

    Reality: YouTube says proper disclosure does not by itself affect eligibility to earn money.

    Myth 22: AI disclosure guarantees monetization

    Reality: Disclosure is transparency; monetization still depends on the broader YPP policies.

    Myth 23: Hiding required AI use is safer

    Reality: Repeated failure to disclose qualifying content can lead to enforcement consequences.

    Myth 24: A disclosure label gives permission to clone anyone’s voice

    Reality: Disclosure does not grant consent, privacy rights, licensing rights, or permission to impersonate someone.

    Myth 25: Realistic AI footage proves an event happened

    Reality: Synthetic media can look convincing. Realistic appearance is not evidence that an event occurred.

    Myth 26: Reaching 1,000 subscribers guarantees monetization

    Reality: The standard threshold is part of eligibility to apply; the channel still undergoes review.

    Myth 27: Watch hours alone guarantee YPP approval

    Reality: Metrics and policy approval are separate steps.

    Myth 28: YouTube reviews only your newest video

    Reality: YouTube reviews the channel as a whole and may focus on representative areas.

    Myth 29: Old videos no longer matter

    Reality: Older popular or high-watch-time videos can still represent the channel during review.

    Myth 30: Shorts do not need originality

    Reality: Shorts monetization remains subject to channel monetization policies.

    Myth 31: Buying subscribers is simply a shortcut

    Reality: Artificially inflating engagement conflicts with YouTube’s creator-integrity requirements.

    Myth 32: YPP approval is permanent

    Reality: Monetized channels remain subject to ongoing policy compliance.

    Myth 33: An AI checker can guarantee YPP approval

    Reality: No external AI tool can make YouTube’s official review decision.

    Myth 34: Expensive production automatically means original content

    Reality: Production cost does not replace meaningful original value.

    Myth 35: Professional-looking AI content is automatically high quality

    Reality: Polished visuals cannot replace accurate information, original explanation, and coherent structure.

    Myth 36: The safest channel is one that never uses AI

    Reality: A non-AI channel can still contain reused, repetitive, or misleading content. AI-assisted channels can still be highly original.

    Myth 37: The safest channel is fully automated

    Reality: YouTube specifically restricts repetitive and mass-produced material. Human direction remains important.

    Myth 38: More videos are always better than better videos

    Reality: Quality and meaningful variation should not be sacrificed simply to increase upload numbers.

    Myth 39: Once a video is published, production records can be deleted

    Reality: Records can help verify licences, correct errors, update videos, and remember disclosure decisions.

    Myth 40: There is one trick that guarantees faceless monetization

    Reality: YouTube does not offer a guaranteed faceless-channel formula. Strong channels combine original value, meaningful variation, appropriate rights, accurate disclosure, and human review.

    Figure 15. Many common monetization myths confuse AI use, copyright, reused content, disclosure, and YPP eligibility.

    Explanation: Faceless creators should rely on current official YouTube guidance rather than shortcuts or fixed formulas. AI use does not determine monetization by itself; the finished channel still needs original value, meaningful variation, appropriate rights, accurate disclosure, and ongoing policy compliance.

    Frequently Asked Questions (FAQ)

    Can a faceless YouTube channel be monetized?

    Yes, potentially. YouTube’s policies do not require you to show your face. The channel still needs to meet eligibility requirements and follow monetization policies.

    Does YouTube ban AI-generated videos?

    No blanket ban appears in the current monetization policy. AI can assist with creative work, but generic or mass-produced template content can be ineligible.

    Can I use an AI voice and still monetize?

    Potentially, yes. A synthetic narrator does not automatically determine monetization. Original scripts, useful explanation, editing, and channel quality still matter.

    Do I need to show my face to prove the content is mine?

    No. Your contribution can be visible through writing, research, demonstrations, commentary, visual design, and editing.

    What is reused content?

    It is material repurposed from YouTube or another online source without enough significant original commentary, substantive modification, or educational or entertainment value.

    What is inauthentic content?

    It refers to repetitive, generic, template-driven, or mass-produced content with too little meaningful variation or creator value.

    Can I use stock footage?

    Yes, when you have appropriate rights and the stock footage supports meaningful original content. Licensing and YPP review remain separate.

    Can I copy an article and have an AI voice read it?

    This is a weak approach. Research the topic and write your own explanation rather than simply converting someone else’s writing into synthetic narration.

    Can I use clips from another YouTube video?

    Possibly, but copyright and permission questions must be handled separately, and you still need enough meaningful original contribution for monetization.

    If another creator gives me permission, will YouTube monetize the video?

    Not automatically. Permission does not guarantee the channel satisfies reused-content or other monetization policies.

    Is there a percentage of reused footage YouTube allows?

    YouTube does not publish a universal percentage that guarantees approval.

    Is there a maximum percentage of AI-generated content?

    YouTube does not publish a universal AI percentage that guarantees or prevents monetization.

    Can I use the same video template for every upload?

    Yes, consistent branding can be acceptable when the substance of each video is materially different.

    Can I use the same AI narrator in every video?

    Using the same narrator does not automatically make videos repetitive. The information, examples, demonstrations, and conclusions should still be meaningfully different.

    Can I upload many AI-generated videos every day?

    Upload frequency alone is not the test. The risk increases if the channel becomes generic, interchangeable, or mass-produced.

    Does every use of AI need to be disclosed?

    No. Ordinary production assistance such as script help, titles, thumbnails, captions, and minor technical enhancements is generally treated differently.

    When is AI disclosure required?

    YouTube requires disclosure for qualifying realistic AI-generated or meaningfully altered content, including realistic synthetic people, altered real events or places, and realistic scenes that did not occur.

    Do AI-generated images always need disclosure?

    No. Clearly fictional or non-realistic content is treated differently from photorealistic synthetic content that viewers could mistake for reality.

    Does AI-generated music need disclosure?

    Under YouTube’s current examples, yes. You should also separately check the music tool’s licence and commercial-use conditions.

    Does my own cloned voice need disclosure?

    YouTube currently lists cloning your own voice for ordinary voiceovers or dubbing among examples that generally do not require disclosure for that reason alone.

    What about cloning another person’s voice?

    This requires much more care. Disclosure, consent, privacy, impersonation, licensing, and applicable law can all be relevant.

    Will selecting AI disclosure stop monetization?

    No, not by itself. YouTube says disclosure does not itself affect eligibility to earn money.

    Should I hide AI use to protect monetization?

    No. If disclosure is required, provide it accurately.

    Can Shorts be monetized if they use AI?

    Potentially, yes. Shorts remain subject to YouTube’s channel monetization policies and other applicable rules.

    Do Shorts Feed watch hours count toward the 4,000-hour requirement?

    No. YouTube states that watch hours from Shorts views in the Shorts Feed do not count toward the 4,000 valid public watch-hour threshold.

    What are the current standard YPP thresholds?

    As of August 8, 2026, the standard ad-revenue routes are 1,000 subscribers plus 4,000 valid public watch hours in 12 months, or 1,000 subscribers plus 10 million valid public Shorts views in 90 days, with other requirements also applying.

    If I reach the YPP numbers, am I automatically accepted?

    No. Reaching the thresholds makes an eligible channel able to apply; the channel still goes through review.

    Should I review old videos before applying?

    Yes, especially popular, high-watch-time, or representative videos.

    Can I buy subscribers or watch time to qualify faster?

    No. YouTube prohibits artificially inflating engagement.

    Can an AI checker tell me whether my channel will be monetized?

    It can help identify possible issues, but it cannot make YouTube’s official YPP decision.

    If YouTube accepts my channel once, is monetization permanent?

    No. YPP channels remain subject to ongoing policy compliance.

    What is the safest beginner approach?

    Create for viewers first: research reliable sources, write an original script, use AI as assistance, add original examples, edit meaningfully, check facts, rights, and disclosure, compare the video with the rest of the channel, publish, and save records.

    Key Takeaways

    • Faceless channels can potentially be monetized; showing your face is not the central requirement.

    • AI-assisted videos are not automatically disqualified.

    • Reused content and inauthentic content are separate monetization concepts.

    • Permission and licensing do not automatically guarantee monetization.

    • A new voice, captions, cropping, or speed changes do not automatically create meaningful original value.

    • Consistent branding is different from repetitive substance.

    • Human contribution can be shown through research, writing, teaching, demonstrations, editing, and fact-checking.

    • Realistic synthetic content may require disclosure; ordinary production assistance is generally treated differently.

    • Proper AI disclosure does not automatically prevent monetization and does not guarantee monetization either.

    • Copyright review, AI disclosure, and monetization review should be handled as separate checks.

    • YouTube reviews the channel as a whole and may focus on popular, recent, and high-watch-time videos plus metadata.

    • Reaching YPP thresholds means eligible to apply, not guaranteed approval.

    • Do not buy or artificially inflate engagement.

    • Keep rights and production records.

    • YouTube policies and AI features can change, so review official guidance when first using a workflow, before applying, after policy notices, and periodically.

    • No AI tool, checklist, consultant, or tutorial can guarantee YPP approval.

    • Create for viewers first, not for automation.

    Practical workflow: Useful Topic → Reliable Research → Original Script → Meaningful Human Contribution → Purposeful Visuals → Careful Editing → Fact-Check → Copyright and Licence Check → AI Disclosure Check → Compare With Other Channel Videos → Final Quality Review → Publish → Save Records.

    Final Tip

    Do not build your faceless YouTube strategy around the question: “What is the minimum I can do and still get monetized?” That approach can lead to weak reused content, repetitive videos, excessive automation, poor fact-checking, missed disclosure requirements, and low viewer value.

    A better question is: “What can I add that makes this video genuinely useful, original, and worth watching?” Focus on reliable research, original writing, clear explanations, topic-specific examples, purposeful visuals, meaningful editing, accurate facts, proper licences and permissions, correct AI disclosure when required, and final human review.

    Short check: Original? → Useful? → Accurate? → Properly Licensed? → AI Disclosure Checked? → Meaningfully Different From My Other Videos?

    AI can help you create the video, but you remain responsible for what you publish. Create for viewers first. Use AI to support your work, not to replace your judgment.
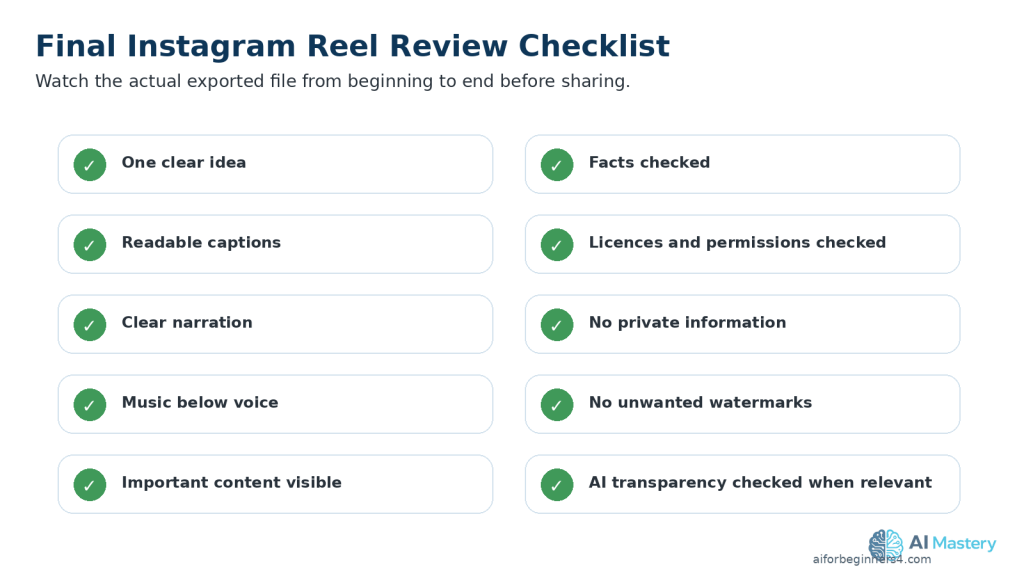
    This article provides general educational information and is not legal, financial, or professional advice. For important copyright, licensing, privacy, contractual, or other legal questions, consider advice from a qualified professional in the relevant jurisdiction.

    Continue Learning

    YouTube Copyright and Licensing for AI Videos: Beginner Guide (2026)

    Use this guide for music, stock footage, Creative Commons, commercial-use rights, attribution, AI-generated assets, Content ID, and licence record keeping.

    How to Create YouTube Thumbnails, Titles, and Descriptions with AI: Beginner Guide (2026)

    Use this guide to create accurate thumbnails, titles, descriptions, and metadata for your videos.

    How to Edit Faceless YouTube Videos and Audio: Beginner Guide (2026)

    Use this guide to improve video structure, pacing, audio, narration, captions, transitions, and final quality.

    How to Create Visuals for Faceless YouTube Videos with AI Images, Stock Footage, and Screen Recordings: Beginner Guide (2026)

    Use this guide to plan and create appropriate visuals for faceless videos.

    How to Create Storyboards and Plan Scenes for Faceless YouTube Videos with AI: Beginner Guide (2026)

    Use this guide before visual creation to decide what every scene should show.

    How to Add Voice, Music, and Captions to AI Videos: Beginner Step-by-Step Guide (2026)

    Use this guide for narration, voice, music, sound, and caption basics.

    AI Image Generation for Beginners: Complete Guide (2026)

    Use this guide for beginner help creating, reviewing, and improving AI-generated images.

    How to Use YouTube Studio and YouTube Analytics for Faceless Channels: Beginner Guide (2026)

    Use this guide to publish and manage videos in YouTube Studio, understand basic analytics, and improve future videos using performance data.

    Recommended learning order: Article 061 → Article 062 → Article 063 → Article 064 → Article 065 → Article 066 → Article 067.

    Sources and References

    Sources reviewed: August 8, 2026

    The following official YouTube sources were used to verify the monetization, reused-content, generic or repetitive content, AI-disclosure, Shorts, privacy, and YouTube Partner Program information in this article. Policies, eligibility requirements, terminology, and interface options can change.

    1. YouTube Channel Monetization Policies

    Primary source for original and authentic content, generic or repetitive content, reused content, AI-assisted creative examples, AI personas on sensitive topics, creator integrity, and channel-level monetization review.

    2. YouTube Partner Program Overview and Eligibility

    Official YPP eligibility and application process, including current standard ad-revenue thresholds and channel review.

    3. Overview of the Expanded YouTube Partner Program

    Official explanation of earlier YPP access for certain fan-funding and Shopping features in eligible regions.

    4. Disclosing Use of Generative AI Content

    Official guidance on when realistic altered or synthetic content must be disclosed and examples of ordinary production assistance.

    5. Understanding ‘How This Content Was Made’ Disclosures

    Official explanation of disclosure information such as Made with AI and how content-origin information can appear on YouTube.

    6. YouTube Shorts Monetization Policies

    Official Shorts monetization rules and the channel monetization policies that apply to Shorts.

    7. How to Earn Money on YouTube

    Overview of YouTube monetization features and the fact that individual features can have additional eligibility requirements.

    8. Protecting Your Identity on YouTube

    Privacy guidance relevant to realistic altered or synthetic content involving a person’s likeness.

    9. YouTube Impersonation Policy

    Official policy covering impersonation, including misleading use of AI-generated likenesses or voices.

    10. Response to Creator Questions About YPP Policies (July 2025)

    TeamYouTube clarification that the 2025 update did not create a blanket AI ban and did not change the separate reused-content policy.

    11. YouTube’s Approach to Responsible AI

    YouTube guidance on realistic altered or synthetic content and disclosure enforcement.

    Source-Checking Guidance for Beginners

    You do not need to reread every policy before publishing every video. Check current official guidance when you first start using AI in YouTube videos, introduce a new type of synthetic media, apply to YPP, change monetization methods, receive a policy-update notice, see a new disclosure option, receive a monetization warning or rejection, and periodically review your channel.

    For changing platform rules, prefer official YouTube Help, the current information shown in YouTube Studio, and official YouTube announcements over old screenshots, social-media rumours, unverified monetization tutorials, or services promising guaranteed YPP approval.

    Policy note: Article 066 reflects official sources reviewed on August 8, 2026. It does not guarantee YouTube Partner Program approval, continued monetization, advertising revenue, or a particular legal outcome.