Author: AI Mastery

  • How to Create AI Videos from Images: Beginner Step-by-Step Guide (2026)

    How to Create AI Videos from Images: Beginner Step-by-Step Guide (2026)

    Estimated reading time: 110–140 minutes
    Last updated: July 28, 2026

    Before Learning

    For the best results, read these guides first:

    AI Image Generation for Beginners: Complete Guide (2026)

    Prompt Engineering for Beginners: Complete Guide (2026)

    How to Create AI Videos with ChatGPT: Beginner Step-by-Step Guide (2026)

    Best AI Video Tools for Beginners: Complete Guide (2026)

    What You’ll Learn

    By the end of this guide, you will know:

    • What image-to-video generation is and how it works

    • How an uploaded image guides the subject, composition, lighting, colours, and visual style

    • Which types of images produce the most stable results

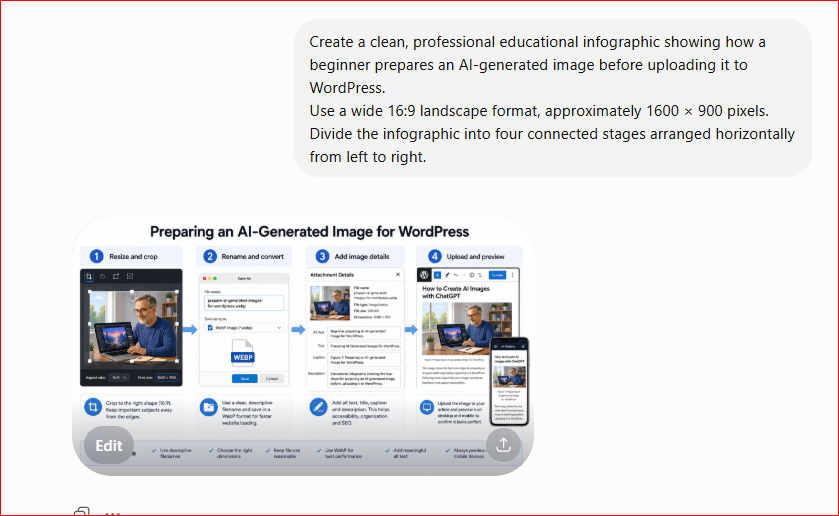
    • How to prepare, resize, crop, rename, and organize a starting image

    • How to decide what should move and what should remain unchanged

    • How to write a clear image-to-video motion prompt

    • How to describe subject movement, background movement, camera movement, timing, and speed

    • How to choose clip duration, aspect ratio, resolution, and motion strength

    • How to animate photographs, AI-generated images, illustrations, products, characters, and landscapes

    • How to maintain consistent faces, clothing, products, backgrounds, and colours

    • How to use first-frame and last-frame controls when available

    • How to generate and review the first video version

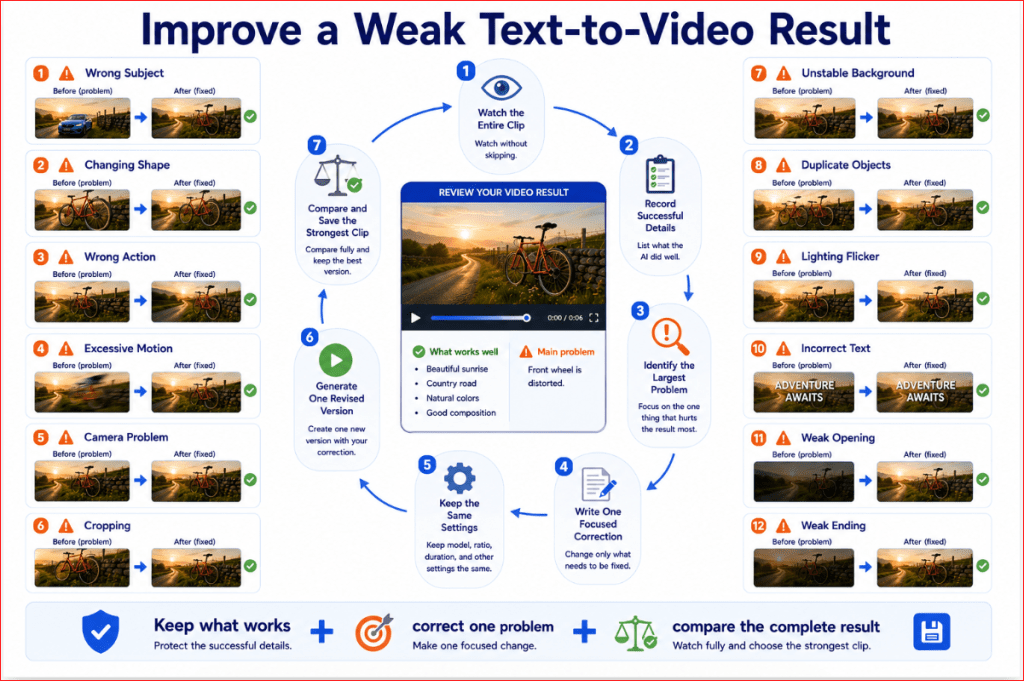
    • How to identify problems and improve one instruction at a time

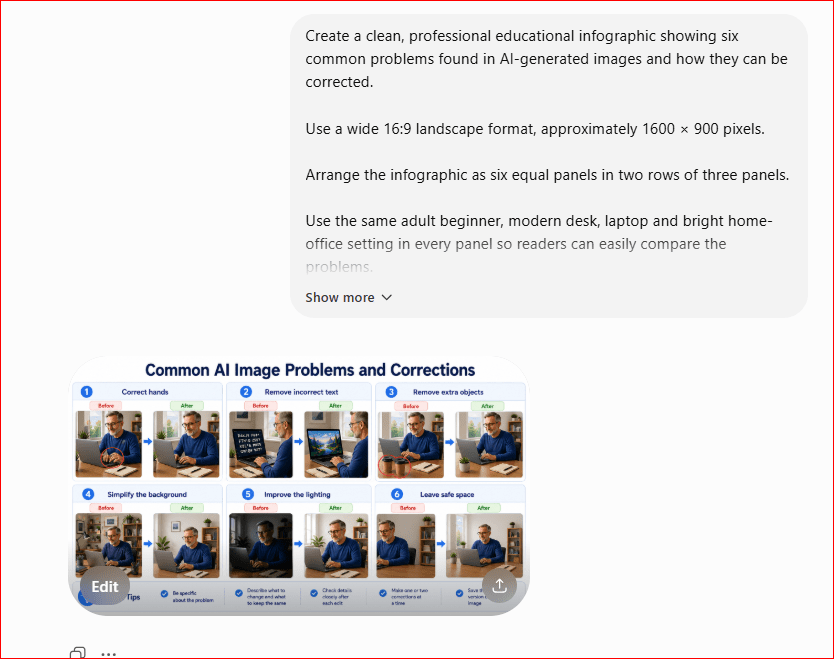
    • How to correct distorted faces, hands, objects, backgrounds, cropping, and excessive motion

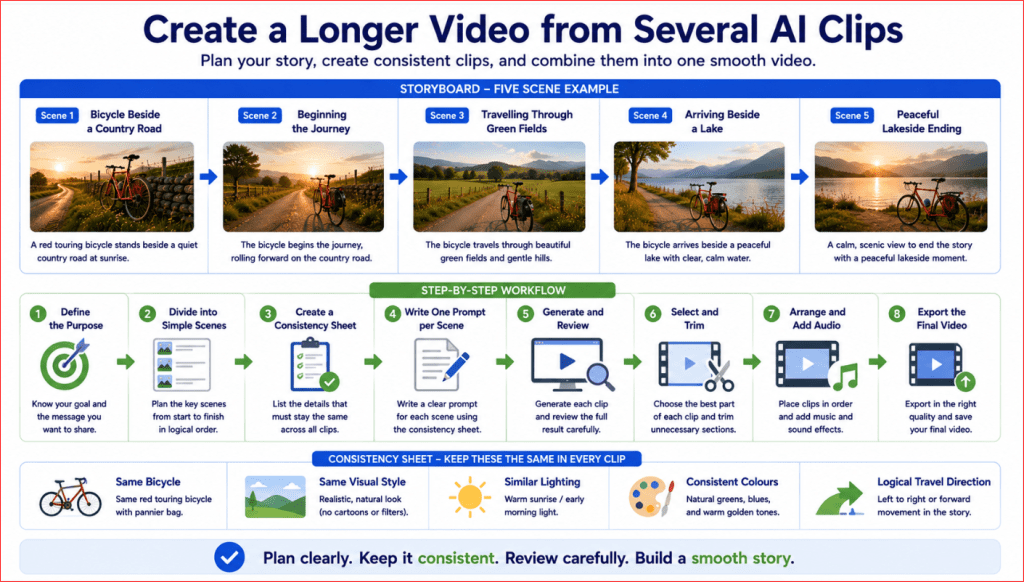
    • How to combine several image-generated clips into a longer video

    • How to add captions, narration, music, transitions, and final editing

    • How to export, compress, name, and organize the finished video

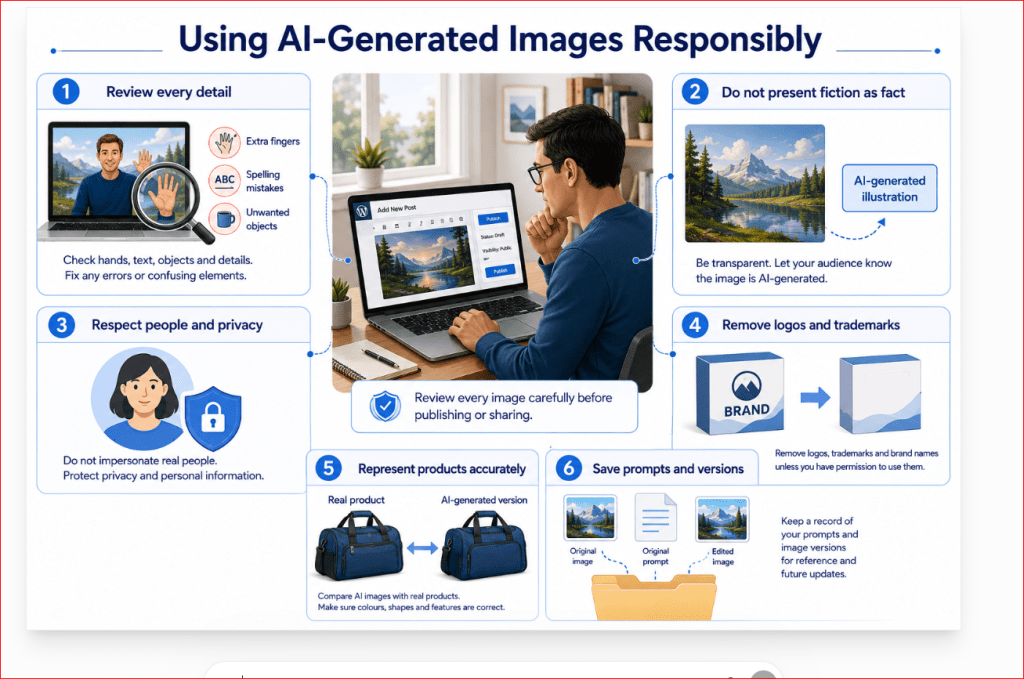
    • How to protect privacy and respect copyright and commercial-use conditions

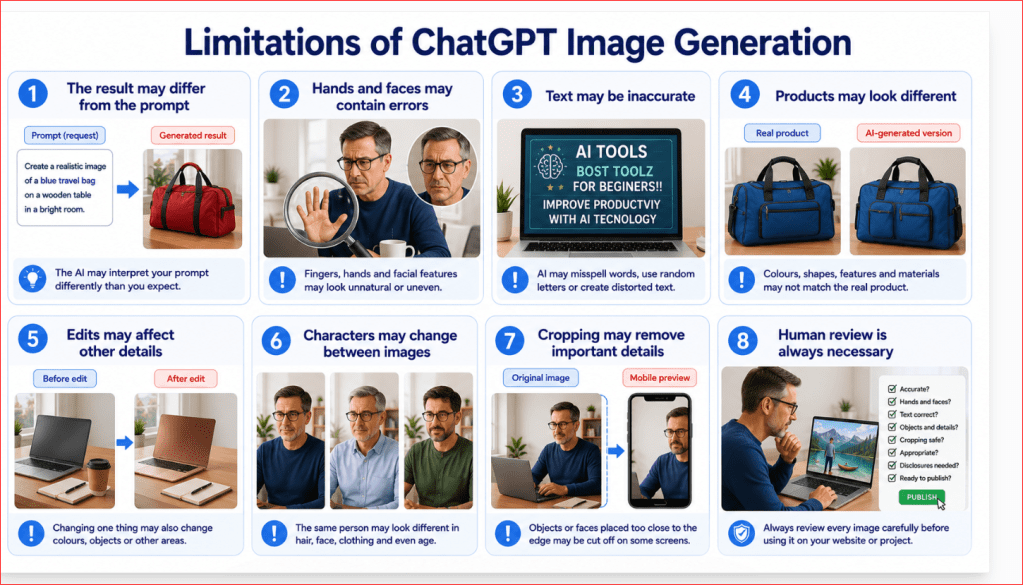
    • Which common mistakes, limitations, and myths beginners should understand

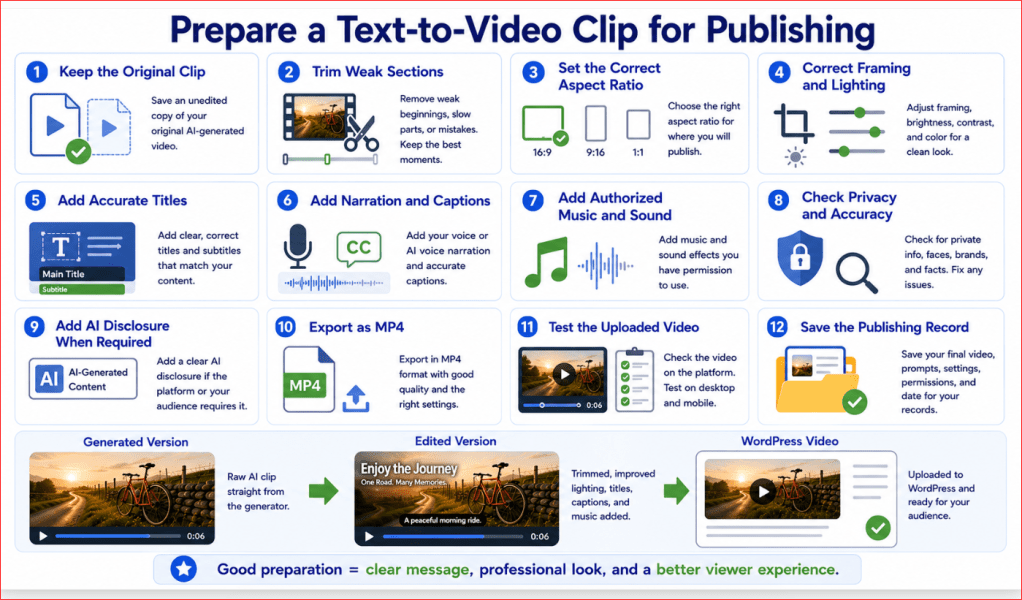
    • How to publish image-generated videos responsibly on WordPress, YouTube, and social media

    In current image-to-video workflows, the uploaded image normally provides the visual foundation, while the written prompt should concentrate mainly on movement, camera behaviour, timing, and what should remain stable.

    High-quality starting images with clear subjects and minimal visual defects generally provide a stronger base because existing defects can become more noticeable when movement is added.

    Introduction

    A still image captures one moment. Image-to-video generation adds movement to that moment by animating the subject, background, environment, or camera.

    For example, an image of a quiet lake could become a short video showing:

    • Water moving gently

    • Mist drifting above the surface

    • Tree branches swaying

    • Clouds moving slowly

    • The camera travelling toward the mountains

    The original image provides the visual foundation for the generated video. It normally guides

    important details such as:

    • The main subject

    • Composition

    • Background

    • Lighting

    • Colours

    • Camera angle

    • Visual style

    The written prompt has a different job. Instead of repeating everything already visible in the image, it should mainly explain what should happen over time.

    A strong image-to-video prompt may describe:

    • Subject movement

    • Environmental movement

    • Camera movement

    • Direction and speed

    • Timing

    • What should remain stable

    Runway’s current image-to-video guidance explains that the uploaded image establishes the composition, subject matter, lighting, and style, while the text prompt should focus primarily on motion, camera work, and how the scene develops over time. [1]

    For example, imagine that you upload a clear photograph of a red bicycle beside a country road.

    A simple motion prompt could say:

    Grass moves gently in the breeze while the camera slowly travels toward the bicycle. The bicycle, wooden fence, road, lighting, and background remain visually consistent.

    The generator uses the image as the starting frame and attempts to create the requested movement across the following frames.

    Image-to-video generation can be used with:

    • Photographs you own or are permitted to use

    • AI-generated images

    • Product photographs

    • Character designs

    • Landscapes

    • Illustrations

    • Website graphics

    • Educational visuals

    • Storyboard frames

    This method can provide more visual control than text-to-video because the starting image already establishes the subject and composition. However, it does not guarantee that every detail will remain unchanged. Faces, hands, products, clothing, backgrounds, or small objects may still distort or transform as movement is generated.

    The quality of the starting image is therefore important. Runway recommends using a high-quality image without visible defects because problems such as blurry faces, malformed hands, or other visual artifacts may become more noticeable when the image is animated. [1]

    Some modern platforms also allow the creator to provide:

    • A first-frame image

    • A last-frame image

    • Both first and last frames

    • Camera controls

    • Motion references

    • Resolution and aspect-ratio settings

    Adobe Firefly currently supports image guidance through first and last keyframes in selected workflows. These frames act as visual anchors that help control how the generated video begins, ends, or transitions between two images. [6]

    Available settings depend on the selected model. The most successful beginner projects usually begin with one clear image and a small amount of realistic motion. Asking a portrait subject to blink gently or adding slight movement to steam, water, curtains, leaves, or clouds is normally easier to control than requesting several dramatic actions at once.

    Image-to-video generation should be treated as an improvement process:

    1. Prepare a suitable image.

    2. Decide what should move.

    3. Decide what should remain stable.

    4. Write a focused motion prompt.

    5. Generate one short clip.

    6. Review the entire result.

    7. Correct the largest problem.

    8. Generate another version when needed.

    9. Edit and export the strongest clip.

    The first result may not be perfect. Generative-video prompting commonly requires reviewing and refining several versions because each attempt helps reveal how the model interprets the image and instructions.

    Current Information Note: Image-to-video model names, controls, supported formats, clip lengths, resolutions, credit costs, and account availability can change frequently. Always check the current official instructions for the platform and model you are using before beginning an important or commercial project. [3][6][9]

    This guide will show you how to choose and prepare a starting image, write effective movement instructions, generate a short video, correct common problems, edit the finished result, and publish it responsibly.
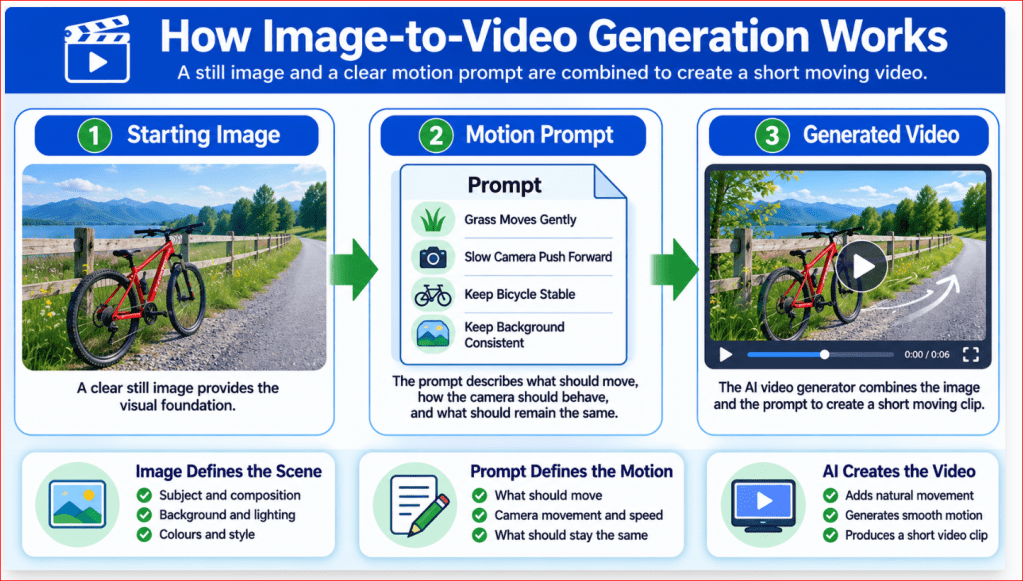
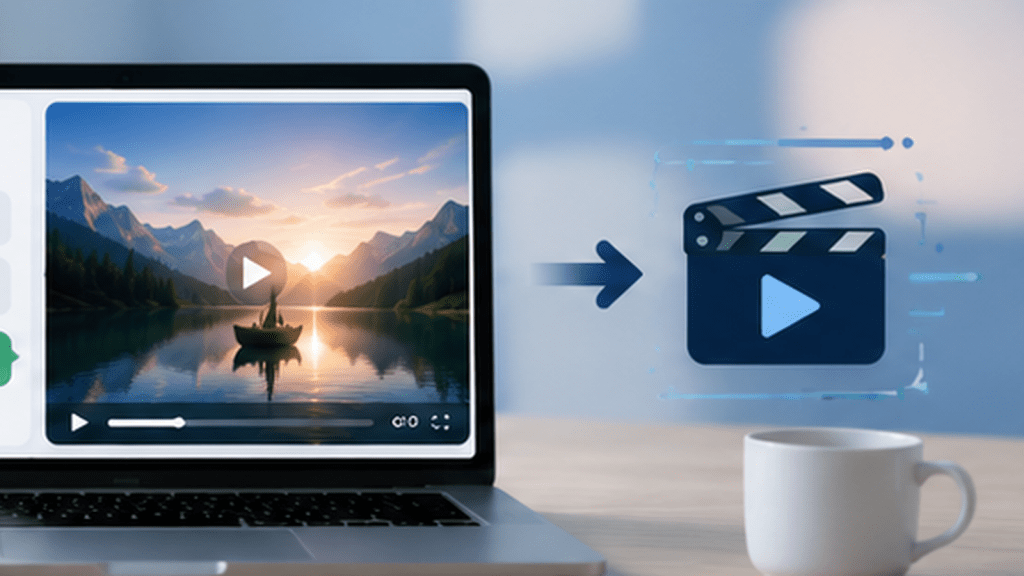
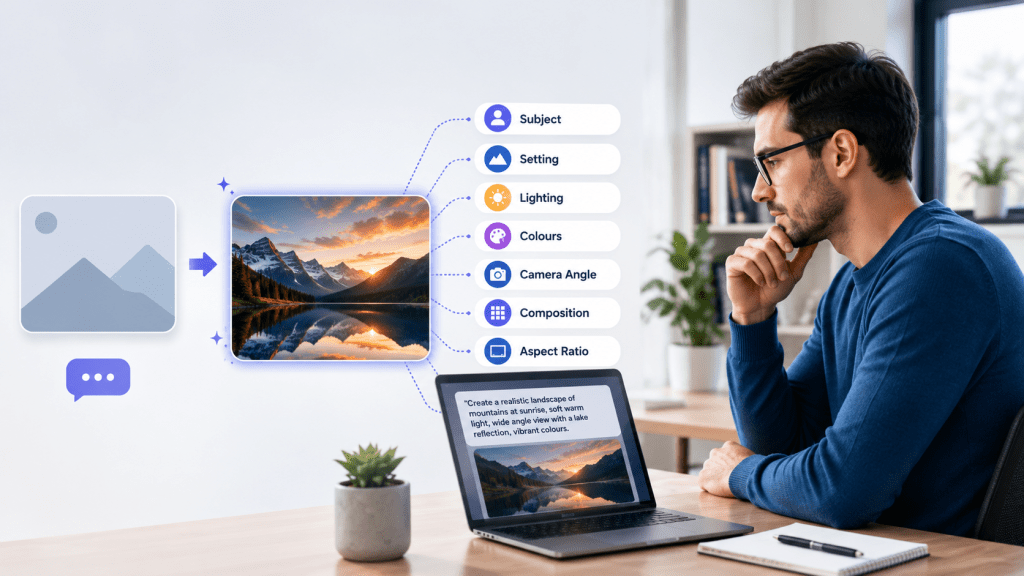
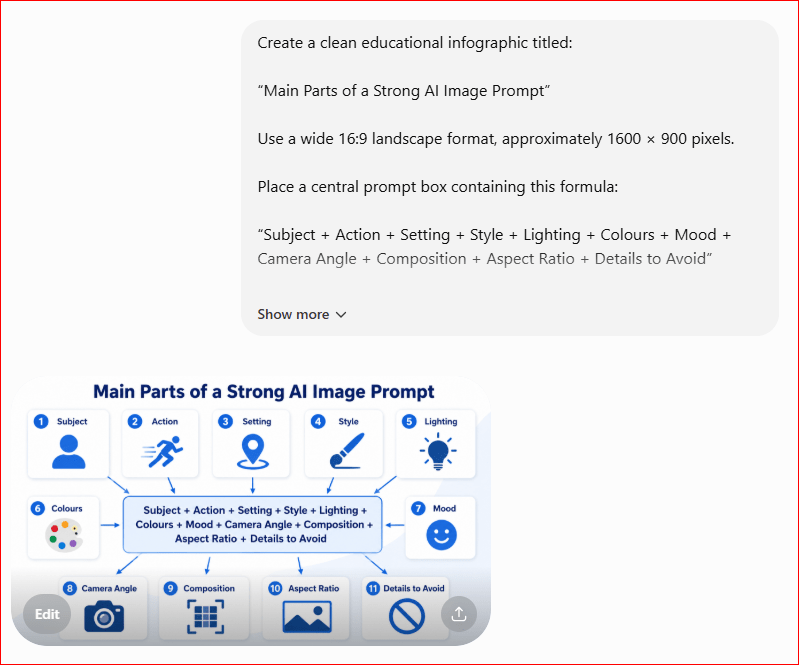
    Figure 1. How a still image and motion prompt work together to create an AI-generated video.

    Figure 1 shows that the uploaded image controls the scene’s visual foundation, while the motion prompt describes what should move, how the camera should behave, and what should remain consistent. The AI video generator combines both inputs to produce a short moving clip.

    What Is Image-to-Video Generation?

    Image-to-video generation is the process of using artificial intelligence to transform a still image into a short moving video.

    The uploaded image becomes the visual starting point. The AI examines the image and attempts to maintain its:

    • Main subject

    • Composition

    • Background

    • Lighting

    • Colour palette

    • Camera angle

    • Visual style

    The written prompt then explains how the scene should change over time.

    Runway describes the input image as the first frame that guides the composition, subject, lighting, and style. Its guidance recommends using the prompt mainly to describe motion rather than repeating details already visible in the image. [1]

    For example, you might upload an image showing a cup of coffee beside a window and enter:

    Gentle steam rises from the coffee while the curtain moves slightly in the breeze. The camera slowly moves closer to the cup. Keep the cup, table, window, lighting, and background unchanged.

    The AI attempts to create the frames that connect the still starting image to the requested movement.

    Image-to-Video Is Not a Traditional Slideshow

    A slideshow displays several still images one after another. It may add simple transitions, zoom effects, music, or text, but the objects inside each photograph normally remain still.

    Image-to-video generation is different because the AI can attempt to animate elements within one image.

    For example, it may add:

    • Natural blinking

    • Hair moving gently

    • Steam rising

    • Water flowing

    • Clouds drifting

    • Leaves swaying

    • Curtains moving

    • A product rotating

    • Camera movement through the scene

    The generated video contains newly created frames rather than simply displaying the original photograph for several seconds.

    The Starting Image Defines the Visual Scene

    The starting image already tells the AI what the scene looks like.

    It normally establishes:

    • Who or what appears

    • Where objects are positioned

    • How closely the subject is framed

    • Which direction the subject faces

    • The time of day

    • The lighting conditions

    • The dominant colours

    • The visual style

    • The amount of space around the subject

    This is why choosing the correct image is essential. A generator cannot reliably preserve details that are blurry, cropped, hidden, or already distorted.

    Runway warns that visual problems in the source image—such as unclear faces or malformed hands—may become more noticeable when the image is animated. [1]

    The Prompt Defines the Movement

    The motion prompt explains what should happen after the first frame.

    A useful prompt may describe:

    Subject action: A person turns their head slowly.

    Environmental motion: Leaves move gently in the wind.

    Camera motion: The camera slowly pushes forward.

    Direction: The person walks from left to right.

    Speed: The movement is slow and natural.

    Timing: The subject pauses before looking toward the camera.

    Stability: The face, clothing, and background remain unchanged.

    You do not need to include every possible instruction. Runway recommends beginning with the most important movement and adding further detail only when refinement is needed. [1]

    Image-to-Video Compared with Text-to-Video

    With text-to-video, the AI must create both the scene and its movement from written instructions.

    With image-to-video, the image already establishes the visual scene, so the prompt can concentrate more heavily on movement.

    Text-to-Video

    Use text-to-video when:

    • You do not already have a starting image

    • You want the AI to invent the complete scene

    • You are exploring different visual ideas

    • Exact composition is not essential

    • You need backgrounds, B-roll, or creative concepts

    Image-to-Video

    Use image-to-video when:

    • You already have a suitable photograph or illustration

    • The subject should remain recognizable

    • You want to preserve a particular composition

    • A product or character must begin in a specific position

    • Several clips should share a similar visual style

    • You want greater control over the opening frame

    Image-to-video often provides a clearer starting point, but it does not guarantee perfect consistency.

    The AI may still alter faces, hands, products, clothing, backgrounds, or small details while generating movement.

    First-Frame and Last-Frame Workflows

    Some platforms allow only one uploaded image. That image becomes the first frame of the generated video.

    Other platforms allow:

    • A first-frame image

    • A last-frame image

    • Both a first and last frame

    Adobe Firefly currently allows uploaded images to guide the beginning, ending, or both ends of a generated clip. [6]

    The images act as visual anchors for the transition, although available controls may change according to the selected model.

    For example:

    First frame: A closed book on a desk

    Last frame: The same book open to a page containing an illustration

    Prompt: The book opens slowly while the camera remains fixed

    The AI attempts to generate the movement between the two frames.

    Using first and last frames can be helpful for:

    • Before-and-after transformations

    • Product reveals

    • Opening and closing objects

    • Changes in lighting

    • Scene transitions

    • Seamless loops

    • Moving from one planned composition to another

    However, the two images should be visually compatible. A dramatic difference in camera angle, subject position, lighting, or background may produce an unstable transition.

    Types of Images That Can Be Animated

    Image-to-video tools can work with many kinds of images, including:

    • Photographs

    • AI-generated images

    • Digital illustrations

    • Product photographs

    • Character designs

    • Landscapes

    • Interior scenes

    • Website graphics

    • Storyboard frames

    • Educational artwork

    The image must belong to you, be generated under terms that permit its use, or be properly licensed.

    What Image-to-Video Does Not Guarantee

    Uploading a clear image does not guarantee that the AI will preserve every detail.

    Possible problems include:

    • A face changing during the clip

    • Hands becoming distorted

    • A product changing shape

    • Clothing changing colour

    • Objects appearing or disappearing

    • The background shifting

    • Excessive camera movement

    • Unnatural blinking or body motion

    • Important areas being cropped

    If the uploaded image does not match the selected aspect ratio, some tools may crop it automatically. Adobe provides crop controls in supported workflows, so the image should be inspected before generation.

    The most reliable beginner approach is to use one clear image, request one or two gentle movements, and generate a short clip.

    When Should You Use Image-to-Video?

    Image-to-video is especially useful when the starting appearance matters more than giving the AI complete creative freedom.

    Good beginner projects include:

    • Adding gentle movement to a landscape

    • Animating steam above a drink

    • Making clouds drift across a sky

    • Adding subtle motion to a website illustration

    • Creating a slow camera movement around a product

    • Animating an AI-generated character

    • Turning a storyboard frame into a short scene

    • Creating a moving background for a presentation

    • Producing a simple before-and-after transition

    It is less suitable when the video requires precise real-world evidence, exact product operation, verified testimony, or an authentic event. In those cases, real footage is usually more appropriate.
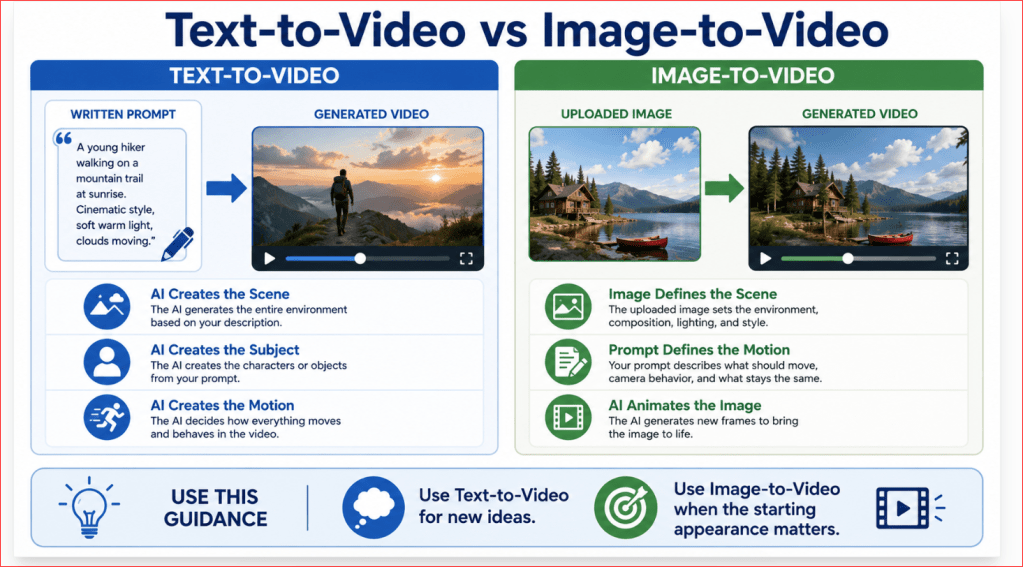
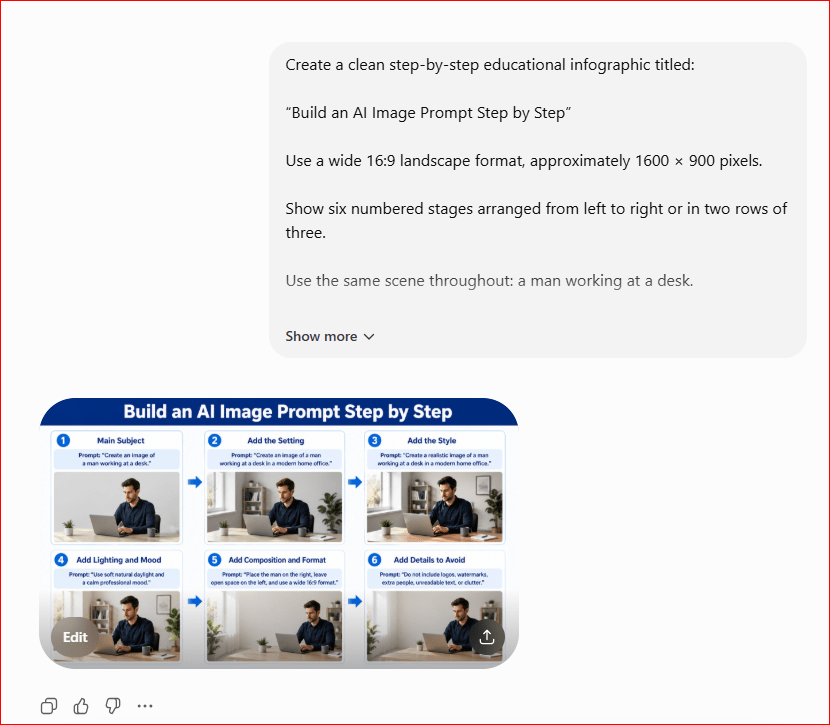
    Figure 2. The main difference between text-to-video and image-to-video generation.

    Figure 2 shows that text-to-video asks the AI to create both the scene and its movement, while image-to-video begins with an existing visual foundation and uses the prompt mainly to control motion, camera behaviour, and stability.

    Which Images Work Best for Image-to-Video?

    The quality of the starting image strongly affects the generated video. The AI uses the uploaded image as its first frame and visual foundation, so unclear or distorted details may continue—or become more noticeable—when movement is added.

    A suitable starting image should be:

    • Clear and sharp

    • Properly exposed

    • Correctly composed

    • Free from visible defects

    • Large enough for the intended video

    • Already close to the desired final appearance

    • Prepared in the correct aspect ratio

    • Legally permitted for your intended use

    Do not choose an image only because the idea is attractive. Examine the subject, background, hands, face, products, edges, and empty space carefully before uploading it.

    Use a Clear Main Subject

    The viewer should be able to identify the main subject immediately.

    Good examples include:

    • One person standing in a simple setting

    • One product on a clean surface

    • One bicycle beside a road

    • One cup of coffee near a window

    • One building in a landscape

    • One animal in a natural environment

    The subject should not be hidden behind other objects or blended into a complicated background.

    A clear subject makes it easier to write movement instructions such as:

    The woman turns her head slowly toward the window.

    or:

    The camera moves gently around the product while the product remains unchanged.

    Choose a Sharp, High-Quality Image

    Avoid starting with an image that is:

    • Blurry

    • Pixelated

    • Heavily compressed

    • Poorly focused

    • Very dark

    • Overexposed

    • Covered by digital noise

    • Damaged by previous editing

    Runway recommends using a high-quality image without visual artifacts because blurry faces, unclear hands, and other existing problems may become more noticeable during animation.

    Zoom in and inspect the image before using it. A picture may appear acceptable at normal size but reveal defects when enlarged.

    Check Faces Carefully

    When the image contains a person, inspect:

    • Both eyes

    • Eyebrows

    • Nose

    • Mouth

    • Teeth

    • Ears

    • Hairline

    • Skin texture

    • Facial symmetry

    • Direction of the person’s gaze

    Avoid using a portrait when:

    • One eye is distorted

    • The mouth is unclear

    • Teeth contain irregular shapes

    • The face is partly hidden

    • The image is too small

    • Strong blur covers facial features

    Animating a weak face may produce unnatural blinking, changing facial features, or unstable expressions.

    For a first beginner project, use gentle motion such as:

    • One natural blink

    • Slight breathing

    • A small head turn

    • Subtle hair movement

    • A slow camera push forward

    Avoid asking for dramatic expressions or rapid head movement until you understand how the selected model handles faces.

    Inspect Hands and Fingers

    Hands are difficult elements for many generative systems.

    Before uploading an image, check that:

    • The correct number of fingers is visible

    • Fingers do not merge

    • The hand is not blurry

    • Arms connect naturally

    • The person holds objects correctly

    • Hands are not hidden in confusing positions

    A distorted starting hand may become more unstable during movement. Runway specifically notes that visual defects in the source image can be intensified in the resulting video.

    When hands are not important, choose:

    • A wider camera view

    • A composition where hands are resting

    • A pose with limited hand visibility

    • A simple movement that does not involve handling objects

    Use Simple, Natural Poses

    The subject’s position should support the movement you plan to request.

    For example:

    • A standing person can turn or begin walking.

    • A seated person can look up or move one hand.

    • A parked bicycle can remain stable while the environment moves.

    • A cup can remain still while steam rises.

    • A tree can remain rooted while leaves move.

    Avoid an image containing a pose that contradicts your requested action.

    For example, an image with strong motion blur or a person frozen in the middle of running may make it difficult to request that the person remain completely still. Runway explains that source images may contain implied-motion cues—such as motion blur, directional lines, dust, or mid-action poses—that influence how the model interprets movement.

    Match the Image to the Intended Motion

    Before selecting the image, ask:

    • What should move?

    • In which direction should it move?

    • Is there enough room for that movement?

    • Is the subject facing the correct direction?

    • Does the pose support the intended action?

    • Will the requested motion remain inside the frame?

    For example, when a person should walk toward the right, the image should leave sufficient empty space on the right side.

    When the camera should push forward, the image should contain enough visual depth, such as:

    • A road

    • A hallway

    • A landscape

    • A row of trees

    • A path

    • A room with visible foreground and background

    Leave Space Around the Subject

    Avoid images where the main subject touches the edges.

    Leave space:

    • Above a person’s head

    • In front of a moving subject

    • Around a product

    • Beside important objects

    • Below feet or wheels

    • Where captions may later appear

    Extra space gives the generator more room for camera movement and reduces the risk of accidental cropping.

    It also helps when the video must later be resized for:

    • 16:9 landscape

    • 9:16 vertical

    • 1:1 square

    • 4:5 portrait

    Prepare the Correct Aspect Ratio First

    Choose the destination format before preparing the starting image.

    Use:

    16:9 for YouTube, WordPress articles, websites, presentations, and landscape video

    9:16 for YouTube Shorts, Instagram Reels, TikTok, and vertical mobile content

    1:1 for square social posts

    4:5 for portrait feed posts

    When an uploaded image does not match the selected video ratio, some tools crop it automatically. Adobe Firefly’s mobile image-to-video workflow currently states that an image that does not match the selected ratio will be cropped to fit.

    Selected Firefly workflows also provide cropping controls for keyframe images, allowing the user to reposition the crop before generating the video.

    Do not rely on automatic cropping. Prepare and inspect the image in the required shape first.

    Expand the Image Instead of Cutting Important Details

    When the original image is too narrow or too short, cropping may remove important content.

    A safer option may be to expand the background around the image before animation.

    For example, you can add space:

    • Above a person’s head

    • Beside a product

    • In front of a walking character

    • Around a landscape

    • Where titles or captions will appear

    Some image editors provide generative expansion tools that can add background space around an image while attempting to preserve the existing composition.

    After expanding the image, inspect the newly generated area for:

    • Repeated objects

    • Incorrect patterns

    • Changing architecture

    • Distorted trees

    • Uneven lighting

    • Unnatural shadows

    • Unexpected people or text

    Use a Simple Background

    A simple background is generally easier to keep stable.

    Suitable backgrounds include:

    • A plain wall

    • A clean studio

    • A quiet road

    • An uncluttered room

    • A field

    • A lake

    • A simple office

    • A softly blurred environment

    Complicated backgrounds may contain many elements that can flicker, shift, or transform, such as:

    • Crowds

    • Shelves filled with products

    • Detailed signs

    • Repeated windows

    • Complex patterns

    • Heavy traffic

    • Dense furniture

    • Small objects

    • Visible text

    When a busy background is necessary, request minimal environmental motion and a stable camera.

    Avoid Important Visible Text

    Text inside the starting image may become distorted or change between frames.

    Be cautious with:

    • Product labels

    • Signs

    • Computer screens

    • Book covers

    • Posters

    • Clothing text

    • Packaging

    • Logos

    • Vehicle licence plates

    When exact wording matters, generate the clip without important visible text and add the correct wording later in a video editor.

    For a product video, real footage may be safer when packaging, instructions, labels, or branding must remain completely accurate.

    Check Products for Accuracy

    When animating a product photograph, inspect:

    • Shape

    • Colour

    • Packaging

    • Buttons

    • Openings

    • Materials

    • Labels

    • Accessories

    • Proportions

    • Reflections

    • Shadows

    The product should already appear exactly as intended before animation.

    Request limited movement, such as:

    The camera moves slowly from left to right around the product. Keep the product’s shape, colour, packaging, label, buttons, proportions, and materials completely unchanged.

    Even with stability instructions, review every frame. Do not use the result as an exact product demonstration when important details change.

    Choose Appropriate Lighting

    Use an image with clear, consistent lighting.

    Good lighting helps define:

    • Facial features

    • Product shape

    • Background depth

    • Clothing texture

    • Object edges

    • The intended mood

    Avoid images with:

    • Harsh mixed lighting

    • Extremely dark shadows

    • Blown-out highlights

    • Different light colours on the same subject

    • Unnatural reflections

    • Light coming from conflicting directions

    When the lighting is already attractive, tell the AI to preserve it:

    Maintain the same soft golden lighting throughout the clip.

    Avoid Excessive Depth-of-Field Blur

    Background blur can create a professional appearance, but excessive blur may make object boundaries unclear.

    Use a source image where:

    • The main subject is sharply focused

    • Important objects are recognizable

    • Foreground and background boundaries are understandable

    • Blur does not cover hands, hair, or product edges

    The AI needs enough visual information to determine which elements belong to the subject and which belong to the environment.

    Check Small and Repeated Objects

    Repeated elements may create instability, including:

    • Fence posts

    • Windows

    • Chairs

    • Books

    • Bottles

    • Wheels

    • Trees

    • Lights

    • Tiles

    • Shelves

    The AI may add, remove, merge, or reshape these elements during animation.

    When repeated details are not essential, simplify the image before generating the video.

    AI-Generated Images Should Be Corrected First

    Do not animate an AI-generated image immediately after creating it.

    First check for:

    • Incorrect hands

    • Distorted faces

    • Unreadable text

    • Duplicate objects

    • Cropped subjects

    • Uneven eyes

    • Incorrect shadows

    • Floating objects

    • Broken furniture

    • Inconsistent patterns

    • Unnatural anatomy

    Correct or regenerate the image before turning it into a video. A visual problem in the image may become more obvious once motion is added.

    Use Compatible First and Last Frames

    When the tool supports both first and last images, the two frames should share:

    • The same subject

    • Similar camera angle

    • Similar composition

    • Matching lighting

    • Consistent colours

    • The same background

    • Similar object proportions

    Firefly currently allows first and last keyframes to guide how a generated video begins and ends. These images function as visual anchors for the generation.

    Avoid using two frames that differ dramatically unless a major transformation is intentional.

    For example, a stable pair might show:

    • A closed book and the same book slightly open

    • A person looking forward and the same person looking left

    • A dark room and the same room with a lamp turned on

    • A product in its package and the same product revealed

    Recommended Starting-Image Checklist

    Before uploading an image, confirm:

    1. The main subject is clear.

    2. The image is sharp and high quality.

    3. Faces and hands look correct.

    4. The subject’s pose supports the intended movement.

    5. The background is reasonably simple.

    6. Important objects are not touching the edges.

    7. There is enough room for the planned movement.

    8. The aspect ratio matches the final video.

    9. Important text can be added later.

    10. Products and labels are accurate.

    11. Lighting and shadows are consistent.

    12. No private information is visible.

    13. You own the image or have permission to use it.

    14. The image is already close to the desired first video frame.

    A strong starting image does not guarantee a perfect video, but it removes many preventable problems before generation begins.
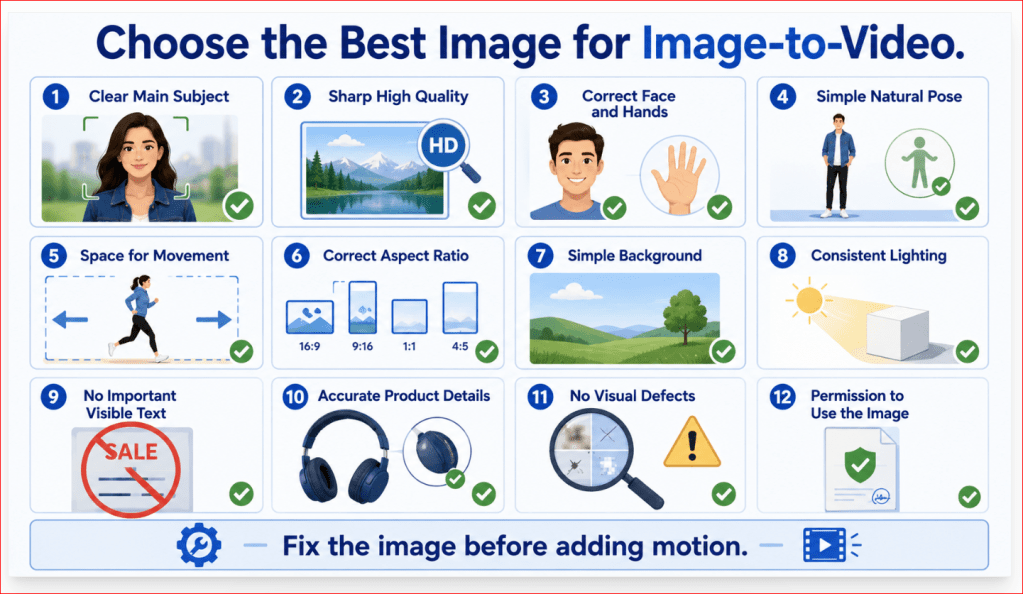
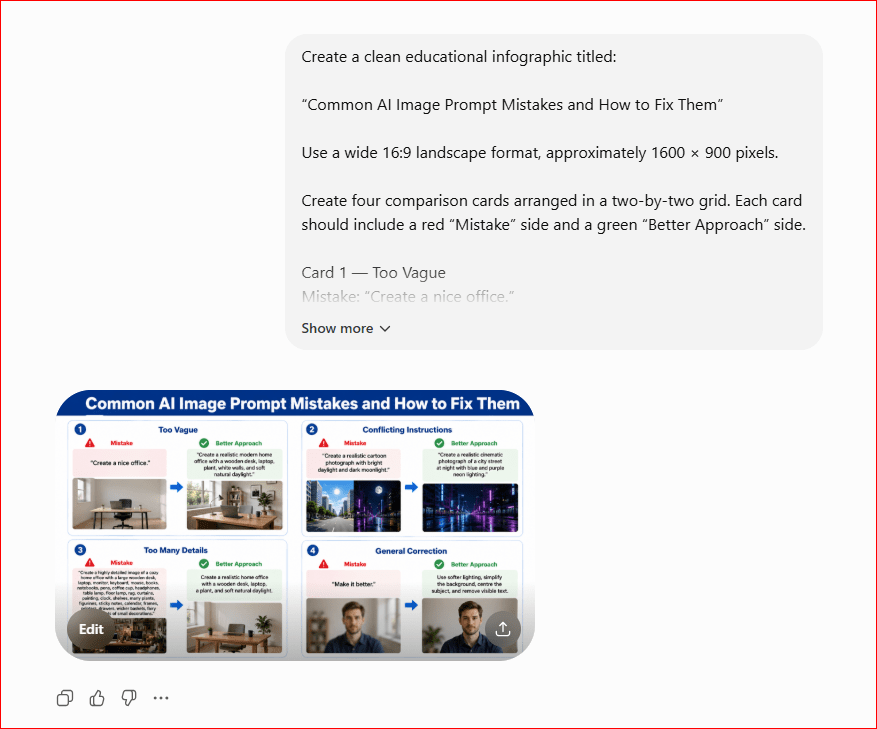
    Figure 3. The qualities of a strong starting image for image-to-video generation.

    Figure 3 provides a practical checklist for selecting an image before animation. A clear subject, correct anatomy, sufficient space, simple background, suitable aspect ratio, accurate details, and consistent lighting give the AI a stronger visual foundation.

    How to Prepare an Image for Image-to-Video

    Preparing the starting image before uploading it can prevent cropping, distortion, privacy problems, and wasted video-generation credits.

    Do not work directly on your only original image. Create a separate copy specifically for the video project.

    Step 1: Keep the Original Image Safe

    Create a project folder and place the untouched original image inside it.

    A simple folder structure could be:

    Article-019-Image-to-Video

    • 01-original-images

    • 02-prepared-images

    • 03-prompts

    • 04-generated-clips

    • 05-edited-video

    • 06-final-exports

    • 07-licences-and-records

    Keeping the original separate allows you to return to it when cropping, resizing, or editing produces an unwanted result.

    Step 2: Create a Working Copy

    Duplicate the original image and edit only the copy.

    For example:

    Original:
    red-bicycle-original.jpg

    Prepared working copy:
    red-bicycle-image-to-video-16×9.jpg

    This avoids accidentally replacing the highest-quality version.

    Step 3: Choose the Final Video Format

    Decide where the video will be published before cropping or resizing the image.

    Use:

    16:9 landscape for WordPress, websites, YouTube, and presentations

    9:16 vertical for TikTok, Instagram Reels, and YouTube Shorts

    1:1 square for square social media posts

    4:5 portrait for portrait feed posts

    For AI Mastery article demonstrations, use 16:9 landscape unless the video is being created specifically for mobile-first social media.

    The image and video should preferably use the same aspect ratio. Otherwise, the generator may crop the uploaded image. Adobe Firefly currently crops images that do not match the selected video ratio, although supported workflows provide controls for repositioning the crop.

    Step 4: Crop the Image Carefully

    Crop the image to the required aspect ratio while protecting the main subject.

    Check that the crop does not remove:

    • The top of a person’s head

    • Hands or feet

    • Product edges

    • Bicycle wheels

    • Important background objects

    • Space needed for movement

    • Space intended for captions

    • Shadows that help the subject look natural

    Leave more empty space in the direction of movement.

    For example:

    • Leave space on the right when a person will walk right.

    • Leave space above when the camera will tilt upward.

    • Leave space around a product when the camera will move around it.

    • Keep foreground and background depth when requesting a camera push forward.

    Step 5: Expand the Background When Cropping Is Unsafe

    Sometimes the original image cannot be cropped without cutting off important details.

    In that case, expand the background instead of forcing a tight crop.

    You might add:

    • More sky above a landscape

    • More road in front of a bicycle

    • More wall beside a person

    • Additional table space around a product

    • Extra space for titles or captions

    A generative expansion tool can extend an image into a selected aspect ratio while attempting to preserve the existing composition. Any generated extension must still be inspected carefully.

    Check expanded areas for:

    • Repeated trees or windows

    • Broken fences

    • Uneven patterns

    • Incorrect shadows

    • Unexpected objects

    • Distorted architecture

    • Changes in lighting

    • Duplicate people or products

    Step 6: Use a Suitable Image Size

    The image should be large enough to remain clear after cropping.

    For a 16:9 project, a practical prepared-image size is:

    1600 × 900 pixels

    A larger image may also be used when the platform supports it, but excessive size does not automatically produce better motion.

    More important qualities include:

    • Sharp focus

    • Correct facial details

    • Clean object edges

    • Accurate products

    • Consistent lighting

    • No visible compression damage

    Runway recommends using a high-quality source image without visual artifacts because existing defects may become more noticeable after animation.

    Step 7: Choose a Compatible File Format

    Common image formats include:

    • JPG or JPEG

    • PNG

    • WebP

    • HEIC on selected devices and platforms

    Supported image formats vary by platform, model, device, and workflow. Check the upload requirements for the exact generator before preparing the final file.

    For a simple beginner workflow:

    • Use JPG for ordinary photographs.

    • Use PNG when preserving fine graphics or transparency is important.

    • Use WebP for efficient website storage when the selected video tool accepts it.

    Do not repeatedly save and recompress a JPG because repeated compression may reduce image quality.

    Step 8: Correct Visible Defects

    Zoom in and inspect the entire image.

    Correct or regenerate the image when you find:

    • Distorted hands

    • Uneven eyes

    • Incorrect teeth

    • Broken glasses

    • Duplicate fingers

    • Misshapen products

    • Floating objects

    • Crooked furniture

    • Unnatural shadows

    • Random symbols

    • Blurry edges

    • Repeated background objects

    Do not expect the video generator to repair these defects automatically. Animation may make them more noticeable.

    Step 9: Remove Unnecessary Visible Text

    Important wording should normally be added during video editing rather than embedded in the generated scene.

    Remove or avoid:

    • Random text

    • Incorrect product labels

    • Website addresses

    • Telephone numbers

    • Licence plates

    • Computer-screen information

    • Personal names

    • Posters containing unreadable words

    Keep genuine product labels only when they are essential and already completely accurate. Even then, inspect every generated frame because text may change during animation.

    Step 10: Remove Personal and Confidential Information

    Before uploading the image, check the foreground and background for:

    • Names

    • Addresses

    • Identification cards

    • Account numbers

    • Email addresses

    • Telephone numbers

    • Medical information

    • Financial information

    • Private computer screens

    • Customer records

    • Children’s identifying information

    • Confidential business documents

    Crop, blur, cover, or remove anything that the video generator does not need.

    A visually small detail in the image may become more noticeable when the camera moves toward it.

    Step 11: Improve Lighting Carefully

    Make small corrections when the image is:

    • Too dark

    • Too bright

    • Flat or low contrast

    • Strongly tinted

    • Difficult to understand

    Avoid aggressive editing that creates:

    • Artificial skin

    • Bright halos

    • Crushed shadows

    • Pure-white highlights

    • Oversaturated colours

    • Uneven lighting

    • Excessive sharpening

    The prepared image should look natural and already resemble the desired first frame.

    Step 12: Keep Important Colours Consistent

    When a character, product, or brand colour matters, record it before generating the video.

    For example:

    • Red bicycle

    • Dark-blue jacket

    • White coffee cup

    • Light-grey wall

    • Green product packaging

    The motion prompt can repeat these essential details:

    Keep the bicycle’s red colour, black seat, silver wheels, and original proportions unchanged.

    This does not guarantee perfect accuracy, but it clearly tells the model which details matter.

    Step 13: Rename the Image Clearly

    Use a descriptive filename before uploading.

    Good example:

    red-bicycle-country-road-image-to-video-16×9.jpg

    Avoid filenames such as:

    • IMG0045.jpg

    • newfinal2.jpg

    • picture-copy.jpg

    • test-last-final.jpg

    A useful filename may include:

    • Main subject

    • Setting

    • Intended use

    • Aspect ratio

    • Version number

    For example:

    coffee-window-steam-animation-16×9-v01.png

    Step 14: Save a Preparation Record

    Record the following information:

    • Original filename

    • Prepared filename

    • Image source

    • Creator or licence

    • Date prepared

    • Aspect ratio

    • Pixel dimensions

    • Editing completed

    • Intended movement

    • Intended platform

    • Whether personal information was removed

    This record becomes useful when creating several scenes or returning to the project later.

    Step 15: Preview the Image at Full Size

    Before uploading, view the image at 100% magnification.

    Inspect:

    • Face

    • Hands

    • Hair

    • Clothing

    • Product

    • Text

    • Background

    • Corners

    • Shadows

    • Repeated objects

    • Expanded areas

    Then view it at normal size to confirm that the full composition remains balanced.

    Step 16: Make a Final Upload Copy

    Save one clean file for uploading to the video generator.

    Do not add:

    • Figure captions

    • Article text

    • Decorative borders

    • Watermarks

    • Instructions

    • Arrows

    • WordPress metadata

    The video generator needs the clean visual scene—not the completed article figure.

    Prepared-Image Checklist

    Before uploading, confirm:

    1. The original image is safely stored.

    2. You are using a separate working copy.

    3. The aspect ratio matches the intended video.

    4. The subject is not cropped.

    5. There is enough room for movement.

    6. The image is sharp and properly exposed.

    7. Faces, hands, and products are correct.

    8. The background is stable and understandable.

    9. Important visible text has been removed or verified.

    10. No personal information is visible.

    11. You own the image or have permission to use it.

    12. The filename is clear and descriptive.

    13. The prepared image is already close to the desired first frame.

    14. A full-size final inspection has been completed.

    Preparing the image properly does not eliminate every generation problem, but it gives the AI a cleaner visual foundation and reduces avoidable corrections later.
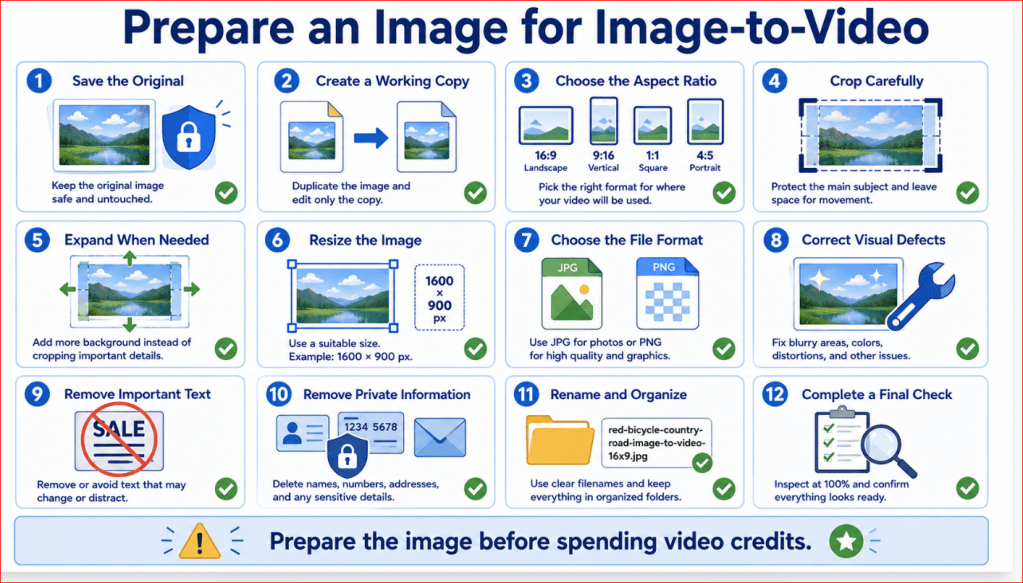
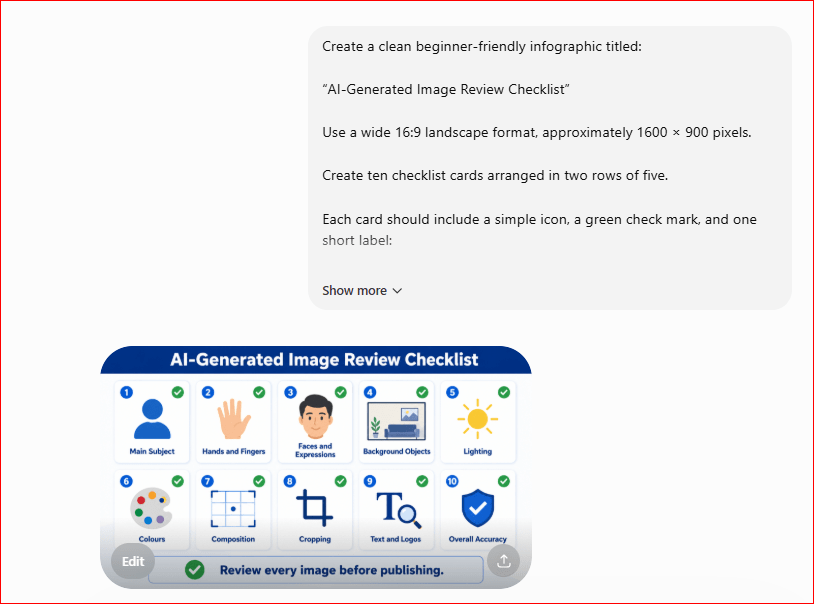
    Figure 4. The step-by-step process for preparing an image before creating an AI video.

    Figure 4 shows how to protect the original image, choose the correct format, crop or expand the composition, correct visible defects, remove private information, rename the file, and complete a final quality check before uploading it to an AI video generator.

    Decide What Should Move and What Should Remain Still

    Before writing the motion prompt, separate the scene into two groups:

    • Elements that should move

    • Elements that should remain stable

    This decision is one of the most important parts of image-to-video prompting. The image already defines the appearance of the scene, while the prompt should describe the intended motion, camera behaviour, and progression over time.

    A beginner should avoid asking everything in the image to move. Controlled motion usually makes it easier to protect the subject, composition, and background.

    Identify the Main Subject

    Begin by identifying the most important person, animal, product, vehicle, or object in the image.

    Ask:

    • Is the subject supposed to move?

    • Should it remain completely still?

    • Which part of the subject should move?

    • How far should it move?

    • How quickly should it move?

    • Does the image provide enough space for the movement?

    For example, in an image of a woman sitting beside a window, possible subject movements include:

    • Blinking once

    • Breathing naturally

    • Turning her head slightly

    • Looking toward the window

    • Moving one hand slowly

    • Allowing her hair to move gently

    Do not request several major body movements in the first test.

    Choose One Main Subject Movement

    One clear action is normally easier to control than several simultaneous actions.

    Weak instruction:

    The woman stands, walks across the room, waves, turns around, opens the window, and looks outside.

    Improved instruction:

    The woman slowly turns her head toward the window and blinks naturally once.

    The improved version gives the AI one main action and a clear direction.

    When additional movement is required, create a separate short clip for the next action.

    Use Subtle Motion for Portraits

    Portraits can become unstable when the face, head, hands, hair, and camera all move at the same time.

    Suitable beginner movements include:

    • Gentle blinking

    • Subtle breathing

    • A slight smile

    • A small head turn

    • Soft hair movement

    • A slow camera push forward

    Example:

    The man remains seated and breathes naturally. He slowly turns his eyes toward the camera and blinks once. His face, hairstyle, clothing, body position, and background remain consistent.

    The word consistent communicates the desired result, but every frame must still be reviewed.

    Use Natural Motion for Landscapes

    Landscape images often work well with gentle environmental movement.

    Possible movements include:

    • Leaves swaying

    • Grass moving

    • Water rippling

    • Clouds drifting

    • Mist travelling slowly

    • Snow falling

    • Sunlight changing slightly

    • A camera moving forward along a path

    Example:

    Leaves and grass move gently in a light breeze while clouds drift slowly across the sky. Small ripples move across the lake. The camera remains fixed.

    Runway’s current guidance recommends directly describing the motion and camera behaviour desired in the final clip. [1]

    Keep Buildings and Solid Objects Stable

    Solid objects should normally remain unchanged unless their movement is essential to the scene.

    Examples include:

    • Buildings

    • Walls

    • Furniture

    • Roads

    • Fences

    • Tables

    • Mountains

    • Parked vehicles

    • Product packaging

    • Signs

    Example stability instruction:

    Keep the building, windows, doors, pavement, streetlights, and camera framing fixed and visually consistent.

    This helps communicate that environmental effects such as rain, leaves, or clouds may move while the permanent structures should not.

    Protect Product Details

    For product images, the product itself often needs to remain stable while the camera or surrounding environment moves.

    Possible controlled movements include:

    • A slow camera orbit

    • A gentle camera push forward

    • A slight turntable rotation

    • Soft reflections moving across the surface

    • Background light changing slightly

    • Steam or particles moving around the product

    Example:

    The camera slowly moves from left to right around the headphones. Keep the headphones’ shape, dark-blue colour, ear cushions, headband, buttons, materials, proportions, and position unchanged.

    Do not request dramatic product movement when exact accuracy is important. Generated footage may still alter small commercial details, so every frame must be checked before business use.

    Separate Subject Motion from Camera Motion

    Subject movement and camera movement are different instructions.

    Subject motion describes what happens inside the scene:

    • A person walks

    • A bird flies

    • Water flows

    • Curtains move

    • A product rotates

    Camera motion describes how the viewer’s viewpoint changes:

    • The camera moves forward

    • The camera pans left

    • The camera tilts upward

    • The camera zooms out

    • The camera remains still

    Some current Firefly workflows provide camera controls or motion presets, while the prompt can also describe the desired movement. Available controls depend on the selected workflow and model.

    For a first test, choose either:

    • One subject movement with a fixed camera, or

    • One camera movement while the subject remains mostly still

    Combining several types of movement increases the chance of instability.

    Decide Whether the Camera Should Move

    A fixed camera is useful when:

    • The subject already fills the frame

    • Product accuracy matters

    • Background stability is important

    • The scene contains several small details

    • You want subtle environmental movement

    • You are testing the image for the first time

    Prompt example:

    The camera remains fixed. Steam rises slowly from the coffee while the curtain moves gently.

    A moving camera is useful when:

    • The image contains visual depth

    • You want a more cinematic result

    • The movement will reveal part of the environment

    • The subject has enough space around it

    • The scene can tolerate slight changes in framing

    Prompt example:

    The camera slowly pushes forward along the country road toward the bicycle. Keep the bicycle and fence visually consistent.

    Use Only One Camera Movement at First

    Beginner-friendly camera movements include:

    • Slow push forward

    • Slow pull backward

    • Gentle pan left

    • Gentle pan right

    • Slow tilt upward

    • Slow tilt downward

    • Subtle zoom in

    • Static camera

    Avoid combining instructions such as:

    Pan right, zoom in, rotate around the subject, tilt upward, and shake slightly.

    A simpler prompt is easier to evaluate:

    The camera slowly pans from left to right while maintaining stable framing.

    Adobe currently offers controls for shot size, camera angle, and motion in supported Firefly Video workflows. It also supports motion references in selected workflows, but the exact options vary by model.

    Decide What the Background Should Do

    The background can be:

    • Completely fixed

    • Gently animated

    • Moving because of the camera

    • Changing intentionally

    For most beginner projects, choose either a fixed background or one small environmental movement.

    Fixed-background example:

    Keep the wall, window, table, chair, lighting, and background completely stable.

    Animated-background example:

    The trees remain in place while their leaves move gently in the breeze.

    Do not say only:

    Animate the background.

    That instruction is too broad and may cause buildings, furniture, trees, or other objects to shift unexpectedly.

    Separate Permanent Elements from Flexible Elements

    A useful planning method is to classify every visible element.

    Permanent elements should remain stable:

    • Face

    • Clothing

    • Product

    • Furniture

    • Building

    • Road

    • Fence

    • Main composition

    Flexible elements may move:

    • Hair

    • Steam

    • Curtains

    • Grass

    • Leaves

    • Clouds

    • Water

    • Light particles

    This approach makes the prompt more precise.

    Example:

    Gentle steam rises from the cup, and the curtain moves slightly in the breeze. Keep the cup, table, window frame, wall, lighting, and composition unchanged. The camera remains fixed.

    Describe Direction Clearly

    Movement should have a clear direction when direction matters.

    Use phrases such as:

    • From left to right

    • From right to left

    • Toward the camera

    • Away from the camera

    • Upward

    • Downward

    • Clockwise

    • Counterclockwise

    • Forward along the road

    • Around the product from left to right

    Weak instruction:

    The bird flies.

    Improved instruction:

    The bird flies slowly from left to right across the upper part of the frame.

    Clear direction reduces ambiguity.

    Describe Speed and Intensity

    Useful speed words include:

    • Very slowly

    • Slowly

    • Gently

    • Gradually

    • At a natural walking pace

    • Smoothly

    • Rapidly

    • Suddenly

    For a beginner project, words such as slowly, gently, and smoothly are usually easier to control.

    Example:

    The camera moves forward very slowly with smooth, stable motion.

    Runway recommends clear, direct language and suggests beginning with the core motion before adding further details. [2]

    Consider the Order of Events

    When the clip includes more than one small action, state the order.

    Example:

    The woman blinks once, pauses briefly, and then turns her head slowly toward the window.

    Another example:

    The lamp turns on gradually. After the room becomes brighter, the camera slowly moves closer to the desk.

    Do not attempt to place too many timed events into one short clip. Separate complicated sequences into multiple scenes.

    Use Timing Words Carefully

    Useful timing phrases include:

    • At the beginning

    • After a brief pause

    • Halfway through the clip

    • Near the end

    • Gradually

    • Throughout the video

    • For the entire clip

    Example:

    At the beginning, the camera remains still. After a brief pause, it slowly pushes forward toward the bicycle.

    Prompt adherence may vary, so always verify whether the event occurred at the intended time.

    State What Must Remain Consistent

    After describing movement, identify the important elements that should not change.

    For a person:

    Keep the face, age, hairstyle, clothing, body proportions, and background consistent.

    For a product:

    Keep the product’s shape, colour, label, materials, buttons, size, and proportions unchanged.

    For a landscape:

    Keep the mountains, road, buildings, horizon, lighting, and composition stable.

    For an interior:

    Keep the walls, furniture, windows, decorations, and room layout fixed.

    Stability instructions are especially useful when only a small part of the image should move.

    Avoid Long Lists of Negative Instructions

    Some video models respond better to positive descriptions of the intended result than to long lists of unwanted outcomes.

    Instead of:

    No shaking, no distortion, no changing objects, no flickering, no extra people, no moving background.

    Use:

    Smooth stable camera motion. The bicycle, fence, road, and background remain visually consistent throughout the clip.

    Model behaviour differs, so follow the prompt guidance for the exact generator being used. Runway’s prompting documentation emphasizes clear descriptions of what should appear and how it should move.

    Create a Movement Plan Before Writing the Prompt

    Use this simple planning template:

    Main subject:
    Red bicycle

    Subject movement:
    None

    Environmental movement:
    Grass moves gently

    Camera movement:
    Slow push forward

    Movement speed:
    Very slow and smooth

    Elements that must remain stable:
    Bicycle, fence, road, trees, lighting, and background

    Clip duration:
    Six seconds

    Aspect ratio:
    16:9

    This plan can then be converted into a complete motion prompt:

    Grass moves gently in a light breeze while the camera slowly pushes forward toward the red bicycle. Use smooth, stable motion. Keep the bicycle, wooden fence, country road, trees, lighting, colours, and background visually consistent throughout the six-second 16:9 clip.

    Movement Planning Checklist

    Before generating, confirm:

    1. The main subject has been identified.

    2. One primary movement has been selected.

    3. The direction is clear.

    4. The speed is described.

    5. The camera movement is simple.

    6. The background movement is controlled.

    7. Important permanent objects are listed.

    8. The intended movement fits inside the frame.

    9. The subject’s pose supports the action.

    10. The clip is not overloaded with events.

    11. The prompt explains what should remain consistent.

    12. The movement is suitable for the selected image.

    A clear movement plan reduces guesswork and makes it easier to identify why a generated clip succeeds or fails.
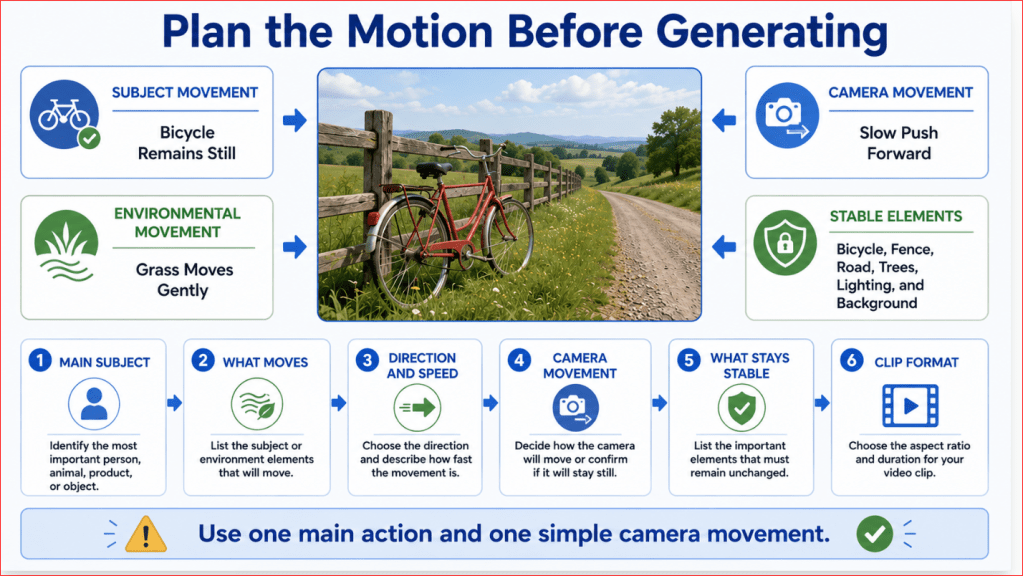
    Figure 5. How to decide what should move and what should remain stable in an image-to-video prompt.

    Figure 5 separates the scene into subject movement, environmental movement, camera movement, and stable elements. Planning these parts before generation helps beginners create simpler prompts and reduces unexpected changes in faces, products, objects, and backgrounds.

    How to Write an Effective Image-to-Video Prompt

    An image-to-video prompt should explain how the existing image should move.

    The uploaded image already establishes the subject, composition, background, lighting, colours, and visual style. Therefore, the prompt should concentrate mainly on:

    • Subject movement

    • Environmental movement

    • Camera movement

    • Direction and speed

    • Timing

    • Elements that must remain consistent

    Runway’s current guidance recommends focusing image-to-video prompts primarily on motion and beginning with the most important movement before adding more detail.

    Use a Simple Prompt Formula

    A practical beginner formula is:

    Camera movement + subject action + environmental movement + speed and timing + stability instructions

    Example:

    The camera slowly pushes forward toward the red bicycle while the grass moves gently in a light breeze. Use smooth, natural motion. Keep the bicycle, fence, road, trees, lighting, colours, and background visually consistent throughout the clip.

    You do not need to include every part in every prompt. A fixed-camera scene may not need a camera movement, while a product video may not need environmental movement.

    Begin with the Most Important Motion

    Start by describing the main action you want to see.

    Examples:

    • The woman slowly turns her head toward the window.

    • Steam rises gently from the coffee.

    • The bird flies from left to right.

    • Small waves move across the lake.

    • The product rotates slowly clockwise.

    • The curtain moves slightly in the breeze.

    Avoid beginning with unnecessary descriptions of objects already visible in the image.

    Weak prompt:

    A beautiful red bicycle with black tyres, a silver frame, a black seat, and handlebars beside a wooden fence on a country road.

    This mainly repeats the image.

    Improved prompt:

    Grass moves gently while the camera slowly travels forward toward the bicycle.

    The improved prompt tells the generator what should happen over time.

    Describe the Subject Action Clearly

    State exactly what the person, animal, vehicle, or object should do.

    Use direct verbs such as:

    • Turns

    • Walks

    • Looks

    • Blinks

    • Rotates

    • Opens

    • Closes

    • Rises

    • Falls

    • Flows

    • Drifts

    • Sways

    Weak instruction:

    Add natural movement.

    Improved instruction:

    The woman blinks once and slowly turns her eyes toward the camera.

    Clear verbs reduce uncertainty.

    Keep the First Action Simple

    One short clip should normally contain one main action.

    Avoid:

    The man stands up, walks across the room, opens the door, waves, turns around, and sits down.

    Use:

    The man slowly stands while the camera remains fixed.

    Create another clip for the next action.

    This scene-by-scene method makes it easier to maintain consistency and replace weak results.

    Describe Environmental Movement Separately

    Environmental movement includes motion that occurs around the main subject.

    Examples include:

    • Leaves moving

    • Grass swaying

    • Clouds drifting

    • Water rippling

    • Rain falling

    • Snow moving

    • Steam rising

    • Curtains moving

    • Light reflections changing

    Example:

    Steam rises slowly from the coffee while the curtain moves gently in the breeze.

    Do not use a broad instruction such as:

    Make the background move.

    That may cause walls, furniture, trees, signs, or buildings to shift unexpectedly.

    Choose a Camera Behaviour

    Camera instructions describe how the viewer’s viewpoint changes.

    Beginner-friendly choices include:

    • Fixed or locked camera

    • Slow push forward

    • Slow pull backward

    • Gentle pan left

    • Gentle pan right

    • Slow tilt upward

    • Slow tilt downward

    • Subtle zoom in

    • Slow orbit around a product

    Example:

    The camera slowly pushes forward along the road toward the bicycle.

    Adobe’s current video-generation guidance allows creators to control shot size, angle, movement, and first or last reference frames in supported workflows. Available controls depend on the selected model.

    Use One Camera Movement at a Time

    Weak instruction:

    The camera pans right, zooms in, rotates around the bicycle, tilts upward, and then pulls backward.

    Improved instruction:

    The camera slowly pans from left to right while maintaining stable framing.

    Several simultaneous camera instructions can make the movement confusing or unstable.

    Describe Direction

    When direction matters, state it clearly.

    Examples:

    • From left to right

    • From right to left

    • Toward the camera

    • Away from the camera

    • Forward along the road

    • Upward toward the sky

    • Clockwise

    • Counterclockwise

    • Around the product from left to right

    Example:

    The bird flies slowly from left to right across the upper part of the frame.

    Without a direction, the model may choose one that does not suit the composition.

    Describe Speed and Motion Style

    Useful motion words include:

    • Slowly

    • Very slowly

    • Gently

    • Smoothly

    • Gradually

    • Naturally

    • Calmly

    • At a normal walking pace

    • Quickly

    • Suddenly

    For a first test, use controlled words such as slowly, gently, and smoothly.

    Example:

    The camera moves forward very slowly with smooth, stable motion.

    Runway recommends clear, direct language and notes that motion style, timing, direction, and speed can all be included when they are important to the result.

    Explain the Order of Events

    When the clip contains two small actions, describe their sequence.

    Example:

    The woman blinks once, pauses briefly, and then turns her head slowly toward the window.

    Another example:

    The lamp turns on gradually. After the room becomes brighter, the camera slowly moves closer to the desk.

    Do not place a long sequence inside a five- or six-second clip. Generate separate scenes when the story contains several actions.

    Use Timing Words

    Useful timing instructions include:

    • At the beginning

    • After a brief pause

    • Halfway through the clip

    • Near the end

    • Gradually

    • Throughout the clip

    • Continuously

    Example:

    At the beginning, the camera remains still. After a brief pause, it slowly pushes forward toward the bicycle.

    The generator may not follow timing perfectly, so review the complete clip.

    State What Must Remain Stable

    After describing the movement, identify the details that must not change.

    For a portrait:

    Keep the face, age, hairstyle, clothing, body proportions, chair, lighting, and background consistent.

    For a product:

    Keep the product’s shape, colour, packaging, buttons, label, materials, and proportions unchanged.

    For a landscape:

    Keep the mountains, road, buildings, horizon, lighting, and composition stable.

    For an interior:

    Keep the walls, furniture, windows, decorations, and room layout fixed.

    Stability instructions are particularly important when only one small part of the image should move.

    Use Positive Stability Language

    Long lists of negative instructions can make a prompt difficult to understand.

    Instead of:

    No shaking, no flickering, no distortion, no changing bicycle, no changing fence, no moving background, and no extra objects.

    Use:

    Use smooth, stable camera motion. Keep the bicycle, fence, road, trees, lighting, and background visually consistent.

    Runway’s prompting guidance generally favours clear descriptions of the intended movement and result rather than relying entirely on negative wording. [2]

    Request a Fixed Camera Clearly

    When the camera should not move, state it directly:

    The camera remains completely fixed while steam rises slowly from the coffee.

    You may also use terms such as:

    • Static camera

    • Locked camera

    • Locked-off shot

    • Stable tripod shot

    Video models are designed to create movement, so a still camera instruction works best when some visible subject or environmental motion is also described. Runway recommends specifying the movement that should occur within the frame when minimizing camera motion. [1]

    Ask for a Continuous Shot When Needed

    Unexpected scene changes may occur when the model interprets the prompt as requiring several shots.

    For one uninterrupted scene, add:

    Use one continuous, seamless shot.

    This can be useful for:

    • Slow product rotations

    • Landscape camera movements

    • Portrait animation

    • Website background clips

    • Simple loops

    Runway recommends checking the prompt for language that may imply a cut and using continuous-shot wording when unwanted transitions appear. [1]

    Match the Prompt to the Image

    Do not request movement that contradicts the source image.

    For example, an image showing:

    • Strong motion blur

    • Dust behind a vehicle

    • A running pose

    • Flowing clothing

    • Directional speed lines

    already suggests movement.

    Asking the same subject to remain completely motionless may require several attempts because the visual cues conflict with the prompt. Runway advises correcting or removing contradictory motion cues from the starting image when they prevent the intended result. [1]

    Do Not Repeat Every Visual Detail

    For image-to-video, you generally do not need to describe:

    • The complete background

    • Every colour

    • Every piece of clothing

    • Every object

    • The full artistic style

    Repeat only details that are essential to preserve.

    Example:

    Keep the woman’s blue jacket, short dark hair, facial appearance, and seated position consistent.

    This reinforces important details without rewriting the entire image.

    Prompt Example: Landscape

    Clouds drift slowly across the sky while grass and tree leaves move gently in a light breeze. Small ripples travel across the lake. The camera remains fixed. Keep the mountains, shoreline, trees, lighting, colours, and composition stable throughout the clip.

    Prompt Example: Portrait

    The woman breathes naturally, blinks once, and turns her eyes slightly toward the window. Her hair moves gently. The camera slowly pushes forward. Keep her face, age, hairstyle, clothing, body position, lighting, and background consistent.

    Prompt Example: Product

    The camera moves slowly from left to right around the headphones. Soft reflections travel across the surface. Keep the headphones’ dark-blue colour, shape, ear cushions, headband, buttons, materials, proportions, and position unchanged. Use one continuous, smooth shot.

    Prompt Example: Coffee Scene

    Steam rises gently from the coffee while the curtain moves slightly in the breeze. The camera remains completely fixed. Keep the cup, table, window, wall, lighting, colours, and background unchanged.

    Prompt Example: Red Bicycle

    Grass moves gently in a light breeze while the camera slowly pushes forward toward the red bicycle. Use smooth, natural movement and one continuous shot. Keep the bicycle, wooden fence, country road, trees, lighting, colours, and background visually consistent throughout the six-second 16:9 clip.

    Use ChatGPT to Improve a Motion Prompt

    You can give ChatGPT the following request:

    Improve this image-to-video motion prompt for a complete beginner. Keep one main action, one simple camera movement, gentle natural motion, clear stability instructions, and a six-second 16:9 format. Do not redesign the scene or add new objects.

    My draft prompt: [paste your prompt here]

    Review the improved prompt before using it. Make sure it still matches the actual image and your intended movement.

    Image-to-Video Prompt Checklist

    Before generating, confirm:

    1. The prompt focuses mainly on motion.

    2. One primary subject action is clearly described.

    3. Environmental movement is limited and specific.

    4. Only one camera movement is used.

    5. Direction is stated when necessary.

    6. Speed and motion style are described.

    7. The sequence of events is understandable.

    8. Important subjects and objects are identified.

    9. Stability instructions protect essential details.

    10. The prompt does not contradict the image.

    11. The clip is not overloaded with actions.

    12. The requested movement fits within the frame.

    13. The aspect ratio and duration are appropriate.

    14. The prompt uses clear, direct language.

    A strong image-to-video prompt does not need to be extremely long. It needs to describe the intended movement clearly and protect the details that matter.
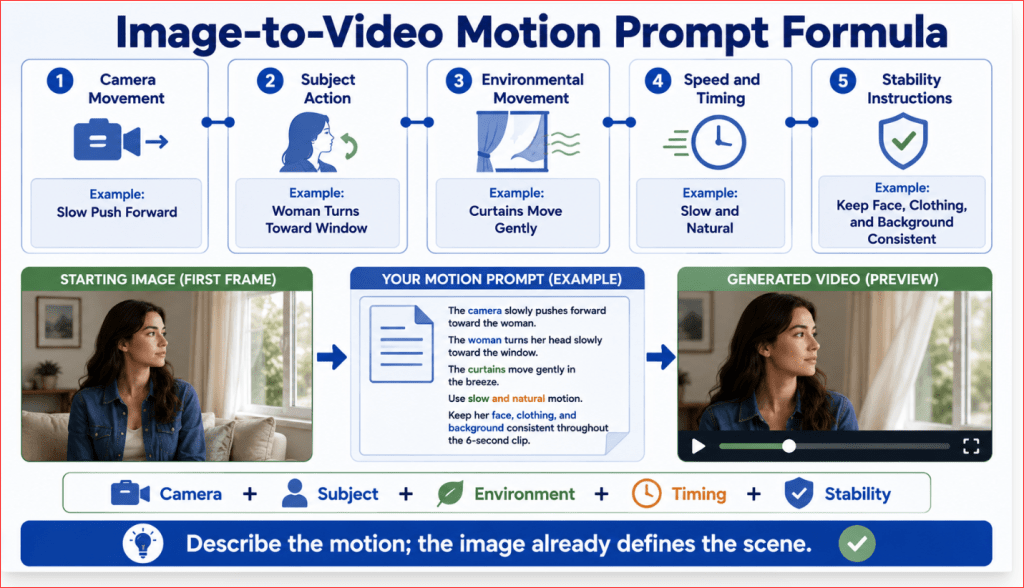
    Figure 6. A beginner formula for writing a clear image-to-video motion prompt.

    Figure 6 divides an image-to-video prompt into five practical parts: camera movement, subject action, environmental movement, speed and timing, and stability instructions. Beginners can use this formula to describe motion without unnecessarily repeating everything already visible in the image.

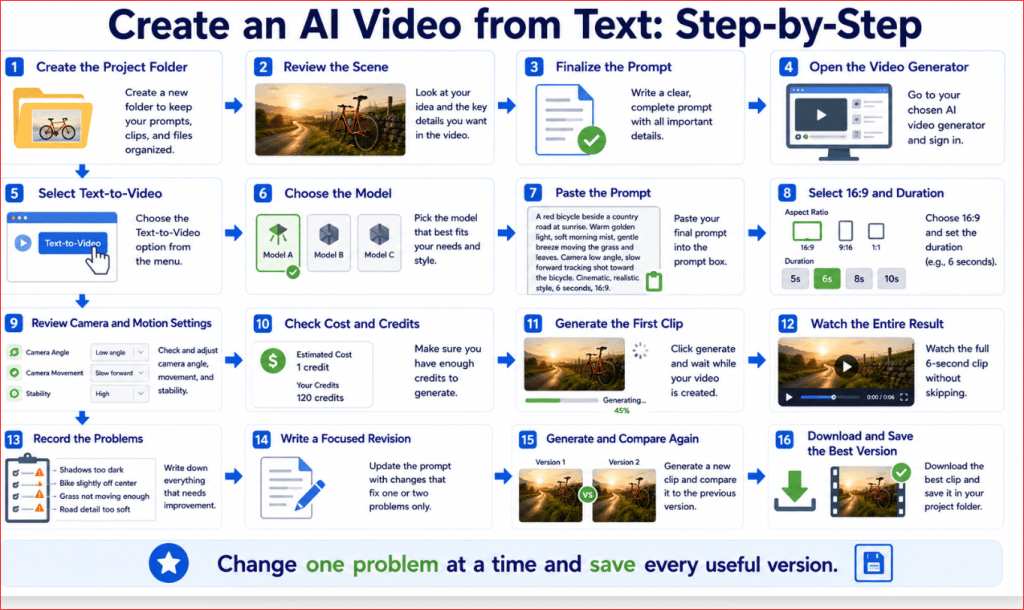
    Step-by-Step: How to Create an AI Video from an Image

    The exact buttons and settings differ between platforms, but the basic workflow is similar:

    1. Choose one simple video goal.

    2. Prepare the starting image.

    3. Plan the movement.

    4. Select an image-to-video model.

    5. Upload the image.

    6. Check the crop and aspect ratio.

    7. Choose the video settings.

    8. Add an optional final frame.

    9. Enter the motion prompt.

    10. Review the settings and credit cost.

    11. Generate one version.

    12. Watch the entire clip.

    13. Identify the main problem.

    14. Revise one instruction.

    15. Generate an improved version.

    16. Download, rename, and organize the result.

    Step 1: Choose One Simple Video Goal

    Decide what you want the finished clip to show.

    Good beginner goals include:

    • Steam rising from a cup of coffee

    • Leaves moving in a landscape

    • A portrait subject blinking naturally

    • A slow camera movement toward a bicycle

    • A product remaining still while the camera moves around it

    • Curtains moving gently beside a window

    Avoid beginning with a complicated story involving several people, locations, camera movements, or actions.

    A useful goal can be written in one sentence:

    Create a six-second landscape video in which grass moves gently while the camera slowly approaches a red bicycle.

    Step 2: Prepare the Starting Image

    Use the preparation process explained earlier in this guide.

    Confirm that the image:

    • Is clear and sharp

    • Contains one obvious main subject

    • Has correct faces and hands

    • Uses the required aspect ratio

    • Leaves enough space for movement

    • Contains no unnecessary private information

    • Has no important distorted text

    • Is owned by you or properly licensed

    • Already resembles the desired opening frame

    Save the prepared image in your project folder before opening the video generator.

    Example filename:

    red-bicycle-country-road-image-to-video-16×9.jpg

    Step 3: Create a Movement Plan

    Before writing the complete prompt, record:

    Main subject:
    Red bicycle

    Subject movement:
    The bicycle remains still

    Environmental movement:
    Grass moves gently

    Camera movement:
    Slow push forward

    Speed:
    Very slow and smooth

    Stable elements:
    Bicycle, fence, road, trees, lighting, colours, and background

    Duration:
    Six seconds

    Aspect ratio:
    16:9 landscape

    This short plan prevents you from adding unnecessary actions while writing the prompt.

    Step 4: Select an Image-to-Video Tool and Model

    Open the AI video platform you selected after completing Article 017.

    Choose a model or workflow that specifically supports image-to-video or a first-frame image.

    The exact wording may include:

    • Image-to-Video

    • Generate Video from Image

    • First Frame

    • Keyframe Image

    • Animate Image

    • Image Input

    Runway’s current Gen-4.5 workflow supports image-to-video by allowing the user to upload an image and enter a motion-focused prompt. Adobe Firefly’s Generate Video workflow currently accepts first and optional last keyframe images. [3][6]

    Do not accidentally select:

    • Text-to-video

    • Video-to-video

    • Image generation

    • A still-image editor

    • A slideshow template

    Check the selected model before continuing because different models may support different durations, aspect ratios, settings, and credit costs.

    Step 5: Start a New Project or Session

    Create a new project, generation, or session.

    Use a clear project name such as:

    Article 019 – Red Bicycle Image-to-Video Test

    Keeping each experiment in a separate project makes it easier to compare versions and locate the final result later.

    Some platforms automatically save completed generations in a project or generation history. Important files should still be downloaded and stored locally.

    Do not rely only on online history. Important files should also be downloaded and stored on your computer.

    Step 6: Upload the Starting Image

    Drag the prepared image into the upload area or select it from your computer.

    After uploading, confirm that:

    • The correct image appears

    • It is not blurry

    • The subject remains fully visible

    • The platform has not rotated it

    • The correct file was selected

    • No older test image was uploaded accidentally

    In Runway’s current workflow, the uploaded image becomes the first frame and provides the composition, subject, lighting, and visual style. In Firefly, the uploaded image can be assigned as the first keyframe.

    Step 7: Inspect the Crop

    Check how the platform fits the image into the video frame.

    Look for accidental removal of:

    • A person’s head

    • Hands or feet

    • Product edges

    • Bicycle wheels

    • Background space

    • Shadows

    • Areas needed for movement

    When the uploaded image does not match the selected aspect ratio, the platform may crop it.

    Firefly currently provides a crop control for uploaded keyframe images so users can reposition the image within the selected format. Runway Gen-4.5 normally accommodates the input image’s aspect ratio but allows the user to select another ratio, which can crop the source.

    Return to your image editor and prepare a better version when the available crop controls cannot protect the composition.

    Step 8: Choose the Aspect Ratio

    Select the format based on where the video will be used.

    16:9: WordPress, websites, YouTube, and presentations

    9:16: Reels, Shorts, TikTok, and vertical mobile content

    1:1: Square social media posts

    4:5: Portrait feed posts

    For an AI Mastery article demonstration, use 16:9 landscape unless the video is intended specifically for vertical social media.

    Do not generate the video in one format with the intention of making a major crop later. Converting a landscape video into a vertical clip may remove the subject or important background details.

    Step 9: Choose a Short Duration

    Begin with a short clip containing one simple movement.

    A practical first test is approximately:

    • Five seconds

    • Six seconds

    • Eight seconds

    Current Runway Gen-4.5 generations can be set from two to ten seconds. Firefly’s available duration and settings depend on the selected Adobe or partner model. [3]

    Longer clips provide more time for actions, but they can also give faces, objects, products, and backgrounds more opportunity to change.

    Use several short clips when creating a longer video.

    Step 10: Choose the Resolution

    Select a practical test resolution before generating.

    A lower or standard resolution may be sufficient while checking:

    • Prompt accuracy

    • Movement

    • Camera behaviour

    • Cropping

    • Subject stability

    • Background consistency

    Use a higher-quality final generation only after the movement and composition are satisfactory.

    Firefly currently allows users to select a resolution, with different resolutions consuming different amounts of generative credits. Runway Gen-4.5 currently outputs at 720p. [3][6][9]

    Higher resolution improves sharpness, but it does not correct poor movement, distorted faces, changing objects, or an unsuitable prompt.

    Step 11: Select the Camera Setting When Available

    Some tools provide menu-based camera controls in addition to the written prompt.

    Available options may include:

    • Static camera

    • Zoom in

    • Zoom out

    • Move left

    • Move right

    • Tilt up

    • Tilt down

    • Handheld motion

    Firefly currently provides these motion choices when only a first keyframe is uploaded. When both first and last frames are supplied, its separate camera-motion options are disabled because the two keyframes guide the transition. [6]

    Choose only one simple movement for the first test.

    For the bicycle example:

    Camera setting: Slow zoom or move forward

    Avoid choosing a camera preset that contradicts the written prompt.

    Step 12: Add a Last Frame Only When Needed

    A last frame is optional.

    Use one when you need the video to end in a planned composition, such as:

    • A closed book becoming open

    • A dark lamp becoming illuminated

    • A person looking forward and then turning sideways

    • A packaged product becoming revealed

    • A camera beginning far away and ending closer

    The first and last frames should contain compatible:

    • Subjects

    • Camera angles

    • Lighting

    • Backgrounds

    • Colours

    • Object positions

    Firefly currently allows both first and last keyframes to act as fixed visual anchors. A prompt is optional when both are supplied, although Adobe recommends describing the content or transition to help the model create smoother movement. [6]

    For a first beginner project, use only one starting image unless the final frame is necessary.

    Step 13: Enter the Motion Prompt

    Paste the prompt into the prompt field.

    For the bicycle example:

    Grass moves gently in a light breeze while the camera slowly pushes forward toward the red bicycle. Use smooth, natural movement and one continuous shot. Keep the bicycle, wooden fence, country road, trees, lighting, colours, and background visually consistent throughout the six-second 16:9 clip.

    Review the prompt before generating.

    Confirm that it contains:

    • One main movement

    • One camera movement

    • Clear direction

    • Clear speed

    • Stability instructions

    • No conflicting actions

    • No unnecessary scene redesign

    Current Runway guidance recommends that image-to-video prompts focus primarily on motion because the image already supplies the composition and appearance. It also recommends beginning with the most important motion and adding more detail only when refinement is needed.

    Step 14: Review the Settings and Credit Cost

    Before pressing Generate, verify:

    • Correct image

    • Correct model

    • Correct aspect ratio

    • Correct duration

    • Correct resolution

    • Correct camera setting

    • Correct first and last frames

    • Correct prompt

    • Expected credit use

    Do not generate several versions automatically.

    One controlled version is easier to evaluate and prevents unnecessary credit consumption.

    Take a screenshot of the settings or record them in your project document when the project is important.

    Step 15: Generate the First Version

    Select Generate and allow the platform to process the clip.

    Do not repeatedly press the button when processing appears slow. This may create duplicate generations and consume additional credits.

    While waiting, record:

    • Generation number

    • Prompt version

    • Model used

    • Duration

    • Aspect ratio

    • Resolution

    • Date

    • Estimated or actual credits

    Example:

    Generation 01 — Original motion prompt — 6 seconds — 16:9

    Step 16: Watch the Entire Clip

    When generation finishes, watch the video from beginning to end.

    Do not judge it only from the preview image.

    Check the:

    • First frame

    • Middle frames

    • Final frame

    • Subject

    • Face and hands

    • Product details

    • Camera movement

    • Background

    • Lighting

    • Cropping

    • Speed

    • Unexpected objects

    • Visible text

    Watch it more than once.

    A clip may appear acceptable at normal speed but reveal problems during a slower or frame-by-frame review.

    Step 17: Compare the Result with the Plan

    Return to the original movement plan.

    Ask:

    • Did the intended element move?

    • Did the movement follow the correct direction?

    • Was the speed suitable?

    • Did the camera behave correctly?

    • Did the bicycle remain unchanged?

    • Did the background remain stable?

    • Did new objects appear?

    • Did the final frame still resemble the original image?

    Use a simple review record:

    Review itemResult
    Grass movementAcceptable
    Camera speedToo fast
    Bicycle stabilityAcceptable
    Fence stabilityMinor flicker
    BackgroundAcceptable
    Overall decisionRevise camera speed

    Step 18: Identify One Main Problem

    Choose the largest problem rather than rewriting the entire prompt.

    Examples:

    • Camera moves too quickly

    • Subject changes shape

    • Background flickers

    • Face becomes distorted

    • Product label changes

    • Motion is too strong

    • Important area is cropped

    • Requested movement does not occur

    Do not change several instructions at once. Generative-video prompting is an iterative process in which each result helps clarify how the model interprets the prompt.

    Step 19: Revise One Instruction

    Correct the most important problem.

    Original wording:

    The camera slowly pushes forward toward the red bicycle.

    Revised wording:

    The camera pushes forward extremely slowly with smooth, stable movement.

    When the bicycle changes shape, add:

    Keep the bicycle completely unchanged throughout the entire clip.

    When the background flickers, add:

    Keep the fence, road, trees, horizon, lighting, and background fixed and visually consistent.

    Keep the rest of the prompt unchanged so you can understand whether the revision improved the result.

    Step 20: Generate the Improved Version

    Create a second generation using the revised prompt.

    Compare the two versions side by side.

    Ask:

    • Did the revised instruction improve the main problem?

    • Did it create a new problem?

    • Which version has better subject stability?

    • Which version has better movement?

    • Which version is easier to edit?

    • Which version should be saved?

    The second version does not automatically replace the first. Keep both until the final decision is made.

    Step 21: Continue Only When Necessary

    A difficult scene may need more than two attempts.

    Use this sequence:

    1. Review the current version.

    2. Identify the largest remaining problem.

    3. Change one instruction.

    4. Generate again.

    5. Compare the versions.

    Stop when:

    • The movement is useful

    • The subject remains acceptably stable

    • The clip can be corrected through ordinary editing

    • Further generations are not producing meaningful improvement

    Do not spend credits trying to make a suitable clip completely flawless when a small trim or edit can solve the problem.

    Step 22: Download the Best Clip

    Download the strongest version to your computer.

    For general beginner use, MP4 is usually the most practical format.

    After downloading, play the file outside the generator to confirm:

    • It opens correctly

    • The full duration is present

    • Audio works when applicable

    • No unexpected watermark appears

    • The resolution is correct

    • Playback is smooth

    • The file is not corrupted

    Firefly currently allows completed generations to be downloaded or opened in its browser video editor, while Runway provides controls to download or continue working with a completed output.

    Step 23: Rename the Video

    Use a descriptive filename.

    Example:

    red-bicycle-country-road-image-to-video-v02.mp4

    A useful filename may contain:

    • Subject

    • Setting

    • Creation method

    • Version number

    • Aspect ratio when helpful

    Avoid:

    • video1.mp4

    • download.mp4

    • final-final2.mp4

    • newclip.mp4

    Step 24: Save the Generation Record

    Save:

    • Starting image

    • Original prompt

    • Revised prompt

    • Model name

    • Platform

    • Aspect ratio

    • Duration

    • Resolution

    • Camera setting

    • Credits used

    • Generation dates

    • Downloaded versions

    • Final selected clip

    This record allows you to reproduce successful results and understand what caused weak versions.

    Step 25: Back Up the Project

    Keep copies in at least two locations when the project is important.

    For example:

    • Computer project folder

    • External drive

    • Cloud storage

    Do not depend entirely on the generator’s online history. Accounts, models, saved sessions, and retention policies can change.

    Beginner Image-to-Video Workflow Summary

    The complete process is:

    1. Choose one simple goal.

    2. Prepare a strong image.

    3. Plan the movement.

    4. Select the correct model.

    5. Upload the image.

    6. Check the crop.

    7. Choose the format and duration.

    8. Enter the motion prompt.

    9. Generate one version.

    10. Review the entire clip.

    11. Correct one main problem.

    12. Generate an improved version.

    13. Download the best result.

    14. Rename, document, and back up the files.

    A successful image-to-video project is normally created through controlled testing—not by generating many versions without a plan.

    Figure 7. The complete beginner workflow for creating an AI video from a still image.

    Figure 7 summarizes the process from preparing the starting image and selecting settings through generation, review, prompt revision, downloading, and record keeping. Following one controlled step at a time helps beginners protect their credits and understand which changes improve the video.

    How to Review and Improve Weak Image-to-Video Results

    The first generated clip should be treated as a test version, not automatically as the final video.

    Image-to-video generation is an iterative process. Runway recommends beginning with a simple prompt and adding or changing one element at a time so you can understand which instruction improves the result. Adobe similarly advises reviewing the generated video, adjusting the prompt or selected model when necessary, and generating a new version.

    Watch the Entire Clip More Than Once

    Do not judge the result from:

    • The preview thumbnail

    • The first frame

    • One attractive moment

    • A single screenshot

    Watch the complete clip from beginning to end.

    During the first viewing, examine the overall result:

    • Does the intended movement occur?

    • Is the speed suitable?

    • Does the camera move correctly?

    • Does the clip feel natural?

    • Does it follow the original plan?

    During the second viewing, examine details:

    • Face

    • Eyes

    • Mouth

    • Hands

    • Clothing

    • Product shape

    • Background

    • Lighting

    • Text

    • Cropping

    • Final frame

    When possible, pause the video at several points or review it frame by frame.

    Compare the Video with the Original Image

    Place the original image beside the generated clip.

    Check whether important details remain recognizable.

    For a person, compare:

    • Facial appearance

    • Age

    • Hairstyle

    • Clothing

    • Body proportions

    • Skin tone

    • Accessories

    For a product, compare:

    • Shape

    • Colour

    • Packaging

    • Buttons

    • Materials

    • Labels

    • Proportions

    For a landscape, compare:

    • Buildings

    • Roads

    • Trees

    • Mountains

    • Horizon

    • Lighting

    • Main composition

    Small changes may be acceptable in a creative scene. They may not be acceptable in a product advertisement, educational demonstration, or other project requiring accuracy.

    Compare the Video with the Movement Plan

    Return to the movement plan prepared before generation.

    For example:

    Planned subject movement:
    Bicycle remains still

    Planned environmental movement:
    Grass moves gently

    Planned camera movement:
    Slow push forward

    Stable elements:
    Bicycle, fence, road, trees, lighting, and background

    Then record what actually happened:

    Review itemPlanned resultGenerated result
    BicycleRemains stillFront wheel changes slightly
    GrassMoves gentlyMovement is too strong
    CameraSlow push forwardCamera moves too quickly
    FenceRemains stableMinor flickering
    LightingRemains constantAcceptable

    This comparison helps identify the largest problem objectively.

    Determine Where the Problem Comes From

    A weak result may come from:

    • The starting image

    • The motion prompt

    • The selected camera control

    • The aspect ratio or crop

    • The clip duration

    • The first and last frames

    • The selected video model

    • A limitation of the generation system

    Do not assume that every problem can be corrected by making the prompt longer.

    Problem 1: The Requested Movement Does Not Occur

    The subject or environment may remain still even though the prompt requested movement.

    For example:

    • Steam does not rise

    • The person does not turn

    • Grass remains still

    • The camera does not move

    • The product does not rotate

    How to Improve It:

    Place the missing movement near the beginning of the prompt.

    Original:

    The camera remains fixed. Keep the room, lighting, table, and background consistent. Steam rises from the coffee.

    Revised:

    Steam rises clearly and continuously from the coffee. The camera remains fixed. Keep the cup, table, room, lighting, and background consistent.

    Runway recommends reinforcing an important component through clear natural language when it is missing from an initial generation.

    Do not add several new actions at the same time.

    Problem 2: The Movement Is Too Strong

    The generated motion may be:

    • Too fast

    • Too dramatic

    • Unnatural

    • Jerky

    • Excessive

    • Distracting

    How to Improve It:

    Use stronger speed-control wording:

    The grass moves very gently in a light breeze with minimal motion.

    or:

    The woman turns her head only slightly and very slowly.

    You may also reduce a motion-strength setting when the platform provides one.

    Problem 3: The Movement Is Too Weak

    The requested movement may be barely visible.

    How to Improve It:

    Make the action more explicit without adding unrelated details:

    The curtains move visibly but gently toward the left throughout the clip.

    or:

    Small, clearly visible ripples travel outward across the lake.

    Avoid changing the camera, subject, environment, and lighting simultaneously.

    Problem 4: The Camera Moves Too Quickly

    A fast camera may create:

    • Motion blur

    • Cropping

    • Object distortion

    • Background instability

    • An uncomfortable viewing experience

    How to Improve It:

    Revise:

    The camera pushes forward extremely slowly with smooth, stable movement.

    When the platform provides both a camera-motion menu and a written prompt, confirm that they do not conflict. Adobe currently allows camera behaviour to be guided through supported motion settings and prompt language.

    Problem 5: The Camera Moves in the Wrong Direction

    The prompt may request a pan right while the result pans left, moves forward, or rotates.

    How to Improve It:

    State the direction precisely:

    The camera pans slowly from left to right across the scene.

    Add a visual endpoint when useful:

    The camera pans slowly from left to right, ending with the bicycle near the centre of the frame.

    Check whether the platform’s selected camera preset contradicts the prompt.

    Problem 6: The Camera Moves When It Should Remain Still

    A portrait, product, or interior scene may unexpectedly zoom or drift.

    How to Improve It:

    Use:

    The camera remains completely fixed in one stable tripod shot.

    Then describe the movement that should occur inside the frame:

    Steam rises gently from the cup while the camera remains completely fixed.

    Runway’s image-to-video guidance recommends describing the movement that should occur within the frame when trying to minimize unwanted camera motion.

    Problem 7: The Subject Changes Appearance

    A person’s face, hair, clothing, age, or body shape may change during the clip.

    How to Improve It:

    Reduce the complexity of the movement and strengthen the consistency instruction:

    The woman blinks naturally once with minimal facial movement. Keep her facial identity, age, hairstyle, blue jacket, body position, skin tone, and background consistent throughout the clip.

    Also consider:

    • Using a shorter duration

    • Reducing head movement

    • Keeping the camera fixed

    • Using a clearer source image

    • Choosing a wider shot

    • Testing another model

    When the original image already contains facial defects or blur, correct the image before regenerating.

    Problem 8: Hands or Fingers Become Distorted

    Hands may:

    • Change shape

    • Gain or lose fingers

    • Merge with objects

    • Move unnaturally

    • Disappear

    How to Improve It:

    Use a simpler action that does not depend on detailed hand movement.

    Instead of:

    The woman lifts the cup, rotates it, waves, and places it back on the table.

    Use:

    The woman keeps both hands resting naturally while she turns her head slightly toward the window.

    When hand movement is essential:

    • Use a wider view

    • Request slow movement

    • Keep the action short

    • Avoid several objects

    • Review every frame

    A distorted hand in the starting image should be corrected before another video generation.

    Problem 9: The Product Changes Shape or Colour

    Products may change:

    • Shape

    • Size

    • Colour

    • Buttons

    • Packaging

    • Labels

    • Materials

    • Reflections

    How to Improve It:

    Use a limited camera movement and detailed preservation instructions:

    The camera moves very slowly from left to right. Keep the headphones’ dark-blue colour, headband, ear cushions, buttons, materials, dimensions, and proportions completely unchanged.

    When precise product accuracy is essential, use real product footage rather than relying entirely on generated animation.

    Problem 10: Background Objects Flicker or Move

    Walls, windows, trees, roads, furniture, and fences may shift or transform.

    How to Improve It:

    Name the important stable elements:

    Keep the wooden fence, road, trees, hills, horizon, lighting, and background fixed and visually consistent.

    Also try:

    • Reducing camera movement

    • Shortening the clip

    • Simplifying the source image

    • Removing small repeated objects

    • Using a fixed camera

    • Testing another model

    Problem 11: New Objects Appear

    The generator may add:

    • People

    • Vehicles

    • Furniture

    • Signs

    • Plants

    • Extra products

    • Birds or animals

    How to Improve It:

    Use positive preservation language:

    Maintain the original scene composition with only the existing bicycle, fence, road, grass, and trees.

    You may also add a brief restriction:

    Do not introduce additional subjects or objects.

    Keep the restriction focused rather than creating a long list of everything that must not appear.

    Problem 12: Objects Disappear

    An existing object may vanish during camera or subject movement.

    How to Improve It:

    Identify the object as permanent:

    The coffee cup remains visible in its original position throughout the complete clip.

    If the object is near the frame edge, prepare a new source image with more surrounding space.

    Problem 13: The Video Contains an Unexpected Scene Change

    The clip may suddenly:

    • Cut to another angle

    • Change location

    • Replace the subject

    • Shift to a different composition

    • Introduce a second shot

    How to Improve It:

    Add:

    Use one continuous, uninterrupted shot with no scene change.

    Runway recommends reviewing prompts for wording that may imply several shots and using continuous-shot language when an unwanted cut appears.

    Remove words that suggest a sequence of separate scenes.

    Problem 14: The Lighting Changes Unexpectedly

    The image may begin with soft daylight and end with:

    • Darker lighting

    • A different colour temperature

    • Harsh shadows

    • Brighter highlights

    • A changed time of day

    How to Improve It:

    State:

    Maintain the same soft natural daylight, shadows, colour temperature, and exposure throughout the clip.

    Avoid requesting dramatic environmental movement when the lighting must remain exact.

    Problem 15: Important Text Becomes Distorted

    Text on signs, products, clothing, screens, or packaging may change or become unreadable.

    How to Improve It:

    The most reliable workflow is usually:

    1. Remove or avoid important visible text in the starting image.

    2. Generate the video.

    3. Add the accurate text later in a video editor.

    Do not rely on generated frames to preserve critical instructions, prices, contact information, or product labels.

    Problem 16: The Image Is Cropped Incorrectly

    The generated video may cut off:

    • A person’s head

    • Hands or feet

    • Product edges

    • Wheels

    • Background space

    • Areas intended for captions

    How to Improve It:

    Return to the starting image and:

    • Prepare it in the correct aspect ratio

    • Expand the background

    • Reposition the subject

    • Leave more surrounding space

    • Upload the corrected version

    Changing the aspect ratio after uploading may require cropping. Runway’s current documentation notes that choosing a resolution or format that differs from the input can prompt the user to crop the image.

    Problem 17: First and Last Frames Do Not Connect Smoothly

    When two keyframes are used, the transition may contain:

    • Sudden changes

    • Warping

    • A different camera angle

    • Altered subjects

    • Unstable backgrounds

    How to Improve It:

    Use first and last frames that share:

    • The same subject

    • Similar framing

    • Similar camera angle

    • Matching lighting

    • Consistent background

    • Similar colours

    • Compatible object positions

    Reduce the difference between the two images or divide the transition into two shorter clips.

    Problem 18: The Clip Ends Poorly

    The final second may contain:

    • Distortion

    • A sudden camera movement

    • A changing face

    • A disappearing object

    • Background flicker

    How to Improve It:

    Possible solutions include:

    • Shortening the generated duration

    • Trimming the last second in an editor

    • Adding a compatible last-frame image

    • Reducing motion near the end

    • Generating a new version with a simpler action

    A strong four- or five-second section may be more useful than keeping a defective final second.

    Change One Instruction at a Time

    Suppose the first result has three problems:

    • Camera moves too quickly

    • Fence flickers

    • Grass movement is too strong

    Correct the largest problem first.

    Generation 1 prompt:

    Grass moves gently while the camera slowly pushes forward toward the bicycle.

    Generation 2 revision:

    Grass moves gently while the camera pushes forward extremely slowly toward the bicycle.

    After reviewing Generation 2, revise the next problem:

    Grass moves very slightly while the camera pushes forward extremely slowly. Keep the wooden fence fixed and visually consistent.

    Runway’s guidance recommends adding one new element at a time because this helps identify which instruction improves the result and makes troubleshooting easier.

    Know When to Change the Starting Image

    Revise or replace the source image when:

    • A face is already unclear

    • Hands are already distorted

    • The product is inaccurate

    • The composition lacks movement space

    • Important objects touch the edges

    • The image contains contradictory motion blur

    • The background is excessively cluttered

    • The aspect ratio requires damaging cropping

    • Important text cannot be removed safely

    A stronger prompt cannot reliably repair every weakness in the original image.

    Know When to Change the Settings

    Change a setting when:

    • The selected aspect ratio crops the image

    • The duration is unnecessarily long

    • Motion strength is excessive

    • A camera preset conflicts with the prompt

    • The resolution consumes too many testing credits

    • First and last frames are incompatible

    Keep the prompt unchanged during the settings test when possible, so the effect of the setting remains clear.

    Know When to Test Another Model

    Consider another model when:

    • Several clear prompt revisions produce the same defect

    • The model repeatedly changes the subject

    • Required aspect ratios are unavailable

    • Camera control is insufficient

    • Product details cannot be maintained

    • The output style does not suit the project

    • Credit use is unreasonable for the results

    Adobe and Runway provide multiple video workflows or models whose available controls and behaviour may differ.

    Record the model name so comparisons remain fair.

    Know When Editing Is Better Than Regenerating

    Ordinary editing may be more practical when the clip only needs:

    • Trimming

    • Cropping

    • A speed adjustment

    • Captions

    • Colour correction

    • Music

    • Narration

    • A transition

    • Removal of a weak final second

    Regeneration is more appropriate when:

    • The face is badly distorted

    • The main subject changes

    • The product becomes inaccurate

    • The requested motion is missing

    • The camera movement is unusable

    • The background transforms dramatically

    Do not consume credits attempting to correct an issue that can be solved quickly in an editor.

    Create a Version Record

    Use a simple record for every generation:

    VersionChange madeResultDecision
    V01Original promptCamera too fastRevise
    V02Slower cameraCamera improvedKeep for comparison
    V03Reduced grass motionStrongest resultSelect
    V04Added fence stabilityBicycle changedReject

    This prevents confusion when several clips look similar.

    Final Review Checklist

    Before selecting the final clip, confirm:

    1. The intended movement occurs.

    2. The direction and speed are suitable.

    3. The camera behaves correctly.

    4. The main subject remains recognizable.

    5. Faces and hands remain acceptable.

    6. Product details remain accurate enough for the intended use.

    7. The background remains reasonably stable.

    8. No important object disappears.

    9. No unwanted subject or object appears.

    10. Lighting and colours remain consistent.

    11. Important text is accurate or will be added during editing.

    12. The composition is not incorrectly cropped.

    13. The ending remains usable.

    14. The downloaded file plays correctly.

    15. The selected version is recorded and saved.

    A useful final clip does not need to be completely flawless. It must be stable, understandable, appropriate for its purpose, and suitable for final editing.
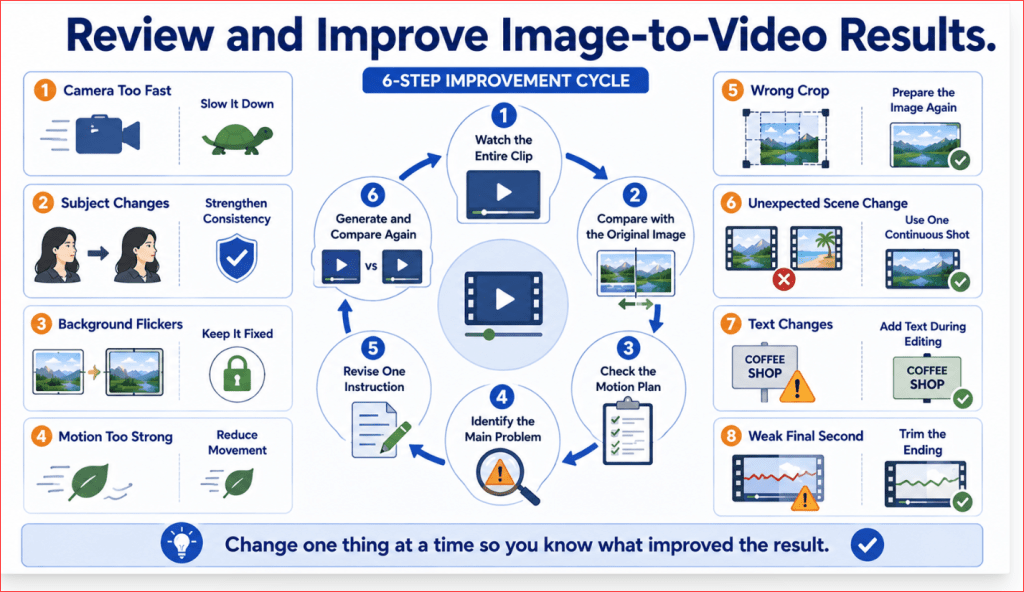
    Figure 8. How to review an image-to-video result and correct one problem at a time.

    Figure 8 shows a controlled improvement cycle: watch the complete clip, compare it with the original image and motion plan, identify the largest problem, revise one instruction or setting, generate again, and record the strongest version.

    How to Edit, Export, and Publish an Image-to-Video Clip

    AI-generated video usually needs editing before it is ready for WordPress, YouTube, social media, or a business project.

    Editing allows you to:

    • Remove weak frames

    • Correct the timing

    • Combine several clips

    • Add accurate text

    • Add narration and captions

    • Improve audio

    • Adjust colours

    • Resize the video

    • Prepare a smaller web-friendly file

    • Add appropriate AI disclosure

    The generated clip provides the visual material. Editing turns that material into a finished video.

    Save the Original Generated Clip

    Before editing, keep an untouched copy of the downloaded video.

    Use folders such as:

    • 01-original-generated-clips

    • 02-working-edits

    • 03-audio-and-captions

    • 04-final-exports

    • 05-wordpress-and-youtube

    Example original filename:

    red-bicycle-image-to-video-v03-original.mp4

    Example edited filename:

    red-bicycle-image-to-video-v03-edited.mp4

    Do not edit your only copy. You may need to return to the original clip when an editing change produces an unwanted result.

    Select the Strongest Version

    When you generated several versions, compare them before editing.

    Check:

    • Subject stability

    • Camera movement

    • Background consistency

    • Face and hand quality

    • Product accuracy

    • Lighting

    • Cropping

    • Beginning and ending

    • Overall usefulness

    Choose the version that requires the fewest major corrections.

    Do not choose a clip only because one frame looks attractive. The complete movement must remain usable.

    Trim Weak Frames

    The beginning or ending may contain:

    • A delayed movement

    • Sudden distortion

    • Background flickering

    • An unstable face

    • An object disappearing

    • An unnecessary pause

    • An abrupt camera movement

    Trim these sections when the remaining clip still communicates the intended idea.

    For example, a six-second generation may contain five strong seconds followed by one defective second. Keeping the first five seconds is often better than spending additional credits trying to regenerate a perfect six-second version.

    Do not trim so aggressively that the action appears to begin or end suddenly.

    Improve the Pacing

    Pacing describes how quickly the video develops.

    A clip may feel:

    • Too slow

    • Too fast

    • Too long before the action starts

    • Too abrupt at the end

    • Uneven when combined with other scenes

    You may improve the pacing by:

    • Trimming pauses

    • Shortening the opening

    • Slowing a gentle movement slightly

    • Speeding up an unnecessarily long section

    • Adding a brief hold before a transition

    • Rearranging clips

    Use speed adjustments carefully. A large speed change can make people, animals, water, smoke, or camera movement look unnatural.

    Combine Several Short Clips

    A longer video is normally easier to create by combining several short scenes rather than asking one generation to perform an entire story.

    For example:

    1. Wide view of the bicycle and country road

    2. Slow camera movement toward the bicycle

    3. Close view of the bicycle’s handlebars

    4. Landscape view with moving grass and clouds

    5. Final wide shot

    Place the clips in a video editor and arrange them in the correct order.

    Check that neighbouring clips have reasonably consistent:

    • Aspect ratios

    • Resolution

    • Lighting

    • Colours

    • Subject appearance

    • Camera direction

    • Movement speed

    • Visual style

    A sudden change in colour, brightness, or character appearance may make the scenes feel unrelated.

    Use Simple Transitions

    Transitions connect one clip to another.

    Useful beginner choices include:

    • Straight cut

    • Short fade

    • Cross-dissolve

    • Fade to black

    • Fade from black

    Do not add a different decorative transition between every scene. Excessive spinning, sliding, flashing, or zooming effects can distract from the video.

    A clean cut or short fade is usually sufficient.

    Add Accurate Titles During Editing

    Important text should normally be added after generation because text created inside AI-generated frames may become distorted or change.

    You can add:

    • Video title

    • Section heading

    • Product name

    • Short explanation

    • Call to action

    • Website name

    • Source note

    • AI disclosure

    Use:

    • Large readable lettering

    • Strong contrast

    • Short phrases

    • Consistent placement

    • Enough display time

    Keep text away from the extreme edges because different players and devices may crop or cover those areas.

    Add Narration

    Narration can explain what the viewer is seeing.

    A simple narration workflow is:

    1. Write the script.

    2. Read it aloud.

    3. Correct difficult sentences.

    4. Record the narration.

    5. Remove long pauses and mistakes.

    6. Place the narration on the timeline.

    7. Adjust the clips to match the narration.

    8. Balance the volume.

    For a short article demonstration, narration might say:

    Image-to-video tools animate a still image by combining the original visual scene with written movement instructions.

    Use a natural speaking pace and simple wording.

    Do not make factual claims based only on what appears in an AI-generated scene. Verify all educational, product, health, financial, or business information separately.

    Add Captions

    Captions help viewers who: [18]

    • Cannot hear the narration

    • Watch without sound

    • Have hearing difficulties

    • Speak a different first language

    • Need additional reading support

    Automatic captions should always be reviewed.

    Check:

    • Spelling

    • Punctuation

    • Timing

    • Names

    • Technical terms

    • Line breaks

    • Placement

    • Speaker changes

    WordPress.com’s Video block supports text tracks for captions and chapters, and it also allows a poster image to be displayed before the video begins. Availability of direct video-hosting features depends on the WordPress.com plan being used. [13][14]

    Captions should not cover the main subject, product, or important visual details.

    Add Music Carefully

    Background music can support the mood, but it should not overpower the narration.

    Use music that:

    • You created

    • You licensed correctly

    • Is supplied under terms that permit your intended use

    • Comes from an authorized music library

    • Does not imitate a protected recording without permission

    Lower the music volume when narration begins.

    Review the beginning and end for abrupt audio cuts. A short fade-in and fade-out can make the music sound more natural.

    Add Sound Effects Only When Helpful

    Sound effects may include:

    • Wind

    • Water

    • Birds

    • Footsteps

    • Door movement

    • Product clicks

    • Traffic

    • Room ambience

    Use sound that matches the visible action.

    Do not add several loud effects simply because the scene contains several objects. Incorrect sound can make an otherwise strong video feel artificial.

    Correct Colours and Brightness

    Generated clips may differ slightly in:

    • Exposure

    • Colour temperature

    • Contrast

    • Saturation

    • Shadows

    • Highlights

    Small adjustments can make several scenes look more consistent.

    Avoid extreme corrections that create:

    • Unnatural skin tones

    • Excessively bright colours

    • Lost shadow details

    • Pure-white highlights

    • Heavy colour casts

    • Artificial product colours

    For a product or educational video, accuracy is more important than dramatic colour effects.

    Add a Poster Image

    A poster image is the still image displayed before a visitor starts the video.

    Choose a frame that:

    • Clearly represents the video

    • Shows the subject properly

    • Is not blurry

    • Contains no distortion

    • Works at a small size

    • Does not reveal private information

    WordPress.com’s Video block currently allows a poster image to be selected from the Media Library or uploaded from the computer.

    The poster image can be:

    • The original starting image

    • A strong frame from the final clip

    • A separate 16:9 thumbnail

    • A designed image containing a short title

    Resize for the Publishing Platform

    Prepare the final shape according to its destination:

    16:9: WordPress, websites, YouTube, and presentations

    9:16: YouTube Shorts, Reels, and TikTok

    1:1: Square social posts

    4:5: Portrait feed posts

    Do not simply stretch the video into another shape.

    When converting formats:

    • Reposition the subject

    • Check captions

    • Protect heads, hands, and products

    • Adjust title placement

    • Review every resized version separately

    A landscape clip may require a new vertical composition rather than a severe crop.

    Export the Final Video

    For most beginner projects, export the finished video as an MP4 file.

    Before exporting, confirm:

    • Correct aspect ratio

    • Suitable resolution

    • Complete narration

    • Correct captions

    • Balanced music

    • No unwanted blank frames

    • No editing guides

    • No accidental private information

    • No unauthorized material

    • Correct final duration

    Use a clear filename:

    red-bicycle-image-to-video-wordpress-16×9-final.mp4

    For a YouTube version:

    red-bicycle-image-to-video-youtube-16×9-final.mp4

    For a vertical social-media version:

    red-bicycle-image-to-video-short-9×16-final.mp4

    Compress the Video for the Web

    Large video files can slow a webpage and consume storage.

    Compression should reduce the file size without making the video visibly blurry.

    After compression, inspect:

    • Fine details

    • Faces

    • Product edges

    • Captions

    • Fast movement

    • Dark areas

    • Colour gradients

    • Audio quality

    Keep the higher-quality master file separately. Use the compressed copy for website delivery.

    Test the Export Outside the Editor

    Play the exported file on your computer before uploading it.

    Confirm:

    • The file opens

    • The full video plays

    • Audio is synchronized

    • Captions are correct

    • The beginning is clean

    • The ending is clean

    • No watermark appeared unexpectedly

    • The resolution is correct

    • The colours remain acceptable

    Also test the final version on a mobile device when mobile viewing is important.

    Publish on WordPress

    WordPress.com currently supports several video-publishing methods: [13][14]

    • Upload through the Video block

    • Use a video already stored in the Media Library

    • Insert a video URL

    • Embed a video from services such as YouTube

    • Use VideoPress when the required plan supports it

    The standard Video block can upload or embed video, add text tracks, and display a poster image. WordPress.com states that direct Video block availability and VideoPress access depend on the site’s plan.

    For Article 019, a practical method is:

    1. Upload the video to YouTube when it is part of your planned channel content.

    2. Paste the YouTube URL into the WordPress article.

    3. Allow WordPress to create the video embed.

    4. Preview the article on desktop and mobile.

    Embedding may be more practical than uploading a large video file directly to the website.

    Add the Video to the Correct Article Location

    Insert the demonstration after the paragraph or step it illustrates.

    For example, place a red-bicycle demonstration after the step-by-step generation section rather than placing it randomly near the conclusion.

    Add a short introduction before the video:

    The following demonstration shows how gentle environmental movement and a slow camera push can animate a still bicycle image.

    Add a short explanation after the video:

    The bicycle remains the visual anchor while the grass and camera movement create the sense of motion. The final result should be reviewed for wheel shape, fence stability, cropping, and background consistency.

    Add Accessible Video Information

    Provide:

    • A descriptive title

    • Captions

    • A short written explanation

    • A poster image

    • A transcript when narration contains important educational information

    Do not make essential instructions available only inside the video. Readers should still be able to understand the main lesson from the written article.

    Publish on YouTube Responsibly

    YouTube currently requires creators to use its AI use disclosure when AI meaningfully generates or alters photorealistic content—for example, when a realistic scene did not actually occur or when a real person appears to do something they did not do. The setting is available during upload in YouTube Studio. [15]

    Disclosure is generally not required for minor production assistance or clearly unrealistic content, but realistic generated scenes may require it. YouTube states that making the disclosure does not by itself reduce the video’s audience or monetization eligibility. [15]

    A written description may also say:

    This video includes visuals created or modified using artificial intelligence.

    The platform disclosure setting should still be completed when required. A sentence in the description should not be used as a substitute for the official upload setting.

    Review Privacy Before Publishing

    Before publication, confirm that the video does not reveal:

    • Names

    • Addresses

    • Telephone numbers

    • Email addresses

    • Licence plates

    • Identification documents

    • Private family information

    • Confidential business details

    • Customer information

    • Private computer screens

    Also confirm that recognizable people gave appropriate permission.

    YouTube allows people to request removal when realistic altered or synthetic content uses their recognizable likeness without appropriate authorization, subject to its privacy-review process. [17]

    Keep the Master and Published Copies

    Save:

    • Original starting image

    • Generated clip

    • Edited project

    • Final high-quality master

    • Compressed WordPress version

    • YouTube version

    • Vertical social-media version

    • Captions or transcript

    • Music licence

    • Prompt and generation record

    The published version should not be your only surviving copy.

    Recommended AI Mastery Publishing Workflow

    For an Article 019 demonstration:

    1. Generate a short 16:9 image-to-video clip.

    2. Select the strongest version.

    3. Trim the weak beginning or ending.

    4. Add a brief title when necessary.

    5. Add narration and checked captions.

    6. Add quiet licensed music only when useful.

    7. Export a high-quality MP4 master.

    8. Create a compressed website copy.

    9. Upload the final video to YouTube when appropriate.

    10. Complete YouTube’s AI disclosure when required.

    11. Embed the video in the relevant WordPress section.

    12. Add a poster image and written explanation.

    13. Preview the post on desktop and mobile.

    14. Keep all source files, prompts, and permissions.

    Editing and publishing should preserve the strongest part of the generated clip while making its purpose, origin, and meaning clear to viewers.
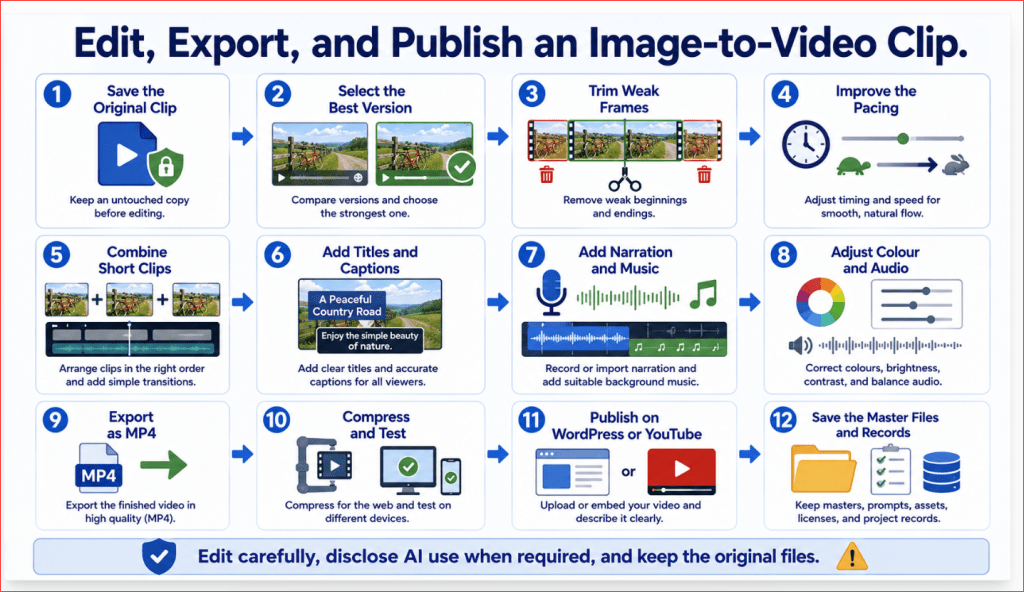
    Figure 9. The complete workflow for editing, exporting, and publishing an image-generated video.

    Figure 9 shows how a generated clip becomes a finished video through trimming, pacing, titles, captions, narration, audio, colour correction, export, compression, disclosure, and publication. The final video should be tested on different devices and stored with its source files and creation records.

    Privacy, Copyright, and Responsible Image-to-Video Use

    Image-to-video tools can animate photographs, portraits, product images, illustrations, and AI-generated artwork. Before uploading or publishing any image, confirm that you have permission to use it and that the finished video will not expose private information, misrepresent real people, or violate another creator’s rights.

    A technically impressive clip can still be unsuitable for publication when its source image, generated content, music, voice, or intended use creates legal or ethical problems.

    Use Images You Own or Have Permission to Use

    Suitable starting images may include:

    • Photographs you created

    • Illustrations you created

    • AI-generated images whose terms permit the intended use

    • Licensed stock images

    • Public-domain material

    • Product photographs supplied by the owner

    • Client material covered by a clear agreement

    • Photographs of people who consented to the intended use

    Do not assume that finding an image online gives you permission to animate, modify, republish, or use it commercially. [19]

    Avoid using:

    • Images copied from another website

    • Film or television screenshots

    • Copyrighted artwork

    • Other people’s social-media photographs

    • Protected characters

    • Celebrity photographs for misleading purposes

    • Client files without authorization

    • Stock images whose licence does not cover modification or video use

    Save the original licence, receipt, permission message, or source record with the project files.

    Platform Permission Does Not Replace Source Permission

    An AI platform may permit commercial use of generated output, but that does not give you rights to an image you were not permitted to upload.

    Runway currently states that, as between Runway and the user, users retain their rights to content they upload and generate and may use their generations commercially. That platform permission does not remove the user’s responsibility for rights belonging to photographers, artists, brands, or recognizable people in the source material. [4]

    Therefore, check two separate questions:

    1. Does the AI platform permit the intended use?

    2. Do I have permission to use every source element?

    Both answers must be acceptable.

    Check the Exact Model Used

    One platform may offer several different video models.

    For example, Adobe Firefly currently provides access to Adobe models and various partner models. Adobe explains that partner models are not developed by Adobe and that creators are responsible for deciding whether a partner model is appropriate for a particular project.

    Record:

    • Platform name

    • Model name

    • Model version when displayed

    • Date generated

    • Account or plan used

    • Commercial-use conditions checked

    • Whether the feature was marked beta or preview

    Do not assume that every model inside the same website has identical terms, training practices, protections, or commercial-use assurances.

    Understand Adobe Firefly’s Commercial-Use Distinction

    Adobe states that outputs from generally available Firefly features may be used in commercial projects. Adobe also explains that its Firefly models were trained using licensed content, openly licensed material, and public-domain content. [8][10]

    However, partner-model outputs should not automatically be treated as having the same commercial-safety position. Adobe states that creators remain responsible for determining whether partner-model outputs are appropriate for their projects. [8]

    For an important business project, note whether the clip was generated with:

    • Adobe Firefly Video

    • A Runway model

    • A Google model

    • A Luma model

    • A Kling model

    • Another partner model

    The platform name alone is not enough.

    Do Not Upload Private Information

    Before uploading a photograph, inspect the entire image for:

    • Names

    • Addresses

    • Telephone numbers

    • Email addresses

    • Identification cards

    • Account numbers

    • Medical information

    • Financial records

    • Licence plates

    • Private computer screens

    • Customer documents

    • Children’s identifying information

    • Confidential workplace material

    Remove, crop, or blur any detail the generator does not need.

    Also check reflections in:

    • Mirrors

    • Windows

    • Glass tables

    • Computer monitors

    • Vehicle surfaces

    • Product packaging

    A detail that appears small in a still image may become more visible when the camera moves toward it.

    Review the Provider’s Data Practices

    Check the provider’s current privacy documentation before uploading personal or commercially sensitive material.

    Adobe states that it does not train Firefly models on Creative Cloud subscribers’ personal content. Partner models can have different terms and data practices, so users should verify the conditions that apply to the exact model, product, and account. [8][10]

    Do not assume that every AI service follows the same approach.

    Review:

    • Whether uploaded images are retained

    • Whether projects are private by default

    • Whether generations appear in public galleries

    • Whether files can be deleted

    • Whether account administrators can access projects

    • Whether content may be used for product improvement

    • Whether different terms apply to business accounts

    Use generic test material until you understand the provider’s settings.

    Protect Real People

    Do not animate a recognizable person without considering consent, context, and the way the finished video could be understood.

    Obtain permission before making someone appear to:

    • Speak

    • Smile

    • Turn toward the camera

    • Walk

    • Hold a product

    • Endorse a service

    • Perform an action that did not occur

    • Appear in advertising

    • Participate in a fictional event

    Permission to take a photograph does not necessarily mean permission to animate it or use it commercially.

    Record:

    • Who gave permission

    • What image may be used

    • How it may be animated

    • Where the video may be published

    • Whether commercial use is included

    • How long the permission applies

    Avoid Misleading Real-Person Videos

    Do not create a realistic video that falsely makes someone appear to:

    • Recommend a product

    • Give medical or financial advice

    • Confess to an action

    • Support a political position

    • Attend an event

    • Make a statement

    • Commit a crime

    • Behave in an embarrassing or harmful way

    YouTube allows identifiable people to request review or removal of realistic altered or synthetic content that resembles them. Its evaluation may consider whether the content is synthetic, realistic, disclosed, uniquely identifiable, satirical, or in the public interest.

    Disclosure does not make harmful impersonation acceptable.

    Use Extra Care with Images of Children

    Do not upload or animate a child’s photograph unless:

    • Appropriate permission has been obtained

    • The purpose is legitimate

    • No identifying information is visible

    • The content is respectful

    • The child is not placed in a misleading situation

    • The publishing platform permits the intended use

    • The finished video will not expose or embarrass the child

    For a public educational website, a licensed generic illustration may be safer than a personal family photograph.

    Check Products and Brands

    Image-to-video generation may alter:

    • Product shape

    • Packaging

    • Labels

    • Colours

    • Buttons

    • Ingredients

    • Safety features

    • Logos

    • Accessories

    • Dimensions

    Do not present a generated product animation as an exact demonstration unless every important detail is verified.

    Also avoid implying that a brand:

    • Created the video

    • Approved the video

    • Sponsors your website

    • Endorses your claims

    • Gave permission when it did not

    When accuracy is essential, use real product footage.

    Check Music, Narration, and Voices Separately

    Rights to the starting image do not automatically include rights to:

    • Background music

    • Sound effects

    • Narration

    • A cloned voice

    • A performer’s likeness

    • A separate video clip

    • Stock footage

    Confirm that every audio element permits:

    • Editing

    • Online publication

    • Commercial use when applicable

    • YouTube use

    • Social-media use

    • Client or advertising use

    Do not imitate another person’s voice without appropriate authorization.

    Add AI Disclosure When Necessary

    Disclosure is particularly important when the generated clip looks realistic and could be mistaken for genuine footage.

    A written note may say:

    This video includes visuals created or modified using artificial intelligence.

    For YouTube, realistic content that has been meaningfully generated or altered must be disclosed through the platform’s upload setting when it:

    • Makes a real person appear to say or do something they did not

    • Alters a real event or location

    • Shows a realistic event or scene that did not occur

    YouTube states that completing the disclosure does not by itself reduce audience reach or monetization eligibility. Repeated failure to disclose qualifying content can lead to labels being applied or other platform action.

    Distinguish Realistic Content from Minor Assistance

    YouTube’s current guidance generally does not require disclosure for ordinary production assistance such as:

    • Creating an outline

    • Improving a script

    • Generating a title

    • Creating captions

    • Colour correction

    • Video sharpening

    • Minor aesthetic effects

    Disclosure is required when realistic synthetic or meaningfully altered content could cause viewers to misunderstand what actually happened.

    For image-to-video, a realistic animation of a real place, person, event, or product should be reviewed carefully against this standard.

    Do Not Present Generated Scenes as Evidence

    Do not use an image-generated video as proof of:

    • A real event

    • Product performance

    • A medical result

    • A financial result

    • Customer satisfaction

    • An accident

    • A crime

    • Property damage

    • A political event

    • A person’s behaviour

    Generated video can illustrate an idea, but it is not documentary evidence.

    Use a clear label such as:

    AI-generated illustration

    or:

    Simulated visual example

    when the context could otherwise confuse viewers.

    Preserve Content Credentials When Practical

    Some tools attach metadata describing how an asset was generated or edited.

    Adobe uses Content Credentials to add information about the application, AI tool, date, and general creation or editing actions associated with qualifying Firefly content. Adobe also states that Content Credentials may be applied when a project containing Firefly-generated material is downloaded or exported. [11]

    YouTube may use compatible Content Credentials as one signal for displaying information about how content was made. [16]

    Avoid intentionally removing provenance information when it supports appropriate transparency.

    Keep Creation Records

    For each important video, save:

    • Original image

    • Image source

    • Licence or permission

    • Prepared image

    • Motion prompt

    • Revised prompts

    • Platform

    • Model

    • Date generated

    • Generated versions

    • Editing project

    • Music and voice licences

    • Disclosure wording

    • Final published file

    • Screenshot or copy of relevant terms

    Use a record such as:

    Record itemDetails
    Starting imagered-bicycle-original.jpg
    Image ownerCreated by author
    PlatformRecord current platform
    ModelRecord exact model
    Generation dateRecord date
    Commercial terms checkedYes
    Real person includedNo
    AI disclosure neededReview before publication
    Final filenamered-bicycle-image-to-video-final.mp4

    These records help you explain how the video was created and reproduce the workflow later.

    Complete a Final Responsible-Use Review

    Before publishing, confirm:

    1. I own or am permitted to use the starting image.

    2. The selected platform and model permit my intended use.

    3. No private or confidential information is visible.

    4. Recognizable people gave appropriate permission.

    5. The video does not create a false endorsement.

    6. Product and brand details have been checked.

    7. Music, narration, and voices are properly authorized.

    8. The clip is not presented as evidence of an event that did not occur.

    9. AI disclosure has been added when needed.

    10. The publishing platform’s current rules have been reviewed.

    11. The source files, prompts, permissions, and final version are saved.

    12. A human completed the final review.

    Responsible image-to-video creation means checking not only whether the clip looks good, but also whether it is permitted, accurate, respectful, transparent, and suitable for its intended audience.

    Figure 10. A responsible-use checklist for creating and publishing image-generated videos.

    Figure 10 reminds beginners to verify image rights, privacy, real-person consent, model-specific terms, product accuracy, audio permissions, AI disclosure, and publishing rules. Keeping organized creation records supports both transparency and safer reuse.

    Common Mistakes Beginners Make with Image-to-Video

    Many weak image-to-video results are caused by preventable decisions made before generation begins. A poor starting image, unclear motion plan, conflicting instructions, or excessive movement can waste credits and make the final clip difficult to correct.

    Understanding these common mistakes helps beginners create more stable videos with fewer attempts.

    Using a Weak Starting Image

    A blurry, distorted, poorly cropped, or low-resolution image gives the video generator an unreliable visual foundation.

    Common source-image problems include:

    • Unclear faces

    • Incorrect hands

    • Cropped heads or products

    • Heavy compression

    • Distorted objects

    • Unreadable text

    • Inconsistent shadows

    • Busy backgrounds

    • Insufficient space for movement

    Reality: Animation usually does not repair defects already present in the image. It may make them more noticeable.

    How to Avoid This Mistake: Inspect the image at full size and correct all important defects before uploading it.

    Choosing an Image That Does Not Support the Intended Action

    The subject’s position and available space must support the requested movement.

    For example, problems may occur when:

    • A person should walk right but has no space on the right

    • A camera should push forward but the image has little visual depth

    • A product should rotate but touches the frame edges

    • A seated person is asked to begin running

    • A subject faces away from the intended direction

    How to Avoid This Mistake: Select or prepare an image whose pose, framing, and composition support the planned movement.

    Using the Wrong Aspect Ratio

    Uploading a square or portrait image into a landscape video workflow may cause automatic cropping.

    Important details may be removed, including:

    • A person’s head

    • Hands or feet

    • Product edges

    • Bicycle wheels

    • Background space

    • Areas intended for captions

    How to Avoid This Mistake: Prepare the image in the final video’s aspect ratio before uploading it.

    Placing the Subject Too Close to the Edge

    Camera movement may push an edge-positioned subject out of the frame.

    This is especially risky when requesting:

    • A camera pan

    • A camera orbit

    • A push forward

    • A subject walking

    • A product rotation

    • Conversion from landscape to vertical

    How to Avoid This Mistake: Leave comfortable space around the subject and additional space in the direction of movement.

    Repeating the Entire Image Description

    An image-to-video prompt does not normally need to describe every visible object, colour, and background detail.

    An unnecessarily repetitive prompt may distract from the movement instructions.

    Weak example:

    A red bicycle with black tyres, a black seat, silver handlebars, and two wheels stands beside a wooden fence on a country road surrounded by green grass and trees.

    This mostly describes what the image already shows.

    Improved example:

    Grass moves gently while the camera slowly pushes forward toward the bicycle. Keep the bicycle, fence, road, trees, lighting, and background consistent.

    How to Avoid This Mistake: Focus the prompt mainly on movement, camera behaviour, timing, and essential stability instructions.

    Using a Vague Motion Prompt

    Instructions such as these are too broad:

    • Animate the image

    • Make it cinematic

    • Add natural movement

    • Bring the scene to life

    • Make everything move

    The model must guess which elements should move and how strongly they should move.

    How to Avoid This Mistake: Name the exact movement, direction, speed, camera behaviour, and stable elements.

    Requesting Too Many Actions

    A short clip cannot reliably contain a long sequence of complicated events.

    For example:

    The woman stands, walks to the window, opens it, waves, turns around, sits down, and picks up a cup.

    This request may cause:

    • Missing actions

    • Abrupt transitions

    • Changing faces

    • Distorted hands

    • Incorrect body movement

    • Unwanted scene changes

    How to Avoid This Mistake: Use one main action per clip and generate the next action as a separate scene.

    Combining Several Camera Movements

    A prompt may become unstable when it requests the camera to:

    • Pan

    • Zoom

    • Tilt

    • Orbit

    • Move forward

    • Pull backward

    all within one short generation.

    How to Avoid This Mistake: Use one simple camera movement at a time. Begin with a fixed camera, slow push forward, or gentle pan.

    Allowing Everything to Move

    When the subject, camera, background, lighting, and several environmental elements all move simultaneously, the scene may become chaotic.

    Possible results include:

    • Background flickering

    • Product distortion

    • Changing faces

    • Unnatural speed

    • Camera shake

    • Objects appearing or disappearing

    How to Avoid This Mistake: Choose one main movement and one small supporting movement. Keep permanent structures stable.

    Failing to State What Must Remain Stable

    The generator may change details that the creator assumed would remain unchanged.

    Important stability details may include:

    • Face

    • Hairstyle

    • Clothing

    • Product shape

    • Product colour

    • Packaging

    • Furniture

    • Building structure

    • Road

    • Fence

    • Lighting

    • Background

    How to Avoid This Mistake: Add a concise stability instruction naming the most important elements.

    Using Conflicting Instructions

    A prompt may accidentally request incompatible behaviour.

    Examples include:

    • “The camera remains fixed” and “the camera moves forward”

    • “The person remains still” and “the person walks”

    • “Keep the lighting unchanged” and “sunset gradually becomes night”

    • “Use one continuous shot” and “cut to a close-up”

    How to Avoid This Mistake: Read the prompt once from beginning to end and remove instructions that contradict each other.

    Ignoring Motion Cues in the Starting Image

    The source image may already suggest movement through:

    • Motion blur

    • Dust

    • Flowing clothing

    • Running poses

    • Speed lines

    • Splashing water

    • Leaning vehicles

    These cues may influence the generated motion even when the prompt requests something different.

    How to Avoid This Mistake: Choose or edit an image whose visual cues match the intended action.

    Requesting Fast Motion Too Early

    Rapid movement is more likely to cause:

    • Distorted bodies

    • Changing faces

    • Merged objects

    • Unstable backgrounds

    • Strong motion blur

    • Incorrect camera behaviour

    How to Avoid This Mistake: Begin with slow, gentle, and natural movement. Increase the speed only after the scene remains stable.

    Using Important Visible Text

    Text on signs, products, clothing, screens, or packaging may change between frames.

    This can create:

    • Misspellings

    • Random symbols

    • Changing numbers

    • Distorted logos

    • Unreadable product labels

    How to Avoid This Mistake: Remove nonessential text from the starting image and add accurate wording during editing.

    Expecting Exact Product Accuracy

    Image-to-video models may alter:

    • Product shape

    • Buttons

    • Packaging

    • Labels

    • Materials

    • Dimensions

    • Colours

    • Accessories

    Reality: A visually attractive product animation may still be commercially inaccurate.

    How to Avoid This Mistake: Use minimal movement, review every frame, and use real footage when exact product operation or appearance is essential.

    Ignoring Faces and Hands During Review

    Beginners may focus on the overall movement and overlook brief facial or hand distortions.

    Problems may appear only:

    • Halfway through the clip

    • During a blink

    • While the head turns

    • When a hand touches an object

    • In the final second

    How to Avoid This Mistake: Review the clip several times and pause at different points.

    Generating Several Versions Before Reviewing the First

    Requesting multiple variations immediately can consume credits without teaching you what caused the problems.

    How to Avoid This Mistake: Generate one version, review it carefully, and revise one instruction before generating again.

    Changing the Entire Prompt After One Weak Result

    When every part of the prompt changes, it becomes difficult to determine what improved or damaged the result.

    How to Avoid This Mistake: Preserve the original prompt and modify only the largest problem.

    Assuming a Longer Prompt Is Always Better

    A long prompt may contain:

    • Repetition

    • Conflicting instructions

    • Too many actions

    • Unnecessary visual descriptions

    • Excessive restrictions

    Reality: A focused prompt is usually easier to interpret than a complicated paragraph containing every possible instruction.

    How to Avoid This Mistake: Include only the movement, camera, timing, and stability details that affect the clip.

    Using a Long Duration for a Simple Action

    A short movement stretched across a long clip may produce unnecessary changes after the intended action finishes.

    For example, after a portrait subject blinks, the remaining seconds may introduce:

    • Additional head movement

    • Changing expressions

    • Background drift

    • Facial distortion

    How to Avoid This Mistake: Match the clip duration to the action. Five or six seconds may be sufficient for a simple beginner test.

    Ignoring the Final Second

    The beginning and middle may look strong while the ending contains:

    • A changing face

    • A disappearing object

    • Sudden camera movement

    • Background distortion

    • Lighting changes

    How to Avoid This Mistake: Always inspect the final second. Trim it when the earlier portion remains useful.

    Regenerating Problems That Editing Could Fix

    Some issues can be corrected more efficiently through ordinary editing.

    Editing may solve:

    • A weak beginning

    • A defective final second

    • Slow pacing

    • Incorrect audio volume

    • Missing captions

    • Colour differences

    • A necessary crop

    How to Avoid This Mistake: Regenerate only when the main subject, movement, product, camera, or background is unusable.

    Forgetting to Download Successful Versions

    Online project histories may change, expire, or become difficult to navigate.

    How to Avoid This Mistake: Download every useful version and store it with its prompt and settings.

    Using Unclear Filenames

    Names such as video1.mp4 or final2.mp4 make it difficult to identify versions later.

    How to Avoid This Mistake: Use descriptive filenames such as:

    red-bicycle-image-to-video-slow-camera-v03.mp4

    Failing to Record the Model and Settings

    The same prompt may behave differently with another:

    • Model

    • Duration

    • Aspect ratio

    • Resolution

    • Camera preset

    • Motion setting

    How to Avoid This Mistake: Save the platform, model, prompt, settings, date, and credit use for every important generation.

    Uploading Private or Unlicensed Images

    A technically successful animation may still be unsuitable because the source image contains private information or was used without permission.

    How to Avoid This Mistake: Verify ownership, licences, consent, privacy, and commercial-use conditions before uploading.

    Publishing Without Disclosure or Context

    A realistic generated scene may be mistaken for genuine footage.

    How to Avoid This Mistake: Add AI disclosure when required and clearly describe simulated or illustrative scenes when viewers could misunderstand them.

    Beginner Mistake-Prevention Checklist

    Before generating, confirm:

    1. The source image is clear and corrected.

    2. The image supports the intended movement.

    3. The aspect ratio is correct.

    4. There is enough space around the subject.

    5. The prompt focuses on motion.

    6. One primary action is requested.

    7. Only one simple camera movement is used.

    8. Important elements are protected with stability instructions.

    9. The prompt contains no contradictions.

    10. Visible text is not essential.

    11. The duration matches the action.

    12. One version will be generated and reviewed first.

    13. The platform, model, settings, and prompt will be recorded.

    14. The image is permitted for the intended use.

    15. The finished video will be reviewed and disclosed responsibly.

    Most image-to-video mistakes can be prevented by slowing down before generation. A clear image, simple movement plan, focused prompt, and careful review are more valuable than producing many uncontrolled versions.
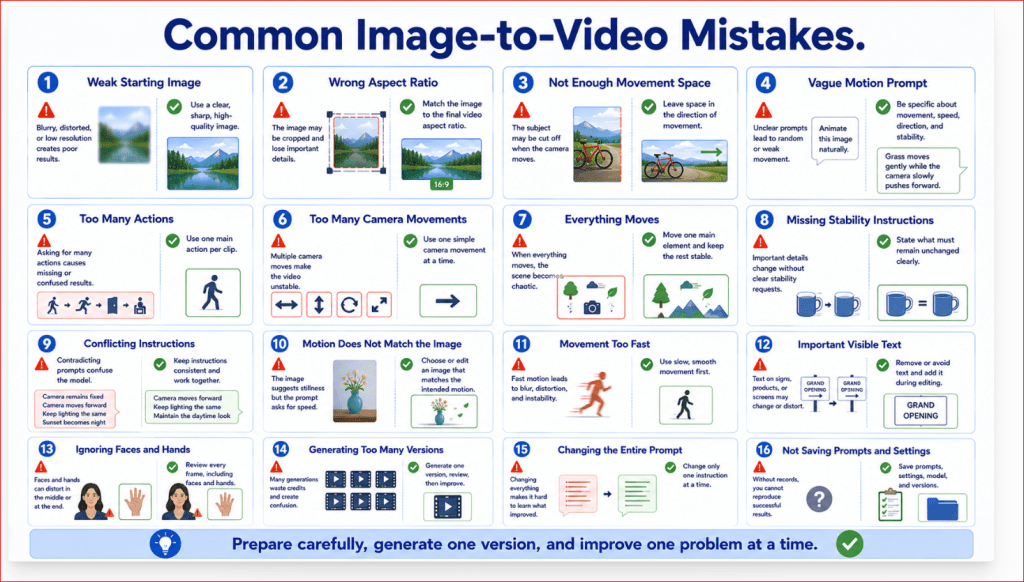
    Figure 11. Common mistakes beginners should avoid when creating an AI video from an image.

    Figure 11 highlights the decisions that commonly produce unstable movement, cropping, changed subjects, wasted credits, privacy risks, and confusing project files. Preparing the source image, simplifying the movement, reviewing one version at a time, and keeping organized records prevent many of these problems.

    Benefits of Creating AI Videos from Images

    Image-to-video generation gives beginners more control than asking an AI system to invent the complete scene from text alone.

    The starting image already establishes the subject, composition, lighting, colours, background, and visual style. The motion prompt can therefore focus mainly on what should move, how quickly it should move, how the camera should behave, and what should remain stable.

    Greater Control Over the Starting Scene

    With text-to-video, the AI must create both the visual scene and its movement.

    With image-to-video, you begin with a scene that you have already selected, generated, photographed, or designed. This gives you greater control over:

    • The main subject

    • Subject position

    • Camera angle

    • Background

    • Lighting

    • Colour palette

    • Visual style

    • Opening composition

    For example, when animating a red bicycle beside a country road, you already know:

    • Where the bicycle appears

    • Which direction the road travels

    • How much space surrounds the bicycle

    • What the lighting looks like

    • Which colours dominate the scene

    You can then concentrate on adding gentle grass movement and a slow camera push rather than asking the AI to design the entire scene again.

    Easier Prompt Writing

    Image-to-video prompts can be simpler because they do not normally need to repeat everything visible in the image.

    Runway’s current guidance recommends focusing almost entirely on motion, including subject action, environmental motion, camera movement, timing, direction, and speed. It also recommends beginning with the most important motion and adding details only when needed.

    Instead of writing:

    Create a red bicycle with black tyres beside a wooden fence on a country road surrounded by green grass, trees, hills, and blue sky.

    You can write:

    Grass moves gently while the camera slowly pushes forward toward the bicycle. Keep the bicycle, fence, road, trees, lighting, and background visually consistent.

    This makes the prompt easier to understand, review, and revise.

    More Predictable Opening Frames

    The uploaded image normally becomes the visual starting point of the generated clip.

    This helps when the video must begin with:

    • A specific person

    • A particular product

    • A prepared illustration

    • A selected landscape

    • A designed website graphic

    • A planned storyboard composition

    • A precise camera angle

    You do not need to generate several text-to-video versions merely to obtain the desired opening composition.

    The first frame still may change slightly as the animation develops, but starting from a prepared image reduces uncertainty at the beginning of the clip.

    Better Use of Existing AI-Generated Images

    A strong AI-generated image does not have to remain a static article illustration.

    It can become:

    • A short website video

    • A presentation background

    • A YouTube visual

    • A social-media clip

    • A storyboard scene

    • A cinematic introduction

    • An educational demonstration

    • A moving article example

    For the AI Mastery website, an infographic or realistic article image can sometimes be adapted into a short supporting animation when the composition is suitable.

    However, instructional infographics containing substantial text should normally remain static. Important wording may distort when the image is animated.

    Useful for Animating Landscapes

    Landscapes are practical beginner projects because they can often be animated with small environmental movements.

    Possible movements include:

    • Clouds drifting

    • Leaves swaying

    • Grass moving

    • Water rippling

    • Mist travelling

    • Snow falling

    • Light changing gradually

    • A camera moving slowly along a path

    A landscape can appear more engaging without changing the main mountains, buildings, roads, or horizon.

    Example:

    Clouds drift slowly across the sky while leaves and grass move gently in a light breeze. Small ripples travel across the lake. Keep the mountains, shoreline, trees, lighting, and composition stable.

    Helpful for Product Concepts

    Image-to-video can turn a prepared product image into a short concept video.

    Possible controlled movements include:

    • A slow camera orbit

    • A gentle push forward

    • A limited turntable rotation

    • Soft reflections moving across the product

    • Background lighting changing gradually

    • Steam or particles moving around the product

    This can be useful for:

    • Early advertising concepts

    • Mood boards

    • Client previews

    • Storyboards

    • Website mock-ups

    • Product-presentation ideas

    The product still must be reviewed carefully. Generated movement may alter packaging, buttons, dimensions, labels, materials, or colours. Use real footage when exact product accuracy is required.

    Makes Portrait Animation Possible

    A still portrait can be given subtle movement such as:

    • Natural blinking

    • Gentle breathing

    • A small head turn

    • Eye movement

    • Slight hair movement

    • A slow camera push forward

    This can make a presentation or educational scene feel more active.

    The safest beginner approach is to keep portrait movement limited. Asking for dramatic facial expressions, complex speech, large body movement, and camera movement simultaneously increases the chance of an unstable face or unnatural body motion.

    Example:

    The woman breathes naturally, blinks once, and slowly turns her eyes toward the window. Her hair moves gently. Keep her facial appearance, age, hairstyle, clothing, body position, lighting, and background consistent.

    Supports Storyboarding and Pre-Visualization

    A storyboard frame can be animated to demonstrate how a planned scene might work before full production begins.

    Image-to-video can help preview:

    • Camera direction

    • Subject movement

    • Scene timing

    • Background motion

    • Lighting changes

    • Product reveals

    • Transitions

    • Opening and closing compositions

    This can help a creator explain an idea to:

    • A video editor

    • A client

    • A teacher

    • A business partner

    • A designer

    • A production team

    The generated clip does not have to become the final video. It can serve as a moving visual draft.

    First-Frame and Last-Frame Control

    Some image-to-video workflows allow users to provide both a beginning image and an ending image.

    Adobe Firefly currently supports uploaded keyframes that can guide the beginning, ending, or both ends of a generated clip. Adobe notes that some other composition, style, and camera controls may be disabled when keyframes are used because the uploaded frames take over part of that guidance.

    This can help create:

    • A book opening

    • A lamp turning on

    • A product reveal

    • A person changing their gaze

    • A camera moving from a wide shot to a closer view

    • A planned before-and-after transition

    The first and last images should remain visually compatible. Large differences in camera angle, lighting, background, or subject position can produce an unstable transition.

    Easier Character and Style Planning

    When several clips should share a related appearance, a prepared image can provide a consistent visual reference.

    You can reuse:

    • The same character design

    • The same clothing

    • The same product

    • The same location

    • The same colour palette

    • The same illustration style

    • Similar lighting

    • Similar composition

    This does not guarantee perfect consistency between generations, but it provides a stronger starting reference than recreating the complete scene from text each time.

    For multi-scene projects, keep a consistency sheet containing:

    • Character description

    • Clothing details

    • Product details

    • Environment description

    • Colour palette

    • Lighting

    • Aspect ratio

    • Model and settings

    • Reference images

    Faster Testing of Creative Ideas

    A still concept can be animated quickly to determine whether an idea is worth developing.

    You can test:

    • Whether a camera push works

    • Whether the composition has enough depth

    • Whether environmental movement improves the scene

    • Whether a portrait feels natural

    • Whether a product should remain still or rotate

    • Whether the clip suits a website or presentation

    • Whether the scene should be filmed for real

    A weak test can still be valuable because it reveals problems before additional time or money is invested.

    Lower Filming Requirements

    Image-to-video generation can create motion without requiring every scene to be filmed with:

    • A camera

    • Lighting equipment

    • Actors

    • A physical location

    • A product studio

    • Weather conditions

    • Travel

    • A full production team

    This can be useful for visual concepts, educational examples, backgrounds, and short supporting scenes.

    It should not replace real filming when authenticity, exact evidence, genuine testimony, or precise product operation is required.

    Useful for Difficult-to-Film Scenes

    Some scenes may be impractical, expensive, dangerous, or impossible to record.

    Examples include:

    • Historical environments

    • Futuristic cities

    • Fantasy landscapes

    • Space scenes

    • Underwater worlds

    • Extreme weather

    • Imaginary products

    • Abstract educational concepts

    A still concept image can be prepared first and then animated with controlled movement.

    Generated scenes must be presented honestly. A realistic AI-generated scene that did not occur may require disclosure when published on platforms such as YouTube. YouTube currently requires its AI use setting for photorealistic content that was meaningfully generated or altered, including realistic scenes that did not actually happen.

    Easier Scene-by-Scene Production

    Longer AI videos are usually easier to build from several short clips.

    For example:

    1. Establishing image of a landscape

    2. Slow movement toward the main subject

    3. Close-up of an object

    4. Environmental detail

    5. Final wide scene

    Each image can be prepared separately and animated with one simple movement.

    This method allows you to:

    • Replace one weak scene

    • Use different movement in each clip

    • Control the pace

    • Protect credits

    • Maintain an organized project

    • Combine only the strongest results

    A single unsuccessful scene does not require recreating the entire video.

    Easier Revision and Troubleshooting

    A prepared image and written movement plan make it easier to determine why a video failed.

    You can separately examine:

    • The source image

    • The crop

    • The motion prompt

    • The camera control

    • The duration

    • The model

    • The generated result

    For example:

    • An incorrect crop usually points to the prepared image or aspect ratio.

    • Excessive camera speed may point to the camera instruction or preset.

    • A changing face may point to the source image, motion complexity, duration, or model.

    • A missing action may point to unclear prompt wording.

    Runway recommends starting simply and refining individual motion components as needed. This controlled iteration helps users understand how prompt changes affect the output.

    Supports Multiple Publishing Formats

    A suitable source image can be prepared for:

    • 16:9 landscape

    • 9:16 vertical

    • 1:1 square

    • 4:5 portrait

    This allows the same idea to be adapted for:

    • WordPress

    • YouTube

    • Presentations

    • YouTube Shorts

    • Instagram Reels

    • TikTok

    • Social-media feeds

    Each format should be prepared and reviewed separately. Severe cropping of one generated video into several shapes may remove important subjects or captions.

    Helpful for Website Visuals

    A short image-generated clip may be used as:

    • An article demonstration

    • A background section

    • A product concept

    • A visual explanation

    • A moving header

    • A before-and-after example

    • A tutorial illustration

    For WordPress, the video should be:

    • Relevant to the article

    • Short and focused

    • Compressed appropriately

    • Supported by written explanation

    • Captioned when narration is important

    • Tested on desktop and mobile

    Do not add video merely for decoration when it slows the page without improving understanding.

    Supports Accessible Educational Content

    Image-generated video can support an explanation when it is combined with:

    • Narration

    • Checked captions

    • A written transcript

    • Clear titles

    • A descriptive introduction

    • A paragraph explaining the result

    For example, a still diagram showing a process can be replaced or supplemented by a short animation that demonstrates movement or sequence.

    Important information should still appear in the written article. Readers should not need to watch the video to understand the essential lesson.

    Encourages Organized Creative Work

    A complete image-to-video project encourages creators to keep:

    • Source images

    • Prepared images

    • Prompt versions

    • Generation settings

    • Generated clips

    • Editing files

    • Audio licences

    • Final exports

    • Publishing records

    This organized workflow makes future projects easier and reduces the chance of losing permissions or successful settings.

    Supports Human Creativity

    The AI creates frames, but the creator still decides:

    • Which image to use

    • What the video should communicate

    • What should move

    • What should remain stable

    • Which prompt to write

    • Which version to keep

    • What needs editing

    • Whether the result is accurate

    • Whether the video is appropriate to publish

    The uploaded image and prompt are not substitutes for creative judgment. They are tools the creator uses to guide the production process.

    A Practical View of the Benefits

    Image-to-video is most useful when you want to:

    • Preserve a planned opening composition

    • Animate an existing visual

    • Add gentle movement

    • Test a scene before filming

    • Create a short supporting clip

    • Build a video scene by scene

    • Reuse a strong AI-generated image

    • Prepare educational or website visuals

    • Control the starting appearance more closely

    It is less suitable when you require:

    • Exact documentary evidence

    • Genuine testimony

    • Guaranteed facial consistency

    • Precise product operation

    • Perfect text preservation

    • Verified real-world events

    • Completely predictable motion

    Use image-to-video for creative flexibility, visual explanation, prototypes, and supporting scenes. Use real footage when authenticity and exact accuracy are essential.
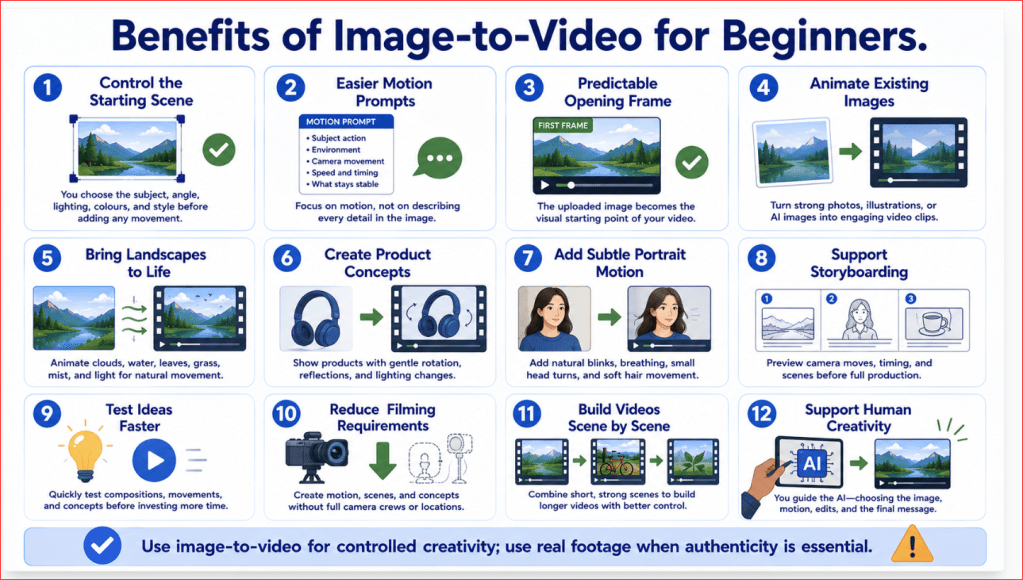
    Figure 12. The main benefits image-to-video generation can provide to beginners and content creators.

    Figure 12 summarizes how image-to-video can provide greater control over the starting scene, simplify motion prompting, animate existing images, support storyboarding, reduce filming requirements, assist scene-by-scene production, and create useful website and educational visuals

    Limitations of Image-to-Video Generation

    Image-to-video tools provide more control over the starting composition than text-to-video, but they cannot guarantee that every detail in the uploaded image will remain unchanged.

    Faces, hands, products, backgrounds, lighting, and camera movement may become unstable as the AI creates new frames. A clear source image and focused motion prompt reduce some problems, but they do not remove the need for careful review.

    Results May Differ Between Generations

    Using the same image and prompt more than once may produce different:

    • Movements

    • Camera paths

    • Facial expressions

    • Background behaviour

    • Lighting changes

    • Final frames

    • Object details

    This variation can help during creative exploration, but it makes exact reproduction difficult.

    How to Reduce This Limitation: Save the source image, complete prompt, model name, settings, generation date, and every useful version.

    Existing Image Defects May Become Worse

    The video generator uses the uploaded image as the first frame and visual foundation. Blurry faces, distorted hands, unclear object edges, or other artifacts may become more noticeable once movement is generated. Runway specifically recommends using a high-quality source image that is free from visible defects.

    How to Reduce This Limitation: Inspect the image at full size and correct important defects before uploading it.

    Faces May Change During Movement

    A person’s:

    • Eyes

    • Mouth

    • Age

    • Facial shape

    • Hairstyle

    • Skin texture

    • Expression

    may change during blinking, speaking, head turns, or camera movement.

    Larger facial movements generally give the model more opportunities to alter the person’s appearance.

    How to Reduce This Limitation: Use a clear portrait, request subtle movement, shorten the duration, and keep the camera fixed or moving very slowly.

    Hands and Fingers May Become Distorted

    Hands can:

    • Gain or lose fingers

    • Merge with objects

    • Change position unnaturally

    • Disappear

    • Become blurred

    • Move independently from the arms

    This risk increases when a person handles small objects or performs several hand movements.

    How to Reduce This Limitation: Use a wider view, keep hands resting naturally, request one slow action, and avoid complicated object handling.

    Products May Change Shape or Details

    Image-to-video generation may alter:

    • Product dimensions

    • Packaging

    • Buttons

    • Labels

    • Colours

    • Materials

    • Reflections

    • Accessories

    • Logos

    A visually attractive animation may therefore be unsuitable as an exact product demonstration.

    How to Reduce This Limitation: Use minimal motion, identify the details that must remain stable, review every frame, and use real footage when precise accuracy is essential.

    Text May Change or Become Unreadable

    Text on signs, screens, clothing, packaging, or product labels may become:

    • Misspelled

    • Distorted

    • Replaced

    • Blurred

    • Inconsistent between frames

    Important wording should not be trusted simply because it looks correct in the starting image.

    How to Reduce This Limitation: Remove nonessential text before generation and add accurate titles, labels, prices, or instructions later in a video editor.

    Backgrounds May Flicker or Transform

    Background elements may:

    • Shift position

    • Change shape

    • Appear or disappear

    • Flicker

    • Merge together

    • Move when they should remain fixed

    Repeated objects such as windows, fence posts, books, chairs, tiles, or trees can be especially difficult to preserve.

    How to Reduce This Limitation: Use a simple background, reduce camera movement, shorten the clip, and name the important permanent elements in the prompt.

    Objects May Appear or Disappear

    The AI may introduce:

    • Extra people

    • Vehicles

    • Furniture

    • Plants

    • Animals

    • Signs

    • Products

    • Decorative objects

    Existing objects may also disappear during camera or subject movement.

    How to Reduce This Limitation: Describe the intended scene as one continuous composition and state that the important existing objects remain visible and unchanged.

    Movement May Be Too Strong or Too Weak

    Words such as gently, slowly, or naturally do not always produce the same level of movement across different models.

    The output may contain:

    • Barely visible movement

    • Excessive motion

    • Jerky movement

    • Unrealistic speed

    • Sudden acceleration

    • Unwanted camera shake

    How to Reduce This Limitation: Generate one test, observe the actual strength, and revise the speed or motion instruction precisely.

    Camera Instructions May Not Be Followed Exactly

    The camera may:

    • Move in the wrong direction

    • Move faster than requested

    • Zoom unexpectedly

    • Drift when it should remain fixed

    • Change framing

    • Introduce a different angle

    Menu-based camera controls and written prompt instructions may also conflict.

    How to Reduce This Limitation: Use one camera movement, check any selected motion preset, and make sure the prompt and settings request the same behaviour.

    Cropping May Remove Important Details

    Choosing a video format that differs from the uploaded image may crop:

    • Heads

    • Hands

    • Feet

    • Product edges

    • Wheels

    • Background space

    • Areas intended for captions

    Automatic cropping may also change the balance of the original composition.

    How to Reduce This Limitation: Prepare the source image in the final aspect ratio and inspect the platform’s crop before generating.

    First and Last Frames May Not Connect Smoothly

    When two keyframes are used, the generated transition may contain:

    • Warping

    • Sudden camera changes

    • Altered subjects

    • Background transformation

    • Lighting changes

    • Unnatural intermediate movement

    The problem is more likely when the two images have very different compositions, angles, lighting, or object positions.

    How to Reduce This Limitation: Use compatible first and last frames or divide a large transformation into several smaller clips.

    Short Clips Limit Complex Storytelling

    A short generation may not provide enough time for:

    • Several actions

    • Detailed dialogue

    • Multiple camera movements

    • Location changes

    • Complex character interactions

    • A complete narrative

    Trying to fit too much into one clip can produce missing actions or unexpected scene changes.

    How to Reduce This Limitation: Divide the story into separate storyboard scenes and combine the strongest short clips during editing.

    Character Consistency Across Clips Is Not Guaranteed

    Even when the same starting character image is reused, separate generations may change:

    • Facial details

    • Clothing

    • Hair

    • Age

    • Body proportions

    • Accessories

    • Lighting

    This can make several clips feel disconnected.

    How to Reduce This Limitation: Reuse the same reference images, repeat essential character details, keep similar framing and lighting, and create a consistency sheet for the project.

    Audio May Need to Be Added Separately

    Some image-to-video models generate silent clips. Others may produce audio that contains:

    • Incorrect words

    • Unnatural timing

    • Weak synchronization

    • Excessive background noise

    • Unsuitable music

    • Unbalanced volume

    How to Reduce This Limitation: Treat generated audio as a draft. Add or replace narration, music, captions, and sound effects during editing.

    Tool Features Differ by Model and Account

    Image-to-video controls may vary according to:

    • Selected model

    • Subscription plan

    • Geographic region

    • Account type

    • Browser

    • Operating system

    • Device

    Adobe’s current Firefly video editor supports Chrome and Edge, and its import and editing workflows include specific file-size, duration, resolution, animation, and transparency limitations. [12]

    How to Reduce This Limitation: Confirm that the required model and controls work on your own account, browser, and device before purchasing a plan.

    Upload and Generation Failures Can Occur

    A generation may fail because of:

    • Unsupported image format

    • Incorrect dimensions

    • Missing required settings

    • Insufficient credits

    • Account restrictions

    • Partner-model restrictions

    • Temporary service problems

    Adobe identifies incomplete settings, unavailable account access, insufficient credits, unsupported reference files, and service disruptions as possible causes of failed video generations. [12]

    How to Reduce This Limitation: Check the error message, confirm the file requirements, review available credits, save the prompt, and try another supported model when appropriate.

    Credits Can Be Consumed Quickly

    One usable scene may require several generations because the first result can contain incorrect motion, unstable subjects, poor cropping, or background changes.

    Testing longer durations, higher resolutions, or several models can increase credit consumption.

    How to Reduce This Limitation: Generate one version at a time, test with simple movement, and use higher-quality settings only after the scene works.

    Built-In Editors May Have Compatibility Limits

    A platform’s editor may not support every media type or workflow.

    Adobe’s current Firefly video editor limits imported files by size, duration, and resolution. Animated GIF and WebP files display only their first frame when added to its timeline, and transparent generated videos may not appear as expected. [12]

    How to Reduce This Limitation: Download a test file and confirm that it works in your preferred editor before starting a large project.

    Prompts May Be Interpreted Differently by Each Model

    There is no universal prompt formula that produces identical behaviour across all image-to-video models.

    Runway explains that rigid prompt structure is less important than communicating the idea clearly and reducing ambiguity. [1]

    A prompt that works well in one tool may require different wording in another.

    How to Reduce This Limitation: Keep the underlying movement plan consistent, but adjust the wording according to the official guidance for the selected model.

    Commercial Permission Does Not Guarantee Accuracy

    A platform may permit commercial use while the generated clip still contains:

    • Incorrect products

    • Unexpected brands

    • Altered labels

    • Misleading actions

    • Unlicensed source material

    • A real person used without sufficient permission

    Commercial-use permission does not replace human review or source-image rights.

    How to Reduce This Limitation: Verify the starting image, model terms, product details, people’s consent, audio rights, and every generated frame before publication.

    AI Cannot Determine Whether the Video Is Appropriate

    The generator cannot reliably decide whether a clip is:

    • Accurate

    • Respectful

    • Misleading

    • Suitable for children

    • Appropriate for advertising

    • Safe to publish

    • Properly disclosed

    • Consistent with platform rules

    The creator remains responsible for the final decision.

    How to Reduce This Limitation: Complete a human review covering visuals, movement, factual claims, privacy, licences, consent, disclosure, and publishing requirements.

    When Image-to-Video Is Not the Best Choice

    Use real footage instead when the project requires:

    • Documentary evidence

    • Genuine testimony

    • Exact product operation

    • Safety instructions

    • Medical demonstrations

    • Legal evidence

    • Verified real events

    • Precise actions by a real person

    • Completely accurate product labels

    Image-to-video is strongest for creative concepts, visual explanations, animation, storyboards, website visuals, and short supporting scenes.

    Limitations Checklist

    Before using the finished clip, confirm:

    1. The main subject remains recognizable.

    2. Faces and hands remain acceptable.

    3. Product details are accurate enough for the intended use.

    4. Important text is correct or will be added later.

    5. The background remains reasonably stable.

    6. No important object disappears.

    7. No unwanted object appears.

    8. Camera movement follows the intended direction.

    9. Cropping does not remove important content.

    10. Lighting and colours remain consistent.

    11. The final second remains usable.

    12. The clip does not misrepresent a real person or event.

    13. Source permissions and model terms have been checked.

    14. Editing is complete.

    15. A human has approved the final video.

    Image-to-video generation offers useful control over the starting scene, but it remains an experimental production method. The strongest results come from realistic expectations, simple motion, controlled testing, careful editing, and responsible human review.

    Figure 13. The main limitations beginners should understand when creating AI videos from images.

    Figure 13 shows that image-to-video generation may produce changing faces, distorted hands, altered products, unstable backgrounds, incorrect text, cropping, camera errors, inconsistent characters, and high credit use. Recognizing these limits helps beginners choose suitable projects and determine when real footage is more appropriate.

    Common Myths About Image-to-Video Generation

    Image-to-video tools can make still pictures appear alive, but they are often misunderstood. Promotional demonstrations may suggest that any photograph can become a perfect video with one click.

    In practice, the quality of the starting image, movement plan, prompt, model, settings, and human review all affect the result.

    Myth 1: Any Image Can Produce a Good Video

    Reality: A blurry, distorted, heavily cropped, or poorly composed image gives the AI a weak visual foundation.

    Problems in the source image may become more noticeable after movement is added, including:

    • Distorted faces

    • Incorrect hands

    • Blurry product details

    • Broken object edges

    • Unreadable text

    • Unnatural shadows

    Prepare and correct the image before spending video credits.

    Myth 2: Image-to-Video Automatically Repairs the Starting Image

    Reality: The video generator is designed mainly to create movement, not to correct every visual defect.

    It may preserve or worsen:

    • Incorrect fingers

    • Uneven eyes

    • Misshapen products

    • Duplicate objects

    • Broken furniture

    • Incorrect text

    • Poor lighting

    Correct or regenerate the starting image first.

    Myth 3: The Prompt Must Describe Everything in the Image

    Reality: The image already defines the visible scene.

    The prompt should focus mainly on:

    • What moves

    • How it moves

    • Camera behaviour

    • Direction and speed

    • Timing

    • What must remain stable

    Instead of repeating the entire image description, use a focused instruction such as:

    Grass moves gently while the camera slowly pushes forward toward the bicycle. Keep the bicycle, fence, road, trees, lighting, and background consistent.

    Myth 4: A Longer Prompt Always Produces a Better Video

    Reality: A long prompt may contain repeated, unnecessary, or conflicting instructions.

    A useful prompt does not need to be complicated. It needs to clearly describe:

    • One primary action

    • One simple camera movement

    • Controlled environmental motion

    • Important stability details

    Add more information only when it helps correct a specific problem.

    Myth 5: More Movement Makes the Video More Impressive

    Reality: Excessive movement often makes an image-generated video less stable.

    Too much movement can cause:

    • Camera shake

    • Changing faces

    • Distorted hands

    • Altered products

    • Background flickering

    • Objects appearing or disappearing

    • Unnatural speed

    Slow, controlled movement usually looks more professional than several dramatic actions occurring at once.

    Myth 6: The Entire Image Should Move

    Reality: Many strong image-to-video clips animate only one or two elements.

    For example:

    • Steam rises while the cup remains still.

    • Leaves move while the tree trunk remains fixed.

    • A person blinks while their body remains still.

    • The camera moves while the product remains unchanged.

    • Water ripples while the shoreline remains stable.

    Movement becomes easier to control when permanent objects are clearly protected.

    Myth 7: Image-to-Video Guarantees Character Consistency

    Reality: A person or character may change during the clip or between separate generations.

    Possible changes include:

    • Face

    • Age

    • Hair

    • Clothing

    • Body proportions

    • Skin tone

    • Accessories

    Reuse the same reference image, repeat essential character details, keep motion simple, and review every scene.

    Even with careful preparation, perfect consistency is not guaranteed.

    Myth 8: One Reference Image Shows the AI Everything It Needs

    Reality: One image only shows the subject from one angle and at one moment.

    It may not clearly show:

    • The opposite side of a product

    • Hidden clothing details

    • The back of a person

    • Objects behind the subject

    • How a body should move

    • What should appear after a camera rotation

    Avoid requesting a large camera orbit or dramatic body movement when the necessary visual information is not present.

    Myth 9: Image-to-Video Preserves Products Exactly

    Reality: Product details may change as new frames are generated.

    The AI may alter:

    • Buttons

    • Packaging

    • Labels

    • Materials

    • Colours

    • Proportions

    • Accessories

    • Reflections

    Image-to-video may be useful for product concepts and early advertising drafts, but real footage is safer when exact product appearance or operation must be demonstrated.

    Myth 10: Visible Text Will Remain Correct

    Reality: Text may become distorted, misspelled, blurred, or inconsistent between frames.

    This affects:

    • Signs

    • Packaging

    • Screens

    • Clothing

    • Book covers

    • Product labels

    • Prices

    • Website addresses

    Generate the scene without essential wording whenever possible. Add accurate text later during editing.

    Myth 11: Higher Resolution Fixes Motion Problems

    Reality: Higher resolution improves sharpness, but it does not automatically correct:

    • Changing faces

    • Distorted hands

    • Incorrect camera movement

    • Background flickering

    • Altered products

    • Missing actions

    • Unexpected objects

    Test the movement and composition first. Use higher-quality settings only after the scene works properly.

    Myth 12: Longer Clips Are Always Better

    Reality: A longer clip gives the model more time to introduce unwanted changes.

    After the main action is completed, the remaining seconds may contain:

    • Facial changes

    • Background drift

    • Additional movement

    • Object distortion

    • Lighting changes

    • A weak ending

    Match the duration to the action. A stable five-second clip is more valuable than an unstable ten-second clip.

    Myth 13: First and Last Frames Guarantee a Smooth Transition

    Reality: Two keyframes provide visual guidance, but they do not guarantee a natural transition.

    Problems are more likely when the images have different:

    • Camera angles

    • Subject positions

    • Backgrounds

    • Lighting

    • Colours

    • Object sizes

    • Compositions

    Use visually compatible frames and divide major transformations into smaller scenes.

    Myth 14: A Fixed-Camera Instruction Stops All Camera Movement

    Reality: The generated camera may still drift, zoom, or change framing.

    A stronger instruction is:

    The camera remains completely fixed in one stable tripod shot while steam rises gently from the cup.

    Describing visible movement within the scene gives the model something to animate while the camera remains still.

    Myth 15: Negative Instructions Prevent Every Error

    Reality: A long list beginning with “no” does not guarantee that unwanted changes will be avoided.

    Instead of writing:

    No flickering, no distortion, no camera shake, no changing background, no extra objects, and no colour changes.

    Use positive instructions:

    Use smooth, stable motion. Keep the subject, background, lighting, colours, and composition visually consistent throughout the clip.

    A small number of focused restrictions may still be useful, but they should not replace a clear description of the intended result.

    Myth 16: One Prompt Works Equally Well in Every Tool

    Reality: Different models may interpret the same prompt differently.

    A prompt that works well in one platform may produce:

    • Stronger or weaker movement

    • A different camera path

    • A changed subject

    • Different timing

    • More background instability

    Keep the movement plan consistent, but adjust the wording and settings for the selected model.

    Myth 17: The First Generation Shows the Tool’s Full Ability

    Reality: A weak first result may be caused by:

    • An unsuitable image

    • Excessive motion

    • An unclear prompt

    • Conflicting camera settings

    • The wrong duration

    • An unsuitable model

    Review the result, identify the largest problem, and revise one instruction before deciding that the tool cannot complete the project.

    Myth 18: Generating Many Versions Is the Fastest Approach

    Reality: Producing several uncontrolled variations may consume credits without teaching you why the results are weak.

    A better workflow is:

    1. Generate one version.

    2. Watch the complete clip.

    3. Identify the main problem.

    4. Change one instruction.

    5. Generate again.

    6. Compare the results.

    Controlled testing produces more useful information than random repetition.

    Myth 19: Image-to-Video Requires No Editing

    Reality: Generated clips commonly need:

    • Trimming

    • Speed adjustments

    • Titles

    • Captions

    • Narration

    • Music

    • Colour correction

    • Audio balancing

    • Transitions

    • Compression

    AI generation creates the moving visual material. Editing prepares it for publication.

    Myth 20: A Paid Plan Automatically Gives Full Commercial Rights

    Reality: Commercial use may depend on:

    • The platform

    • The selected model

    • The subscription plan

    • The starting image

    • Real-person consent

    • Music and voice rights

    • Brands and protected content

    • The intended publishing platform

    Paying for access does not give you permission to animate an image owned by someone else.

    Myth 21: Adding an AI Disclosure Makes Every Use Acceptable

    Reality: Disclosure supports transparency, but it does not excuse:

    • Copyright infringement

    • Unauthorized use of a person’s likeness

    • False endorsements

    • Misleading advertising

    • Harmful impersonation

    • Fabricated evidence

    • Inaccurate product claims

    The video must still be permitted, accurate, respectful, and appropriate.

    Myth 22: AI-Generated Video Can Be Used as Real Evidence

    Reality: A generated clip is a simulation or creative output. It is not proof that an event occurred.

    Do not present it as evidence of:

    • An accident

    • A crime

    • Product performance

    • Customer satisfaction

    • Medical results

    • Financial results

    • Property damage

    • A person’s behaviour

    Clearly identify generated or simulated scenes when viewers could misunderstand them.

    Myth 23: Image-to-Video Can Replace All Real Filming

    Reality: Image-to-video is useful for:

    • Creative concepts

    • Visual explanations

    • Storyboards

    • Animated landscapes

    • Website visuals

    • Product concepts

    • Short supporting scenes

    Real footage remains preferable for:

    • Genuine testimony

    • Documentary evidence

    • Exact product operation

    • Safety instructions

    • Verified events

    • Authentic demonstrations

    • Precise actions by real people

    Myth 24: Human Creativity Is No Longer Necessary

    Reality: The creator still decides:

    • Which image to use

    • What should move

    • What should remain stable

    • How the prompt should be written

    • Which model and settings to select

    • Which result is strongest

    • What needs editing

    • Whether the video is accurate

    • Whether it should be published

    The AI creates frames. The human provides purpose, direction, judgment, and responsibility.

    A Practical Reality Check

    Image-to-video generation works best when you:

    • Begin with a strong image

    • Plan one simple movement

    • Use a focused prompt

    • Protect important details

    • Generate one version at a time

    • Review the complete clip

    • Correct one problem at a time

    • Edit the selected result

    • Check permissions and disclosure

    • Keep organized records

    The goal is not to make every part of the image move. The goal is to add controlled movement that improves the scene without damaging the details that make the image useful.
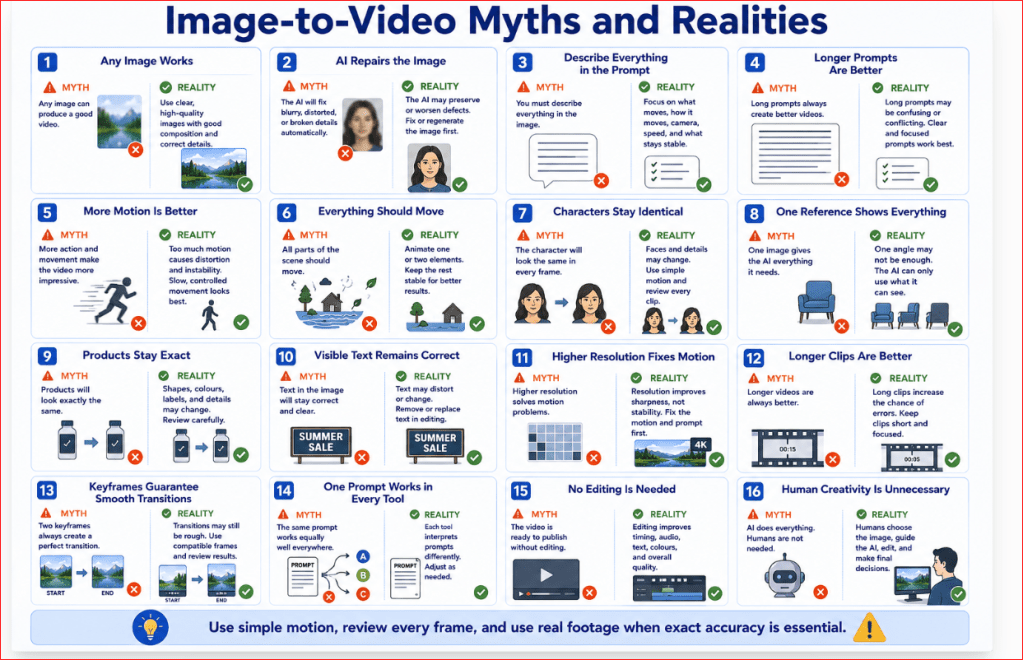
    Figure 14. Common myths and realities about creating AI videos from still images.

    Figure 14 corrects common misunderstandings about source-image quality, prompt length, movement, consistency, resolution, editing, commercial rights, disclosure, and human creativity. Image-to-video works best as a controlled production process rather than an automatic one-click solution.

    Frequently Asked Questions About Creating AI Videos from Images

    What Is Image-to-Video Generation?

    Image-to-video generation uses an uploaded still image as the opening visual foundation for a newly generated moving clip.

    The starting image normally guides the:

    • Subject

    • Composition

    • Lighting

    • Colours

    • Background

    • Visual style

    The written prompt mainly explains the motion, camera behaviour, direction, speed, timing, and what should remain stable.

    Is Image-to-Video Easier Than Text-to-Video?

    It can be easier when you already have a strong image.

    With text-to-video, the AI must create both the scene and its movement. With image-to-video, the image has already established the subject and composition, allowing the prompt to focus more directly on animation.

    Image-to-video is particularly useful when:

    • The opening composition matters

    • A specific product or character must appear

    • You want to animate an existing photograph

    • Several clips should share a similar visual style

    • You need greater control over the first frame

    It does not guarantee that every detail will remain unchanged.

    What Is the Best Image for a First Project?

    Choose an image that has:

    • One obvious main subject

    • Sharp focus

    • Correct faces and hands

    • A simple background

    • Consistent lighting

    • Enough space for movement

    • The correct aspect ratio

    • No unnecessary visible text

    • No private information

    • No visual defects

    Runway recommends using a high-quality image without artifacts because blurry faces, hands, or other weaknesses may become more noticeable during animation.

    A landscape, stationary product, coffee cup with steam, or bicycle beside a road is normally easier than a crowded scene containing several people.

    Do I Need to Describe Everything Visible in the Image?

    No. The image already communicates the visible subject, composition, lighting, and style.

    The prompt should mainly describe:

    • Subject action

    • Environmental movement

    • Camera movement

    • Direction and speed

    • Timing

    • Important stability requirements

    Runway’s official guidance recommends focusing image-to-video prompts almost entirely on motion rather than repeating what is already visible.

    For example:

    Grass moves gently while the camera slowly pushes forward toward the bicycle. Keep the bicycle, fence, road, trees, lighting, and background visually consistent.

    How Long Should My First Clip Be?

    Begin with approximately five or six seconds and one simple movement.

    Runway’s current Gen-4.5 workflow allows durations from two to ten seconds. A longer duration may help with sequential actions, but it also gives faces, products, objects, and backgrounds more time to change.

    Use several short clips when creating a longer video.

    Can I Keep the Camera Completely Still?

    You can request a fixed camera, although the generator may still introduce slight movement.

    Use wording such as:

    The camera remains completely fixed in one stable tripod shot while steam rises gently from the coffee.

    Describe some visible movement inside the scene so the model knows what it should animate while the camera remains still.

    Positive wording such as locked camera or the camera remains still is generally clearer than relying on a long list of negative restrictions.

    Can I Animate a Photograph of a Real Person?

    Technically, a compatible tool may animate a portrait, but you should have appropriate permission from the recognizable person.

    Begin with subtle movements such as:

    • One natural blink

    • Gentle breathing

    • A slight eye movement

    • A small head turn

    • Soft hair movement

    Do not make a real person appear to give an endorsement, make a statement, perform an action, or participate in an event without authorization.

    Realistic synthetic content that makes someone appear to do something they did not do may also require disclosure on YouTube.

    How Can I Keep a Face Consistent?

    Use:

    • A clear, high-quality portrait

    • A short duration

    • Minimal facial movement

    • A fixed or very slow camera

    • Clear identity-preservation instructions

    • A wider framing when possible

    Example:

    The woman blinks naturally once. Keep her facial identity, age, hairstyle, skin tone, clothing, body position, lighting, and background visually consistent.

    Perfect facial consistency is not guaranteed. Review the eyes, mouth, hairline, expression, and final frame carefully.

    Why Does the Product Change During the Video?

    The AI must create new frames between the starting image and the end of the clip. During that process, it may reinterpret small commercial details.

    Possible changes include:

    • Shape

    • Colour

    • Buttons

    • Packaging

    • Materials

    • Labels

    • Proportions

    • Reflections

    Use minimal movement and identify the details that must remain unchanged. Real footage is preferable when exact product appearance or operation must be demonstrated.

    Should I Use Both a First Frame and a Last Frame?

    Use both when the video needs to finish in a planned composition.

    Suitable examples include:

    • A closed book becoming open

    • A lamp changing from off to on

    • A person changing their gaze

    • A packaged product becoming revealed

    • A wide shot ending closer to the subject

    Adobe Firefly currently supports keyframe images for image-guided video generation. Compatible first and last images can guide how the clip begins and ends.

    The frames should have similar subjects, lighting, camera angles, backgrounds, colours, and object positions. Large differences may produce an unstable transition.

    Can I Create a Long Video from One Image?

    Image-to-video generators commonly produce short clips rather than a complete long-form video.

    You can create a longer sequence by:

    1. Generating the first short clip.

    2. Saving a suitable final frame.

    3. Using that frame as the starting image for the next clip.

    4. Repeating the process.

    5. Combining the clips in a video editor.

    Runway specifically describes using the last frame of one generation as the image input for a continuation.

    A storyboard and scene-by-scene workflow provide better control than placing an entire story into one prompt.

    Can ChatGPT Help Me Create the Video?

    ChatGPT can help you prepare:

    • The video idea

    • Scene plan

    • Motion prompt

    • Camera instructions

    • Narration

    • Captions

    • Troubleshooting revisions

    • File-naming system

    • Publishing checklist

    The moving footage in this workflow is then created using an image-to-video generator that accepts the prepared image and motion prompt.

    Always check that the final prompt still matches the actual image before generating.

    How Many Generations Will I Need?

    There is no fixed number.

    A simple landscape may produce a usable result after one or two attempts. Portraits, products, hands, text, complex actions, and strong camera movements may require more testing.

    Iteration is an expected part of generative-video creation. Each result shows how the model interpreted the image and instructions.

    Use this process:

    1. Generate one version.

    2. Watch the entire clip.

    3. Identify the largest problem.

    4. Revise one instruction.

    5. Generate again.

    6. Compare the versions.

    Do not generate many variations before reviewing the first result.

    What Should I Do When Nothing Moves?

    Move the missing action closer to the beginning of the prompt and describe it more directly.

    Weak prompt:

    Maintain the same room and lighting. Steam should be visible.

    Improved prompt:

    Steam rises clearly and continuously from the coffee throughout the clip. The camera remains fixed.

    Keep the rest of the prompt simple so the requested motion remains the main instruction.

    What Should I Do When Everything Moves Too Much?

    Reduce the number and intensity of the requested actions.

    Instead of requesting movement in the subject, camera, background, lighting, and several objects, choose:

    • One main action

    • One simple camera movement

    • One small environmental movement

    • Clear stable elements

    Example:

    Grass moves very gently while the camera pushes forward extremely slowly. Keep the bicycle, fence, road, trees, lighting, and background stable.

    Runway recommends beginning with the essential motion and adding one component at a time during refinement.

    Can I Upload an Image-Generated Video to WordPress?

    Yes. WordPress.com supports embedding a video from another service or adding video using the Video block. It also provides options for text tracks and poster images. Directly hosted video options and VideoPress availability depend on the site’s plan.

    Before publishing:

    • Export as MP4

    • Compress the website copy

    • Add a poster image

    • Include captions when needed

    • Add a written explanation

    • Test playback on desktop and mobile

    Embedding a YouTube video may be more practical than uploading a large file directly to the website.

    Can I Upload the Video to YouTube?

    Yes, provided you have the necessary rights to the:

    • Starting image

    • Generated footage

    • Music

    • Narration

    • Voices

    • Additional media

    YouTube requires disclosure when content is meaningfully altered or synthetically generated and appears realistic—for example, when it shows a realistic scene that did not happen or makes a real person appear to do something they did not do.

    The disclosure is completed through the altered-content setting in YouTube Studio.

    Do All Image-Generated Videos Require AI Disclosure?

    Not every minor or obviously unrealistic use requires disclosure.

    Disclosure becomes more important—and may be required—when the clip:

    • Appears realistic

    • Uses a recognizable real person

    • Alters a real place or event

    • Depicts a realistic event that never occurred

    • Uses another person’s cloned voice

    • Could reasonably mislead viewers

    YouTube distinguishes realistic, meaningful synthetic content from minor production assistance such as captions, script improvement, colour adjustment, or ordinary video repair.

    A useful written note is:

    This video includes visuals created or modified using artificial intelligence.

    Use the platform’s official disclosure setting when required.

    Can I Use Image-to-Video Clips Commercially?

    Possibly, but you must check both the video model’s conditions and the rights to the source image.

    Runway currently states that, as between Runway and the user, users retain their rights to uploaded and generated content and may use their generations commercially. [4]

    Adobe states that outputs from Firefly features may be used commercially according to the conditions described in its current Firefly documentation. Partner models available through Adobe may require a separate suitability review.

    Platform permission does not give you rights to:

    • Someone else’s photograph

    • Copyrighted artwork

    • Unauthorized music

    • A protected character

    • A person’s likeness

    • An unlicensed product image

    Review the exact platform, model, plan, source material, and intended use.

    What Is the Best First Image-to-Video Project?

    Use one clear landscape image containing a small amount of natural motion.

    For example:

    Clouds drift slowly while grass and tree leaves move gently in a light breeze. Small ripples move across the lake. The camera remains fixed. Keep the mountains, shoreline, trees, lighting, colours, and composition stable.

    This project avoids complicated faces, hands, dialogue, text, and product details while teaching the essential workflow.
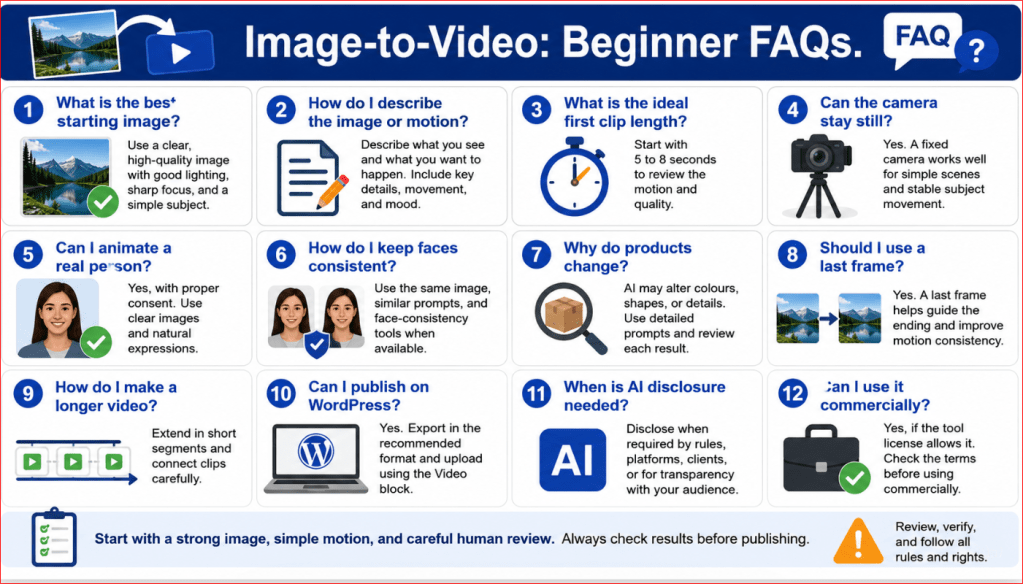
    Figure 15. Quick answers to common beginner questions about creating AI videos from images.

    Figure 15 summarizes the practical questions beginners ask most often, including source-image quality, motion prompts, duration, camera stability, real-person images, keyframes, longer videos, WordPress and YouTube publishing, disclosure, and commercial use.

    Key Takeaways

    • Image-to-video generation turns a still image into a short moving clip.

    • The uploaded image defines the subject, composition, lighting, colours, background, and opening visual style.

    • The written prompt should focus mainly on movement, camera behaviour, speed, timing, and what must remain stable.

    • A clear, sharp, properly composed image usually produces a stronger starting point than a blurry or distorted image.

    • Correct faces, hands, products, object edges, lighting, and background defects before uploading the image.

    • Prepare the source image in the final video’s aspect ratio to reduce unwanted cropping.

    • Leave enough empty space around the subject and in the direction of the intended movement.

    • Begin with one main action and one simple camera movement.

    • Gentle motion is normally easier to control than fast or dramatic movement.

    • Suitable beginner movements include blinking, breathing, drifting clouds, moving grass, rising steam, rippling water, and a slow camera push.

    • Separate subject movement, environmental movement, camera movement, and stable elements before writing the prompt.

    • Use clear movement verbs such as turns, moves, drifts, rises, rotates, or flows.

    • Describe direction and speed when they matter.

    • State which important elements should remain consistent, including faces, clothing, products, buildings, furniture, lighting, and backgrounds.

    • Do not repeat every visible detail from the image unless a detail is essential to preserve.

    • Avoid placing several actions or camera movements into one short clip.

    • Five- or six-second clips are usually practical for a first beginner project.

    • First and last frames can guide a planned transition, but they do not guarantee a smooth result.

    • Compatible keyframes should use similar subjects, camera angles, lighting, colours, backgrounds, and object positions.

    • Generate one version first instead of requesting several uncontrolled variations.

    • Watch the complete clip, including the final second, before deciding whether it is usable.

    • Compare the result with the original image and the movement plan.

    • Correct the largest problem first and change only one instruction or setting at a time.

    • Higher resolution improves sharpness but does not correct unstable movement, distorted faces, altered products, or incorrect camera behaviour.

    • Important visible text should normally be added during editing because generated text may change between frames.

    • Product videos require careful frame-by-frame review because buttons, packaging, labels, colours, and dimensions may change.

    • Real footage remains the safer choice when exact product operation, genuine testimony, documentary evidence, or verified events are required.

    • Generated clips usually need trimming, pacing adjustments, captions, narration, music, colour correction, compression, and final testing.

    • MP4 is generally the most practical export format for beginner projects.

    • Keep the original image, prepared image, prompts, settings, generated versions, editing project, licences, and final exports in organized folders.

    • Confirm that you own or are permitted to use the starting image.

    • Obtain appropriate permission before animating a recognizable real person.

    • Remove private or confidential information before uploading an image.

    • Check the commercial-use conditions for the exact platform and model used.

    • Add AI disclosure when realistic generated or altered content could mislead viewers or when the publishing platform requires it.

    • Image-to-video works best as a controlled creative workflow supported by human planning, review, editing, and responsible publication.

    Final Tip

    Do not begin your first image-to-video project with a complicated portrait, product demonstration, or multi-scene story.

    Begin with one clear image and one gentle movement.

    A practical first project is:

    • One landscape image

    • Five or six seconds

    • 16:9 format

    • Fixed or slowly moving camera

    • Gentle clouds, grass, leaves, mist, or water movement

    • No people

    • No important text

    • No product labels

    • No complicated hand movement

    Use this workflow:

    1. Inspect and prepare the starting image.

    2. Decide what should move.

    3. Decide what must remain stable.

    4. Write one focused motion prompt.

    5. Generate one version.

    6. Watch the complete clip.

    7. Identify the largest problem.

    8. Change one instruction.

    9. Generate one improved version.

    10. Edit and save the strongest result.

    For example:

    Clouds drift slowly across the sky while grass and tree leaves move gently in a light breeze. Small ripples travel across the lake. The camera remains completely fixed. Keep the mountains, shoreline, trees, lighting, colours, and composition visually consistent throughout the six-second 16:9 clip.

    Keep a record of:

    • Starting image

    • Prepared image

    • Original prompt

    • Revised prompt

    • Platform and model

    • Aspect ratio

    • Duration

    • Resolution

    • Camera setting

    • Credits used

    • Selected version

    • Final filename

    This record turns one successful experiment into a repeatable workflow.

    For the AI Mastery website, the best approach is to create one short demonstration that clearly supports the article. Do not add movement simply because the tool can create it. The video should help the reader understand something that a still image cannot explain as clearly.

    The goal is not to animate everything. The goal is to add controlled movement without damaging the subject, composition, accuracy, or meaning of the original image.
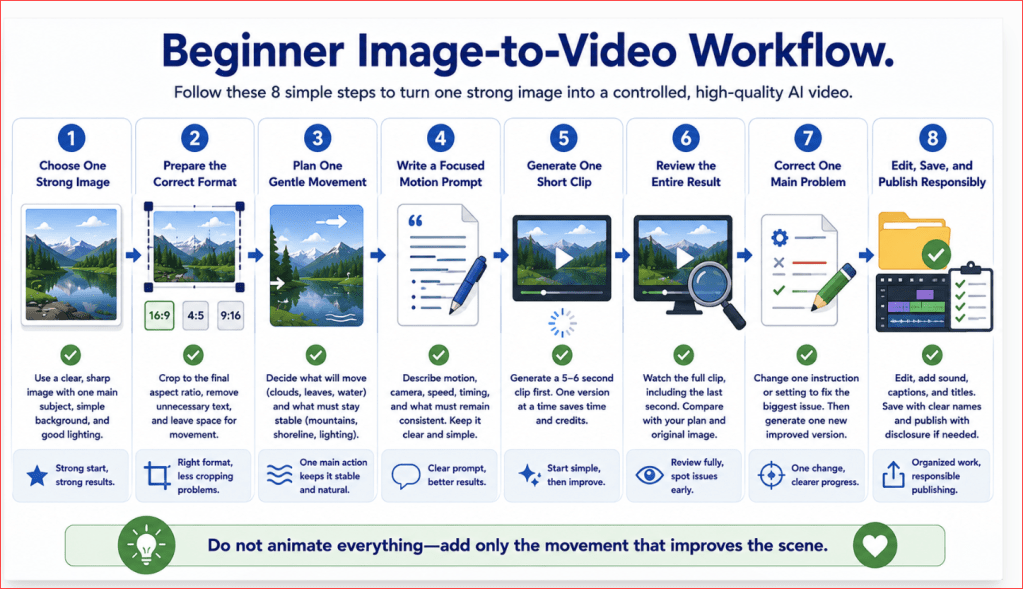
    Figure 16. A practical beginner workflow for turning one strong image into a controlled AI-generated video.

    Figure 16 summarizes the recommended starting method: prepare one clear image, plan one gentle movement, generate one short version, review the complete result, correct one problem, and save the strongest clip with its prompts and settings.

    Conclusion

    Image-to-video generation allows beginners to turn a still photograph, illustration, product image, landscape, or AI-generated picture into a short moving video.

    The uploaded image provides the visual foundation. It establishes the subject, composition, lighting, colours, background, camera angle, and opening appearance. The motion prompt then explains:

    • What should move

    • How the movement should happen

    • How the camera should behave

    • How fast the motion should be

    • What should remain stable

    The strongest results usually begin with a clear, sharp image that already looks close to the desired first frame.

    Before uploading an image:

    1. Save the untouched original.

    2. Create a separate working copy.

    3. Choose the final aspect ratio.

    4. Crop or expand the image carefully.

    5. Correct visible defects.

    6. Remove private information.

    7. Confirm that faces, hands, products, and backgrounds are accurate.

    8. Verify that you own the image or have permission to use it.

    A beginner should not attempt to animate every element in the scene. One main action and one simple camera movement are normally easier to control.

    Suitable first movements include:

    • Clouds drifting slowly

    • Grass moving gently

    • Steam rising

    • Water rippling

    • Curtains moving slightly

    • A portrait subject blinking once

    • A slow camera push toward a stationary subject

    A practical motion prompt should focus on:

    • Camera movement

    • Subject action

    • Environmental movement

    • Direction and speed

    • Timing

    • Stability instructions

    For example:

    Grass moves gently in a light breeze while the camera slowly pushes forward toward the red bicycle. Use smooth, natural movement and one continuous shot. Keep the bicycle, wooden fence, country road, trees, lighting, colours, and background visually consistent throughout the six-second 16:9 clip.

    The first generation should be treated as a test.

    Watch the complete clip and compare it with:

    • The original image

    • The movement plan

    • The intended camera behaviour

    • The required subject and background stability

    When a problem appears, identify the largest issue and revise only one instruction or setting.

    For example:

    • Slow the camera when it moves too quickly.

    • Reduce environmental movement when the scene becomes unstable.

    • Strengthen consistency instructions when a face or product changes.

    • Prepare the image again when important areas are cropped.

    • Trim the final second when only the ending contains a defect.

    Changing one element at a time makes it easier to understand what improved the result.

    Image-to-video generation has important limitations. It may produce:

    • Changing faces

    • Distorted hands

    • Altered products

    • Incorrect visible text

    • Flickering backgrounds

    • Objects appearing or disappearing

    • Unexpected cropping

    • Incorrect camera movement

    • Inconsistent characters between clips

    Higher resolution does not automatically correct these problems. It improves sharpness, not movement accuracy or subject consistency.

    Generated clips also normally require editing. A finished video may need:

    • Trimming

    • Pacing adjustments

    • Titles

    • Captions

    • Narration

    • Music

    • Sound effects

    • Colour correction

    • Audio balancing

    • Compression

    • A poster image

    • AI disclosure

    For WordPress, a short MP4 file may be uploaded or a hosted video may be embedded. The article should also include a written explanation so readers can understand the lesson without relying only on the video.

    For YouTube and other public platforms, review whether realistic AI-generated or meaningfully altered content requires disclosure.

    Before publishing, confirm that:

    • The starting image is owned or properly licensed.

    • Recognizable people gave appropriate permission.

    • No private information is visible.

    • Product and brand details are accurate.

    • Music, narration, and voices are authorized.

    • The selected platform and model permit the intended use.

    • The clip is not presented as evidence of something that did not happen.

    • AI disclosure has been added when required.

    • All prompts, permissions, licences, and final files are saved.

    Image-to-video generation is most useful for:

    • Creative concepts

    • Landscapes

    • Website visuals

    • Educational demonstrations

    • Storyboards

    • Product concepts

    • Presentation backgrounds

    • Short supporting scenes

    Real filming remains more appropriate when a project requires:

    • Genuine testimony

    • Documentary evidence

    • Exact product operation

    • Safety instructions

    • Verified events

    • Authentic demonstrations

    • Precise actions by real people

    Image-to-video is not a one-click replacement for filming or editing. It is a controlled production workflow that combines a strong source image, a focused motion prompt, careful testing, human review, and responsible publication.

    Begin with one image, one gentle movement, and one short clip. Learn what the selected model does well, keep organized records, and increase the complexity only after the basic workflow produces stable and useful results.

    Sources and References

    Citations in square brackets refer to the numbered official sources below. These pages were reviewed on July 28, 2026. Features, model names, prices, limits, policies, and plan conditions may change. Readers should check current official information when first using a tool, changing plans or models, receiving a policy-update notice, and periodically for important projects.

    [1] Runway. Image-to-Video Prompting Guide. Explains that the input image defines the visual foundation while the prompt should focus primarily on motion, camera work, timing, direction, speed, and temporal progression. Accessed July 28, 2026.

    [2] Runway. Introduction to Prompting. Recommends clear language, positive phrasing, simple starting prompts, controlled iteration, and changing one element at a time when troubleshooting. Accessed July 28, 2026.

    [3] Runway. Creating with Gen-4.5. Lists current Gen-4.5 image-to-video inputs, durations, aspect ratios, output resolution, generation settings, and iteration controls. Accessed July 28, 2026.

    [4] Runway. Usage Rights. Describes Runway-specific ownership and commercial-use information. Source-image rights, third-party permissions, and other legal requirements must still be checked separately. Accessed July 28, 2026.

    [5] Runway. Understanding Runway’s Security and Privacy Standards. Provides Runway-specific information about uploaded-asset privacy and sharing. Other providers may use different defaults and data practices. Accessed July 28, 2026.

    [6] Adobe Help Center. Generate Videos Using Images. Explains first and last keyframes, crop controls, aspect ratios, resolution, camera motion choices, prompt requirements, generation history, and download or editing options. Accessed July 28, 2026.

    [7] Adobe Help Center. Generate Videos Using Firefly Models. Describes image-guided video generation in the Firefly video editor and notes that available settings depend on the chosen model and keyframes. Accessed July 28, 2026.

    [8] Adobe Help Center. Partner Models in Adobe Products. Explains that partner models are not developed by Adobe and that users must determine whether a particular model is suitable for their project. Accessed July 28, 2026.

    [9] Adobe Help Center. Generative Credits FAQ. Explains how generative credits are consumed and how plan conditions and access can affect available generative features. Accessed July 28, 2026.

    [10] Adobe Help Center. Adobe Firefly FAQ. Provides current information about Firefly models, commercial use, model training, user content, and product-specific conditions. Accessed July 28, 2026.

    [11] Adobe Help Center. Content Credentials Overview. Explains how Content Credentials can provide tamper-evident information about how qualifying Firefly content was generated or edited. Accessed July 28, 2026.

    [12] Adobe Help Center. Known Limitations in Firefly Video Editor. Lists current browser, device, import, media, transparency, and workflow limitations for the Firefly video editor. Accessed July 28, 2026.

    [13] WordPress.com Support. Video Block. Explains how to upload, embed, or select videos, add text tracks, choose a poster image, and configure playback. Plan requirements may change. Accessed July 28, 2026.

    [14] WordPress.com Support. Working with Video. Summarizes WordPress.com video and VideoPress options, storage, optimization, and plan-dependent features. Accessed July 28, 2026.

    [15] YouTube Help. Disclosing Use of GenAI Content. Explains when creators must use YouTube’s AI-use disclosure for realistic, meaningfully generated, or altered content. Accessed July 28, 2026.

    [16] YouTube Help. Understanding “How This Content Was Made” Disclosures. Explains how YouTube displays creator disclosures and compatible content-provenance information. Accessed July 28, 2026.

    [17] YouTube Help. Protecting Your Identity. Explains the privacy-request process for realistic altered or synthetic content that depicts a recognizable person. Accessed July 28, 2026.

    [18] W3C Web Accessibility Initiative. Captions/Subtitles. Explains that captions provide synchronized text for speech and important non-speech audio needed to understand video content. Accessed July 28, 2026.

    [19] Canadian Intellectual Property Office. A Guide to Copyright. Provides general Canadian copyright information, including protection for original artistic works such as photographs. This article provides general education, not legal advice. Accessed July 28, 2026.

    Continue Learning

    Continue developing your AI video skills with these related guides:

    How to Create AI Videos with ChatGPT: Beginner Step-by-Step Guide (2026)

    Best AI Video Tools for Beginners: Complete Guide (2026)

    How to Edit AI-Generated Videos: Beginner Step-by-Step Guide (2026)

    How to Add Voice, Music, and Captions to AI Videos (2026)

    AI Image Generation for Beginners: Complete Guide (2026)

    Prompt Engineering for Beginners: Complete Guide (2026)

  • How to Create AI Videos from Text: Beginner Step-by-Step Guide (2026)

    How to Create AI Videos from Text: Beginner Step-by-Step Guide (2026)

    Estimated reading time: 120–150 minutes
    Last updated: July 28, 2026

    Before Learning

    For the best results, read these beginner-friendly guides first:

    ChatGPT Basics for Beginners: Complete Guide (2026)

    Prompt Engineering for Beginners: Complete Guide (2026)

    How to Create AI Videos with ChatGPT: Beginner Step-by-Step Guide (2026)

    Best AI Video Tools for Beginners: Complete Guide (2026)

    These guides explain how to use ChatGPT, write clearer prompts, plan an AI video, and choose a suitable video-generation tool.

    What You’ll Learn

    By the end of this guide, you will know:

    • What text-to-video generation is and how it works

    • How a written prompt becomes a moving video

    • How to choose a simple video idea

    • How to describe the subject, setting, action, and camera movement

    • How to describe lighting, style, mood, duration, and aspect ratio

    • How to write an effective text-to-video prompt

    • How to use ChatGPT to improve a video prompt

    • How to choose suitable video-generation settings

    • How to generate your first text-to-video clip

    • How to review the complete result

    • How to correct weak movement, changing objects, distorted faces, and unstable backgrounds

    • How to improve one prompt instruction at a time

    • How to create several connected clips for a longer video

    • How to add captions, narration, music, and final editing

    • How to export, name, and organize the finished video

    • How to use AI-generated videos responsibly

    • Which common mistakes, limitations, and myths beginners should understand

    • How to prepare text-generated videos for WordPress, YouTube, and social media

    Introduction

    Text-to-video generation allows you to create a moving video from written instructions. Instead of uploading a starting image or recording footage with a camera, you describe the scene you want, and an AI video generator creates a short clip based on your description.

    The written instruction is called a text-to-video prompt.

    For example:

    Create a six-second cinematic video of a red bicycle beside a quiet country road at sunrise. Grass moves gently in the breeze while the camera slowly travels toward the bicycle. Use warm natural lighting, realistic movement, and a wide 16:9 landscape composition.

    The AI video generator interprets the prompt and attempts to create:

    • A red bicycle

    • A country road

    • Sunrise lighting

    • Moving grass

    • A slow forward camera movement

    • A realistic visual style

    • A wide landscape composition

    Unlike image-to-video generation, text-to-video does not begin with an uploaded picture. The AI must create the complete visual scene, including the subject, background, lighting, composition, and movement.

    This gives the AI more creative freedom, but it also gives you less control over the exact appearance of the first frame.

    A text-to-video prompt should normally explain:

    • The main subject

    • The setting

    • The subject’s action

    • Environmental movement

    • Camera angle

    • Camera movement

    • Lighting

    • Visual style

    • Mood

    • Clip duration

    • Aspect ratio

    • Important quality requirements

    Current text-to-video guidance from Runway recommends describing both the visual appearance and the movement of the scene. Adobe similarly recommends using a clear, well-structured prompt that identifies the shot, subject, action, location, and visual style. [1, 4, 5]

    A vague prompt may say:

    Create a video of a bicycle.

    This does not explain:

    • What the bicycle looks like

    • Where it is located

    • Whether it is moving

    • How the camera should behave

    • What time of day it is

    • What visual style should be used

    • What shape the video should have

    The AI must make all these decisions.

    A clearer prompt might say:

    Create a realistic six-second video of a red bicycle standing beside a wooden fence on a quiet country road at sunrise. Grass and tree leaves move gently in a light breeze. The camera slowly pushes forward toward the bicycle in one continuous shot. Use warm golden light, natural colours, smooth movement, and a wide 16:9 landscape composition. Do not include people, visible text, logos, or additional bicycles.

    The clearer prompt gives the AI more useful direction while still leaving room for the model to create the scene.

    However, a detailed prompt does not guarantee a perfect result.

    The generated clip may still contain:

    • Changing objects

    • Unstable backgrounds

    • Unnatural movement

    • Incorrect hands or faces

    • Unexpected camera behaviour

    • Distorted products

    • Unreadable visible text

    • Objects appearing or disappearing

    • Incorrect cropping

    • Differences from the original idea

    For this reason, text-to-video generation should be treated as a process of:

    1. Planning the scene

    2. Writing the prompt

    3. Generating a short test

    4. Reviewing the entire result

    5. Identifying the largest problem

    6. Revising one instruction

    7. Generating an improved version

    8. Editing the strongest clip

    Runway’s introductory prompting guidance recommends beginning with a simple prompt, reviewing the result, and improving it through controlled iteration rather than attempting to produce everything perfectly in one generation. [2]

    In this guide, ChatGPT will be used to help you:

    • Develop the video idea

    • Organize the scene

    • Write the first prompt

    • Improve unclear instructions

    • Plan camera movement

    • Create several connected scenes

    • Write narration and captions

    • Troubleshoot weak results

    • Prepare a publishing checklist

    A compatible AI video generator will then create the moving clip from the finished prompt.

    Text-to-video is especially useful when you do not already have a suitable photograph or reference image. It can help create:

    • Cinematic landscapes

    • Creative story scenes

    • Educational visual examples

    • Website background clips

    • Presentation visuals

    • Social-media content

    • Advertising concepts

    • Animated environments

    • Video prototypes

    • B-roll footage

    Text-to-video is less suitable when exact appearance is essential.

    For example, it may not be the best choice when you need:

    • An exact product demonstration

    • A consistent real person

    • Documentary evidence

    • Genuine customer testimony

    • Accurate safety instructions

    • A precise technical process

    • A verified historical event

    In those situations, real footage or carefully controlled image-to-video generation may provide greater accuracy.

    The most practical beginner approach is to start with one subject, one action, one setting, and one camera movement. Generate a short clip, review it carefully, and increase the complexity only after the basic result is stable.

    Current Information Note

    AI video tools, model names, available settings, generation limits, credit costs, privacy options, and commercial-use conditions can change frequently.

    Some current platforms allow users to select settings such as the model, aspect ratio, camera controls, and prompt enhancement, but the exact options depend on the selected service and model. [3, 5]

    Always check the provider’s current official documentation before paying for a plan or beginning an important commercial project.

    Figure 1. Text-to-video generation turns a written description into a short moving video.

    Figure 1 shows the basic text-to-video process. The user writes a prompt describing the subject, setting, action, camera, lighting, style, duration, and format. The AI video generator interprets these instructions and creates a moving clip that must be reviewed and improved before publication.

    How Text-to-Video Generation Works

    Text-to-video generation begins with a written prompt and ends with a sequence of moving images called video frames. [1, 5]

    A traditional video is usually recorded with a camera. A text-to-video system creates the frames using artificial intelligence instead.

    The process can be understood in seven main steps.

    Step 1: You Write the Video Prompt

    The process begins when you describe the video you want.

    For example:

    Create a six-second realistic video of a small wooden boat moving slowly across a calm lake at sunrise. Soft mist drifts above the water while the camera gently follows the boat from the side. Use warm natural lighting and a wide 16:9 landscape format.

    The prompt gives the AI information about:

    • The subject

    • The setting

    • The action

    • Environmental movement

    • Camera movement

    • Lighting

    • Visual style

    • Duration

    • Aspect ratio

    The AI cannot see the exact video in your imagination. It relies on the words in the prompt to understand what it should create.

    Step 2: The AI Identifies the Main Elements

    The AI examines the prompt and separates it into important visual and motion instructions.

    From the boat example, it may identify:

    Subject: Small wooden boat

    Setting: Calm lake

    Time: Sunrise

    Action: Boat moving slowly

    Environment: Mist drifting above the water

    Camera: Side-following movement

    Lighting: Warm natural light

    Format: Wide 16:9 landscape

    Duration: Six seconds

    Clear prompts make this step easier.

    A vague instruction such as:

    Create a beautiful lake video.

    does not provide enough information about the main subject, movement, camera, lighting, or visual style.

    Step 3: The AI Creates the Starting Scene

    The system creates the first visual appearance of the scene.

    It must decide:

    • Where the boat appears

    • How large it is

    • What the lake looks like

    • Where the horizon is placed

    • How the sunrise lights the scene

    • What colours appear in the sky and water

    • How the camera frames the subject

    Because there is no uploaded reference image, the AI creates these visual details from the written prompt.

    This means that two generations using the same prompt may look different.

    For example, one version may show:

    • A small fishing boat

    • A wide open lake

    • Orange sunrise light

    • Mountains in the background

    Another version may show:

    • A narrow wooden rowboat

    • A lake surrounded by trees

    • Soft yellow light

    • Mist covering part of the background

    Both versions may follow the general prompt while interpreting some details differently.

    Step 4: The AI Plans the Movement

    The AI then attempts to understand what should move during the clip.

    Movement may include:

    • The main subject

    • Background objects

    • Water

    • Clouds

    • Trees

    • Clothing

    • Hair

    • Shadows

    • Reflections

    • The camera itself

    In the boat example:

    • The boat moves slowly forward.

    • Mist drifts above the lake.

    • Water produces gentle ripples.

    • Reflections change as the boat moves.

    • The camera follows the boat from the side.

    A strong prompt should make the movement clear.

    Instead of writing:

    The boat moves.

    write:

    The small wooden boat travels slowly from left to right across the calm lake while the camera follows it smoothly from the side.

    This gives the AI clearer information about direction, speed, and camera behaviour.

    Step 5: The AI Generates a Sequence of Frames

    A video is made from many still images shown quickly one after another.

    These images are called frames.

    The AI generates a sequence of frames that attempts to show the requested scene changing over time.

    For the movement to look natural, important details should remain consistent from one frame to the next.

    The AI should try to preserve:

    • The shape of the boat

    • The boat’s colour

    • The lake

    • The horizon

    • The lighting

    • The camera angle

    • The background

    • The direction of movement

    However, the AI may struggle to keep everything stable.

    Possible problems include:

    • The boat changing shape

    • Parts of the boat disappearing

    • The background shifting

    • The horizon moving unexpectedly

    • Reflections becoming unrealistic

    • The camera changing direction

    • Additional objects appearing

    • The movement becoming too fast

    These problems are called temporal consistency problems because details change incorrectly over time.

    Step 6: The Frames Are Combined into a Video Clip

    After the frames are generated, they are played in sequence to create the appearance of movement.

    The resulting clip may include:

    • Subject movement

    • Camera movement

    • Environmental motion

    • Lighting changes

    • Depth and perspective

    • Visual effects

    Some tools may also generate or add:

    • Sound effects

    • Background audio

    • Dialogue

    • Music

    • Lip movement

    These features depend on the selected platform and model.

    Do not assume that automatically generated sound is accurate or suitable. Listen to the complete clip and review all dialogue, music, and sound effects before using them.

    Step 7: You Review and Improve the Result

    The first generated video should be treated as a draft.

    Watch the complete clip several times.

    Check:

    • Does the subject match the prompt?

    • Is the main action correct?

    • Is the movement smooth?

    • Does the camera follow the requested direction?

    • Are objects stable?

    • Does the background remain consistent?

    • Are faces and hands natural?

    • Does the lighting remain believable?

    • Is the composition suitable?

    • Is anything cropped?

    • Did unwanted objects appear?

    • Is visible text readable?

    • Does the clip end cleanly?

    Identify the largest problem first.

    For example, suppose the boat looks correct, but the camera moves too quickly.

    Do not rewrite the complete prompt immediately.

    Add or strengthen one instruction:

    Keep the same subject, lake, sunrise lighting, and side view. Use a very slow and steady camera movement. Do not zoom, rotate, shake, or change the camera angle.

    Generate another version and compare it with the first result.

    This controlled process helps you understand which instructions improve the video.

    A Simple Text-to-Video Workflow

    The complete process can be summarized as:

    Written prompt → AI interprets the scene → Starting frame is created → Movement is planned → Video frames are generated → Frames become a clip → User reviews and improves the result

    Text-to-video generation is not simply pressing a button and accepting the first clip. [2, 3]

    The strongest results normally come from:

    1. Starting with a simple scene

    2. Writing clear visual instructions

    3. Describing movement precisely

    4. Using one camera movement

    5. Generating a short test

    6. Reviewing the complete clip

    7. Correcting one problem at a time

    8. Saving every useful version

    Figure 2. The main stages that turn a written prompt into an AI-generated video clip.

    Figure 2 shows how a text-to-video system interprets a written description, creates the visual scene, plans movement, generates a sequence of frames, and combines those frames into a video. The finished clip must still be reviewed because subjects, backgrounds, camera movement, and other details may change unexpectedly.

    What You Need Before Creating a Text-to-Video Clip

    You do not need professional cameras, actors, filming locations, or advanced animation skills to begin creating a text-to-video clip.

    However, preparing a few basic items before generating the video can make the process easier and reduce unnecessary attempts.

    A Clear Video Idea

    Begin with one simple idea that can be shown in a short clip.

    For example:

    A red bicycle beside a country road while grass moves in the breeze.

    This idea contains:

    • One main subject

    • One setting

    • One environmental movement

    • A simple visual purpose

    Avoid beginning with an entire story containing many characters, locations, actions, and camera changes.

    A complicated first idea might say:

    Create a complete adventure about four friends travelling through several cities, entering a forest, escaping a storm, and arriving at a mountain cabin.

    This would require:

    • Several characters

    • Multiple locations

    • Many actions

    • Different lighting conditions

    • Scene transitions

    • Character consistency

    • Longer video duration

    • More editing

    A better approach is to divide the story into short scenes.

    For example:

    1. Four friends prepare for a journey.

    2. Their vehicle travels along a country road.

    3. Dark clouds appear above a forest.

    4. The group reaches a mountain cabin.

    5. Warm lights appear inside the cabin.

    Each scene can then be generated separately and combined later.

    One Main Subject

    Choose one clear subject for your first clip.

    Examples include:

    • A bicycle

    • A wooden boat

    • A small house

    • A bird

    • A robot

    • A coffee cup

    • A tree

    • A car

    • A person walking

    • A product concept

    Scenes with one subject are generally easier to control than scenes containing several unrelated objects or people.

    For example:

    A small blue robot standing in a bright classroom.

    is simpler than:

    Five robots, several students, two teachers, flying screens, moving chairs, and three animals inside a crowded classroom.

    More subjects create more opportunities for:

    • Duplicate objects

    • Missing objects

    • Changing faces

    • Incorrect positions

    • Unstable backgrounds

    • Confusing movement

    One Clear Action

    Decide what the main subject should do.

    Useful beginner actions include:

    • Walk slowly

    • Turn toward the camera

    • Move from left to right

    • Open a door

    • Lift an object

    • Look through a window

    • Travel across water

    • Drive along a road

    • Sit quietly

    • Wave gently

    • Rotate slowly

    • Remain still while the environment moves

    Use actions that can be shown clearly within a short clip.

    For example:

    A small wooden boat moves slowly from left to right across a calm lake.

    This is easier to generate than:

    A boat races across the lake, turns suddenly, jumps over a wave, changes direction, circles an island, and stops beside a dock.

    A Defined Setting

    Explain where the scene takes place.

    The setting may include:

    • A country road

    • A modern office

    • A quiet lake

    • A classroom

    • A city street

    • A forest

    • A kitchen

    • A garden

    • A beach

    • A mountain valley

    • A futuristic laboratory

    • A simple studio background

    A setting should support the main subject without becoming unnecessarily crowded.

    For example:

    A red bicycle beside a wooden fence on a quiet country road.

    gives the AI a clearer environment than:

    A bicycle somewhere outside.

    You may also describe important background details:

    • Green fields

    • Distant mountains

    • Wooden buildings

    • Large windows

    • Indoor plants

    • Wet pavement

    • Soft clouds

    • Calm water

    • Autumn leaves

    Do not add background objects that do not improve the scene.

    A Camera Plan

    Decide how the viewer should see the subject.

    Useful camera views include:

    • Wide shot

    • Medium shot

    • Close-up

    • Eye-level view

    • Low-angle view

    • High-angle view

    • Side view

    • Overhead view

    • Behind-the-subject view

    Then decide whether the camera should remain still or move.

    Beginner-friendly camera movements include:

    • Static camera

    • Slow push forward

    • Slow pull backward

    • Gentle pan left

    • Gentle pan right

    • Smooth side tracking

    • Slow upward movement

    • Slow downward movement

    Use only one main camera movement in the first version.

    For example:

    Use a medium-wide side view while the camera slowly tracks beside the boat.

    Avoid combining several camera instructions such as:

    Zoom in, rotate around the subject, move upward, pan left, and then pull backward.

    Too many camera movements can create:

    • Sudden changes

    • Unstable framing

    • Cropped subjects

    • Unwanted rotation

    • Camera shake

    • Confusing motion

    A Lighting and Mood Choice

    Lighting affects the colours, realism, atmosphere, and visibility of the generated scene.

    Useful lighting descriptions include:

    • Soft natural daylight

    • Warm sunrise light

    • Golden-hour sunlight

    • Bright studio lighting

    • Soft indoor lighting

    • Cool moonlight

    • Dramatic cinematic lighting

    • Gentle evening light

    • Cloudy diffused light

    The mood should match the subject and setting.

    Possible moods include:

    • Peaceful

    • Welcoming

    • Professional

    • Hopeful

    • Dramatic

    • Mysterious

    • Energetic

    • Calm

    • Playful

    • Futuristic

    For example:

    Use warm sunrise light and a peaceful, hopeful mood.

    Avoid conflicting lighting instructions unless the contrast is intentional.

    For example:

    Bright midday sunshine with dark midnight lighting.

    may confuse the generator.

    A Visual Style

    Choose how the video should look.

    Common styles include:

    • Realistic

    • Cinematic

    • Documentary-style

    • Cartoon

    • Three-dimensional animation

    • Watercolour animation

    • Digital illustration

    • Minimalist

    • Storybook

    • Futuristic

    • Vintage

    • Product-commercial style

    One main visual style is usually enough.

    For example:

    Use a realistic cinematic style with natural colours.

    Avoid combining too many unrelated styles, such as:

    Realistic photographic cartoon watercolour 3D documentary style.

    This may lead to an inconsistent result.

    The Correct Aspect Ratio

    Aspect ratio describes the shape of the video.

    Choose it according to where the video will be published.

    16:9 landscape: WordPress, YouTube, presentations, websites, and standard video

    9:16 vertical: YouTube Shorts, Instagram Reels, TikTok, and mobile-first content

    1:1 square: Square social-media posts

    4:5 portrait: Instagram and Facebook feed posts

    For an AI Mastery article demonstration, use:

    16:9 landscape

    Choosing the format before generating the video helps protect the composition.

    Changing the aspect ratio later may:

    • Crop the main subject

    • Remove background details

    • Cut off hands or feet

    • Reduce image quality

    • Leave empty borders

    • Require another generation

    A Suitable Clip Duration

    Text-to-video generators usually work best with short clips.

    A beginner can start with approximately:

    • Four seconds

    • Five seconds

    • Six seconds

    • Eight seconds

    The available duration depends on the selected tool and model.

    Short clips are easier to review and improve because they contain fewer opportunities for the subject or background to change.

    For a longer video, generate several short clips and combine them in a video editor.

    A File-Organization System

    Create a folder before beginning the project.

    For Article 018, use a folder such as:

    018 How to Create AI Videos from Text

    Inside it, create subfolders such as:

    • Featured Image

    • Figures

    • Video Prompts

    • Generated Clips

    • Selected Clips

    • Edited Videos

    • Audio

    • Captions

    • Sources

    • Old Versions

    Use clear filenames.

    For example:

    • 018-red-bicycle-text-to-video-prompt.txt

    • 018-red-bicycle-version-01.mp4

    • 018-red-bicycle-version-02.mp4

    • 018-red-bicycle-selected-clip.mp4

    • 018-red-bicycle-final-16×9.mp4

    Do not save every version as:

    • Video 1

    • New video

    • Final

    • Final new

    • Final corrected

    • Final final

    Clear names help you identify the strongest version later.

    A Record of the Prompt and Settings

    Save the exact information used for every important generation.

    Record:

    • Complete prompt

    • Platform

    • Selected model

    • Date generated

    • Clip duration

    • Aspect ratio

    • Resolution

    • Camera setting

    • Motion setting

    • Prompt-enhancement option

    • Credits used

    • Resulting filename

    • Problems found

    • Changes made in the next version

    For example:

    Project: Red bicycle country-road test
    Prompt version: 01
    Duration: Six seconds
    Aspect ratio: 16:9
    Camera: Slow forward movement
    Main problem: Bicycle front wheel changed shape
    Next correction: Strengthen bicycle-stability instruction

    This record helps you understand which prompt changes improved or weakened the result.

    A Review Checklist

    Prepare a simple checklist before generating the clip.

    Check:

    • Main subject

    • Subject appearance

    • Action

    • Background

    • Camera angle

    • Camera movement

    • Lighting

    • Colours

    • Style

    • Duration

    • Aspect ratio

    • Cropping

    • Visible text

    • Hands and faces

    • Product accuracy

    • Unwanted objects

    • Beginning and ending frames

    • Overall stability

    A checklist helps you review the complete clip instead of focusing only on the most attractive frame.

    Beginner Preparation Example

    Suppose you want to create a video of a red bicycle beside a country road.

    Your preparation might be:

    Subject: Red bicycle
    Setting: Quiet country road beside a wooden fence
    Action: Bicycle remains still while grass moves
    Camera: Slow forward movement
    Lighting: Warm sunrise light
    Style: Realistic cinematic
    Mood: Peaceful
    Duration: Six seconds
    Aspect ratio: 16:9 landscape
    Important stability instructions: Keep the bicycle, fence, road, wheels, lighting, and background consistent
    Details to avoid: No people, text, logos, extra bicycles, camera shake, or sudden zoom

    This preparation can then be converted into a complete text-to-video prompt.

    Figure 3. The main items beginners should prepare before generating a text-to-video clip.

    Figure 3 provides a practical preparation checklist for text-to-video projects. Deciding the subject, action, setting, camera, lighting, style, duration, aspect ratio, file organization, and review method before generation can reduce confusion and make prompt improvement more controlled.

    How to Write an Effective Text-to-Video Prompt

    A text-to-video prompt describes the scene the AI should create and how that scene should move over time.

    The prompt should give enough information to guide the generator without adding unnecessary or conflicting instructions.

    A useful beginner formula is:

    Subject + appearance + setting + action + environmental movement + camera + lighting + style + mood + duration + aspect ratio + stability instructions + details to avoid

    You do not need every element in every prompt. However, this formula provides a reliable checklist when planning an important video.

    Step 1: Identify the Main Subject

    Begin by stating clearly what the video is about.

    Examples include:

    • A red bicycle

    • A small wooden boat

    • An elderly man

    • A friendly robot

    • A modern house

    • A coffee cup

    • A bird

    • A product concept

    • A mountain landscape

    Place the main subject near the beginning of the prompt.

    For example:

    Create a video of a red bicycle.

    This gives the AI a basic subject, but it does not provide enough information for a controlled result.

    Step 2: Describe the Subject’s Appearance

    Add the details that are important to the subject’s appearance.

    You might describe:

    • Colour

    • Size

    • Material

    • Clothing

    • Age range

    • Shape

    • Condition

    • Position

    • Important accessories

    For example:

    Create a video of a clean red touring bicycle with a black seat, silver handlebars, and two matching wheels.

    Do not add details that are not important to the final scene.

    Too many small instructions may distract the AI from the main subject and movement.

    Step 3: Describe the Setting

    Explain where the subject appears.

    For example:

    Create a video of a clean red touring bicycle beside a wooden fence on a quiet country road.

    You may add useful environmental details such as:

    • Green fields

    • Distant hills

    • A bright classroom

    • A modern office

    • A calm lake

    • A simple studio

    • A city street

    • A forest path

    • A comfortable kitchen

    Keep the setting organized.

    A crowded scene creates more opportunities for objects to appear, disappear, duplicate, or change shape.

    Step 4: Describe the Main Action

    State what the subject should do.

    For example:

    The bicycle remains still beside the fence.

    Or:

    A cyclist rides the bicycle slowly from left to right.

    Use clear action verbs such as:

    • Walks

    • Turns

    • Opens

    • Lifts

    • Moves

    • Travels

    • Looks

    • Sits

    • Waves

    • Rotates

    • Remains still

    Avoid vague instructions such as:

    Make the scene interesting.

    The AI may interpret “interesting” in an unexpected way.

    Step 5: Describe Environmental Movement

    Text-to-video prompts can also explain what should move around the subject.

    Environmental movement may include:

    • Grass moving

    • Leaves swaying

    • Water rippling

    • Mist drifting

    • Clouds travelling

    • Curtains moving

    • Snow falling

    • Light reflections changing

    • Dust floating

    • Rain falling

    For example:

    Grass and small wildflowers move gently in a light breeze while soft clouds travel slowly across the sky.

    Use restrained motion for the first version.

    Too much movement may cause the background to become unstable.

    Step 6: Choose the Camera View

    Explain how the subject should be framed.

    Useful camera views include:

    • Wide shot

    • Medium shot

    • Close-up

    • Eye-level view

    • Side view

    • Front view

    • Low-angle view

    • High-angle view

    • Overhead view

    For example:

    Use a medium-wide eye-level view showing the complete bicycle, fence, road, and surrounding field.

    The camera view affects what is visible in the frame.

    A close-up may hide the background, while a wide shot may make the subject appear small.

    Step 7: Choose One Camera Movement

    State whether the camera should remain still or move.

    Beginner-friendly choices include:

    • Static camera

    • Slow push forward

    • Slow pull backward

    • Gentle pan left

    • Gentle pan right

    • Smooth side tracking

    • Slow upward movement

    • Slow downward movement

    For example:

    The camera slowly pushes forward toward the bicycle in one smooth continuous movement.

    Use one main movement in the first generation.

    Avoid combining several directions such as:

    Zoom in, rotate around the bicycle, move upward, pan left, and then pull backward.

    This may create unstable framing or unexpected camera changes.

    Step 8: Describe the Lighting

    Lighting affects the visibility, colours, shadows, and overall atmosphere.

    Useful lighting instructions include:

    • Soft natural daylight

    • Warm sunrise light

    • Golden-hour sunlight

    • Bright studio lighting

    • Soft indoor lighting

    • Cloudy diffused light

    • Cool moonlight

    • Dramatic cinematic lighting

    For example:

    Use warm sunrise light with soft shadows and natural colours.

    Keep the lighting consistent with the setting and time of day.

    Avoid conflicting combinations such as bright midday sunlight and dark moonlight unless the contrast is intentional.

    Step 9: Choose the Visual Style

    Explain how the video should look.

    Common choices include:

    • Realistic

    • Cinematic

    • Documentary-style

    • Cartoon

    • Three-dimensional animation

    • Digital illustration

    • Watercolour animation

    • Minimalist

    • Futuristic

    • Vintage

    • Product-commercial style

    For example:

    Use a realistic cinematic style with natural textures and believable movement.

    Choose one main style.

    Combining unrelated styles may create an inconsistent result.

    Step 10: Describe the Mood

    Mood explains the emotional atmosphere of the scene.

    Possible moods include:

    • Peaceful

    • Welcoming

    • Professional

    • Hopeful

    • Dramatic

    • Calm

    • Playful

    • Mysterious

    • Energetic

    • Futuristic

    For example:

    Create a peaceful and hopeful atmosphere.

    The mood should match the subject, movement, lighting, and setting.

    Step 11: State the Duration

    Specify a short clip duration when the tool allows it.

    For example:

    Create a six-second video.

    Short clips are usually easier to control than long clips.

    The available duration depends on the selected platform and model. When the tool provides a duration setting, select it in the interface as well as mentioning it in the prompt when useful.

    Step 12: State the Aspect Ratio

    Choose the shape of the video before generation.

    For an AI Mastery article demonstration, write:

    Use a wide 16:9 landscape composition.

    Other common formats include:

    • 9:16 vertical

    • 1:1 square

    • 4:5 portrait

    Choose the format according to the publishing platform.

    Step 13: Add Stability Instructions

    Stability instructions explain what should remain visually consistent throughout the clip.

    For example:

    Keep the bicycle, wheels, handlebars, seat, fence, road, lighting, colours, and background visually consistent throughout the entire clip.

    This can help reduce:

    • Changing objects

    • Misshaped wheels

    • Background shifts

    • Colour changes

    • Lighting changes

    • Objects appearing or disappearing

    Stability instructions cannot guarantee a perfect result, but they give the AI clearer direction.

    Step 14: Add Details to Avoid

    Finish with a short list of unwanted elements.

    For example:

    Do not include people, additional bicycles, visible text, logos, watermarks, camera shake, sudden zooming, object duplication, or changing bicycle parts.

    Only include restrictions that are important.

    An extremely long list of negative instructions may make the prompt difficult to understand.

    Complete Red Bicycle Prompt

    The separate prompt elements can now be combined:

    Create a realistic six-second cinematic video of a clean red touring bicycle with a black seat, silver handlebars, and two matching wheels standing beside a wooden fence on a quiet country road. Show green fields and distant hills in the background. The bicycle remains completely still while grass and small wildflowers move gently in a light breeze and soft clouds travel slowly across the sky. Use a medium-wide eye-level view showing the complete bicycle. The camera slowly pushes forward in one smooth continuous movement. Use warm sunrise light, natural colours, soft shadows, and a peaceful atmosphere. Use a wide 16:9 landscape composition. Keep the bicycle, wheels, handlebars, seat, fence, road, lighting, colours, and background visually consistent throughout the clip. Do not include people, additional bicycles, visible text, logos, watermarks, camera shake, sudden zooming, duplicated objects, or changing bicycle parts.

    This prompt is detailed, but its instructions follow a clear order.

    It tells the AI:

    • What to create

    • Where to place it

    • What should move

    • What should remain still

    • How the camera should behave

    • How the scene should look

    • What format to use

    • Which problems to avoid

    Weak Prompt Compared with a Strong Prompt

    Weak prompt:

    Create a nice video of a bicycle outside.

    This prompt does not explain:

    • The bicycle’s appearance

    • The exact setting

    • The action

    • Environmental movement

    • Camera position

    • Camera movement

    • Lighting

    • Style

    • Mood

    • Duration

    • Aspect ratio

    • Stability requirements

    Stronger prompt:

    Create a realistic six-second video of a red bicycle standing beside a wooden fence on a quiet country road at sunrise. Grass moves gently in the breeze while the camera slowly pushes forward. Use warm natural lighting, smooth movement, a peaceful cinematic style, and a wide 16:9 landscape composition. Keep the bicycle, fence, road, and background consistent. Do not include people, text, logos, extra bicycles, camera shake, or sudden movement.

    The stronger prompt gives the AI clearer direction without becoming unnecessarily complicated.

    Reusable Text-to-Video Prompt Template

    Use this template for future projects:

    Create a [duration] [visual style] video of [main subject and appearance] in [setting]. The subject [main action]. [Environmental elements] move [direction and speed]. Use a [camera view] while the camera [camera movement]. Use [lighting], [colour description], and a [mood] atmosphere. Use a [aspect ratio] composition. Keep [important subjects, objects, background, lighting, and colours] visually consistent throughout the clip. Do not include [unwanted objects, text, logos, camera problems, or visual errors].

    Example Using the Template

    Create a five-second realistic video of a small wooden boat with a white sail travelling across a calm lake at sunrise. The boat moves slowly from left to right while gentle ripples spread across the water and mist drifts above the surface. Use a medium-wide side view while the camera tracks smoothly beside the boat. Use warm golden light, natural blue and orange colours, and a peaceful atmosphere. Use a wide 16:9 landscape composition. Keep the boat, sail, lake, mountains, lighting, and reflections visually consistent throughout the clip. Do not include people, additional boats, visible text, logos, camera shake, sudden zooming, or changing boat parts.

    Keep the First Prompt Manageable

    A strong prompt does not need to describe an entire film.

    For the first generation, focus on:

    1. One main subject

    2. One clear action

    3. One setting

    4. One environmental movement

    5. One camera movement

    6. One lighting condition

    7. One visual style

    8. One short duration

    9. One aspect ratio

    10. A few important stability instructions

    After reviewing the first result, add or change only the instructions needed to correct the largest problem.

    Figure 4. The main elements of a clear and effective text-to-video prompt

    Figure 4 breaks a text-to-video prompt into practical building blocks. Beginners can use this formula to describe the subject, setting, action, movement, camera, lighting, style, mood, duration, format, stability requirements, and unwanted details in a clear and logical order.

    How ChatGPT Can Help You Improve a Text-to-Video Prompt

    ChatGPT can help turn a basic video idea into a clearer, more organized text-to-video prompt. [19]

    It does not replace the dedicated AI video generator. Its main role is to help you:

    • Develop the scene

    • Organize the prompt

    • Clarify movement

    • Choose a camera view

    • Remove conflicting instructions

    • Add stability requirements

    • Simplify an overly complicated idea

    • Troubleshoot problems after generation

    • Create revised prompt versions

    • Plan several connected scenes

    You can write the prompt yourself and ask ChatGPT to review it, or you can begin with a simple idea and ask ChatGPT to build the first draft.

    Start with a Simple Video Idea

    You do not need to prepare a complete prompt before asking ChatGPT for help.

    For example, you could write:

    I want to create a short AI video of a red bicycle beside a country road at sunrise.

    ChatGPT can then help identify the missing information.

    It may ask or help you decide:

    • What type of bicycle should appear?

    • Should the bicycle move or remain still?

    • What should move in the environment?

    • What camera view should be used?

    • Should the camera remain static or move?

    • What visual style should the video use?

    • How long should the clip be?

    • What aspect ratio is required?

    • Which details must remain consistent?

    • Which unwanted elements should be excluded?

    This turns a general idea into a more complete scene plan.

    Ask ChatGPT to Build the First Prompt

    A useful request is:

    Turn this idea into a clear six-second text-to-video prompt. Use one main subject, one environmental movement, one camera movement, realistic cinematic style, warm sunrise lighting, and a 16:9 landscape format. Keep the scene simple and add important stability instructions.

    ChatGPT might produce:

    Create a realistic six-second cinematic video of a clean red touring bicycle standing beside a wooden fence on a quiet country road at sunrise. The bicycle remains still while grass and small wildflowers move gently in a light breeze. Use a medium-wide eye-level view while the camera slowly pushes forward in one smooth continuous movement. Use warm natural lighting, soft shadows, peaceful colours, and a wide 16:9 landscape composition. Keep the bicycle, wheels, fence, road, lighting, and background visually consistent. Do not include people, additional bicycles, visible text, logos, camera shake, sudden zooming, or changing bicycle parts.

    Review the result before using it.

    Confirm that it matches your intended scene and does not include details you do not want.

    Ask ChatGPT to Organize a Prompt

    A prompt may contain useful information but place it in a confusing order.

    For example:

    Make a video that is cinematic and has no text and the camera moves slowly and it is a bicycle outside with sunrise and the grass moves and it should be six seconds and wide and realistic.

    The main idea is understandable, but the instructions are disorganized.

    Ask ChatGPT:

    Organize this text-to-video prompt in the following order: subject, setting, action, environmental movement, camera, lighting, style, duration, aspect ratio, stability instructions, and details to avoid. Preserve the original idea and do not add new objects.

    The organized version might become:

    Create a realistic six-second cinematic video of a red bicycle beside a wooden fence on a quiet country road. The bicycle remains still while the grass moves gently in a light breeze. Use a medium-wide view with a slow forward camera movement. Use warm sunrise lighting and a peaceful atmosphere. Use a wide 16:9 landscape composition. Keep the bicycle, fence, road, lighting, and background consistent. Do not include visible text, logos, additional bicycles, camera shake, or sudden movement.

    Organizing the prompt helps the AI identify the most important instructions.

    Ask ChatGPT to Simplify a Complicated Prompt

    A beginner may try to include too many actions in one clip.

    For example:

    Create a video of a cyclist entering a city, riding through traffic, stopping at a café, meeting a friend, drinking coffee, checking a phone, leaving the café, and riding into the countryside while the camera changes between close-up, aerial, side, and front views.

    This is too complicated for one short text-to-video generation.

    Ask ChatGPT:

    Divide this idea into simple text-to-video scenes. Each scene should contain one main action, one setting, and one camera movement. Keep the same cyclist, bicycle, clothing, and visual style throughout.

    ChatGPT could divide it into:

    1. The cyclist enters the city.

    2. The cyclist rides along a quiet street.

    3. The cyclist stops outside a café.

    4. The cyclist meets a friend at an outdoor table.

    5. The cyclist leaves the café.

    6. The cyclist rides toward the countryside.

    Each scene can then be generated separately and combined during editing.

    Ask ChatGPT to Identify Conflicting Instructions

    Conflicting instructions can weaken a video prompt.

    For example:

    Create a bright midday scene under dark moonlight. The camera remains completely static while rotating around the subject.

    This contains two conflicts:

    • Bright midday lighting conflicts with dark moonlight.

    • A static camera cannot rotate around the subject.

    Ask ChatGPT:

    Review this text-to-video prompt for conflicting instructions. Identify each conflict, explain it briefly, and provide a corrected version without changing the main idea.

    ChatGPT can help you choose one clear instruction.

    For example:

    Create a nighttime scene under soft moonlight. Use a slow circular camera movement around the subject.

    Or:

    Create a bright midday scene. Keep the camera completely static.

    Ask ChatGPT to Improve Movement Instructions

    Weak movement descriptions may produce unpredictable results.

    For example:

    The person moves naturally.

    This does not explain:

    • What the person does

    • Which direction they move

    • How quickly they move

    • Whether the camera follows

    • What should remain stable

    Ask ChatGPT:

    Rewrite the movement instruction so it clearly describes the action, direction, speed, and camera behaviour. Keep the action simple.

    A clearer version might say:

    The person walks slowly from left to right across the room while the camera tracks smoothly beside them at eye level.

    For environmental movement, you might ask:

    Improve this instruction: “The trees move.”

    ChatGPT could write:

    Tree branches and leaves sway gently in a light breeze while the trunks and surrounding landscape remain stable.

    Ask ChatGPT to Strengthen Stability Instructions

    When the first generation contains changing objects or backgrounds, ChatGPT can help add focused stability instructions.

    Suppose the bicycle wheels change shape.

    Describe the problem precisely:

    The generated video is mostly correct, but the bicycle wheels change size and shape during the clip. The handlebars also become distorted near the end.

    Then ask:

    Add focused stability instructions to the prompt. Preserve the bicycle’s shape, wheel size, handlebars, frame, colour, position, and all successful parts of the scene. Do not rewrite unrelated instructions.

    ChatGPT might add:

    Keep both bicycle wheels perfectly circular, equal in size, correctly aligned, and unchanged throughout the entire clip. Preserve the bicycle frame, handlebars, seat, colour, and proportions. Do not bend, duplicate, remove, enlarge, or reshape any bicycle component.

    This focused correction is usually more useful than simply writing:

    Make the bicycle better.

    Ask ChatGPT to Protect Successful Details

    A revised generation may accidentally damage parts that were already correct.

    Before changing the prompt, identify what must remain unchanged.

    For example:

    Keep the red bicycle, wooden fence, country road, sunrise lighting, green fields, camera angle, composition, and slow forward movement unchanged. Correct only the unstable front wheel.

    This tells the AI that the current scene is mostly successful.

    A reusable correction structure is:

    Keep [successful details] unchanged. Correct only [specific problem]. The corrected result should [required appearance or behaviour]. Do not change [protected elements].

    For example:

    Keep the bicycle, fence, road, lighting, colours, composition, background, and camera movement unchanged. Correct only the front wheel. Keep it perfectly circular, correctly aligned with the frame, and unchanged throughout the clip. Do not modify any other part of the scene.

    Ask ChatGPT to Shorten an Overly Long Prompt

    A prompt may become difficult to manage after several revisions.

    Ask ChatGPT:

    Shorten this text-to-video prompt without removing the subject, action, camera movement, lighting, style, aspect ratio, stability requirements, or important restrictions. Remove repetition and unnecessary adjectives.

    ChatGPT can reduce repeated instructions while keeping the essential details.

    For example, this repeated wording:

    Keep the bicycle unchanged. Do not change the bicycle. The bicycle should remain the same. Preserve the bicycle throughout the video.

    can become:

    Keep the bicycle’s appearance, shape, colour, position, and proportions consistent throughout the entire clip.

    Ask ChatGPT to Create Several Prompt Versions

    Different prompt versions can help you test one variable at a time.

    For example, ask:

    Create three versions of this prompt. Keep the subject, setting, action, lighting, style, duration, and aspect ratio identical. Change only the camera movement:

    1. Static camera

    2. Slow forward push

    3. Smooth side tracking

    This creates a controlled comparison.

    You can also test:

    • Different camera views

    • Different movement speeds

    • Different lighting

    • Different visual styles

    • Different subject actions

    • Different environmental movement

    Do not change several major elements at once because you may not know which change improved the result.

    Ask ChatGPT to Create a Prompt Comparison Table

    Before generating several versions, ask ChatGPT to organize the differences.

    For example:

    Create a comparison table for three versions of my bicycle video prompt. Keep everything the same except the camera movement. Include the version number, camera instruction, expected visual effect, possible risk, and filename.

    The table might contain:

    VersionCamera instructionExpected effectPossible riskFilename
    01Static cameraMaximum scene stabilityLess visual energybicycle-static-v01.mp4
    02Slow forward pushGreater depth and focusSubject may distort as camera approachesbicycle-push-v02.mp4
    03Smooth side trackingStronger sense of spaceBackground may shiftbicycle-track-v03.mp4

    This helps you test the scene systematically.

    Ask ChatGPT to Review the Final Prompt

    Before pasting the prompt into the video generator, ask:

    Review this final text-to-video prompt. Check whether it clearly includes the subject, setting, action, environmental movement, camera view, camera movement, lighting, style, mood, duration, aspect ratio, stability instructions, and details to avoid. Identify anything missing or conflicting. Do not rewrite it unless a correction is necessary.

    This creates a final quality check.

    Ask ChatGPT to Troubleshoot the Generated Clip

    After generating the video, describe what happened.

    For example:

    The bicycle is correct at the beginning, but the front wheel becomes oval after three seconds. The camera also accelerates near the end. The background and lighting are good.

    Ask:

    Suggest the smallest prompt changes needed to correct only those two problems. Preserve the successful background, lighting, composition, bicycle colour, and overall style.

    ChatGPT might suggest:

    Keep both wheels perfectly circular and equal in size throughout every frame. Preserve the bicycle’s proportions and alignment. Maintain one very slow, constant-speed forward camera movement from beginning to end. Do not accelerate, zoom suddenly, rotate, or change the camera angle.

    This is more controlled than creating an entirely new prompt.

    Ask ChatGPT to Maintain Consistency Across Scenes

    When creating several clips, prepare a consistency description.

    For example:

    Create a short consistency sheet for a red-bicycle video series. Include the bicycle’s colour, type, wheel shape, seat, handlebars, setting, lighting, colour palette, visual style, camera height, and details that must remain unchanged.

    A consistency sheet might say:

    Bicycle

    • Red touring bicycle

    • Black seat

    • Silver straight handlebars

    • Two equal circular wheels

    • Clean frame

    • No basket

    • No rider

    Setting

    • Quiet country road

    • Wooden fence

    • Green fields

    • Distant low hills

    • No buildings or vehicles

    Lighting and style

    • Warm sunrise lighting

    • Natural colours

    • Realistic cinematic style

    • Soft shadows

    • Peaceful atmosphere

    Camera

    • Eye-level height

    • Medium-wide framing

    • Smooth movement

    • No camera shake

    Use the same description in each related scene.

    Ask ChatGPT to Prepare a Revision Record

    After each generation, record what changed.

    Ask ChatGPT to format your notes as:

    • Prompt version

    • Main change

    • Successful details

    • Problems found

    • Next correction

    • Selected or rejected

    • Filename

    For example:

    Prompt version: 03
    Main change: Reduced forward camera speed
    Successful details: Bicycle colour, fence, lighting and background
    Problems found: Front wheel changes shape in final second
    Next correction: Add wheel-stability instruction
    Decision: Keep for comparison but do not publish
    Filename: 018-red-bicycle-text-video-v03.mp4

    This record prevents repeated mistakes and helps identify the strongest version.

    Useful ChatGPT Requests

    You can copy and modify these requests:

    Turn my idea into a simple six-second text-to-video prompt for a complete beginner.

    Review this video prompt and identify missing or conflicting instructions.

    Simplify this prompt so it contains one subject, one action, and one camera movement.

    Divide this complex video idea into separate short scenes.

    Improve only the movement instructions without changing the visual scene.

    Add stability instructions for the subject and background.

    Keep all successful details unchanged and correct only the named problem.

    Create three controlled prompt versions that change only the camera movement.

    Shorten this prompt without removing essential instructions.

    Create a consistency sheet for several connected video scenes.

    Suggest the smallest prompt correction based on the problems I observed.

    Organize my generation notes into a clear revision record.

    Important Reminder

    ChatGPT does not see the generated video unless you upload the clip or provide clear screenshots and a detailed description of the problem.

    When asking for troubleshooting help, explain:

    • What looks correct

    • What looks wrong

    • When the problem appears

    • Which details must remain unchanged

    • What the corrected result should look like

    The more specific your review is, the more focused the revised prompt can be.

    Use ChatGPT as a planning and revision assistant, but judge the generated video yourself. A well-written prompt can improve the result, but every final clip still requires human review.

    Figure 5. ChatGPT can help develop, organize, review, simplify, and improve text-to-video prompts.

    Figure 5 shows how ChatGPT supports the text-to-video workflow before and after generation. It can turn a simple idea into an organized prompt, identify conflicts, improve movement and stability instructions, divide complicated stories into shorter scenes, and prepare focused revisions based on problems found in the generated clip.

    How to Create Your First Text-to-Video Clip

    After preparing the scene and writing the prompt, you can generate the first video version.

    The exact interface varies between AI video platforms, but the basic workflow is similar.

    For this example, use the red-bicycle prompt developed earlier in the article.

    Step 1: Create a Project Folder

    Before opening the video generator, create a folder for the project.

    Use:

    018 Red Bicycle Text-to-Video Test

    Inside the folder, create:

    • Prompts

    • Generated Clips

    • Selected Clips

    • Edited Videos

    • Audio

    • Captions

    • Screenshots

    • Sources

    • Old Versions

    Save the original prompt in the Prompts folder.

    Suggested filename:

    018-red-bicycle-prompt-v01.txt

    Organizing the files before generating prevents useful versions from becoming mixed with rejected clips.

    Step 2: Review the Video Idea

    Confirm that the scene is simple enough for one short generation.

    The planned scene is:

    • One red bicycle

    • One country-road setting

    • Bicycle remains still

    • Grass moves gently

    • Clouds move slowly

    • Camera pushes forward

    • Warm sunrise lighting

    • Six-second duration

    • Wide 16:9 format

    This is suitable for a beginner because it contains one main subject and limited movement.

    Do not add extra people, vehicles, animals, buildings, or several camera changes during the first test.

    Step 3: Review the Final Prompt

    Use the complete prompt:

    Create a realistic six-second cinematic video of a clean red touring bicycle with a black seat, silver handlebars, and two matching wheels standing beside a wooden fence on a quiet country road. Show green fields and distant hills in the background. The bicycle remains completely still while grass and small wildflowers move gently in a light breeze and soft clouds travel slowly across the sky. Use a medium-wide eye-level view showing the complete bicycle. The camera slowly pushes forward in one smooth continuous movement. Use warm sunrise light, natural colours, soft shadows, and a peaceful atmosphere. Use a wide 16:9 landscape composition. Keep the bicycle, wheels, handlebars, seat, fence, road, lighting, colours, and background visually consistent throughout the clip. Do not include people, additional bicycles, visible text, logos, watermarks, camera shake, sudden zooming, duplicated objects, or changing bicycle parts.

    Check that the prompt includes:

    • Subject

    • Appearance

    • Setting

    • Action

    • Environmental movement

    • Camera view

    • Camera movement

    • Lighting

    • Style

    • Mood

    • Duration

    • Aspect ratio

    • Stability instructions

    • Details to avoid

    Correct any missing or conflicting instruction before generation.

    Step 4: Open the AI Video Generator

    Open the selected video-generation platform and sign in.

    Look for an option such as:

    • Text-to-Video

    • Generate Video

    • Create Video

    • Video from Prompt

    • AI Video Generator

    Do not select image-to-video for this demonstration because Article 018 begins with text only.

    The wording and layout may differ between platforms.

    Step 5: Start a New Video Project

    Select the option to create a new project or generation.

    When available, give the project a clear name:

    Article 018 — Red Bicycle Text-to-Video Test

    A descriptive project name makes it easier to find the generation later.

    Avoid generic names such as:

    • Untitled

    • New project

    • Video test

    • Final video

    Step 6: Select the Text-to-Video Mode

    Confirm that the selected generation method is text-to-video.

    The interface should allow you to enter a written description without requiring a starting image.

    Some platforms place text-to-video and image-to-video inside the same workspace. Check that no image has been accidentally attached.

    The input should be:

    Written prompt → Generated video

    not:

    Uploaded image + motion prompt → Generated video

    Step 7: Choose the Video Model

    Some platforms provide more than one video-generation model.

    The available models may differ in:

    • Visual quality

    • Motion quality

    • Clip duration

    • Resolution

    • Camera control

    • Generation speed

    • Credit use

    • Audio support

    • Aspect ratios

    • Commercial-use conditions

    For the first test, choose a general-purpose model suitable for realistic text-to-video generation.

    Record the exact model name in your project notes.

    Do not assume that the newest or most expensive model is automatically the best choice for a simple beginner project.

    Step 8: Paste the Prompt

    Copy the final prompt from the saved text file and paste it into the prompt box.

    Read it again after pasting.

    Check for:

    • Missing sentences

    • Repeated wording

    • Accidental line breaks

    • Changed punctuation

    • Conflicting instructions

    • Unwanted copied notes

    • Drafting instructions that should not be included

    Paste only the actual video prompt.

    Do not paste:

    • Figure captions

    • Article explanations

    • File-management notes

    • WordPress instructions

    • Source references

    Step 9: Choose the Aspect Ratio

    Select:

    16:9 landscape

    This format is suitable for:

    • WordPress articles

    • YouTube

    • Presentations

    • Desktop viewing

    • Standard video players

    Check the preview frame after selecting the aspect ratio.

    Confirm that there is enough space for:

    • The complete bicycle

    • Both wheels

    • The fence

    • The road

    • Some surrounding landscape

    If the preview crops the subject, revise the composition instruction before generating.

    For example:

    Keep the complete bicycle fully inside the frame with clear space around both wheels.

    Step 10: Choose the Clip Duration

    Select approximately:

    Six seconds

    when the platform supports it.

    A short clip is suitable for the first test because it is easier to:

    • Review

    • Regenerate

    • Compare

    • Edit

    • Download

    • Embed in WordPress

    When six seconds is unavailable, choose the nearest suitable short duration.

    Record the actual selected duration.

    Step 11: Choose the Resolution

    Select a practical test resolution.

    For early experiments, a lower or standard resolution may be sufficient.

    For the final published clip, use the highest suitable resolution that:

    • The selected model supports

    • Your plan permits

    • Your computer can handle

    • Your editor can open

    • Your website can display efficiently

    Higher resolution can make a video sharper, but it does not correct:

    • Changing objects

    • Distorted wheels

    • Weak movement

    • Camera instability

    • Poor prompt interpretation

    • Unnatural backgrounds

    Test the scene quality before spending additional credits on a higher-resolution version.

    Step 12: Review Camera Controls

    Some platforms provide separate camera controls.

    Possible options include:

    • Static

    • Pan left

    • Pan right

    • Zoom in

    • Zoom out

    • Move forward

    • Move backward

    • Track left

    • Track right

    • Move upward

    • Move downward

    The prompt already requests:

    A slow forward camera movement.

    When the interface includes a matching control, select the option closest to:

    Slow push forward

    Do not select a control that conflicts with the prompt.

    For example, do not request a forward push in the prompt while selecting a rapid pull-back in the interface.

    When no separate camera setting exists, rely on the written prompt.

    Step 13: Review Motion Strength

    Some tools allow you to choose how strongly the scene moves.

    Possible settings may include:

    • Low

    • Moderate

    • High

    • Subtle

    • Dynamic

    For the bicycle example, use low or moderate motion.

    The bicycle remains still, while the movement comes mainly from:

    • Grass

    • Wildflowers

    • Clouds

    • The camera

    High motion may cause:

    • Bicycle distortion

    • Changing wheels

    • Background instability

    • Excessive grass movement

    • Sudden camera motion

    • Objects appearing or disappearing

    Use stronger motion only when the scene genuinely requires it.

    Step 14: Review Prompt Enhancement

    Some platforms offer an option that automatically expands or improves the prompt.

    This may be called:

    • Enhance Prompt

    • Improve Prompt

    • Rewrite Prompt

    • Prompt Assistant

    • Creative Prompt

    Automatic enhancement may add useful details, but it may also change the original idea.

    Before using it, check whether the platform shows the revised wording.

    Confirm that it did not add:

    • People

    • Vehicles

    • Buildings

    • Animals

    • Extra bicycles

    • Dramatic camera movement

    • Visible text

    • Unwanted weather

    • A different time of day

    • A different visual style

    For a controlled comparison, save both versions:

    • Original prompt

    • Enhanced prompt

    Do not assume that the enhanced version will always produce a better result.

    Step 15: Review Sound Options

    Some video models may offer automatically generated:

    • Music

    • Environmental audio

    • Sound effects

    • Dialogue

    • Narration

    For the first visual test, disable generated audio when possible unless sound is necessary for the experiment.

    This makes it easier to review the visual quality separately.

    Audio can be added later during editing.

    When generated audio cannot be disabled, listen to the complete clip and check for:

    • Unwanted voices

    • Distorted sounds

    • Incorrect music

    • Sudden volume changes

    • Copyright or licensing concerns

    • Audio that does not match the scene

    Step 16: Check the Generation Cost

    Before selecting Generate, review:

    • Credits required

    • Number of versions

    • Resolution

    • Duration

    • Selected model

    • Audio settings

    • Watermark conditions

    • Download options

    Record the expected credit use.

    Do not generate several versions automatically until you know how many credits each attempt consumes.

    For the first test, generate one version.

    Step 17: Generate the First Clip

    Select:

    Generate

    The platform may require several seconds or minutes to process the request.

    Do not repeatedly click the Generate button while waiting.

    Doing so may:

    • Create duplicate generations

    • Consume additional credits

    • Slow the project

    • Make the results harder to organize

    Wait until the first generation is complete.

    Step 18: Watch the Entire Clip

    Do not judge the video from its thumbnail or opening frame.

    Watch the clip from beginning to end several times.

    First, watch the complete scene normally.

    Then watch it again while checking the bicycle.

    On another viewing, check:

    • Camera movement

    • Background

    • Lighting

    • Grass and cloud motion

    • Beginning frame

    • Final frame

    Problems may appear only near the end.

    Step 19: Review the Main Subject

    Check whether the bicycle remains accurate throughout the clip.

    Review:

    • Frame shape

    • Red colour

    • Black seat

    • Silver handlebars

    • Front wheel

    • Back wheel

    • Wheel size

    • Wheel alignment

    • Pedals

    • Position beside the fence

    • Overall proportions

    Possible problems include:

    • Oval wheels

    • Wheels changing size

    • Missing bicycle parts

    • Extra bicycle parts

    • A bent frame

    • Changing handlebars

    • The bicycle moving unexpectedly

    • A second bicycle appearing

    Record the exact time when each problem appears.

    For example:

    The front wheel becomes oval during the final two seconds.

    Step 20: Review the Movement

    Check whether the requested movement occurred.

    The intended movement is:

    • Grass moves gently

    • Wildflowers move gently

    • Clouds move slowly

    • Camera moves forward slowly

    • Bicycle remains still

    Ask:

    • Is the motion too strong?

    • Is the grass moving naturally?

    • Do the clouds move smoothly?

    • Does the camera remain steady?

    • Does the camera maintain one direction?

    • Does the camera suddenly accelerate?

    • Does the bicycle move when it should remain still?

    The motion should support the scene without distracting from the subject.

    Step 21: Review the Background

    Check:

    • Wooden fence

    • Country road

    • Green fields

    • Distant hills

    • Sky

    • Clouds

    • Lighting

    • Shadows

    • Horizon

    Look for:

    • Fence posts appearing or disappearing

    • Road changing shape

    • Fields becoming distorted

    • Hills moving unexpectedly

    • Horizon shifting

    • Objects forming in the background

    • Sudden weather changes

    • Lighting flicker

    Background changes can make the complete scene look unstable even when the bicycle is correct.

    Step 22: Review the Camera

    Confirm that the camera:

    • Uses an eye-level view

    • Shows the complete bicycle

    • Moves forward slowly

    • Uses one continuous movement

    • Does not shake

    • Does not rotate

    • Does not suddenly zoom

    • Does not crop the bicycle

    • Does not change direction

    The camera may begin correctly and become unstable near the end.

    Watch the final second carefully.

    Step 23: Review Lighting and Colours

    Check whether the scene maintains:

    • Warm sunrise light

    • Natural colours

    • Soft shadows

    • Peaceful atmosphere

    • Consistent brightness

    Possible problems include:

    • Sudden darkening

    • Colour changes

    • Flickering shadows

    • Lighting moving in the wrong direction

    • Sunrise becoming midday

    • Overly orange colour

    • Unnatural reflections

    Lighting should remain believable from beginning to end.

    Step 24: Review Unwanted Elements

    Check for anything that was not requested.

    Examples include:

    • People

    • Cars

    • Animals

    • Signs

    • Words

    • Logos

    • Watermarks

    • Extra bicycles

    • Buildings

    • Floating objects

    • Unnatural shadows

    • Random background movement

    A small unwanted object may be easy to miss during the first viewing.

    Pause the clip when necessary.

    Step 25: Record the Results

    Create a generation record.

    For example:

    Project: Article 018 Red Bicycle Test
    Prompt version: 01
    Model: Enter selected model
    Date: Enter generation date
    Duration: Six seconds
    Aspect ratio: 16:9
    Resolution: Enter selected resolution
    Motion strength: Low or moderate
    Audio: Off
    Credits used: Enter amount
    Filename: 018-red-bicycle-text-video-v01.mp4

    Successful details:

    • Correct bicycle colour

    • Good sunrise lighting

    • Stable fence

    • Smooth grass movement

    • Suitable composition

    Problems found:

    • Front wheel becomes oval near the end

    • Camera accelerates during the final second

    • Clouds move too quickly

    Next correction:

    • Strengthen wheel-stability instruction

    • Require constant camera speed

    • Reduce cloud movement

    Step 26: Write a Focused Revision

    Do not rewrite the entire scene when most of it is correct.

    Use:

    Keep the red bicycle, black seat, silver handlebars, wooden fence, country road, green fields, distant hills, sunrise lighting, colours, composition, and visual style unchanged. Keep both bicycle wheels perfectly circular, equal in size, correctly aligned, and unchanged throughout every frame. Maintain one very slow, constant-speed forward camera movement from beginning to end. Clouds should move very slowly and remain subtle. Do not accelerate, shake, rotate, crop the bicycle, reshape any bicycle part, or change the background.

    This revision protects successful details and corrects only the named problems.

    Save it as:

    018-red-bicycle-prompt-v02.txt

    Step 27: Generate the Second Version

    Paste the revised prompt and confirm that all generation settings remain the same.

    Keep the same:

    • Model

    • Duration

    • Aspect ratio

    • Resolution

    • Motion strength

    • Audio setting

    Changing several settings at the same time makes the comparison less useful.

    Generate one revised version.

    Step 28: Compare the Two Versions

    Watch Version 01 and Version 02 one after the other.

    Compare:

    • Bicycle accuracy

    • Wheel stability

    • Camera speed

    • Background

    • Lighting

    • Cloud movement

    • Composition

    • Overall realism

    Do not assume that the newer version is automatically better.

    Version 02 may correct the wheel but introduce another problem.

    Select the strongest complete clip.

    Step 29: Download Every Useful Version

    Download any version that may be useful.

    Use clear filenames:

    • 018-red-bicycle-text-video-v01.mp4

    • 018-red-bicycle-text-video-v02.mp4

    • 018-red-bicycle-text-video-v03.mp4

    Do not rely only on the platform’s online project history.

    Projects may be:

    • Deleted

    • Limited by storage

    • Difficult to find

    • Removed when a subscription ends

    • Affected by platform changes

    Keep local copies.

    Step 30: Select the Best Clip

    Move the strongest generation into the Selected Clips folder.

    Rename it:

    018-red-bicycle-selected-text-to-video.mp4

    Do not call it the final published video yet.

    It may still require:

    • Trimming

    • Cropping

    • Captions

    • Narration

    • Music

    • Colour correction

    • Compression

    • Accessibility review

    Step 31: Save the Complete Creation Record

    Keep:

    • Original idea

    • Scene plan

    • Prompt Version 01

    • Revised prompts

    • Generation settings

    • Model name

    • Dates

    • Credit use

    • Generated clips

    • Review notes

    • Selected clip

    • Licences or terms checked

    • Final edited version

    This creates a repeatable workflow for future text-to-video projects.

    Figure 6. The step-by-step workflow for generating and improving a video from a written prompt.

    Figure 6 summarizes the complete beginner workflow for text-to-video generation. The process begins with a simple scene and organized prompt, continues through model and setting selection, and finishes with careful review, focused revision, comparison, downloading, and record keeping.

    How to Improve a Weak Text-to-Video Result

    The first generated clip should be treated as a draft.

    Even a well-written prompt may produce a video with:

    • Changing objects

    • Unstable backgrounds

    • Incorrect movement

    • Camera problems

    • Distorted faces or hands

    • Lighting changes

    • Unexpected cropping

    • Extra subjects

    • Unreadable text

    • A weak beginning or ending

    Do not immediately replace the complete prompt.

    First, identify which parts worked and which part caused the greatest problem.

    Review the Successful Details First

    Before correcting anything, write down what should remain unchanged.

    For example:

    Successful details:

    • The bicycle is red.

    • The country-road setting is correct.

    • The sunrise lighting looks natural.

    • The wooden fence remains stable.

    • The grass movement is gentle.

    • The wide composition is suitable.

    Protecting these details reduces the risk of losing the strongest parts of the video during the next generation.

    A useful instruction is:

    Keep the red bicycle, country road, wooden fence, sunrise lighting, colours, composition, visual style, and successful environmental movement unchanged.

    Then describe only the problem that needs correction.

    Identify the Largest Problem

    Watch the clip several times and select the most important issue.

    For example:

    • The front wheel changes shape.

    • The camera moves too quickly.

    • A second bicycle appears.

    • The background shifts.

    • The bicycle moves even though it should remain still.

    • The final frame becomes distorted.

    Do not try to correct every small issue in one revision.

    A focused correction is easier to test and compare.

    Use a Focused Revision Formula

    Use this structure:

    Keep [successful details] unchanged. Correct only [specific problem]. The corrected result should [required appearance or movement]. Do not [unwanted change].

    For example:

    Keep the red bicycle, fence, road, fields, sunrise lighting, composition, and slow environmental movement unchanged. Correct only the front wheel. Keep it perfectly circular, equal in size to the back wheel, correctly aligned with the frame, and visually unchanged throughout every frame. Do not modify any other bicycle part or background detail.

    This gives the generator a clear correction target.

    Common Text-to-Video Problems and Focused Corrections

    The Main Subject Looks Different from the Prompt

    The generated subject may have the wrong:

    • Colour

    • Shape

    • Size

    • Material

    • Clothing

    • Position

    • Age

    • Accessories

    For example, the prompt requests a red touring bicycle, but the result shows a blue mountain bicycle.

    How to Improve It: Place the subject description near the beginning and remove unnecessary competing details.

    Use:

    Create a clean red touring bicycle with a black seat, silver straight handlebars, a slim frame, and two equal circular wheels. This exact bicycle is the main visual subject.

    You can also add:

    Do not change the bicycle type, colour, frame style, seat, handlebars, or wheel design.

    The Subject Changes Shape During the Clip

    This is a common consistency problem.

    A bicycle may develop:

    • Oval wheels

    • A bent frame

    • Extra pedals

    • Missing handlebars

    • Changing colours

    • Duplicate parts

    A person may develop:

    • Changing facial features

    • Distorted hands

    • Different clothing

    • Changing body proportions

    How to Improve It: Add precise stability instructions.

    For a bicycle:

    Keep the bicycle’s frame, colour, wheels, seat, handlebars, pedals, proportions, and position visually identical throughout every frame. Do not bend, duplicate, remove, resize, or reshape any bicycle component.

    For a person:

    Keep the same face, hairstyle, clothing, body proportions, skin tone, and accessories throughout the complete clip. Do not change the person’s identity or appearance.

    The Subject Moves When It Should Remain Still

    The AI may interpret environmental movement as permission to move the main subject.

    For example, the bicycle may roll forward even though only the grass should move.

    How to Improve It: Separate the stationary subject from the moving environment.

    Use:

    The bicycle remains completely stationary and firmly positioned beside the fence. Only the grass, small wildflowers, and clouds move gently. The bicycle does not roll, rotate, tilt, shake, or change position.

    This removes ambiguity about which elements should move.

    The Main Action Is Incorrect

    The subject may:

    • Move in the wrong direction

    • Move too quickly

    • Perform a different action

    • Stop unexpectedly

    • Repeat the action

    • Begin too late

    For example, a person should walk from left to right but instead walks toward the camera.

    How to Improve It: Describe the action using direction, speed, and timing.

    Use:

    The person begins walking immediately and continues slowly from the left side of the frame toward the right side. Maintain one steady walking speed throughout the complete six-second clip.

    Avoid vague wording such as:

    The person walks naturally.

    The Movement Is Too Fast

    Fast motion can make the subject or background unstable.

    Possible symptoms include:

    • Sudden acceleration

    • Excessive grass movement

    • Rapid cloud movement

    • Unnatural walking

    • Strong camera shake

    • Objects becoming distorted

    How to Improve It: Use clear speed limits.

    For example:

    Use slow, restrained movement throughout the complete clip. Grass moves gently in a light breeze, clouds travel very slowly, and the camera maintains a constant low speed. Do not accelerate or introduce rapid movement.

    Words such as slow, gentle, subtle, steady, and constant-speed provide clearer guidance.

    The Movement Is Too Weak

    Sometimes the video appears almost still.

    The environment may not move enough, or the requested action may be difficult to see.

    How to Improve It: Identify one movement and make it more visible without making the entire scene dynamic.

    For example:

    Make the grass movement clearly visible but still natural. Grass blades and small wildflowers sway gently from left to right throughout the clip while the bicycle and fence remain completely still.

    Avoid increasing all movement at the same time.

    The Camera Ignores the Prompt

    The camera may:

    • Remain static

    • Move in the wrong direction

    • Zoom unexpectedly

    • Rotate

    • Shake

    • Change angle

    • Move too quickly

    How to Improve It: Use one simple camera instruction.

    For example:

    Use one very slow, smooth forward camera movement from beginning to end. Maintain the same eye-level angle and direction. Do not rotate, pan, shake, pull backward, accelerate, or suddenly zoom.

    When the platform includes separate camera controls, confirm that the selected control matches the prompt.

    The Camera Crops the Subject

    The subject may be fully visible at the beginning but partly cropped later.

    For example:

    • A bicycle wheel leaves the frame.

    • A person’s head becomes cropped.

    • A product moves too close to the edge.

    • Important background details disappear.

    How to Improve It: Add framing and safe-space instructions.

    Use:

    Keep the complete bicycle fully inside the frame throughout the entire clip. Maintain clear space around both wheels, handlebars, seat, and frame. Do not crop or move the bicycle beyond the image boundaries.

    For a person:

    Keep the person’s complete head, hands, torso, and feet visible throughout the clip.

    A wider initial framing may also reduce cropping.

    The Background Changes or Becomes Unstable

    The background may:

    • Shift position

    • Change shape

    • Produce new objects

    • Lose existing objects

    • Move with the camera incorrectly

    • Become blurry or distorted

    How to Improve It: Identify the essential background elements and protect them.

    Use:

    Keep the wooden fence, road, green fields, distant hills, horizon, sky, and cloud arrangement visually consistent. Do not add, remove, duplicate, bend, or reposition background objects.

    Do not describe too many small background details unless they are important.

    Simple backgrounds are usually easier to stabilize.

    Objects Appear or Disappear

    The AI may create:

    • Extra bicycles

    • New people

    • Vehicles

    • Signs

    • Animals

    • Buildings

    • Random objects

    It may also remove objects that should remain visible.

    How to Improve It: State exactly which objects should appear.

    For example:

    Show one red bicycle, one wooden fence, one country road, green fields, distant hills, grass, wildflowers, and clouds. Do not add people, vehicles, animals, buildings, signs, text, or additional bicycles.

    Use the word one when the exact number matters.

    Duplicate Subjects Appear

    A single bicycle, person, cup, or product may become duplicated.

    How to Improve It: State the exact quantity and preserve it.

    Use:

    Show exactly one red bicycle throughout the complete clip. Do not create a second bicycle, reflection bicycle, duplicate wheel set, or additional bicycle parts.

    For people:

    Show exactly one adult person. Do not add another person or duplicate any body part.

    Faces Change During the Video

    A face may:

    • Change identity

    • Become distorted

    • Change age

    • Change expression unexpectedly

    • Lose facial features

    • Become asymmetrical

    How to Improve It: Simplify the action and protect the identity.

    Use:

    Keep the same person, facial structure, skin tone, hairstyle, age, clothing, and expression throughout every frame. Use subtle head movement and avoid rapid facial motion.

    When exact identity is essential, text-to-video may not provide enough control. A suitable reference image and image-to-video workflow may be more appropriate.

    Hands and Fingers Become Distorted

    Hands are difficult to maintain when they perform complicated actions.

    Problems may include:

    • Extra fingers

    • Missing fingers

    • Merged hands

    • Changing hand size

    • Objects passing through fingers

    • Hands disappearing

    How to Improve It: Use a simpler action and reduce hand prominence.

    Instead of:

    The person rapidly opens a small box, removes several objects, points at the screen, and waves.

    use:

    The person rests both hands naturally on the desk while looking at the laptop.

    When hand movement is necessary, describe one slow action:

    The person slowly lifts one coffee cup with the right hand while the left hand remains resting on the desk.

    Lighting Flickers or Changes

    The video may begin with warm sunrise light and suddenly become darker, brighter, or a different colour.

    How to Improve It: Require one stable lighting condition.

    Use:

    Maintain the same warm sunrise lighting, brightness, colour temperature, shadow direction, and exposure throughout the complete clip. Do not flicker, darken, brighten suddenly, or change the time of day.

    Lighting changes may still occur when the camera moves through a complex environment, so begin with a simple scene.

    Colours Change

    The subject or background may change colour during the video.

    For example:

    • The red bicycle becomes orange.

    • Clothing changes from blue to green.

    • The sky changes from yellow to purple.

    • A product’s colour becomes inconsistent.

    How to Improve It: State the required colours clearly and protect them.

    Use:

    Keep the bicycle consistently deep red, the seat black, the handlebars silver, the grass natural green, and the sunrise light warm gold throughout every frame.

    Avoid adding too many competing colour descriptions.

    The Generated Text Is Incorrect

    AI-generated video may contain:

    • Misspelled words

    • Random letters

    • Changing signs

    • Distorted labels

    • Unreadable screens

    • Incorrect product packaging

    How to Improve It: Generate the scene without visible text whenever possible.

    Use:

    Do not include readable text, letters, numbers, captions, signs, labels, logos, packaging words, or screen text.

    Add accurate text later in a video editor.

    For important product labels or instructions, use real verified material rather than relying on generated text.

    The Product Is Inaccurate

    A generated product may contain:

    • Incorrect buttons

    • Missing components

    • Impossible features

    • Wrong dimensions

    • Changing colours

    • Misleading accessories

    How to Improve It: Text-to-video is not ideal when exact product accuracy is required.

    You may add:

    Preserve the product’s shape, dimensions, materials, controls, colours, and components exactly as described. Do not add or remove features.

    However, when accuracy is essential, use:

    • Real product footage

    • A verified product photograph

    • Image-to-video with a suitable reference

    • Manual editing

    Do not use an inaccurate generated product video to make factual or commercial claims.

    The Clip Begins Poorly

    The opening frame may contain:

    • A distorted subject

    • An unfinished scene

    • A sudden camera movement

    • Incorrect lighting

    • An object appearing gradually

    How to Improve It: Add an opening-state instruction.

    For example:

    Begin with the complete red bicycle clearly visible, fully formed, stationary, and correctly positioned beside the fence. Start with stable sunrise lighting and a steady eye-level camera.

    The clip should not begin in the middle of a transformation unless that effect is intentional.

    The Clip Ends Poorly

    The final second may contain:

    • Distortion

    • Sudden movement

    • Subject disappearance

    • Camera acceleration

    • Abrupt lighting change

    • An incomplete action

    How to Improve It: Describe how the clip should finish.

    Use:

    End with the bicycle fully visible, unchanged, and stationary. Maintain the same camera angle, lighting, background, and composition during the final second. Finish smoothly without sudden movement, distortion, fading, or object disappearance.

    The weak ending can also be trimmed during editing when the earlier portion is strong.

    The Prompt Is Partly Ignored

    A long prompt may contain too many instructions for the model to follow reliably.

    How to Improve It: Shorten the prompt and prioritize the most important details.

    Keep:

    • Main subject

    • Main action

    • Setting

    • One camera movement

    • Lighting

    • Style

    • Aspect ratio

    • Critical stability instructions

    Remove:

    • Repeated adjectives

    • Unnecessary background objects

    • Several camera changes

    • Multiple actions

    • Long negative lists

    • Details that do not affect the main purpose

    A shorter, organized prompt can be more effective than a long, confusing prompt.

    Change One Variable at a Time

    When comparing prompt versions, keep the generation settings consistent.

    Do not change all of these together:

    • Prompt

    • Model

    • Duration

    • Aspect ratio

    • Resolution

    • Motion strength

    • Camera control

    • Prompt enhancement

    When several variables change, you may not know which one improved or weakened the result.

    A controlled test could be:

    Version 01: Original prompt

    Version 02: Wheel-stability correction only

    Version 03: Camera-speed correction only

    Version 04: Reduced cloud movement only

    Keep clear notes for each version.

    Red Bicycle Revision Example

    Version 01 Problem

    The first clip has:

    • Correct bicycle colour

    • Good background

    • Suitable sunrise lighting

    • Stable fence

    • Front wheel distortion

    • Camera acceleration near the end

    Version 02 Focused Prompt

    Keep the red touring bicycle, black seat, silver handlebars, wooden fence, country road, green fields, distant hills, sunrise lighting, colours, composition, and realistic cinematic style unchanged. Keep both bicycle wheels perfectly circular, equal in size, correctly aligned with the frame, and visually identical throughout every frame. Maintain one very slow, constant-speed forward camera movement from beginning to end. Do not accelerate, shake, rotate, crop the bicycle, reshape any bicycle part, or change the background.

    Version 02 Review

    Compare whether:

    • Both wheels remain circular

    • The bicycle stays fully visible

    • The camera maintains a steady speed

    • Previously successful details remain correct

    • New problems appear

    Do not select Version 02 only because it is newer.

    Choose the strongest complete result.

    Know When to Stop Regenerating

    Repeated generation can consume time and credits without producing a perfect clip.

    Stop regenerating when:

    • The remaining issue can be trimmed

    • A small problem can be hidden by a title or transition

    • Another tool can correct the issue more easily

    • The scene is too complicated for the selected model

    • A reference image would provide better control

    • Real footage is required for accuracy

    • Additional attempts are not producing meaningful improvement

    A useful five-second section may be better than an unstable eight-second clip.

    Save the strongest version and continue with editing.

    Figure 7. A focused revision process helps correct text-to-video problems without losing successful details.

    Figure 7 shows how beginners can improve a weak text-to-video result by identifying what worked, selecting the largest problem, protecting successful details, changing one instruction, generating a controlled revision, and comparing the complete clips before choosing the strongest version.

    How to Create a Longer Video from Several Text-to-Video Clips

    Most text-to-video generators create short clips rather than complete long videos. [6]

    To create a longer video, divide the main idea into several simple scenes, generate each scene separately, and combine the strongest clips in a video editor.

    This method gives you more control over:

    • Subject consistency

    • Camera movement

    • Scene order

    • Timing

    • Narration

    • Captions

    • Music

    • Transitions

    • Problem correction

    • Final video length

    Trying to create an entire story in one generation may produce changing subjects, confused actions, unstable backgrounds, or unexpected camera movements.

    Begin with the Complete Video Purpose

    Before dividing the video into scenes, write one sentence explaining its purpose.

    For example:

    Create a short peaceful promotional video showing a red bicycle journey from a country road to a lakeside resting place.

    This purpose gives the project a clear direction.

    It helps you decide:

    • Which scenes are necessary

    • Which scenes can be removed

    • What mood should remain consistent

    • How the video should begin

    • How the video should end

    Avoid adding scenes that do not support the main purpose.

    Decide the Approximate Final Length

    Estimate how long the finished video should be.

    For example:

    • 15 seconds

    • 30 seconds

    • 45 seconds

    • 60 seconds

    A 30-second video might use:

    • Five clips of approximately six seconds each

    • Six clips of approximately five seconds each

    • A combination of clips with some sections trimmed

    The final length may become shorter after removing weak openings or endings.

    Do not assume that every generated second must be used.

    Divide the Story into Simple Scenes

    Each scene should contain:

    • One main subject

    • One main action

    • One setting

    • One camera view

    • One camera movement

    • One lighting condition

    • One clear purpose

    For the red-bicycle example, the complete story could be divided into five scenes.

    Scene 1: Establish the Country Road

    Purpose:

    Introduce the bicycle and setting.

    Prompt idea:

    A red touring bicycle stands beside a wooden fence on a quiet country road at sunrise. Grass moves gently while the camera slowly pushes forward.

    Scene 2: Begin the Journey

    Purpose:

    Show the bicycle travelling along the road.

    Prompt idea:

    The same red touring bicycle is ridden slowly along the country road from left to right while the camera tracks smoothly beside it.

    Scene 3: Travel Through the Countryside

    Purpose:

    Show progress through a wider landscape.

    Prompt idea:

    The same red bicycle travels along a winding road through green fields while the camera follows from behind at a safe distance.

    Scene 4: Arrive Beside the Lake

    Purpose:

    Introduce the destination.

    Prompt idea:

    The same red bicycle approaches a calm lakeside path while warm sunlight reflects across the water.

    Scene 5: End at the Resting Place

    Purpose:

    Provide a peaceful conclusion.

    Prompt idea:

    The same red bicycle stands beside a wooden bench overlooking the lake at sunset while the camera slowly pulls backward.

    Generating these scenes separately is more practical than asking one prompt to create the complete journey.

    Create a Scene Plan

    Prepare a simple planning table before generation.

    ScenePurposeMain actionCameraApproximate duration
    1Introduce bicycle and roadBicycle remains stillSlow push forward5–6 seconds
    2Begin journeyBicycle moves left to rightSide tracking5–6 seconds
    3Show countryside travelBicycle follows winding roadFollow from behind5–6 seconds
    4Arrive near lakeBicycle approaches lakeGentle forward movement5–6 seconds
    5Finish peacefullyBicycle remains beside benchSlow pull backward5–6 seconds

    The scene plan prevents repeated or unnecessary clips.

    It also helps you identify which camera movement belongs to each scene.

    Prepare a Consistency Sheet

    A consistency sheet records the visual details that must remain the same across every connected clip.

    For the bicycle project, use:

    Main subject

    • Red touring bicycle

    • Slim red frame

    • Black seat

    • Silver straight handlebars

    • Two equal circular wheels

    • No basket

    • No visible logo

    • Clean condition

    Environment

    • Quiet countryside

    • Green fields

    • Wooden fences

    • Low distant hills

    • Natural vegetation

    • No traffic

    • No large buildings

    • No crowds

    Lighting

    • Warm early-morning or golden-hour lighting

    • Soft natural shadows

    • Natural green, blue, brown, and gold colours

    • No sudden colour changes

    Visual style

    • Realistic cinematic style

    • Natural textures

    • Smooth motion

    • Peaceful atmosphere

    • Wide 16:9 landscape format

    Camera

    • Eye-level or slightly elevated view

    • Smooth controlled movement

    • No camera shake

    • No rapid zooming

    • No sudden rotation

    Copy the relevant consistency details into each scene prompt.

    Keep the Main Subject Description Identical

    Do not describe the bicycle differently in each prompt.

    For example, avoid changing from:

    A red touring bicycle with a black seat and silver handlebars

    to:

    A bright crimson mountain bicycle with curved black handlebars.

    Even small wording changes may produce a different bicycle.

    Use the same core description throughout every scene:

    The same clean red touring bicycle with a slim red frame, black seat, silver straight handlebars, and two equal circular wheels.

    The phrase the same may help communicate continuity, but it does not guarantee exact consistency because each clip is generated separately.

    Use a Reference Image When Greater Consistency Is Needed

    Pure text-to-video generation may create a different version of the subject in each scene.

    For greater visual consistency, you may:

    1. Generate or select one strong image of the subject.

    2. Use that image as a visual reference when the platform supports it.

    3. Create later scenes using image-to-video or reference-image controls.

    4. Maintain the same subject description in every prompt.

    This changes part of the workflow from pure text-to-video to a more controlled reference-based method.

    Use text-to-video when creative variation is acceptable.

    Use a reference image or real footage when exact appearance is important.

    Keep the Visual Style Consistent

    Choose one main visual style for the complete project.

    For example:

    Realistic cinematic style with natural textures, warm lighting, smooth movement, and a peaceful atmosphere.

    Do not make one scene realistic, another cartoon, another watercolour, and another futuristic unless the style change is intentional.

    Consistency helps the separate clips feel like one video.

    Keep the Colour Palette Consistent

    Use a repeated colour description across all prompts.

    For example:

    Use natural green fields, a deep red bicycle, warm golden light, soft blue sky, and neutral brown wooden details.

    A repeated colour palette helps reduce sudden visual changes between clips.

    However, the exact colours may still vary between generations and may require correction during editing.

    Plan Camera Continuity

    Connected clips look smoother when camera directions support one another.

    For example:

    • Scene 1: Slow push toward the bicycle

    • Scene 2: Bicycle moves from left to right

    • Scene 3: Camera follows from behind

    • Scene 4: Camera approaches the lake

    • Scene 5: Camera slowly pulls backward

    Avoid making the subject travel left to right in one scene and immediately right to left in the next unless the direction change is intentional.

    This may make the bicycle appear to turn around unexpectedly.

    Maintain Screen Direction

    Screen direction describes the direction a subject moves across the frame.

    For example:

    • Left to right

    • Right to left

    • Toward the camera

    • Away from the camera

    For a continuous journey, keep the main direction consistent.

    Use:

    The bicycle travels from left to right.

    in several connected side-view scenes.

    Changing direction can be useful when showing a return journey, but it should be planned.

    Create Transition-Friendly Openings and Endings

    Each clip should begin and end in a way that can connect to another clip.

    For example:

    • Begin with the subject already visible.

    • Avoid incomplete transformations.

    • Maintain stable lighting during the final second.

    • Avoid sudden camera acceleration.

    • End with the subject still inside the frame.

    • Leave a short stable moment before the clip ends.

    A useful instruction is:

    Begin with the bicycle clearly visible and fully formed. End smoothly with the bicycle still visible and unchanged. Maintain stable camera movement and lighting during the opening and final second.

    Stable openings and endings are easier to trim and connect.

    Use Overlapping Visual Details

    Two connected scenes can share a common visual element.

    For example:

    • Scene 1 ends with the bicycle near the right side of the road.

    • Scene 2 begins with the bicycle near the left side of a similar road.

    • Both scenes use the same fence, lighting, and travel direction.

    The viewer may accept the transition more easily when the clips share:

    • Subject

    • Direction

    • Colour palette

    • Lighting

    • Camera height

    • Background type

    • Movement speed

    Generate Each Scene Separately

    Use a separate prompt file for every scene.

    Suggested filenames:

    • 018-bicycle-scene-01-country-road-prompt-v01.txt

    • 018-bicycle-scene-02-start-journey-prompt-v01.txt

    • 018-bicycle-scene-03-countryside-travel-prompt-v01.txt

    • 018-bicycle-scene-04-lake-arrival-prompt-v01.txt

    • 018-bicycle-scene-05-lakeside-ending-prompt-v01.txt

    Save generated clips with matching names:

    • 018-bicycle-scene-01-v01.mp4

    • 018-bicycle-scene-02-v01.mp4

    • 018-bicycle-scene-03-v01.mp4

    • 018-bicycle-scene-04-v01.mp4

    • 018-bicycle-scene-05-v01.mp4

    Matching names prevent the prompts and videos from becoming separated.

    Review Each Clip Independently

    Before combining the clips, check each scene for:

    • Correct bicycle

    • Correct setting

    • Intended action

    • Stable wheels

    • Suitable camera movement

    • Consistent colours

    • Appropriate lighting

    • Clean opening

    • Clean ending

    • No unwanted objects

    • No visible text or logos

    • No sudden distortion

    Do not begin editing with several weak clips.

    Improve or replace the most important weak scenes first.

    Select the Best Version of Each Scene

    A project may contain several generations of one scene.

    For example:

    • Scene 1 Version 01

    • Scene 1 Version 02

    • Scene 1 Version 03

    Compare the complete clips and select the strongest one.

    Move selected files into:

    Selected Clips

    Rename them clearly:

    • 018-bicycle-scene-01-selected.mp4

    • 018-bicycle-scene-02-selected.mp4

    • 018-bicycle-scene-03-selected.mp4

    • 018-bicycle-scene-04-selected.mp4

    • 018-bicycle-scene-05-selected.mp4

    Do not delete rejected versions immediately. They may contain useful sections.

    Use Only the Strongest Part of a Clip

    A six-second generation may contain only four strong seconds.

    For example:

    • The first second is unstable.

    • The middle four seconds look correct.

    • The final second contains distortion.

    During editing, trim away the weak beginning and ending.

    A shorter clean section is more valuable than a longer unstable clip.

    Place the Clips in Story Order

    In the video editor, arrange the selected clips in the planned order:

    1. Country-road introduction

    2. Beginning of journey

    3. Countryside travel

    4. Lake arrival

    5. Lakeside conclusion

    Watch the complete sequence without music or narration first.

    Check whether the visual story is understandable.

    Review the Transition Between Every Two Clips

    Watch each connection separately.

    For example:

    • Scene 1 to Scene 2

    • Scene 2 to Scene 3

    • Scene 3 to Scene 4

    • Scene 4 to Scene 5

    Check:

    • Does the bicycle suddenly change?

    • Does the travel direction remain logical?

    • Does the lighting change too strongly?

    • Does the camera jump?

    • Does the setting change too abruptly?

    • Does the subject appear in a believable position?

    A transition problem may be caused by either clip.

    Use Simple Transitions

    Useful transitions include:

    • Direct cut

    • Short dissolve

    • Fade to black

    • Fade from black

    • Brief title card

    Do not use a decorative transition between every clip.

    Excessive transitions can distract from the video and make it look less professional.

    A direct cut may work well when the movement and screen direction are similar.

    A short dissolve may help when the location or time changes.

    Match the Timing to the Story

    Not every scene needs the same duration.

    For example:

    • Scene 1 introduction: Four seconds

    • Scene 2 beginning journey: Five seconds

    • Scene 3 countryside travel: Six seconds

    • Scene 4 lake arrival: Five seconds

    • Scene 5 conclusion: Four seconds

    The final video would be approximately 24 seconds before titles or transitions.

    Keep each scene only as long as necessary to communicate its purpose.

    Plan Narration Before Final Trimming

    When the video includes narration, prepare the spoken text before completing the final timing.

    Example narration:

    A quiet road can lead to a new beginning. With every turn, the journey reveals a different view. Sometimes the destination is not a place, but a moment to pause.

    Read the narration aloud and measure its duration.

    Then adjust the clip lengths to support the spoken words.

    Do not force a long narration into a very short video.

    Plan Captions and On-Screen Text

    Add accurate text during editing rather than asking the AI video generator to create it inside the scene.

    Possible text includes:

    • Opening title

    • Scene label

    • Short message

    • Educational explanation

    • Closing statement

    • Website address

    Keep on-screen text:

    • Large

    • Brief

    • High contrast

    • Correctly spelled

    • Away from important subjects

    • Visible long enough to read

    For accessibility, captions should accurately match spoken narration or dialogue.

    Add Music After the Visual Sequence Is Stable

    Do not use music to hide weak visual transitions.

    First, create a strong visual sequence.

    Then choose music that matches:

    • Mood

    • Pace

    • Length

    • Audience

    • Publishing platform

    • Licensing requirements

    For the bicycle example, gentle instrumental music may support the peaceful visual style.

    Confirm that you have permission to use the selected music.

    Use Sound Effects Carefully

    Possible sound effects include:

    • Light wind

    • Bicycle wheels

    • Birds

    • Water

    • Footsteps

    • Road ambience

    Sound effects should support the scene without becoming distracting.

    Do not add sounds that imply an event that is not visible.

    For example, loud traffic sounds would not match a quiet empty country road.

    Review the Complete Video

    After combining all scenes, watch the video several times.

    Review once for:

    • Story order

    Review again for:

    • Subject consistency

    Review again for:

    • Camera and transitions

    Review again for:

    • Audio

    Review again for:

    • Captions and text

    Review again for:

    • Beginning and ending

    Check whether the complete video feels like one connected project rather than several unrelated clips.

    Example Complete Folder Structure

    The completed project may contain:

    018 How to Create AI Videos from Text

    • Featured Image

    • Figures

    • Video Prompts

    • Scene 01

    • Scene 02

    • Scene 03

    • Scene 04

    • Scene 05

    • Generated Clips

    • Selected Clips

    • Edited Videos

    • Audio

    • Captions

    • Screenshots

    • Sources

    • Old Versions

    This structure makes future updates easier.

    Save a Master Project Record

    Create a document containing:

    • Project purpose

    • Final scene order

    • Consistency sheet

    • Every final prompt

    • Model used

    • Generation dates

    • Selected settings

    • Credit use

    • Selected clip filenames

    • Editing decisions

    • Audio sources

    • Caption text

    • Final export settings

    • Publishing locations

    This record is especially important when the video is used for a website, client, business, advertisement, or educational project.

    Final Multi-Scene Workflow

    The complete process is:

    1. Define the video purpose.

    2. Estimate the final duration.

    3. Divide the idea into simple scenes.

    4. Prepare a consistency sheet.

    5. Write one prompt for each scene.

    6. Generate each scene separately.

    7. Review and revise each clip.

    8. Select the strongest version of every scene.

    9. Trim weak openings and endings.

    10. Arrange the clips in story order.

    11. Correct transition problems.

    12. Add narration, captions, music, and sound.

    13. Review the complete video.

    14. Export and save the final version.

    15. Keep the complete creation record.

    Figure 8. A longer AI video can be created by generating several simple connected scenes and combining the strongest clips.

    Figure 8 shows how a complete video idea can be divided into short scenes that share the same subject, style, lighting, colour palette, and movement direction. Each scene is generated and reviewed separately before the selected clips are trimmed, arranged, edited, and exported as one connected video.

    How to Prepare a Text-to-Video Clip for Publishing

    After selecting the strongest generated clip, prepare it for its intended publishing platform.

    A generated video should not normally be uploaded immediately without checking:

    • Beginning and ending

    • Video dimensions

    • Aspect ratio

    • Resolution

    • Audio

    • Captions

    • Visible text

    • File size

    • Filename

    • Accessibility

    • Accuracy

    • Publishing rights

    The amount of editing required depends on the project. A simple website demonstration may need only trimming and compression, while a longer educational video may require narration, captions, music, titles, and several connected scenes.

    The related guide How to Edit AI-Generated Videos: Beginner Step-by-Step Guide (2026) explains AI-video editing in greater detail. This section provides the essential preparation steps needed to complete a text-to-video project.

    Step 1: Keep the Original Generated Clip

    Do not edit the only copy of the generated video.

    Keep the original file in:

    Generated Clips

    Make a separate working copy and place it in:

    Edited Videos

    For example:

    Original generation:

    018-red-bicycle-text-video-v03.mp4

    Working copy:

    018-red-bicycle-edit-v01.mp4

    Keeping the original makes it possible to:

    • Restart the edit

    • Compare before and after

    • Recover a removed section

    • Create another format

    • Verify what the AI originally generated

    • Preserve the project record

    Step 2: Watch the Selected Clip Again

    Review the selected clip before importing it into an editor.

    Check:

    • Opening frame

    • Final frame

    • Main subject

    • Subject movement

    • Camera movement

    • Background

    • Lighting

    • Cropping

    • Unwanted objects

    • Visible text

    • Audio

    • Overall stability

    A clip that looked acceptable during comparison may still contain a small problem that becomes noticeable during editing.

    Record the usable time range.

    For example:

    Usable section: 00:00.6 to 00:05.2

    This means that the beginning and final portion should be removed.

    Step 3: Import the Clip into a Video Editor

    Open a suitable video-editing application and create a new project.

    Import:

    • Selected video clips

    • Narration

    • Music

    • Sound effects

    • Captions

    • Titles

    • Logo only when appropriate and authorized

    • Any real photographs or verified graphics

    Organize the editor’s media area using clear folders or labels.

    For example:

    • Video

    • Audio

    • Titles

    • Captions

    • Images

    • Exports

    Do not mix rejected clips with the selected publishing files.

    Step 4: Set the Project Aspect Ratio

    Set the editing project to the same aspect ratio as the generated video whenever possible.

    For the AI Mastery website example, use:

    16:9 landscape

    Common publishing formats include:

    16:9 landscape: WordPress, YouTube, websites, presentations, and desktop video

    9:16 vertical: YouTube Shorts, TikTok, Instagram Reels, and mobile-first platforms

    1:1 square: Square social-media posts

    4:5 portrait: Instagram and Facebook feed posts

    Changing from one format to another may crop the subject.

    For example, converting a 16:9 bicycle video to 9:16 may remove:

    • One bicycle wheel

    • Part of the fence

    • The surrounding landscape

    • Important movement near the sides

    When creating several formats, make a separate editing project for each shape.

    Step 5: Trim the Weak Beginning

    AI-generated clips may begin with:

    • An unfinished subject

    • A sudden camera movement

    • Temporary distortion

    • Incorrect lighting

    • An object forming

    • A blank or blurred frame

    Move the beginning trim point forward until the scene is stable.

    Do not remove so much that the video begins abruptly in the middle of an action.

    A strong opening should show:

    • The subject clearly

    • The correct composition

    • Stable lighting

    • Understandable movement

    • No unfinished transformation

    Step 6: Trim the Weak Ending

    The final second of an AI-generated clip may contain:

    • Changing subject shape

    • Camera acceleration

    • Background distortion

    • Lighting flicker

    • Object disappearance

    • Sudden blur

    • Incomplete movement

    Trim the video before the problem begins.

    For example, a six-second generation may contain only five useful seconds.

    Use the clean five-second section rather than keeping the complete unstable clip.

    Step 7: Remove Unnecessary Pauses

    Some clips contain a long period with little useful movement.

    Remove unnecessary time when:

    • The subject remains inactive too long

    • The camera pauses unexpectedly

    • The action finishes early

    • The final section adds no useful information

    However, do not shorten the clip so much that viewers cannot understand the scene.

    A peaceful scene may require slower timing than an energetic social-media clip.

    Step 8: Correct the Composition Carefully

    Some editors allow you to:

    • Reposition the video

    • Increase or decrease its size

    • Crop the frame

    • Rotate the video

    • Add background space

    Use these controls carefully.

    Confirm that the complete subject remains visible.

    For the red-bicycle example, protect:

    • Both wheels

    • Handlebars

    • Seat

    • Bicycle frame

    • Fence

    • Road

    • Important environmental movement

    Avoid enlarging the clip so much that the bicycle becomes cropped.

    Step 9: Avoid Excessive Digital Zoom

    Digital zoom enlarges the existing pixels.

    Too much enlargement may cause:

    • Blurriness

    • Pixelation

    • Reduced detail

    • More visible AI distortions

    • Cropped subjects

    A small adjustment may be acceptable, but a large zoom does not create missing detail.

    When the subject is too small, generating a better-framed version may produce a stronger result.

    Step 10: Stabilize Only When Necessary

    Some editors provide video-stabilization controls.

    Stabilization may help reduce:

    • Minor camera shake

    • Small unwanted movement

    • Slight frame instability

    However, stabilization may also:

    • Crop the video

    • Reduce sharpness

    • Create warped edges

    • Change intended camera movement

    Do not apply stabilization automatically.

    Compare the original and stabilized versions before accepting the change.

    Step 11: Adjust Brightness and Colour Carefully

    Basic corrections may include:

    • Exposure

    • Brightness

    • Contrast

    • Highlights

    • Shadows

    • Colour temperature

    • Saturation

    • White balance

    Make small adjustments.

    Do not attempt to solve a serious generation error with extreme colour correction.

    For example, colour adjustment may improve a slightly dark scene, but it cannot correct:

    • A distorted bicycle

    • A changing face

    • Missing objects

    • Incorrect movement

    • Unstable backgrounds

    Keep skin tones, product colours, and natural environments believable.

    Step 12: Add an Opening Title When Needed

    An educational video may begin with a brief title.

    For example:

    Creating an AI Video from Text

    Keep the title:

    • Short

    • Large

    • Easy to read

    • Correctly spelled

    • Visible long enough

    • Separate from important visual details

    Do not place the title directly over the main subject when another clear area is available.

    For the bicycle video, the title could appear in open sky or unused landscape space.

    Step 13: Add Explanatory Text in the Editor

    Do not depend on the AI generator to create accurate visible words inside the scene.

    Add text manually during editing.

    Possible labels include:

    • Text-to-Video Prompt

    • Generated Clip

    • First Version

    • Focused Revision

    • Final Selected Clip

    • Camera: Slow Push Forward

    • Aspect Ratio: 16:9

    Manual text is easier to:

    • Spell correctly

    • Position accurately

    • Resize

    • Animate

    • Replace

    • Translate

    • Keep consistent

    Step 14: Keep On-Screen Text Readable

    Use:

    • Large font size

    • Clear typeface

    • Strong contrast

    • Short wording

    • Suitable display time

    • Consistent placement

    Avoid:

    • Long paragraphs

    • Decorative fonts

    • Very small labels

    • Low-contrast text

    • Fast-moving captions

    • Text near the frame edge

    • Several messages appearing at once

    Test the video at normal viewing size rather than only in the editor’s enlarged preview.

    Step 15: Add Narration When It Improves Understanding

    Narration can explain what the video shows.

    For example:

    This short clip was created from a written prompt describing the subject, setting, movement, camera, lighting, and aspect ratio.

    Keep the narration:

    • Clear

    • Accurate

    • Brief

    • Relevant to the visible scene

    • Suitable for the audience

    Do not describe an action or object that does not appear in the final video.

    Record narration in a quiet environment or use an authorized voice-generation tool.

    Review pronunciation, names, numbers, and factual statements.

    Step 16: Add Captions

    Captions make spoken content easier to understand and improve accessibility. [15]

    Captions should:

    • Match the spoken words

    • Use correct spelling

    • Include suitable punctuation

    • Appear at the correct time

    • Remain visible long enough

    • Avoid covering important visuals

    • Identify important sounds when necessary

    Automatically generated captions must be reviewed.

    Common caption errors include:

    • Incorrect names

    • Missing words

    • Wrong punctuation

    • Misheard technical terms

    • Incorrect numbers

    • Poor timing

    Correct every important caption error before publishing.

    Step 17: Add Music Only When Appropriate

    Music can support the mood of a video.

    For the peaceful bicycle scene, suitable music might be:

    • Gentle instrumental music

    • Soft acoustic music

    • Calm ambient music

    The music should not overpower:

    • Narration

    • Dialogue

    • Important sound effects

    Reduce the music volume when narration begins.

    Use music that you created, licensed, or have permission to publish.

    Do not assume that music available online is free for commercial or public use.

    Step 18: Add Sound Effects Carefully

    The bicycle video might use:

    • Gentle wind

    • Moving grass

    • Distant birds

    • Soft road ambience

    • Quiet bicycle-wheel sounds when the bicycle moves

    Sound should match the visible action.

    Do not add:

    • Traffic to an empty quiet road

    • Heavy rain to a sunny scene

    • Bicycle movement when the bicycle remains still

    • Loud birds when no natural environment is shown

    Sound effects should support the visual scene rather than create confusion.

    Step 19: Review Automatically Generated Audio

    Some AI video generators may create audio with the clip.

    Listen carefully for:

    • Unwanted voices

    • Incorrect dialogue

    • Distorted speech

    • Repeated sounds

    • Sudden volume changes

    • Music that does not match

    • Sounds with uncertain usage rights

    Remove or replace unsuitable audio during editing.

    Do not publish generated speech without checking every spoken word.

    Step 20: Add a Disclosure When Required

    Some platforms, projects, clients, or jurisdictions may require disclosure when realistic content was created or altered using AI. [11, 12]

    A simple disclosure might say:

    This video includes AI-generated visuals.

    The correct wording depends on:

    • Publishing platform

    • Type of content

    • Intended audience

    • Realism of the video

    • Whether a real person is represented

    • Advertising requirements

    • Local rules

    • Client policies

    Do not use disclosure wording to make unsupported guarantees.

    Check the current publishing rules before uploading important content.

    Step 21: Check for Misleading Content

    Ask whether viewers could misunderstand the clip as:

    • Real recorded footage

    • Documentary evidence

    • A genuine event

    • A real product demonstration

    • A customer testimonial

    • A verified location

    • A real person performing an action

    When there is a meaningful risk of confusion, provide suitable context or disclosure.

    Do not present a generated event as proof that it happened.

    Step 22: Verify Products, Places, and Technical Details

    AI-generated videos may show inaccurate:

    • Products

    • Buildings

    • Maps

    • Machinery

    • Medical equipment

    • Safety procedures

    • Historical details

    • Uniforms

    • Signs

    • Measurements

    Review every important factual element.

    For educational or commercial content, replace inaccurate generated details with verified material.

    Step 23: Confirm Permission for Real People

    When a video represents a real person, confirm that you have the necessary permission to use:

    • Their appearance

    • Their photograph

    • Their voice

    • Their name

    • Their personal information

    • A realistic imitation of them

    Do not create misleading endorsements or statements that the person did not make.

    When a real person is not necessary, use a fictional adult character instead.

    Step 24: Remove Private Information

    Before publishing, check every frame for:

    • Names

    • Addresses

    • Email addresses

    • Phone numbers

    • Account information

    • Licence plates

    • Identification documents

    • Computer screens

    • Private photographs

    • Medical information

    • Children’s identifying information

    Blur, crop, replace, or remove private information.

    Generated clips can also accidentally reproduce information from uploaded reference material, so review them carefully.

    Step 25: Check Brands and Logos

    A generated clip may contain:

    • Invented logos

    • Distorted brand names

    • Recognizable packaging

    • Similar trademarks

    • Unrequested signs

    Remove unintended branding when it is not needed.

    Do not imply that a company approved, sponsored, or created the video unless that statement is accurate.

    Step 26: Review the Complete Video Without Sound

    Watch the finished video with the sound turned off.

    Check:

    • Story clarity

    • Composition

    • Subject consistency

    • Camera movement

    • Captions

    • Titles

    • Transitions

    • Beginning

    • Ending

    • Unexpected objects

    The visual story should remain understandable.

    Step 27: Review the Complete Video with Sound

    Watch again with sound.

    Check:

    • Narration clarity

    • Caption accuracy

    • Music level

    • Sound-effect timing

    • Sudden volume changes

    • Audio beginning and ending

    • Synchronization

    Use headphones and normal speakers when possible because problems may sound different on each device.

    Step 28: Review the Video at Full Screen

    Small preview windows may hide:

    • Distorted details

    • Blurry subjects

    • Incorrect text

    • Background problems

    • Compression artifacts

    • Cropping

    Watch the video at full screen before exporting the final version.

    Also test it at normal website or mobile size.

    Step 29: Choose the Export Resolution

    For a standard 16:9 video, common resolutions include:

    1280 × 720: HD

    1920 × 1080: Full HD

    3840 × 2160: 4K

    Use a resolution supported by the original material.

    Exporting a low-resolution generation as 4K does not restore missing detail.

    For a WordPress demonstration, 1280 × 720 or 1920 × 1080 may be practical, depending on:

    • Original quality

    • File size

    • Website plan

    • Hosting limits

    • Internet speed

    • Intended display size

    Step 30: Choose a Practical Video Format

    A widely supported choice is:

    MP4

    MP4 video is commonly used for:

    • Websites

    • YouTube

    • Social media

    • Presentations

    • Computers

    • Mobile devices

    The editor may also ask for a video codec. A common compatible option is:

    H.264

    Available settings depend on the editing application and publishing platform.

    Step 31: Balance Quality and File Size

    A very large video file may:

    • Upload slowly

    • Use more storage

    • Load slowly on a website

    • Consume more mobile data

    • Affect playback

    A very small, highly compressed file may:

    • Look blurry

    • Show blocky movement

    • Lose fine details

    • Make text difficult to read

    Export a test version and inspect it before publishing.

    Do not reduce the quality more than necessary.

    Step 32: Use a Clear Final Filename

    Use a descriptive filename that identifies the article and content.

    For example:

    018-how-to-create-ai-videos-from-text-red-bicycle-demo.mp4

    Avoid filenames such as:

    • Final.mp4

    • New final.mp4

    • Video corrected.mp4

    • Untitled export.mp4

    • Final final 2.mp4

    A clear filename helps with:

    • WordPress organization

    • Website maintenance

    • Searchability

    • Backups

    • Future updates

    Step 33: Save a High-Quality Master Copy

    Keep one high-quality version that is not heavily compressed.

    Suggested filename:

    018-red-bicycle-text-to-video-master.mp4

    Store the master copy locally.

    Create separate publishing copies for:

    • WordPress

    • YouTube

    • Social media

    • Presentations

    • Mobile viewing

    Do not repeatedly edit and export the same compressed file because quality may decrease.

    Step 34: Create Platform-Specific Copies

    A publishing folder might include:

    • 018-red-bicycle-wordpress-16×9.mp4

    • 018-red-bicycle-youtube-16×9.mp4

    • 018-red-bicycle-reel-9×16.mp4

    • 018-red-bicycle-square-1×1.mp4

    Review every version because changing the shape may alter:

    • Cropping

    • Text placement

    • Caption position

    • Subject size

    • Transition appearance

    Do not assume that one export is suitable for every platform.

    Step 35: Create a Video Thumbnail

    A thumbnail helps readers understand what the video contains before playing it.

    Choose a frame that:

    • Shows the main subject clearly

    • Has good lighting

    • Contains no distortion

    • Matches the video

    • Has space for a short title when needed

    For the bicycle example, select a stable frame showing:

    • Complete red bicycle

    • Wooden fence

    • Country road

    • Warm sunrise

    • Clear landscape

    Do not select a dramatic frame that does not accurately represent the clip.

    Step 36: Add Accessible Supporting Text

    When placing the video in a WordPress article, add a short paragraph explaining: [13, 14]

    • What the video demonstrates

    • Whether it was generated from text

    • What viewers should observe

    • Whether sound is required

    For example:

    This short demonstration shows a text-to-video clip created from a prompt describing a red bicycle, country-road setting, gentle environmental movement, slow camera motion, sunrise lighting, and a 16:9 composition. Watch the bicycle wheels, background, and camera speed to evaluate the clip’s visual consistency.

    Do not rely on the video alone to communicate essential educational information.

    Step 37: Test the Uploaded Video

    After uploading, test:

    • Playback

    • Loading time

    • Sound

    • Captions

    • Full-screen mode

    • Mobile display

    • Desktop display

    • Thumbnail

    • Controls

    • Beginning and ending

    • Page layout

    Test the published or preview page, not only the editor.

    Step 38: Keep the Final Publishing Record

    Record:

    • Final filename

    • Master filename

    • Export resolution

    • Aspect ratio

    • Format

    • Codec

    • Duration

    • File size

    • Audio sources

    • Caption file

    • Thumbnail filename

    • Disclosure used

    • Publishing date

    • Publishing location

    • Any later corrections

    This record helps when the video must be updated, replaced, or republished.

    Text-to-Video Publishing Checklist

    Before publishing, confirm:

    • The strongest generated version was selected.

    • Weak opening and ending sections were trimmed.

    • The subject remains stable.

    • The background remains acceptable.

    • The camera movement is suitable.

    • The video uses the correct aspect ratio.

    • No important details are cropped.

    • Titles and labels are correctly spelled.

    • Narration is accurate.

    • Captions match the audio.

    • Music and sound effects are authorized.

    • Generated audio was reviewed.

    • Private information was removed.

    • Real people were used with permission.

    • Products and technical details were verified.

    • Unwanted brands and logos were removed.

    • AI disclosure was added when required.

    • The export quality is suitable.

    • The file size is practical.

    • The filename is descriptive.

    • A high-quality master copy was saved.

    • The uploaded video was tested on the final platform.

    • The complete creation and publishing record was saved.

    Figure 9. A text-generated video should be reviewed, edited, exported, tested, and documented before publication.

    Figure 9 summarizes the final preparation process for a text-to-video clip. Keeping the original generation, trimming weak sections, adding accurate text and audio, checking accessibility and rights, exporting the correct format, testing the upload, and saving a complete project record help produce a more reliable publishing result.

    Common Mistakes When Creating AI Videos from Text

    Text-to-video generation becomes easier when you understand the mistakes that commonly weaken the result.

    Most beginner problems are caused by:

    • Starting with an idea that is too complicated

    • Using vague movement instructions

    • Requesting several camera movements

    • Ignoring the aspect ratio

    • Accepting the first generation

    • Failing to save prompts and settings

    • Using generated text, products, or people without careful review

    The following mistakes can be reduced through better planning and controlled revision.

    Mistake 1: Beginning with a Complicated Story

    A beginner may try to create an entire story in one prompt.

    For example:

    Create a video of a family leaving their house, entering a car, driving through a city, arriving at an airport, boarding an aircraft, flying across the ocean, and reaching a tropical beach.

    This prompt contains:

    • Several people

    • Multiple locations

    • Many actions

    • Several vehicles

    • Scene transitions

    • Different camera views

    • Changing lighting

    • A long timeline

    A short text-to-video generation may combine, remove, or confuse these elements.

    Possible results include:

    • Changing characters

    • Missing family members

    • Distorted vehicles

    • Sudden location changes

    • Impossible actions

    • Unstable backgrounds

    • An unfinished story

    How to Avoid This Mistake: Divide the idea into separate scenes.

    For example:

    1. The family leaves the house.

    2. The family enters the car.

    3. The car travels toward the airport.

    4. The family walks through the airport.

    5. An aircraft flies above the clouds.

    6. The family arrives at the beach.

    Generate each scene separately and combine the strongest clips during editing.

    Mistake 2: Using a Vague Prompt

    A vague prompt may say:

    Create a beautiful video of a bicycle.

    The AI must decide:

    • What the bicycle looks like

    • Where it appears

    • Whether it moves

    • What the camera does

    • What lighting is used

    • What style is required

    • What aspect ratio should be created

    The result may not match the user’s idea.

    How to Avoid This Mistake: Include the most important visual and motion instructions.

    For example:

    Create a realistic six-second video of a red touring bicycle standing beside a wooden fence on a quiet country road at sunrise. Grass moves gently while the camera slowly pushes forward. Use warm natural lighting and a wide 16:9 landscape composition.

    This gives the generator a clearer starting point.

    Mistake 3: Adding Too Many Prompt Details

    A prompt can also become too detailed.

    For example:

    Create a red bicycle with exactly twelve visible frame reflections, seven specific flowers, twenty fence posts, three cloud shapes, precise leaf counts, several changing shadows, multiple birds, moving insects, detailed buildings, passing vehicles, and five camera movements.

    Too many instructions can reduce clarity.

    The AI may focus on unimportant details while ignoring the subject or main action.

    How to Avoid This Mistake: Prioritize the details that affect the purpose of the scene.

    Keep:

    • Main subject

    • Important appearance

    • Setting

    • Main action

    • Environmental movement

    • Camera

    • Lighting

    • Style

    • Aspect ratio

    • Critical stability instructions

    Remove details that do not improve the video.

    Mistake 4: Requesting Several Main Actions

    A short clip may not be able to show several complicated actions clearly.

    For example:

    The person stands up, walks across the room, opens a box, removes a laptop, turns toward the camera, waves, sits down, and begins typing.

    The result may:

    • Skip actions

    • Combine actions

    • Show incorrect timing

    • Distort hands

    • Change the person

    • End before the sequence is complete

    How to Avoid This Mistake: Use one main action per clip.

    For example:

    The person slowly opens the box while remaining seated at the desk.

    Create another clip for the next action.

    Mistake 5: Using Unclear Movement Instructions

    Instructions such as:

    Move naturally.

    or:

    Make the background dynamic.

    do not explain what should move, in which direction, or how quickly.

    The AI may create excessive or unrelated motion.

    How to Avoid This Mistake: Describe the movement using:

    • Subject

    • Action

    • Direction

    • Speed

    • Timing

    For example:

    Grass and small wildflowers sway gently from left to right in a light breeze throughout the complete clip.

    For a walking person:

    The person walks slowly from the left side of the frame toward the right side at one steady speed.

    Mistake 6: Requesting Too Many Camera Movements

    A prompt may say:

    Zoom toward the bicycle, rotate around it, move upward, pan left, pull backward, and then follow it from the side.

    This may create:

    • Camera shake

    • Sudden movement

    • Changing perspective

    • Cropped subjects

    • Background distortion

    • Unclear composition

    How to Avoid This Mistake: Use one main camera movement.

    For example:

    Use one slow, steady forward camera movement from beginning to end.

    After the first version is stable, test a different camera movement in a separate generation.

    Mistake 7: Giving Conflicting Instructions

    A prompt may contain instructions that cannot happen together.

    For example:

    Keep the camera completely static while it rotates around the bicycle.

    Or:

    Use bright midday sunlight and dark midnight moonlight.

    The generator may ignore one instruction or produce an inconsistent result.

    How to Avoid This Mistake: Review the prompt for contradictions.

    Choose one instruction:

    Keep the camera completely static.

    or:

    Move the camera slowly around the bicycle.

    Choose one lighting condition:

    Use warm sunrise light.

    Mistake 8: Failing to State What Should Remain Still

    The user may describe moving grass and clouds but forget to say that the bicycle should remain stationary.

    The AI may move the bicycle as well.

    How to Avoid This Mistake: Separate moving and stationary elements.

    For example:

    The bicycle remains completely still beside the fence. Only the grass, wildflowers, and clouds move gently.

    This makes the movement plan clearer.

    Mistake 9: Ignoring Subject Stability

    The AI may create the correct subject at the beginning but change it during the clip.

    For example:

    • Wheels change shape

    • Clothing changes colour

    • A person’s face changes

    • Product parts appear or disappear

    • The subject becomes duplicated

    How to Avoid This Mistake: Add stability instructions.

    For example:

    Keep the bicycle’s frame, colour, wheels, seat, handlebars, proportions, and position visually consistent throughout every frame.

    Stability wording cannot guarantee a perfect result, but it provides useful guidance.

    Mistake 10: Ignoring the Background

    Beginners may focus only on the main subject.

    However, the background may contain:

    • Moving buildings

    • Changing roads

    • Bending fences

    • Disappearing trees

    • New objects

    • Shifting horizons

    • Lighting flicker

    How to Avoid This Mistake: Review the complete frame.

    Add focused instructions when necessary:

    Keep the fence, road, fields, hills, horizon, sky, and lighting visually consistent throughout the clip.

    Simple backgrounds are generally easier to control than crowded scenes.

    Mistake 11: Choosing the Wrong Aspect Ratio

    A user may create a 16:9 landscape video and later discover that a 9:16 vertical version is required.

    Changing the format may crop:

    • The subject

    • Hands or feet

    • Important objects

    • Background movement

    • Titles or captions

    How to Avoid This Mistake: Choose the publishing platform before generating.

    Use:

    • 16:9 for WordPress, YouTube, websites, and presentations

    • 9:16 for Shorts, Reels, and TikTok

    • 1:1 for square social-media posts

    • 4:5 for portrait feed posts

    Create separate versions when several formats are required.

    Mistake 12: Selecting an Unnecessarily Long Duration

    Longer clips provide more time for:

    • Objects to change

    • Faces to distort

    • Backgrounds to shift

    • Lighting to flicker

    • Camera movement to become unstable

    • New objects to appear

    How to Avoid This Mistake: Begin with a short generation of approximately four to eight seconds, depending on the available tool.

    Create longer videos by combining several short clips.

    Mistake 13: Using High Motion for a Simple Scene

    A quiet bicycle beside a country road does not require strong motion.

    High motion may cause:

    • Rapid grass movement

    • Camera instability

    • Bicycle distortion

    • Moving fence posts

    • Unnatural clouds

    • Objects appearing

    How to Avoid This Mistake: Use low or moderate motion for calm scenes.

    Increase motion only when the subject or story requires it.

    Mistake 14: Allowing Prompt Enhancement to Change the Idea

    Automatic prompt enhancement may add:

    • People

    • Animals

    • Buildings

    • Vehicles

    • Dramatic weather

    • Extra camera movement

    • A different style

    • A different time of day

    The result may look attractive but no longer match the intended scene.

    How to Avoid This Mistake: Review the enhanced wording before generating.

    Save:

    • Original prompt

    • Enhanced prompt

    Compare the two versions and confirm that the added details are appropriate.

    Mistake 15: Changing Several Variables at Once

    A user may revise the prompt, select another model, change the duration, increase the motion, alter the aspect ratio, and enable prompt enhancement at the same time.

    If the result improves or becomes worse, it will be difficult to identify the cause.

    How to Avoid This Mistake: Change one main variable at a time.

    For example:

    • Version 01: Original prompt

    • Version 02: Wheel-stability correction

    • Version 03: Slower camera movement

    • Version 04: Reduced environmental motion

    Keep the other settings unchanged.

    Mistake 16: Accepting the First Generated Clip

    The first clip may contain attractive lighting or movement, but it may also contain problems that appear only after several seconds.

    A thumbnail cannot show:

    • Changing objects

    • A weak ending

    • Camera acceleration

    • Lighting flicker

    • Background instability

    How to Avoid This Mistake: Watch the complete clip several times.

    Review separately for:

    • Main subject

    • Movement

    • Camera

    • Background

    • Lighting

    • Opening

    • Ending

    • Unwanted objects

    • Audio

    Treat the first generation as a draft.

    Mistake 17: Judging Only One Frame

    A single paused frame may look excellent even when the video is unstable.

    A text-to-video clip must be judged over time.

    How to Avoid This Mistake: Review:

    • Beginning frame

    • Middle frames

    • Final frame

    • Complete movement

    • Object consistency

    • Camera consistency

    A strong video requires more than one attractive image.

    Mistake 18: Regenerating Without Recording the Problem

    A beginner may repeatedly select Generate without writing down what needs to change.

    This can waste:

    • Time

    • Credits

    • Storage

    • Useful prompt information

    It may also recreate the same problem.

    How to Avoid This Mistake: Record:

    • What worked

    • What failed

    • When the problem appeared

    • What changed in the next prompt

    • Which settings were used

    • Which version was strongest

    Use a clear revision record.

    Mistake 19: Deleting Earlier Versions Too Soon

    A newer version may correct one problem but weaken another part of the scene.

    For example:

    • Version 01 has better lighting.

    • Version 02 has more stable wheels.

    • Version 03 has smoother camera movement.

    An earlier clip may contain the strongest usable section.

    How to Avoid This Mistake: Save every useful generation until the final video has been completed and backed up.

    Use clear filenames rather than relying only on the platform’s online history.

    Mistake 20: Trying to Correct Everything Through Regeneration

    Some problems are easier to fix during editing.

    For example:

    • Weak first half-second

    • Distorted final frame

    • Excessive empty time

    • Small colour difference

    • Missing title

    • Required captions

    • Minor audio issue

    How to Avoid This Mistake: Stop regenerating when a practical editing solution is available.

    Trim, crop, add text, adjust timing, or replace audio when appropriate.

    Do not spend repeated credits trying to create a perfect clip when the strongest section is already usable.

    Mistake 21: Asking the AI to Generate Important Visible Text

    AI-generated video text may be:

    • Misspelled

    • Distorted

    • Incomplete

    • Changing between frames

    • Replaced with random symbols

    How to Avoid This Mistake: Generate the scene without visible text.

    Add accurate titles, signs, labels, captions, and product information manually in the editor.

    Mistake 22: Using AI-Generated Products as Accurate Demonstrations

    A generated product may show:

    • Incorrect controls

    • Missing parts

    • Invented features

    • Impossible dimensions

    • Changing logos

    • Misleading performance

    How to Avoid This Mistake: Use real verified product footage when accuracy matters.

    A generated product concept may be suitable for creative illustration, but it should not be presented as factual proof of how a real product works.

    Mistake 23: Using Real People Without Permission

    A realistic AI video may appear to show a real person doing or saying something they never did.

    This can create privacy, consent, reputational, and publishing concerns.

    How to Avoid This Mistake: Obtain appropriate permission before using a real person’s:

    • Appearance

    • Photograph

    • Voice

    • Name

    • Personal information

    • Realistic likeness

    Use a fictional adult character when a real identity is unnecessary.

    Mistake 24: Publishing Without Checking AI Disclosure Rules

    Some realistic AI-generated or altered content may require disclosure depending on the publishing platform, project, audience, or local requirements.

    How to Avoid This Mistake: Check the current rules before publishing.

    When appropriate, use a clear statement such as:

    This video includes AI-generated visuals.

    Do not assume that one disclosure rule applies to every platform.

    Mistake 25: Using Music or Voices Without Checking Rights

    A generated video may include automatic music, speech, or sound effects.

    The user may also add online music without confirming permission.

    How to Avoid This Mistake: Confirm that you have the right to use:

    • Music

    • Voice recordings

    • Narration

    • Sound effects

    • Uploaded audio

    • Automatically generated audio

    Keep records of licences, permissions, and sources.

    Mistake 26: Uploading the Video Without Testing It

    A video may work correctly on the computer but fail after uploading.

    Possible problems include:

    • Slow loading

    • Missing sound

    • Incorrect captions

    • Cropped mobile view

    • Wrong thumbnail

    • Playback failure

    • Large file size

    • Broken page layout

    How to Avoid This Mistake: Test the uploaded video on:

    • Desktop

    • Mobile

    • Full-screen mode

    • Normal page view

    • Headphones

    • Speakers

    Review the actual published or preview page.

    Mistake 27: Using Confusing Filenames

    Files named:

    • Final

    • Final new

    • Corrected

    • Final final

    • New video 2

    become difficult to identify later.

    How to Avoid This Mistake: Include:

    • Article number

    • Subject

    • Scene number

    • Version number

    • Purpose

    • Format

    For example:

    018-red-bicycle-scene-01-text-video-v03.mp4

    For the final WordPress copy:

    018-how-to-create-ai-videos-from-text-wordpress-16×9.mp4

    Mistake 28: Failing to Save the Creation Record

    Without a record, you may forget:

    • The final prompt

    • The model used

    • Selected settings

    • Generation date

    • Credits used

    • Audio source

    • Disclosure wording

    • Export settings

    • Publishing location

    How to Avoid This Mistake: Save a project document containing the complete creation and publishing history.

    This is especially important for:

    • Business content

    • Client work

    • Advertising

    • Educational materials

    • Videos containing real people

    • Projects that may need future updates

    Common-Mistake Review Formula

    Before generating or publishing, ask:

    1. Is the idea simple enough?

    2. Is the main subject clear?

    3. Is there one main action?

    4. Is the movement specific?

    5. Is there one camera movement?

    6. Are any instructions conflicting?

    7. Is the correct aspect ratio selected?

    8. Are important details protected?

    9. Have I watched the entire clip?

    10. Have I recorded the prompt and settings?

    11. Can the remaining problem be corrected through editing?

    12. Have I checked privacy, accuracy, rights, and disclosure requirements?

    Avoiding these common mistakes does not guarantee a perfect generation, but it creates a more organized process and improves the chance of producing a usable video.

    Figure 10. Common text-to-video mistakes can be reduced through simpler scenes, clearer prompts, controlled revisions, and careful publishing checks.

    Figure 10 highlights the most common problems beginners encounter when creating videos from text. Planning one subject and one action, using one camera movement, reviewing the complete clip, changing one variable at a time, adding accurate text during editing, and saving the creation record can make the workflow more reliable.

    Limitations of Text-to-Video Generation

    Text-to-video technology can create impressive short clips, but it still has important limitations.

    A detailed prompt may improve the result, but it cannot guarantee that every object, person, movement, background, or camera instruction will remain correct throughout the entire video.

    Understanding these limitations helps beginners choose suitable projects, review generated clips realistically, and decide when another method would provide better control.

    Limitation 1: The Result May Not Match the Prompt Exactly

    The AI may understand the general idea but change important details.

    For example, a prompt may request:

    • A red touring bicycle

    • A wooden fence

    • A quiet country road

    • Warm sunrise lighting

    • A slow forward camera movement

    The generated video may instead show:

    • A different bicycle design

    • An incomplete fence

    • A road with buildings

    • Bright midday lighting

    • A static or rapidly moving camera

    The AI is interpreting the prompt rather than following it like an exact technical drawing.

    Reality: A clear prompt provides direction, but the model still makes creative decisions.

    How to Reduce This Limitation: Place the most important subject, action, setting, and camera instructions near the beginning. Remove unnecessary details and generate several controlled versions when needed.

    Limitation 2: Objects May Change Between Frames

    An object may look correct at the beginning and become distorted later.

    A bicycle may develop:

    • Changing wheel shapes

    • A bent frame

    • Missing pedals

    • Extra handlebars

    • Different colours

    • Duplicate parts

    Other objects may:

    • Grow or shrink

    • Appear or disappear

    • Change material

    • Move unexpectedly

    • Merge with the background

    Reality: Maintaining the same object accurately across many frames remains difficult, especially when the object has complex shapes or is moving.

    How to Reduce This Limitation: Use a simple subject, restrained movement, short duration, and focused stability instructions. Trim the clip before the distortion begins when the earlier section is usable.

    Limitation 3: Faces May Change

    A generated person’s face may change during the video.

    Possible problems include:

    • Different facial structure

    • Changing age

    • Uneven eyes

    • Distorted mouth

    • Changing expression

    • Inconsistent skin tone

    • Different hairstyle

    • Identity changes

    These problems may become more noticeable during:

    • Head turns

    • Talking

    • Strong expressions

    • Fast camera movement

    • Close-up shots

    • Longer clips

    Reality: Text-to-video generation may not preserve one exact person reliably throughout several frames or separate scenes.

    How to Reduce This Limitation: Use subtle movement, medium or wider framing, short clips, and a consistent character description. When exact appearance is important, use an authorized reference image or real footage.

    Limitation 4: Hands and Fingers May Be Distorted

    Hands are especially difficult when they interact with small objects.

    Possible problems include:

    • Extra fingers

    • Missing fingers

    • Merged fingers

    • Changing hand size

    • Objects passing through hands

    • Hands disappearing

    • Unnatural wrist movement

    Complicated actions increase the risk.

    Examples include:

    • Typing rapidly

    • Opening packaging

    • Holding several small objects

    • Playing an instrument

    • Using tools

    • Pointing and waving at the same time

    Reality: Detailed hand-object interaction may be unstable even when the rest of the scene looks convincing.

    How to Reduce This Limitation: Use one slow hand action, avoid close-ups when unnecessary, and keep the hands resting naturally when they are not important to the scene. Use real footage for accurate demonstrations.

    Limitation 5: Movement May Look Unnatural

    The main action may be:

    • Too fast

    • Too slow

    • Repeated

    • Incomplete

    • Physically impossible

    • In the wrong direction

    • Poorly timed

    A person may slide instead of walking.

    A vehicle may move without the wheels rotating correctly.

    Water may flow in an unnatural direction.

    Clothing or hair may move without wind.

    Reality: The AI is creating the appearance of movement, but it may not consistently follow real-world physics.

    How to Reduce This Limitation: Use simple actions, state the direction and speed clearly, and generate short clips. Review movement frame by frame when physical accuracy matters.

    Limitation 6: Camera Instructions May Be Ignored

    The prompt may request a slow camera movement, but the result may include:

    • A static camera

    • Sudden zooming

    • Unexpected rotation

    • Rapid acceleration

    • Camera shake

    • A change of angle

    • Cropping

    • Movement in the opposite direction

    The camera may behave correctly at first and become unstable near the end.

    Reality: Written camera instructions and interface camera controls do not always produce the intended movement.

    How to Reduce This Limitation: Use one simple camera movement, match the prompt with any separate camera setting, and avoid combining zooming, panning, tracking, and rotation in one short clip.

    Limitation 7: Backgrounds May Become Unstable

    Background details may:

    • Move unexpectedly

    • Change shape

    • Appear or disappear

    • Become blurred

    • Bend or stretch

    • Produce new objects

    • Shift with the camera incorrectly

    Common examples include:

    • Changing fence posts

    • Bending buildings

    • Moving roads

    • Disappearing trees

    • Shifting horizons

    • Changing windows

    • Unstable furniture

    Reality: A detailed or crowded background increases the number of elements the AI must preserve across every frame.

    How to Reduce This Limitation: Use a simple setting with only a few important background elements. State which objects must remain unchanged and avoid unnecessary decoration.

    Limitation 8: Visible Text Is Often Incorrect

    Generated signs, screens, labels, packaging, and documents may contain:

    • Misspelled words

    • Random letters

    • Changing text

    • Distorted numbers

    • Incomplete sentences

    • Invented logos

    • Unreadable symbols

    A word may look correct in one frame and change in the next.

    Reality: Text inside an AI-generated video is not reliable enough for important information.

    How to Reduce This Limitation: Ask the generator to avoid visible text. Add accurate titles, captions, labels, and signs manually during editing.

    Limitation 9: Product Details May Be Inaccurate

    A generated product may show:

    • Invented features

    • Missing controls

    • Incorrect materials

    • Wrong dimensions

    • Changing buttons

    • Impossible connections

    • Distorted packaging

    • Misleading performance

    A product may look realistic while still being technically wrong.

    Reality: Visual realism does not prove factual accuracy.

    How to Reduce This Limitation: Use real verified product footage or authorized product images when accuracy matters. Do not use an AI-generated demonstration as evidence of how a real product operates.

    Limitation 10: Character Consistency Across Scenes Is Difficult

    A longer video may use several separately generated clips.

    The same character may change:

    • Face

    • Height

    • Clothing

    • Hair

    • Age

    • Body shape

    • Accessories

    • Skin tone

    The same bicycle, vehicle, room, or product may also look different between scenes.

    Reality: Repeating the same description does not guarantee that separate generations will produce an identical subject.

    How to Reduce This Limitation: Prepare a consistency sheet and copy the same core description into every prompt. Use reference-image controls when available and permitted. Choose clips with similar framing, lighting, and colours.

    Limitation 11: Exact Scene Composition Is Difficult to Control

    The AI may place the subject:

    • Too close to the frame edge

    • Too far from the camera

    • In the wrong position

    • Partly behind another object

    • At a different camera height

    • In an unsuitable background area

    Important details may become cropped when the camera moves.

    Reality: Text prompts provide general composition guidance but not the precision of manual layout or traditional filming.

    How to Reduce This Limitation: State the camera view, subject position, safe space, and required visible body or object parts. Use wider framing when cropping is a risk.

    Limitation 12: Long Clips Are More Likely to Develop Problems

    The longer the clip continues, the more opportunities there are for:

    • Subject changes

    • Background distortion

    • Camera acceleration

    • Lighting flicker

    • New objects

    • Weak endings

    • Unnatural motion

    A strong opening may become unstable after several seconds.

    Reality: A longer duration does not always produce a more useful result.

    How to Reduce This Limitation: Generate short clips and combine the strongest sections during editing. A stable four-second clip may be more valuable than an unstable eight-second clip.

    Limitation 13: Complex Actions May Be Incomplete

    A prompt may request a sequence such as:

    1. A person walks to a desk.

    2. The person sits down.

    3. The person opens a laptop.

    4. The person types.

    5. The person turns toward the camera.

    The AI may:

    • Skip an action

    • Combine two actions

    • Perform them in the wrong order

    • Finish before the sequence is complete

    • Distort the person or objects

    Reality: Short text-to-video generations are better suited to one main action than a long sequence of coordinated actions.

    How to Reduce This Limitation: Divide the action into separate clips and combine them in the editor.

    Limitation 14: Physical Accuracy May Be Weak

    Generated motion may not follow real-world rules.

    Examples include:

    • Incorrect wheel rotation

    • Objects floating

    • Incorrect shadows

    • Water moving uphill

    • Impossible reflections

    • Doors opening incorrectly

    • Objects passing through one another

    • Unnatural body balance

    Reality: A visually convincing clip can still contain physical errors.

    How to Reduce This Limitation: Review the complete movement carefully. Use real footage, animation software, or a controlled production process when physical or technical accuracy is essential.

    Limitation 15: Lighting May Flicker or Change

    Lighting can change unexpectedly between frames.

    Possible problems include:

    • Sudden brightness changes

    • Colour-temperature changes

    • Moving shadows

    • Flickering highlights

    • Sunrise becoming midday

    • Indoor lighting changing direction

    • Reflections appearing without a source

    Reality: Maintaining consistent lighting across moving frames can be difficult.

    How to Reduce This Limitation: Use one simple lighting condition and request consistent brightness, colour temperature, shadow direction, and exposure. Trim sections containing visible flicker.

    Limitation 16: The Final Result May Contain Unwanted Content

    The model may add:

    • Extra people

    • Animals

    • Vehicles

    • Signs

    • Buildings

    • Objects

    • Words

    • Logos

    • Unrequested weather

    • Additional movement

    These additions may appear only briefly.

    Reality: Negative instructions can reduce unwanted details, but they cannot guarantee that nothing unexpected will appear.

    How to Reduce This Limitation: Keep the scene simple, state the exact number of important subjects, and review every frame before publishing.

    Limitation 17: Generated Audio May Be Incorrect

    When a model creates sound automatically, the result may contain:

    • Unwanted voices

    • Distorted speech

    • Incorrect sound effects

    • Repeated sounds

    • Music that does not match

    • Sudden volume changes

    • Audio that begins or ends abruptly

    Generated dialogue may not match the visible mouth movement.

    Reality: Audio must be reviewed separately from the visual result.

    How to Reduce This Limitation: Disable automatic audio during visual testing when possible. Add verified narration, captions, music, and sound effects during editing.

    Limitation 18: Exact Real-Person Representation May Be Unreliable

    A prompt describing a real person may produce:

    • An inaccurate likeness

    • Changing identity

    • Incorrect clothing

    • Distorted features

    • An appearance that is misleadingly realistic

    There may also be consent, privacy, disclosure, and platform-policy concerns.

    Reality: Text-to-video should not be used casually to make a real person appear to perform an action or make a statement.

    How to Reduce This Limitation: Obtain appropriate permission and use authorized source material. Use a fictional adult character when a real identity is unnecessary.

    Limitation 19: Different Generations May Produce Very Different Results

    Using the same prompt twice may create different:

    • Subjects

    • Backgrounds

    • Camera angles

    • Colours

    • Lighting

    • Movement

    • Composition

    • Details

    This can make exact reproduction difficult.

    Reality: AI video generation includes variation, even when the prompt and settings remain similar.

    How to Reduce This Limitation: Save every useful version, record the exact prompt and settings, and use fixed controls or reference material when the selected platform supports them.

    Limitation 20: Higher Resolution Does Not Correct Generation Errors

    Increasing the output resolution may improve sharpness, but it does not correct:

    • Changing objects

    • Incorrect actions

    • Distorted hands

    • Unstable backgrounds

    • Camera problems

    • Incorrect text

    • Product inaccuracies

    A high-resolution error is still an error.

    Reality: Resolution affects image detail, not the correctness of the generated content.

    How to Reduce This Limitation: Test the prompt and movement at a practical resolution before using more credits for the final high-quality generation.

    Limitation 21: Prompt Improvement May Require Several Attempts

    A prompt that appears clear may still produce an unexpected clip.

    Several versions may be needed to correct:

    • Subject appearance

    • Movement

    • Camera behaviour

    • Background stability

    • Lighting

    • Cropping

    Each attempt may consume time and credits.

    Reality: Text-to-video creation is usually an iterative process rather than a one-click result.

    How to Reduce This Limitation: Generate one version at a time, record the main problem, change one variable, and compare the complete results.

    Limitation 22: Costs and Usage Limits May Restrict Experimentation

    Depending on the selected platform and plan, generation may involve:

    • Credits

    • Monthly limits

    • Queue limits

    • Watermarks

    • Resolution restrictions

    • Duration restrictions

    • Download limits

    • Storage limits

    Repeated unsuccessful attempts may increase the cost of one usable clip.

    Reality: Free or lower-cost access may not include every feature or output option.

    How to Reduce This Limitation: Begin with a short, simple test. Review the current plan details before paying, and record the credits used by each generation.

    Limitation 23: Privacy Controls Differ Between Platforms

    Projects, uploaded references, prompts, and generated videos may be handled differently by each provider.

    Possible differences include:

    • Public or private projects

    • Data retention

    • Content-review processes

    • Training options

    • Sharing settings

    • Team access

    • Deletion procedures

    Reality: A project should not be assumed private simply because it is inside a personal account.

    How to Reduce This Limitation: Check the current privacy settings and provider terms before uploading private, confidential, personal, or client material.

    Limitation 24: Commercial-Use Conditions May Differ

    A generated video may be intended for:

    • A business website

    • Advertising

    • Client work

    • A paid course

    • A monetized channel

    • Product promotion

    The right to use the output may depend on:

    • The provider

    • The selected plan

    • The model

    • Uploaded source rights

    • Music and voice rights

    • Local requirements

    • Platform rules

    Reality: Creating a clip does not automatically confirm that every element is approved for every commercial purpose.

    How to Reduce This Limitation: Review the current provider terms and keep records of source ownership, permissions, licences, model used, and generation date.

    Limitation 25: Text-to-Video Cannot Replace Verified Evidence

    An AI-generated video can appear highly realistic.

    However, it does not prove that:

    • An event occurred

    • A product works

    • A person made a statement

    • A location exists as shown

    • A medical process is correct

    • A historical scene is accurate

    • A safety method is reliable

    Reality: Generated visuals are synthetic content, not documentary evidence.

    How to Reduce This Limitation: Use verified real footage and reliable sources when factual proof is required. Label generated illustrations appropriately when viewers could misunderstand them.

    When Text-to-Video Is a Suitable Choice

    Text-to-video may be useful for:

    • Creative concepts

    • Story ideas

    • Cinematic landscapes

    • Educational illustrations

    • Website background clips

    • Social-media visuals

    • Presentation footage

    • Fictional scenes

    • Marketing prototypes

    • Mood and style experiments

    • General-purpose B-roll

    It is most suitable when some creative variation is acceptable.

    When Another Method May Be Better

    Consider using real footage, traditional animation, screen recording, or image-to-video when you need:

    • An exact real person

    • A verified product

    • Accurate machinery

    • Precise hand movements

    • Documentary evidence

    • Medical or safety instructions

    • A consistent character across many scenes

    • Accurate visible text

    • A genuine testimonial

    • A specific real location

    • Repeatable technical movement

    Choosing the correct method is more important than forcing every project into text-to-video generation.

    Practical Limitation Review

    Before using a generated clip, ask:

    1. Does the result match the main idea?

    2. Does the subject remain consistent?

    3. Is the movement believable?

    4. Is the camera stable?

    5. Does the background remain acceptable?

    6. Are faces and hands suitable?

    7. Is visible text accurate?

    8. Are products and technical details verified?

    9. Is the clip long enough without becoming unstable?

    10. Could viewers mistake it for real evidence?

    11. Do I have the necessary source, audio, voice, and publishing rights?

    12. Would real footage or image-to-video provide better control?

    Text-to-video generation is most effective when it is used for suitable projects, supported by careful human review, and combined with editing or real material when greater accuracy is required.

    Figure 11. Text-to-video generation has limitations involving prompt accuracy, consistency, movement, text, products, people, costs, privacy, and publishing rights.

    Figure 11 summarizes the most important limitations beginners should understand before relying on a generated video. A realistic-looking clip may still contain changing objects, distorted faces or hands, unstable movement, incorrect text, inaccurate products, or misleading details. Careful review and the correct choice of production method remain essential.

    Common Myths About Text-to-Video Generation

    Text-to-video tools can create impressive clips, but beginners may develop unrealistic expectations after watching carefully selected demonstrations online.

    Understanding the difference between a promotional example and a normal working process helps you plan projects more accurately.

    Myth 1: The AI Creates Exactly What You Imagine

    A prompt may describe the intended subject, setting, movement, camera, lighting, and style, but the AI cannot see the exact scene in your mind.

    It interprets the words and makes its own visual decisions.

    Two generations from the same prompt may contain different:

    • Subjects

    • Backgrounds

    • Camera angles

    • Colours

    • Lighting

    • Movement

    • Compositions

    Reality: A prompt gives the AI direction, but it does not provide complete control.

    Improve the result by starting with a simple idea, prioritizing the most important details, and generating controlled revisions.

    Myth 2: A Longer Prompt Always Produces a Better Video

    A detailed prompt can be useful, but a very long prompt may contain:

    • Repeated instructions

    • Conflicting descriptions

    • Too many objects

    • Several actions

    • Multiple camera movements

    • Unnecessary visual details

    The generator may ignore or combine some instructions.

    Reality: Clarity is more important than length.

    A well-organized prompt containing one subject, one action, one setting, and one camera movement may produce a more stable result than a long and complicated description.

    Myth 3: One Generation Is Usually Enough

    An attractive first frame does not mean that the complete clip is suitable.

    Problems may appear later, including:

    • Changing objects

    • Camera acceleration

    • Background distortion

    • Lighting flicker

    • Weak endings

    • Duplicate subjects

    Reality: The first generation should normally be treated as a test or draft.

    Watch the complete clip, identify the largest problem, revise one instruction, and compare the new version with the original.

    Myth 4: Better Prompts Guarantee Perfect Results

    Prompt quality matters, but even a carefully written prompt may produce:

    • Incorrect movement

    • Misshaped objects

    • Changing faces

    • Cropped subjects

    • Unexpected backgrounds

    • Unwanted content

    The model’s technical limitations still affect the result.

    Reality: A better prompt improves direction but cannot guarantee a flawless video.

    Human review, regeneration, trimming, and editing remain necessary.

    Myth 5: Text-to-Video Works Like Traditional Filming

    Traditional filming allows a creator to control:

    • Actors

    • Props

    • Camera placement

    • Lighting

    • Location

    • Timing

    • Repeated takes

    Text-to-video generation interprets written instructions and creates synthetic frames.

    The creator cannot directly control every object or movement in the same way.

    Reality: Text-to-video is a generative process, not a digital replacement for every part of traditional production.

    Real filming may still be better when exact actions, people, products, or locations are required.

    Myth 6: Realistic-Looking Videos Are Factually Accurate

    A generated video may look convincing while showing:

    • Incorrect machinery

    • Impossible movement

    • Inaccurate products

    • Invented buildings

    • Incorrect signs

    • Unrealistic procedures

    • False historical details

    Visual realism can make errors harder to notice.

    Reality: A realistic appearance does not prove that the content is accurate.

    Verify important products, processes, places, measurements, and factual claims before publishing.

    Myth 7: The Same Prompt Always Produces the Same Video

    AI generation normally includes variation.

    Using the same prompt again may create a different:

    • Bicycle

    • Character

    • Setting

    • Composition

    • Camera movement

    • Colour palette

    • Background

    Even similar settings may not reproduce the exact earlier result.

    Reality: A prompt is not a complete recipe for recreating an identical clip.

    Save every useful generation and record the model, settings, prompt, date, and filename.

    Myth 8: The AI Will Keep a Character Consistent Across Every Scene

    A repeated character description may still produce changes in:

    • Face

    • Hair

    • Clothing

    • Height

    • Body proportions

    • Accessories

    • Age

    • Skin tone

    Separate text-to-video generations do not automatically remember the exact appearance of a character from an earlier clip.

    Reality: Character consistency across several scenes remains difficult.

    Use a detailed consistency sheet, repeat the same description, and use authorized reference-image controls when greater visual consistency is necessary.

    Myth 9: AI-Generated Hands and Faces Are Always Reliable Now

    Video models may produce improved faces and hands, but difficult movements can still cause:

    • Extra fingers

    • Missing fingers

    • Changing facial features

    • Distorted expressions

    • Unnatural hand-object interaction

    • Identity changes

    Problems may be especially noticeable in close-ups or long clips.

    Reality: Faces and hands must still be inspected throughout the complete video.

    Use restrained movement and real footage when accurate human actions are essential.

    Myth 10: Higher Resolution Fixes a Weak Generation

    Increasing the resolution may make the clip sharper, but it cannot correct:

    • Changing bicycle wheels

    • Distorted hands

    • Incorrect actions

    • Camera shake

    • Unstable backgrounds

    • Misspelled text

    • Inaccurate products

    Reality: Resolution improves image detail, not content accuracy.

    Test the prompt and movement at a practical resolution before spending additional credits on a higher-quality export.

    Myth 11: AI Video Generators Create Accurate Written Text

    A generated sign, label, document, or screen may contain:

    • Random letters

    • Misspelled words

    • Changing characters

    • Incorrect numbers

    • Distorted logos

    • Unreadable sentences

    The text may also change from one frame to the next.

    Reality: Important visible wording should normally be added manually during editing.

    Generate a clean scene without text, then add accurate titles, labels, captions, signs, and product information in the editor.

    Myth 12: The AI Automatically Knows the Best Camera Movement

    The generator may select a camera movement that does not support the scene.

    It might:

    • Move too quickly

    • Rotate unexpectedly

    • Crop the subject

    • Change direction

    • Ignore the requested camera

    • Remain static

    Reality: Camera behaviour should be planned and described clearly.

    Begin with one simple option, such as a static camera, slow forward push, or smooth side-tracking movement.

    Myth 13: More Motion Makes the Video More Professional

    Strong movement may appear dramatic, but it can also create:

    • Subject distortion

    • Background instability

    • Camera shake

    • Unnatural physics

    • Cropping

    • Distracting visual changes

    A peaceful scene does not need constant action.

    Reality: Movement should support the purpose and mood of the video.

    Use subtle motion for calm scenes and stronger movement only when the subject requires it.

    Myth 14: AI Video Can Replace Every Type of Real Footage

    Text-to-video may be useful for fictional, creative, illustrative, or conceptual scenes.

    It should not automatically replace real footage when the project requires:

    • Documentary evidence

    • A genuine testimonial

    • An exact product demonstration

    • A verified location

    • A real safety procedure

    • Medical instructions

    • Legal evidence

    • Accurate technical movement

    Reality: The best production method depends on the purpose of the content.

    Use verified real footage whenever authenticity or exact accuracy is essential.

    Myth 15: AI-Generated Video Is Automatically Free to Use Anywhere

    A generated clip may involve:

    • Provider terms

    • Plan restrictions

    • Uploaded source rights

    • Music rights

    • Voice rights

    • Real-person permissions

    • Platform disclosure rules

    • Commercial-use conditions

    Creating the clip does not automatically confirm that every included element can be used for every purpose.

    Reality: Usage conditions must be reviewed for the specific tool, model, plan, source material, and publishing platform.

    Keep records of the terms and permissions checked for important projects.

    Myth 16: Anything Generated Inside an Account Is Automatically Private

    Platforms may handle prompts, uploads, generated files, project sharing, and data retention differently.

    A personal account does not necessarily mean that every project has the same privacy protection.

    Reality: Privacy depends on the provider’s current settings and terms.

    Do not upload confidential, private, client, medical, or identifying information until you understand how the selected service handles it.

    Myth 17: Automatically Generated Audio Is Ready to Publish

    AI-generated audio may include:

    • Incorrect dialogue

    • Unwanted voices

    • Distorted speech

    • Poor sound effects

    • Unbalanced volume

    • Music that does not match

    • Audio that begins or ends abruptly

    Reality: Generated audio requires the same careful review as generated visuals.

    Check every spoken word, sound effect, music track, and usage right before publishing.

    Myth 18: Editing Is Unnecessary When the Generated Clip Looks Good

    Even a strong generation may still need:

    • Trimming

    • Colour adjustment

    • Captions

    • Narration

    • Titles

    • Audio correction

    • Compression

    • Format changes

    • Disclosure

    • Accessibility improvements

    Reality: Generation creates the source clip, while editing prepares it for viewers and publishing platforms.

    The best workflow combines generation with careful post-production.

    Myth 19: Every Weak Result Can Be Fixed by Regenerating

    Repeated regeneration may correct one problem but create another.

    Some issues are easier to correct by:

    • Trimming the beginning

    • Removing the final second

    • Adding text manually

    • Replacing audio

    • Cropping carefully

    • Combining clips

    • Using a different production method

    Reality: Regeneration is only one correction method.

    Stop generating when editing, a reference image, or real footage would provide a more practical solution.

    Myth 20: AI Video Removes the Need for Human Creativity

    The AI can generate visual material, but a person still decides:

    • The purpose

    • The story

    • The audience

    • The scene order

    • The prompt

    • The strongest result

    • The narration

    • The editing

    • The ethical context

    • The final publishing decision

    Reality: AI video generation supports human creativity; it does not replace creative judgment.

    The creator remains responsible for the idea, accuracy, permissions, quality, and final use of the video.

    Myth Review Checklist

    Before beginning a project, remember:

    • The AI interprets rather than perfectly follows.

    • Longer prompts are not automatically better.

    • The first generation is usually a draft.

    • Realistic visuals may still be inaccurate.

    • Character consistency is not guaranteed.

    • Higher resolution does not fix content errors.

    • Generated text and audio require review.

    • Editing remains an important part of the workflow.

    • Usage and privacy conditions must be checked.

    • Human judgment remains essential.

    Text-to-video generation is most useful when expectations are realistic and the creator remains involved throughout planning, generation, review, editing, and publication.

    Figure 12. Understanding common text-to-video myths helps beginners develop realistic expectations and make better production decisions.

    Figure 12 compares common beliefs about text-to-video generation with the practical reality. Clear prompts and advanced tools can improve results, but they do not guarantee perfect accuracy, consistent characters, correct visible text, reliable audio, or unrestricted publishing rights. Human review and editing remain essential.

    How to Use Text-to-Video Generation Responsibly

    Text-to-video tools can create convincing scenes that never occurred in real life.

    This makes careful human review especially important.

    Before generating or publishing a video, consider:

    • Who or what the video represents

    • Whether viewers could mistake it for real footage

    • Whether private information is involved

    • Whether you have permission to use the source material

    • Whether products, places, and procedures are accurate

    • Whether disclosure is required

    • Whether the video could cause harm or confusion

    • Whether commercial use is permitted

    The person who creates and publishes the video remains responsible for deciding whether it is suitable.

    Use Source Material You Own or Have Permission to Use

    Text-to-video normally begins with written instructions, but a project may also involve:

    • Photographs

    • Logos

    • Character designs

    • Product images

    • Music

    • Voice recordings

    • Scripts

    • Reference videos

    • Client material

    • Brand assets

    Do not assume that material found online can be copied into an AI project.

    Before using source material, confirm that:

    • You created it

    • You purchased an appropriate licence

    • You received permission

    • It is supplied by an authorized client

    • Its licence permits the intended use

    • Any required attribution is provided

    Keep a copy of the permission, licence, receipt, or source page with the project records.

    Obtain Permission Before Representing a Real Person

    A text-to-video prompt can create a realistic person or imitate someone’s appearance.

    Do not make a real person appear to:

    • Say something they did not say

    • Endorse a product they did not endorse

    • Participate in an event that never occurred

    • Perform an embarrassing or harmful action

    • Give medical, financial, political, or legal advice

    • Appear in advertising without permission

    Obtain appropriate permission before using a real person’s:

    • Name

    • Face

    • Body

    • Photograph

    • Voice

    • Personal story

    • Recognizable clothing or surroundings

    • Realistic likeness

    When a real identity is unnecessary, use a clearly fictional adult character.

    For example:

    Create a fictional adult teacher explaining a simple idea in a bright classroom. Do not resemble a known or real person.

    Take Extra Care with Children

    Do not upload or generate identifying material involving children without appropriate permission and a legitimate purpose.

    Avoid including:

    • Full names

    • Home addresses

    • School names

    • Uniform details

    • Personal documents

    • Medical information

    • Daily schedules

    • Exact locations

    • Private family photographs

    Use fictional or generic educational visuals when a real child is not necessary.

    Review the complete background because identifying details may appear on signs, screens, clothing, or documents.

    Remove Private and Confidential Information

    Do not include private information in prompts, uploads, screenshots, or generated videos unless it is necessary and properly protected.

    Examples include:

    • Home addresses

    • Phone numbers

    • Email addresses

    • Account numbers

    • Passwords

    • Identification documents

    • Licence plates

    • Medical records

    • Employment records

    • Financial information

    • Private client material

    • Confidential business plans

    • Unpublished products

    Before publishing, pause the video at different points and examine:

    • Computer screens

    • Documents

    • Signs

    • Packaging

    • Background photographs

    • Vehicles

    • Reflections

    • Name badges

    • Mobile devices

    Blur, crop, replace, or remove sensitive details.

    Check the Project’s Privacy Settings

    A project stored inside an online account is not automatically confidential. [17]

    Before entering sensitive information, review the provider’s current settings for:

    • Project visibility

    • Sharing

    • Team access

    • Data retention

    • Content review

    • Training preferences

    • Deletion

    • Public galleries

    • Download links

    Do not use confidential client or personal information until you understand how the selected service handles it.

    For sensitive projects, use anonymous descriptions and remove unnecessary identifying information.

    Review the Provider’s Current Terms

    AI video services may have different rules concerning:

    • Ownership

    • Commercial use

    • Uploaded material

    • Generated output

    • Restricted content

    • Real-person likenesses

    • Voice generation

    • Data retention

    • Public sharing

    • Watermarks

    • Attribution

    • Account level

    • Selected models

    These conditions can change.

    Review the current official terms before using a generated video for:

    • Advertising

    • Client work

    • Paid courses

    • Monetized videos

    • Business websites

    • Product promotions

    • Resale

    • Political communication

    • Public campaigns

    Keep a dated record of the terms or guidance you reviewed for an important project.

    Confirm Commercial-Use Permission

    A video created under a free or trial plan may not have the same usage conditions as one created under a paid plan. [7, 8, 9]

    Before commercial publication, check:

    • Whether commercial use is permitted

    • Whether the selected plan affects usage rights

    • Whether attribution is required

    • Whether a watermark must remain

    • Whether uploaded sources permit commercial use

    • Whether music and voices have separate conditions

    • Whether client delivery is permitted

    • Whether resale or template use is permitted

    Do not describe a video as commercially cleared unless you have verified all relevant elements.

    Avoid Misleading Viewers

    A realistic generated clip may look like recorded footage.

    Viewers could mistakenly believe that:

    • An event happened

    • A person was present

    • A product was tested

    • A location exists exactly as shown

    • A customer gave a testimonial

    • A procedure is safe

    • A public figure made a statement

    • A news event was recorded

    Do not present generated visuals as evidence of a real event.

    Provide context when there is a meaningful risk of misunderstanding.

    For example:

    This is an AI-generated illustration created for educational purposes.

    The disclosure should be clear enough for the intended audience.

    Add AI Disclosure When Required

    Disclosure rules may depend on:

    • The publishing platform

    • How realistic the video appears

    • Whether a real person is represented

    • Whether the video is advertising

    • The subject matter

    • Local requirements

    • Client policies

    • The intended audience

    Possible disclosure wording includes:

    This video includes AI-generated visuals.

    Or:

    This fictional demonstration was created using artificial intelligence.

    Do not hide important disclosure inside tiny text or an unrelated description.

    Place it where viewers can reasonably notice it.

    Do Not Create False Testimonials or Endorsements

    Do not generate a person who appears to recommend:

    • A product

    • A service

    • A business

    • A political candidate

    • A medical treatment

    • An investment

    • A course

    • A charity

    unless the endorsement is authentic and properly authorized.

    A fictional character should not be presented in a way that suggests a real customer gave the statement.

    For fictional advertising demonstrations, make the context clear and avoid unsupported claims.

    Verify Product Accuracy

    AI-generated products may look convincing while containing incorrect features.

    Before using a product video, check:

    • Shape

    • Dimensions

    • Materials

    • Buttons

    • Ports

    • Labels

    • Packaging

    • Accessories

    • Colour

    • Operation

    • Safety features

    Do not show an AI-generated product performing an action that the real product cannot perform.

    For factual product demonstrations, use verified photographs, approved manufacturer material, or real footage.

    Verify Educational and Technical Information

    Take special care when creating videos involving:

    • Medicine

    • Health

    • Safety

    • Machinery

    • Construction

    • Electricity

    • Vehicles

    • Finance

    • Law

    • Emergency procedures

    • Food preparation

    • Childcare

    A visually realistic procedure may still be dangerous or incorrect.

    Do not rely on an AI-generated video as the only source for technical instruction.

    Verify the process using appropriate professional or authoritative sources.

    Do Not Use Generated Content as Documentary Evidence

    Text-to-video generation can create events that never happened.

    It should not be presented as:

    • Security footage

    • News footage

    • Court evidence

    • Scientific evidence

    • Historical documentation

    • Proof of product performance

    • Proof of a person’s actions

    • Proof of an accident

    • Proof of a location or condition

    Use genuine, verifiable records when evidence is required.

    Check Brands, Logos, and Packaging

    Generated videos may include recognizable or invented branding.

    Review the clip for:

    • Company logos

    • Product names

    • Store signs

    • Clothing brands

    • Vehicle badges

    • Packaging

    • Interface designs

    • Trademark-like symbols

    Remove unintended branding when it is not necessary.

    Do not imply that a brand sponsored, approved, or participated in the video unless that is accurate.

    Review Visible Text

    AI-generated text may be incorrect, distorted, or misleading.

    Inspect:

    • Signs

    • Screens

    • Documents

    • Packaging

    • Licence plates

    • Posters

    • Clothing

    • Background labels

    When accurate wording is required, generate the scene without visible text and add it manually in a video editor.

    Check all manually added text for:

    • Spelling

    • Grammar

    • Numbers

    • Names

    • Dates

    • Links

    • Claims

    Verify Music and Sound Rights

    A text-generated video may contain automatic music or sound.

    Before publishing, determine whether you have permission to use:

    • Generated music

    • Uploaded music

    • Background tracks

    • Sound effects

    • Voice recordings

    • Narration

    • Samples

    • Remixed audio

    Record:

    • Source

    • Creator or provider

    • Licence

    • Download date

    • Intended use

    • Attribution requirement

    Do not assume that a track is safe to use because it was available inside an application.

    Obtain Permission for Voices

    A person’s voice can be identifying even when their face is not shown.

    Do not imitate or clone a real person’s voice without appropriate permission. [18]

    Take particular care with:

    • Family members

    • Employees

    • Clients

    • Teachers

    • Medical professionals

    • Public figures

    • Children

    • Deceased people

    When no real voice is necessary, use an authorized generic voice or record original narration.

    Review the complete spoken content before publication.

    Check All Claims

    A video may contain written, spoken, or visual claims.

    Examples include:

    • “This product works instantly.”

    • “This method is completely safe.”

    • “This service guarantees results.”

    • “This treatment cures the condition.”

    • “This investment cannot lose money.”

    • “This is the real location.”

    • “This person recommends the product.”

    Verify every important claim.

    Do not use attractive AI visuals to make unsupported statements appear more believable.

    Avoid Harmful Stereotypes

    Review fictional people and scenes for unnecessary stereotypes involving:

    • Age

    • Disability

    • Ethnicity

    • Religion

    • Gender

    • Nationality

    • Employment

    • Income

    • Education

    • Appearance

    Use respectful descriptions and include diversity only where it fits naturally.

    Do not assign negative behaviour to a group without a legitimate and carefully supported reason.

    Make the Video Accessible

    Responsible publishing also includes accessibility. [15]

    Consider adding:

    • Accurate captions

    • A written explanation

    • Clear narration

    • High-contrast text

    • Readable font sizes

    • Adequate display time

    • Descriptive surrounding content

    • Transcripts when appropriate

    Do not rely entirely on colour, sound, or fast animation to communicate essential information.

    Avoid flashing or rapidly changing effects that could make the video difficult or unsafe for some viewers.

    Review the Video for Emotional Impact

    A generated clip may unintentionally appear:

    • Frightening

    • Disturbing

    • Violent

    • Misleading

    • Humiliating

    • Discriminatory

    • Inappropriate for children

    • Insensitive to a serious event

    Consider the intended audience and publishing context.

    A visual that is suitable for fictional entertainment may not be suitable for education, advertising, news, or a family website.

    Use Extra Care with News and Political Content

    A generated video involving a public event, election, government, conflict, or political figure can easily mislead viewers. [11, 12, 16]

    Do not create or share realistic footage that falsely appears to document:

    • A speech

    • A protest

    • An arrest

    • A military event

    • An election event

    • A government announcement

    • A public emergency

    • A candidate’s behaviour

    Use clearly labelled illustrations when synthetic visuals are necessary for explanation.

    Verify the latest platform rules before publishing this type of content.

    Save the Complete Creation Record

    For every important video, save:

    • Original idea

    • Complete prompts

    • Prompt revisions

    • Platform

    • Model

    • Generation date

    • Settings

    • Generated versions

    • Selected clip

    • Source files

    • Source permissions

    • Music licences

    • Voice permissions

    • Review notes

    • Disclosure wording

    • Export settings

    • Publishing locations

    • Later corrections

    A complete record helps demonstrate how the video was created and what checks were performed.

    Correct or Remove Problematic Content

    If you discover an important problem after publishing:

    1. Review the issue.

    2. Remove or unpublish the video when necessary.

    3. Correct the inaccurate or harmful section.

    4. Replace the affected file.

    5. Update the disclosure or explanation.

    6. Record what was changed.

    7. Notify affected viewers or clients when appropriate.

    Do not leave misleading content online simply because it has already been published.

    Responsible Text-to-Video Checklist

    Before publishing, confirm:

    • You own or have permission to use all source material.

    • Real people were used with appropriate permission.

    • Children’s identifying information was not exposed.

    • Private and confidential information was removed.

    • Project privacy settings were checked.

    • Current provider terms were reviewed.

    • Commercial-use conditions were confirmed when relevant.

    • The video cannot easily be mistaken for genuine evidence.

    • AI disclosure was added when required.

    • No false testimonial or endorsement was created.

    • Product and technical details were verified.

    • Visible text was reviewed or added manually.

    • Brands and logos were handled appropriately.

    • Music, sounds, and voices were authorized.

    • Spoken and visual claims were checked.

    • Captions and accessibility support were included.

    • The complete clip was reviewed for harmful or misleading content.

    • The creation and publishing records were saved.

    Responsible use does not mean avoiding AI video generation. It means using the technology with permission, transparency, accuracy, careful review, and respect for the people who may appear in or watch the final video.

    Figure 13. Responsible text-to-video creation requires permission, privacy protection, accurate information, suitable disclosure, authorized media, and complete records.

    Figure 13 summarizes the main responsibilities involved in creating and publishing text-generated videos. Creators should verify their sources, obtain permission from real people, remove private information, review provider terms, check products and claims, disclose synthetic content when required, confirm voice and music rights, and save the complete creation record.

    Frequently Asked Questions About Text-to-Video Generation

    What Is Text-to-Video Generation?

    Text-to-video generation is the process of creating a moving video from written instructions.

    The user describes:

    • The subject

    • The setting

    • The action

    • The camera

    • The lighting

    • The visual style

    • The desired format

    An AI video generator interprets these instructions and creates a short sequence of moving frames.

    Do I Need to Upload an Image?

    No. Text-to-video generation can begin with a written prompt only.

    This is different from image-to-video generation, which starts with an uploaded or generated reference image.

    Text-to-video provides more creative freedom, but the creator normally has less control over the exact appearance of the first frame.

    Use image-to-video when a particular subject, character, product, or composition must be preserved more closely.

    Can ChatGPT Generate the Finished Video?

    ChatGPT can help you:

    • Develop the idea

    • Write the prompt

    • Organize the scenes

    • Improve movement instructions

    • Troubleshoot weak results

    • Prepare narration and captions

    • Create an editing plan

    The finished video must then be generated through a compatible AI video-generation feature or platform.

    Available features can vary by account, plan, device, region, and current product availability.

    How Long Should My First Text-to-Video Clip Be?

    Begin with a short clip of approximately four to eight seconds, depending on the options available in the selected tool.

    Short clips are easier to:

    • Generate

    • Review

    • Compare

    • Revise

    • Trim

    • Organize

    Longer clips create more opportunities for objects, faces, backgrounds, lighting, and camera movement to become unstable.

    Can I Create a Long Video from One Prompt?

    Some tools may support longer generations, but asking one prompt to create a complete story can reduce consistency and control.

    A more practical beginner method is to:

    1. Divide the story into short scenes.

    2. Write one prompt for each scene.

    3. Generate each clip separately.

    4. Select the strongest versions.

    5. Combine them in a video editor.

    6. Add narration, captions, music, and transitions.

    This method makes it easier to replace or improve one weak scene without recreating the entire video.

    How Detailed Should a Text-to-Video Prompt Be?

    The prompt should be detailed enough to explain the important visual and movement instructions, but not so long that it becomes confusing.

    A useful prompt normally includes:

    • One main subject

    • Important appearance details

    • One setting

    • One main action

    • Environmental movement

    • One camera view

    • One camera movement

    • Lighting

    • Visual style

    • Mood

    • Duration

    • Aspect ratio

    • Stability instructions

    • Important details to avoid

    Remove repeated adjectives, unnecessary objects, several actions, and conflicting camera directions.

    Should I Describe What Remains Still?

    Yes.

    When only part of the scene should move, state this clearly.

    For example:

    The bicycle remains completely stationary beside the fence. Only the grass, small wildflowers, clouds, and camera move.

    Without this distinction, the AI may move or distort the main subject.

    What Is the Best Camera Movement for Beginners?

    A static camera is often the easiest option because it reduces the number of changing visual elements.

    Other beginner-friendly movements include:

    • Slow push forward

    • Slow pull backward

    • Gentle pan left

    • Gentle pan right

    • Smooth side tracking

    Use one main camera movement in the first generation.

    Avoid combining zooming, rotation, tracking, panning, and vertical movement inside one short clip.

    Why Does the AI Ignore Part of My Prompt?

    The model may ignore or reinterpret instructions when the prompt contains:

    • Too many objects

    • Several actions

    • Conflicting descriptions

    • Multiple camera movements

    • Repeated restrictions

    • Unnecessary background details

    • A long sequence of events

    Simplify the prompt and prioritize the subject, action, camera, and important stability requirements.

    Generate separate clips for separate actions.

    Why Do Objects Change Shape?

    AI video generators create a sequence of frames and must preserve the subject across time.

    Complex shapes, movement, camera changes, and longer durations can make this difficult.

    To reduce the problem:

    • Use a simple subject.

    • Keep the clip short.

    • Use restrained movement.

    • Use a stable camera.

    • Add precise consistency instructions.

    • Trim the clip before the distortion begins.

    • Use an authorized reference image when greater control is needed.

    A prompt cannot guarantee perfect object consistency.

    Why Do Faces Change During the Video?

    Faces may change when:

    • The person turns quickly.

    • The camera moves close to the face.

    • The person speaks.

    • Strong expressions are requested.

    • Lighting changes.

    • The clip is long.

    • The scene contains several people.

    Use short clips, subtle facial movement, consistent lighting, and medium framing.

    When exact identity is necessary, use properly authorized reference material or real footage.

    Can Text-to-Video Create Accurate Hands?

    It may create acceptable hands in simple scenes, but detailed hand and object interactions can still produce errors.

    For better results:

    • Use one slow hand movement.

    • Avoid unnecessary close-ups.

    • Keep unused hands resting naturally.

    • Avoid several objects.

    • Review every frame.

    • Use real footage when exact hand movements are important.

    Why Is the Generated Text Misspelled?

    Text-to-video models are primarily creating visual frames and movement rather than typesetting accurate words across time.

    Signs, labels, screens, and packaging may contain:

    • Misspellings

    • Random symbols

    • Changing letters

    • Incorrect numbers

    • Distorted logos

    Ask the generator to avoid visible text and add accurate wording manually in a video editor.

    Can I Use the Same Prompt to Recreate the Same Video?

    Not necessarily.

    The same prompt may create different:

    • Subjects

    • Backgrounds

    • Camera views

    • Colours

    • Lighting

    • Movement

    • Compositions

    Save every useful clip and record:

    • The exact prompt

    • Selected model

    • Settings

    • Date

    • Aspect ratio

    • Duration

    • Resolution

    • Filename

    Some tools may offer additional controls that improve repeatability, but exact reproduction should not be assumed.

    How Can I Keep a Character Consistent Across Several Scenes?

    Create a consistency sheet that records the character’s:

    • Age range

    • Face

    • Hairstyle

    • Skin tone

    • Clothing

    • Body proportions

    • Accessories

    • Visual style

    • Lighting

    • Camera height

    Repeat the same core description in every scene prompt.

    When permitted and available, use the same authorized reference image or character-reference feature.

    Even with these steps, separate generations may not produce a perfectly identical character.

    Should I Use Prompt Enhancement?

    Prompt enhancement can help expand a short description, but it may also add details you did not request.

    Review whether it introduced:

    • Extra people

    • Vehicles

    • Animals

    • Buildings

    • Dramatic weather

    • Additional camera movement

    • A different style

    • A different time of day

    Save the original and enhanced prompts separately.

    For a controlled test, change only one factor at a time.

    How Many Versions Should I Generate?

    There is no fixed number.

    Generate enough versions to find a usable result without repeatedly spending time or credits on small imperfections.

    A practical process is:

    1. Generate one test.

    2. Record what worked.

    3. Identify the largest problem.

    4. Make one focused revision.

    5. Generate one more version.

    6. Compare the complete clips.

    7. Stop when editing or another method becomes more practical.

    Do not assume that the newest generation is automatically the best.

    Should I Generate Several Versions at the Same Time?

    Generating several versions can provide useful choices, but it may also consume credits quickly.

    For a beginner project, generating one version at a time makes it easier to:

    • Review carefully

    • Record the exact problem

    • Make a controlled correction

    • Understand which change affected the result

    Check the estimated generation cost before requesting multiple outputs.

    Does a Higher Resolution Produce Better Movement?

    Higher resolution may improve sharpness and visible detail, but it does not automatically improve:

    • Object consistency

    • Camera movement

    • Face stability

    • Hand accuracy

    • Background stability

    • Physical realism

    • Correct text

    Test the prompt and motion at a practical resolution before creating a more expensive final version.

    What Aspect Ratio Should I Use?

    Choose the aspect ratio according to the publishing destination.

    16:9 landscape: WordPress, YouTube, websites, presentations, and standard video

    9:16 vertical: YouTube Shorts, Instagram Reels, TikTok, and mobile-first content

    1:1 square: Square social-media posts

    4:5 portrait: Instagram and Facebook feeds

    For a standard AI Mastery article demonstration, use 16:9 landscape.

    Can I Change a Landscape Video into a Vertical Video?

    Yes, but converting 16:9 landscape to 9:16 vertical may crop important content.

    The conversion may remove:

    • Parts of the subject

    • Hands or feet

    • Background movement

    • Titles

    • Captions

    • Objects near the sides

    A better approach may be to create a separate vertical generation or editing project.

    Review every platform-specific version individually.

    Do I Need a Video Editor?

    A video editor is strongly recommended.

    Editing allows you to:

    • Trim weak openings and endings

    • Arrange several clips

    • Add accurate text

    • Add narration

    • Correct captions

    • Add music and sound

    • Adjust timing

    • Create transitions

    • Export the correct format

    • Prepare different platform versions

    AI generation creates the source material. Editing prepares it for viewers.

    Can I Add Narration and Captions Later?

    Yes. Adding narration and captions during editing usually provides more control than trying to generate accurate speech and visible text inside the original scene.

    Review:

    • Pronunciation

    • Factual accuracy

    • Caption spelling

    • Timing

    • Volume

    • Music level

    • Accessibility

    Automatically generated captions should always be checked before publication.

    Can I Use AI-Generated Music or Voices?

    Possibly, but the permitted use depends on the provider, plan, model, licence, source material, and publishing purpose.

    Before publishing, verify:

    • Commercial-use conditions

    • Voice permissions

    • Music permissions

    • Attribution requirements

    • Platform rules

    • Client requirements

    Do not imitate a real person’s voice without appropriate authorization.

    Can I Use an AI-Generated Video Commercially?

    Commercial-use conditions vary. [7, 8, 9]

    Check:

    • The current provider terms

    • Your subscription plan

    • The model used

    • Source-material rights

    • Music and voice rights

    • Real-person permissions

    • Watermark or attribution conditions

    • Advertising rules

    • Publishing-platform requirements

    Keep a dated record of the conditions you reviewed.

    Do I Need to Disclose That the Video Was AI-Generated?

    Disclosure may be required depending on: [11, 12]

    • The publishing platform

    • The realism of the video

    • Whether a real person is represented

    • Whether the content could mislead viewers

    • The subject matter

    • Advertising rules

    • Local requirements

    • Client policies

    A suitable statement may be:

    This video includes AI-generated visuals.

    Check the current requirements before publication.

    Can I Use a Real Person in a Text-to-Video Prompt?

    Using a real person’s name, appearance, photograph, or voice may involve consent, privacy, platform-policy, and disclosure requirements. [16, 18]

    Do not make someone appear to:

    • Say something they did not say

    • Endorse a product

    • Participate in a fictional event

    • Perform a harmful or embarrassing action

    • Provide professional advice they did not provide

    Use a fictional adult character when a real identity is not necessary.

    Is Text-to-Video Suitable for Product Demonstrations?

    It may be suitable for creative concepts, mock-ups, or general promotional ideas.

    It is less suitable when viewers need to see:

    • Exact controls

    • Genuine dimensions

    • Real materials

    • Verified performance

    • Correct safety features

    • Accurate assembly

    • Actual packaging

    Use real footage or authorized product material when factual accuracy matters.

    Is Text-to-Video Suitable for Medical, Safety, or Technical Instructions?

    Use extreme caution.

    A generated video may show a procedure that looks realistic but is incomplete, inaccurate, or unsafe.

    For high-stakes instruction, use:

    • Verified information

    • Qualified professional review

    • Real demonstrations

    • Approved diagrams

    • Authoritative sources

    Do not rely on synthetic video as the only instructional evidence.

    What Should I Do When the Video Is Almost Correct?

    Identify whether the remaining problem can be corrected more efficiently through editing.

    Editing may solve:

    • A weak opening

    • A distorted final second

    • Excessive empty time

    • Missing titles

    • Caption errors

    • Music problems

    • Minor brightness differences

    Regenerate only when the problem affects the essential subject, action, camera, or accuracy.

    When Should I Stop Regenerating?

    Stop when:

    • A strong usable section already exists.

    • The remaining problem can be trimmed.

    • Editing can correct the issue.

    • Another tool would provide better control.

    • A reference image is needed.

    • Real footage is more appropriate.

    • New attempts are not producing meaningful improvement.

    • The cost is no longer reasonable for the project.

    A shorter stable clip is usually better than a longer unstable one.

    What Files Should I Save?

    For an important project, save:

    • Original idea

    • Scene plan

    • Complete prompts

    • Prompt revisions

    • Model and settings

    • Generated versions

    • Review notes

    • Selected clips

    • Edited project

    • Narration

    • Caption files

    • Music and sound sources

    • Licences and permissions

    • Final exports

    • Thumbnail

    • Publishing record

    Clear records make future updates and corrections easier.

    Figure 14. Answers to common beginner questions can help users choose the correct text-to-video workflow, format, and review process.

    Figure 14 provides a quick decision guide for common text-to-video questions. It helps beginners decide when to use text-only generation, when to use a reference image or real footage, how long the first clip should be, which aspect ratio to choose, and when to regenerate or continue with editing.

    Key Takeaways

    Text-to-video generation allows you to create a short moving video from a written description without starting with an uploaded image.

    Remember these important points:

    • Begin with one simple video idea.

    • Use one main subject, one setting, and one main action.

    • Explain what should move and what should remain still.

    • Choose one camera view and one main camera movement.

    • Describe the lighting, visual style, mood, duration, and aspect ratio.

    • Keep the most important instructions clear and organized.

    • Avoid unnecessary objects, repeated descriptions, and conflicting directions.

    • Start with a short clip of approximately four to eight seconds when the selected tool permits it.

    • Use a static camera or slow controlled movement for the first test.

    • Choose the aspect ratio before generating the video.

    • Use 16:9 for WordPress, YouTube, websites, and presentations.

    • Use 9:16 for Shorts, Reels, TikTok, and other vertical platforms.

    • Treat the first generation as a draft rather than a finished video.

    • Watch the complete clip instead of judging only the thumbnail or opening frame.

    • Review the subject, movement, camera, background, lighting, opening, and ending separately.

    • Record which details worked before revising the prompt.

    • Identify the largest problem and correct one instruction at a time.

    • Keep the model, duration, format, resolution, and other settings unchanged during controlled comparisons.

    • Save every useful prompt and generated version with a descriptive filename.

    • Do not assume that a newer generation is automatically better.

    • Trim weak openings or endings when the strongest part of the clip is already usable.

    • Create longer videos by generating several short scenes and combining them in a video editor.

    • Use a consistency sheet when the same character, object, setting, or visual style appears across several scenes.

    • Add accurate titles, captions, signs, and labels during editing rather than relying on generated visible text.

    • Review automatically generated narration, music, dialogue, and sound effects before publication.

    • Verify products, locations, technical procedures, and factual claims.

    • Obtain permission before using a real person’s appearance, photograph, name, or voice.

    • Remove private, confidential, or identifying information.

    • Check the provider’s current privacy, commercial-use, and publishing terms.

    • Confirm that music, voices, photographs, logos, and other source materials are authorized.

    • Add an AI disclosure when required or when realistic synthetic content could mislead viewers.

    • Keep the original generated clip and save a high-quality master copy.

    • Test the exported video on the actual publishing platform.

    • Preserve the complete creation and publishing record.

    Text-to-video works best when creative variation is acceptable. When exact identity, product accuracy, genuine evidence, or precise technical movement is essential, use authorized reference material, controlled animation, or verified real footage.

    Figure 15. The essential text-to-video workflow begins with a simple idea and ends with careful editing, review, and responsible publication.

    Figure 15 summarizes the main lessons from this guide. A successful text-to-video project requires a clear scene, an organized prompt, suitable generation settings, complete video review, focused revisions, careful editing, responsible-use checks, and well-organized creation records.

    Final Tip

    Do not try to create a perfect, complicated video with your first prompt.

    Begin with:

    • One main subject

    • One simple setting

    • One clear action

    • One environmental movement

    • One camera movement

    • One short clip

    Generate the first version and watch it from beginning to end.

    Then ask:

    What is the single most important problem in this clip?

    Protect the details that already look correct and revise only the instruction connected to that problem.

    For example:

    Keep the bicycle, country road, wooden fence, sunrise lighting, colours, composition, and visual style unchanged. Correct only the front wheel. Keep it perfectly circular, correctly aligned, equal in size to the back wheel, and visually unchanged throughout every frame.

    This focused approach is usually more effective than rewriting the complete prompt after every generation.

    Remember:

    Start simply, review carefully, and improve specifically.

    The goal is not to make the AI follow every imagined detail perfectly. The goal is to create the strongest usable clip through clear planning, controlled testing, human judgment, and careful editing.

    Sources and References

    Citations in square brackets refer to the numbered official sources below. These pages were reviewed on July 28, 2026. Features, prices, limits, policies, and plan conditions may change, so check the current official page before an important project or publication.

    [1] Runway. Text to Video Prompting Guide. Explains that text-to-video prompts should clearly describe what appears in the frame and how the elements move. Accessed July 28, 2026.

    [2] Runway. Introduction to Prompting. Recommends reviewing each generation and refining the prompt through an iterative process. Accessed July 28, 2026.

    [3] Runway. Getting Started with Generative Video. Describes a general workflow for creating a session, prompting, generating, reviewing, and iterating. Accessed July 28, 2026.

    [4] Adobe. Writing Effective Text Prompts for Video Generation. Provides official prompt-writing guidance for video generation in Adobe Firefly. Accessed July 28, 2026.

    [5] Adobe. Generate Videos Using Text Prompts. Explains how text prompts can define video content, emotion, setting, camera angle, and camera movement. Available controls depend on the selected model. Accessed July 28, 2026.

    [6] Runway. How to Create Longer Videos and Films. Explains how short generated clips can be planned and combined into longer-form video projects. Accessed July 28, 2026.

    [7] Runway. Usage Rights. Describes Runway-specific ownership and commercial-use information. Users should also review the current terms and the rights attached to any uploaded material. Accessed July 28, 2026.

    [8] Adobe. Adobe Firefly FAQ. Provides current information about Adobe Firefly features, models, data practices, and product-specific conditions. Accessed July 28, 2026.

    [9] Adobe. Generative Credits FAQ. Explains generative-credit use and Adobe-specific commercial-use conditions, including important distinctions between Adobe and partner models. Accessed July 28, 2026.

    [10] Adobe. Known Limitations in Firefly. Lists current known limitations. The specific items can change as Firefly features are updated. Accessed July 28, 2026.

    [11] YouTube Help. Disclosing Use of Generative AI Content. Explains when creators should use YouTube’s altered or synthetic content disclosure. Accessed July 28, 2026.

    [12] YouTube Help. Understanding “How This Content Was Made” Disclosures on YouTube. Explains how YouTube presents information about content origin and meaningful alteration. Accessed July 28, 2026.

    [13] WordPress.com Support. Video Block. Explains how to upload or embed video, add text tracks, choose a poster image, and configure playback settings. Accessed July 28, 2026.

    [14] WordPress.com Support. Working with Video. Summarizes the available methods for adding uploaded and externally hosted video to a WordPress.com site. Plan requirements may change. Accessed July 28, 2026.

    [15] W3C Web Accessibility Initiative. Captions/Subtitles. Explains that captions provide synchronized text for speech and important non-speech audio information. Accessed July 28, 2026.

    [16] YouTube Help. Impersonation Policy. Explains that AI disclosure does not permit misleading impersonation and that voice or likeness imitation may violate policy. Accessed July 28, 2026.

    [17] Runway. Understanding Runway’s Security and Privacy Standards. Provides Runway-specific information about asset privacy and sharing. Other providers may use different defaults and controls. Accessed July 28, 2026.

    [18] Runway. Voice Verification. States that explicit consent is required when a voice is submitted for custom voice training in Runway. Accessed July 28, 2026.

    [19] OpenAI. Prompt Engineering Best Practices for ChatGPT. Recommends clear, specific instructions and iterative refinement when working with ChatGPT. Accessed July 28, 2026.

    Continue Learning

    Continue building your AI video skills with these related guides:

    How to Create AI Videos with ChatGPT: Beginner Step-by-Step Guide (2026)

    Best AI Video Tools for Beginners: Complete Guide (2026)

    How to Create AI Videos from Images: Beginner Step-by-Step Guide (2026)

    How to Edit AI-Generated Videos: Beginner Step-by-Step Guide (2026)

    These guides explain how to plan AI videos with ChatGPT, choose a suitable video-generation tool, animate a starting image, and prepare generated clips for publication.

  • Best AI Video Tools for Beginners: Complete Guide (2026)

    Best AI Video Tools for Beginners: Complete Guide (2026)

    Estimated reading time: 75–95 minutes
    Last updated: July 28, 2026

    Before Learning

    These guides provide useful background before you compare AI video tools:

    ChatGPT Basics for Beginners: Complete Guide (2026)

    Prompt Engineering for Beginners: Complete Guide (2026)

    AI Image Generation for Beginners: Complete Guide (2026)

    What You’ll Learn

    By the end of this guide, you will know:

    • What an AI video tool is and what it can do

    • The difference between text-to-video, image-to-video, video-to-video, and AI-assisted editing

    • Which features beginners should compare before selecting a tool

    • Which AI video tools are easiest for complete beginners

    • Which tools are suitable for social media, YouTube, education, websites, and business marketing

    • How video quality, duration, resolution, and aspect ratio differ between tools

    • How free plans, trials, credits, and paid plans generally work

    • How to check commercial-use rights before publishing a generated video

    • How to protect personal information and uploaded images

    • How to compare the strengths and limitations of each tool

    • How to select the best AI video generator for your needs and budget

    Modern services may offer several video-generation models inside one workspace. For example, Adobe Firefly currently supports its own video model and multiple partner models, while Canva offers prompt-based video clips with synchronized audio. Features and availability can change, so this article will rely on current official information rather than outdated tool lists. [4][3][18]

    Introduction

    AI video tools can create short moving clips from written prompts, still images, or existing footage. Some platforms also include editing features that allow users to trim clips, replace backgrounds, adjust lighting, add sound, or combine several scenes into a longer video. [1]

    The number of available tools has grown quickly. Some services focus on realistic cinematic video, while others are designed for social media, advertising, animation, product demonstrations, or professional production. Certain platforms now provide access to several video-generation models inside one workspace, allowing users to compare results without opening a separate service for every model. [3][4]

    This variety is useful, but it can also confuse beginners. A tool may produce impressive demonstrations while still being too complicated, expensive, slow, or limited for an ordinary beginner. The most advanced tool is not automatically the best choice.

    A beginner should consider practical questions such as:

    • Is the interface easy to understand?

    • Can it generate video from text, images, or both?

    • Does it support the required aspect ratio?

    • How long are the generated clips?

    • Does it include editing and audio features?

    • How many credits does each generation use?

    • Can the finished video be used commercially?

    • What happens to uploaded images and videos?

    • Does the tool place a watermark on exported clips?

    Some platforms provide simple prompt-based generation, while others offer detailed controls for camera movement, reference images, resolution, visual style, and editing. Adobe Firefly, for example, currently supports text-to-video, image-to-video, camera controls, multiple aspect ratios, and access to Adobe and partner video models. Runway supports text-to-video, image-to-video, video-to-video, and prompt-based editing of existing footage. [1]

    Current Information Note: AI video features, model names, prices, credits, free trials, output limits, and account availability can change frequently. Always check the provider’s official website before paying for a plan or beginning an important project.

    This guide will compare the leading beginner-friendly AI video tools using practical criteria rather than promotional claims. The goal is to help you choose a tool that matches your experience, budget, and intended type of video.

    Figure 1. The main factors beginners should compare when choosing an AI video tool.

    Figure 1 shows that choosing an AI video generator involves more than comparing visual quality. Beginners should also consider ease of use, supported creation methods, editing features, output formats, costs, privacy, and commercial-use conditions.

    What Is an AI Video Tool?

    An AI video tool is software that uses artificial intelligence to create, animate, transform, or edit video content.

    Instead of filming every scene with a camera, you may provide the tool with:

    • A written description

    • A still image

    • An existing video

    • A script

    • A reference image

    • Instructions describing movement, camera direction, lighting, or style

    The tool processes these instructions and produces a video clip or modifies existing footage.

    Different AI video tools perform different jobs. Some focus on generating realistic scenes, while others specialize in avatars, animation, editing, advertising, or social media content.

    AI Video Generators

    An AI video generator creates new moving footage from text or images.

    For example, you could enter:

    Create a six-second cinematic video of a small fishing boat moving across a calm lake at sunrise. Add gentle mist, slow water movement, and a smooth forward camera motion.

    A text-to-video tool attempts to create the entire scene from that description.

    With image-to-video, you upload a still image and describe how it should move. Adobe Firefly currently supports video generation from text prompts and static images, while Runway’s generative-video models also support text-to-video and image-to-video workflows. [1][2]

    AI Video Editing Tools

    AI-assisted editing tools work with footage that already exists.

    Depending on the platform, they may help you:

    • Remove backgrounds

    • Change the visual style

    • Add captions

    • Remove pauses

    • Improve audio

    • Resize the video

    • Extend a clip

    • Remove or replace objects

    • Create shorter clips from longer footage

    Runway’s current Edit Studio uses Aleph 2.0 for prompt-based editing of existing footage. Older Gen-3 Alpha and Turbo video-to-video workflows were retired in July 2026. [14]

    These tools do not always create an entire video from nothing. Instead, they reduce the time and technical skill required to edit an existing video.

    AI Avatar Video Tools

    AI avatar tools create a digital presenter who speaks a supplied script.

    You normally:

    1. Select an avatar.

    2. Enter or upload a script.

    3. Choose a voice and language.

    4. Generate the presentation.

    5. Add supporting images, titles, or background elements.

    Avatar videos are commonly used for:

    • Training

    • Product explanations

    • Business presentations

    • Online courses

    • Customer instructions

    • Social media announcements

    Some platforms combine avatar creation with templates and traditional editing. Dedicated avatar platforms such as Synthesia focus on scripts, presenters, voices, captions, and multilingual delivery. [21]

    Multi-Model AI Video Platforms

    A multi-model platform allows users to access more than one AI video model from the same workspace.

    This can be useful because one model may be better at:

    • Realistic movement

    • Animation

    • Camera control

    • Character consistency

    • Product scenes

    • Fast generation

    • Stylized video

    The user can test different models without creating a separate editing project each time. Adobe Firefly, for example, provides access to Adobe’s own video technology and selected partner models. [3][4]

    However, different models may use different numbers of credits, support different settings, or have different commercial-use conditions. Always check which model is selected before generating a clip.

    The Difference Between a Video Platform and a Video Model

    Beginners often use the words tool, platform, and model as though they mean the same thing, but there is an important difference.

    AI video platform:
    The website or application where you enter prompts, upload files, organize projects, generate clips, and edit or download the results.

    AI video model:
    The artificial-intelligence system that interprets your instructions and produces the video.

    One platform may provide access to several models. Changing the selected model may change:

    • Video quality

    • Generation speed

    • Clip duration

    • Prompt interpretation

    • Available aspect ratios

    • Camera controls

    • Credit usage

    • Commercial-use conditions

    Therefore, when comparing AI video tools, check both the platform and the specific model being used.

    What an AI Video Tool Does Not Guarantee

    Even a powerful tool cannot guarantee:

    • A perfect result on the first attempt

    • Completely natural hands or body movement

    • Accurate text inside the video

    • Consistent characters across every scene

    • Exact product details

    • Stable backgrounds

    • Correct lip synchronization

    • Automatic permission to use every output commercially

    AI video creation normally involves generating, reviewing, revising, and editing several versions. The best tool is not the one that promises perfection. It is the one that gives you enough control to correct weak results.


    Figure 2. The main types of AI video tools and the tasks they perform.

    Figure 2 separates AI video tools into four practical groups: generators, editors, avatar tools, and multi-model platforms. Understanding these differences helps beginners avoid selecting a tool that does not support the type of video they want to create.

    Features Beginners Should Compare Before Choosing an AI Video Tool

    AI video tools can look similar on the surface, but their capabilities may differ considerably. Before paying for a plan, compare the features that affect the kind of video you want to create.

    Do not choose a tool only because its demonstration videos look impressive. A practical beginner tool should be understandable, affordable, and suitable for your intended platform.

    Ease of Use

    A beginner-friendly tool should have a clear workspace with understandable controls.

    Look for:

    • A visible prompt box

    • Simple upload controls

    • Clearly labelled video settings

    • An easy-to-find Generate button

    • A preview window

    • Basic editing controls

    • A clear download or export option

    • Helpful instructions or examples

    An advanced platform may provide more control, but it can also require more time to learn. A simpler platform may be a better starting point when your main goal is to create short social media, website, or educational videos.

    Before subscribing, test whether you can complete these basic actions without confusion:

    1. Start a new project.

    2. Enter a prompt.

    3. Upload an image.

    4. Choose the video format.

    5. Generate a clip.

    6. Review the result.

    7. Download or edit the video.

    A tool that makes these actions difficult may not be the best choice for a complete beginner.

    Supported Creation Methods

    Check how the tool can create video.

    The most useful options include:

    • Text-to-video

    • Image-to-video

    • Video-to-video

    • Script-to-avatar video

    • AI-assisted editing

    • Video extension

    • First-frame or last-frame control

    A tool does not need every feature to be useful. It only needs the features required for your project.

    For example:

    • Choose text-to-video when you want the AI to design the entire scene.

    • Choose image-to-video when you already have a strong starting image.

    • Choose video-to-video when you want to transform existing footage.

    • Choose an avatar tool when you need a digital presenter.

    • Choose AI-assisted editing when you already have footage that needs improvement.

    Adobe Firefly currently supports text-prompt video generation, image-guided generation, reference frames, resolution settings, aspect ratios, and multiple Adobe or partner video models. The exact controls can change according to the selected model. [3][1][2][4]

    Text-to-Video Quality

    Text-to-video quality refers to how well the tool converts written instructions into a moving scene.

    When testing a tool, examine whether it correctly follows:

    • The main subject

    • The location

    • The action

    • The camera movement

    • The lighting

    • The visual style

    • The requested mood

    • The aspect ratio

    • Stability instructions

    Do not judge quality from one attractive frame. Watch the entire clip.

    A video may begin well but develop problems such as:

    • Objects changing shape

    • Background flickering

    • Unnatural movement

    • Sudden camera changes

    • Incorrect lighting

    • Extra objects

    • Character inconsistency

    Use the same simple test prompt with several tools when possible. This gives you a fairer comparison than using a different prompt for every platform.

    Image-to-Video Control

    Image-to-video tools should let you upload a still image and describe how it should move.

    Check whether the platform allows you to control:

    • Subject movement

    • Background movement

    • Camera movement

    • Motion strength

    • Clip duration

    • Starting frame

    • Ending frame

    • Aspect ratio

    • Image cropping

    • Subject consistency

    Some tools allow only a starting image. Others allow both first and last keyframes, which can provide greater control over how the clip begins and ends. Adobe Firefly currently allows images to guide the first frame, last frame, or both in supported workflows. [3][2]

    A good image-to-video tool should animate the requested elements without unnecessarily changing the person, product, background, clothing, or composition.

    Video Resolution

    Resolution affects the number of pixels in the generated video.

    Common options may include:

    • 540p

    • 720p

    • 1080p

    • 4K on selected models or workflows

    Higher resolution can produce a sharper image, but it may also:

    • Use more credits

    • Take longer to generate

    • Produce a larger file

    • Require a higher-priced plan

    • Be unavailable on some models

    For learning and testing, a lower resolution may be sufficient. For a finished website, YouTube, presentation, or business video, higher resolution is generally preferable when the tool and budget permit it.

    Adobe states that its available resolutions and credit consumption vary according to the selected video model. Some partner-model options support resolutions up to 1080p or 4K, while other workflows default to 720p. [2][3][5]

    Do not assume that selecting the highest resolution will correct poor motion or an inaccurate prompt. Resolution improves image sharpness; it does not automatically fix generation errors.

    Aspect Ratio Options

    Aspect ratio describes the shape of the video.

    The most useful formats include:

    16:9 landscape: YouTube, websites, presentations, and standard video

    9:16 vertical: YouTube Shorts, Instagram Reels, TikTok, and mobile-first content

    1:1 square: Square social media posts and advertisements

    4:5 portrait: Instagram and Facebook feed posts

    21:9 ultra-wide: Selected cinematic or creative projects

    Choose the aspect ratio before generating the video. Changing it later may crop the subject or remove important parts of the composition.

    Different models inside the same platform may support different aspect ratios. Adobe’s documentation shows that available video formats can vary by model, with some supporting widescreen, square, vertical, portrait, landscape, or ultra-wide options. [1][3]

    For your AI Mastery website, 16:9 landscape is normally the strongest format for article demonstrations, featured visuals, YouTube videos, and desktop viewing.

    Clip Duration

    Many AI video tools generate short clips rather than complete long videos.

    A tool may offer clips of:

    • Four seconds

    • Five seconds

    • Eight seconds

    • Ten seconds

    • Twelve seconds

    • Longer durations in selected models or plans

    Available duration often depends on:

    • The selected model

    • The subscription plan

    • The output resolution

    • The generation method

    • Whether audio is included

    Adobe Firefly’s own video workflows commonly use five-second generations, while selected partner models available through Firefly may provide options such as five, eight, or ten seconds. [3][5]

    Short clips are not necessarily a weakness. Beginners can often produce a more stable longer video by generating several short scenes and combining them in an editor.

    Camera and Motion Controls

    Camera controls help determine how the viewer sees the scene.

    Useful options may include:

    • Static camera

    • Zoom in

    • Zoom out

    • Pan left

    • Pan right

    • Camera moving forward

    • Camera moving backward

    • Camera following the subject

    • Shot size

    • Camera angle

    • Motion strength

    • First-frame and last-frame guidance

    Some tools allow these controls through menus. Others require you to describe them in the prompt.

    Adobe Firefly currently offers camera-related controls such as shot size, shot angle, and motion presets in supported Firefly Video workflows. The available controls depend on the selected model. [3][1][2]

    For beginners, one slow camera movement is usually easier to control than several movements in the same short clip.

    Reference Images and Consistency Controls

    Reference images can help the AI understand the desired:

    • Character

    • Product

    • Clothing

    • Setting

    • Colour palette

    • Composition

    • Visual style

    • First frame

    • Final frame

    Reference controls are especially useful when creating several scenes that should look connected.

    However, uploading the same reference image does not guarantee perfect consistency. Check whether the tool also allows you to repeat descriptions, save styles, reuse settings, or control starting frames.

    For product videos, examine whether the generated clip preserves:

    • Shape

    • Colour

    • Packaging

    • Buttons

    • Labels

    • Materials

    • Size and proportions

    Do not use a generated product video for an advertisement when the tool changes important commercial details.

    Audio Generation

    Some platforms generate silent clips, while others can produce:

    • Dialogue

    • Ambient sound

    • Sound effects

    • Music

    • Narration

    • Synchronized audio

    Canva currently promotes prompt-generated video clips that may include synchronized audio, dialogue, and sound effects. Its workspace also provides editing features for refining the generated result. [18]

    Built-in audio can save time, but it should still be reviewed carefully.

    Listen for:

    • Incorrect words

    • Poor pronunciation

    • Unnatural voices

    • Music that is too loud

    • Audio that does not match the action

    • Poor lip synchronization

    • Sudden changes in volume

    • Unwanted background sounds

    A visually strong platform may still require a separate editor or narration tool for professional audio.

    Editing Features

    A complete video normally needs editing after generation.

    Useful built-in editing features include:

    • Trimming

    • Splitting clips

    • Rearranging scenes

    • Adding captions

    • Adding titles

    • Resizing

    • Removing backgrounds

    • Applying filters

    • Adjusting colour

    • Adding narration

    • Adding music

    • Adding transitions

    • Exporting different formats

    Canva combines AI-generated video with its broader editing workspace, including visual elements, filters, effects, templates, background tools, and other design features. [18]

    A generator with basic visual quality but strong editing tools may be more useful to a beginner than a generator with excellent clips but no practical way to assemble or correct them.

    Generation Speed

    Generation speed can vary according to:

    • Model demand

    • Clip duration

    • Resolution

    • Audio generation

    • Server traffic

    • Subscription priority

    • Number of requested versions

    Do not select a tool based only on the fastest result. A clip generated quickly is not useful if the movement is unstable or the scene does not follow the prompt.

    During a trial, record:

    • How long one clip takes

    • Whether the tool displays progress

    • Whether you can work on another project while waiting

    • Whether failed generations still use credits

    • Whether higher plans receive priority processing

    Credits and Usage Limits

    Many AI video platforms use credits instead of offering unlimited generation.

    A credit system may charge differently according to:

    • The selected model

    • Video duration

    • Resolution

    • Number of variations

    • Audio generation

    • Text-to-video or image-to-video mode

    • Standard or priority processing

    Adobe states that different resolutions and partner models may consume different amounts of generative credits. [2][4][5]

    Before paying, calculate the practical cost of creating one usable video—not merely one generation.

    For example, one scene may require:

    1. An initial test

    2. A revised version

    3. A corrected version

    4. A higher-resolution final version

    A plan that appears inexpensive may become costly when several attempts are required for every scene.

    Free Plans and Trials

    A free plan or trial is useful for learning the interface, but it may include:

    • Very few generations

    • Lower resolution

    • Watermarked exports

    • Limited models

    • Slower processing

    • Restricted commercial use

    • No advanced camera controls

    • Limited storage

    • Shorter clips

    Use the free access to test:

    • Prompt understanding

    • Motion stability

    • Image upload quality

    • Aspect-ratio support

    • Export process

    • Ease of editing

    Do not begin a large project until you understand how quickly the available credits are consumed.

    Watermarks and Export Conditions

    Check whether the downloaded video contains:

    • A visible platform watermark

    • A small model label

    • Metadata identifying AI generation

    • Resolution restrictions

    • Export-format limitations

    A watermark may be acceptable while practising, but it may not be suitable for a professional website, advertisement, presentation, or client project.

    Also check whether the tool exports:

    • MP4

    • MOV

    • GIF

    • Separate audio

    • Captions

    • Transparent backgrounds where supported

    • Different resolutions

    For most beginners, MP4 is the most practical standard video format.

    Privacy and Uploaded Files

    When using image-to-video or video-to-video, you may upload personal or business material.

    Before uploading, check:

    • Whether files are stored

    • How long they are retained

    • Whether they may be used to improve the service

    • Whether private projects are available

    • Whether files can be deleted

    • Whether other users can view generations

    • Whether the provider offers business-level privacy controls

    Avoid uploading:

    • Private family photographs

    • Identification documents

    • Confidential business information

    • Medical records

    • Financial information

    • Client materials without permission

    • Photographs of other people without consent

    • Copyrighted material you are not allowed to use

    A creative tool should never receive sensitive information unless you understand and accept its current privacy terms.

    Commercial-Use Rights

    Do not assume that paying for a plan automatically gives unlimited commercial rights.

    Check:

    • Whether commercial use is permitted

    • Whether rules differ by plan

    • Whether partner models have separate conditions

    • Whether uploaded source material must belong to you

    • Whether generated music and voices have separate licences

    • Whether recognizable brands or characters are restricted

    • Whether the tool offers protection or indemnification

    • Whether local copyright laws affect ownership

    Save a copy of the applicable terms or record the date you checked them. Platform rules can change.

    Customer Support and Learning Resources

    A beginner may need help with:

    • Failed generations

    • Credit charges

    • Upload problems

    • Incorrect cropping

    • Account access

    • Watermarks

    • Export errors

    • Commercial-use questions

    Look for:

    • Official help pages

    • Tutorials

    • Prompt examples

    • Community forums

    • Email or chat support

    • Clear billing information

    • Cancellation instructions

    Good support can be more valuable than one additional advanced feature.

    A Practical Beginner Test

    Before choosing a paid plan, use the same small project to test every shortlisted tool.

    Try creating:

    A six-second realistic video of a red bicycle beside a wooden fence on a quiet country road at sunrise. Grass moves gently in the breeze while the camera slowly moves toward the bicycle. Keep the bicycle and background stable. Use 16:9 landscape format, smooth motion, no people, no text, no logos, and no duplicated objects.

    Compare the results using these questions:

    1. Did the tool understand the subject?

    2. Did it follow the requested movement?

    3. Was the camera stable?

    4. Did the bicycle retain its shape?

    5. Did the background remain consistent?

    6. Was the aspect ratio correct?

    7. Was the clip easy to download?

    8. How many credits were used?

    9. Could the result be edited easily?

    10. Would you feel comfortable using the tool again?

    The strongest tool is the one that meets your practical needs consistently—not necessarily the one with the most complicated feature list.


    Figure 3. The essential features beginners should compare before selecting an AI video tool.

    Figure 3 provides a practical comparison checklist covering creation methods, video quality, formats, controls, audio, editing, costs, privacy, and usage rights. Testing these areas helps beginners choose a tool based on real project requirements rather than advertising demonstrations.

    Best AI Video Tools for Beginners in 2026

    There is no single AI video tool that is best for every beginner. The right choice depends on the type of video you want to create.

    A person making short social media clips has different needs from someone creating employee training, YouTube explanations, cinematic scenes, or business presentations.

    The following shortlist focuses on tools that provide a practical combination of:

    • Beginner-friendly controls

    • Useful AI-generation features

    • Editing options

    • Clear export workflows

    • Different video styles and purposes

    • Official learning and support resources

    The tools are not ranked only by visual quality. They are compared according to how useful they are for a particular beginner workflow.

    Beginner Comparison at a Glance

    AI video toolBest suited forMain strengthImportant consideration
    CanvaComplete beginners, social media, presentations, and simple marketing videosEasy generation and editing in one familiar workspaceAdvanced camera and consistency controls may be limited
    Adobe FireflyBeginners who want cinematic clips, image animation, and several model choicesText-to-video, image-to-video, camera controls, and model selectionControls, output options, and credit use vary by selected model
    RunwayCreative users who want more precise motion and camera controlStrong prompt interpretation and advanced generative-video controlsThe larger feature set may require more learning
    SynthesiaTraining, education, presentations, and presenter-led business videosAI avatars, scripts, voiceovers, captions, and multilingual videoIt is primarily designed for structured presenter-led content
    InVideo AIYouTube, faceless videos, explainers, and complete videos from a topic or scriptAutomatically prepares scripts, visuals, narration, subtitles, and musicGenerated videos require careful review for accuracy and originality
    CapCutShorts, Reels, TikTok, advertisements, and social media editingCombines AI generation with a strong short-form editing workflowFeatures, models, and availability can differ between devices and regions

    Canva — Best for Complete Beginners

    Canva is one of the easiest starting points for people who already use it for featured images, social media graphics, presentations, or WordPress visuals. [18]

    Its Create a Video Clip feature can turn a written prompt into a short AI-generated clip with synchronized audio, including dialogue and sound effects. The generated clip can then be refined using Canva’s existing video-editing tools, filters, transitions, graphics, cropping, and background features. [18]

    Canva is especially suitable for:

    • Social media videos

    • Simple article demonstrations

    • Website introductions

    • Short promotional clips

    • Presentation backgrounds

    • Reels and Shorts

    • Videos that combine generated clips with text and graphics

    Its main advantage is simplicity. A beginner can generate a clip, add titles and other visual elements, arrange scenes, and export the finished video without moving between several complicated programs.

    However, Canva may not provide the same level of detailed motion, reference, or camera control as a platform designed primarily for advanced generative video.

    Best beginner use: Creating a short AI-generated scene and combining it with titles, music, captions, and other Canva elements.

    Adobe Firefly — Best for Creative Generation and Multiple Models

    Adobe Firefly is a strong choice for beginners who want more generation control while remaining inside a visual, browser-based workspace.

    Firefly supports video generation from text prompts and still images. Its supported workflows include camera controls, visual styles, different formats, prompt-based editing, and a browser video editor for arranging generated and uploaded clips. Adobe also provides access to its own Firefly Video model and selected partner models from the same platform. [3]

    Firefly is especially suitable for:

    • Cinematic B-roll

    • Landscape and nature scenes

    • Product concepts

    • Website video backgrounds

    • Marketing experiments

    • Storyboards

    • Image-to-video animation

    • Creative visual effects

    Adobe describes videos generated with its own Firefly Video model as commercially safe. This statement should not automatically be applied to every partner model available inside Firefly because different models may have separate terms and conditions. [3][4][6]

    Firefly’s multi-model approach is useful because beginners can test different video systems without opening a completely separate workspace for each one. However, model selection also makes credit use and available controls more complicated.

    Best beginner use: Generating polished B-roll or animating an existing image while controlling the framing, movement, and overall visual style.

    Runway — Best for Advanced Creative Control

    Runway is better suited to beginners who are ready to move beyond basic one-click generation and learn more detailed creative controls.

    Its Gen-4.5 model supports both text-to-video and image-to-video creation. Runway states that the model can follow detailed instructions involving camera movement, scene composition, event timing, and environmental changes. Supported generations currently range from two to ten seconds, with the available aspect ratios depending on the generation method. [9]

    Runway is especially suitable for:

    • Cinematic experiments

    • Detailed camera choreography

    • Stylized scenes

    • Visual storytelling

    • Image animation

    • Creative advertising concepts

    • Video transformation and editing

    Its advantage is control. Users can describe not only what appears but also how the action develops and how the camera behaves.

    The disadvantage is that the interface, model choices, credit system, and detailed prompting requirements may feel less comfortable to a complete beginner than Canva.

    Best beginner use: Moving to more controlled cinematic generation after learning the basic prompt structure in a simpler platform.

    Synthesia — Best for Avatar and Training Videos

    Synthesia is designed primarily for videos in which a digital presenter communicates a script.

    Users can begin with a prompt, script, document, presentation, web page, or uploaded material. Synthesia can structure the content into scenes, add an AI avatar and voiceover, generate captions, and translate the video into more than 160 languages. Its editor is organized similarly to presentation slides, making it approachable for people who are not experienced video editors. [21]

    Synthesia is especially suitable for:

    • Training videos

    • Educational explanations

    • Employee onboarding

    • Business presentations

    • Product instructions

    • Multilingual communication

    • Online courses

    • Presenter-led marketing

    It can also add AI-generated B-roll to presenter-led videos. However, its central strength remains structured communication rather than unrestricted cinematic filmmaking.

    Best beginner use: Turning an article, lesson, presentation, or business script into a video delivered by an AI presenter.

    InVideo AI — Best for Complete Videos from an Idea or Script

    InVideo AI is designed to turn a topic, prompt, or prepared script into a more complete video.

    The platform can prepare a script, select or generate visuals, create a voiceover, add subtitles and music, and arrange the material into scenes. Users can also make changes using written editing instructions, such as deleting a scene, changing a voice, or adjusting the introduction. [23]

    InVideo AI is especially suitable for:

    • Faceless YouTube videos

    • Educational explainers

    • List videos

    • Social media content

    • Marketing videos

    • Narrated articles

    • Script-based presentations

    • Videos combining stock and generated media

    Its main advantage is automation. Instead of generating each short clip separately, a beginner can request a more complete first draft.

    Its main limitation is the need for careful human review. Automatically selected visuals, scripts, factual statements, pronunciation, subtitles, and music may not always match the creator’s intention.

    Best beginner use: Turning a finished article outline or script into a narrated first-draft video.

    CapCut — Best for Social Media Creation and Editing

    CapCut combines generative features with an editing environment widely focused on short-form and social media content.

    Its current AI-video workflows can create video from words or images using different video models. The generated material can then be refined with captions, overlays, voiceovers, templates, scene timing, and other editing controls. [24]

    CapCut is especially suitable for:

    • TikTok videos

    • Instagram Reels

    • YouTube Shorts

    • Product promotions

    • Social media advertisements

    • Captioned videos

    • Fast mobile editing

    • Vertical content

    Its main advantage is the connection between generation and practical social media editing. Users can create a first draft and immediately improve its pacing, captions, audio, and presentation.

    However, available AI models, tools, credits, and features may vary between the web version, desktop application, mobile application, subscription level, and geographic location.

    Best beginner use: Creating or importing an AI-generated clip and turning it into a polished vertical social media video.

    Which Tool Should a Complete Beginner Try First?

    A practical starting order is:

    1. Canva for the easiest overall learning experience.

    2. Adobe Firefly for standalone cinematic or image-to-video clips.

    3. CapCut for social media editing and vertical videos.

    4. InVideo AI for complete narrated videos from a topic or script.

    5. Synthesia for avatar-led teaching and business presentations.

    6. Runway when greater camera, movement, and generation control is needed.

    This is not a permanent ranking. Tool capabilities change quickly, and a platform that is best for one project may be unsuitable for another.

    For an AI Mastery beginner article or demonstration, Canva is usually the easiest place to begin. Adobe Firefly is a stronger next step when the goal is to generate more cinematic visual scenes. CapCut can then be used when the finished clip requires social media captions, timing adjustments, music, or vertical formatting.

    Figure 4. Six beginner-friendly AI video tools matched to their strongest use cases.

    Figure 4 helps beginners select a starting tool according to the type of video they want to create. Canva supports simple all-in-one projects, Firefly focuses on creative generation, Runway offers greater control, Synthesia creates presenter-led videos, InVideo AI builds complete videos from scripts, and CapCut specializes in social media production and editing.

    Which AI Video Tool Is Best for Your Project?

    The best AI video tool depends on the finished result you want—not simply which platform has the longest feature list.

    Begin by identifying your main goal:

    • A short social media clip

    • A cinematic generated scene

    • A narrated YouTube video

    • A presenter-led lesson

    • A product demonstration

    • An animated still image

    • A complete business or educational video

    Once the goal is clear, selecting a suitable tool becomes much easier.

    Best for Complete Beginners: Canva

    Canva is a practical starting point for beginners who want generation and editing inside one familiar workspace.

    Choose Canva when you want to create:

    • Short article demonstrations

    • Social media posts

    • Presentation videos

    • Website introductions

    • Reels or Shorts

    • Simple promotional content

    • Videos combining clips, text, graphics, and music

    Canva’s Create a Video Clip feature currently generates a 16:9 clip of up to eight seconds from a written prompt, with synchronized audio that may include dialogue, sound effects, and music. The result can then be edited using Canva’s standard design and video tools. [18]

    Canva is particularly useful when the generated video is only one part of a larger design. You can place the clip inside a presentation, advertisement, article graphic, or social media layout without moving it to a separate program.

    Choose Canva when: ease of use and all-in-one editing matter more than advanced camera controls.

    Best for Cinematic Scenes and Website B-Roll: Adobe Firefly

    Adobe Firefly is suitable when you want to generate visually polished scenes from text or animate an existing image.

    Choose Firefly for:

    • Cinematic landscapes

    • Website background clips

    • Product concepts

    • Atmospheric B-roll

    • Creative advertisements

    • Storyboard scenes

    • Image-to-video animation

    • Controlled camera movement

    Firefly supports text-to-video and image-to-video creation. Supported workflows allow users to describe settings, emotions, camera angles, and camera movement. Adobe also offers its own Firefly Video model and selected partner models within the Firefly workspace. [1]

    Adobe states that videos created with the Adobe Firefly Video Model are designed to be safe for commercial use. Do not automatically apply that statement to every partner model available through Firefly; check the conditions associated with the model you select. [1]

    Choose Adobe Firefly when: you want creative generation, image animation, camera controls, and several model options.

    Best for Greater Camera and Motion Control: Runway

    Runway is a stronger choice for users who are ready to learn more detailed prompting and generation controls.

    Choose Runway for:

    • Cinematic experiments

    • Complex camera movement

    • Stylized storytelling

    • Visual effects

    • Image animation

    • Creative advertising concepts

    • Controlled action sequences

    • Video transformation

    Runway’s current Gen-4.5 workflow supports text-to-video and image-to-video. Its official prompting resources emphasize descriptions of subject action, camera behaviour, timing, composition, and environmental movement. [9][10]

    Runway may take longer to learn than Canva because effective results often depend on more deliberate prompting and careful review.

    Choose Runway when: you are comfortable learning additional controls in exchange for greater creative flexibility.

    Best for Presenter-Led Education and Training: Synthesia

    Synthesia is appropriate when the video’s main purpose is to have a digital presenter explain information.

    Choose Synthesia for:

    • Beginner lessons

    • Employee training

    • Online courses

    • Business presentations

    • Product instructions

    • Customer-support videos

    • Multilingual communication

    • Presenter-led tutorials

    Synthesia can generate structured videos containing scenes, voiceover, an AI avatar, and captions. Its current text-to-video offering supports voiceovers in more than 160 languages. [21]

    This approach is different from generating a cinematic landscape or fictional scene. The main focus is clear communication by a digital speaker.

    Choose Synthesia when: your script and presenter are more important than cinematic visual generation.

    Best for Complete Narrated Videos: InVideo AI

    InVideo AI is useful when you want the platform to prepare most of the first draft automatically.

    Choose InVideo AI for:

    • Faceless YouTube videos

    • Narrated articles

    • Educational explainers

    • List videos

    • Marketing videos

    • Script-based presentations

    • Social media stories

    • Topic-based videos

    A user can provide an idea or script, and InVideo AI can prepare a script, visuals, voiceover, subtitles, music, and transitions. It also supports written editing commands for revising parts of the generated result. [23]

    The automation can save considerable time, but every generated element must be checked. Review:

    • Factual accuracy

    • Script wording

    • Chosen visuals

    • Pronunciation

    • Captions

    • Music

    • Scene order

    • Copyright and permissions

    Choose InVideo AI when: you want a complete narrated first draft rather than generating every short clip separately.

    Best for Reels, Shorts, and Mobile Editing: CapCut

    CapCut is suitable for people creating short-form content that requires captions, music, pacing changes, overlays, and vertical formatting.

    Choose CapCut for:

    • TikTok videos

    • Instagram Reels

    • YouTube Shorts

    • Mobile advertisements

    • Product promotions

    • Captioned social media videos

    • Vertical video editing

    • Fast clip assembly

    CapCut provides text-to-video and image-to-video workflows through selected AI models. Generated material can remain inside CapCut for further editing, including captions, pacing changes, effects, and colour adjustments. [24]

    Because CapCut features may vary between its web, desktop, and mobile versions, confirm that the required generator and editing options are available on the device you intend to use.

    Choose CapCut when: the final video is intended mainly for social media and requires substantial short-form editing.

    Best for Animating an Existing Image

    For image-to-video projects, start by comparing:

    • Adobe Firefly

    • Runway

    • CapCut

    • Canva, when its available workflow supports your required image animation

    Adobe Firefly offers dedicated image-to-video generation with motion and camera controls. Runway’s image-to-video prompting focuses on describing the movement that should occur while the uploaded image provides the visual foundation. [2]

    Image-to-video is usually preferable when you already have:

    • A strong AI-generated image

    • A product image

    • A character design

    • A landscape

    • A website illustration

    • A clearly composed photograph you are permitted to use

    The starting image should already look close to the desired final scene.

    Best for Commercial Business Content

    For business use, do not select a platform only because it can produce attractive video.

    Check:

    • Commercial-use permissions

    • Model-specific conditions

    • Privacy controls

    • Watermarks

    • Export resolution

    • Rights to generated audio

    • Rights to uploaded materials

    • Whether product details remain accurate

    Adobe positions its own Firefly Video Model as commercially safe and explains that the model is trained using licensed and public-domain material. However, partner models offered through the same platform may operate under separate conditions. [3]

    Regardless of the platform, you remain responsible for ensuring that:

    • Your reference material is permitted

    • The video does not misuse brands or protected characters

    • Product details are not misleading

    • Music and voices are licensed appropriately

    • Real people have provided permission

    • The finished video follows the publishing platform’s rules

    Best for YouTube

    The suitable tool depends on the kind of YouTube video.

    YouTube projectPractical starting tool
    Short cinematic clipAdobe Firefly or Runway
    Complete faceless videoInVideo AI
    Presenter-led lessonSynthesia
    YouTube ShortCanva or CapCut
    Article demonstrationCanva
    Animated featured imageAdobe Firefly or Runway
    Final editing and captionsCanva or CapCut

    AI-generated videos may be uploaded to YouTube, but they must follow the platform’s policies. YouTube requires creators to disclose altered or synthetic content when it appears realistic and could be mistaken for a real person, place, scene, or event. [27]

    AI generation alone does not guarantee monetization. Videos should include meaningful original work such as:

    • Original explanations

    • Human review

    • Useful editing

    • Commentary

    • Educational value

    • A clear purpose

    • Accurate information

    Mass-producing highly similar automated videos with minimal changes can create policy and quality problems. [28]

    Best Choice by Goal

    Use this simplified decision guide:

    Choose Canva for the easiest all-in-one beginner workflow.

    Choose Adobe Firefly for cinematic clips, B-roll, and image animation.

    Choose Runway for greater camera, motion, and creative control.

    Choose Synthesia for avatar-led education, training, and presentations.

    Choose InVideo AI for complete narrated videos from a topic or script.

    Choose CapCut for social media editing, captions, and vertical videos.

    Do not pay for all six platforms. Select one tool that matches your immediate project, use its free access or smallest suitable plan, and test it with a simple video first.

    Recommended Starting Point for AI Mastery

    For the AI Mastery website, the most practical workflow is:

    1. Use ChatGPT to plan the video, storyboard, narration, and prompts.

    2. Use Canva for the simplest first experiments and article demonstrations.

    3. Use Adobe Firefly when a more cinematic generated scene or image-to-video clip is required.

    4. Use CapCut or Canva to add captions, music, titles, and final edits.

    5. Consider InVideo AI later when converting complete AI Mastery articles into narrated YouTube videos.

    6. Consider Synthesia when creating presenter-led lessons.

    7. Move to Runway when you need more advanced motion and camera control.

    This approach avoids unnecessary subscriptions while providing a clear path from beginner creation to more advanced production.

    Figure 5. A beginner decision guide for choosing an AI video tool according to the project goal.

    Figure 5 connects common video goals with suitable starting tools. It helps beginners choose a platform for simple editing, cinematic generation, presenter-led lessons, complete narrated videos, social media production, or advanced creative control.

    Free Plans, Credits, and the Real Cost of AI Video

    AI video generation usually costs more than AI image generation because each video contains many frames that must remain visually consistent.

    A free plan can help you test a platform, but it may not provide enough generations to complete a finished project. Beginners should understand how subscriptions, credits, generation limits, and failed attempts affect the real cost.

    Current Information Note: Prices, credits, free allowances, model access, and promotional offers can change frequently. The information below reflects official provider information available in July 2026. Always check the final checkout page before subscribing.

    Free Access Is Mainly for Testing

    Free access is most useful for learning how a platform works.

    It may allow you to:

    • Explore the interface

    • Enter a few prompts

    • Upload a reference image

    • Test one or more models

    • Generate short clips

    • Examine video quality

    • Learn how credits are calculated

    • Check whether the workflow feels comfortable

    However, free plans may include:

    • A small one-time credit allowance

    • Daily limits

    • Watermarked videos

    • Lower resolution

    • Limited model selection

    • Slower processing

    • Restricted download options

    • Limited commercial features

    Do not assume that a platform described as “free” provides unlimited video creation.

    How AI Video Credits Work

    Credits are units that a platform deducts when you use an AI feature.

    The number of credits required may depend on:

    • The selected video model

    • Clip duration

    • Resolution

    • Text-to-video or image-to-video mode

    • Whether audio is included

    • Number of generated versions

    • Processing speed

    • Use of partner models

    • Upscaling or enhancement

    For example, Runway currently charges its Gen-4.5 model at 12 credits for each second of generated video. A five-second generation therefore uses 60 credits, while a ten-second generation uses 120 credits. [11]

    This means that the number displayed beside a plan does not directly tell you how many finished videos you can create. You must compare the credits supplied with the cost of the model you intend to use.

    One Generation Is Not the Same as One Finished Clip

    A beginner may assume that one prompt will produce one usable video. In practice, the first generation may contain:

    • Unnatural movement

    • Incorrect framing

    • Changing objects

    • An unstable background

    • Distorted hands

    • The wrong camera direction

    • Poor lighting

    • Unwanted text

    • Incorrect cropping

    A single finished scene may require:

    1. An initial test

    2. A slower-motion version

    3. A corrected-camera version

    4. A version with a more stable background

    5. A higher-resolution final generation

    Therefore, calculate the likely cost of several attempts rather than the cost of one generation.

    Current Free and Entry-Level Options

    The following summary is intended as a starting guide rather than a permanent price list.

    ToolCurrent beginner accessImportant limitation
    CanvaSome AI video features may be available through Canva’s plans and limited AI allowancesAvailability and usage limits depend on the account, plan, and region
    Adobe FireflyLimited free access to selected standard and premium featuresFree access may not be enough for repeated video testing
    RunwayA one-time free allocation of 125 creditsCredits do not renew, free videos contain a watermark, and only selected models are available
    SynthesiaA free Basic plan with a monthly usage allowanceDownload, avatar, branding, and advanced features differ from paid plans
    InVideo AIFree access is available for testing the workflowExports and AI-generation capacity may be restricted
    CapCutMany basic editing features are free; selected AI operations use credits or require membershipFeatures and prices may differ by device, platform, region, and account

    Adobe currently offers limited free access to selected standard and premium generative features. Its paid Firefly plans include monthly generative credits for premium video, audio, and partner-model features. [5]

    Runway’s Free plan currently includes 125 one-time credits. Those credits do not renew, and generated videos on the Free plan include a Runway watermark. [12]

    Synthesia currently offers a free Basic plan with 1,200 monthly credits, described as usable for up to ten minutes of video per month or a limited number of AI-generated video assets. Paid plans provide additional avatars, downloads, branding controls, and other capabilities. [21]

    CapCut uses credits for selected AI-powered features. Its official guidance explains that credits and subscriptions serve different purposes: a subscription unlocks eligible tools and benefits, while credits may be consumed when particular AI actions are performed. [25]

    Adobe Firefly Credit Example

    Adobe’s current individual Firefly plans include:

    • Firefly Free: Limited access to selected standard and premium features

    Firefly Standard: 2,000 monthly generative credits

    Firefly Pro: 4,000 monthly generative credits

    • Firefly Pro Plus: 10,000 monthly generative credits

    • Firefly Premium: 50,000 monthly generative credits

    Adobe’s current Firefly plans include 2,000 monthly credits for Standard, 4,000 for Pro, 10,000 for Pro Plus, and 50,000 for Premium. Video credit use depends on the selected model, resolution, duration, and feature, so the number of clips available from a plan can vary. [5]

    This example shows why beginners should check the selected model before pressing Generate. A partner model may consume a different number of credits from Adobe’s own video model.

    Runway Credit Example

    Runway’s current plans include different monthly credit amounts: [11][13]

    Free: 125 one-time credits

    Standard: 625 credits per month

    Pro: 2,250 credits per month

    Max: 9,500 credits per month

    Runway’s official pricing page estimates that 625 credits can provide approximately 52 seconds of Gen-4.5 video when all credits are used only with that model. The same credits can produce a different amount when another model is selected. [13]

    Standard and Pro monthly credits normally do not roll over. The Max plan allows up to one month of unused credits to roll into the following month, while separately purchased credits do not expire under Runway’s current policy. [11]

    Synthesia Usage Example

    Synthesia measures usage through a shared credit system covering AI features.

    Its current paid individual plans include different video allowances, avatar selections, branding options, and collaboration features. The Starter plan currently provides capacity described as up to 120 minutes of video or AI dubbing per year when billed annually, while the Creator plan provides a larger yearly allowance and additional features. [21]

    Because Synthesia is mainly designed for presenter-led content, its minutes should not be compared directly with the short cinematic clips generated by Runway or Firefly. The products perform different jobs.

    CapCut Credits and Subscriptions

    CapCut’s system can be confusing because a Pro subscription and AI credits are not identical.

    A CapCut subscription may provide:

    • Premium editing tools

    • Templates and media

    • Cloud storage

    • Higher-quality exports

    • Watermark-related benefits

    • A monthly AI-credit allowance

    Credits may then be deducted when using specific AI operations, such as AI generation, script-to-video, premium voice features, or other advanced processing. [25]

    CapCut advises users to check the current subscription page because final prices and available plans can vary by region, platform, account, promotion, and applicable taxes. [25]

    Watch for Credits That Expire

    Before subscribing, determine whether unused credits:

    • Expire at the end of each month

    • Roll over into the next billing period

    • Remain permanently

    • Expire after a stated number of months

    • Disappear when the subscription is cancelled

    • Are shared with other members of a workspace

    Do not purchase a large plan only because it contains many credits. Expiring unused credits provide no value.

    Runway currently states that Standard and Pro monthly credits expire on the billing date, whereas separately purchased credits do not expire. [11]

    Check Whether Failed Generations Use Credits

    A generation may fail because of:

    • A server error

    • A content-policy restriction

    • An unsupported file

    • A technical problem

    • An interrupted connection

    • An unavailable model

    Before paying, review the provider’s policy for failed generations.

    Check whether:

    • Credits are deducted immediately

    • Failed generations are automatically refunded

    • You must contact support

    • Refunds depend on the reason for the failure

    • Cancelled generations still consume credits

    Keep screenshots or transaction records when a substantial number of credits disappears unexpectedly.

    Monthly Versus Annual Billing

    Annual plans are often advertised using a lower monthly equivalent. However, the entire annual amount may be charged at once.

    Before selecting an annual plan, confirm:

    • The total amount charged today

    • Whether the displayed price is monthly or annual

    • Whether the plan renews automatically

    • The cancellation deadline

    • The refund policy

    • Whether credits are provided monthly or annually

    • Whether unused credits expire

    • Whether changing plans affects the remaining balance

    Do not choose annual billing until you have tested the platform and confirmed that it matches your workflow.

    Avoid Buying Several Plans at Once

    A beginner does not need subscriptions to every AI video tool.

    A sensible approach is:

    1. Test the free version of one platform.

    2. Create one simple five- to eight-second clip.

    3. Review its motion, quality, and prompt accuracy.

    4. Test image-to-video when available.

    5. Check the export and watermark.

    6. Calculate the credits used.

    7. Purchase the smallest suitable plan only when needed.

    Complete one small project before adding a second subscription.

    Calculate the Cost of a Finished Project

    Suppose you want to make a 30-second video containing five six-second scenes.

    If each scene requires three attempts, the project may involve:

    • Five initial generations

    • Five corrected generations

    • Five final generations

    • Fifteen generations in total

    The editing stage may also require:

    • Upscaling

    • Narration

    • Music

    • Captions

    • Additional stock media

    • A separate editing application

    The true cost includes the complete workflow, not merely the advertised price of one generation.

    A Simple Cost-Tracking Method

    Create a small table for every project:

    ItemAmount used
    Number of scenes5
    Generations attempted15
    Credits consumedRecord actual total
    Usable clips produced5
    Editing costRecord if applicable
    Audio or narration costRecord if applicable
    Total project costCalculate after completion

    This information helps you compare platforms fairly and estimate future expenses.

    Best Budget Strategy for a Beginner

    Use this practical sequence:

    1. Start with free access.

    2. Use one simple test prompt.

    3. Generate at a lower resolution while experimenting.

    4. Correct one problem at a time.

    5. Save every usable version.

    6. Use higher resolution only for the final clip.

    7. Avoid unnecessary variations.

    8. Combine short clips in an editor.

    9. Track every credit used.

    Upgrade only when the free or entry plan prevents you from completing a real project.

    For the AI Mastery website, begin with free tests in Canva or Adobe Firefly. Purchase a plan only when you are ready to produce a specific article demonstration, website video, or YouTube project.

    Figure 6. How credits, repeated attempts, resolution, and editing affect the real cost of an AI video.

    Figure 6 shows that the advertised cost of one generation is not the complete project cost. Beginners should account for repeated attempts, model selection, clip duration, resolution, audio, editing, and credits that may expire.

    Privacy, Copyright, and Commercial-Use Checks

    AI video tools may require you to upload photographs, product images, scripts, voices, or existing footage. Before uploading anything, confirm that you have permission to use it and understand how the platform handles your content. This section provides general educational information and is not legal advice.

    A visually impressive video is not useful when it creates privacy, copyright, or commercial-use problems.

    Protect Personal and Private Information

    Do not upload sensitive material simply because the tool allows file uploads.

    Avoid uploading:

    • Identification documents

    • Financial information

    • Medical records

    • Private family photographs

    • Confidential business documents

    • Customer or employee information

    • Passwords or account details

    • Unreleased product information

    • Client material without permission

    • Images of children without appropriate consent

    Even when a provider offers strong privacy controls, the safest practice is to remove unnecessary personal information before uploading a file.

    For example, crop out:

    • Names

    • Addresses

    • Email addresses

    • Phone numbers

    • Account numbers

    • Licence plates

    • Private computer screens

    • Documents visible in the background

    Check Whether Uploaded Content May Improve AI Features

    Different providers handle user content differently.

    Canva states that users can manage whether their content may be used to improve AI-powered features through their privacy settings. Its explanation includes uploaded media and text as user content, so beginners should review those settings before uploading private or business material. [20]

    Adobe states that it does not train its Firefly generative models on Creative Cloud subscribers’ personal content. Adobe also states that user content is not used to train generative AI partner models offered through its creative applications. [4][6]

    Do not assume that every platform follows the same policy. Read the current privacy and AI-product terms for the specific service you use.

    Check Whether Your Generations Are Public

    Some services include:

    • Public galleries

    • Community feeds

    • Shared workspaces

    • Discover pages

    • Reusable community prompts

    • Public project links

    Before generating private business content, check whether your project is:

    • Private by default

    • Public by default

    • Visible to team members

    • Shared when you publish it to a community

    • Searchable by other users

    • Included in an inspiration gallery

    Adobe explains that submitting work to the Firefly community allows the generated image and prompt to appear in community or marketing areas. Submission is separate from ordinary private generation, so do not publish confidential work to a community gallery. [6]

    Use Only Material You Have Permission to Upload

    You should own the source material or have clear permission to use it.

    Suitable material may include:

    • Photographs you created

    • AI-generated images you are permitted to use

    • Licensed stock images

    • Original illustrations

    • Your own product images

    • Videos you recorded

    • Music you created or licensed

    • Voices used with consent

    • Customer material covered by an agreement

    Do not upload:

    • Copyrighted films

    • Television scenes

    • Music videos

    • Other people’s photographs

    • Celebrity images for misleading uses

    • Branded advertising material

    • Protected characters

    • Artwork copied from another creator

    • Client files without authorization

    Purchasing access to an AI platform does not give you rights to material owned by someone else.

    Commercial Use Does Not Mean Unlimited Use

    A provider may allow commercial use of generated outputs, but that does not remove your other responsibilities.

    You must still check:

    • The rights to your uploaded source material

    • Whether recognizable people gave permission

    • Whether the video contains protected brands

    • Whether generated music has separate terms

    • Whether partner models have different rules

    • Whether the output makes misleading claims

    • Whether the publishing platform requires disclosure

    • Whether the content violates local laws

    Adobe currently states that outputs from commercially released Firefly features may be used in commercial projects. It also states that outputs from Adobe Firefly models are intended to be commercially safe because those models are trained on licensed and public-domain content. [4][6]

    However, Adobe separately warns that users are responsible for determining whether outputs from partner models are suitable for their projects. Therefore, always note which model created the video.

    Commercial Safety Is Not a Legal Guarantee

    Terms such as commercially safe do not guarantee that every generated result is legally risk-free.

    AI output may still:

    • Resemble existing artwork

    • Include an unexpected logo

    • Produce a similar character

    • Contain inaccurate product details

    • Reproduce a protected design

    • Generate misleading people or events

    • Be similar to another user’s output

    Adobe notes that generative outputs may not be unique and that different users may create the same or similar results. [6]

    Review every frame before using the video in:

    • Paid advertising

    • Product packaging

    • Client campaigns

    • Course materials

    • Business websites

    • Monetized YouTube videos

    • Commercial social media posts

    Do Not Assume You Own Every Generated Element

    Copyright treatment of AI-generated material differs between countries and may depend on the amount of meaningful human creative contribution. [31]

    Your contribution may include:

    • Developing the concept

    • Writing and revising prompts

    • Selecting and arranging scenes

    • Editing the footage

    • Adding original narration

    • Creating music

    • Adding graphics

    • Controlling pacing

    • Combining generated and original material

    Keep records of your creative process, especially for important commercial projects.

    Save:

    • The original idea

    • Prompts

    • Revised prompts

    • Reference images

    • Generated versions

    • Editing decisions

    • Narration scripts

    • Music licences

    • Dates of generation

    • The model and platform used

    • Relevant terms checked at the time

    Be Careful with Real People

    Do not create a realistic video of a real person doing or saying something without permission, particularly when the video could harm, embarrass, impersonate, or mislead viewers.

    Avoid creating:

    • False endorsements

    • Fake interviews

    • Fabricated statements

    • Political misinformation

    • Misleading medical advice

    • Fraudulent business announcements

    • Sexualized or humiliating portrayals

    • Videos intended to damage someone’s reputation

    When using an avatar, cloned voice, or likeness, obtain clear consent and explain how the material will be used.

    Protect Children

    Images and videos involving children require additional care.

    Do not upload or generate realistic material involving a child unless:

    • You have appropriate permission

    • The purpose is legitimate

    • The content is safe and respectful

    • No private information is visible

    • The platform permits the intended use

    • The finished content will not expose or embarrass the child

    For a public website, consider using a generic illustration or licensed stock image rather than a personal family photograph.

    Check Product Accuracy

    AI video tools may alter:

    • Packaging

    • Buttons

    • Labels

    • Colours

    • Product dimensions

    • Ingredients

    • Logos

    • Safety features

    • Accessories

    Do not use generated footage to demonstrate the exact operation of a product unless every detail is verified.

    For commercial advertising, use real footage when accuracy is essential.

    A generated product concept should be clearly presented as a concept rather than a faithful demonstration of the real item.

    Review Generated Audio Separately

    Audio may have separate ownership, consent, and licensing concerns.

    Check:

    • Who owns the generated voice

    • Whether voice cloning is permitted

    • Whether the speaker consented

    • Whether generated music may be used commercially

    • Whether the music resembles a protected song

    • Whether the tool places restrictions on downloads

    • Whether attribution is required

    Do not ask a generator to imitate a specific living singer, actor, public figure, or private person without authorization.

    Check Platform Disclosure Rules

    Some publishing platforms require creators to disclose realistic altered or synthetic content.

    Disclosure may be needed when a video:

    • Makes a real person appear to speak

    • Alters a real event

    • Shows a realistic event that never occurred

    • Could be mistaken for genuine footage

    • Discusses elections, emergencies, war, health, or finance

    • Contains a cloned voice

    • Uses a realistic synthetic presenter

    The safest practice is to disclose AI use when viewers could reasonably misunderstand the content.

    A simple disclosure may say:

    This video includes visuals created or modified using artificial intelligence.

    Do not use disclosure as an excuse for misleading content. A clearly labelled false claim can still cause harm.

    Read the Rules for the Exact Model

    A multi-model platform may provide several video models under one subscription.

    Before generating, record:

    • Platform name

    • Model name

    • Model version

    • Date used

    • Commercial-use terms

    • Privacy terms

    • Credit cost

    • Whether the feature is beta

    • Whether Content Credentials are added

    Adobe attaches Content Credentials to exported content that includes Firefly-generated material, supporting transparency about how the asset was created. [7]

    Partner models may follow different training, privacy, and licensing conditions, even when accessed inside the same platform.

    A Beginner Safety Checklist

    Before uploading or publishing, confirm:

    1. I own the source material or have permission to use it.

    2. No private information is visible.

    3. Real people have consented to the intended use.

    4. I checked whether the project is private or public.

    5. I reviewed the platform’s current AI and privacy terms.

    6. I recorded the platform and model used.

    7. I checked the commercial-use conditions.

    8. I reviewed every frame for brands, protected material, and inaccuracies.

    9. I verified music, narration, and voice rights.

    10. I added an AI disclosure when appropriate.

    11. I saved the prompts, source files, licences, and final version.

    12. I checked the rules of the website or platform where the video will appear.

     Figure 7. A beginner checklist for protecting privacy, respecting copyright, and using AI-generated videos commercially.

     Figure 7 reminds beginners that responsible AI video creation begins before a file is uploaded and continues after the video is generated. Source permissions, privacy settings, model terms, human consent, audio rights, accuracy checks, disclosure, and record keeping should all be reviewed before publication.

    Common Mistakes Beginners Make When Choosing an AI Video Tool

    Choosing the wrong tool can waste credits, time, and money. Most problems happen because beginners subscribe before testing whether the platform fits their actual project.

    Choosing a Tool Only Because the Demonstration Looks Impressive

    Promotional videos usually show a platform’s strongest results. They may not show:

    • Failed generations

    • Repeated prompt revisions

    • Credit usage

    • Editing time

    • Character inconsistencies

    • Watermarks

    • Lower-quality free exports

    Reality: A beautiful demonstration does not prove that the tool will reliably create your type of video.

    How to Avoid This Mistake: Test the platform using your own simple prompt before paying for a plan.

    Buying an Annual Plan Before Testing the Tool

    Annual plans may appear cheaper when shown as a monthly equivalent. However, the full annual amount may be charged immediately.

    A beginner may later discover that:

    • The interface is difficult

    • The required model is unavailable

    • Credits are consumed too quickly

    • Videos contain a watermark

    • The tool does not support the required format

    • The cancellation policy is restrictive

    How to Avoid This Mistake: Begin with free access or the smallest monthly plan. Consider annual billing only after completing at least one real project successfully.

    Comparing Subscription Prices Instead of Finished-Video Costs

    A lower-priced plan is not always cheaper in practice.

    One usable scene may require:

    1. An initial generation

    2. A revised prompt

    3. A corrected-motion version

    4. A stable-background version

    5. A higher-resolution export

    Reality: The real cost is the amount spent to produce a usable finished video, not the advertised cost of one generation.

    How to Avoid This Mistake: Record how many attempts and credits each finished scene requires.

    Choosing the Most Advanced Tool First

    Advanced platforms may provide detailed controls for camera movement, keyframes, references, motion strength, model selection, and editing.

    These features are valuable, but they can overwhelm a complete beginner.

    How to Avoid This Mistake: Start with a simpler tool that allows you to learn prompting, reviewing, and basic editing. Move to an advanced platform when you know which controls you actually need.

    Paying for Several Tools at the Same Time

    Beginners may subscribe to multiple platforms because each appears to offer something different.

    This can lead to:

    • Several monthly charges

    • Unused credits

    • Confusing workflows

    • Files spread across many accounts

    • Difficulty learning any one platform properly

    How to Avoid This Mistake: Choose one main generator and one editor only when needed. Complete a small project before adding another subscription.

    Ignoring the Difference Between the Platform and the Model

    A platform may offer access to several video models.

    Each model may have different:

    • Credit costs

    • Clip lengths

    • Resolutions

    • Aspect ratios

    • Prompt behaviour

    • Commercial-use conditions

    • Privacy terms

    • Camera controls

    Selecting a different model can produce very different results inside the same platform.

    How to Avoid This Mistake: Record the platform, model name, model version, settings, and date used for every important clip.

    Assuming Every Tool Supports the Same Aspect Ratios

    Some tools support landscape, vertical, square, and portrait video. Others offer only selected formats.

    Generating in the wrong format and cropping later may remove:

    • A person’s head

    • Important products

    • Captions

    • Background details

    • On-screen graphics

    How to Avoid This Mistake: Choose the publishing platform and aspect ratio before generating the first clip.

    Ignoring Watermarks and Export Restrictions

    Free plans may allow video generation but restrict professional use through:

    • Visible watermarks

    • Lower resolution

    • Limited downloads

    • Restricted file formats

    • Missing commercial-use permissions

    How to Avoid This Mistake: Generate and download one test clip before starting a full project. Check the exported file—not only the preview shown inside the platform.

    Assuming Higher Resolution Means Better Video

    A 1080p or 4K export may look sharper, but higher resolution does not automatically correct:

    • Distorted movement

    • Changing objects

    • Incorrect hands

    • Unstable backgrounds

    • Poor prompt interpretation

    • Inaccurate product details

    Reality: Resolution affects sharpness, while prompt quality and model performance affect the content.

    How to Avoid This Mistake: Test at a lower resolution first. Use higher resolution only after the scene, motion, and composition are correct.

    Using Complicated Prompts During the First Test

    A long prompt containing several characters, locations, actions, camera movements, and lighting changes may produce a confusing result.

    This makes it difficult to determine whether the problem comes from:

    • The tool

    • The selected model

    • The prompt

    • The uploaded image

    • The settings

    How to Avoid This Mistake: Test every platform with one subject, one location, one action, and one camera movement.

    Ignoring Image-to-Video Quality

    A tool may produce attractive text-to-video clips but perform poorly when animating uploaded images

    Image-to-video quality is especially important when creating:

    • Product clips

    • Character scenes

    • Website illustrations

    • Animated article images

    • Consistent multi-scene videos

    How to Avoid This Mistake: Test both text-to-video and image-to-video when you expect to use both methods.

    Ignoring Editing Requirements

    Generated clips usually need trimming, captions, narration, music, transitions, or colour correction.

    A beginner may choose a powerful generator but later discover that it does not provide practical editing tools.

    How to Avoid This Mistake: Decide whether you want:

    • Generation and editing in one platform

    • A separate AI generator and video editor

    • A complete automated script-to-video workflow

    Include editing time and cost in your decision.

    Forgetting About Audio

    Some tools generate silent clips. Others create dialogue, sound effects, music, or narration.

    Generated audio may contain:

    • Incorrect words

    • Poor pronunciation

    • Unnatural timing

    • Excessive volume

    • Weak lip synchronization

    • Music that does not fit the scene

    How to Avoid This Mistake: Listen to the complete clip with headphones. Be prepared to replace or edit the audio separately.

    Ignoring Privacy Settings

    Uploading a photograph or business file without reviewing privacy settings can expose sensitive material.

    A beginner may not notice that:

    • A project is public

    • A community-sharing option is enabled

    • Uploaded material is retained

    • Team members can access the file

    • Content settings permit broader service use

    How to Avoid This Mistake: Review privacy, storage, sharing, and deletion settings before uploading personal or commercial material.

    Assuming Commercial Use Is Automatically Permitted

    A paid subscription does not automatically guarantee unrestricted commercial use.

    Restrictions may depend on:

    • The selected plan

    • The selected model

    • Uploaded source material

    • Generated audio

    • Real-person consent

    • Protected brands

    • Publishing-platform rules

    How to Avoid This Mistake: Check the current commercial-use terms for both the platform and the exact model used.

    Failing to Save Successful Prompts and Settings

    A beginner may generate a strong clip but fail to record how it was created.

    Later, the result may be difficult to reproduce.

    Save:

    • The prompt

    • The uploaded image

    • The platform

    • The model

    • The resolution

    • The aspect ratio

    • The duration

    • The motion setting

    • The generation date

    • The final filename

    How to Avoid This Mistake: Create one organized project folder and keep a simple generation record.

    Expecting a Perfect Result on the First Attempt

    AI video generation is normally an improvement process.

    A weak first result does not necessarily mean the platform is unsuitable. The prompt or settings may need adjustment.

    How to Avoid This Mistake: Identify the largest problem, revise one instruction, and generate another version. Changing everything at once makes it difficult to learn what improved the result.

    Figure 8. Common mistakes beginners should avoid when selecting and testing an AI video tool.

     Figure 8 highlights the decisions that commonly lead to wasted credits, unsuitable subscriptions, privacy risks, and disappointing results. Testing one simple project, checking the exact model and terms, and recording costs and settings can prevent most of these problems.

    Step-by-Step: Test an AI Video Tool Before Paying

    A short practical test can reveal more than promotional videos, feature lists, or reviews. Before purchasing a subscription, use the same simple project to test each tool you are considering.

    The goal is not to create a perfect video. The goal is to determine whether the platform is easy to use, follows your instructions, produces stable results, and offers reasonable value.

    Step 1: Define One Simple Test Scene

    Choose a scene containing:

    • One main subject

    • One location

    • One clear action

    • One camera movement

    • Simple lighting

    • No dialogue

    • No visible text

    For example:

    A vintage red bicycle rests beside a wooden fence on a quiet country road at sunrise. Grass moves gently in the breeze while the camera slowly moves toward the bicycle.

    Avoid testing a platform with several characters, locations, or complicated actions. A simple scene makes it easier to identify whether a problem comes from the tool or the prompt.

    Step 2: Decide Where the Video Will Be Used

    Choose the intended publishing platform before generating the clip.

    For example:

    • YouTube or website: 16:9 landscape

    • YouTube Shorts, TikTok, or Instagram Reels: 9:16 vertical

    • Square social media post: 1:1

    • Portrait feed post: 4:5

    This ensures that you test the correct aspect ratio instead of judging a format you will not use.

    Step 3: Prepare One Standard Prompt

    Use the same prompt when comparing several tools.

    For example:

    Create a six-second realistic cinematic video of a vintage red bicycle resting beside a wooden fence on a quiet country road at sunrise. Grass moves gently in the breeze while the camera slowly moves toward the bicycle. Use soft golden natural lighting, stable framing, smooth motion, and a peaceful atmosphere. Keep the bicycle, fence, road, and background unchanged. Use 16:9 landscape format. No people, no text, no logos, no camera shake, and no duplicated objects.

    Using the same prompt creates a fairer comparison.

    Do not rewrite the prompt to favour one platform unless the tool requires a different format.

    Step 4: Record the Starting Conditions

    Before pressing Generate, record:

    • Platform name

    • Model name

    • Date

    • Generation method

    • Clip duration

    • Resolution

    • Aspect ratio

    • Motion setting

    • Credits available

    • Credits required

    • Free or paid account

    • Estimated processing time, when shown

    This information helps you understand why two results may differ.

    Step 5: Generate Only One Version First

    Do not request several variations immediately.

    Generate one clip and watch it from beginning to end.

    Check:

    • Did the subject appear correctly?

    • Did the action follow the prompt?

    • Was the camera movement correct?

    • Did the background remain stable?

    • Did the bicycle retain its shape?

    • Did any new objects appear?

    • Was the lighting appropriate?

    • Was the aspect ratio correct?

    • Did the clip contain a watermark?

    • Was the video easy to download?

    One careful test is more useful than generating several versions without reviewing them.

    Step 6: Review the Entire Clip Slowly

    Do not judge the video only from the first frame or preview image.

    Watch:

    • The beginning

    • The middle

    • The final second

    • The clip at normal speed

    • The clip frame by frame when possible

    Look for:

    • Flickering

    • Object transformation

    • Sudden movement

    • Cropping

    • Background changes

    • Lighting changes

    • Extra objects

    • Camera shake

    • Distorted shapes

    • Unwanted text

    Many AI-video problems appear near the end of a clip.

    Step 7: Identify the Largest Problem

    Choose the most important weakness.

    For example:

    • The camera moves too quickly.

    • The bicycle changes shape.

    • The background flickers.

    • The grass moves unnaturally.

    • The scene is too dark.

    • The subject is cropped.

    • Extra objects appear.

    Do not revise every instruction at the same time.

    Changing one main detail makes it easier to determine whether the tool responds well to corrections.

    Step 8: Revise the Prompt Once

    Add a specific correction.

    For example:

    Keep the bicycle completely unchanged throughout the video. Use a slower camera movement and reduce the grass motion. Keep the fence, road, lighting, and background fixed and stable.

    Generate a second version using the revised prompt.

    Compare whether the platform:

    • Followed the correction

    • Improved the main problem

    • Introduced new problems

    • Used additional credits reasonably

    • Preserved the original visual style

    A tool that responds well to revisions may be more useful than one that occasionally produces an impressive first result but ignores corrections.

    Step 9: Test Image-to-Video

    When you expect to animate images, upload a simple high-quality reference image.

    Use an image with:

    • One main subject

    • Clean edges

    • Good lighting

    • A simple background

    • Enough space around the subject

    • No important objects cut off

    Use a motion prompt such as:

    Animate this image into a six-second realistic video. Keep the bicycle, fence, road, lighting, colours, and background unchanged. Add only gentle grass movement and a slow camera push forward. Use smooth natural motion, stable framing, no new objects, no text, no logos, and no sudden changes.

    Check whether the platform preserves the original image instead of redesigning it unnecessarily.

    Step 10: Test the Editing Workflow

    A generated clip will normally require some editing.

    Check whether you can easily:

    • Trim the beginning and end

    • Adjust the clip length

    • Add captions

    • Add a title

    • Add narration

    • Add music

    • Change the aspect ratio

    • Arrange several clips

    • Export the finished video

    A generator may produce strong footage but still be unsuitable when the editing process is difficult or requires another expensive service.

    Step 11: Download a Test Export

    Do not judge the platform only from its internal preview.

    Download the video and check:

    • File format

    • Resolution

    • Watermark

    • Audio quality

    • File size

    • Playback quality

    • Colour changes

    • Compatibility with your editor

    • Whether the clip plays correctly on your computer

    For most beginner projects, an MP4 export is practical and widely supported.

    Step 12: Check the Mobile and Desktop Experience

    When the platform offers web, desktop, and mobile versions, features may not be identical.

    Check whether:

    • Your projects appear on every device

    • The required AI model is available

    • Uploaded images remain accessible

    • Editing tools are included

    • Exports use the expected quality

    • Credits are shared correctly

    • The interface remains readable

    Use the version you expect to rely on for your actual project.

    Step 13: Review Privacy and Sharing Settings

    Before uploading personal or commercial files, locate the platform’s privacy controls.

    Confirm:

    • Whether projects are private

    • Whether generations appear in a public gallery

    • Whether public sharing is optional

    • How uploaded files can be deleted

    • Whether project links can be disabled

    • Whether team members can see the content

    • Whether AI-training preferences can be changed

    Do not test privacy-sensitive material. Use a generic image until you understand the platform’s settings.

    Step 14: Review the Commercial-Use Terms

    For business, monetized, or client work, check:

    • Whether commercial use is allowed

    • Whether the rule differs by plan

    • Whether the selected model has separate terms

    • Whether watermarked exports may be used publicly

    • Whether generated audio has additional restrictions

    • Whether attribution is required

    • Whether uploaded source material must belong to you

    Save the date on which you checked the terms.

    Step 15: Calculate the Cost of One Usable Clip

    Record:

    • Number of generations

    • Credits consumed

    • Number of usable results

    • Resolution

    • Clip duration

    • Editing time

    • Extra services required

    • Watermark-removal requirements

    • Subscription cost

    For example:

    Test resultRecord
    Generations attempted2
    Usable clips1
    Total credits usedEnter actual amount
    Finished duration6 seconds
    WatermarkYes or no
    Separate editor neededYes or no
    Approximate creation timeEnter actual time

    This provides a more realistic measure than comparing subscription prices alone.

    Step 16: Score the Tool

    Use a score from 1 to 5 for each category.

    CategoryScore
    Ease of use/5
    Prompt accuracy/5
    Motion quality/5
    Background stability/5
    Image-to-video quality/5
    Editing tools/5
    Export quality/5
    Generation speed/5
    Credit value/5
    Privacy controls/5
    Commercial-use clarity/5
    Overall suitability/5

    Do not select the platform only because it receives the highest total score. Some categories may matter more for your project.

    For example:

    • A social media creator may prioritize editing, captions, and vertical formats.

    • A business user may prioritize privacy and commercial-use clarity.

    • A filmmaker may prioritize camera control and visual quality.

    • An educator may prioritize avatars, narration, captions, and language support.

    Step 17: Make a Practical Decision

    After testing, choose one of these outcomes:

    Use the free version:
    Suitable for learning and occasional simple projects.

    Buy the smallest monthly plan:
    Suitable when the free limits prevent completion of a real project.

    Continue testing another platform:
    Suitable when the tool ignores prompts, consumes credits too quickly, or lacks required features.

    Do not use the platform:
    Suitable when privacy, commercial-use terms, watermarks, exports, or costs are unacceptable.

    Avoid subscribing simply because you have already spent time testing the tool. A failed test can save you from a poor long-term purchase.

    Recommended Test for AI Mastery

    For the AI Mastery website, use this sequence:

    1. Create one six-second 16:9 video.

    2. Use a simple educational or technology-related scene.

    3. Test one text-to-video generation.

    4. Test one image-to-video generation.

    5. Review prompt accuracy and stability.

    6. Download the final clip.

    7. Check whether it works in Canva, CapCut, or your preferred editor.

    8. Record the credits used.

    9. Confirm commercial-use conditions.

    10. Purchase a plan only when a specific article or YouTube project requires it.

    This controlled test prevents unnecessary subscriptions and creates a repeatable evaluation process for future AI tools.

     Figure 9. A step-by-step process for testing an AI video tool before purchasing a subscription.

     Figure 9 shows how beginners can evaluate an AI video platform using one simple prompt, two controlled generations, an image-to-video test, an export check, and a cost review. This process helps users compare practical results instead of relying on promotional demonstrations.

    Benefits of Using AI Video Tools for Beginners

    AI video tools do not remove the need for planning, creativity, or editing. However, they can make video production more accessible to people who do not own professional equipment or have advanced editing experience.

    The greatest benefit is not simply speed. It is the ability to test ideas, create visual drafts, and improve videos without beginning every project with filming.

    Lower Starting Requirements

    Traditional video production may require:

    • A camera

    • Lighting equipment

    • Microphones

    • Actors or presenters

    • Filming locations

    • Video-editing software

    • Technical production skills

    • Considerable preparation time

    AI video tools can reduce some of these requirements.

    A beginner may start with:

    • A written idea

    • A prompt

    • A reference image

    • A script

    • A computer or mobile device

    • Internet access

    • A suitable AI video platform

    This makes it possible to experiment with video before investing in expensive equipment.

    Faster Idea Testing

    A written concept can be turned into a short visual draft within minutes.

    For example, a small-business owner could test:

    • A product-advertisement idea

    • A website background

    • A social media scene

    • A course introduction

    • A promotional concept

    • A story opening

    • A presentation sequence

    The first version does not need to be published. It can act as a visual prototype that helps the creator decide whether the idea is worth developing further.

    Easier Storyboarding

    A storyboard shows what happens in each scene before the full video is produced.

    AI tools can help create:

    • Opening scenes

    • Camera-angle examples

    • Character references

    • Product concepts

    • Location ideas

    • Lighting tests

    • Scene transitions

    • Final-shot options

    This is useful even when the finished project will eventually use real filming.

    A generated storyboard can help a creator explain the intended video to:

    • A client

    • A designer

    • A video editor

    • A teacher

    • A business partner

    • A production team

    Access to Scenes That Are Difficult to Film

    Some scenes may be expensive, dangerous, impossible, or impractical to record.

    Examples include:

    • Futuristic cities

    • Historical environments

    • Space scenes

    • Fantasy landscapes

    • Extreme weather

    • Underwater environments

    • Large-scale transformations

    • Abstract educational concepts

    • Imaginary products

    • Animated data visualizations

    AI can create a visual concept without requiring a physical location or complex production setup.

    However, generated scenes should not be presented as genuine footage when viewers could be misled.

    Faster Creation of Short Clips

    Short clips are useful for:

    • Website headers

    • Social media posts

    • Article demonstrations

    • Presentation backgrounds

    • YouTube introductions

    • Advertising concepts

    • Online lessons

    • Product ideas

    A beginner can create several short clips and combine them in an editor rather than filming an entire video from beginning to end.

    This scene-by-scene method also makes weak sections easier to replace.

    Easier Image Animation

    Image-to-video tools can bring movement to:

    • AI-generated images

    • Illustrations

    • Landscapes

    • Product photographs

    • Character designs

    • Artwork you are permitted to use

    • Website graphics

    • Educational diagrams

    For example, a still image of a forest could be animated with:

    • Gentle leaf movement

    • Drifting mist

    • Moving clouds

    • Flowing water

    • A slow camera push forward

    This can make an existing image more engaging without redesigning the entire scene.

    Support for People Who Are Not Comfortable on Camera

    Some people have useful knowledge to share but do not want to appear in a video.

    AI tools can support:

    • Narrated screen presentations

    • Faceless educational videos

    • Avatar-led lessons

    • Animated explainers

    • Text-based video stories

    • Product demonstrations

    • Voice-over presentations

    The creator can focus on the script and information rather than personal on-camera performance.

    Multilingual Video Creation

    Some AI video platforms support:

    • Multiple languages

    • Translated scripts

    • AI narration

    • Captions

    • Dubbing

    • Avatar speech

    • Subtitle generation

    This can help creators communicate with audiences who speak different languages.

    However, every translation and pronunciation should be reviewed by someone who understands the language. Automated translation may produce incorrect wording, unsuitable tone, or mispronounced names.

    Easier Caption Creation

    Captions improve accessibility and help viewers who:

    • Watch videos without sound

    • Have hearing difficulties

    • Speak a different first language

    • Are in a noisy environment

    • Need extra support understanding narration

    AI-assisted editors may generate captions automatically.

    The creator should still check:

    • Spelling

    • Punctuation

    • Timing

    • Speaker names

    • Technical terms

    • Line length

    • Placement on the screen

    Automatic captions are a starting point, not a final quality guarantee.

    Faster Video Resizing

    A single video may need several formats:

    • 16:9 for YouTube and websites

    • 9:16 for Shorts, Reels, and TikTok

    • 1:1 for square social media posts

    • 4:5 for portrait feed posts

    AI-assisted editing tools can help resize or reframe a video.

    Some tools attempt to keep the main subject visible automatically. Nevertheless, every resized version should be checked because important people, products, captions, or background details may be cropped.

    Easier Removal of Unwanted Material

    AI-assisted editing may help:

    • Remove backgrounds

    • Remove pauses

    • Reduce noise

    • Delete unwanted objects

    • Replace selected areas

    • Improve framing

    • Extend backgrounds

    • Separate a subject from the scene

    These features can reduce manual editing time.

    They may also introduce errors, so review the edited area frame by frame before publishing.

    Faster Creation of Video Variations

    A creator may need several versions of the same idea.

    For example:

    • A calm version

    • An energetic version

    • A landscape version

    • A vertical version

    • A version with narration

    • A silent version

    • A business version

    • A social media version

    AI tools can make these variations easier to prepare.

    Do not generate variations without a reason. Every extra version may consume credits and increase review time.

    Useful Support for Small Businesses

    Small businesses may use AI video tools for:

    • Website introductions

    • Product concepts

    • Social media promotions

    • Educational demonstrations

    • Presentation backgrounds

    • Event announcements

    • Customer instructions

    • Early advertising drafts

    AI can help produce a first version before the business invests in professional filming.

    For important product claims, customer testimonials, safety instructions, or exact demonstrations, real footage may still be the better choice.

    Support for Teachers and Course Creators

    Educators may use AI video tools to create:

    • Lesson introductions

    • Topic summaries

    • Visual examples

    • Animated explanations

    • Presenter-led training

    • Course announcements

    • Scenario demonstrations

    • Background visuals

    A visual explanation can help make an unfamiliar topic easier to understand.

    The educational content must still be checked for accuracy. A polished video can communicate incorrect information just as effectively as correct information.

    Helpful for Creators with Limited Editing Experience

    Some platforms combine generation with:

    • Templates

    • Captions

    • Music

    • Narration

    • Transitions

    • Stock media

    • Simple timelines

    • Automatic resizing

    This can reduce the number of separate applications a beginner must learn.

    A simple all-in-one platform may be more practical than an advanced generator that requires several additional services.

    Encourages Experimentation

    AI video tools make it easier to test creative choices such as:

    • Lighting

    • Camera angles

    • Colour palettes

    • Visual styles

    • Subject movement

    • Scene duration

    • Narration tone

    • Background design

    Experimentation helps beginners understand what makes a video clear, stable, and engaging.

    Keep successful prompts and settings so that useful experiments can be repeated.

    Supports Human Creativity Rather Than Replacing It

    The tool generates material, but the creator still decides:

    • The purpose

    • The audience

    • The message

    • The script

    • The scene order

    • The visual direction

    • Which results to keep

    • What needs correction

    • How the final video is edited

    • Whether the video is appropriate to publish

    The strongest results usually combine AI assistance with human judgment.

    A Practical View of the Benefits

    AI video tools are most useful when they help you:

    • Test an idea quickly

    • Reduce unnecessary filming

    • Create visual prototypes

    • Animate existing images

    • Prepare short supporting clips

    • Improve accessibility

    • Produce several formats

    • Organize a scene-by-scene workflow

    They are less suitable when a project requires:

    • Exact evidence

    • Genuine testimony

    • Precise product operation

    • Authentic documentary footage

    • Guaranteed factual accuracy

    • A real person’s verified actions or statements

    Use AI when flexibility and creative experimentation are valuable.

    Use real filming when authenticity and exact accuracy are essential.

     Figure 10. The main benefits AI video tools can provide to beginners, educators, creators, and small businesses.

     Figure 10 summarizes how AI video tools can lower starting requirements, speed up idea testing, animate images, support multilingual and accessible content, simplify editing, and help users create visual prototypes. These benefits are strongest when AI supports human planning and review rather than replacing them.

    Limitations of AI Video Tools for Beginners

    AI video tools can produce impressive results, but they are not automatic replacements for filming, editing, or human judgment.

    Beginners should understand the limitations before using generated video for education, advertising, websites, YouTube, or business projects.

    Results May Change Between Generations

    Entering the same prompt more than once may produce different:

    • Subjects

    • Backgrounds

    • Camera angles

    • Lighting

    • Colours

    • Movements

    • Compositions

    This variation can be useful when exploring ideas, but it makes exact reproduction difficult.

    Even when a platform provides a seed or similar control, changing the prompt, reference image, or settings may affect the result. Adobe explains that a seed can help produce a similar asset, but changes to generation properties can still alter the output.

    How to Reduce This Limitation: Save the prompt, seed, model, settings, reference image, date, and best generated version.

    Characters May Look Different Between Scenes

    A character’s:

    • Face

    • Hair

    • Clothing

    • Age

    • Body shape

    • Skin tone

    • Accessories

    may change between separately generated clips.

    Using several permitted reference images from different angles can reduce, but not eliminate, identity changes across separate generations. [9]

    How to Reduce This Limitation: Create several clear reference images of the character from different angles. Repeat the same character description in every scene prompt.

    Generated Clips Are Often Short

    Many generative-video workflows create short segments rather than a complete long-form video.

    A practical way to create a longer video is to generate shorter clips and combine them through video editing. [15]

    How to Reduce This Limitation: Divide the complete video into short scenes. Generate and review each scene separately, then arrange the clips in an editor.

    Longer Stories Require Additional Planning

    A complete story may involve:

    • Several characters

    • Multiple locations

    • Dialogue

    • Scene changes

    • Cause-and-effect events

    • Consistent clothing and products

    • Matching lighting

    • Continuous narration

    The AI may not remember all these details automatically across separate generations.

    How to Reduce This Limitation: Create a storyboard, scene list, character sheet, environment sheet, and consistency checklist before generating clips.

    Text-to-Video May Provide Less Consistency

    Text-to-video gives the model considerable freedom to design the scene. This is useful for B-roll, backgrounds, and creative exploration, but it may be less suitable when exact character or scene consistency is important.

    Text-to-video gives the model more freedom to invent the scene, so it may be less suitable when precise character or scene consistency is essential. [9][10]

    How to Reduce This Limitation: Use image-to-video or reference-based workflows when the person, product, setting, or composition must remain recognizable.

    Image Cropping May Change the Composition

    An uploaded reference image may be cropped to match the dimensions required by the selected model.

    When an uploaded image does not match the selected video format, cropping may remove material near the edges. [2]

    Important details may disappear, including:

    • A person’s head

    • A product

    • Text

    • Background objects

    • Space intended for captions

    • Parts of a logo or design

    How to Reduce This Limitation: Prepare the image in the required aspect ratio before uploading it. Leave enough space around the main subject.

    Hands, Faces, and Complex Actions May Be Unstable

    AI-generated people may show:

    • Unnatural fingers

    • Changing facial details

    • Stiff expressions

    • Incorrect body movement

    • Objects passing through hands

    • Inconsistent walking or running

    • Poor interaction between characters

    Actions involving writing, eating, handling small objects, or several people interacting can be especially difficult.

    How to Reduce This Limitation: Use simple, slow movements. Avoid unnecessary close-ups of complicated hand actions, and inspect the entire clip carefully.

    Products May Change Shape or Details

    Generated product footage may alter:

    • Size

    • Shape

    • Colour

    • Packaging

    • Buttons

    • Materials

    • Labels

    • Accessories

    • Safety features

    A visually attractive clip may therefore be unsuitable for an accurate advertisement or product demonstration.

    How to Reduce This Limitation: Use real product footage when exact accuracy matters. AI-generated product video is better suited to early concepts, mood boards, and visual prototypes.

    Visible Text May Be Incorrect

    Signs, labels, screens, packages, and clothing may contain:

    • Misspelled words

    • Random symbols

    • Distorted letters

    • Changing text

    • Unreadable sentences

    Some platforms provide text-generation controls, but the result must still be checked. Adobe currently allows quoted text instructions in supported Generate Video workflows, but this does not remove the need for manual verification. [1]

    How to Reduce This Limitation: Generate the scene without important visible text. Add accurate titles, captions, product labels, and calls to action later in a video editor.

    Generated Audio May Need Replacement

    AI-generated audio may contain:

    • Incorrect pronunciation

    • Unnatural pacing

    • Weak emotion

    • Poor lip synchronization

    • Music that does not match the scene

    • Sudden volume changes

    • Repetitive sound effects

    • Incorrect spoken words

    How to Reduce This Limitation: Review narration, dialogue, music, and sound effects separately. Replace weak audio and balance all sound levels during editing.

    Availability May Differ by Device, Browser, Account, or Region

    A feature shown in a tutorial may not be available in every account.

    Adobe states that video-generation availability can vary according to geographic location, user type, plan, and regulatory requirements. Its video workflows also have specific browser and operating-system requirements. [3]

    Adobe’s Firefly video editor currently has additional compatibility and import limitations, including browser support and limits on file size, duration, and resolution. [8]

    How to Reduce This Limitation: Confirm the feature on the exact device, browser, account, and plan you intend to use before paying.

    Editing Tools May Have Technical Limits

    A built-in editor may not support every file or workflow.

    For example, Adobe currently states that animated GIF and WebP files may display only their first frame when added to the Firefly video-editor timeline. It also lists limits for imported file size, duration, and resolution. [8]

    How to Reduce This Limitation: Download a test export and open it in your preferred editor before beginning a large project. Keep a separate local copy of every important file.

    Credits Can Be Consumed Quickly

    Video generation commonly requires several attempts because the first result may contain movement, framing, consistency, or cropping problems.

    A project containing several scenes may therefore use substantially more credits than expected.

    How to Reduce This Limitation: Generate one version at a time, review it carefully, and identify the main problem before generating again.

    Built-In Avatars May Have Usage Restrictions

    Avatar platforms may restrict how stock presenters can be used.

    Synthesia currently limits stock-avatar use to approved general and brand-safe content. Certain endorsements, sensitive topics, opinions, and representations of specific organizations may require a personal or studio avatar instead. [22]

    How to Reduce This Limitation: Review the avatar-use and content-moderation rules before writing the final script.

    Commercial Use Still Requires Human Review

    Commercial-use permission does not guarantee that every generated clip is:

    • Accurate

    • Original

    • Free of protected material

    • Suitable for advertising

    • Properly licensed

    • Safe from misleading claims

    A generated scene may unintentionally contain a recognizable brand, inaccurate product feature, or visual resemblance to protected content.

    How to Reduce This Limitation: Review every frame, verify the source material, confirm the selected model’s terms, and keep records of your creative process.

    AI Cannot Decide Whether the Video Is Appropriate

    AI cannot reliably determine whether every generated scene is:

    • Fair

    • Accurate

    • Respectful

    • Ethical

    • Suitable for children

    • Appropriate for the audience

    • Compliant with current platform rules

    • Potentially misleading

    The creator remains responsible for the final decision to publish.

    How to Reduce This Limitation: Conduct a complete human review of the visuals, narration, captions, music, permissions, disclosures, and factual claims.

    When AI Video May Not Be the Right Choice

    Use real filming instead when the project requires:

    • Genuine customer testimony

    • Documentary evidence

    • Exact product operation

    • A real event

    • Safety instructions

    • Medical or legal demonstrations

    • Verified actions by a real person

    • Precise proof of results

    AI video is strongest for creative concepts, visual explanations, B-roll, prototypes, animation, and scenes that are clearly presented as generated or illustrative.

     Figure 11. The main limitations beginners should consider before choosing and using an AI video tool.

     Figure 11 shows that AI video tools may produce short clips, inconsistent characters, unstable movement, inaccurate text, altered products, unexpected cropping, and additional editing costs. Understanding these limitations helps beginners choose realistic projects and avoid using generated video when exact authenticity is required.

    Common Myths About AI Video Tools

    AI video tools are often promoted as effortless, automatic, and capable of replacing traditional video production. These claims can create unrealistic expectations for beginners.

    Understanding the difference between marketing promises and practical results helps you choose tools more carefully and avoid wasting credits.

    Myth 1: AI Creates a Perfect Video from One Prompt

    Reality: The first generation may contain unstable movement, incorrect framing, changing objects, distorted hands, or an unsuitable visual style.

    A usable result may require:

    • Revising the prompt

    • Reducing movement

    • Changing the reference image

    • Selecting another model

    • Regenerating the scene

    • Editing the final clip

    Treat the first result as a draft rather than a finished video.

    Myth 2: The Most Expensive Tool Produces the Best Results

    Reality: A higher-priced plan may provide more credits, models, storage, or advanced controls, but it does not guarantee better results for your project.

    A simpler platform may be more useful when you need:

    • Easy editing

    • Captions

    • Templates

    • Social media formats

    • Quick exports

    • A straightforward interface

    The best tool is the one that reliably performs the task you need.

    Myth 3: Longer Prompts Always Produce Better Videos

    Reality: A longer prompt may confuse the model when it contains too many subjects, actions, locations, lighting styles, or camera movements.

    A strong prompt should be detailed but focused.

    Begin with:

    • One main subject

    • One setting

    • One action

    • One camera movement

    • One lighting style

    • One visual mood

    Add more information only when it improves the result.

    Myth 4: AI Video Requires No Editing

    Reality: Generated clips commonly need trimming, captions, sound adjustments, titles, transitions, colour correction, or scene arrangement.

    Editing is especially important when combining several generated clips into one complete video.

    AI creates the raw visual material. Editing turns that material into a finished project.

    Myth 5: High Resolution Fixes Generation Problems

    Reality: Higher resolution improves sharpness but does not correct:

    • Unnatural movement

    • Incorrect hands

    • Changing faces

    • Unstable backgrounds

    • Poor composition

    • Incorrect product details

    • Weak prompt interpretation

    Correct the content first. Upscale or regenerate at a higher resolution only after the scene is satisfactory.

    Myth 6: ChatGPT Generates Every AI Video Directly

    Reality: ChatGPT can help plan the idea, write prompts, prepare storyboards, create narration, and improve weak instructions.

    The moving video is normally generated by a dedicated AI video model or platform.

    This distinction is important because the video generator—not ChatGPT alone—determines:

    • Available clip lengths

    • Resolution

    • Aspect ratios

    • Motion quality

    • Credit use

    • Export conditions

    • Commercial-use terms

    Myth 7: Text-to-Video Is Always Better Than Image-to-Video

    Reality: The better method depends on the project.

    Use text-to-video when:

    • You want the AI to design the entire scene

    • Exact character consistency is not essential

    • You need creative exploration

    • You are generating backgrounds or B-roll

    Use image-to-video when:

    • You already have a strong starting image

    • The subject should remain recognizable

    • Composition matters

    • You want greater control over the first frame

    • Several scenes should share a similar visual style

    Neither method is automatically superior.

    Myth 8: More Motion Makes the Video More Impressive

    Reality: Excessive motion can cause:

    • Camera shake

    • Distorted bodies

    • Changing backgrounds

    • Altered products

    • Unnatural speed

    • Unwanted object movement

    Slow, controlled movement often looks more professional than dramatic movement.

    For beginners, one clear subject action and one camera movement are usually sufficient.

    Myth 9: AI-Generated Text Will Be Correct

    Reality: Text displayed on signs, packages, screens, clothing, or buildings may be misspelled or distorted.

    Even when a tool supports text instructions, every word must be checked.

    For important text:

    1. Generate the visual scene without the wording.

    2. Add the correct title, caption, label, or call to action during editing.

    Myth 10: A Paid Plan Automatically Gives Full Commercial Rights

    Reality: Commercial-use conditions may depend on:

    • The platform

    • Subscription level

    • Selected model

    • Uploaded source material

    • Generated voice or music

    • Use of real people

    • Protected brands or characters

    • The publishing platform

    Paying for access does not provide rights to copyrighted material uploaded without permission.

    Always review the current terms for the exact model and account used.

    Myth 11: AI Videos Are Automatically Original

    Reality: Different users may generate similar scenes, compositions, characters, or visual styles.

    The output may also unintentionally resemble:

    • Existing artwork

    • Commercial designs

    • Recognizable brands

    • Protected characters

    • Another generated result

    Human editing, original narration, scene arrangement, and meaningful creative decisions can make the final project more distinctive.

    Myth 12: AI Video Can Replace All Real Filming

    Reality: AI video can replace or support some creative scenes, prototypes, backgrounds, animations, and visual concepts.

    Real filming remains more appropriate when the project requires:

    • Genuine testimony

    • Documentary evidence

    • Accurate product operation

    • A real event

    • Verified actions

    • Safety instructions

    • Exact demonstrations

    • Authentic human emotion

    Use AI when creative flexibility is valuable. Use real footage when authenticity is essential.

    Myth 13: One Reference Image Guarantees Character Consistency

    Reality: A single image may not show enough information about the person or character.

    The model may change:

    • Facial features

    • Hairstyle

    • Clothing

    • Body shape

    • Age

    • Accessories

    For stronger consistency, use several permitted reference images showing different angles and repeat the same character description in every scene prompt.

    Myth 14: Free AI Video Tools Are Completely Free

    Reality: Free access may include:

    • Limited credits

    • Watermarks

    • Lower resolution

    • Slower processing

    • Restricted models

    • Fewer exports

    • Limited commercial features

    Free access is usually best for testing rather than producing a complete multi-scene project.

    Myth 15: AI Automatically Understands the Creator’s Intention

    Reality: The model only receives the prompt, uploaded files, and selected settings.

    It does not automatically know:

    • Your audience

    • Your business goal

    • Which details are essential

    • Which objects must remain unchanged

    • What should not appear

    • Where the video will be published

    Clear instructions remain necessary.

    Myth 16: Human Creativity Is No Longer Needed

    Reality: AI can generate options, but the creator still decides:

    • What the video should communicate

    • Which scenes are appropriate

    • Which results should be kept

    • What needs correction

    • How clips should be arranged

    • Whether the information is accurate

    • Whether the video should be published

    AI can accelerate production, but it cannot replace responsible creative judgment.

    Figure 12. Common myths and realities about choosing and using AI video tools.

     Figure 12 corrects common misunderstandings about AI video tools. It reminds beginners that useful results still require focused prompts, controlled movement, editing, appropriate rights, realistic expectations, and human creative judgment.

    Frequently Asked Questions About AI Video Tools

    What Is the Best AI Video Tool for a Complete Beginner?

    For a complete beginner, Canva is usually the easiest starting point because it combines AI video features with templates, captions, graphics, music, resizing, and basic editing in one workspace. Adobe Firefly is a practical next step for users who want stronger text-to-video, image-to-video, and camera controls.

    The best choice still depends on the project:

    • Canva for simple all-in-one creation

    • Adobe Firefly for cinematic clips and image animation

    • CapCut for social media editing

    • Synthesia for avatar-led lessons

    • InVideo AI for complete narrated drafts

    • Runway for greater motion and camera control

    Start with one tool and complete a small test before subscribing.

    Can I Create AI Videos for Free?

    Yes, some platforms provide limited free access. Free plans are mainly suitable for testing the interface, prompt accuracy, motion quality, and export process.

    Free access may include:

    • Limited credits or generations

    • Short clips

    • Lower resolution

    • Restricted models

    • Watermarked exports

    • Slower processing

    • Limited editing or download options

    Adobe Firefly offers limited free video generation, while Runway’s plans use model-based credits. Synthesia also provides entry access with usage limits. Current allowances can change, so check the provider’s official plan page before starting a project.

    Do I Need More Than One AI Video Tool?

    Not at the beginning.

    One platform may be enough when it combines generation and editing. For example, Canva and Adobe Firefly provide generation alongside broader editing workflows.

    A separate editor becomes useful when the generator does not provide the captions, audio, transitions, resizing, or scene-arrangement controls you need.

    A practical beginner setup is:

    1. One AI video generator

    2. One video editor, only when necessary

    3. ChatGPT for planning, scripts, storyboards, and prompts

    Avoid paying for several subscriptions until one project clearly requires them.

    Can ChatGPT Generate the Finished Video Directly?

    For this workflow, use ChatGPT to develop the idea, write the prompt, prepare the storyboard, draft narration, and improve weak instructions. Create the moving clip with a currently available dedicated video platform.

    OpenAI discontinued the Sora web and app experiences on April 26, 2026. The Sora API is scheduled for discontinuation on September 24, 2026. [26]

    Because AI products change, always check the tools currently available through your account instead of relying on an older tutorial.

    Should I Use Text-to-Video or Image-to-Video?

    Use text-to-video when you want the AI to design the complete scene from a written description.

    Use image-to-video when:

    • You already have a suitable image

    • The subject should remain recognizable

    • The composition is important

    • You need greater control over the opening frame

    • Several clips should share a similar style

    Adobe Firefly and Runway currently support both text-to-video and image-to-video workflows.

    For beginners, image-to-video may provide a more controlled starting point because the uploaded image establishes the subject, colours, composition, and background.

    How Long Should My First AI-Generated Clip Be?

    Begin with approximately five to eight seconds and one simple action.

    Short clips are generally easier to review and correct. They also reduce the risk of characters, products, or backgrounds changing as the scene continues.

    Current tools vary by model. Runway Gen-4.5 supports different generation durations and charges credits according to the number of seconds generated. Adobe Firefly workflows also commonly focus on short generated clips.

    Create longer videos by combining several short scenes in an editor.

    How Many Attempts Will I Need?

    There is no fixed number.

    A simple scene may produce a usable result after one or two attempts. A scene involving people, hands, products, dialogue, or complex movement may require several revisions.

    Use this improvement process:

    1. Generate one version.

    2. Watch the entire clip.

    3. Identify the largest problem.

    4. Change one instruction.

    5. Generate again.

    6. Compare the results.

    Changing one instruction at a time makes it easier to understand what improved the video.

    Will a Higher Resolution Produce a Better Video?

    Higher resolution makes the image sharper, but it does not automatically correct:

    • Unnatural movement

    • Changing faces

    • Distorted hands

    • Unstable backgrounds

    • Incorrect products

    • Weak prompt interpretation

    • Poor composition

    Test the scene at a lower or standard resolution first. Use a higher-resolution generation or upscale only after the subject, motion, camera, and composition are satisfactory.

    Available resolutions and credit costs vary according to the platform and selected model.

    Can I Use AI-Generated Videos on WordPress?

    Yes. You can upload an exported video to WordPress or embed it from a supported video-hosting service.

    Before uploading:

    • Export the video in a common format such as MP4

    • Compress the file for web use

    • Confirm that you have the necessary rights

    • Add a descriptive title

    • Include captions when narration is important

    • Check playback on desktop and mobile

    • Avoid excessively large files that slow the page

    For a long or high-resolution video, hosting it on a dedicated video platform and embedding it may reduce the load placed on the WordPress website.

    Can I Use AI-Generated Videos on YouTube?

    Yes, provided the video follows YouTube’s policies and you have the necessary rights to its visuals, music, narration, voices, and source material.

    YouTube requires disclosure when content is meaningfully altered or synthetically generated and appears realistic—for example, when it makes a real person appear to do something they did not do or depicts a realistic event that never occurred. The disclosure setting is available during the YouTube Studio upload process. [27]

    For monetization, videos should be original and non-repetitious. AI generation does not remove the need for meaningful narration, editing, commentary, education, or other original creative value.

    Do I Always Need to Disclose AI Use?

    Not every minor edit requires disclosure. Disclosure becomes more important—and may be required—when the content:

    • Looks realistic

    • Involves a real person

    • Uses a cloned voice

    • Alters a real event or location

    • Shows something that never happened

    • Could reasonably mislead viewers

    • Covers a sensitive subject

    YouTube currently requires disclosure for realistic, meaningfully altered or synthetic content. [27]

    A simple general disclosure can say:

    This video includes visuals created or modified using artificial intelligence.

    Always check the rules of the platform where the video will be published.

    Can I Use AI Videos for Commercial Projects?

    Possibly, but commercial-use rules depend on:

    • The platform

    • The selected model

    • The account or plan

    • Uploaded source material

    • Generated music or voices

    • Real-person consent

    • Brands and protected characters

    Adobe states that videos created using its own Firefly Video Model are designed for commercial use, while partner models available within Firefly may have different conditions. [4][6]

    Commercial permission from the AI provider does not give you rights to copyrighted photographs, music, trademarks, or other source material that you were not permitted to upload.

    Will a Paid Plan Remove Every Watermark?

    Not necessarily.

    Watermark and export conditions vary by:

    • Platform

    • Subscription plan

    • Selected model

    • Generation method

    • Export resolution

    Check the downloaded test file before paying for a large project. Runway’s free access and paid plans differ in available credits, models, and export conditions.

    Do not rely only on the clean preview shown inside the platform.

    How Can I Protect My Privacy?

    Before uploading photographs, scripts, videos, or business material:

    • Remove personal information

    • Confirm whether projects are private

    • Review storage and deletion settings

    • Check whether content may appear publicly

    • Review AI-training preferences

    • Obtain permission from recognizable people

    • Avoid confidential client or business material

    Use a generic test image until you understand the provider’s privacy controls.

    What Is the Best Tool for the AI Mastery Website?

    For the current AI Mastery workflow:

    • Use ChatGPT for planning, prompts, scripts, and narration.

    • Begin with Canva for simple creation and editing.

    • Use Adobe Firefly for cinematic scenes and image-to-video.

    • Use CapCut for captions, social media formatting, and final short-form edits.

    • Consider InVideo AI when converting complete articles into narrated videos.

    • Consider Synthesia for presenter-led lessons.

    • Use Runway after you need more advanced camera and motion control.

    Do not subscribe to all of them. Complete a small test in one platform and expand only when a real project requires another tool.

    Figure 13. Quick answers to common beginner questions about choosing and using AI video tools.

     Figure 13 summarizes the practical questions beginners ask most often, including free access, tool selection, clip duration, WordPress and YouTube use, disclosure, commercial rights, privacy, and the recommended AI Mastery workflow.

    Key Takeaways

    • AI video tools can create, animate, transform, or edit video from prompts, images, scripts, or existing footage.

    • The best tool depends on the project. Canva is practical for simple all-in-one creation, Adobe Firefly for cinematic clips and image animation, Runway for advanced control, Synthesia for avatar-led lessons, InVideo AI for complete narrated drafts, and CapCut for short-form social media editing.

    • Beginners should test one simple scene before purchasing a subscription.

    • Use the same prompt when comparing tools so that the results can be judged fairly.

    • Compare ease of use, prompt accuracy, motion stability, aspect ratios, resolution, editing features, audio, privacy, watermarks, commercial-use terms, and credit consumption.

    • One generation does not always produce one usable video. Several attempts may be required.

    • Start with short clips containing one subject, one action, one setting, and one camera movement.

    • Text-to-video is useful for creating new scenes, while image-to-video provides greater control when you already have a suitable starting image.

    • Higher resolution improves sharpness but does not fix unstable movement, changing objects, distorted hands, or weak prompt interpretation.

    • AI-generated clips usually need human editing, captions, audio review, and final quality checks.

    • Do not assume that a paid plan provides unlimited commercial rights.

    • Check the terms for the exact platform, model, plan, music, voice, and source materials used.

    • Protect private information and obtain permission before uploading images or videos of real people.

    • Disclose AI use when realistic synthetic content could confuse or mislead viewers.

    • Save prompts, settings, reference images, model names, licences, generated versions, and final files.

    • AI video tools are strongest for creative concepts, B-roll, animation, prototypes, educational visuals, and short supporting scenes.

    • Real filming remains preferable when authenticity, evidence, exact product operation, genuine testimony, or verified events are required.

    • AI assists the creative process, but the creator remains responsible for accuracy, permissions, quality, and the decision to publish.

    Final Tip

    Do not begin by searching for the most powerful AI video tool. Begin with one simple project.

    Choose a tool that allows you to:

    • Understand the interface

    • Create one short clip

    • Review the result carefully

    • Correct one problem at a time

    • Download the video successfully

    • Edit it without unnecessary difficulty

    • Use it under terms you understand

    A beginner often learns more from completing one six-second video than from opening accounts with several advanced platforms.

    For your first project:

    1. Choose one clear subject.

    2. Use one simple action.

    3. Select one camera movement.

    4. Generate one version.

    5. Review the entire clip.

    6. Correct the largest problem.

    7. Generate one improved version.

    8. Edit and save the strongest result.

    Keep a record of the prompt, selected model, settings, credits used, and final filename. This creates a repeatable workflow and prevents you from starting from zero with every new project.

    For the AI Mastery website, the practical starting strategy is:

    • Use ChatGPT for planning, prompts, narration, and troubleshooting.

    • Begin with Canva or Adobe Firefly for your first controlled test.

    • Use Canva or CapCut for captions, titles, music, and final editing.

    • Add another paid platform only when a real project requires features your current tool cannot provide.

    The goal is not to collect AI tools. The goal is to learn one reliable workflow that produces useful, accurate, and responsible videos.

    Figure 14. A practical beginner workflow for choosing, testing, and using an AI video tool.

     Figure 14 summarizes the safest starting process for beginners. It begins with one simple project, continues through controlled generation and review, and ends with editing, record keeping, and responsible publication.

    Conclusion

    AI video tools have made video creation more accessible to beginners, educators, website owners, content creators, and small businesses. They can turn written prompts, still images, scripts, and existing footage into short video clips without requiring professional cameras or advanced production skills.

    However, choosing the right tool requires more than watching impressive demonstrations. Beginners should compare:

    • Ease of use

    • Text-to-video and image-to-video support

    • Video quality and stability

    • Aspect ratios and clip duration

    • Editing and audio features

    • Credits and subscription costs

    • Watermarks and export conditions

    • Privacy protections

    • Commercial-use terms

    • Customer support and learning resources

    There is no single platform that is best for every project.

    Canva may be the easiest starting point for simple creation and editing. Adobe Firefly may be more suitable for cinematic scenes and image animation. Runway may provide stronger creative controls. Synthesia is designed for presenter-led lessons and training. InVideo AI can prepare complete narrated drafts, while CapCut is practical for social media editing and vertical videos.

    The best choice is the tool that matches your immediate goal, budget, experience, and publishing platform.

    Before paying for a subscription:

    1. Define one simple project.

    2. Test one short clip.

    3. Use the same prompt when comparing platforms.

    4. Review the entire result carefully.

    5. Correct one problem at a time.

    6. Test the export and editing process.

    7. Record the credits consumed.

    8. Check privacy and commercial-use terms.

    9. Confirm that the tool works on your device.

    10. Subscribe only when a real project requires additional access.

    AI video generation should be treated as a creative and technical workflow rather than a one-click solution. Useful results normally come from planning, controlled prompting, repeated review, editing, and responsible publishing.

    ChatGPT can support the process by helping you develop ideas, prepare scene plans, write detailed prompts, create narration, and troubleshoot weak results. A dedicated AI video platform then generates or edits the moving footage.

    The creator remains responsible for checking:

    • Accuracy

    • Permissions

    • Privacy

    • Product details

    • Captions

    • Audio

    • Commercial rights

    • AI disclosure

    • Publishing-platform rules

    Start with one tool, one simple scene, and one clear purpose. Learn what works, keep organized records, and expand your workflow only when the project genuinely requires another platform.

    With realistic expectations and careful human review, AI video tools can become valuable assistants for creating educational content, website visuals, social media clips, presentations, prototypes, and small-business marketing videos.

    Sources and References

    Citations in square brackets refer to the numbered official sources below. These pages were reviewed on July 28, 2026. Features, model names, prices, credits, limits, policies, and plan conditions may change. Check the current official page when first using a tool, changing plans or features, receiving a policy-update notice, and periodically before important or commercial work.

    [1] Adobe Help Center. Generate Videos Using Text Prompts. Explains text-to-video prompting, available controls, model-dependent settings, and generation workflow. Accessed July 28, 2026.

    [2] Adobe Help Center. Generate Videos Using Images. Explains image-guided video, keyframes, crop controls, formats, generation settings, and download options. Accessed July 28, 2026.

    [3] Adobe Help Center. Generate Video Using Firefly Models. Describes Firefly video models, model selection, generation controls, and browser-based editing workflows. Accessed July 28, 2026.

    [4] Adobe Help Center. Partner Models in Adobe Products. Explains that partner models are not developed by Adobe and that users must assess model-specific suitability and terms. Accessed July 28, 2026.

    [5] Adobe Help Center. Generative Credits FAQ. Lists current Firefly plan credits and explains how generative credits and premium features are used. Accessed July 28, 2026.

    [6] Adobe Help Center. Adobe Firefly FAQ. Provides current information about Firefly models, training, user content, commercial use, and product conditions. Accessed July 28, 2026.

    [7] Adobe Help Center. Content Credentials Overview. Explains how Content Credentials can add tamper-evident information about how qualifying assets were created or edited. Accessed July 28, 2026.

    [8] Adobe Help Center. Known Limitations in Firefly Video Editor. Lists current browser, import, media, size, duration, resolution, GIF, WebP, and workflow limitations. Accessed July 28, 2026.

    [9] Runway Help Center. Creating with Gen-4.5. Lists Gen-4.5 inputs, durations, aspect ratios, output resolution, prompting guidance, and credit cost. Accessed July 28, 2026.

    [10] Runway Help Center. Text-to-Video Prompting Guide. Explains the visual and motion components of effective text-to-video prompts. Accessed July 28, 2026.

    [11] Runway Help Center. How Do Credits Work?. Lists current monthly credit amounts, Gen-4.5 credit use, rollover rules, and expiration conditions. Accessed July 28, 2026.

    [12] Runway Help Center. Free Plan Details. Describes the one-time free credit allocation, available tools, export limits, and watermark conditions. Accessed July 28, 2026.

    [13] Runway. Plans and Pricing. Provides current plan allowances and model-specific estimates. Prices and plan names can change. Accessed July 28, 2026.

    [14] Runway Help Center. Creating with Edit Studio. Explains current prompt-based editing of uploaded footage using Edit Studio and Aleph 2.0. Accessed July 28, 2026.

    [15] Runway Help Center. How to Create Longer Videos and Films. Explains planning and combining shorter generated clips into longer video projects. Accessed July 28, 2026.

    [16] Runway Help Center. Usage Rights. Provides Runway-specific information about use of uploaded and generated content. Source rights must still be checked. Accessed July 28, 2026.

    [17] Runway Help Center. Understanding Runway’s Security and Privacy Standards. Provides Runway-specific information about uploaded assets, privacy, and security controls. Accessed July 28, 2026.

    [18] Canva. AI Video Generator. Describes Create a Video Clip, synchronized audio, dialogue, sound effects, and Canva editing. Accessed July 28, 2026.

    [19] Canva. AI Product Terms. Provides current conditions for Canva AI products and user responsibilities. Accessed July 28, 2026.

    [20] Canva Trust Center. Privacy. Provides privacy information and controls relevant to user content and AI-powered features. Accessed July 28, 2026.

    [21] Synthesia. Pricing and Plan Features. Lists current free and paid plan credits, video allowances, avatars, downloads, and supported languages and voices. Accessed July 28, 2026.

    [22] Synthesia Help Center. Guidelines for Using Stock and Personal Avatars in Videos. Explains avatar-use limitations and content-moderation requirements. Accessed July 28, 2026.

    [23] InVideo Help Center. How Can I Create a Video Using My Script?. Explains script-based video creation using media, music, subtitles, voice, and language settings. Accessed July 28, 2026.

    [24] CapCut. AI Video Tools. Provides information about CapCut AI video creation and editing workflows. Accessed July 28, 2026.

    [25] CapCut Help Center. What Are Credits in CapCut?. Explains the relationship between credits, subscriptions, and credit-based AI operations. Accessed July 28, 2026.

    [26] OpenAI Help Center. What to Know About the Sora Discontinuation. Provides the discontinuation dates for the Sora web and app experiences and Sora API. Accessed July 28, 2026.

    [27] YouTube Help. Disclosing Use of GenAI Content. Explains when creators must disclose realistic, meaningfully generated, or altered content. Accessed July 28, 2026.

    [28] YouTube Help. YouTube Channel Monetization Policies. Explains originality, repetitive or mass-produced content, reused content, and monetization requirements. Accessed July 28, 2026.

    [29] WordPress.com Support. Video Block. Explains how to upload or embed video, select a poster image, add text tracks, and configure playback. Accessed July 28, 2026.

    [30] W3C Web Accessibility Initiative. Captions/Subtitles. Explains that captions provide synchronized text for speech and important non-speech audio. Accessed July 28, 2026.

    [31] U.S. Copyright Office. Copyright and Artificial Intelligence, Part 2: Copyrightability. Discusses human authorship and copyrightability of works containing AI-generated material. This guide provides general education, not legal advice. Accessed July 28, 2026.

    Continue Learning

    Continue building your AI video skills with these related guides:

    • How to Create AI Videos with ChatGPT: Beginner Step-by-Step Guide (2026)

    Prompt Engineering for Beginners: Complete Guide (2026)

    AI Image Generation for Beginners: Complete Guide (2026)

    How to Create AI Videos from Images: Beginner Guide (2026)

    How to Edit AI-Generated Videos: Beginner Step-by-Step Guide (2026)

    How to Add Voice, Music, and Captions to AI Videos (2026)
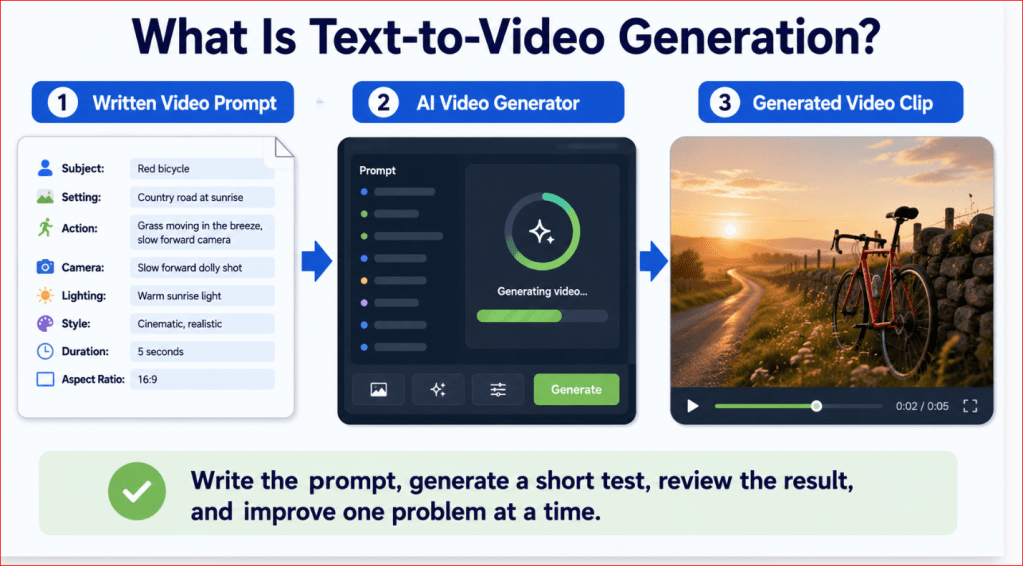
  • How to Create AI Videos with ChatGPT: Beginner Step-by-Step Guide (2026)

    How to Create AI Videos with ChatGPT: Beginner Step-by-Step Guide (2026)
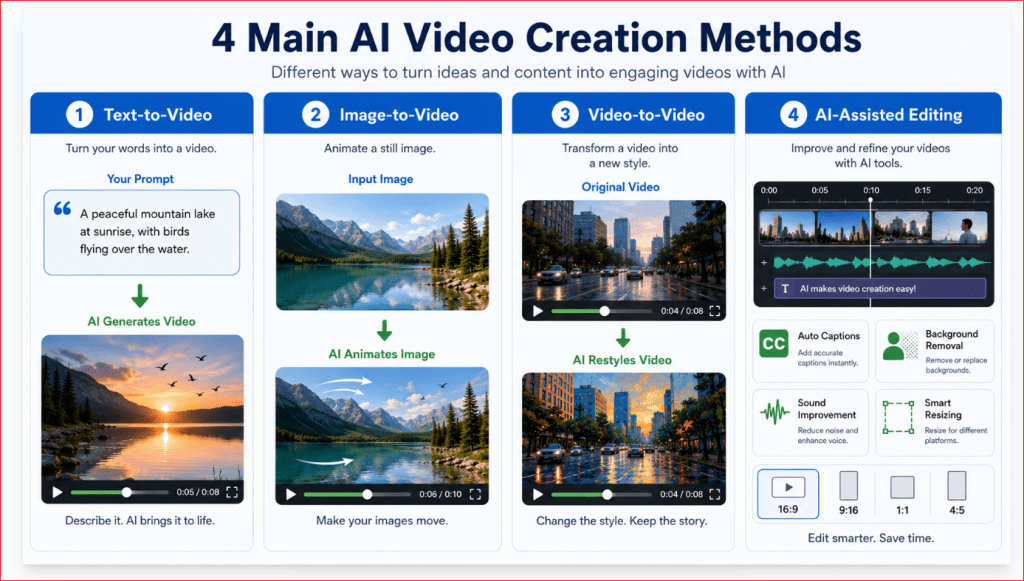
    Estimated reading time: 55–65 minutes
    Last updated: July 28, 2026

    What You’ll Learn

    By the end of this guide, you will know:

    • What AI video generation is and how it works

    • How ChatGPT helps you create better AI videos

    • How to choose a suitable AI video generator to use alongside ChatGPT

    • How to write clearer prompts for more controlled video results

    • How to create videos from text descriptions

    • How to create videos from existing images

    • How to edit AI-generated videos

    • Common mistakes beginners should avoid

    • Tips for improving the presentation of AI-generated videos

    • The current limitations of AI video generation

    • Best practices for using AI-generated videos responsibly

    Before Learning

    These related guides will make this article easier to follow:

    ChatGPT Basics for Beginners (Complete Guide 2026)

    Prompt Engineering for Beginners: Complete Guide (2026)
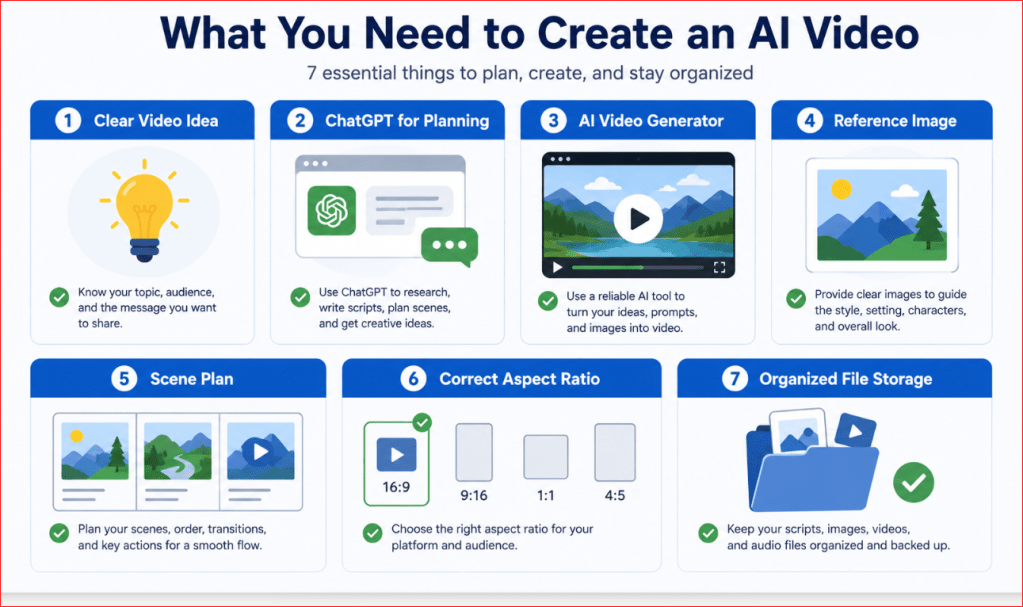
    AI Image Generation for Beginners: Complete Guide (2026)
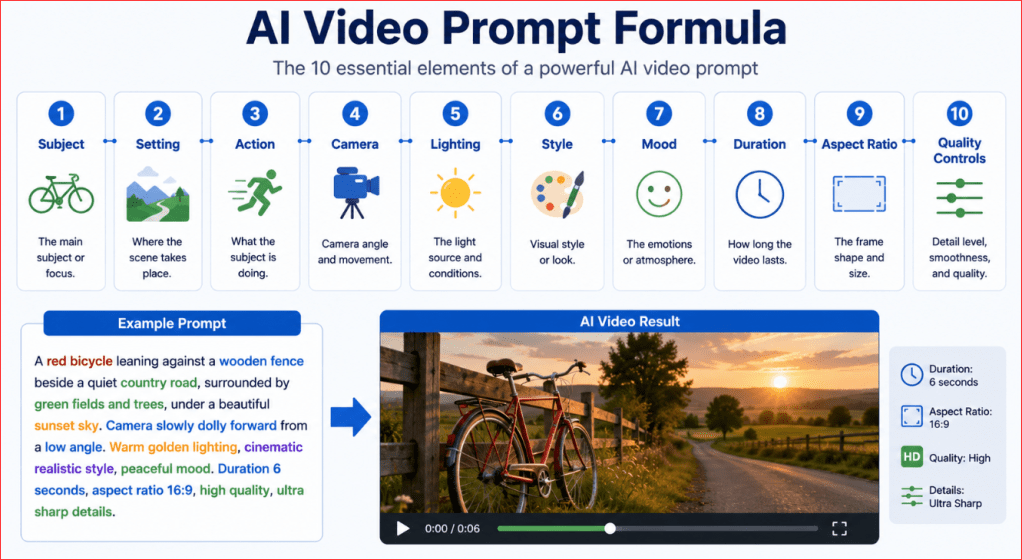
    Introduction

    AI video generation has advanced rapidly. Some tasks that once required expensive software, professional cameras, and advanced editing skills can now be completed more quickly with artificial intelligence.

    In this guide, ChatGPT is used as a creative planning assistant rather than as the video generator. It helps you develop ideas, write and improve prompts, plan scenes, and prepare narration. A clear prompt gives a dedicated video generator better direction than a vague request. [2]

    Beginners can create simple visual content for YouTube, social media, websites, presentations, online courses, and business marketing without years of professional video-editing experience.

    In this guide, you will learn how ChatGPT works together with modern AI video tools to create professional-looking videos step by step.

    Current Information Note

    OpenAI discontinued the Sora web and app experiences on April 26, 2026, and states that the Sora API is scheduled to be discontinued on September 24, 2026. This guide therefore uses ChatGPT mainly for planning and prompt writing, while the moving clips are created with a dedicated video generator that is currently available to the reader. Tool features, access, and service names can change, so check the current official information before starting. [1]

    Figure 1. ChatGPT helping a beginner create an AI video using a video generation tool.

    Figure 1 introduces the relationship between ChatGPT and AI video generators. It helps readers understand that ChatGPT can help create and improve prompts, while dedicated AI tools generate the actual moving video.

    What Is AI Video Generation?

    AI video generation is the process of using artificial intelligence to create or modify video content.

    Instead of recording every scene with a camera, you can describe what you want using written instructions called a prompt. The AI then interprets your description and generates a short video based on it.

    For example, you could enter:

    Create a five-second video of a small wooden boat moving across a calm lake at sunrise, with soft mist above the water and gentle camera movement.

    The AI video tool may then create a moving scene that includes the boat, lake, sunrise, mist, and camera motion described in the prompt.

    AI video generators can create content in several ways.

    Text-to-Video

    Text-to-video tools create a video directly from a written description. [3][11]

    You describe:

    • The subject

    • The setting

    • The action

    • The camera movement

    • The lighting

    • The visual style

    The AI uses these instructions to generate the video.

    Image-to-Video

    Image-to-video tools turn a still image into a moving scene. [4]

    For example, you can upload an image of a forest and ask the AI to:

    • Move the tree branches gently

    • Add falling leaves

    • Create drifting fog

    • Make the camera slowly move forward

    The original image becomes the starting point for the video.

    Video-to-Video

    Video-to-video tools modify an existing video.

    They may help you:

    • Change the visual style

    • Replace the background

    • Improve lighting

    • Add visual effects

    • Remove unwanted objects

    • Convert real footage into animation

    AI-Assisted Video Editing

    Some AI tools do not generate an entire video from scratch. Instead, they help edit existing footage.

    They may automatically:

    • Add captions

    • Remove pauses

    • Improve sound quality

    • Resize videos for social media

    • Remove backgrounds

    • Create short clips from longer videos

    The best method depends on whether you are starting with text, an image, or an existing video.

    Figure 2. The four main ways artificial intelligence can create or improve video content.

    Figure 2 shows the main ways AI can create or improve videos. It helps beginners quickly understand the difference between generating a video from text, animating an image, transforming existing footage, and using AI editing tools.

    How ChatGPT Helps You Create AI Videos

    ChatGPT helps you plan and improve many stages of the AI video creation process.

    It does not replace the video generator. Instead, it helps you prepare clear instructions that the video tool can understand.

    Develop the Video Idea

    You can ask ChatGPT to turn a simple idea into a complete video concept.

    For example:

    Help me develop a 15-second promotional video idea for a small bakery. The video should feel warm, friendly, and suitable for social media.

    ChatGPT can suggest:

    • The main subject

    • The sequence of scenes

    • The mood

    • The visual style

    • The camera angles

    • The ending message

    Write a Video Prompt

    ChatGPT can transform a basic request into a detailed AI video prompt.

    A basic request might be:

    Create a video of a café.

    ChatGPT can improve it to:

    Create a realistic eight-second video of a quiet neighbourhood café during the early morning. Warm sunlight enters through large windows while a barista prepares coffee behind the counter. Steam rises gently from a cup in the foreground. Use a slow camera movement toward the counter, warm natural lighting, soft shadows, and a welcoming cinematic style.

    The improved prompt gives the AI video generator clearer direction.

    Create a Scene-by-Scene Plan

    Longer videos usually work better when divided into several short scenes.

    ChatGPT can prepare a simple scene plan such as:

    1. Exterior view of the café

    2. Close-up of coffee beans being poured

    3. Barista preparing coffee

    4. Customer receiving the drink

    5. Final view of the café table

    Each scene can then be generated separately and combined later.

    Write Narration and Dialogue

    ChatGPT can write:

    • Voice-over scripts

    • Character dialogue

    • Introductions

    • Product descriptions

    • Educational explanations

    • Calls to action

    You can also ask it to adjust the language for a particular audience.

    For example:

    Rewrite this video narration using simple language for complete beginners. Keep it under 60 words.

    Improve Camera and Motion Instructions

    AI video prompts often need specific movement instructions.

    ChatGPT can suggest camera movements such as:

    • Slow zoom in

    • Slow zoom out

    • Pan left or right

    • Camera moving forward

    • Camera circling the subject

    • Overhead camera view

    • Close-up shot

    • Wide establishing shot

    It can also describe subject movement, such as a person walking, leaves moving in the wind, or a product slowly rotating.

    Maintain a Consistent Style

    When a video contains several scenes, the visual style should remain consistent.

    ChatGPT can help you repeat important details in every prompt, including:

    • Character appearance

    • Clothing

    • Location

    • Colour scheme

    • Lighting

    • Camera style

    • Mood

    • Aspect ratio

    This reduces sudden visual changes between clips.

    Review and Improve Weak Results

    The first generated video may not look exactly as expected. [5][6]

    You can describe the problem to ChatGPT, such as:

    The person moves too quickly, the camera shakes, and the background changes during the clip. Improve my prompt.

    ChatGPT can rewrite the prompt with clearer instructions, such as slower movement, a fixed background, and stable camera motion.

    Figure 3. The main ways ChatGPT supports the AI video creation process.

    Figure 3 shows that ChatGPT can support the entire planning process, from developing the original idea to improving the final prompt. It also reinforces that the actual video is created by a specialized AI video generator.

    What You Need Before You Begin

    You do not need professional cameras, expensive editing equipment, or advanced technical skills to begin creating AI videos.

    However, you should prepare a few basic items before starting.

    A Clear Video Idea

    Begin with one simple idea.

    Decide what you want the video to show and why you are creating it. For example, your goal might be to create:

    • A short social media video

    • A product demonstration

    • An educational explanation

    • A website introduction

    • A YouTube scene

    • A promotional advertisement

    • An animated story

    • A presentation background

    Avoid trying to include too many ideas in one short video. A focused scene is usually easier for the AI to understand and generate successfully.

    Access to ChatGPT

    You can use ChatGPT to develop your idea, create a storyboard, write narration, and prepare detailed prompts.

    You can begin with a simple request such as:

    Help me plan a ten-second AI video showing a modern home office becoming more organized.

    ChatGPT can then help you define the setting, action, camera movement, lighting, mood, and visual style.

    An AI Video Generator

    You also need an AI video generator that can turn your prompt or image into a video.

    Depending on the available tool, you may be able to:

    • Generate a video from written instructions

    • Animate an uploaded image

    • Add sound effects or dialogue

    • Transform an existing video

    • Extend a short video

    • Create several clips for a longer project

    Video-generation tools, features, access, pricing, and usage limits change frequently. Before beginning a project, check the tool’s supported inputs, clip lengths, aspect ratios, export quality, watermark policy, privacy settings, and commercial-use terms. [8][9][12][13]

    How to Choose an AI Video Generator

    Choose a tool that matches the type of project you want to create. Check whether it provides:

    • Text-to-video, image-to-video, or both

    • Suitable clip lengths and aspect ratios

    • Acceptable resolution and export options

    • Clear watermark and download rules

    • Privacy controls for uploaded images and videos

    • Commercial-use terms that match your project

    • Pricing or credit limits you can manage

    • Availability on your device and in your region

    There is no single best tool for every beginner. Features change quickly, so choose the simplest tool that supports your planned workflow.

    A Reference Image When Needed

    A reference image gives the video generator a visual starting point.

    You may use:

    • An AI-generated image

    • A photograph you own

    • A product image

    • A character design

    • A landscape

    • An illustration

    • A branded background you have permission to use

    Use a clear, high-quality image without unnecessary objects. A confusing starting image can produce confusing movement. [4]

    Do not upload material that you do not have the right or permission to use, especially private photographs of other people.

    A Basic Scene Plan

    Even a short video benefits from a simple plan.

    Write down:

    1. What appears at the beginning

    2. What action takes place

    3. How the camera moves

    4. What appears at the end

    For example:

    1. A closed notebook rests on a clean desk.

    2. The notebook slowly opens.

    3. Handwritten ideas appear across the pages.

    4. The camera moves closer to the finished page.

    This plan can be converted into a detailed prompt before generating the video.

    A Suitable Aspect Ratio

    Choose the video shape according to where it will be published.

    Common choices include:

    16:9 landscape: YouTube, websites, presentations, and television-style videos

    9:16 vertical: YouTube Shorts, Instagram Reels, TikTok, and mobile viewing

    1:1 square: Social media posts and advertisements

    4:5 portrait: Instagram and Facebook feed posts

    Choosing the correct aspect ratio at the beginning can prevent important parts of the video from being cropped later.

    Enough Storage Space

    AI-generated video files can be much larger than images.

    Create an organized folder for:

    • Original prompts

    • Reference images

    • Generated clips

    • Narration files

    • Music and sound effects

    • Edited versions

    • Final exported videos

    Use descriptive filenames instead of names such as video1 or final2.

    For example:

    organized-home-office-scene-01.mp4

    A simple file system makes it easier to revise, replace, and combine clips later.

    Figure 4. The basic items needed before creating an AI video.

    Figure 4 gives beginners a visual checklist of the basic items required before starting an AI video project. Preparing the idea, prompt, format, reference material, and file-storage system in advance can make the creation process easier and more organized.

    How to Write an Effective AI Video Prompt

    A strong AI video prompt gives the generator clear instructions about what should appear, what should move, and how the finished scene should look. [3][10]

    A vague prompt may produce unpredictable motion, unwanted objects, poor framing, or an inconsistent background. A detailed prompt gives the AI a better creative brief.

    Start with the Main Subject

    First, describe the most important person, object, animal, or location in the scene.

    For example:

    A small red bicycle beside a wooden fence.

    You can improve the description by adding useful details:

    A clean vintage red bicycle with a brown leather seat resting beside a weathered wooden fence.

    Avoid adding unnecessary details that do not improve the scene.

    Describe the Setting

    Explain where the scene takes place.

    The setting may include:

    • A modern office

    • A quiet beach

    • A busy city street

    • A family kitchen

    • A forest path

    • A professional studio

    • A futuristic laboratory

    Include the time of day or weather when it affects the appearance.

    For example:

    The bicycle stands beside a wooden fence on a quiet country road during early morning, with light mist over the fields.

    Explain the Action

    A video prompt must describe movement.

    State clearly what the subject should do.

    Examples include:

    • A person slowly walks toward the camera

    • A product rotates on a display stand

    • Steam rises from a cup

    • Leaves move gently in the wind

    • A car drives along a wet road

    • A notebook opens by itself

    • Clouds move across the sky

    Use simple and realistic actions. Too many movements in one short clip may confuse the AI.

    Add Camera Instructions

    Camera direction helps control how the viewer sees the scene.

    Useful camera instructions include:

    • Static camera

    • Slow zoom in

    • Slow zoom out

    • Pan left

    • Pan right

    • Camera moving forward

    • Camera following the subject

    • Close-up shot

    • Medium shot

    • Wide shot

    • Overhead view

    • Low-angle view

    For beginners, slow and simple camera movement usually produces more stable results.

    Describe the Lighting

    Lighting affects the mood and quality of the video.

    You might request:

    • Soft natural daylight

    • Warm golden-hour lighting

    • Bright studio lighting

    • Cool evening light

    • Dramatic side lighting

    • Soft shadows

    • Gentle indoor lighting

    Avoid combining several conflicting lighting styles in one prompt.

    Choose the Visual Style

    State how the video should look.

    Possible styles include:

    • Realistic

    • Cinematic

    • Documentary

    • Professional commercial

    • Hand-drawn animation

    • Watercolour illustration

    • 3D animation

    • Minimalist

    • Futuristic

    • Vintage film

    Keep the style consistent throughout all scenes in the same project.

    Include the Mood

    Mood describes the feeling of the scene.

    Examples include:

    • Calm

    • Welcoming

    • Energetic

    • Inspiring

    • Serious

    • Peaceful

    • Luxurious

    • Playful

    • Mysterious

    The mood should match the lighting, movement, and purpose of the video.

    State the Video Length and Format

    When the tool allows it, include the desired duration and aspect ratio.

    For example:

    Create an eight-second video in 16:9 landscape format.

    You can also specify whether the video is intended for a website, YouTube, or a vertical social media post.

    Add Quality and Stability Instructions

    You may include instructions that reduce common problems.

    Examples include:

    • Smooth natural motion

    • Stable background

    • Consistent character appearance

    • No camera shake

    • No sudden object changes

    • Realistic body movement

    • Clean composition

    • Sharp subject

    • No duplicated objects

    • No visible text

    • No unintended logos or generated text

    Different generators handle exclusion instructions differently. Some accept phrases such as “no visible text,” while others work better with positive wording or a separate negative-prompt control. Follow the current guidance for the selected tool. [3][4]

    These instructions do not guarantee a perfect result, but they give the generator clearer guidance.

    Use a Simple Prompt Formula

    A practical AI video prompt can follow this structure:

    Subject + setting + action + camera movement + lighting + visual style + mood + duration + aspect ratio + quality instructions

    For example:

    Create an eight-second realistic video of a vintage red bicycle resting beside a wooden fence on a quiet country road at sunrise. Light mist moves gently across the fields while nearby grass sways in the breeze. Use a slow camera movement toward the bicycle, soft golden natural lighting, a peaceful cinematic mood, and a 16:9 landscape format. Keep the bicycle and background consistent, with smooth motion, stable framing, no people, no text, no logos, and no duplicated objects.

    This prompt gives the AI clear instructions without making the scene unnecessarily complicated.

    Figure 5. The main parts of an effective AI video prompt.

    Figure 5 breaks an AI video prompt into clear building blocks. Beginners can use this structure as a checklist to make sure they describe the subject, motion, camera, lighting, style, format, and quality requirements before generating a video.

    Step-by-Step: Create an AI Video from Text

    Text-to-video generation begins with a written description. The AI video generator uses that description to create the scene, movement, camera behaviour, lighting, and visual style. [3][6][11]

    The following process helps beginners create a more reliable result.

    Step 1: Choose One Simple Scene

    Start with a scene that contains:

    • One main subject

    • One clear action

    • One location

    • One camera movement

    For example:

    A baker places a fresh loaf of bread on a wooden counter while morning sunlight enters through the window.

    Do not begin with a long story containing several characters, locations, and actions. Short, focused scenes are easier to generate successfully.

    Step 2: Ask ChatGPT to Improve the Idea

    Enter your basic idea into ChatGPT.

    For example:

    Turn this idea into a detailed eight-second AI video prompt: A baker places fresh bread on a wooden counter in the morning.

    ChatGPT can add useful details such as:

    • The baker’s appearance

    • The style of the kitchen

    • The movement of the hands

    • The direction of the camera

    • The lighting

    • The mood

    • The aspect ratio

    • Quality-control instructions

    Review the result and remove any details you do not need.

    Step 3: Check the Prompt for Clarity

    Before using the prompt, confirm that it answers these questions:

    • What is the main subject?

    • Where is the scene happening?

    • What action takes place?

    • How does the camera move?

    • What lighting is used?

    • What visual style is required?

    • How long should the clip be?

    • What aspect ratio is needed?

    • What problems should the AI avoid?

    A clear prompt is easier to improve if the first result is not satisfactory.

    Step 4: Open the AI Video Generator

    Open the video-generation tool available through your account.

    Look for an option such as:

    • Create video

    • Generate video

    • Text-to-video

    • New project

    • Start from prompt

    The exact wording differs from one tool to another.

    Step 5: Paste the Prompt

    Copy the completed prompt from ChatGPT and paste it into the video generator.

    For example:

    Create an eight-second realistic cinematic video of an adult baker placing a freshly baked loaf of bread on a clean wooden counter inside a warm traditional bakery during early morning. Soft sunlight enters through a side window while gentle steam rises from the bread. Use a slow camera movement toward the loaf, natural hand movement, warm golden lighting, soft shadows, and a welcoming atmosphere. Use 16:9 landscape format. Keep the baker, counter, bread, and background consistent. Use smooth motion, stable framing, no visible text, no logos, no duplicated objects, and no sudden scene changes.

    Read the prompt once more before generating the video.

    Step 6: Select the Video Settings

    Choose the available settings that match your project.

    These may include:

    • Video duration

    • Aspect ratio

    • Resolution

    • Number of variations

    • Visual style

    • Motion strength

    • Camera movement

    • Reference image

    • Audio settings

    Do not select the highest motion level automatically. Strong movement may produce unstable or unrealistic results.

    Step 7: Generate the First Version

    Start the generation process.

    When the video appears, watch it several times and examine:

    • Subject consistency

    • Body movement

    • Object movement

    • Background stability

    • Camera motion

    • Lighting

    • Cropping

    • Unwanted objects

    • Sudden visual changes

    Do not judge the clip only by the first frame. Some problems appear later in the video.

    Step 8: Identify the Main Problem

    If the result is weak, identify the most important problem instead of changing everything at once.

    For example:

    • The baker moves too quickly

    • The bread changes shape

    • The camera shakes

    • The background changes

    • The hands look unnatural

    • The scene is too dark

    • The subject is cropped

    • Extra objects appear

    A specific diagnosis makes the next prompt easier to improve.

    Step 9: Ask ChatGPT to Revise the Prompt

    Describe the problem clearly.

    For example:

    Improve this prompt. The baker’s hands move too quickly, the loaf changes shape, and the camera is unstable. Keep the same scene and style.

    ChatGPT may add clearer controls such as:

    • Slow natural hand movement

    • Fixed loaf shape

    • Stable counter and background

    • Static camera or gentle forward movement

    • No object transformation

    • Consistent subject appearance

    Step 10: Generate a New Version

    Paste the revised prompt into the video generator and create another version.

    Compare both clips and keep the stronger one.

    It may take several attempts to produce a usable result. This is normal. AI video generation usually involves testing, reviewing, and refining rather than expecting a finished video from the first prompt. [5][6]

    Step 11: Download and Rename the Video

    After selecting the best result, save the clip using a descriptive filename.

    For example:

    bakery-fresh-bread-scene-01.mp4

    Avoid filenames such as:

    video-final-new-2.mp4

    Descriptive filenames make it easier to organize multiple scenes.

    Figure 6. The step-by-step process for creating an AI video from a text prompt.

    Figure 6 shows that text-to-video creation is an improvement cycle rather than a single action. The user develops the idea, writes the prompt, generates the clip, reviews the result, and revises the instructions until the video becomes more useful and consistent.

    Step-by-Step: Create an AI Video from an Image

    Image-to-video generation starts with a still image. The AI then adds movement to the subject, background, camera, or environment. [4]

    This method is useful when you already have a strong image and want to turn it into a short animated scene.

    Step 1: Choose a Suitable Image

    Select a clear image with:

    • One main subject

    • A simple background

    • Good lighting

    • Enough space around the subject

    • No important objects cut off at the edges

    The starting image should already resemble the scene you want in the video.

    A crowded or confusing image may produce unpredictable movement.

    Step 2: Check the Image Quality

    Use a high-quality image whenever possible.

    Avoid images that are:

    • Blurry

    • Pixelated

    • Heavily compressed

    • Poorly cropped

    • Too dark

    • Filled with tiny details

    • Visually inconsistent

    The AI uses the image as its visual foundation, so weak image quality can lead to weak video quality.

    Step 3: Decide What Should Move

    Choose one or two main movements.

    For example:

    • Hair moving gently in the wind

    • Steam rising from a cup

    • Water flowing in the background

    • Leaves moving on a tree

    • A product slowly rotating

    • A person blinking naturally

    • A curtain moving beside a window

    • The camera slowly moving forward

    Do not ask every object in the image to move at the same time.

    Step 4: Decide What Should Remain Still

    It is equally important to tell the AI what should not change.

    You may request:

    • Keep the face consistent

    • Keep the background stable

    • Keep the product shape unchanged

    • Keep the clothing unchanged

    • Keep the colours consistent

    • Do not add new objects

    • Do not change the camera angle suddenly

    These instructions can reduce unwanted transformations.

    Step 5: Ask ChatGPT to Write the Motion Prompt

    Describe the image and the movement you want.

    For example:

    Write an image-to-video prompt for a still image of a woman sitting beside a window holding a cup of tea. Add only gentle steam from the cup, slight curtain movement, and a slow camera push forward. Keep her face, clothing, hands, and background consistent.

    ChatGPT can turn this into a more complete motion prompt.

    Step 6: Upload the Image

    Open the image-to-video feature in the available AI video tool.

    Choose an option such as:

    • Upload image

    • Animate image

    • Image-to-video

    • Start from image

    • Add reference image

    Select the image from your device.

    Before continuing, confirm that the image is displayed correctly and has not been cropped incorrectly.

    Step 7: Paste the Motion Prompt

    Paste the prompt created with ChatGPT.

    For example:

    Animate this image into a six-second realistic video. Keep the woman seated in the same position beside the window while gentle steam rises from the cup. Add slight natural movement to the curtain and a slow, smooth camera push forward. Maintain the same face, hairstyle, clothing, hands, cup, window, background, lighting, and colour palette. Use calm natural motion, stable framing, no new objects, no facial changes, no hand distortion, no sudden movement, and no text or logos.

    The prompt should focus on motion rather than redescribing the entire image unnecessarily. [4]

    Step 8: Choose the Motion Strength

    Some tools allow you to control how strongly the image moves.

    Use a lower or moderate motion level for:

    • Portraits

    • Product images

    • Interior scenes

    • Close-up shots

    • Images where consistency is important

    Use stronger motion only when the scene genuinely requires it.

    Too much motion can cause faces, hands, products, or backgrounds to change.

    Step 9: Generate the First Version

    Create the video and watch the entire clip.

    Check whether:

    • The main subject remains recognizable

    • The face stays consistent

    • The hands remain natural

    • The background stays stable

    • The requested movement appears

    • Unwanted movement is avoided

    • The camera behaves correctly

    • The image edges remain clean

    Pay close attention to the final seconds because unwanted changes may appear near the end.

    Step 10: Revise the Motion Prompt

    If the result is too active or unstable, simplify the instructions.

    For example:

    Reduce the motion. Keep the woman completely still except for natural blinking. Keep the cup fixed. Only animate the steam and curtain slightly. Use a static camera.

    If the result feels too still, increase one movement at a time.

    For example:

    Keep the subject consistent, but add a slightly stronger forward camera movement and more visible steam.

    Step 11: Generate Another Version

    Create a new version using the revised prompt.

    Compare the clips based on:

    • Stability

    • Natural movement

    • Subject consistency

    • Visual quality

    • Suitability for the intended purpose

    The most dramatic version is not always the best. A subtle, stable clip often looks more professional.

    Step 12: Save the Final Clip

    Download the strongest version and rename it clearly.

    For example:

    woman-tea-window-image-to-video-01.mp4

    Store the original image, prompt, and final video in the same project folder.

    Figure 7. The process for turning a still image into an AI-generated video.

    Figure 7 shows that successful image-to-video creation depends on controlling both movement and stability. The prompt should explain what the AI should animate and what must remain unchanged throughout the clip.

    How to Create a Multi-Scene AI Video

    A longer AI video is often easier to control when it is divided into several short clips. [7]

    Instead of asking the AI to generate an entire story at once, create one scene at a time and combine the clips afterward.

    This approach gives you more control over the subject, camera movement, timing, and visual consistency.

    Step 1: Define the Main Goal

    Decide what the complete video should accomplish.

    For example, the goal might be to:

    • Explain a simple process

    • Promote a product

    • Introduce a business

    • Tell a short story

    • Create a social media advertisement

    • Show a before-and-after transformation

    • Present an educational topic

    Write the goal in one clear sentence.

    For example:

    Create a 30-second promotional video showing how a small bakery prepares fresh bread each morning.

    Step 2: Divide the Video into Short Scenes

    Break the main idea into separate moments.

    A simple bakery video might include:

    1. Exterior view of the bakery at sunrise

    2. Baker mixing the dough

    3. Bread baking inside the oven

    4. Fresh bread placed on the counter

    5. Customer receiving the finished loaf

    Each scene should focus on one clear action.

    Step 3: Choose the Length of Each Scene

    Short clips are often easier to control. [7]

    For a 30-second video, you might create:

    • Five scenes of approximately six seconds each

    • Six scenes of approximately five seconds each

    • Ten scenes of approximately three seconds each

    The exact timing depends on the story and the tool being used.

    Avoid making every scene the same length automatically. An opening scene may need more time than a quick close-up.

    Step 4: Create a Simple Storyboard

    A storyboard is a scene-by-scene plan showing what happens in the video.

    You can ask ChatGPT:

    Create a five-scene storyboard for a 30-second bakery promotional video. Include the subject, action, camera shot, lighting, and approximate duration for each scene.

    A basic storyboard might include:

    Scene 1: Bakery Exterior

    Wide shot

    Early morning

    Warm lights inside the bakery

    Slow camera movement toward the entrance

    Duration: five seconds

    Scene 2: Preparing the Dough

    Close-up of hands mixing dough

    Warm indoor lighting

    Static camera

    Duration: six seconds

    Scene 3: Bread in the Oven

    Close-up through the oven door

    Bread rising and turning golden

    Gentle camera push forward

    Duration: five seconds

    Scene 4: Finished Bread

    Baker places fresh bread on a wooden counter

    Steam rises from the loaf

    Slow camera movement toward the bread

    Duration: seven seconds

    Scene 5: Customer Experience

    Customer receives the loaf and smiles

    Bright, welcoming lighting

    Medium shot

    Duration: seven seconds

    Step 5: Create a Consistency Sheet

    A consistency sheet records important details that should remain the same in every scene.

    Include:

    • Character appearance

    • Clothing

    • Hairstyle

    • Location

    • Interior design

    • Colour palette

    • Lighting style

    • Camera style

    • Product appearance

    • Visual mood

    • Aspect ratio

    For example:

    The baker is an adult man with short dark hair, wearing a white shirt, beige apron, and dark trousers. The bakery has wooden shelves, cream walls, warm golden lighting, and a clean traditional appearance.

    Repeat these details in every relevant prompt.

    Step 6: Write One Prompt for Each Scene

    Do not use one large prompt for the entire video.

    Prepare a separate prompt for every scene.

    For example:

    Scene 1: Create a five-second realistic cinematic video of a small traditional bakery on a quiet street at sunrise. Warm lights glow through the front windows. Use a slow camera movement toward the entrance, soft golden morning light, stable framing, and a welcoming mood. Use 16:9 landscape format. No people, no visible logos, no text, and no sudden camera movement.

    Each prompt should contain only the details required for that scene while preserving the overall visual style.

    Step 7: Generate and Review Each Clip

    Create one scene at a time.

    After each clip is generated, check:

    • Character consistency

    • Clothing

    • Background

    • Product appearance

    • Lighting

    • Camera direction

    • Motion speed

    • Aspect ratio

    • Unwanted objects

    Do not continue automatically if one scene looks significantly different from the others.

    Step 8: Regenerate Weak Scenes

    Some clips may need several attempts.

    If a scene does not match the others, revise the prompt.

    For example:

    Regenerate this scene using the same baker, clothing, bakery interior, warm lighting, and cinematic style as the previous clips. Keep the camera stable and use slower hand movement.

    Focus on the biggest inconsistency first.

    Step 9: Arrange the Clips in Order

    Import the finished clips into a video editor.

    Place them in the correct sequence according to the storyboard.

    Trim unnecessary frames from the beginning or end of each clip.

    The story should remain understandable even before narration or music is added.

    Step 10: Add Transitions Carefully

    Transitions connect one clip to the next.

    Common options include:

    • Straight cut

    • Fade

    • Crossfade

    • Dip to black

    • Gentle zoom transition

    Simple transitions usually look more professional than dramatic effects.

    Use the same transition style throughout the video unless a scene change requires something different.

    Step 11: Add Narration, Music, and Captions

    Once the visual sequence is complete, add supporting audio and text.

    You may include:

    • Voice-over narration

    • Background music

    • Sound effects

    • Captions

    • Short titles

    • A final call to action

    Keep the audio balanced so that music does not overpower the narration.

    Step 12: Review the Complete Video

    Watch the video from beginning to end.

    Check:

    • Does the story make sense?

    • Do the scenes match visually?

    • Is the pacing comfortable?

    • Are the transitions smooth?

    • Is the narration clear?

    • Are captions readable?

    • Is the final message easy to understand?

    • Are there any AI errors that need correction?

    Review the video on both a computer and a mobile device when possible.

    Figure 8. The workflow for creating a multi-scene AI video.

    Figure 8 shows how a longer AI video can be built from several shorter clips. Planning each scene separately and using a consistency sheet gives the creator more control over the final story, pacing, and visual style.

    How to Edit AI-Generated Videos

    The first version of an AI-generated video is rarely the final version.

    Most videos benefit from a few simple edits that improve their appearance, pacing, and overall quality. Small adjustments can make a significant difference without requiring advanced editing skills.

    Step 1: Watch the Entire Video

    Before making any changes, watch the video from beginning to end several times.

    Look for:

    • Sudden changes in the subject

    • Unnatural body movement

    • Flickering backgrounds

    • Camera shake

    • Inconsistent lighting

    • Missing objects

    • Extra unwanted objects

    • Poor framing

    • Distracting transitions

    Take notes so you know exactly what needs to be improved.

    Step 2: Trim Unnecessary Sections

    AI-generated videos often include a few unwanted frames at the beginning or end.

    Trim these sections to create a cleaner result.

    Common examples include:

    • The subject appearing suddenly

    • Camera movement starting too early

    • Objects changing shape near the end

    • A frozen final frame

    A clean beginning and ending make the video feel more professional.

    Step 3: Improve the Pacing

    Every scene should last long enough for viewers to understand what they are seeing.

    If a clip feels rushed:

    • Extend the duration if your tool allows it.

    • Slow the playback slightly.

    • Replace it with a longer version.

    If a scene feels too slow:

    • Shorten the clip.

    • Remove unnecessary pauses.

    • Move to the next scene sooner.

    Aim for a comfortable viewing rhythm.

    Step 4: Correct Visual Problems

    Review each scene carefully.

    Common issues include:

    • Distorted hands or faces

    • Objects changing size

    • Backgrounds shifting unexpectedly

    • Inconsistent shadows

    • Sudden colour changes

    • Duplicate objects

    • Cropped subjects

    If a problem affects only one scene, regenerate that scene instead of the entire video.

    Step 5: Improve the Audio

    If your video includes sound, check that it matches the visuals.

    Review:

    • Voice-over quality

    • Background music volume

    • Sound effects

    • Timing between speech and visuals

    • Unwanted background noise

    The narration should remain easy to hear throughout the video.

    Step 6: Add Captions

    Accurate, synchronized captions make videos easier to understand and improve accessibility. [18][19]

    They also help viewers who:

    • Watch without sound

    • Have hearing difficulties

    • Speak a different first language

    • View the video in noisy environments

    Keep captions:

    • Short

    • Easy to read

    • Correctly spelled

    • Well-timed

    • Consistent in style

    Avoid covering important parts of the video.

    Use a readable font, strong contrast, and text large enough to read on a phone. Avoid rapid flashing effects, and include clear narration or descriptive text when it helps viewers understand the scene. [18][19]

    Step 7: Add Titles and Simple Graphics

    A few simple graphics can improve clarity.

    Examples include:

    • Opening title

    • Section headings

    • Product names

    • Labels

    • Simple arrows

    • Highlight boxes

    • End screen

    Avoid filling the screen with unnecessary text or decorative effects.

    Step 8: Adjust Colour and Brightness

    Some AI-generated clips may appear too dark or too bright.

    Small adjustments can improve:

    • Brightness

    • Contrast

    • Saturation

    • White balance

    • Shadow detail

    Avoid excessive colour correction that makes the scene look unnatural.

    Step 9: Keep the Style Consistent

    If your video contains several scenes, make sure they share the same:

    • Colour palette

    • Lighting

    • Camera style

    • Subject appearance

    • Typography

    • Caption style

    • Transition style

    Consistency makes the finished video feel more polished.

    Step 10: Export the Final Video

    When the edits are complete, export the video using settings appropriate for where it will be published.

    Choose the correct:

    • Resolution

    • Aspect ratio

    • File format

    • Video quality

    Save the finished version with a descriptive filename.

    For example:

    bakery-promo-final-1080p.mp4

    Keep the original project files in case you need to make changes later.

    Step 11: Review Before Publishing

    Watch the exported video one final time.

    Check:

    • Video quality

    • Audio quality

    • Spelling in captions

    • Smooth transitions

    • Consistent appearance

    • Correct aspect ratio

    • No missing scenes

    • No obvious AI mistakes

    If possible, test the video on both a computer and a mobile device.

    A final review helps catch small problems before sharing the video.

    Figure 9. The video editing checklist for AI-generated videos.

    Figure 9 summarizes the essential editing steps after an AI video has been generated. Reviewing, refining, and exporting the video carefully helps produce a polished result that is ready for websites, presentations, or social media.

    Common AI Video Generation Mistakes

    AI video generation is powerful, but beginners often make avoidable mistakes that reduce video quality.

    Understanding these problems early can save time, credits, and frustration.

    Using a Vague Prompt

    A vague prompt might say:

    Create a beautiful video of a city.

    This does not give the AI enough direction.

    The generator does not know:

    • Which city style to use

    • What time of day it is

    • What should move

    • How the camera should behave

    • What mood the video should have

    • Whether the style should be realistic or animated

    A clearer prompt might be:

    Create an eight-second realistic cinematic video of a modern city street at night after light rain. Reflections glow on the pavement while cars move slowly in the background. Use a gentle camera movement forward, cool blue lighting, stable framing, and a calm atmosphere.

    How to Avoid This Mistake

    Include the subject, setting, action, camera movement, lighting, style, mood, duration, and aspect ratio.

    Including Too Many Actions

    A short video cannot always handle several complex movements at once.

    For example:

    A woman walks through a market, picks up fruit, talks to a seller, turns toward the camera, waves, and enters a car.

    This may cause distorted movement, missing actions, or sudden scene changes.

    How to Avoid This Mistake

    Use one main action per clip. Divide longer sequences into separate scenes.

    Changing Too Many Details at Once

    When a generated video has several problems, beginners may completely rewrite the prompt.

    This makes it difficult to identify which change improved or damaged the result.

    How to Avoid This Mistake

    Correct one major problem at a time. For example, first stabilize the camera, then improve the hand movement, and finally adjust the lighting.

    Requesting Fast or Complicated Movement

    Rapid movement can cause:

    • Distorted bodies

    • Changing faces

    • Unstable objects

    • Flickering backgrounds

    • Unnatural motion

    How to Avoid This Mistake

    Use instructions such as:

    • Slow natural movement

    • Gentle camera motion

    • Stable framing

    • One simple action

    • Consistent subject appearance

    Ignoring the Background

    A prompt may describe the main subject clearly but say nothing about the background.

    The AI may then add unwanted people, objects, signs, or changing scenery.

    How to Avoid This Mistake

    Describe the background and state whether it should remain fixed.

    For example:

    Keep the bakery interior, shelves, counter, and lighting unchanged throughout the clip.

    Forgetting Camera Instructions

    Without camera direction, the generator may choose an unsuitable camera angle or movement.

    The result may include:

    • Sudden zooming

    • Camera shake

    • Unwanted rotation

    • Poor framing

    • Cropped subjects

    How to Avoid This Mistake

    Use one clear camera instruction, such as a static camera, slow zoom, gentle pan, or smooth forward movement.

    Using Strong Motion for Portraits

    High motion can cause faces, hands, hair, and clothing to change.

    This is especially common when animating a still portrait.

    How to Avoid This Mistake

    Use low or moderate motion and limit the animation to small actions such as blinking, breathing, slight hair movement, or a gentle camera push.

    Expecting Perfect Text Inside the Video

    AI video generators may create misspelled, distorted, or unreadable signs and labels.

    How to Avoid This Mistake

    Ask for no visible text in the generated scene. Add titles, captions, labels, and product information later in a video editor.

    Using the Wrong Aspect Ratio

    A landscape video may not fit a vertical social media platform. Cropping it later can remove important parts of the scene.

    How to Avoid This Mistake

    Choose the publishing platform before generating the video and select the correct format from the beginning.

    Failing to Review the Entire Clip

    The opening frames may look good while problems appear later.

    Common late-clip problems include:

    • Faces changing

    • Objects disappearing

    • Hands becoming distorted

    • Backgrounds shifting

    • Unwanted objects appearing

    How to Avoid This Mistake

    Watch the complete clip several times, including the final second.

    Regenerating Without Saving Good Versions

    A new version may be worse than the previous one.

    If the earlier clip was not saved, it may be difficult or impossible to recover.

    How to Avoid This Mistake

    Download and rename every promising version before generating another.

    Using Copyrighted or Private Material

    Uploading protected images, private photographs, or branded content without permission can create legal and ethical problems.

    How to Avoid This Mistake

    Use material you created, licensed, purchased with suitable rights, or have clear permission to use.

    Figure 10. Common mistakes beginners make when generating AI videos.

    Figure 10 helps beginners recognize the most common causes of weak AI-generated videos. Clear prompts, simple movement, correct formatting, careful review, and responsible source material can prevent many of these problems.

    Tips for Better AI Video Results

    Good AI videos usually come from careful planning and small improvements rather than one perfect prompt.

    The following tips can help beginners produce more stable, realistic, and professional-looking videos.

    Keep Each Scene Simple

    Use one main subject, one clear action, and one camera movement.

    Simple scenes are easier for the AI to understand and more likely to remain consistent.

    Use Short Clips

    Short clips are easier to control than long continuous videos.

    Generate several short scenes and combine them later instead of asking the AI to create an entire story in one attempt.

    Describe Motion Clearly

    Do not only describe what the scene looks like.

    Explain what should move and how it should move.

    For example:

    The curtain moves gently in the breeze while the camera slowly moves toward the window.

    State What Must Remain Unchanged

    Include stability instructions such as:

    • Keep the face consistent

    • Keep the background fixed

    • Keep the product shape unchanged

    • Keep the clothing and colours consistent

    • Do not add new objects

    This is especially important for image-to-video generation.

    Use Slow, Natural Movement

    Slow movement generally produces better results than rapid action.

    Useful instructions include:

    • Gentle motion

    • Slow camera push

    • Natural walking speed

    • Slight head movement

    • Soft fabric movement

    • Stable framing

    Use One Camera Movement

    Avoid combining zooming, panning, rotating, and tracking in the same short clip.

    Choose the movement that best supports the scene.

    Avoid Text Inside Generated Scenes

    AI-generated text may be misspelled or unreadable.

    Generate the scene without visible text and add captions, titles, signs, and labels later using a video editor.

    Use Reference Images

    A reference image can help define:

    • Character appearance

    • Product design

    • Colour palette

    • Location

    • Clothing

    • Lighting

    • Composition

    Use a clear image with a simple background and enough space around the subject.

    Repeat Important Details

    When creating several clips, repeat the same character, clothing, setting, lighting, and style details in every relevant prompt.

    Do not assume the generator will remember earlier scenes automatically.

    Save Every Promising Version

    Download any clip that contains useful movement, composition, or lighting.

    Even if it is not perfect, it may be valuable for part of the final video.

    Change One Thing at a Time

    When improving a weak result, revise one major problem before changing the entire prompt.

    For example:

    • Stabilize the camera.

    • Slow the subject’s movement.

    • Correct the lighting.

    • Remove unwanted background objects.

    This makes it easier to understand which instruction improved the result.

    Review Frame by Frame

    Watch the full clip slowly.

    Check the beginning, middle, and end for:

    • Object changes

    • Facial distortion

    • Hand problems

    • Background movement

    • Flickering

    • Cropping

    • Lighting changes

    A clip may appear acceptable at normal speed but reveal errors during a closer review.

    Keep Your Prompts Organized

    Save your prompts in a document or spreadsheet.

    Record:

    • Scene number

    • Original prompt

    • Revised prompt

    • Generator settings

    • Filename

    • Problems found

    • Best version

    This helps you reproduce successful results and avoid repeating failed attempts.

    Match the Video to the Platform

    Decide where the video will be published before creating it.

    Use:

    • 16:9 for YouTube, websites, and presentations

    • 9:16 for Shorts, Reels, TikTok, and mobile-first content

    • 1:1 for square social media posts

    • 4:5 for portrait feed posts

    Add the Final Polish in an Editor

    Use a video editor to add:

    • Accurate text

    • Captions

    • Narration

    • Music

    • Sound effects

    • Transitions

    • Branding

    • Colour correction

    AI generation creates the visual foundation. Editing turns the clips into a complete finished video.

    Figure 11. Practical tips for producing better AI-generated videos.

    Figure 11 provides a practical checklist that beginners can follow while planning, generating, reviewing, and editing AI videos. The most reliable results usually come from simple scenes, controlled movement, consistent details, and careful revision.

    Limitations of AI Video Generation

    AI video tools can create impressive results, but they are not perfect. Beginners should understand their limitations before using generated videos for websites, advertising, education, or business projects.

    Inconsistent Characters

    A person’s face, hairstyle, clothing, age, or body shape may change between frames or scenes.

    This problem becomes more noticeable in longer videos or when the subject moves quickly.

    How to Reduce This Limitation

    Use a clear reference image, repeat the character description in every prompt, keep movements simple, and generate short clips instead of one long scene.

    Distorted Hands and Body Movement

    Hands, fingers, arms, legs, and facial expressions may move unnaturally.

    Complex actions such as eating, writing, running, or handling small objects are often more difficult for the AI to generate correctly.

    How to Reduce This Limitation

    Use slow, simple actions and avoid close-up shots of complicated hand movements whenever possible. Review the entire clip carefully before publishing it.

    Objects May Change Shape

    Products, furniture, tools, food, and other objects may change size, colour, position, or shape during the clip.

    For example, a cup may become larger, a chair may disappear, or a product label may change.

    How to Reduce This Limitation

    Ask the AI to keep the object unchanged, use a reference image, reduce motion strength, and keep the camera stable.

    Background Instability

    Walls, windows, signs, furniture, trees, and other background elements may move, flicker, or transform unexpectedly.

    How to Reduce This Limitation

    Describe the background clearly and include instructions such as:

    Keep the background fixed, stable, and unchanged throughout the clip.

    Incorrect or Unreadable Text

    Text shown on signs, screens, packages, or clothing may be misspelled, distorted, or replaced with random symbols.

    How to Reduce This Limitation

    Ask the generator to avoid visible text. Add accurate titles, labels, and captions later using a video editor.

    Limited Control Over Exact Results

    Even a detailed prompt may not produce exactly what you imagined.

    The generator may interpret camera movement, action, lighting, or composition differently.

    How to Reduce This Limitation

    Generate several versions, compare the results, and revise one instruction at a time.

    Short Video Lengths

    Many AI video tools are designed to create short clips rather than complete long-form videos.

    Longer generations may become less consistent as the scene continues.

    How to Reduce This Limitation

    Build longer projects from several short clips and combine them in a video editor.

    Scene-to-Scene Inconsistency

    When several clips are generated separately, the character, setting, lighting, clothing, or visual style may change.

    How to Reduce This Limitation

    Create a consistency sheet and repeat the same important details in every scene prompt.

    Lip-Sync and Speech Problems

    A character’s mouth movement may not match the narration or dialogue correctly.

    Speech may also sound unnatural, poorly timed, or emotionally inconsistent.

    How to Reduce This Limitation

    Create the visual clip first, then use a dedicated narration or lip-sync tool if needed. Review the timing closely before publishing.

    Audio May Need Additional Editing

    Generated music, speech, or sound effects may not match the scene perfectly.

    The audio may be too loud, too quiet, repetitive, or poorly synchronized.

    How to Reduce This Limitation

    Edit audio separately and balance narration, music, and effects in a video editor.

    Product Accuracy Problems

    AI may change important product details such as:

    • Shape

    • Colour

    • Size

    • Packaging

    • Buttons

    • Labels

    • Materials

    This can be a serious problem in advertising.

    How to Reduce This Limitation

    Use real product footage or carefully controlled reference images for important commercial details. Do not use AI-generated product scenes when exact accuracy is required.

    High Generation Costs or Usage Limits

    Video generation may use credits, limited monthly allowances, or paid plans. [13]

    Repeated testing can quickly consume available usage.

    How to Reduce This Limitation

    Plan prompts carefully, begin with low-cost tests when available, save good versions, and avoid regenerating without first identifying the main problem.

    Processing Time

    Video generation may take longer than image generation, especially for higher-quality clips.

    Busy services may also process requests more slowly.

    How to Reduce This Limitation

    Prepare several prompts in advance and organize the project so you can review or edit other scenes while generating clips.

    Copyright and Ownership Concerns

    AI-generated videos may unintentionally resemble protected characters, brands, artwork, or other existing content.

    Copyright protection, ownership, and commercial-use rights may depend on applicable law, the amount of human creative input, the service’s current terms, and the rights attached to the source material. [8][12][13][21][22]

    How to Reduce This Limitation

    Use original material, avoid direct copies of protected content, review the service’s current terms, and keep records of your prompts and source material. For important commercial projects, obtain qualified legal advice.

    Difficulty Creating Complex Stories

    AI video tools may struggle with:

    • Several characters interacting

    • Long conversations

    • Precise action sequences

    • Multiple location changes

    • Detailed cause-and-effect events

    • Consistent storytelling over time

    How to Reduce This Limitation

    Divide complex stories into short, clearly planned scenes and use editing to control the final sequence.

    Human Review Is Still Necessary

    AI cannot reliably decide whether every generated scene is accurate, appropriate, ethical, or suitable for the intended audience.

    How to Reduce This Limitation

    Review every clip manually before publishing. Check visual accuracy, permissions, captions, audio, and possible misleading content.

    Figure 12. The main limitations of AI video generation and how to reduce them.

    Figure 12 shows that AI video generation still requires careful planning, testing, editing, and human review. Understanding these limitations helps beginners choose suitable scenes and avoid relying on AI where exact accuracy is essential.

    How to Use AI-Generated Videos Responsibly

    AI-generated videos can be useful for education, marketing, storytelling, and creative projects. However, they should be created and shared carefully.

    The person publishing the video remains responsible for checking its accuracy, permissions, and possible effect on viewers.

    Important Note

    Copyright, privacy, likeness, disclosure, and commercial-use rules vary by location, platform, and project. This section provides general educational information, not legal advice.

    Review Every Video Before Publishing

    Do not publish an AI-generated video immediately after it is created.

    Watch the entire clip and check for:

    • Distorted faces or bodies

    • Incorrect product details

    • Unwanted text

    • Misleading scenes

    • Offensive content

    • Private information

    • Copyrighted logos or characters

    • Sudden visual changes

    • Inaccurate captions or narration

    Human review is necessary even when the video looks realistic.

    Do Not Mislead Viewers

    AI-generated videos can appear convincing.

    Do not present a fictional event as if it actually happened. Avoid creating videos that falsely show:

    • A real person saying something they never said

    • A public event that did not happen

    • A product performing better than it actually does

    • A location or building that does not exist

    • A customer giving a false testimonial [23]

    • A news event with invented details

    When appropriate, tell viewers that the video was created or modified using AI.

    Protect Real People

    Do not use a person’s image or voice in a deceptive, harmful, or commercial way without the appropriate permission or legal basis. Rules differ by jurisdiction. [16][20]

    Be particularly careful when using images of:

    • Children

    • Family members

    • Customers

    • Employees

    • Public figures

    • Private individuals

    Never use AI video tools to impersonate someone or create false evidence. [16][20]

    Protect Personal Information

    Before uploading a reference image or video, check whether it contains: [9][20]

    • Full names

    • Addresses

    • Phone numbers

    • Email addresses

    • Identification documents

    • Vehicle licence plates

    • Financial information

    • Medical information

    • Private messages

    • Computer passwords or account details

    Crop, blur, or remove private information before uploading the file.

    Respect Copyright

    Use images, video clips, music, sound effects, and other materials that you: [21][22]

    • Created yourself

    • Purchased with suitable rights

    • Licensed correctly

    • Received permission to use

    • Obtained from a legitimate royalty-free source

    Do not assume that material found online is free to reuse. [21][22]

    Avoid Unauthorized Characters, Brands, and Likenesses

    AI tools may generate content that resembles famous characters, company logos, packaging, branded products, or real people.

    Avoid requesting unauthorized copies or deceptive impersonations of:

    • Movie characters

    • Cartoon characters

    • Real-person or celebrity likenesses

    • Company logos

    • Branded packaging

    • Protected artwork

    Create original characters and designs instead.

    Check Product Accuracy

    AI-generated product videos may show incorrect colours, features, dimensions, packaging, or labels.

    Do not use an AI-generated video as the only evidence of how a product looks or works.

    For important commercial content, compare the video with the real product before publishing it.

    Check Educational and Factual Claims

    A visually impressive video can still contain inaccurate information.

    Verify:

    • Names

    • Dates

    • Statistics

    • Procedures

    • Historical events

    • Health information

    • Financial claims

    • Technical explanations

    Use reliable sources before adding factual narration or captions.

    Use Care with Health, Legal, and Financial Content

    AI-generated videos should not be presented as professional advice unless reviewed by a qualified expert.

    Mistakes in these areas may cause serious harm.

    Use clear disclaimers when appropriate, but do not treat a disclaimer as a substitute for qualified review. Avoid guaranteed or unsupported claims.

    Label AI-Generated Content When Appropriate

    Disclosure can help viewers understand how the content was created.

    A simple note may say: [14][15]

    This video was created with the assistance of artificial intelligence.

    You may place the disclosure in:

    • The video caption

    • The description

    • The opening title

    • The closing credits

    • The website page containing the video

    The best location depends on how realistic or sensitive the content is.

    Some platforms provide a specific AI-use or altered-content setting. Use that setting when required; a note in the description may not be enough. [14][15]

    Keep Creation Records

    Save basic information about each project, including:

    • Original prompt

    • Revised prompts

    • Reference images

    • Generated versions

    • Final edited video

    • Creation date

    • Source licences

    • Permission records

    • AI disclosure wording

    These records may help if questions arise later.

    Follow Platform Rules

    Social media platforms, advertising networks, and video services may have rules for AI-generated or altered content. [14][15][16]

    Review the current rules before publishing, especially when the video contains:

    • Realistic people

    • Political subjects

    • News-style content

    • Paid advertising

    • Health claims

    • Financial claims

    • Synthetic voices

    • Sensitive events

    Use Human Judgment

    A video can be technically impressive but still be inappropriate, confusing, or misleading.

    Before publishing, ask:

    • Is the video accurate?

    • Is it respectful?

    • Do I have permission to use the source material?

    • Could viewers misunderstand it?

    • Does it need an AI disclosure?

    • Would I be comfortable explaining how it was created?

    Responsible use protects both the creator and the audience.

    Figure 13. A responsible-use checklist for AI-generated videos.

    Figure 13 gives beginners a practical checklist for reviewing AI-generated videos before publication. It emphasizes accuracy, permission, privacy, disclosure, and human responsibility.

    Practical Uses for AI-Generated Videos

    AI-generated videos can be used in many personal, educational, creative, and business projects.

    The most suitable uses are usually short, clearly planned videos where exact real-world accuracy is not essential.

    Social Media Content

    AI videos can help create short content for platforms such as:

    • YouTube Shorts

    • Instagram Reels

    • TikTok

    • Facebook

    • LinkedIn

    Possible examples include:

    • Motivational scenes

    • Simple educational tips

    • Product introductions

    • Animated quotes

    • Short stories

    • Background videos

    • Before-and-after concepts

    Choose the correct aspect ratio before generating the clip.

    Website Content

    Short AI videos can make a website more engaging. [17]

    They may be used for:

    • Homepage backgrounds

    • Service introductions

    • Tutorial demonstrations

    • Article illustrations

    • Product-category pages

    • About-page introductions

    • Landing pages

    Keep website videos short and compressed so they do not slow down page loading.

    Educational Videos

    Teachers, trainers, bloggers, and course creators can use AI-generated clips to help explain ideas visually.

    Examples include:

    • Historical reconstructions

    • Science demonstrations

    • Animated diagrams

    • Vocabulary examples

    • Process explanations

    • Geography scenes

    • Training scenarios

    Always verify educational details before publishing the video.

    YouTube Videos

    AI-generated clips can support longer YouTube content.

    They may be used as:

    • Opening scenes

    • Background footage

    • Story illustrations

    • Transition clips

    • Visual examples

    • Reconstructed scenes

    • Narration support

    Combine AI clips with original narration, screenshots, diagrams, and real footage to create a more complete video.

    Product Promotion

    AI video can help demonstrate a product concept or create an attractive promotional scene.

    Possible uses include:

    • Product introductions

    • Lifestyle scenes

    • Promotional backgrounds

    • Concept advertisements

    • Packaging presentations

    • Social media teasers

    However, the product must remain visually accurate. Use real footage when exact features, dimensions, colours, or functions must be shown.

    Small-Business Marketing

    Small businesses may use AI-generated video for:

    • Service advertisements

    • Seasonal promotions

    • Event announcements

    • Website introductions

    • Social media campaigns

    • Brand storytelling

    • Customer education

    A bakery, restaurant, repair service, consultant, or online shop could use short AI scenes to support marketing content without filming every visual from scratch.

    Presentations

    AI-generated clips can make presentations more visually interesting.

    They may be useful for:

    • Opening slides

    • Section transitions

    • Concept demonstrations

    • Future scenarios

    • Process illustrations

    • Background motion

    • Project introductions

    Avoid adding distracting movement behind important text.

    Storytelling

    Writers and creative beginners can turn ideas into visual stories.

    AI video can help create:

    • Short fictional scenes

    • Children’s stories

    • Fantasy locations

    • Animated characters

    • Book trailers

    • Poetry videos

    • Visual storyboards

    Create one scene at a time and keep character descriptions consistent.

    Online Courses

    Course creators can use AI-generated video to support lessons.

    Examples include:

    • Lesson introductions

    • Scenario demonstrations

    • Animated examples

    • Visual summaries

    • Background scenes

    • Practice situations

    AI video should support the lesson rather than replace clear teaching.

    Advertising Concepts

    AI video can help businesses test creative ideas before paying for a full production.

    For example, a business can compare:

    • Different settings

    • Different camera angles

    • Different moods

    • Different colour schemes

    • Different product presentations

    • Different story concepts

    These early versions can act as visual prototypes.

    Music and Creative Projects

    AI-generated visuals can support:

    • Original music videos

    • Instrumental tracks

    • Poetry readings

    • Meditation videos

    • Ambient backgrounds

    • Art projects

    • Experimental animation

    Only use music, voices, and images that you have permission to use. [21][22]

    Video Prototypes

    A prototype is an early version used to demonstrate an idea.

    AI video prototypes can help explain:

    • A future advertisement

    • A proposed film scene

    • A website concept

    • A product launch

    • An architectural idea

    • A training scenario

    The prototype can help other people understand the idea before more time or money is invested.

    Figure 14. Common practical uses for AI-generated videos.

    Figure 14 shows the wide range of projects that can benefit from AI-generated video. These tools are especially useful for short visual scenes, educational support, creative storytelling, marketing concepts, and video prototypes.

    Common Myths About AI Video Generation

    AI video generation is often misunderstood. Some people expect perfect results immediately, while others believe the technology can replace every part of professional video production.

    The following myths explain what beginners should realistically expect.

    Myth 1: AI Creates Perfect Videos from One Prompt

    A detailed prompt improves the result, but it does not guarantee perfection.

    AI-generated videos may still contain:

    • Distorted movement

    • Changing faces

    • Unstable backgrounds

    • Incorrect objects

    • Poor timing

    • Unwanted camera motion

    Reality

    Creating a useful AI video often requires several attempts. The prompt may need to be revised, and some scenes may need to be regenerated or edited.

    Myth 2: ChatGPT Creates the Complete Video by Itself

    ChatGPT is used to help plan the idea, write the prompt, create the storyboard, and improve weak instructions.

    A dedicated video-generation tool is responsible for creating the moving video.

    Reality

    ChatGPT and the AI video generator perform different roles. ChatGPT helps with planning and communication, while the generator produces the visual clip.

    Myth 3: Longer Prompts Always Produce Better Videos

    A long prompt is not automatically a good prompt.

    Too many details, actions, camera movements, and style instructions can confuse the generator.

    Reality

    The best prompts are clear, organized, and focused. Include important details, but avoid unnecessary complexity.

    Myth 4: AI Video Requires No Editing

    Even a strong generated clip may contain weak frames, poor pacing, inaccurate text, or audio problems.

    Reality

    Most AI videos benefit from trimming, captions, sound adjustment, colour correction, transitions, and a final review.

    Myth 5: AI Video Can Replace Professional Filming in Every Situation

    AI video is useful for concepts, short scenes, educational examples, creative projects, and prototypes.

    However, it may not be suitable when exact accuracy is essential.

    Examples include:

    • Product demonstrations

    • Legal evidence

    • Medical instructions

    • Customer testimonials

    • Technical procedures

    • News reporting

    Reality

    Real footage is still the safer choice when viewers must see exactly what happened or how something works.

    Myth 6: The AI Remembers Every Character and Setting

    Different clips may produce changes in appearance, clothing, lighting, or background.

    Reality

    You must repeat important details in each prompt and use reference images or consistency sheets when available.

    Myth 7: More Motion Makes a Video More Exciting

    Strong motion may appear dramatic, but it can also create distortion and instability.

    Reality

    Slow, controlled movement often looks more realistic and professional.

    Myth 8: AI Can Generate Accurate Text Inside Videos

    Signs, labels, packaging, and screens may contain misspelled or unreadable text.

    Reality

    Add important text later in a video editor rather than relying on the generator.

    Myth 9: Every Generated Video Can Be Used Commercially

    Usage rights may depend on:

    • The tool

    • The subscription plan

    • The source images

    • The music

    • The voices

    • The reference material

    • The platform rules

    Reality

    Check the current terms and licences before using generated videos for advertising, sales, or paid projects.

    Myth 10: AI-Generated Videos Are Automatically Original

    A generated video may unintentionally resemble existing characters, brands, artwork, or visual styles.

    Reality

    Review the result carefully and avoid prompts that request direct copies of protected material.

    Myth 11: Anyone Can Publish Realistic AI Videos Without Disclosure

    A realistic AI video may mislead viewers, especially when it includes real people, news-style scenes, or sensitive events.

    Reality

    Disclosure may be necessary or appropriate depending on the subject, platform, and purpose of the video. [14][15]

    Myth 12: AI Video Removes the Need for Human Creativity

    AI can generate visuals, but it does not replace the creator’s judgment.

    The human creator still decides:

    • The purpose

    • The story

    • The audience

    • The message

    • The scene order

    • The final quality

    Whether the video should be published.

    Reality

    AI is a creative tool. The quality of the final video still depends heavily on human planning, review, and editing.

    Figure 15. Common myths and realities about AI video generation.

    Figure 15 corrects common misunderstandings about AI video generation. It shows that useful results still depend on clear prompts, careful editing, responsible use, and human creative judgment.

    Frequently Asked Questions

    Can ChatGPT Create the Complete Video Directly?

    No—not in the workflow described in this guide. ChatGPT can help you plan a video, write prompts, create storyboards, prepare narration, and improve weak instructions or results.

    The moving video is generated by a currently available dedicated AI video tool.

    Do I Need Video-Editing Experience?

    No. Beginners can create simple AI videos without advanced editing experience.

    However, learning basic skills such as trimming clips, adding captions, adjusting sound, and arranging scenes will improve the final result.

    Can I Create a Video from a Photograph?

    Yes. Image-to-video tools can animate a still photograph by adding movement to the subject, background, camera, or environment.

    Use a clear image and describe both what should move and what should remain unchanged.

    How Long Should an AI-Generated Clip Be?

    Short clips are usually easier to control.

    A clip of approximately five to ten seconds is often suitable for one simple action. Longer videos can be created by combining several short clips.

    Why Does My Character Change During the Video?

    AI may have difficulty maintaining the same face, clothing, hairstyle, or body shape across several frames.

    Use a reference image, repeat the character details, reduce motion, and create shorter clips.

    Why Do Objects Change Shape?

    The AI synthesizes the video from learned patterns rather than recording a real object.

    Reduce complex movement, use a clear reference image, keep the camera stable, and state that the object must remain unchanged.

    Can AI Video Generators Create Accurate Text?

    They may create visible text, but the result can be misspelled, distorted, or unreadable.

    It is usually better to generate the scene without text and add accurate titles or captions later in a video editor.

    Can I Add Music and Narration?

    Yes. You can add narration, music, sound effects, and captions during the editing stage.

    Use audio that you created, properly licensed, purchased with suitable usage rights, or have permission to use.

    Can I Use AI-Generated Videos on YouTube?

    AI-generated videos may be used on YouTube when they follow the platform’s rules and you have the necessary rights to all video, music, voice, and source materials. [14][16]

    YouTube requires disclosure when AI meaningfully alters or generates realistic content that could be mistaken for real events, places, or actions. Check the current upload settings and policy before publishing. [14]

    Can I Use AI Videos for My Business?

    Yes. AI-generated videos can support advertisements, websites, presentations, social media, educational content, and early product concepts.

    Review the video carefully and do not use inaccurate AI-generated visuals to make false claims about a product or service.

    Are AI-Generated Videos Free?

    Some tools provide limited free access, trials, or credits, while others require a paid plan.

    Video generation often uses more processing resources than image generation, so free limits may be restricted.

    How Many Attempts Does It Take to Get a Good Video?

    There is no fixed number.

    A simple scene may work after one or two attempts, while a difficult scene may require several prompt revisions and regenerated versions.

    Should I Use Text-to-Video or Image-to-Video?

    Use text-to-video when you want the AI to create the entire scene from a written description.

    Use image-to-video when you already have a suitable image and want greater control over the subject, composition, or visual style.

    What Is the Best Aspect Ratio?

    The best format depends on where the video will be published:

    • 16:9 for YouTube, websites, and presentations

    • 9:16 for Shorts, Reels, TikTok, and mobile viewing

    • 1:1 for square social media posts

    • 4:5 for portrait feed posts

    Choose the format before generating the video.

    Can AI Video Replace Real Filming?

    AI video can replace some visual scenes, concept demonstrations, backgrounds, and creative sequences.

    It should not replace real footage when exact accuracy, proof, product details, or genuine human testimony is required.

    Do I Need to Disclose That a Video Was Created with AI?

    Disclosure may be appropriate or required when the video is realistic, contains real people, covers sensitive events, or could mislead viewers.

    Check the rules of the platform where the video will be published, and use its built-in AI-use or altered-content setting when required.

    Key Takeaways

    • ChatGPT helps plan AI videos and write detailed prompts.

    • Dedicated AI video tools generate the actual moving clips.

    • Simple scenes usually produce more reliable results.

    • A strong prompt describes the subject, setting, action, camera, lighting, style, mood, duration, and format.

    • Short clips are easier to control than long videos.

    • Image-to-video prompts should explain what moves and what remains unchanged.

    • Multi-scene videos require a storyboard and consistency sheet.

    • AI-generated videos usually need editing before publication.

    • Generated text, hands, faces, products, and backgrounds may be inaccurate.

    • Human review is necessary before every video is published.

    • Copyright, privacy, disclosure, and platform rules must be considered.

    • AI video works best as a creative tool guided by human planning and judgment.

    Final Tip

    Start with one simple scene.

    Use one subject, one action, and one camera movement. Generate a short clip, review the result carefully, and improve only the most important problem.

    This step-by-step approach is more effective than trying to create a complete professional video with one complicated prompt.

    Figure 16. The complete beginner workflow for creating an AI video.

    Figure 16 summarizes the complete process covered in this guide. It reminds beginners that successful AI video creation is a cycle of planning, generating, reviewing, improving, editing, and publishing responsibly.

    Conclusion

    AI video generation gives beginners a practical way to create some types of moving visual content without professional cameras, actors, or advanced editing equipment.

    ChatGPT can help you develop the idea, plan each scene, write stronger prompts, create narration, and improve weak results. The actual video is then generated using a dedicated AI video tool.

    The best results usually come from keeping each scene simple, using short clips, describing motion clearly, and reviewing every generated version carefully.

    AI video tools are improving quickly, but they can still produce inconsistent characters, distorted movement, changing objects, unstable backgrounds, and incorrect text. For this reason, human review and editing remain essential.

    Start with one simple video idea, generate a short clip, review the result, and improve one problem at a time. With practice, you can use AI video generation for websites, social media, education, presentations, storytelling, and small-business marketing.

    Sources and References

    Citations in square brackets refer to the numbered official sources below. These pages were reviewed on July 28, 2026. Features, access, prices, credits, licences, privacy practices, and platform rules can change. Readers do not need to reread every policy before every publication, but they should check when first using a tool, changing plans or features, receiving a policy-update notice, and periodically for important publishing or commercial projects.

    [1] OpenAI. What to Know About the Sora Discontinuation. Confirms that the Sora web and app experiences ended on April 26, 2026, and gives the scheduled Sora API discontinuation date. Accessed July 28, 2026.

    [2] OpenAI. Prompt Engineering Best Practices for ChatGPT. Recommends clear, specific instructions, sufficient context, and iterative refinement when working with ChatGPT. Accessed July 28, 2026.

    [3] Runway. Text to Video Prompting Guide. Explains that text-to-video prompts should describe both the visible scene and how the elements move, using clear and direct language. Accessed July 28, 2026.

    [4] Runway. Image to Video Prompting Guide. Explains that the starting image defines the composition and appearance, while the text prompt should focus mainly on motion and temporal changes. Accessed July 28, 2026.

    [5] Runway. Introduction to Prompting. Recommends starting simply, reviewing the output, and refining prompts as part of an iterative creative process. Accessed July 28, 2026.

    [6] Runway. Getting Started with Generative Video. Describes a current workflow for selecting a generation mode, prompting, generating, reviewing, and iterating. Accessed July 28, 2026.

    [7] Runway. How to Create Longer Videos and Films. Explains how shorter generated clips can be planned and combined through editing to create longer-form video projects. Accessed July 28, 2026.

    [8] Runway. Usage Rights. Provides Runway-specific ownership and commercial-use information. Other providers may use different terms. Accessed July 28, 2026.

    [9] Runway. Understanding Runway’s Security and Privacy Standards. Provides Runway-specific information about asset privacy, sharing, and security controls. Other tools may use different defaults. Accessed July 28, 2026.

    [10] Adobe. Writing Effective Text Prompts for Video Generation. Provides current official guidance on concise prompts, actions, camera angles, movement, context, and iterative refinement for video generation. Accessed July 28, 2026.

    [11] Adobe. Generate Videos Using Text Prompts. Explains how text prompts and available settings can guide video content, setting, mood, camera angle, and movement. Accessed July 28, 2026.

    [12] Adobe. Adobe Firefly FAQ. Provides current product-specific information about Firefly features, models, data practices, beta status, and commercial use. Accessed July 28, 2026.

    [13] Adobe. Generative Credits FAQ. Explains generative-credit use, plan conditions, and distinctions that may apply to premium video and partner-model features. Accessed July 28, 2026.

    [14] YouTube Help. Disclosing Use of Generative AI Content. Explains when creators must use YouTube’s AI-use disclosure for realistic, meaningfully altered, or synthetically generated content. Accessed July 28, 2026.

    [15] YouTube Help. Understanding “How This Content Was Made” Disclosures on YouTube. Explains how YouTube presents information about AI generation, meaningful alteration, and supported content-provenance signals. Accessed July 28, 2026.

    [16] YouTube Help. Impersonation Policy. Explains that AI disclosure does not permit misleading impersonation and addresses unauthorized use of a person’s voice or likeness. Accessed July 28, 2026.

    [17] WordPress.com Support. Video Block. Explains direct video upload, embedding, poster images, playback settings, and text tracks in the WordPress Video block. Accessed July 28, 2026.

    [18] W3C Web Accessibility Initiative. Captions/Subtitles. Explains the role of accurate synchronized captions for speech and important non-speech audio information. Accessed July 28, 2026.

    [19] W3C Web Accessibility Initiative. Planning Audio and Video Media. Provides planning guidance for captions, transcripts, audio descriptions, and other accessibility needs. Accessed July 28, 2026.

    [20] Office of the Privacy Commissioner of Canada. Consent. Explains meaningful consent for collecting, using, and disclosing personal information in Canada. Accessed July 28, 2026.

    [21] Canadian Intellectual Property Office. A Guide to Copyright. Provides general Canadian copyright information for audiovisual works, photographs, music, sound recordings, and other protected material. Accessed July 28, 2026.

    [22] Creative Commons. The Creative Commons Licences. Explains licence conditions such as attribution, ShareAlike, NonCommercial, and NoDerivatives that may apply to source assets. Accessed July 28, 2026.

    [23] Federal Trade Commission. Consumer Reviews and Testimonials Rule: Questions and Answers. Explains concerns involving false reviews, fake testimonials, AI-generated avatars, and marketing content that may mislead consumers. Accessed July 28, 2026.

    Continue Learning

    Continue building your AI-video skills with these related guides:

    Best AI Video Tools for Beginners: Complete Guide (2026)

    How to Create AI Videos from Text: Beginner Step-by-Step Guide (2026)
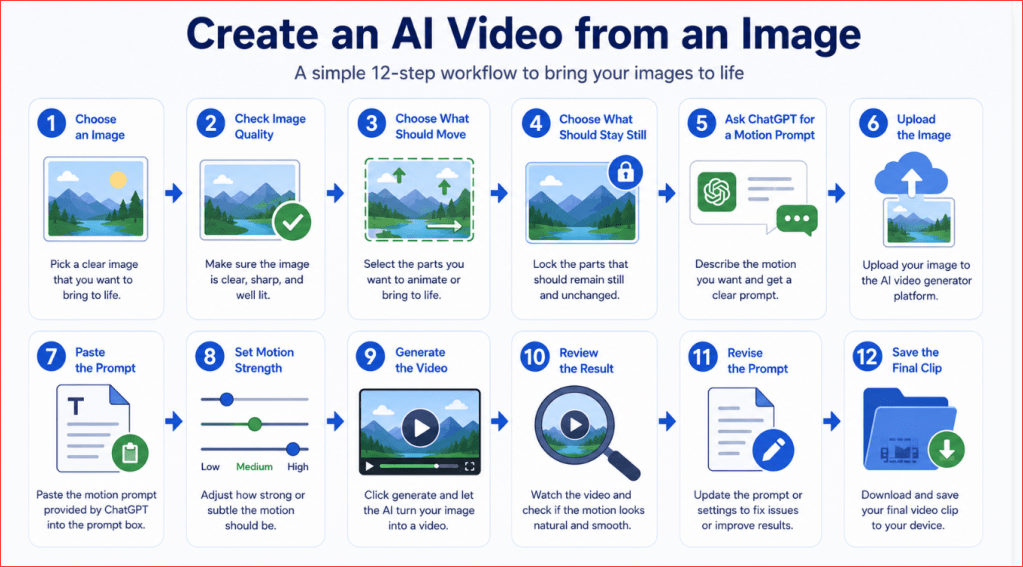
    How to Create AI Videos from Images: Beginner Step-by-Step Guide (2026)
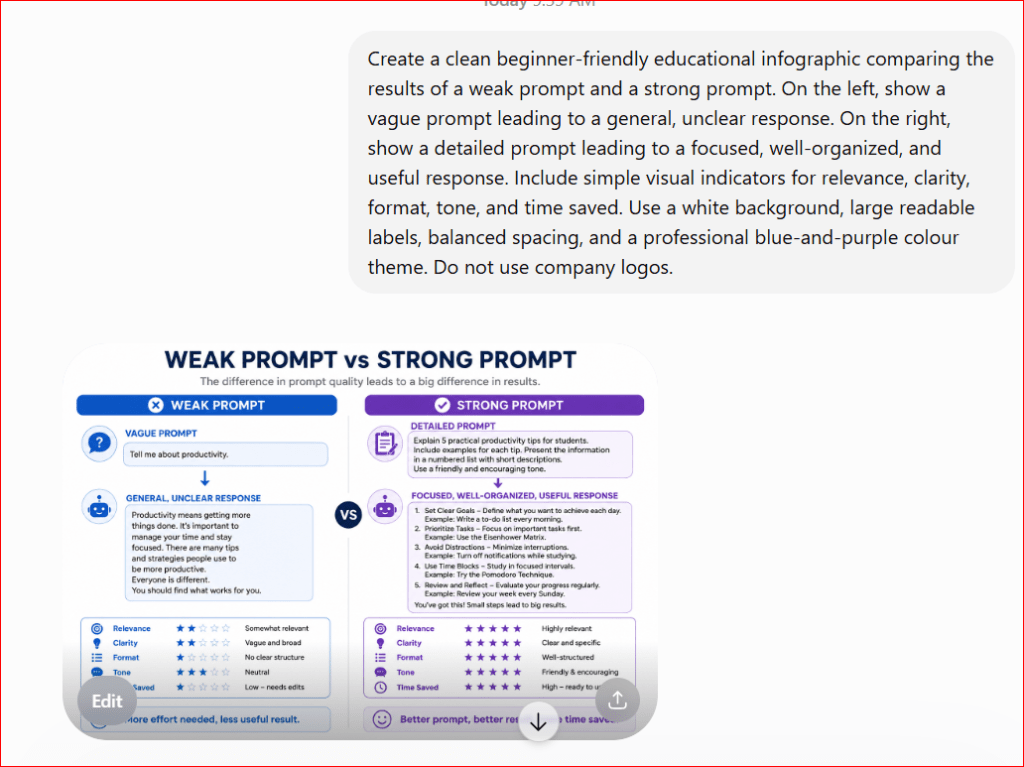
    How to Edit AI-Generated Videos: Beginner Step-by-Step Guide (2026)
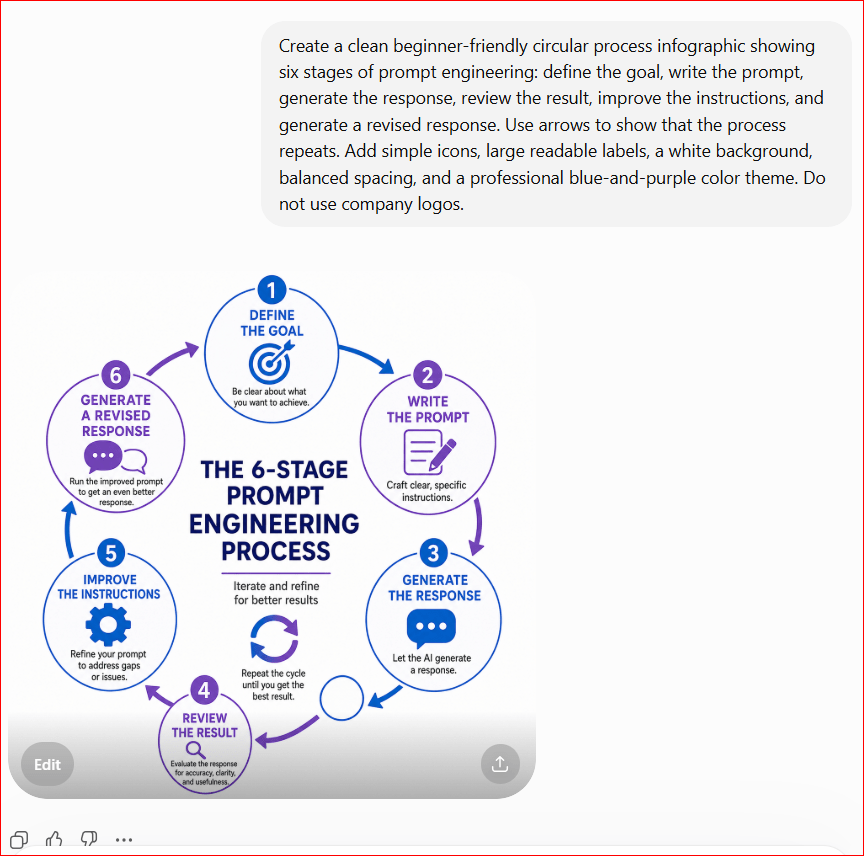
    How to Add Voice, Music, and Captions to AI Videos: Beginner Step-by-Step Guide (2026)
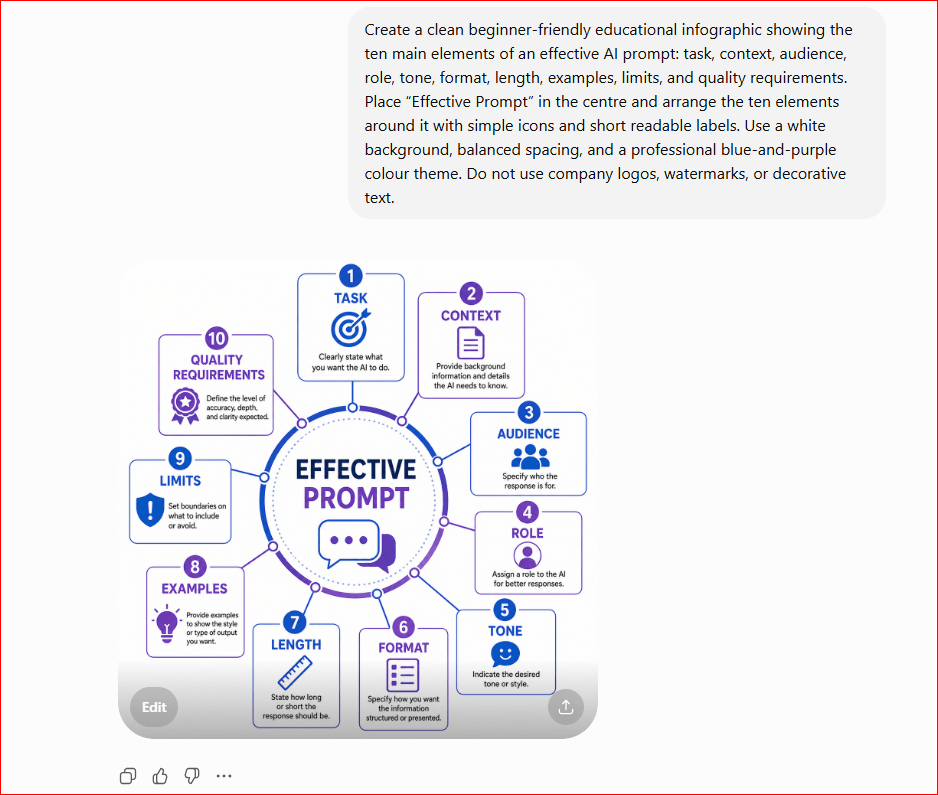
    These guides continue the learning path from selecting a suitable video tool to creating clips, editing the strongest versions, adding audio and captions, and preparing the final video for publication.

  • How to Edit Images with ChatGPT: Beginner Step-by-Step Guide (2026)
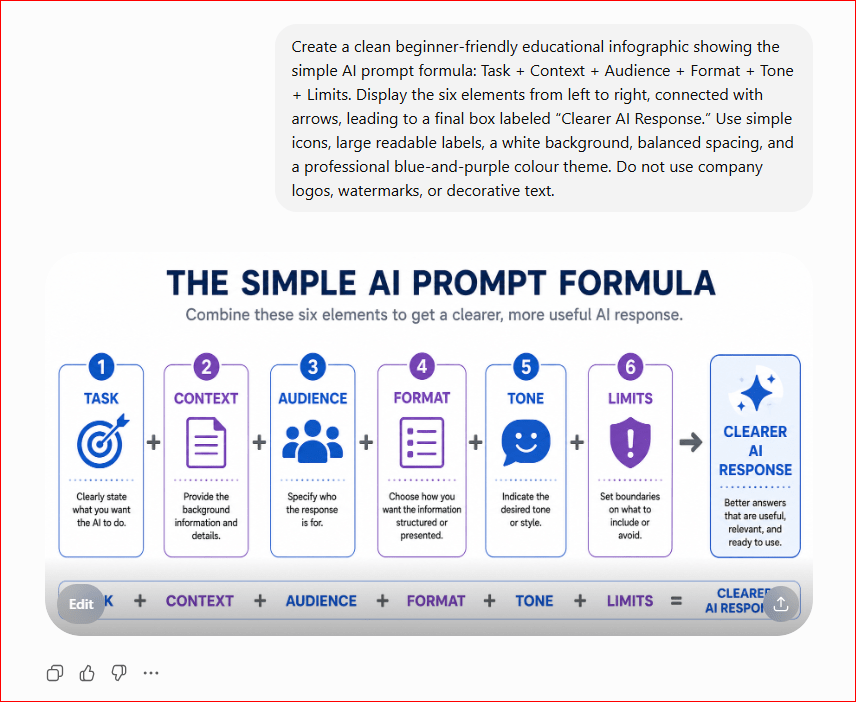
    How to Edit Images with ChatGPT: Beginner Step-by-Step Guide (2026)
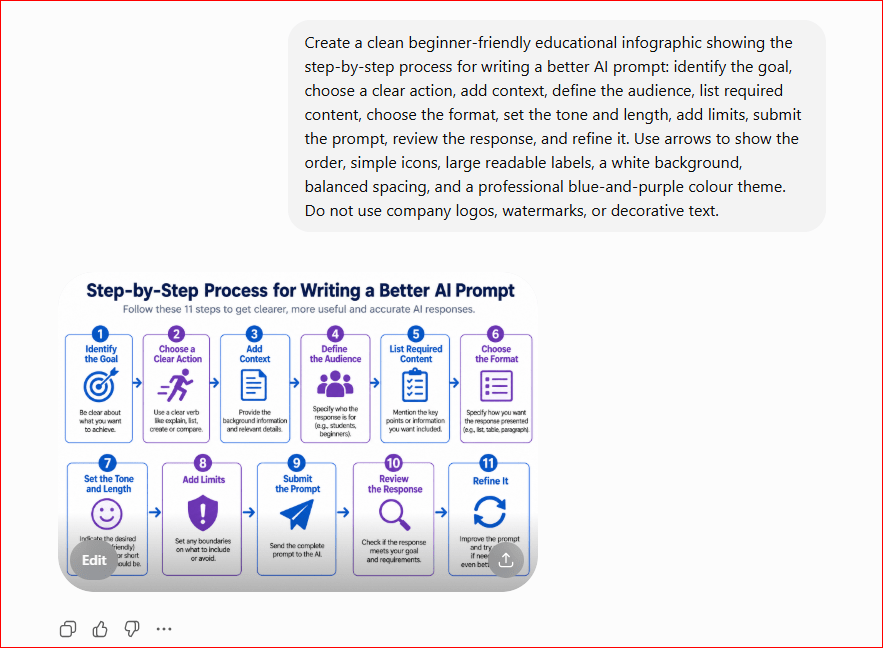
    Estimated reading time: 20–25 minutes

    Last updated: July 2026

    What You’ll Learn

    In this beginner-friendly guide, you will learn:

    • How to upload an existing image or reopen an image created in ChatGPT

    • How to write a clear instruction that explains what must change and what must stay the same

    • How to remove, add, or replace objects and backgrounds

    • How to change colours, lighting, composition, aspect ratio, text, and visual style

    • How to correct hands, faces, small objects, and other image mistakes

    • How to make several edits without losing successful corrections

    • How to review, save, download, and prepare the final image for WordPress

    • How to use AI image editing responsibly

    Introduction

    Image editing means changing an existing picture instead of creating a completely new one. You might remove a distracting object, replace a background, change a colour, improve the lighting, correct a hand, add open space for a title, or convert the image into another visual style.

    ChatGPT Images can edit an image created in ChatGPT or an existing image that you upload. You can describe the edit directly in the conversation, or use the selection tool to highlight one area. The selected boundary is a guide rather than a perfect mask, so nearby details may sometimes change.

    OpenAI’s official Images in ChatGPT guide explains the current create, edit, aspect-ratio, selection, and save controls. The exact button names or positions may change as ChatGPT is updated.

    The most important beginner rule is simple: make one focused change, protect the details that are already correct, review the entire image, and save every successful version.

    What Does Image Editing Mean?

    When you generate an image, ChatGPT begins with a written description. When you edit an image, the existing picture becomes the starting point. Your instruction tells ChatGPT which parts to preserve and which parts to change.

    A whole-image edit can change the overall mood, lighting, colours, or style. A local edit changes one object or one small area. Local edits usually give you more control because the request is easier to review.

    “Keep the person, face, clothing, desk, laptop, lighting, and camera angle unchanged. Remove only the white coffee cup beside the laptop and rebuild the wooden desk surface naturally.”

    This example identifies the protected details, the exact object, its location, and the required repair. It is much clearer than writing “Fix the image.”

    What Types of Images Can You Edit with ChatGPT?

    You can edit many kinds of still images, including:

    • Images created by ChatGPT

    • Personal photographs that you have permission to use

    • Room, garden, travel, food, pet, and household photographs

    • Illustrations, posters, digital artwork, and educational graphics

    • Blog images, featured images, website headers, and social-media graphics

    • Product concepts, office scenes, advertisements, and presentation images

    Images with clear subjects, good lighting, and enough resolution are easier to edit. Very blurry, highly rotated, panoramic, fisheye, or heavily compressed images may produce less reliable results.

    ChatGPT image inputs support PNG, JPEG/JPG, and non-animated GIF files. The current limit is 20 MB per image. Video clips are not supported as image inputs.

    For the current file types and size limit, see OpenAI’s ChatGPT Image Inputs FAQ.

    How to Upload an Image to ChatGPT for Editing

    1. Open ChatGPT and begin a new conversation, or open the conversation containing the image you want to edit.

    2. Select the attachment or plus button beside the message box.

    3. Choose Add photos & files, then locate the image on your device.

    4. Select the image and wait for its preview to appear.

    5. Write the editing instruction and send the image and instruction together.

    On a computer, you can also drag an image into the message area or paste a copied image from the clipboard. If an upload fails, check the file type, file size, internet connection, and whether the file is damaged.

    Before uploading, remove or cover private information such as addresses, identification numbers, financial details, medical information, children’s identifying information, or confidential business material. Upload only images you are allowed to use and edit.

    Four-step infographic showing how to upload an image to ChatGPT for editing.

    Figure 1. Upload an existing image by selecting the attachment button, choosing the file, and waiting for its preview to appear.

    This four-step example shows the basic upload process. After the image preview appears, write a precise editing instruction and send the image and instruction together.

    How to Write a Clear Image-Editing Instruction

    A strong editing instruction answers four questions:

    1. What must remain unchanged?

    2. What must change?

    3. Where is the change located?

    4. How should the edited area match the original image?

    Use this simple formula:

    “Keep [important details] unchanged. Remove, add, replace, or change [specific object or area] in [exact location]. Match the existing [perspective, lighting, colours, texture, and style]. Do not change [important exclusions].”

    Use Exact Location Words

    Useful location words include left, right, centre, top, bottom, foreground, background, behind the person, beside the laptop, near the window, and upper-right corner. When similar objects appear, explain which one should remain.

    “Remove only the smaller plant on the right side of the shelf. Keep the large plant beside the window.”

    Describe the Desired Result

    Do not explain only what should disappear. Describe what should appear afterward. When removing an object, mention the background, texture, shadow, or reflection that must be repaired. When adding an object, describe its size, colour, material, position, perspective, and shadow.

    “Replace the cup with one small green plant in a plain white ceramic pot. Keep it in the same general position and match the desk perspective, soft daylight, colours, and shadows.”

    Avoid Conflicting Instructions

    Read the complete instruction before sending it. Do not write “keep the background unchanged” and “replace the background” in the same request. Avoid combining unrelated changes such as removing furniture, changing clothing, correcting a hand, adding text, and resizing the image all at once.

    Four-part image-editing instruction showing what to keep, what to change, where to edit, and how to match the original.

    Figure 2. A clear image-editing instruction explains what to keep, what to change, where to make the change, and how the edited area should match the original image.

    This four-part structure helps beginners write precise editing requests while protecting successful details.

    How to Use the Selection Tool

    Use the selection tool when one small object or area needs attention. Open the image, choose Select, highlight the area, and then describe the edit. The highlight does not need to be perfectly exact, but it should cover the complete problem area.

    • Include the complete object, its edges, connected parts, shadow, and relevant reflections.

    • Avoid selecting a very large area unless the surrounding background also needs rebuilding.

    • Protect important nearby details in the written instruction.

    • Review the complete image because edits may extend beyond the highlighted area.

    “Correct only the selected right hand so it has one thumb and four natural fingers. Match the skin tone, pose, perspective, lighting, and shadows. Keep the face, clothing, laptop, desk, and background unchanged.”

    How to Remove, Add, or Replace Objects

    Remove an Object

    Identify the object clearly and explain what should appear behind it. Include its shadow or reflection when necessary.

    “Keep the laptop, notebook, plant, desk, room, and lighting unchanged. Remove only the white coffee cup on the right side of the laptop. Rebuild the wooden desk surface with matching grain, perspective, lighting, and shadows.”

    Afterward, check for leftover parts, repeated patterns, blurred patches, bent lines, missing nearby objects, or incorrect background perspective.

    Before-and-after example of removing an object and rebuilding the hidden background naturally.

    Figure 3. Removing an object also requires rebuilding the hidden background, texture, shadow, and lighting naturally.

    The repaired area should match the surrounding surface, perspective, colours, shadows, and lighting.

    Add an Object

    Describe the new object and how it should relate to the existing scene. A new object should rest naturally on the correct surface and receive light from the same direction.

    “Add one small closed navy-blue notebook beside the laptop with a black pen resting on top. Keep it smaller than the laptop and match the desk angle, natural daylight, colours, and contact shadow.”

    Before-and-after example of adding an object with matching size, perspective, lighting, and shadows.

    Figure 4. A newly added object should match the original image’s size, position, perspective, lighting, and shadows.

    The new item should appear naturally connected to the surrounding scene and surface.

    Replace an Object

    A replacement combines removal and addition. Identify both the original object and the new object, then explain whether the size and position should remain similar.

    “Keep the person, laptop, desk, room, lighting, and camera angle unchanged. Replace only the white coffee cup beside the laptop with a small green plant in a white ceramic pot. Use the same general position and match the existing scale, perspective, lighting, and shadows.”

    For products, compare the edited result with the real product. AI may unintentionally change dimensions, materials, labels, buttons, packaging, or features.

    Before-and-after example of replacing one object with another while preserving position, scale, lighting, and shadows.

    Figure 5. Replacing an object requires the new item to match the original position, scale, perspective, lighting, and shadows.

    The replacement should fit the same space and look as though it was part of the original scene.

    How to Replace or Change an Image Background

    A successful background edit protects the main subject while making the new setting match the original camera angle, lighting, colours, and depth of field.

    “Keep the person, face, expression, hair, clothing, pose, desk, laptop, lighting, and camera angle unchanged. Replace only the crowded background with a clean modern home office containing one simple shelf and one small plant. Match the existing perspective and soft daylight.”

    For a plain or transparent background, protect the subject’s edges carefully, especially around hair, fingers, glasses, thin objects, and soft shadows. A traditional background-removal tool may be better when perfectly clean edges are required.

    After the edit, check for halos, missing hair, distorted furniture, incorrect object placement, mismatched blur, or a background that appears too sharp or too flat.

    Before-and-after example of replacing an image background while preserving the main subject.

    Figure 6. A successful background replacement preserves the main subject while matching the new scene’s perspective, lighting, colours, and depth of field.

    The subject should remain consistent while the new background looks natural and supports the image’s purpose.

    How to Change Colours and Improve Lighting

    Change One Colour

    Identify the exact object, its current colour, and its new colour. Protect texture, patterns, folds, highlights, shadows, printed details, and nearby objects with similar colours.

    “Change only the red notebook beside the laptop to deep navy blue. Preserve its shape, material, texture, position, highlights, and shadow. Do not apply blue to the desk, laptop, clothing, or background.”

    Before-and-after example of changing an object’s colour while preserving its texture, highlights, and shadows.

    Figure 7. A successful colour change preserves the object’s shape, texture, highlights, shadows, and surrounding details.

    Only the requested colour should change while the rest of the image remains consistent.

    Improve Lighting

    Describe the lighting problem and the desired light source. Useful details include direction, brightness, softness, colour temperature, highlights, and shadows.

    “Brighten the room moderately using soft natural daylight from the window on the left. Reduce the dark shadow across the person’s face while preserving natural skin tones, clothing colours, window detail, and realistic shadows.”

    Review skin tones, bright windows, product reflections, shadow direction, and colour balance. Do not continue from a version that is washed out, unusually yellow, or inconsistent with the original scene.

    Before-and-after example of improving image lighting while preserving natural colours, highlights, and detail.

    Figure 8. Improved lighting makes important details easier to see while preserving natural colours, highlights, shadows, and depth.

    Lighting corrections should brighten the image without washing out details or creating unnatural shadows.

    How to Crop, Resize, or Change the Aspect Ratio

    Cropping removes part of an image. Resizing changes the dimensions. Extending the canvas creates new space around the existing scene. ChatGPT Images also provides an aspect-ratio control, but a traditional image tool may still be needed for exact pixel dimensions and compression.

    • 1:1 square — profile images and square social posts

    • 16:9 landscape — WordPress featured images, presentations, and video thumbnails

    • 4:5 portrait — portrait-oriented social posts

    • 9:16 vertical — Stories, Reels, and short-form video covers

    “Change the image to a wide 16:9 landscape format by extending the office background naturally. Position the person on the right and leave clean open space on the left for a title. Keep the complete head, hands, laptop, and desk inside the frame. Do not stretch or distort the person or objects.”

    Check that important details are not too close to the edges and that new background areas match the original perspective, lighting, texture, and colours.

    Infographic comparing square, landscape, portrait, and vertical image aspect ratios.

    Figure 9. The same image can be adapted to square, landscape, portrait, and vertical formats while keeping the main subject visible and correctly proportioned.

    Choose the aspect ratio that matches the platform and avoid stretching or cutting off important details.

    How to Add or Correct Text in an Image

    ChatGPT can attempt to add or correct short text, but spelling, punctuation, spacing, and letter shapes must be reviewed carefully. Keep the wording short and place the exact text inside quotation marks.

    “Replace only the incorrect title with the exact words “AI for Beginners.” Keep the text box, position, size, colour, and background unchanged. Do not change any other letters or design elements.”

    For important website titles, prices, instructions, or long labels, a safer method is to create clean open space and add the final text later in Canva, PowerPoint, TextMaker, WordPress, or another design tool. This gives you precise control over spelling, font, alignment, line spacing, and safe margins.

    Checklist for adding or correcting image text with accurate spelling, readable contrast, safe spacing, and correct placement.

    Figure 10. Clear image text requires correct spelling, readable formatting, suitable contrast, safe spacing, and accurate placement.

    For important wording, review every character or add the final text later with a design tool.

    How to Change the Style of an Image

    You can request styles such as digital illustration, watercolour, pencil sketch, minimalist graphic, three-dimensional illustration, storybook artwork, or vintage poster. Describe the visual characteristics rather than asking for an exact copy of a living artist’s style.

    “Keep the same person, pose, desk, laptop, and composition. Change the realistic photograph into a clean modern digital illustration with smooth shapes, soft blue and white colours, gentle natural lighting, and a professional beginner-friendly appearance.”

    Style changes may alter faces, hands, objects, colours, and composition. Compare the result with the original and protect the details that must remain recognizable.

    Examples of changing one image into several visual styles while preserving the main subject and composition.

    Figure 11. An image can be changed into different visual styles while preserving its main subject, composition, and important details.

    Compare the result with the original because style changes may also affect faces, hands, objects, and colours.

    How to Fix Hands, Faces, and Small Image Mistakes

    Hands, faces, teeth, clothing edges, product shapes, text, shadows, and small background objects can require focused corrections. Fix one area at a time and use the selection tool when helpful.

    “Correct only the person’s right hand resting beside the laptop. Show one thumb and four naturally proportioned fingers in a relaxed position. Match the existing skin tone, wrist connection, pose, lighting, and shadows. Keep the face, clothing, desk, laptop, and background unchanged.”

    • Check finger count, thumb position, hand size, wrist connection, and contact with nearby objects.

    • Protect the person’s identity, expression, hairstyle, skin tone, and pose when correcting a face.

    • Compare product shapes, buttons, labels, and proportions with the original or a reliable reference.

    • Review shadows, reflections, edges, and textures after every local correction.

    Checklist for correcting hands, faces, text, product details, and other small image mistakes.

    Figure 12. Small image mistakes can be corrected by identifying the exact problem and protecting all nearby details that are already correct.

    Focused corrections are especially important for hands, faces, text, product details, and small objects.

    How to Make Several Edits Without Changing the Whole Image

    Several edits are easier to control when completed in a planned order. Save each successful version before requesting the next change.

    1. Correct the background or composition.

    2. Remove unwanted objects.

    3. Add or replace necessary objects.

    4. Fix hands, faces, text, and small mistakes.

    5. Improve lighting and colours.

    6. Change the aspect ratio or crop the image.

    7. Add final text with a design tool when exact typography is required.

    8. Review and save the final version.

    “Use the current corrected version. Keep the removed chair area, corrected hand, person, face, clothing, desk, laptop, background, lighting, and composition unchanged. Change only the notebook from red to navy blue.”

    When a later edit creates several new problems, return to the last successful version. Continuing to repair a poor version can reduce consistency and waste time.

    Step-by-step workflow showing how to make several image edits without losing previous corrections.

    Figure 13. Making one focused edit at a time helps protect previous corrections and reduces unwanted changes to the rest of the image.

    A step-by-step sequence makes it easier to identify which instruction caused a problem and return to the last successful version.

    Common Image-Editing Mistakes and How to Avoid Them

    • Vague instructions — identify the exact object, location, and desired result.

    • Too many changes at once — make one or two related edits per step.

    • Failing to protect correct details — repeat the important details that must remain unchanged.

    • Selecting too much or too little — cover the complete problem area without including unnecessary nearby details.

    • Removing an object without repairing the background — mention texture, perspective, shadows, and reflections.

    • Ignoring lighting and perspective — match the direction, scale, camera angle, and contact with surfaces.

    • Stretching an image — extend or crop the background instead of distorting the subject.

    • Adding too much generated text — use short wording or add exact text later with a design tool.

    • Reviewing only the edited area — inspect the complete image after every change.

    • Publishing the first acceptable result — compare versions and complete a final quality and responsibility review.

    Checklist of common ChatGPT image-editing mistakes and how to avoid them.

    Figure 14. Clear instructions, focused edits, protected details, and careful reviews help prevent common image-editing mistakes.

    This checklist summarizes frequent problems such as vague requests, excessive changes, poor selection, mismatched lighting, and incomplete review.

    Limitations of Editing Images with ChatGPT

    AI image editing is useful, but it is not perfectly predictable. Important limitations include:

    • The result may not follow every instruction exactly.

    • Unrequested parts of the image may change.

    • The selection boundary may affect nearby details.

    • Hands, faces, teeth, and small objects may remain inaccurate.

    • Text may contain spelling, spacing, or letter-shape errors.

    • Product details, packaging, buttons, labels, and proportions may change.

    • Rebuilt backgrounds may contain repeated patterns, bent lines, or unnatural textures.

    • Lighting, shadows, reflections, and exact colours may not match perfectly.

    • Repeated edits may reduce consistency.

    • Exact pixel dimensions, typography, and detailed edge work may require another tool.

    Treat every AI-edited image as a draft until it has been checked by a person. Human review remains necessary before an image is published, shared, or used commercially.

    Infographic showing common limitations of AI image editing, including text, hand, product, selection, and lighting errors.

    Figure 15. Image-editing limitations may include unwanted changes, inaccurate text, inconsistent faces or hands, imperfect selections, product errors, and mismatched lighting.

    This overview helps beginners understand why every edited image should be checked carefully and why successful versions should be saved before making additional changes.

    Responsible Use of AI Image Editing

    • Edit only images that you own or have permission to use and modify.

    • Remove personal, financial, medical, identifying, or confidential information before uploading.

    • Do not use edits to misrepresent real people, create false evidence, or invent events that viewers may believe are real.

    • Do not change product features, packaging, condition, size, or performance in a way that could mislead customers.

    • Review logos, trademarks, copyrighted artwork, and brand names before publication.

    • Be especially careful with images of children and real private individuals.

    • Disclose major AI edits when the image could otherwise be mistaken for an unedited photograph or exact product representation.

    • Keep the original image, editing instructions, intermediate versions, final file, and date.

    Responsible AI image editing should improve communication without misleading viewers, violating privacy, or changing important facts.

    Six-card checklist for responsible AI image editing, including permission, privacy, accuracy, disclosure, and saved records.

    Figure 16. Responsible AI image editing requires permission, privacy protection, accurate representation, careful review, appropriate disclosure, and saved records.

    This checklist summarizes the main responsibilities to consider before publishing an AI-edited image. These practices help protect real people, reduce misleading content, and preserve a record of the changes.

    Best Practices for Editing Images with ChatGPT

    • Begin with the clearest, highest-quality original image available.

    • Keep an unchanged copy of the original.

    • Decide the image’s purpose and required aspect ratio before editing.

    • Make one clear change at a time and protect the successful details.

    • Use exact object and location descriptions.

    • Ask new areas to match the original lighting, perspective, colours, texture, and shadows.

    • Save each successful version with a descriptive filename.

    • Compare every new version with the previous successful image.

    • Review the image at normal size, enlarged size, and the approximate published size.

    • Use another tool for exact text, dimensions, compression, WebP conversion, colour values, or pixel-level repairs.

    A successful image edit should be clear, accurate, natural, suitable for its intended purpose, and carefully reviewed before publication.

    Six-stage best-practices workflow for editing images with ChatGPT.

    Figure 17. Following a clear editing process helps protect important details and produce more accurate, consistent, and publishable images.

    Following this workflow makes it easier to identify mistakes, preserve successful corrections, and return to an earlier version when a later edit creates new problems.

    Step-by-Step Example: Editing an Image from Start to Finish

    Imagine a square home-office image showing an adult beginner using a laptop. The image contains an extra chair, an incorrect right hand, dark lighting, a red notebook, and no open space for a website title.

    1. Save the unchanged original as home-office-image-original.webp.

    2. Remove the extra chair and rebuild the wall and floor naturally.

    3. Correct only the right hand while protecting the person’s identity and pose.

    4. Brighten the room with soft daylight from the left.

    5. Change only the notebook from red to navy blue.

    6. Convert the composition to wide 16:9, place the person on the right, and leave open space on the left.

    7. Add the exact title later with a design tool.

    8. Review the complete image and save the final web-ready version.

    “Use the current corrected version. Keep the person, face, expression, clothing, pose, corrected hand, desk, laptop, navy-blue notebook, plant, background, improved lighting, colours, and natural proportions unchanged. Change the image to a wide 16:9 format by extending the home-office background. Position the person on the right and leave clean open space on the left for a website title. Do not stretch or crop the person.”

    The final image should preserve the original person and scene while presenting a cleaner background, corrected hand, improved lighting, suitable colours, and a wide composition prepared for WordPress.

    Start-to-finish image-editing workflow showing object removal, hand correction, lighting improvement, colour change, and a final 16:9 composition.

    Figure 18. A complete image-editing workflow moves from reviewing the original image to making focused corrections, resizing the composition, and preparing the final file.

    This example demonstrates how each edit can build on the previous successful version. Completing the changes in a controlled order reduces accidental changes and makes the final review easier.

    How to Save and Download the Finished Image

    1. Open the completed image in ChatGPT Images or in the conversation.

    2. Review the final version at normal size and zoom in on faces, hands, text, products, edges, shadows, and repaired areas.

    3. Select Save to download the image to your device. On supported devices, you may also see Copy or Share.

    4. Rename the file with a descriptive name, such as how-to-edit-images-with-chatgpt-featured-image.webp.

    5. Use a design or image tool to confirm the final pixel dimensions, convert to WebP when needed, and compress the file without making it blurry.

    6. Keep the original image and important intermediate versions in a separate folder.

    For WordPress, also prepare the image alt text, title, caption, and description. The alt text should describe the image’s purpose and important visible content rather than repeating the article title word for word.

    Frequently Asked Questions About Editing Images with ChatGPT

    Can ChatGPT edit an image I upload?

    Yes. Upload a supported still image and describe the change you want. Use a clear file and identify the exact object or area.

    Can ChatGPT edit only one part of an image?

    Yes. Describe the location or use the selection tool. Always review the full image because nearby details may still change.

    Can ChatGPT remove, add, or replace objects?

    Yes. Explain what must remain unchanged, identify the object and location, describe the new result, and ask the edited area to match the original perspective, lighting, and shadows.

    Can ChatGPT change or remove a background?

    Yes. Protect the main subject and describe the new background, camera angle, lighting, colours, and depth of field. Transparent edges may need further cleanup in another tool.

    Can ChatGPT fix hands and faces?

    It can attempt focused corrections, but these areas are complex. Make one correction at a time and compare the result with the previous version.

    Can ChatGPT correct text inside an image?

    It can attempt short text, but every letter must be reviewed. For exact wording and typography, add the final text later with a design tool.

    Can ChatGPT crop or resize an image?

    It can change composition and aspect ratio. Use a traditional tool when exact pixel dimensions, compression, or file size are required.

    Why did something change that I did not mention?

    AI editing can affect nearby or related image details. Reduce this risk by protecting important elements, making one focused edit, and saving each successful version.

    Will ChatGPT always produce the exact edit I request?

    No. A precise instruction improves the chance of a suitable result but does not guarantee it. Review every image before use.

    Do I still need another image-editing tool?

    Often, yes. Traditional tools provide better control for exact text, dimensions, colours, layers, compression, transparent edges, and print preparation.

    Key Takeaways

    • Start with a clear image and keep an unchanged original.

    • State what must stay the same before describing the edit.

    • Identify the exact object, location, and desired result.

    • Make one or two related changes at a time.

    • Match the original perspective, lighting, colours, textures, shadows, and style.

    • Use the selection tool for small areas, but review the complete image afterward.

    • Save every successful version and return to an earlier version when necessary.

    • Use another tool for exact typography, dimensions, compression, or detailed finishing.

    • Check permission, privacy, product accuracy, and the risk of misleading viewers.

    • Treat every AI-edited image as a draft until it has been carefully reviewed.

    Final Tip

    Do not ask ChatGPT to “fix everything” when most of the image is already correct. Use a focused instruction that protects successful details and identifies only the remaining problem.

    “Use the current corrected version. Keep the person, face, clothing, pose, hands, desk, laptop, background, lighting, colours, camera angle, composition, and previous corrections unchanged. Correct only the small problem in the selected area. Match the surrounding perspective, texture, lighting, and shadows. Do not change anything else.”

    Small, controlled improvements are usually safer than one long instruction containing many unrelated changes.

    Continue Learning

    Continue building your AI image-generation and editing skills with these beginner-friendly guides:

    AI Image Generation for Beginners: Complete Guide (2026)
    How to Write Better AI Image Prompts: Step-by-Step Beginner Guide (2026)
    Best AI Image Prompts for Beginners: 50 Examples to Copy and Customize (2026)

    Prompt Engineering for Beginners: Complete Guide (2026)

    Best ChatGPT Prompts for Beginners: Complete Guide (2026)

    Each guide provides practical instructions and examples that can help you create clearer prompts, generate more useful images, and improve your results through focused follow-up instructions.

  • Best AI Image Prompts for Beginners: 50 Examples to Copy and Customize (2026)

    Best AI Image Prompts for Beginners: 50 Examples to Copy and Customize (2026)

    Estimated reading time: 30–35 minutes
    Last updated: July 2026

    What You’ll Learn

    In this beginner-friendly guide, you will learn:

    · How to use ready-made AI image prompts

    · How to customize a prompt for your own needs

    · Which prompt details should be changed

    · How to create images for blogs, social media, business, education, products, and personal projects

    · How to choose suitable styles, lighting, colours, camera angles, and aspect ratios

    · How to avoid common image-generation problems

    · How to improve a copied prompt when the first result is not satisfactory

    · How to review AI-generated images before publishing or sharing them

    This guide includes 50 practical AI image prompts that you can copy, paste, and modify. Each example is designed to help beginners create clearer, more useful, and more professional-looking images.

    Table of Contents:

    1. What You’ll Learn
    2. Table of Contents:
    3. Introduction
    4. How to Use These AI Image Prompts
      1. Step 1: Choose the Right Prompt Category
      2. Step 2: Copy the Complete Prompt
      3. Step 3: Change the Important Details
      4. Step 4: Paste the Prompt into the AI Image Generator
      5. Step 5: Review the Generated Image
      6. Step 6: Request Specific Improvements
      7. Step 7: Save the Prompt That Worked
    5. Blog and Website Image Prompts
      1. Prompt 1: Beginner Learning Artificial Intelligence
      2. Prompt 2: Step-by-Step Tutorial Featured Image
      3. Prompt 3: Technology Article Header
      4. Prompt 4: Comparison Article Image
      5. Prompt 5: Beginner Guide Cover Image
    6. Social-Media Image Prompts
      1. Prompt 6: Educational Social-Media Post
      2. Prompt 7: Social-Media Announcement
      3. Prompt 8: Motivational AI Learning Image
      4. Prompt 9: Social-Media Tips Graphic
      5. Prompt 10: Vertical Story or Reel Cover
    7. Business and Marketing Image Prompts
      1. Prompt 11: Small Business Owner
      2. Prompt 12: Digital-Marketing Campaign
      3. Prompt 13: Customer-Service Representative
      4. Prompt 14: Business Growth Concept
      5. Prompt 15: Professional Email Campaign
    8. Product Image Prompts
      1. Prompt 16: Simple Product Photograph
      2. Prompt 17: Product in a Lifestyle Setting
      3. Prompt 18: Product Feature Presentation
      4. Prompt 19: Product Colour Variations
      5. Prompt 20: Product Advertisement
    9. Educational Illustration Prompts
      1. Prompt 21: Teacher Explaining a Lesson
      2. Prompt 22: Simple Process Diagram
      3. Prompt 23: Scientific Concept Illustration
      4. Prompt 24: Before-and-After Learning Comparison
      5. Prompt 25: Educational Checklist
    10. People and Professional Portrait Prompts
      1. Prompt 26: Professional Business Portrait
      2. Prompt 27: Friendly Website Author Portrait
      3. Prompt 28: Customer-Service Team Portrait
      4. Prompt 29: Professional Working at a Desk
      5. Prompt 30: Public Speaker or Trainer
    11. Nature and Travel Image Prompts
      1. Prompt 31: Mountain Landscape
      2. Prompt 32: Tropical Beach Destination
      3. Prompt 33: Historic City Street
      4. Prompt 34: Forest Walking Trail
      5. Prompt 35: Travel Planning Scene
    12. Creative and Artistic Image Prompts
      1. Prompt 36: Watercolour Landscape
      2. Prompt 37: Futuristic City
      3. Prompt 38: Fantasy Forest
      4. Prompt 39: Minimalist Poster Design
      5. Prompt 40: Storybook Illustration
    13. Seasonal and Special-Event Image Prompts
      1. Prompt 41: Winter Holiday Scene
      2. Prompt 42: New Year Celebration
      3. Prompt 43: Spring Celebration
      4. Prompt 44: Birthday Celebration
      5. Prompt 45: Community Event Announcement
    14. Personal Project Image Prompts
      1. Prompt 46: Personal Learning Workspace
      2. Prompt 47: Weekly Planning Scene
      3. Prompt 48: Home Organization Project
      4. Prompt 49: Family Activity Illustration
      5. Prompt 50: Personal Goal and Progress Image
    15. How to Customize These Prompts for Better Results
      1. Change the Main Subject
      2. Change the Action
      3. Change the Setting
      4. Change the Visual Style
      5. Change the Lighting
      6. Change the Colours
      7. Change the Composition
      8. Change the Aspect Ratio
      9. Change the Details to Avoid
      10. Keep the Prompt Consistent
    16.  How to Improve a Prompt When the First Image Is Not Satisfactory
      1. Identify the Main Problem
      2. Give a Specific Correction
      3. Keep the Successful Details
      4. Change One or Two Details at a Time
      5. Clarify the Main Subject
      6. Simplify a Crowded Prompt
      7. Correct the Composition
      8. Remove Incorrect Text
      9. Regenerate When Necessary
    17. Common Mistakes When Using Ready-Made AI Image Prompts
      1. Copying the Prompt Without Changing It
      2. Adding Too Many Unrelated Details
      3. Combining Conflicting Styles
      4. Requesting Too Much Text Inside the Image
      5. Forgetting the Aspect Ratio
      6. Using Vague Correction Requests
      7. Failing to Check Hands, Faces, and Small Objects
      8. Using AI Images as Exact Product Representations
      9. Presenting Fictional Places as Real Locations
      10. Publishing Without a Final Review
    18. Benefits of Using Ready-Made AI Image Prompts
      1. Saves Time
      2. Makes Prompt Writing Easier
      3. Reduces Missing Details
      4. Produces More Consistent Results
      5. Helps Beginners Learn by Example
      6. Supports Different Projects
      7. Encourages Clearer Corrections
      8. Creates a Reusable Prompt Library
    19. Limitations of Ready-Made AI Image Prompts
      1. The Result May Not Match the Prompt Exactly
      2. The Prompt May Not Suit Every Project
      3. Some Details May Be Ignored
      4. Hands and Faces May Contain Errors
      5. Generated Text May Be Incorrect
      6. Products May Be Inaccurate
      7. Characters May Change Between Images
      8. Corrections Can Change Unrelated Details
      9. Real Places May Be Represented Incorrectly
      10. Copyright and Brand Concerns Still Apply
      11. Human Review Is Still Necessary
    20. Common Myths About Ready-Made AI Image Prompts
      1. Myth 1: A Ready-Made Prompt Always Produces the Same Image
      2. Myth 2: You Should Copy Every Prompt Without Changing It
      3. Myth 3: Longer Prompts Are Always Better
      4. Myth 4: The AI Understands Every Instruction Perfectly
      5. Myth 5: The First Image Should Be Perfect
      6. Myth 6: AI-Generated Text Will Always Be Correct
      7. Myth 7: AI-Generated Product Images Are Always Accurate
      8. Myth 8: Ready-Made Prompts Remove the Need for Creativity
      9. Myth 9: One Prompt Works Equally Well on Every Platform
      10. Myth 10: Attractive Images Are Automatically Safe to Publish
    21. Frequently Asked Questions
      1. What Is a Ready-Made AI Image Prompt?
      2. Can I Copy These Prompts Exactly?
      3. Do These Prompts Work with Every AI Image Generator?
      4. Why Does the Same Prompt Create Different Images?
      5. How Much Detail Should I Include?
      6. What Should I Do When the Image Is Incorrect?
      7. Can I Ask the AI to Add Text to the Image?
      8. Which Aspect Ratio Should I Use?
      9. Can I Use AI-Generated Images for Business?
      10. Should I Save the Prompts That Work Well?
      11. Do I Need to Mention That an Image Was Created with AI?
      12. Are Ready-Made Prompts Suitable for Complete Beginners?
    22. Key Takeaways
    23. Final Tip
    24. Continue Learning

    Introduction

    AI image prompts are written instructions that tell an AI image generator what kind of picture to create. A clear prompt can describe the subject, action, setting, visual style, lighting, colours, mood, camera angle, composition, and image format.

    Writing a strong prompt from the beginning can be difficult, especially for someone who is new to AI image generation. You may know what kind of image you want, but you may not know which details to include or how to organize them.

    Ready-made prompts provide a practical starting point. Instead of writing every prompt from scratch, you can copy an example and change the parts that matter to your project.

    For example, you could change:

    · The subject

    · The action or pose

    · The setting

    · The visual style

    · The colours

    · The lighting

    · The mood

    · The aspect ratio

    · The details to avoid

    ·

    A prompt for a business image can be changed into a blog image, social-media design, educational illustration, product concept, or personal project by replacing a few important details.

    The 50 prompts in this guide are organized into clear categories so you can quickly find an example that matches your purpose. Each prompt can be copied, pasted into an AI image generator, and customized to create a more suitable result.

    How to Use These AI Image Prompts

    The prompts in this guide are ready-made starting points. You can copy them exactly as written, but changing a few important details will usually produce an image that better matches your needs.

    Step 1: Choose the Right Prompt Category

    Begin by selecting a prompt from the category that matches your project.

    For example:

    · Blog and website images

    · Social-media images

    · Business and marketing images

    · Product images

    · Educational illustrations

    · People and professional portraits

    · Nature and travel images

    · Creative and artistic images

    · Seasonal and special-event images

    · Personal projects

    Choosing the correct category gives you a suitable starting structure, style, composition, and image format.

    Step 2: Copy the Complete Prompt

    Copy the entire prompt rather than selecting only one sentence.

    A complete prompt may contain instructions about:

    · The main subject

    · The action

    · The setting

    · The visual style

    · The lighting

    · The colours

    · The mood

    · The camera angle

    · The composition

    · The aspect ratio

    · Details to avoid

    Keeping these elements together gives the AI more complete instructions.

    Step 3: Change the Important Details

    Replace the parts that do not match your project.

    For example, the original prompt might say:

    “Create a realistic image of a young woman working on a laptop in a modern home office.”

    You could customize it as:

    “Create a realistic image of an elderly man learning how to use artificial intelligence on a tablet in a bright living room.”

    You may change:

    · The person, animal, object, or place

    · The clothing or appearance

    · The activity

    · The background

    · The colours

    · The visual style

    · The lighting

    · The image format

    Keep the details that already suit your purpose.

    Step 4: Paste the Prompt into the AI Image Generator

    Paste the customized prompt into ChatGPT or another AI image generator.

    Read it once before generating the image. Check that the instructions are clear and do not contain conflicting details.

    For example, avoid combining instructions such as:

    “Bright midday sunlight with a dark nighttime atmosphere.”

    Choose one clear lighting condition unless the contrast is intentional.

    Step 5: Review the Generated Image

    After the image is created, check whether it matches the prompt.

    Review:

    · The main subject

    · Hands and faces

    · Background objects

    · Lighting and colours

    · Composition

    · Cropping

    · Text and logos

    · Aspect ratio

    · Overall accuracy

    Do not publish the image immediately simply because it looks attractive. A visually appealing image can still contain incorrect or misleading details.

    Step 6: Request Specific Improvements

    When something is wrong, explain the exact correction required.

    Instead of saying:

    “Make it better.”

    Write:

    “Keep the same person, clothing, setting, and camera angle. Remove the extra chair, brighten the background, and place the laptop fully inside the frame.”

    Changing one or two details at a time usually gives the AI clearer direction and reduces unwanted changes.

    Step 7: Save the Prompt That Worked

    When a prompt produces a useful image, save it in a document or prompt library.

    Record:

    · The final prompt

    · The generated image

    · The date

    · The image purpose

    · Any corrections that improved the result

    A successful prompt can later be reused as a template for similar images.

    The prompts in this guide are not rigid instructions. Treat them as flexible templates that can be shortened, expanded, or adapted for different people, subjects, platforms, and projects.

    Figure 1. A ready-made AI image prompt can be customized by replacing the details that do not match your project.

    This example shows how a complete prompt can be reused without starting from the beginning. By changing the subject, device, and setting while keeping the useful structure, beginners can create a prompt that better matches their intended image.

    Blog and Website Image Prompts

    The following prompts are designed for blog posts, website pages, online tutorials, and digital articles. Most use a wide landscape format because this shape works well for WordPress featured images and website content.

    Prompt 1: Beginner Learning Artificial Intelligence

    “Create a realistic image of an adult beginner learning about artificial intelligence on a laptop in a bright home office. Show a clean desk with a notebook, pen, and small plant. Use soft natural daylight, blue and white colours, and a calm educational atmosphere. Place the person on the right side and leave open space on the left for a website title. Use a wide 16:9 landscape format. Do not include brand logos, watermarks, unreadable text, extra people, or a cluttered background.”

    Customize: Change the learner’s age, device, room, colours, or position to match your article.

    “Create a clean professional image representing a step-by-step online tutorial. Show a laptop displaying a simple sequence of numbered visual steps, with a notebook and checklist beside it. Use a modern realistic digital-illustration style, soft natural lighting, blue and light-grey colours, and an organized educational mood. Keep the main visual elements centred and leave safe space around the edges. Use a wide 16:9 landscape format. Do not include brand logos, watermarks, tiny text, or unnecessary objects.”

    Customize: Replace the tutorial topic with AI images, email writing, business planning, website design, or another subject.

    Prompt 3: Technology Article Header

    “Create a modern website header image showing a laptop surrounded by subtle artificial-intelligence symbols, connected data points, digital icons, and soft glowing interface elements. Use a clean futuristic style with blue, purple, white, and light-grey colours. Keep the composition professional and uncluttered, with open space on the left for a headline. Use a wide banner format. Do not include readable text, company logos, watermarks, or dark distracting backgrounds.”

    Customize: Change the technology symbols to represent chatbots, automation, cybersecurity, coding, cloud computing, or digital marketing.

    Prompt 4: Comparison Article Image

    “Create a clean split-screen comparison image for a blog article. Divide the image into two balanced panels showing two different digital tools being used for the same task. Use simple visual differences in layout, colours, and features without displaying real brand logos. Add a neutral centre divider, soft studio lighting, and a professional educational style. Use a wide 16:9 landscape format. Do not include brand names, watermarks, unreadable interface text, or excessive decoration.”

    Customize: Replace the two digital tools with AI assistants, image generators, writing tools, productivity platforms, or research tools.

    Prompt 5: Beginner Guide Cover Image

    “Create a welcoming featured image for a complete beginner guide. Show an adult learner looking confidently at a laptop while simple visual icons represent learning, questions, progress, and achievement. Use a realistic digital-illustration style, soft natural lighting, blue, white, and subtle green colours, and a friendly professional mood. Place the learner on the right and leave open space on the left for a title. Use a wide 16:9 landscape format. Do not include logos, watermarks, unreadable text, distorted hands, or crowded background details.”

    Customize: Change the guide topic, learner, icons, colour palette, or background to match your website article.

    Social-Media Image Prompts

    These prompts are designed for social-media posts, profile content, announcements, educational graphics, and promotional campaigns. Choose the aspect ratio that matches the platform where the image will be published.

    Prompt 6: Educational Social-Media Post

    “Create a clean educational social-media image showing an adult beginner learning one simple artificial-intelligence skill on a tablet. Include a notebook, pencil, and a few clear visual icons representing learning and progress. Use a friendly modern illustration style, bright natural lighting, blue, white, and light-green colours, and a welcoming atmosphere. Keep the main subject centred with safe space around the edges. Use a square 1:1 format. Do not include brand logos, watermarks, unreadable text, distorted hands, or unnecessary background objects.”

    Customize: Change the skill, learner, device, colour palette, or visual icons.

    Prompt 7: Social-Media Announcement

    “Create a professional social-media announcement image showing an open laptop, a calendar, and a glowing notification symbol on a clean desk. Use a modern digital-illustration style, soft studio lighting, blue, purple, and white colours, and an organized professional mood. Leave clear open space in the upper half for announcement text to be added later. Use a square 1:1 format. Do not include visible words, logos, watermarks, clutter, or cropped objects.”

    Customize: Adapt the image for a new article, product launch, event, course, update, or website announcement.

    Prompt 8: Motivational AI Learning Image

    “Create an uplifting image of an adult learner making progress with artificial intelligence. Show the person confidently using a laptop while a simple visual path leads from a question symbol to a completed goal. Use warm natural lighting, blue, gold, and white colours, and an encouraging modern style. Keep the composition clean and balanced, with open space for a short motivational message. Use a portrait 4:5 format. Do not include visible text, brand logos, watermarks, distorted hands, or crowded details.”

    Customize: Change the goal to learning, business, productivity, career development, or creative work.

    Prompt 9: Social-Media Tips Graphic

    “Create a clean social-media graphic presenting three simple visual tips for writing better AI prompts. Use three balanced cards with clear icons representing clarity, detail, and review. Use a modern infographic style with blue, white, light-grey, and subtle green accents. Leave space beneath each icon for short text to be added later using a design tool. Use a square 1:1 format. Do not generate readable text, logos, watermarks, decorative clutter, or tiny details.”

    Customize: Replace the three topics with safety tips, productivity tips, image-generation tips, research tips, or business advice.

    Prompt 10: Vertical Story or Reel Cover

    “Create a vertical social-media cover showing a beginner using an AI tool on a smartphone while colourful visual ideas appear around the screen. Use a polished realistic digital-illustration style, bright modern lighting, blue, purple, pink, and white accents, and an energetic but uncluttered atmosphere. Place the person in the lower half and leave open space in the upper half for a title. Use a vertical 9:16 format suitable for Stories, Reels, or Shorts. Do not include logos, watermarks, unreadable text, extra fingers, or cropped facial features.”

    Customize: Change the activity to AI image creation, writing, research, planning, or video generation.

    Business and Marketing Image Prompts

    These prompts are designed for business websites, advertisements, presentations, email campaigns, customer communication, and digital-marketing content.

    Prompt 11: Small Business Owner

    “Create a realistic image of a small business owner working at a clean desk in a bright modern office. Show the person reviewing a business plan on a laptop, with a notebook, calculator, and coffee cup nearby. Use soft natural daylight, neutral colours, and a calm professional atmosphere. Place the business owner on the right side and leave open space on the left for promotional text. Use a wide 16:9 landscape format. Do not include brand logos, watermarks, unreadable documents, extra people, or a cluttered background.”

    Customize: Change the business type, person, office setting, desk objects, colours, or composition.

    Prompt 12: Digital-Marketing Campaign

    “Create a modern digital-marketing image showing a laptop surrounded by simple visual symbols for email, social media, website traffic, advertising, and analytics. Use a clean professional infographic style, blue, purple, white, and light-grey colours, and subtle glowing connections between the elements. Keep the layout balanced and leave open space for a campaign title. Use a wide 16:9 landscape format. Do not include real company logos, readable statistics, watermarks, tiny text, or excessive visual effects.”

    Customize: Focus the symbols on social-media marketing, email marketing, SEO, paid advertising, affiliate marketing, or e-commerce.

    Prompt 13: Customer-Service Representative

    “Create a realistic image of a friendly customer-service representative wearing a headset and assisting a customer through an online support session. Use a bright, organized office setting, soft studio lighting, blue and white colours, and a welcoming professional mood. Show a clear facial expression and natural hand position. Use a wide landscape composition with open space on one side for a headline. Do not include brand logos, visible customer information, unreadable screen text, watermarks, distorted hands, or crowded desks.”

    Customize: Change the representative’s age, clothing, workplace, communication device, or customer-service industry.

    Prompt 14: Business Growth Concept

    “Create a clean professional image representing business growth. Show a small business owner standing beside a simple upward-moving visual path made of steps, arrows, and progress symbols. Include a laptop, planning document, and subtle financial-chart elements without readable numbers. Use a modern realistic digital-illustration style, bright natural lighting, blue, green, white, and gold accents, and an optimistic professional mood. Use a wide 16:9 format. Do not include logos, watermarks, unrealistic money piles, unreadable text, or exaggerated promises.”

    Customize: Change the growth goal to sales, website traffic, customer satisfaction, productivity, or market expansion.

    Prompt 15: Professional Email Campaign

    “Create a clean marketing image showing an email campaign being prepared on a laptop. Surround the laptop with simple icons representing a subject line, audience, message, image, call to action, and performance review. Use a modern infographic style, soft blue, white, light-grey, and subtle green colours, with balanced spacing and a professional atmosphere. Leave open space for a campaign title. Use a wide landscape format. Do not include readable email addresses, real company names, watermarks, tiny text, or distracting background objects.”

    Customize: Adapt the image for a newsletter, promotional email, welcome message, product announcement, or customer follow-up.

    Product Image Prompts

    These prompts are designed for product concepts, e-commerce listings, advertisements, catalogues, packaging ideas, and promotional content. Always compare AI-generated product images with the real product before publishing them.

    Prompt 16: Simple Product Photograph

    “Create a realistic product photograph of a reusable water bottle standing upright on a clean white surface. Use soft studio lighting, natural reflections, sharp details, and a simple light-grey background. Keep the bottle centred and fully visible, with safe space around the edges. Use a square 1:1 format. Do not include logos, labels, text, extra bottles, people, watermarks, or distracting objects.”

    Customize: Replace the water bottle with a coffee mug, lamp, notebook, kitchen tool, container, or another simple product.

    Prompt 17: Product in a Lifestyle Setting

    “Create a realistic lifestyle image of a modern ceramic coffee mug placed on a wooden table beside an open book and a small plant. Use warm morning sunlight, soft neutral colours, and a comfortable home atmosphere. Keep the mug as the main focus and softly blur the background. Use a wide 16:9 landscape format. Do not include visible brand names, unreadable text, extra mugs, watermarks, distorted objects, or excessive clutter.”

    Customize: Change the product, room, supporting objects, lighting, colour palette, or intended customer.

    Prompt 18: Product Feature Presentation

    “Create a clean product-feature image showing a wireless desk lamp in the centre, surrounded by four simple visual icons representing adjustable brightness, flexible positioning, energy efficiency, and compact design. Use a modern infographic style with white, blue, light-grey, and subtle green colours. Leave space beneath each icon for verified feature text to be added later. Use a wide landscape format. Do not include generated claims, readable specifications, brand logos, watermarks, or tiny text.”

    Customize: Replace the lamp and feature icons with accurate features from the product you are presenting.

    Prompt 19: Product Colour Variations

    “Create a clean studio image showing the same reusable travel cup in four colour variations: navy blue, white, soft green, and light pink. Arrange the cups evenly in one row on a neutral background. Use soft studio lighting, consistent shadows, accurate proportions, and a balanced composition. Use a wide landscape format. Do not change the shape between versions. Do not include logos, labels, text, watermarks, extra cups, or decorative clutter.”

    Customize: Change the product, number of variations, colours, arrangement, or background.

    Prompt 20: Product Advertisement

    “Create a polished advertisement image featuring a modern desk organizer on a clean office desk. Show the organizer holding pens, a notebook, and small office tools while keeping the product fully visible. Use bright professional lighting, blue, white, and natural wood colours, and a clean modern atmosphere. Place the product on the right side and leave open space on the left for advertising text to be added later. Use a wide 16:9 landscape format. Do not include logos, generated prices, promotional claims, watermarks, unreadable text, or unnecessary objects.”

    Customize: Replace the organizer with another product and adjust the setting, supporting objects, colours, or composition to match the advertisement.

    Educational Illustration Prompts

    These prompts are designed for lessons, tutorials, classroom materials, training guides, presentations, and beginner-friendly explanations. Keep educational visuals simple, accurate, and easy to understand.

    Prompt 21: Teacher Explaining a Lesson

    “Create a friendly educational illustration of a teacher standing beside a whiteboard and explaining a simple lesson to a small group of students. Show the students paying attention and taking notes. Use bright natural lighting, blue, green, white, and warm neutral colours, and a welcoming classroom atmosphere. Use a wide landscape format. Do not include school logos, unreadable writing, distorted hands, crowded desks, or distracting decorations.”

    Customize: Change the lesson topic, age group, classroom setting, teaching tools, or illustration style.

    Prompt 22: Simple Process Diagram

    “Create a clean educational infographic showing a four-step process from beginning to completion. Arrange four numbered cards from left to right, connected by clear arrows. Use simple icons, short placeholder labels, blue, white, light-grey, and subtle green colours, and generous spacing. Use a wide 16:9 landscape format. Do not include long paragraphs, brand logos, watermarks, tiny text, or unnecessary decoration.”

    Customize: Replace the four stages with steps for creating an AI image, writing an email, completing a project, conducting research, or learning a new skill.

    Prompt 23: Scientific Concept Illustration

    “Create a clear beginner-friendly educational illustration explaining the water cycle. Show evaporation, condensation, cloud formation, precipitation, and water returning to rivers and oceans. Use simple arrows, recognizable natural elements, bright daylight, and blue, green, and white colours. Use a wide landscape format. Do not include complicated scientific notation, unreadable labels, logos, watermarks, or unrealistic environmental details.”

    Customize: Replace the water cycle with another verified scientific process, such as plant growth, the solar system, weather formation, or the human digestive system.

    Prompt 24: Before-and-After Learning Comparison

    “Create a clean split-screen educational illustration comparing a beginner before learning a skill and after completing a lesson. On the left, show the learner appearing uncertain beside a question symbol. On the right, show the same learner confidently completing the task beside a check mark. Use a friendly modern illustration style, balanced composition, soft natural lighting, and blue, white, and subtle green colours. Use a wide 16:9 format. Do not include readable text, brand logos, watermarks, exaggerated emotions, or cluttered backgrounds.”

    Customize: Change the skill to artificial intelligence, computer use, writing, mathematics, language learning, or business planning.

    Prompt 25: Educational Checklist

    “Create a clean educational checklist infographic with six evenly spaced cards. Each card should include a simple icon, a green check mark, and space for one short label to be added later. Use a modern beginner-friendly style with blue, white, light-grey, and green colours. Keep the layout organized and easy to scan. Use a wide landscape format. Do not generate long text, brand logos, watermarks, tiny details, or decorative clutter.”

    Customize: Use the checklist for reviewing AI images, checking research sources, preparing a presentation, completing a tutorial, or following safety steps.

    People and Professional Portrait Prompts

    These prompts are designed for professional profiles, business websites, author pages, training materials, social media, and personal branding. AI-generated portraits should not be presented as photographs of real people unless clearly disclosed.

    Prompt 26: Professional Business Portrait

    “Create a realistic head-and-shoulders portrait of a confident middle-aged business professional wearing a navy-blue suit and white shirt. Show a natural friendly expression and direct eye contact with the camera. Use soft studio lighting, natural skin texture, and a simple light-grey office background. Use a portrait 4:5 format. Do not include brand logos, watermarks, exaggerated facial features, distorted clothing, unnatural skin, or distracting background objects.”

    Customize: Change the person’s age, clothing, expression, background, colour palette, or profession.

    Prompt 27: Friendly Website Author Portrait

    “Create a warm professional portrait of an adult website author sitting at a clean desk beside a laptop and notebook. Show the person smiling naturally and looking toward the camera. Use soft window light, warm neutral colours, and a comfortable home-office background with a small plant and bookshelf. Use a portrait 4:5 format. Do not include readable screen text, logos, watermarks, distorted hands, excessive decorations, or artificial-looking skin.”

    Customize: Change the author’s appearance, desk items, room, lighting, clothing, or website subject.

    Prompt 28: Customer-Service Team Portrait

    “Create a realistic professional image of three friendly customer-service representatives standing together in a bright modern office. Show natural expressions, neat business-casual clothing, and a welcoming team atmosphere. Use balanced studio lighting, blue, white, and neutral colours, and a wide landscape composition. Do not include company logos, visible customer data, watermarks, identical faces, distorted hands, or crowded background details.”

    Customize: Change the number of people, clothing, industry, office setting, team roles, or composition.

    Prompt 29: Professional Working at a Desk

    “Create a realistic image of a focused professional working at a modern desk with a laptop, notebook, and organized documents. Show the person reviewing information on the screen with a calm and confident expression. Use soft natural daylight, neutral colours, and a clean office background. Place the person on the right side and leave open space on the left for website text. Use a wide 16:9 landscape format. Do not include logos, watermarks, unreadable documents, extra people, distorted hands, or excessive clutter.”

    Customize: Change the profession to teacher, accountant, marketer, consultant, writer, engineer, or small business owner.

    Prompt 30: Public Speaker or Trainer

    “Create a realistic image of a confident adult trainer standing beside a presentation screen and speaking to a small professional audience. Show a natural hand gesture, attentive listeners, and a clean conference-room setting. Use bright balanced lighting, blue, white, and warm neutral colours, and a professional educational atmosphere. Use a wide landscape format. Do not include company logos, readable presentation text, watermarks, duplicated audience members, distorted hands, or crowded details.”

    Customize: Change the topic, audience, room, presenter’s clothing, presentation style, or camera angle.

    Nature and Travel Image Prompts

    These prompts are designed for travel blogs, destination guides, nature articles, environmental content, posters, and personal projects. AI-generated locations should not be presented as exact photographs of real places unless they have been carefully verified.

    Prompt 31: Mountain Landscape

    “Create a realistic wide landscape image of snow-covered mountains surrounding a calm blue lake at sunrise. Show soft golden light reflecting on the water, green pine trees in the foreground, light morning mist, and a peaceful natural atmosphere. Use a wide 16:9 landscape format. Do not include people, buildings, logos, watermarks, unrealistic reflections, or excessive colour saturation.”

    Customize: Change the season, time of day, weather, vegetation, water, or overall mood.

    Prompt 32: Tropical Beach Destination

    “Create a realistic travel image of a quiet tropical beach with clear turquoise water, soft white sand, palm trees, and gentle waves. Use bright natural daylight, warm colours, and a relaxing vacation atmosphere. Leave open space in the upper-left area for a travel-title overlay. Use a wide 16:9 landscape format. Do not include resort logos, crowds, litter, watermarks, unreadable signs, or unrealistic ocean colours.”

    Customize: Change the beach type, weather, time of day, number of visitors, or composition.

    Prompt 33: Historic City Street

    “Create a realistic image of a charming historic city street with stone buildings, small cafés, flower boxes, and people walking peacefully. Use warm late-afternoon sunlight, natural colours, and a welcoming travel atmosphere. Show a balanced street-level perspective and use a wide landscape format. Do not include real business logos, unreadable signs, distorted architecture, duplicated people, watermarks, or modern objects that conflict with the historic setting.”

    Customize: Change the architectural style, season, country-inspired setting, street activity, or lighting.

    Prompt 34: Forest Walking Trail

    “Create a peaceful realistic image of a walking trail through a green forest. Show tall trees, soft sunlight filtering through the leaves, small plants along the path, and light mist in the distance. Use natural green and brown colours, an eye-level viewpoint, and a calm restorative mood. Use a wide 16:9 landscape format. Do not include people, signs, buildings, rubbish, logos, watermarks, or unnatural lighting.”

    Customize: Change the forest type, weather, season, trail surface, viewpoint, or atmosphere.

    Prompt 35: Travel Planning Scene

    “Create a realistic top-down image of a travel-planning workspace with an open notebook, printed map, smartphone, camera, sunglasses, and a cup of coffee arranged neatly on a wooden desk. Use soft natural daylight, warm neutral colours, and an organized adventurous mood. Leave clear space for a title and use a wide landscape format. Do not include readable personal information, brand logos, watermarks, airline names, distorted objects, or excessive clutter.”

    Customize: Change the destination theme, travel equipment, desk surface, colour palette, or image format.

    Creative and Artistic Image Prompts

    These prompts are designed for digital art, posters, book concepts, imaginative scenes, decorative images, and personal creative projects. Artistic prompts allow more freedom, but the main subject and style should still be described clearly.

    Prompt 36: Watercolour Landscape

    “Create a soft watercolour painting of a peaceful countryside with rolling green hills, a small stone cottage, wildflowers, and a narrow path leading into the distance. Use gentle blue, green, yellow, and pink colours, soft morning light, and visible watercolour textures. Use a wide 16:9 landscape format. Do not include logos, watermarks, harsh outlines, modern buildings, or excessive detail.”

    Customize: Change the season, cottage style, landscape, colours, weather, or time of day.

    Prompt 37: Futuristic City

    “Create a cinematic digital painting of a futuristic city at night with tall glass buildings, elevated walkways, glowing blue and purple lights, and clean electric vehicles. Show light reflections on wet streets and a wide street-level viewpoint. Use a dramatic but organized composition and a wide landscape format. Do not include brand logos, readable advertisements, watermarks, duplicated vehicles, or overcrowded visual details.”

    Customize: Change the city style, lighting, technology, weather, colour palette, or camera angle.

    Prompt 38: Fantasy Forest

    “Create a detailed fantasy illustration of an enchanted forest with glowing plants, ancient trees, a winding path, and soft light passing through the branches. Use rich green, blue, gold, and purple colours and a mysterious but welcoming mood. Place the path in the centre and use a wide landscape composition. Do not include frightening creatures, logos, watermarks, unreadable signs, or excessive darkness.”

    Customize: Add a small cottage, bridge, traveller, magical animal, waterfall, or different atmosphere.

    Prompt 39: Minimalist Poster Design

    “Create a clean minimalist poster featuring a single mountain silhouette beneath a large rising sun. Use simple geometric shapes, a limited colour palette of dark blue, soft orange, cream, and white, and generous open space. Keep the composition balanced and use a portrait 4:5 format. Do not include readable text, logos, watermarks, decorative clutter, or complex textures.”

    Customize: Replace the mountain with a city skyline, ocean wave, tree, desert, planet, or abstract symbol.

    Prompt 40: Storybook Illustration

    “Create a warm storybook illustration of a child reading beside a bedroom window while stars and imaginative shapes appear outside. Use soft rounded forms, gentle blue, gold, purple, and cream colours, warm evening lighting, and a peaceful magical atmosphere. Use a portrait 4:5 format. Do not include readable book text, brand logos, watermarks, frightening elements, distorted hands, or excessive clutter.”

    Customize: Change the child, room, story theme, weather, time of day, colour palette, or illustration style.

    Seasonal and Special-Event Image Prompts

    These prompts are designed for holidays, celebrations, seasonal campaigns, greeting cards, event announcements, and themed website content. Avoid using protected logos, characters, or branded decorations.

    Prompt 41: Winter Holiday Scene

    “Create a warm realistic winter holiday scene in a comfortable living room with a decorated tree, wrapped gifts, soft lights, a fireplace, and snow visible through the window. Use red, green, gold, cream, and natural wood colours, soft evening lighting, and a welcoming family atmosphere. Leave open space on one side for a greeting to be added later. Use a wide 16:9 landscape format. Do not include brand logos, readable text, watermarks, distorted decorations, or excessive clutter.”

    Customize: Change the decorations, room, colours, weather, cultural details, or image format.

    Prompt 42: New Year Celebration

    “Create a polished New Year celebration image with elegant gold and silver decorations, soft sparkling lights, a modern city skyline in the background, and a festive but sophisticated atmosphere. Leave clear open space in the centre for a year or message to be added later using a design tool. Use a wide landscape format. Do not generate readable numbers, brand logos, watermarks, overcrowded fireworks, or distorted objects.”

    Customize: Change the city setting, colours, decorations, mood, or composition.

    Prompt 43: Spring Celebration

    “Create a cheerful spring celebration image with blooming flowers, fresh green leaves, colourful decorations, and soft morning sunlight in a garden setting. Use pastel pink, yellow, blue, green, and white colours and a bright welcoming atmosphere. Leave open space for a short event message. Use a square 1:1 format. Do not include logos, watermarks, unreadable signs, excessive decorations, or unnatural flower shapes.”

    Customize: Adapt the image for a spring sale, community event, family celebration, garden article, or seasonal greeting.

    Prompt 44: Birthday Celebration

    “Create a joyful birthday celebration image with a decorated table, colourful balloons, wrapped gifts, a simple cake, and soft festive lighting. Use bright but balanced colours and a clean welcoming composition. Leave open space in the upper area for a birthday message to be added later. Use a portrait 4:5 format. Do not include readable names, branded characters, logos, watermarks, distorted candles, or excessive clutter.”

    Customize: Change the age group, colour theme, decorations, setting, cake style, or image format.

    Prompt 45: Community Event Announcement

    “Create a friendly community-event image showing people gathering in a clean outdoor park with simple event tents, tables, decorations, and families participating in activities. Use bright natural daylight, blue, green, orange, and white colours, and a welcoming inclusive atmosphere. Leave open space for event details to be added later. Use a wide 16:9 landscape format. Do not include real organization logos, readable signs, watermarks, duplicated people, distorted faces, or crowded background details.”

    Customize: Adapt the image for a workshop, market, school activity, charity event, neighbourhood gathering, or public celebration.

    Personal Project Image Prompts

    These prompts are designed for hobbies, family projects, home organization, personal learning, creative planning, and non-commercial activities. Avoid using AI-generated images to imitate real people without their permission.

    Prompt 46: Personal Learning Workspace

    “Create a realistic image of an adult learning a new digital skill at a tidy desk in a comfortable home office. Show a laptop, notebook, pen, reading glasses, and a small plant. Use soft natural daylight, warm neutral colours, and a calm focused atmosphere. Use a wide 16:9 landscape format. Do not include brand logos, watermarks, unreadable screen text, distorted hands, extra people, or excessive clutter.”

    Customize: Change the learner, skill, device, room, desk objects, colours, or time of day.

    Prompt 47: Weekly Planning Scene

    “Create a clean top-down image of a weekly-planning workspace with an open planner, calendar pages, coloured pens, sticky notes, a smartphone, and a cup of coffee arranged neatly on a wooden desk. Use soft morning light, blue, green, cream, and natural wood colours, and an organized productive mood. Leave open space for a title. Use a wide landscape format. Do not include readable personal information, logos, watermarks, duplicated objects, or clutter.”

    Customize: Change the planning purpose to household tasks, study, exercise, appointments, travel, or business activities.

    Prompt 48: Home Organization Project

    “Create a realistic before-and-after image showing a cluttered home workspace on the left and the same workspace neatly organized on the right. Include a desk, shelves, papers, storage boxes, and office supplies. Use bright natural lighting, neutral colours, and a clear balanced split-screen composition. Use a wide 16:9 landscape format. Do not include brand logos, readable documents, watermarks, distorted furniture, or unrelated objects.”

    Customize: Replace the workspace with a kitchen, closet, garage, bedroom, craft room, or storage area.

    Prompt 49: Family Activity Illustration

    “Create a warm realistic illustration of a family enjoying a quiet indoor activity together around a table. Show adults and children completing a puzzle, drawing, or reading while interacting naturally. Use soft evening lighting, warm neutral colours, and a comfortable welcoming atmosphere. Use a wide landscape format. Do not include real family likenesses, brand logos, watermarks, distorted hands, duplicated people, or crowded background details.”

    Customize: Change the activity, family size, room, season, clothing, lighting, or illustration style.

    Prompt 50: Personal Goal and Progress Image

    “Create an uplifting image representing progress toward a personal goal. Show an adult moving along a simple visual pathway from planning to practice to achievement, using clear symbols such as a notebook, footsteps, progress markers, and a completed goal. Use a modern realistic digital-illustration style, soft natural lighting, blue, green, white, and subtle gold colours, and an encouraging atmosphere. Use a wide 16:9 landscape format. Do not include readable text, logos, watermarks, exaggerated success symbols, or clutter.”

    Customize: Change the goal to learning, fitness, saving, home improvement, creativity, career development, or another personal objective.

    How to Customize These Prompts for Better Results

    The 50 prompts in this guide are templates. You do not need to use every word exactly as written.

    Begin by identifying which details already match your project and which details need to change.

    Change the Main Subject

    Replace the person, animal, object, product, or location with the subject you need.

    Original:

    “Create a realistic image of an adult beginner learning about artificial intelligence on a laptop.”

    Customized:

    “Create a realistic image of a retired adult learning about artificial intelligence on a tablet.”

    Keep the remaining prompt structure when it still supports your purpose.

    Change the Action

    Explain what the subject should be doing.

    Possible actions include:

    · Reading

    · Writing

    · Working

    · Teaching

    · Presenting

    · Planning

    · Walking

    · Holding a product

    · Looking at the camera

    · Using a laptop or smartphone

    A clear action helps the AI create a more meaningful scene.

    Change the Setting

    Replace the background or location to suit your project.

    For example, you could change:

    · A home office to a business office

    · A classroom to a training room

    · A city street to a quiet park

    · A wooden desk to a clean studio surface

    · A living room to a public library

    The setting should support the main subject rather than compete with it.

    Change the Visual Style

    Choose a style that matches the purpose of the image.

    Possible styles include:

    · Realistic photograph

    · Digital illustration

    · Cartoon illustration

    · Watercolour painting

    · 3D render

    · Minimalist design

    · Cinematic image

    · Educational infographic

    · Vintage poster

    · Storybook illustration

    Avoid combining several unrelated styles in one prompt.

    For example, “realistic cartoon watercolour photograph” gives the AI conflicting instructions.

    Change the Lighting

    Lighting can completely change the appearance and mood of an image.

    You may request:

    · Soft natural daylight

    · Warm morning light

    · Golden-hour sunlight

    · Bright studio lighting

    · Warm evening lighting

    · Dramatic cinematic lighting

    · Soft indoor lighting

    · Neon city lighting

    Choose lighting that matches the setting and atmosphere.

    Change the Colours

    Adjust the colour palette to match your website, brand, event, or subject.

    For example:

    · Blue and white for a clean professional look

    · Green and brown for nature content

    · Gold and navy for a premium appearance

    · Pastel colours for a gentle friendly mood

    · Bright colours for children’s content

    · Neutral colours for product photography

    Using a consistent colour palette can make several images look connected.

    Change the Composition

    Explain where the subject should appear inside the image.

    For example:

    · Place the subject in the centre.

    · Place the person on the right.

    · Leave open space on the left for a title.

    · Use a top-down view.

    · Show the full product.

    · Keep important details away from the edges.

    · Blur the background slightly.

    · Use a balanced split-screen layout.

    Composition is especially important when you plan to add text later.

    Change the Aspect Ratio

    Select an image shape that matches where the image will be used.

    Common choices include:

    · 1:1 square for social-media posts and products

    · 4:5 portrait for social-media feeds and portraits

    · 9:16 vertical for Stories, Reels, and Shorts

    · 16:9 landscape for WordPress featured images and presentations

    · Wide banner format for website headers

    Changing the aspect ratio may also require changing the composition.

    Change the Details to Avoid

    Add exclusions based on the type of image you are creating.

    For example:

    · Do not include brand logos.

    · Do not include readable personal information.

    · Do not include watermarks.

    · Do not include extra people.

    · Do not include duplicated objects.

    · Do not include distorted hands.

    · Do not include text inside the image.

    · Do not crop the main subject.

    · Do not use a crowded background.

    Specific exclusions are more useful than general instructions such as “avoid mistakes.”

    Keep the Prompt Consistent

    Read the complete customized prompt before generating the image.

    Check that the instructions do not conflict.

    For example, avoid asking for:

    · Bright midday sunlight and dark moonlight

    · A crowded scene and a minimalist composition

    · A realistic photograph and a cartoon illustration

    · A close-up portrait and a wide aerial view

    · A centred subject and a subject placed at the edge

    A customized prompt works best when the subject, style, lighting, colours, mood, and composition support one clear visual idea.

    Figure 2. The main parts of a ready-made AI image prompt can be changed to match a different project or platform.

    This infographic provides a simple customization checklist. Beginners can keep the useful structure of a ready-made prompt while changing the subject, action, setting, style, lighting, colours, composition, and aspect ratio.

     How to Improve a Prompt When the First Image Is Not Satisfactory

    The first generated image may not match your expectations. This does not always mean that the complete prompt is wrong. Often, one or two instructions need to be clarified.

    Review the image carefully before changing the prompt.

    Identify the Main Problem

    Start by deciding what is incorrect or unsatisfactory.

    Common problems include:

    · The subject looks different from the description

    · The action is unclear

    · The background is too crowded

    · The lighting does not match the requested mood

    · The colours are unsuitable

    · The image is cropped incorrectly

    · Important objects are missing

    · Extra objects have appeared

    · Hands or facial features look distorted

    · Text inside the image is incorrect

    · The aspect ratio is unsuitable

    Focus on the most important problem first.

    Give a Specific Correction

    Avoid instructions such as:

    “Make the image better.”

    This does not explain what needs to change.

    Use a specific request instead:

    “Keep the same person, clothing, and office setting. Remove the extra chair and place the laptop completely inside the frame.”

    A clear correction tells the AI which parts should remain and which parts should change.

    Keep the Successful Details

    When part of the image is already correct, say so.

    For example:

    “Keep the same background, lighting, colour palette, and camera angle.”

    This may help prevent the AI from changing details that you already like.

    You can then add the required correction:

    “Change the person’s expression to a natural smile and remove the unreadable text from the laptop screen.”

    Change One or Two Details at a Time

    Making too many corrections in one request may create new problems.

    A better approach is to improve the image gradually.

    For example:

    First correction:

    “Keep the same composition. Remove the extra plant and simplify the desk.”

    Second correction:

    “Keep all remaining details. Brighten the background and use softer natural daylight.”

    This makes it easier to understand which instruction improved the result.

    Clarify the Main Subject

    When the subject is unclear, describe it more precisely.

    Instead of:

    “Create a person using a computer.”

    Use:

    “Create a realistic image of a middle-aged small business owner sitting at a desk and reviewing a marketing plan on a laptop.”

    You can add clothing, expression, position, or activity when these details are important.

    Simplify a Crowded Prompt

    A very long prompt can sometimes contain too many competing instructions.

    Remove details that do not support the main image.

    For example, this prompt may be too crowded:

    “Create a business owner using a laptop in an office with several workers, many charts, plants, shelves, posters, products, documents, phones, and large windows.”

    A clearer version would be:

    “Create a realistic image of a small business owner using a laptop at a clean desk in a bright modern office. Include one notebook and one small plant. Keep the background simple.”

    The simplified prompt gives greater attention to the main subject.

    Correct the Composition

    When the image does not leave enough room for a title or crops the subject, describe the layout more clearly.

    For example:

    “Place the person on the right side of the image. Leave clear open space on the left for a website title. Keep the person’s head, hands, and laptop fully inside the frame.”

    This is especially useful for featured images, advertisements, and social-media graphics.

    Remove Incorrect Text

    AI image generators may produce misspelled or unreadable words.

    You can request:

    “Remove all generated text from the image and leave a clean empty area where text can be added later.”

    Add the correct wording afterward using WordPress, Canva, or another design tool.

    Regenerate When Necessary

    Sometimes an image contains several serious problems. In that situation, starting again may be faster than requesting many corrections.

    Use the original prompt, simplify unclear instructions, add the most important exclusions, and generate a new version.

    The goal is not to correct every small detail in one attempt. Generate, review, correct, and repeat until the image is suitable for its intended purpose.

    Common Mistakes When Using Ready-Made AI Image Prompts

    Ready-made prompts can save time, but copying them without reviewing or customizing them may produce unsuitable results. The following mistakes are common among beginners.

    Copying the Prompt Without Changing It

    A prompt may be well written but still describe the wrong person, setting, colours, or image format for your project.

    Before generating the image, check whether you need to change:

    · The subject

    · The action

    · The setting

    · The visual style

    · The lighting

    · The colours

    · The composition

    · The aspect ratio

    · The details to avoid

    A few small changes can make the prompt much more relevant.

    Adding Too Many Unrelated Details

    More detail does not always create a better image.

    A prompt may become confusing when it includes too many people, objects, actions, styles, or lighting conditions.

    For example:

    “Create a realistic cartoon watercolour image of a business owner, teacher, student, customer, and family working in an office, classroom, café, and garden.”

    This prompt contains several conflicting ideas.

    Choose one main subject, one setting, and one clear purpose.

    Combining Conflicting Styles

    Avoid mixing visual styles that do not work well together.

    For example:

    · Realistic photograph and cartoon illustration

    · Minimalist design and highly detailed background

    · Vintage poster and futuristic 3D render

    · Soft watercolour and sharp studio photography

    Choose one primary style and describe it clearly.

    Requesting Too Much Text Inside the Image

    AI image generators may create misspelled, distorted, or unreadable text.

    Instead of asking the AI to create a complete headline, paragraph, price, or list inside the image, request open space for text.

    For example:

    “Leave clear open space on the left for a title to be added later.”

    Add the correct text afterward using WordPress, Canva, or another design tool.

    Forgetting the Aspect Ratio

    The wrong image shape can lead to poor cropping.

    For example, a square image may not work well as a wide WordPress featured image, and a landscape image may not fit a vertical Story.

    Choose the required format before generating:

    · 1:1 for square social-media posts

    · 4:5 for portrait social-media posts

    · 9:16 for Stories, Reels, and Shorts

    · 16:9 for featured images and presentations

    · Wide banner for website headers

    Placing Important Details Near the Edges

    Faces, hands, products, and other important objects may be cropped when they are too close to the image boundary.

    Add an instruction such as:

    “Keep the main subject fully inside the frame with safe space around the edges.”

    This is especially important when WordPress or social-media platforms automatically crop images.

    Using Vague Correction Requests

    Instructions such as “fix it,” “make it better,” or “improve the image” do not explain what needs to change.

    Use a specific correction:

    “Keep the same person and background. Remove the extra notebook, brighten the lighting, and move the subject slightly to the right.”

    Specific corrections usually produce more useful results.

    Failing to Check Hands, Faces, and Small Objects

    An image may appear attractive at first but still contain errors.

    Examine:

    · Fingers and hands

    · Eyes, teeth, and facial features

    · Product shapes

    · Repeated objects

    · Background people

    · Reflections

    · Shadows

    · Signs and labels

    · Clothing details

    Zoom in before publishing the image.

    Using AI Images as Exact Product Representations

    AI may change a product’s shape, colour, size, material, features, or packaging.

    Do not use an AI-generated product image as an exact representation unless it has been carefully compared with the real product.

    Customers should not be misled about what they will receive.

    Presenting Fictional Places as Real Locations

    AI-generated travel images may contain invented buildings, roads, landmarks, or environmental details.

    Do not describe an AI-generated location as an exact photograph of a real destination unless the details have been verified.

    A safer description is:

    “AI-generated illustration inspired by a historic European street.”

    Publishing Without a Final Review

    Do not publish an image immediately because it looks attractive.

    Check that the image:

    · Matches the article or project

    · Contains no obvious visual errors

    · Uses the correct aspect ratio

    · Leaves enough space for text

    · Does not contain logos or personal information

    · Does not misrepresent a person, product, place, or event

    · Is suitable for the intended audience

    A careful final review helps prevent misleading or unprofessional images.

    Benefits of Using Ready-Made AI Image Prompts

    Ready-made prompts provide a practical starting point for beginners who are not yet confident writing detailed image instructions.

    Saves Time

    You do not need to build every prompt from the beginning.

    A complete example already includes useful elements such as:

    · The main subject

    · The setting

    · The visual style

    · The lighting

    · The colours

    · The composition

    · The aspect ratio

    · The details to avoid

    You can change only the parts that do not match your project.

    Makes Prompt Writing Easier

    A ready-made prompt shows how different instructions can be combined into one clear description.

    By reading and modifying complete examples, beginners can gradually learn how strong prompts are structured.

    Reduces Missing Details

    Short prompts often leave out important information.

    For example:

    “Create a business image.”

    This does not explain the person, activity, setting, lighting, colours, composition, or format.

    A ready-made prompt reminds you to include these details when they are important.

    Produces More Consistent Results

    Using the same basic prompt structure can help several images look connected.

    This is useful when creating images for:

    · A series of blog articles

    · A social-media campaign

    · A training course

    · A business presentation

    · A product catalogue

    · A website section

    You can keep the same style, lighting, colours, and composition while changing the main subject.

    Helps Beginners Learn by Example

    Each prompt demonstrates how to describe a specific image.

    Over time, you may begin to recognize which words control:

    · The style

    · The mood

    · The camera angle

    · The background

    · The placement of the subject

    · The image shape

    This makes it easier to write original prompts later.

    Supports Different Projects

    A single ready-made prompt can often be adapted for several purposes.

    For example, a prompt showing a person using a laptop could be changed into:

    · A blog featured image

    · A business advertisement

    · A training illustration

    · A social-media post

    · A website banner

    · A personal learning image

    Changing the setting, colours, format, and open space can make the same basic idea suitable for another platform.

    Encourages Clearer Corrections

    A detailed starting prompt makes it easier to identify what went wrong.

    You can compare the generated image with the original instructions and request a specific correction.

    For example:

    “Keep the same person, lighting, and colour palette. Remove the extra chair and leave more open space on the left.”

    Creates a Reusable Prompt Library

    Prompts that produce good results can be saved and reused.

    You can organize them into categories such as:

    · Blog images

    · Social-media graphics

    · Business images

    · Product scenes

    · Educational illustrations

    · Portraits

    · Nature images

    · Creative artwork

    A personal prompt library can reduce the time required for future image projects.

    Ready-made prompts are most useful when they are treated as flexible templates rather than permanent instructions. Review each prompt, customize the necessary details, and check every generated image before using it.

    Limitations of Ready-Made AI Image Prompts

    Ready-made prompts are useful starting points, but they do not guarantee a perfect image. The AI may still misunderstand instructions, ignore details, or create visual errors.

    The Result May Not Match the Prompt Exactly

    An AI image generator interprets the prompt rather than following it like a precise technical drawing.

    It may change:

    · The subject’s appearance

    · The number of objects

    · The position of people

    · The background

    · The lighting

    · The colours

    · The camera angle

    · The composition

    A detailed prompt improves direction, but the final result may still require correction.

    The Prompt May Not Suit Every Project

    A prompt written for a blog image may not work well for a product advertisement, social-media Story, or educational diagram.

    You may need to change:

    · The aspect ratio

    · The amount of open space

    · The level of detail

    · The visual style

    · The colours

    · The intended audience

    Always adapt the prompt to the platform and purpose.

    Some Details May Be Ignored

    Long prompts can contain many instructions. The AI may give more attention to some details and ignore others.

    For example, it may create the correct subject and setting but forget to leave open space for a title.

    Place the most important information near the beginning of the prompt and repeat critical layout instructions clearly when necessary.

    Hands and Faces May Contain Errors

    AI-generated people may have:

    · Extra or missing fingers

    · Unnatural hand positions

    · Uneven eyes

    · Distorted teeth

    · Unusual facial features

    · Inconsistent skin texture

    Carefully inspect portraits and images containing people before publishing them.

    Generated Text May Be Incorrect

    AI image generators may create misspelled words, random letters, or unreadable labels.

    This can affect:

    · Signs

    · Book covers

    · Computer screens

    · Product packaging

    · Posters

    · Infographics

    · Clothing

    A safer approach is to request an empty area and add the correct text later using a design tool.

    Products May Be Inaccurate

    The AI may change a product’s:

    · Shape

    · Size

    · Colour

    · Material

    · Features

    · Buttons

    · Packaging

    · Accessories

    Ready-made product prompts are better suited to concepts, backgrounds, and promotional ideas than exact product representations.

    Characters May Change Between Images

    When generating several images of the same person or character, the AI may change the face, clothing, hairstyle, age, or body shape.

    Repeated descriptions may improve consistency, but they may not produce an identical character every time.

    Corrections Can Change Unrelated Details

    You may request one small correction, but the AI may also change parts that were already correct.

    For example, asking it to remove one object may also change:

    · The person’s face

    · The clothing

    · The background

    · The lighting

    · The camera angle

    Include instructions such as:

    “Keep the same person, clothing, lighting, background, and composition.”

    Even then, some variation may occur.

    Real Places May Be Represented Incorrectly

    AI-generated travel images may include invented landmarks, inaccurate architecture, or unrealistic geography.

    They should not be presented as exact photographs of real locations unless carefully verified.

    A ready-made prompt may accidentally request:

    · A protected character

    · A company logo

    · A branded product

    · A recognizable artistic style

    · A public figure

    · A copyrighted design

    Review the prompt before generating and remove unnecessary brand or character references.

    Human Review Is Still Necessary

    Ready-made prompts reduce writing time, but they do not replace human judgement.

    You must still decide whether the image is:

    · Accurate

    · Appropriate

    · Clear

    · Ethical

    · Relevant

    · Visually professional

    · Safe to publish

    The best results usually come from combining a useful prompt template with careful customization, review, and correction.

    Common Myths About Ready-Made AI Image Prompts

    Ready-made prompts are useful, but beginners may have unrealistic expectations about what they can do. Understanding the following myths can help you use them more effectively.

    Myth 1: A Ready-Made Prompt Always Produces the Same Image

    Reality: AI image generators usually create a different result each time, even when the same prompt is used.

    The subject, background, lighting, colours, and composition may change between generations. The prompt provides direction, but it does not create an identical image every time.

    Myth 2: You Should Copy Every Prompt Without Changing It

    Reality: A prompt should be customized to match your project.

    You may need to change:

    · The subject

    · The setting

    · The colours

    · The visual style

    · The aspect ratio

    · The amount of open space

    · The details to avoid

    A useful template becomes more effective when it reflects your specific purpose.

    Myth 3: Longer Prompts Are Always Better

    Reality: A long prompt can become confusing when it includes unnecessary or conflicting details.

    A strong prompt should be detailed enough to explain the image clearly, but focused enough to support one main idea.

    Clear and relevant instructions are more important than the total number of words.

    Myth 4: The AI Understands Every Instruction Perfectly

    Reality: The AI may misunderstand, ignore, or combine some details incorrectly.

    For example, it may:

    · Add an extra object

    · Place the subject incorrectly

    · Change the requested colours

    · Ignore the open space

    · Use the wrong camera angle

    · Crop an important part of the image

    Reviewing and correcting the result is a normal part of AI image generation.

    Myth 5: The First Image Should Be Perfect

    Reality: Many useful AI-generated images require more than one attempt.

    You may need to:

    1. Generate the first image.

    2. Review the result.

    3. Identify the main problem.

    4. Request a specific correction.

    5. Generate another version.

    This gradual improvement process is normal.

    Myth 6: AI-Generated Text Will Always Be Correct

    Reality: Text inside AI-generated images may contain spelling mistakes, random letters, or distorted words.

    For important titles, labels, prices, and instructions, request a clean empty area and add the correct text later using WordPress, Canva, or another design tool.

    Myth 7: AI-Generated Product Images Are Always Accurate

    Reality: AI may change a product’s shape, colour, material, packaging, size, or features.

    AI-generated product images should not be used as exact representations unless they have been carefully compared with the real product.

    Myth 8: Ready-Made Prompts Remove the Need for Creativity

    Reality: Prompts provide a starting structure, but you still choose the subject, style, mood, colours, setting, and purpose.

    Your decisions determine how the prompt is adapted and whether the final image supports your project.

    Myth 9: One Prompt Works Equally Well on Every Platform

    Reality: Different AI image generators may interpret the same prompt differently.

    A prompt that works well in one tool may need adjustments in another. You may need to simplify the wording, change the order of details, or clarify the composition.

    Myth 10: Attractive Images Are Automatically Safe to Publish

    Reality: A visually appealing image may still contain inaccuracies, misleading details, logos, distorted people, incorrect products, or invented locations.

    Every image should be checked carefully before it is published, shared, or used commercially.

    Frequently Asked Questions

    What Is a Ready-Made AI Image Prompt?

    A ready-made AI image prompt is a complete written instruction that can be copied into an AI image generator.

    It usually includes details such as the subject, setting, style, lighting, colours, composition, aspect ratio, and elements to avoid.

    You can use it as written or change the details to match your project.

    Can I Copy These Prompts Exactly?

    Yes. You can copy and paste any of the prompts in this guide.

    However, you will usually get a more suitable image by changing details such as:

    · The main subject

    · The activity

    · The background

    · The colours

    · The image style

    · The aspect ratio

    · The open space for text

    Review the complete prompt before generating the image.

    Do These Prompts Work with Every AI Image Generator?

    They can be used with many AI image generators, including ChatGPT and other platforms.

    However, different tools may interpret the same instructions differently. You may need to shorten, reorganize, or clarify a prompt depending on the tool you are using.

    Why Does the Same Prompt Create Different Images?

    AI image generators normally create new variations each time.

    Even when the prompt remains unchanged, the person, background, colours, lighting, and composition may be different.

    This variation is a normal part of AI image generation.

    How Much Detail Should I Include?

    Include enough information to explain the main visual idea clearly.

    Important details may include:

    · Who or what should appear

    · What the subject should be doing

    · Where the scene should take place

    · Which visual style should be used

    · What type of lighting and colours you want

    · Where the subject should be positioned

    · Which image format is required

    Avoid adding details that do not support the main purpose of the image.

    What Should I Do When the Image Is Incorrect?

    Identify the most important problem and request a specific correction.

    For example:

    “Keep the same person, clothing, background, and lighting. Remove the extra chair and place the laptop fully inside the frame.”

    Changing one or two details at a time usually makes the correction easier to control.

    Can I Ask the AI to Add Text to the Image?

    You can ask the AI to include text, but the generated words may be misspelled or distorted.

    For important titles, labels, prices, and instructions, ask the AI to leave open space and add the correct text later using WordPress, Canva, or another design tool.

    Which Aspect Ratio Should I Use?

    Choose the aspect ratio according to where the image will appear.

    · Use 16:9 for WordPress featured images and presentations.

    · Use 1:1 for square social-media posts.

    · Use 4:5 for portrait social-media posts.

    · Use 9:16 for Stories, Reels, and Shorts.

    · Use a wide banner format for website headers.

    The exact display and cropping may vary between platforms.

    Can I Use AI-Generated Images for Business?

    AI-generated images may be used for many business purposes, but you should review the rules of the image generator and the platform where the image will be published.

    You should also check that the image does not contain:

    · Unauthorized logos

    · Misleading product details

    · Personal information

    · Protected characters

    · Inaccurate claims

    · Distorted people or objects

    Commercial use does not remove the need for careful review.

    Should I Save the Prompts That Work Well?

    Yes. Save successful prompts in a personal prompt library.

    For each prompt, you may record:

    · The final prompt

    · The generated image

    · The date

    · The intended purpose

    · The aspect ratio

    · The corrections that improved the result

    This makes it easier to create similar images later.

    Do I Need to Mention That an Image Was Created with AI?

    Disclosure requirements may depend on the platform, publication, industry, and purpose of the image.

    Disclosure is especially important when an AI-generated image could be mistaken for:

    · A real person

    · A real event

    · An exact product

    · A real location

    · Documentary evidence

    Use clear descriptions when necessary and avoid presenting fictional content as verified reality.

    Are Ready-Made Prompts Suitable for Complete Beginners?

    Yes. They help beginners understand how a complete image prompt is organized.

    By copying and customizing the examples, you can gradually learn how to control the subject, setting, style, lighting, colours, composition, and image format.

    Key Takeaways

    · Ready-made AI image prompts save time and provide a clear starting structure.

    · Every prompt should be reviewed and customized before it is used.

    · Important details include the subject, action, setting, style, lighting, colours, composition, and aspect ratio.

    · Clear instructions usually produce more suitable images than vague requests.

    · A longer prompt is not automatically better; every detail should support one main visual idea.

    · Different image formats are suitable for different platforms, such as 16:9 for WordPress featured images and 9:16 for Stories and Reels.

    · Important people, products, and objects should remain fully inside the frame with safe space around the edges.

    · AI-generated text may be incorrect, so titles and labels are often better added later using WordPress or a design tool.

    · Product images, portraits, and real locations require careful accuracy checks.

    · Specific correction requests are more useful than instructions such as “make it better.”

    · Changing one or two details at a time can make image improvements easier to control.

    · Successful prompts should be saved in a personal prompt library for future projects.

    · Every generated image should be reviewed for distorted hands, faces, duplicated objects, incorrect text, logos, cropping problems, and misleading details.

    · Ready-made prompts are flexible templates, not guaranteed instructions.

    · Human judgement is still necessary before an AI-generated image is published, shared, or used commercially.

    The 50 examples in this guide can help you begin quickly, but the best results come from combining a useful prompt with careful customization, review, and improvement.

    Final Tip

    Do not try to create the perfect image with one prompt.

    Start with a suitable example, customize the most important details, generate the image, and review the result carefully. When something is incorrect, request one or two specific changes instead of rewriting the entire prompt.

    A simple improvement process is:

    1. Choose a ready-made prompt.

    2. Change the subject, setting, style, and aspect ratio.

    3. Generate the first image.

    4. Check the subject, hands, faces, text, background, and cropping.

    5. Request specific corrections.

    6. Save the final prompt that produced the best result.

    The more successful prompts you save, the faster and easier your future image projects will become.

    Continue Learning

    Continue building your AI image-generation skills with these beginner-friendly guides:

    · AI Image Generation for Beginners: Complete Guide (2026)

    · How to Write Better AI Image Prompts: Step-by-Step Beginner Guide (2026)

    · Prompt Engineering for Beginners: Complete Guide (2026)

    · Best ChatGPT Prompts for Beginners: Complete Guide (2026)

  • How to Write Better AI Image Prompts: Step-by-Step Beginner Guide (2026)

    How to Write Better AI Image Prompts: Step-by-Step Beginner Guide (2026)

    Estimated reading time: 38 minutes

    Last updated: July 2026

    What You’ll Learn

    In this beginner-friendly guide, you will learn:

    · What an AI image prompt is

    · Why clear prompts produce better images

    · The main parts of an effective image prompt

    · How to describe the subject, setting, style, lighting, and composition

    · How to choose the correct image size and aspect ratio

    · How to improve an image prompt step by step

    · Common AI image prompt mistakes

    · Practical prompt examples you can copy and modify

    · How to review and refine AI-generated images responsibly

    By the end of this guide, you will be able to write clearer and more detailed prompts that help ChatGPT create images closer to what you imagined.

    Introduction

    AI image generators can turn written instructions into pictures within seconds. You can use them to create blog images, social-media graphics, educational illustrations, product concepts, posters, and many other visual materials.

    However, the quality of the image depends greatly on the quality of the prompt you provide.

    A simple prompt such as:

    “Create a beautiful house.”

    gives the AI very little information. The AI must guess the type of house, its location, colours, surroundings, lighting, image style, and composition. The result may look attractive, but it may not match what you imagined.

    A clearer prompt provides more useful details:

    “Create a realistic two-storey red-brick family house with large windows, a green front garden, warm evening sunlight, and a wide landscape composition.”

    This version tells the AI what the main subject is, what it should look like, where it is located, how it should be lit, and how the final image should be arranged.

    Writing a good AI image prompt does not require technical knowledge. You only need to describe your idea clearly and organize the most important details in a logical order.

    In this guide, you will learn a simple step-by-step method for writing better AI image prompts. You will also see practical examples, common mistakes, and ways to improve an image when the first result is not satisfactory.

    What Is an AI Image Prompt?

    An AI image prompt is a written instruction that tells an AI image generator what picture you want it to create.

    A prompt can be very simple:

    “Create an image of a cat sitting beside a window.”

    This instruction gives the AI a basic subject and location. However, many details are missing, so the AI must make its own decisions about the cat’s colour, the room, the lighting, the weather, and the image style.

    A more detailed prompt gives the AI clearer direction:

    “Create a realistic orange cat sitting beside a large window on a rainy afternoon, with soft natural light, a peaceful mood, and a square composition.”

    This prompt explains:

    · The main subject

    · The subject’s appearance

    · The location

    · The weather

    · The lighting

    · The mood

    · The image style

    · The image format

    An AI image generator cannot see the exact picture in your mind. It interprets the words in your prompt and uses them to create the image.

    The clearer and more organized your instructions are, the more likely the final image will match your idea.

    A good AI image prompt does not need to be extremely long. It should simply include the most important details in a clear and logical order.

    Why Better Prompts Produce Better Images

    AI image generators rely on the words you provide. When a prompt is vague, the AI must guess many important details.

    For example:

    “Create a picture of a car.”

    This prompt does not explain the type of car, colour, location, lighting, camera angle, image style, or mood. The AI may create an acceptable image, but it may be very different from what you expected.

    A clearer prompt gives the AI more direction:

    “Create a realistic red sports car parked on a modern city street at night, with reflections on the wet road, cinematic lighting, and a wide landscape composition.”

    This improved prompt describes:

    · The main subject

    · The colour and appearance

    · The location

    · The time of day

    · The lighting

    · The image style

    · The composition

    Better prompts usually produce better results because they reduce unnecessary guessing.

    A detailed prompt can also save time. Instead of generating many unsuitable images, you are more likely to receive a useful result within fewer attempts.

    However, adding more words does not automatically make a prompt better. The details must be relevant, clear, and consistent. Too many conflicting instructions can confuse the AI and weaken the final image.

    The goal is not to write the longest prompt. The goal is to provide the right details in a clear order.

    Figure 1. A clear and detailed prompt gives the AI more useful direction than a vague prompt.

    This comparison shows how adding relevant details can improve an AI-generated image. The stronger prompt explains the subject, colour, setting, lighting, style, and composition, reducing the amount of guessing required from the AI.

    The Main Parts of a Strong AI Image Prompt

    A strong AI image prompt usually contains several important parts. You do not need to include every part in every prompt, but adding the most relevant details gives the AI clearer instructions.

    The main parts are:

    · Subject

    · Action or pose

    · Setting or background

    · Visual style

    · Lighting

    · Colours

    · Mood

    · Camera angle

    · Composition

    · Image size or aspect ratio

    · Details to avoid

    For example:

    “Create a realistic elderly man reading a book beside a fireplace in a comfortable living room, with warm evening lighting, soft brown and gold colours, a peaceful mood, and a wide landscape composition.”

    This prompt contains several clear elements:

    · Subject: An elderly man

    · Action: Reading a book

    · Setting: A comfortable living room beside a fireplace

    · Style: Realistic

    · Lighting: Warm evening lighting

    · Colours: Soft brown and gold

    · Mood: Peaceful

    · Composition: Wide landscape

    You can think of these parts as building blocks. Start with the main subject, then add the details that are most important to the final image.

    A simple prompt formula is:

    Subject + action + setting + style + lighting + mood + composition

    You do not have to follow this exact order every time. However, using a consistent structure makes your prompts easier to write, review, and improve.

    Figure 2. The main building blocks that can be combined to create a strong AI image prompt.

    A strong prompt is created by combining the details that matter most to the final image. Not every prompt needs all eleven elements, but this structure provides a reliable checklist for beginners.

    Step 1: Describe the Main Subject Clearly

    The subject is the main person, animal, object, or place that should appear in the image.

    Begin your prompt by clearly identifying the subject.

    A vague subject description might be:

    “Create an image of a woman.”

    This gives the AI very little direction. It must decide the woman’s age, clothing, appearance, position, expression, and surroundings.

    A clearer description would be:

    “Create an image of a middle-aged woman wearing a blue business suit.”

    You can make the subject even more specific:

    “Create a realistic image of a middle-aged woman wearing a blue business suit, standing confidently and holding a tablet.”

    Useful subject details may include:

    · Age group

    · Clothing

    · Hair colour or style

    · Facial expression

    · Body position

    · Objects the subject is holding

    · Important physical features

    Include only details that matter to the image. Too many unnecessary details can make the prompt difficult to follow.

    For example:

    “Create a friendly elderly man with grey hair and glasses, wearing a green sweater and smiling at the camera.”

    This prompt gives the AI a clear picture of the main subject before any background, lighting, or style details are added.

    Step 2: Describe the Action or Pose

    After identifying the main subject, explain what the subject is doing or how it should be positioned.

    An unclear prompt might say:

    “Create an image of a businessman.”

    This identifies the subject but does not explain whether the businessman is standing, sitting, speaking, working, or looking at the camera.

    A clearer prompt would be:

    “Create a businessman sitting at a desk and reviewing a financial report.”

    You can add more specific details:

    “Create a realistic businessman sitting at a modern office desk, reviewing a financial report and pointing at a chart on a laptop screen.”

    Useful action or pose details may include:

    · Sitting or standing

    · Walking or running

    · Looking at the camera

    · Holding an object

    · Speaking to another person

    · Working on a computer

    · Reading or writing

    · Smiling, thinking, or appearing surprised

    · Facing forward, sideways, or away from the camera

    For example:

    “Create a young teacher standing beside a whiteboard, pointing at a simple diagram and smiling at a group of students.”

    The action helps the AI understand what is happening in the scene. It also makes the image more useful for storytelling, education, advertising, and blog content.

    Keep the action clear and realistic. Avoid giving the subject several conflicting actions at the same time.

    Step 3: Describe the Setting or Background

    The setting explains where the subject is located and what should appear around it.

    A vague prompt might say:

    “Create an image of a woman using a laptop.”

    This describes the subject and action, but the AI still has to guess the location and background.

    A clearer prompt would be:

    “Create a woman using a laptop at a wooden desk in a bright home office.”

    You can add more useful background details:

    “Create a realistic middle-aged woman using a laptop at a wooden desk in a bright home office, with a bookshelf, a small plant, and a large window in the background.”

    Useful setting details may include:

    · Indoor or outdoor location

    · Type of room or building

    · Natural surroundings

    · Furniture

    · Weather

    · Time of day

    · Background objects

    Whether the background should be simple or detailed.

    For example:

    “Create a young man reading a book on a wooden bench in a quiet city park during autumn, with colourful leaves and soft sunlight in the background.”

    The background should support the main subject rather than distract from it. For blog images, product images, and educational graphics, a clean and simple background is often more effective.

    Avoid adding too many unrelated background objects. A crowded setting can make the image confusing and reduce attention on the main subject.

    Step 4: Choose the Visual Style

    The visual style describes how you want the image to look.

    The same subject can appear very different depending on the style you choose.

    For example:

    “Create an image of a small house in the countryside.”

    This prompt does not explain whether the image should look realistic, painted, cartoon-like, cinematic, or three-dimensional.

    A clearer version would be:

    “Create a realistic image of a small stone house in the countryside.”

    You could also request a different style:

    · Watercolour painting

    · Cartoon illustration

    · 3D render

    · Pencil sketch

    · Cinematic photography

    · Minimalist design

    · Digital painting

    · Vintage poster

    · Infographic style

    For example:

    “Create a warm watercolour painting of a small stone house surrounded by green hills and wildflowers.”

    Or:

    “Create a cinematic photograph of a small stone house in the countryside during golden-hour sunlight.”

    The visual style should match the purpose of the image.

    For example:

    · Use a realistic style for product concepts and professional blog images.

    · Use a cartoon or illustrated style for children’s content.

    · Use an infographic style for educational explanations.

    · Use a minimalist style for clean website graphics.

    · Use a cinematic style for dramatic and emotional scenes.

    Avoid combining too many unrelated styles in one prompt. Instructions such as “realistic cartoon watercolour photograph” may confuse the AI.

    Choose one main visual style and describe it clearly.

    Step 5: Describe the Lighting

    Lighting affects the brightness, mood, colours, and overall appearance of an AI-generated image.

    If you do not describe the lighting, the AI will choose it automatically. The result may still look good, but it may not match the atmosphere you want.

    A simple prompt might say:

    “Create a realistic image of a family sitting in a living room.”

    A clearer prompt would be:

    “Create a realistic image of a family sitting in a comfortable living room with soft natural daylight coming through a large window.”

    Useful lighting descriptions include:

    · Soft natural light

    · Bright daylight

    · Warm evening light

    · Golden-hour sunlight

    · Soft studio lighting

    · Dramatic cinematic lighting

    · Neon lighting

    · Candlelight

    · Moonlight

    · Low-light atmosphere

    For example:

    “Create a realistic portrait of an elderly woman reading beside a window, with soft morning light illuminating her face.”

    Or:

    “Create a cinematic image of a man walking through a modern city at night, with blue and purple neon lights reflecting on the wet street.”

    Different lighting choices create different effects:

    · Soft natural light creates a clean and realistic appearance.

    · Warm evening light creates a comfortable and welcoming mood.

    · Bright studio lighting works well for products and professional portraits.

    · Dramatic lighting adds strong shadows and emotional impact.

    · Neon lighting creates a modern or futuristic atmosphere.

    The lighting should match the subject, setting, and mood of the image.

    Avoid using conflicting instructions such as bright midday sunlight and dark moonlight in the same scene unless you have a specific creative purpose.

    Step 6: Choose the Colours

    Colours influence the mood, style, and visual identity of an AI-generated image.

    If you do not specify colours, the AI will choose them automatically. Adding colour instructions can help the image match your website, brand, subject, or intended atmosphere.

    A simple prompt might say:

    “Create a modern home office.”

    A clearer prompt would be:

    “Create a modern home office with white walls, light wooden furniture, green plants, and soft blue decorative accents.”

    Useful colour descriptions include:

    · Warm colours

    · Cool colours

    · Bright and colourful

    · Soft pastel colours

    · Neutral colours

    · Earth tones

    · Black and white

    · Blue and purple tones

    · Gold and brown tones

    · A limited colour palette

    For example:

    “Create a minimalist educational infographic using blue, white, and light-grey colours.”

    Or:

    “Create a peaceful autumn landscape using warm orange, red, brown, and gold tones.”

    Different colour choices create different effects:

    · Warm colours such as red, orange, and yellow can create energy, comfort, or excitement.

    · Cool colours such as blue, green, and purple can create a calm, modern, or professional appearance.

    · Neutral colours such as white, grey, beige, and brown can create a clean and balanced design.

    · Pastel colours can create a soft, friendly, or gentle mood.

    · Bright colours can attract attention and work well for children’s content or social-media graphics.

    For website images, using a consistent colour palette can help your articles look connected and professional.

    Avoid requesting too many unrelated colours. A simple and controlled colour palette often produces a cleaner image.

    Step 7: Describe the Mood or Atmosphere

    The mood explains how you want the image to feel.

    Two images can show the same subject and setting but create very different emotions depending on the mood described in the prompt.

    A simple prompt might say:

    “Create an image of a cabin in the forest.”

    A clearer prompt would be:

    “Create a peaceful image of a small wooden cabin in a quiet forest, surrounded by morning mist and soft sunlight.”

    You could create a completely different feeling with:

    “Create a mysterious image of an abandoned wooden cabin in a dark forest, surrounded by thick fog and dramatic moonlight.”

    Useful mood descriptions include:

    · Peaceful

    · Cheerful

    · Welcoming

    · Professional

    · Mysterious

    · Dramatic

    · Exciting

    · Romantic

    · Futuristic

    · Serious

    · Calm

    · Energetic

    For example:

    “Create a cheerful classroom illustration with smiling students, bright colours, and a friendly atmosphere.”

    Or:

    “Create a professional office scene with a calm, confident, and organized atmosphere.”

    The mood should match the subject, lighting, colours, and purpose of the image.

    For example:

    · A peaceful mood works well with soft lighting and gentle colours.

    · A dramatic mood works well with strong shadows and cinematic lighting.

    · A cheerful mood works well with bright colours and smiling subjects.

    · A professional mood works well with clean backgrounds and balanced lighting.

    Avoid combining moods that conflict with each other unless you intentionally want an unusual creative effect.

    Choose one main mood and support it with suitable lighting, colours, expressions, and background details.

    Step 8: Choose the Camera Angle and Viewpoint

    The camera angle explains where the viewer appears to be positioned in relation to the subject.

    Changing the viewpoint can make the same scene feel more professional, dramatic, personal, or informative.

    A simple prompt might say:

    “Create an image of a chef preparing food.”

    A clearer prompt would be:

    “Create a realistic eye-level image of a chef preparing food in a modern restaurant kitchen.”

    You could create a different effect with:

    “Create a top-down view of a chef’s hands preparing fresh vegetables on a wooden kitchen counter.”

    Useful camera-angle descriptions include:

    · Eye-level view

    · Close-up view

    · Wide-angle view

    · Top-down view

    · Side view

    · Front view

    · Over-the-shoulder view

    · Low-angle view

    · High-angle view

    · Aerial view

    For example:

    “Create a close-up portrait of an elderly man smiling gently at the camera.”

    Or:

    “Create a wide-angle view of a modern office with several people working at their desks.”

    Different viewpoints serve different purposes:

    · Close-up views emphasize faces, expressions, and small details.

    · Wide-angle views show more of the setting and surrounding environment.

    · Top-down views work well for food, desks, tools, and organized layouts.

    · Eye-level views usually feel natural and realistic.

    · Low-angle views can make a subject appear powerful or impressive.

    · High-angle views can show the scene more clearly from above.

    Choose the viewpoint that best supports the subject and purpose of the image.

    Avoid requesting several conflicting camera angles in the same prompt. Use one main viewpoint unless the image is designed as a multi-panel comparison.

    Step 9: Describe the Composition and Framing

    Composition explains how the subject and other elements should be arranged inside the image.

    A good composition helps the viewer understand what is important and prevents the image from looking crowded or unbalanced.

    A simple prompt might say:

    “Create an image of a laptop on a desk.”

    A clearer prompt would be:

    “Create a realistic image of a laptop centred on a clean wooden desk, with a notebook and small plant placed neatly beside it, leaving open space around the main subject.”

    Useful composition instructions include:

    · Subject centred in the image

    · Subject placed on the left or right

    · Main subject in the foreground

    · Background softly blurred

    · Balanced composition

    · Symmetrical layout

    · Minimalist composition

    · Plenty of open space

    · Full-body view

    · Head-and-shoulders portrait

    · Close framing

    · Wide environmental view

    For example:

    “Create a professional woman standing on the right side of the image, with open space on the left for website text.”

    Or:

    “Create a centred product photograph of a white coffee mug on a clean table, with a softly blurred kitchen background.”

    Different composition choices are useful for different purposes:

    · Centred composition works well for portraits, products, and featured images.

    · Open space on one side is useful when text will be added later.

    · Minimalist composition keeps attention on the main subject.

    · Wide composition helps show the subject and surroundings together.

    · Close framing emphasizes facial expressions or product details.

    · Balanced composition helps the image look organized and professional.

    For blog featured images, it is often helpful to leave some empty space around the subject. This makes cropping easier and allows room for a title if one is added later.

    Avoid placing important details too close to the edges because they may be cut off when the image is resized or displayed on different devices.

    Step 10: Choose the Image Size or Aspect Ratio

    The image size and aspect ratio determine the shape of the final image.

    Choosing the correct format from the beginning helps prevent important details from being cropped later.

    A simple prompt might say:

    “Create an image of a family having a picnic.”

    A clearer prompt would be:

    “Create a wide landscape image of a family having a picnic in a green park, suitable for a blog featured image.”

    Common aspect ratios include:

    · Square 1:1 — useful for profile images, product pictures, and some social-media posts

    · Landscape 16:9 — useful for blog featured images, presentations, and video thumbnails

    · Portrait 4:5 — useful for social-media posts and vertical designs

    · Vertical 9:16 — useful for Stories, Reels, Shorts, and mobile content

    · Wide banner format — useful for website headers and advertisements

    For example:

    “Create a realistic 16:9 landscape image of a modern home office with a laptop, notebook, and plant.”

    Or:

    “Create a vertical 9:16 image of a young woman using a smartphone in a bright city street.”

    The subject should also fit the selected image shape.

    For example:

    · A wide landscape format can show both the subject and the surrounding environment.

    · A portrait format works well for people standing or sitting.

    · A square format works well for centred subjects and simple compositions.

    · A vertical format is suitable for mobile screens and short-form video platforms.

    When creating images for WordPress, a wide landscape format is usually the safest choice for featured images.

    Avoid placing important subjects or text too close to the edges. Leave enough space around the main elements so the image can be resized or cropped without losing important details.

    Step 11: Explain What the Image Should Avoid

    You can improve an AI image prompt by explaining what should not appear in the final image.

    These instructions are sometimes called negative instructions or exclusion instructions.

    For example:

    “Create a realistic image of a modern home office.”

    The AI may add unnecessary people, cluttered furniture, visible brand logos, or unreadable text.

    A clearer prompt would be:

    “Create a realistic modern home office with a laptop, notebook, and small plant. Keep the background clean and uncluttered. Do not include people, brand logos, watermarks, or visible text.”

    Useful details to avoid may include:

    · Extra people

    · Unnecessary objects

    · Crowded backgrounds

    · Brand names or logos

    · Watermarks

    · Misspelled or unreadable text

    · Distorted hands or faces

    · Duplicate objects

    · Harsh shadows

    · Blurred main subjects

    · Objects cut off at the edges

    For example:

    “Create a realistic product image of a white coffee mug on a wooden table, with soft studio lighting and a simple background. Do not include logos, text, extra cups, people, or distracting objects.”

    Negative instructions are especially useful when creating:

    · Product images

    · Blog featured images

    · Educational graphics

    · Professional portraits

    · Website banners

    · Social-media advertisements

    Keep the instructions clear and specific. Instead of writing only “no mistakes,” explain the exact problems you want the AI to avoid.

    For example:

    “Show both hands clearly with five natural-looking fingers on each hand. Do not include extra fingers, duplicated hands, or distorted arms.”

    The AI may not follow every exclusion perfectly. Always review the finished image carefully and request corrections when necessary.

    Put All the Parts Together

    After describing each part separately, combine the most important details into one clear prompt.

    A basic prompt might be:

    “Create an image of a woman working on a laptop.”

    A stronger version would be:

    “Create a realistic image of a middle-aged woman working on a laptop at a clean wooden desk in a bright home office. She is wearing a light-blue blouse and looking at the laptop screen with a focused expression. Include a small plant, notebook, and bookshelf in the background. Use soft natural daylight, neutral colours, a calm professional mood, and an eye-level camera view. Place the woman on the right side of the image and leave open space on the left for website text. Use a wide 16:9 landscape format. Do not include brand logos, watermarks, unreadable text, extra people, or unnecessary objects.”

    This complete prompt includes:

    · Subject: A middle-aged woman

    · Action: Working on a laptop

    · Setting: A bright home office

    · Appearance: Light-blue blouse and focused expression

    · Background: Plant, notebook, and bookshelf

    · Style: Realistic

    · Lighting: Soft natural daylight

    · Colours: Neutral colours

    · Mood: Calm and professional

    · Camera angle: Eye-level view

    · Composition: Subject on the right with open space on the left

    · Aspect ratio: Wide 16:9 landscape

    · Details to avoid: Logos, watermarks, unreadable text, extra people, and clutter

    You do not need to include every possible detail in every prompt. Include only the information that directly affects the final image.

    A useful prompt formula is:

    Subject + action + setting + style + lighting + colours + mood + camera angle + composition + aspect ratio + details to avoid

    This formula gives you a reliable starting point. You can shorten or expand it depending on the type of image you want to create.

    How to Improve an AI Image Prompt Step by Step

    You do not need to write a perfect prompt on the first attempt. A practical approach is to begin with a simple idea and improve it gradually.

    Step 1: Start with the Main Subject

    Begin with a basic prompt:

    “Create an image of a man working at a desk.”

    This gives the AI the main subject and action, but many details are still missing.

    Step 2: Add the Setting

    Improve the prompt by describing the location:

    “Create an image of a man working at a desk in a modern home office.”

    The AI now understands where the scene takes place.

    Step 3: Add the Visual Style

    Choose how the image should look:

    “Create a realistic image of a man working at a desk in a modern home office.”

    The word “realistic” helps guide the overall appearance.

    Step 4: Add Lighting and Mood

    Describe the atmosphere:

    “Create a realistic image of a man working at a desk in a modern home office, with soft natural daylight and a calm professional mood.”

    The lighting and mood make the scene more specific.

    Step 5: Add Composition and Format

    Explain how the image should be arranged:

    “Create a realistic image of a man working at a desk in a modern home office, with soft natural daylight and a calm professional mood. Place the man on the right side and leave open space on the left. Use a wide 16:9 landscape format.”

    This version is more suitable for a blog featured image because it includes space for text and the correct image shape.

    Step 6: Add Details to Avoid

    Finish by removing unwanted elements:

    “Create a realistic image of a man working at a desk in a modern home office, with soft natural daylight and a calm professional mood. Place the man on the right side and leave open space on the left. Use a wide 16:9 landscape format. Do not include brand logos, watermarks, unreadable text, extra people, or a cluttered background.”

    The final prompt is clearer, more complete, and more likely to produce a useful result.

    Improving a prompt step by step makes it easier to identify which details are helping and which instructions may be causing problems.

    Figure 3. A basic image prompt can be improved gradually by adding useful details one step at a time.

    This process helps beginners avoid writing an overly complicated prompt at the beginning. Each stage adds one useful type of information, making it easier to understand which instructions improve the final result.

    Common AI Image Prompt Mistakes

    Even a detailed prompt can produce disappointing results when the instructions are unclear, conflicting, or poorly organized. The following mistakes are common among beginners.

    Using a Prompt That Is Too Vague

    A vague prompt does not give the AI enough useful direction.

    Example:

    “Create a nice office.”

    The AI must guess the office style, colours, furniture, lighting, camera angle, and purpose.

    How to Avoid This Mistake: Describe the most important details clearly.

    Improved prompt:

    “Create a realistic modern home office with a wooden desk, laptop, green plant, white walls, soft natural daylight, and a clean professional appearance.”

    Adding Too Many Unnecessary Details

    A long prompt is not automatically a good prompt. Too many minor details can distract the AI from the main subject.

    For example, describing every book, decoration, wall colour, clothing detail, and background object may make the scene crowded or inconsistent.

    How to Avoid This Mistake: Include only the details that directly affect the final image.

    Giving Conflicting Instructions

    Conflicting instructions make it difficult for the AI to understand the intended result.

    For example:

    “Create a realistic cartoon photograph with bright daylight and dark moonlight.”

    The requested styles and lighting conditions do not work naturally together.

    How to Avoid This Mistake: Choose one main style, one lighting direction, and one clear mood.

    Improved prompt:

    “Create a realistic cinematic photograph of a city street at night, illuminated by blue and purple neon lights.”

    Forgetting the Image’s Purpose

    An image for a blog featured image requires a different layout from an image designed for Instagram or a website banner.

    How to Avoid This Mistake: Decide where the image will be used before writing the prompt. Then specify the correct composition and aspect ratio.

    For example:

    “Use a wide 16:9 landscape format suitable for a WordPress featured image.”

    Placing Important Details Near the Edges

    Subjects, text, or objects placed too close to the edges may be cut off when the image is resized or cropped.

    How to Avoid This Mistake: Ask for open space around the important elements.

    For example:

    “Keep the main subject away from the edges and leave safe space around the subject for cropping.”

    Asking the AI to Generate Too Much Text

    AI image generators may produce misspelled, distorted, or unreadable words inside images.

    How to Avoid This Mistake: Create the visual without text whenever possible. Add the final wording later using Canva, WordPress, or another design tool.

    Expecting a Perfect Result Immediately

    The first generated image may not match your idea exactly. This does not always mean the entire prompt is poor.

    How to Avoid This Mistake: Review the result, identify the specific problem, and request one or two corrections at a time.

    For example:

    “Keep the same image, but remove the extra chair and make the background brighter.”

    Using Instructions That Are Too General

    Instructions such as “make it better,” “fix everything,” or “make it professional” do not explain what should change.

    How to Avoid This Mistake: State the exact improvement required.

    For example:

    “Use softer lighting, simplify the background, centre the subject, and remove all visible text.”

    Clear corrections help the AI understand what went wrong and make the editing process more efficient.

    Figure 4. Common prompt-writing mistakes can be corrected by using clearer, more focused instructions.

    The examples show that better prompting is not simply about adding more words. Effective prompts remove vague language, conflicting instructions, unnecessary details, and general correction requests.

    Practical AI Image Prompt Examples

    The following prompts show how the main prompt elements can be combined for different purposes. You can copy them and change the subject, colours, setting, style, or image format.

    Blog Featured Image

    “Create a realistic image of a beginner learning how to write AI image prompts on a laptop in a bright home office. Show an AI-generated landscape on the laptop screen, with a notebook and pen on the desk. Use soft natural daylight, blue and white colours, and a clean professional mood. Place the person on the right side and leave open space on the left. Use a wide 16:9 landscape format suitable for a WordPress featured image. Do not include brand logos, watermarks, or unreadable text.”

    Educational Infographic

    “Create a clean educational infographic explaining the main parts of an AI image prompt. Include separate sections for subject, action, setting, style, lighting, mood, composition, and aspect ratio. Use simple icons, short labels, blue and light-grey colours, and a clear beginner-friendly layout. Use a wide 16:9 landscape format. Do not include decorative clutter, brand logos, or small unreadable text.”

    Social-Media Image

    “Create a cheerful image of a young woman using an AI image generator on a tablet while sitting in a bright café. Use warm natural lighting, colourful decorations, and a friendly modern atmosphere. Keep the woman centred and leave enough space around her for cropping. Use a square 1:1 format suitable for social media. Do not include visible brand names, watermarks, or distorted hands.”

    Product Concept Image

    “Create a realistic product concept image of a modern reusable water bottle standing on a clean white surface. Use soft studio lighting, a simple light-grey background, and a centred composition. Show the entire bottle clearly with natural reflections and sharp details. Use a square 1:1 format. Do not include logos, labels, text, extra bottles, people, or distracting objects.”

    Professional Portrait

    “Create a realistic head-and-shoulders portrait of a confident middle-aged businesswoman wearing a navy-blue suit and white blouse. She is smiling gently and looking at the camera. Use soft studio lighting, a neutral office background, natural skin texture, and a calm professional mood. Use a portrait 4:5 format. Do not include jewellery with brand logos, distorted facial features, or distracting background objects.”

    Children’s Illustration

    “Create a colourful cartoon illustration of two children learning about robots in a friendly classroom. Show them building a small robot together at a table while a teacher helps them. Use bright colours, soft rounded shapes, cheerful expressions, and a welcoming educational atmosphere. Use a wide landscape format. Do not include frightening robots, crowded details, brand logos, or unreadable text.”

    These examples demonstrate that a strong prompt should match the purpose of the image. A blog image may require open space for a title, while a product image may require a centred subject and a simple background.

    How to Review and Improve the Generated Image

    After the AI creates an image, examine it carefully before using it.

    Even a strong prompt can produce small mistakes or details that do not match your original idea.

    Check the following areas:

    · Main subject

    · Hands and fingers

    · Faces and expressions

    · Background objects

    · Lighting

    · Colours

    · Composition

    · Cropping

    · Visible text

    · Brand names or logos

    · Overall accuracy

    Identify the Exact Problem

    Avoid giving a general correction such as:

    “Make the image better.”

    Instead, explain exactly what needs to change.

    For example:

    “Keep the same image, but brighten the background and remove the extra chair.”

    Or:

    “Keep the woman’s clothing and position unchanged, but correct her left hand so it has five natural-looking fingers.”

    Specific instructions make it easier for the AI to understand the correction.

    Change One or Two Details at a Time

    Requesting many major changes at once may cause the AI to alter parts of the image that were already correct.

    A better approach is to improve the image gradually.

    For example:

    1. Correct the subject’s hands.

    2. Simplify the background.

    3. Adjust the lighting.

    4. Improve the composition.

    5. Check the final image again.

    Explain What Must Stay the Same

    When editing an existing image, tell the AI which parts should not change.

    For example:

    “Keep the same person, clothing, facial expression, camera angle, and background. Only remove the visible text from the laptop screen.”

    This reduces the chance that the AI will redesign the entire image.

    Compare the Result with the Original Prompt

    Review the finished image against your original instructions.

    Ask yourself:

    · Is the main subject correct?

    · Is the setting accurate?

    · Does the lighting match the requested mood?

    · Is the composition suitable for its intended use?

    · Are there any unwanted objects?

    · Is the image size appropriate?

    · Does anything look unnatural or misleading?

    The image is ready only when it is clear, accurate, visually balanced, and suitable for its intended purpose.

    Figure 5. A practical checklist for reviewing AI-generated images before publishing or sharing them.

    Even a well-written prompt can produce small errors. This checklist reminds readers to examine the subject, hands, faces, background, lighting, colours, composition, cropping, visible text, and overall accuracy before using the image.

    Benefits of Writing Better AI Image Prompts

    Writing clear and detailed prompts provides several practical benefits.

    More Accurate Images

    A strong prompt gives the AI clearer instructions about the subject, setting, lighting, colours, style, and composition. This increases the chance that the final image will match your original idea.

    Fewer Unnecessary Attempts

    Vague prompts often require many generations before producing a useful image.

    A better prompt can reduce repeated attempts and save time.

    Easier Image Editing

    When the original prompt is well organized, it is easier to identify what needs to be changed.

    For example, you can request:

    “Keep the same subject and composition, but change the lighting to soft morning daylight.”

    More Consistent Results

    Using the same prompt structure helps you create images with similar styles, colours, and layouts.

    This is especially useful for:

    · Blog articles

    · Social-media campaigns

    · Educational materials

    · Product images

    · Website graphics

    · Brand content

    Better Control Over Composition

    Clear composition instructions help you decide where the subject should appear and where open space should be left.

    This is useful when adding titles, captions, buttons, or other design elements later.

    More Professional Images

    Details such as lighting, camera angle, colour palette, and background simplicity can make AI-generated images look cleaner and more professional.

    Better Images for Specific Platforms

    Including the correct aspect ratio helps create images suitable for WordPress, Instagram, presentations, YouTube thumbnails, or mobile content.

    Less Confusion for the AI

    Clear and consistent instructions reduce unnecessary guessing.

    The AI can focus on the most important parts of the scene instead of trying to interpret vague or conflicting directions.

    Limitations of AI Image Prompts

    Even a carefully written prompt cannot guarantee a perfect image. AI image generators still have technical limitations and may misunderstand some instructions.

    The AI May Misinterpret the Prompt

    The AI may focus on one part of the prompt while ignoring another.

    For example, you may request a person standing beside a desk, but the AI may place the person behind the desk or sitting in a chair.

    How to Reduce This Limitation: Place the most important instruction near the beginning of the prompt and describe the required position clearly.

    Some Details May Be Incorrect

    AI-generated images may contain:

    · Distorted hands or fingers

    · Unnatural faces

    · Duplicate objects

    · Incorrect reflections

    · Impossible shadows

    · Misshaped furniture

    · Objects that blend together

    How to Reduce This Limitation: Review the image closely and request a specific correction instead of regenerating the entire scene immediately.

    Text Inside Images May Be Unreadable

    AI image generators may misspell words or create random letters.

    This is especially common with:

    · Posters

    · Signs

    · Labels

    · Book covers

    · Computer screens

    · Product packaging

    How to Reduce This Limitation: Generate the image without text whenever possible. Add the final wording later using Canva or another design tool.

    Editing One Detail May Change Other Details

    When you ask the AI to correct one part of an image, it may also change the person’s face, clothing, background, colours, or composition.

    How to Reduce This Limitation: Clearly state what must remain unchanged.

    For example:

    “Keep the same person, clothing, pose, lighting, background, and camera angle. Only remove the extra object from the desk.”

    Exact Product Accuracy May Be Difficult

    AI may not reproduce a real product, machine, building, uniform, or technical object accurately.

    Small details, measurements, buttons, labels, and components may be incorrect.

    How to Reduce This Limitation: Use real photographs or verified reference materials when exact accuracy is required. Do not rely on AI-generated images for technical instructions or product claims without checking them carefully.

    Consistent Characters Can Be Difficult to Maintain

    The same character may look different across several generated images.

    The AI may change:

    · Facial features

    · Hair

    · Clothing

    · Age

    · Body shape

    · Accessories

    How to Reduce This Limitation: Reuse the same detailed character description and provide a reference image when the tool supports it.

    The AI Cannot Read Your Mind

    A prompt may seem clear to you because you already know what you want. However, the AI only receives the words you provide.

    It cannot automatically understand details that were not included.

    How to Reduce This Limitation: Review your prompt as though another person were reading it for the first time. Add any important information that is missing.

    Good prompting improves the result, but human review remains necessary. The final image should always be checked for accuracy, quality, suitability, and responsible use.

    Common Myths About AI Image Prompts

    Many beginners misunderstand how AI image prompting works. These common myths can lead to unrealistic expectations and disappointing results.

    Myth 1: A Very Long Prompt Is Always Better

    A long prompt is not automatically a strong prompt.

    Too many unnecessary details can confuse the AI or cause it to ignore the most important instructions.

    Reality: A good prompt should be clear, relevant, and well organized. Include the details that directly affect the image.

    Myth 2: The AI Understands Exactly What You Imagine

    The AI cannot see the picture in your mind.

    It only interprets the written instructions you provide.

    Reality: Important details must be stated clearly. Do not assume the AI will understand information that is missing from the prompt.

    Myth 3: The First Image Should Be Perfect

    Even a strong prompt may not produce the ideal image on the first attempt.

    Small problems can appear in the hands, background, lighting, composition, or other details.

    Reality: AI image creation is often a process of generating, reviewing, and improving the result.

    Myth 4: Adding “Professional” Fixes Everything

    Words such as “professional,” “beautiful,” or “high quality” are too general on their own.

    They do not explain the required lighting, style, composition, colours, or setting.

    Reality: Describe the exact features that should make the image look professional.

    For example:

    “Use soft studio lighting, a clean background, balanced composition, natural colours, and sharp details.”

    Myth 5: AI Always Follows Every Instruction

    AI image generators may ignore or misinterpret part of a prompt, especially when the instructions are long or conflicting.

    Reality: Place the most important instructions near the beginning and avoid combining incompatible styles, moods, or lighting conditions.

    Myth 6: AI-Generated Images Are Always Accurate

    An AI image may look convincing while containing incorrect details.

    This can include inaccurate tools, products, uniforms, buildings, maps, text, or technical objects.

    Reality: Visual quality does not guarantee factual accuracy. Important details must always be checked.

    Myth 7: AI Images Do Not Need Human Review

    AI-generated images can contain errors, misleading details, logos, inappropriate content, or visual problems.

    Reality: Every image should be reviewed carefully before it is published or shared.

    Myth 8: One Prompt Works Equally Well for Every Purpose

    A prompt for a blog featured image may not work well for a product image, social-media post, infographic, or website banner.

    Reality: The prompt should match the image’s intended use, audience, composition, and aspect ratio.

    Frequently Asked Questions

    How Long Should an AI Image Prompt Be?

    There is no perfect prompt length.

    A useful prompt may contain one sentence or several short sentences. The most important factor is whether it clearly describes the subject, setting, style, lighting, mood, composition, and image format.

    Avoid adding details that do not affect the final image.

    Do I Need Technical Knowledge to Write AI Image Prompts?

    No. You do not need coding or design experience.

    Write the prompt as though you are clearly describing the image to another person. Start with the main subject, then add the most important visual details.

    Should I Include Every Prompt Element?

    No. Include only the elements that matter to the image.

    For a simple product image, you may only need:

    · Product description

    · Background

    · Lighting

    · Camera view

    · Aspect ratio

    · Details to avoid

    A complex scene may require more information.

    What Should I Do When the First Image Is Wrong?

    Identify the exact problem and request a specific correction.

    For example:

    “Keep the same subject and background, but remove the extra chair and brighten the lighting.”

    Avoid general instructions such as “fix everything.”

    Can I Ask the AI to Keep Part of an Image Unchanged?

    Yes. Clearly state which details should remain the same.

    For example:

    “Keep the same person, clothing, pose, facial expression, background, and camera angle. Only change the shirt colour from red to blue.”

    The AI may still change other details, so review the edited image carefully.

    Why Does the AI Ignore Some Instructions?

    The prompt may contain too many details, conflicting instructions, or unclear wording.

    Move the most important instructions closer to the beginning and simplify anything that is unnecessary.

    Can AI Generate Accurate Text Inside an Image?

    Sometimes, but the text may contain spelling mistakes or distorted letters.

    For important wording, create the image without text and add the final text later using Canva or another design tool.

    Which Aspect Ratio Is Best for a WordPress Featured Image?

    A wide landscape format, such as 16:9, is usually a practical choice for WordPress featured images.

    Leave safe space around the subject because different themes and devices may crop the image differently.

    Can I Reuse the Same Prompt?

    Yes. A strong prompt can be used as a template.

    Change the subject, setting, style, colours, lighting, or aspect ratio to create a new image while keeping the same basic structure.

    Do AI-Generated Images Still Need Human Review?

    Yes. Always check the image for distorted details, incorrect objects, visible logos, unreadable text, poor cropping, misleading information, and other problems before publishing it.

    Key Takeaways

    Writing better AI image prompts is mainly about giving the AI clear, useful, and organized instructions.

    Remember these main points:

    · Start with the main subject.

    · Describe the action or pose.

    · Explain the setting or background.

    · Choose one clear visual style.

    · Add suitable lighting and colours.

    · Describe the mood or atmosphere.

    · Select the camera angle and viewpoint.

    · Explain the composition and framing.

    · Choose the correct aspect ratio.

    · State what the image should avoid.

    · Review the finished image carefully.

    · Improve one or two details at a time.

    A reliable prompt structure is:

    Subject + action + setting + style + lighting + colours + mood + camera angle + composition + aspect ratio + details to avoid

    You do not need to use every element in every prompt. Include only the details that are important to the final image.

    The best prompts are not always the longest. They are the prompts that clearly explain what should appear, how it should look, and how the image will be used.

    Final Tip

    Do not try to create the perfect prompt in one attempt.

    Start with a clear idea, generate the image, review the result, and improve the prompt based on what needs to change.

    Use this simple process:

    1. Describe the image clearly.

    2. Review the generated result carefully.

    3. Correct one or two problems at a time.

    The best AI image prompts are developed through practice. Each image you create teaches you which details are useful, which instructions are unnecessary, and how to communicate your ideas more clearly.

    Continue Learning

    Continue building your AI image and prompting skills with these beginner-friendly guides:

    · AI Image Generation for Beginners: Complete Guide (2026)

    · Prompt Engineering for Beginners: Complete Guide (2026)

    · Best ChatGPT Prompts for Beginners: Complete Guide (2026)

  • How to Create AI Images with ChatGPT: Step-by-Step Beginner Guide (2026)

    How to Create AI Images with ChatGPT: Step-by-Step Beginner Guide (2026)

    Estimated Reading Time: 60 minutes
    Last Updated: July 2026

    What You’ll Learn

    By the end of this guide, you will understand:

    · What AI image generation is.

    · How ChatGPT creates images from written instructions.

    · How to access image-generation tools in ChatGPT.

    · How to write a clear AI image prompt.

    · How to generate your first image step by step.

    · How to improve an image using follow-up instructions.

    · How to change colours, objects, backgrounds, text and visual styles.

    · How to choose the correct image shape and size.

    · How to fix common AI image problems.

    · How to save and organize your generated images.

    · How to prepare images for WordPress and social media.

    · How to use AI-generated images safely and responsibly.

    Introduction

    AI image generation allows you to create pictures by describing what you want in words. Instead of drawing an image yourself or searching through stock-photo websites, you can ask ChatGPT to create an original image based on your instructions.

    You can use ChatGPT to create many types of images, including:

    · Featured images for WordPress articles.

    · Social media graphics.

    · Product images for online stores.

    · Educational illustrations.

    · Business presentation visuals.

    · Cartoon characters.

    · Realistic landscapes.

    · Logo concepts.

    · Simple infographics.

    The written instruction you give to ChatGPT is called an image prompt. A good image prompt explains what should appear in the image and how it should look.

    For example:

    Basic prompt:

    Create an image of a modern home office.

    Improved prompt:

    Create a realistic modern home office with a wooden desk, a laptop, indoor plants, warm natural lighting and a clean white background. Use a professional style and a wide landscape format.

    The improved prompt gives ChatGPT more useful details, making it easier for the AI to create an image that matches your idea.

    You do not need drawing or graphic-design experience to begin. You can start with a simple description, review the generated image and then ask ChatGPT to make specific changes.

    In this guide, you will learn how to create your first AI image, improve the result, correct common problems and prepare the finished image for WordPress, social media or personal projects.

    What Is ChatGPT Image Generation?

    ChatGPT image generation is a feature that creates pictures from written instructions. You describe the image you want, and ChatGPT uses artificial intelligence to produce a new visual based on your description.

    For example, you could write:

    Prompt:

    Create a friendly robot teaching children about artificial intelligence in a bright classroom. Use a colourful cartoon style and a wide landscape format.

    ChatGPT will analyse the prompt and create an image containing the requested subject, setting, style and format.

    You can also continue the conversation and ask ChatGPT to improve or change the image.

    For example:

    · Make the classroom brighter.

    · Change the robot to blue.

    · Add three students.

    · Remove the text from the wall.

    · Use a more realistic style.

    · Change the image to a square format.

    This makes image creation an interactive process. You do not need to describe everything perfectly in your first prompt. You can review the result and give additional instructions until the image is closer to what you need.

    How It Works

    The basic process has four steps:

    1. You describe the image you want.

    2. ChatGPT interprets your instructions.

    3. The AI generates an image.

    4. You review the result and request changes when necessary.

    The quality of the image often depends on the clarity of your prompt. A vague prompt may produce a general result, while a detailed prompt gives the AI more guidance.

    Vague prompt:

    Create a picture of a business meeting.

    Detailed prompt:

    Create a realistic image of four business professionals having a meeting in a modern office. Include a large window, a conference table, laptops and natural daylight. Use a professional style and a wide landscape format.

    The detailed prompt clearly explains the people, setting, objects, lighting, style and image shape.

    How to Access Image Generation in ChatGPT

    You can create an image directly inside a ChatGPT conversation. You may type your image request in the message box, or open More and select Images when that option appears in your interface. ChatGPT can then generate an image based on your written description. (OpenAI Help Center)

    Follow these steps:

    1. Open ChatGPT on your computer, tablet or mobile device.

    2. Sign in to your ChatGPT account.

    3. Start a new conversation.

    4. Click inside the message box.

    5. Describe the image you want ChatGPT to create.

    6. Review your prompt before sending it.

    7. Click the Send button.

    8. Wait while ChatGPT generates the image.

    Your first prompt can be simple.

    Example prompt:

    Create a realistic image of a beginner learning artificial intelligence on a laptop in a bright home office. Use a clean, professional style and a wide landscape format.

    ChatGPT will use your description to create the image. More detailed or complex requests may take longer to complete.

    Using the Images Option

    Some versions of ChatGPT display an Images option inside the More menu.

    To use it:

    1. Select More near the message box.

    2. Select Images.

    3. Enter your image description.

    4. Choose an image shape or aspect ratio when the option is available.

    5. Send the prompt.

    The location and appearance of these controls may differ slightly between the web version and mobile applications.

    Figure 1. Opening the image-generation option in ChatGPT

    This figure shows where the More menu and Images option appear in ChatGPT. Selecting Images opens the image-generation feature, although beginners can also create an image by typing a direct request in the normal message box.

    You Can Also Ask Directly

    You do not always need to open a separate image tool. You can simply type a direct request into a normal ChatGPT conversation.

    For example:

    Prompt:

    Create an educational illustration showing how artificial intelligence helps people write, study, design images and organize information.

    ChatGPT recognizes that you are requesting an image and begins the image-generation process.

    What to Do If the Images Option Is Not Visible

    When you do not see an Images button, try these steps:

    · Start a new conversation.

    · Type a direct image request into the message box.

    · Refresh the browser or reopen the application.

    · Make sure you are signed in.

    · Update the ChatGPT mobile application when an update is available.

    · Check whether image generation is available in the ChatGPT version you are using.

    The simplest method is usually to write:

    Create an image of…

    Then complete the sentence with a clear description of the image you need.

    How to Write Your First AI Image Prompt

    An AI image prompt is the written description you give to ChatGPT. It tells the AI what image to create and how the image should look.

    A clear prompt usually includes:

    · The main subject.

    · The background or location.

    · Important objects or details.

    · The visual style.

    · The colours.

    · The lighting.

    · The mood.

    · The image shape.

    You do not need to include every detail in every prompt. Begin with the most important information and add more details when needed.

    A Simple Image-Prompt Formula

    Use this beginner formula:

    Subject + Setting + Important Details + Style + Lighting + Image Format

    For example:

    Subject: A beginner learning artificial intelligence
    Setting: A modern home office
    Important details: Laptop, notebook, coffee cup and indoor plants
    Style: Realistic and professional
    Lighting: Bright natural light
    Image format: Wide landscape

    The complete prompt becomes:

    Prompt:

    Create a realistic image of a beginner learning artificial intelligence in a modern home office. Include a laptop, notebook, coffee cup and indoor plants. Use bright natural lighting, a clean professional style and a wide landscape format.

    Start with the Main Subject

    The subject is the most important person, animal, object or scene in the image.

    Examples include:

    · A friendly robot.

    · A business owner using a laptop.

    · A family travelling.

    · A modern office.

    · A travel bag.

    · A mountain landscape.

    · A teacher explaining artificial intelligence.

    A vague subject may produce an unclear image.

    Vague prompt:

    Create a technology image.

    Clearer prompt:

    Create an image of a small friendly robot helping a beginner use a laptop.

    Describe the Setting

    The setting explains where the subject appears.

    Possible settings include:

    · A bright classroom.

    · A modern office.

    · A home workspace.

    · A busy city street.

    · A peaceful beach.

    · A professional photography studio.

    · A simple white background.

    For example:

    Prompt:

    Create an image of a small friendly robot helping a beginner use a laptop in a bright modern classroom.

    The setting gives ChatGPT more information about the environment.

    Add Important Details

    Include objects or features that are important to the image.

    For example:

    · A wooden desk.

    · A large window.

    · Indoor plants.

    · A smartphone.

    · A notebook and pen.

    · A blue travel bag.

    · A presentation screen.

    Do not overload the prompt with details that do not affect the final result.

    Choose a Visual Style

    The style controls the overall appearance of the image.

    Common styles include:

    · Realistic photography.

    · Cartoon.

    · Watercolour painting.

    · Digital illustration.

    · Minimalist design.

    · Cinematic style.

    · Three-dimensional design.

    · Professional infographic.

    · Children’s-book illustration.

    For example:

    Prompt:

    Create a digital illustration of a friendly robot teaching a beginner how to use artificial intelligence.

    Changing the style can create a completely different result, even when the subject remains the same.

    Describe the Lighting and Mood

    Lighting affects the atmosphere of an image.

    Examples include:

    · Bright natural lighting.

    · Soft morning light.

    · Warm indoor lighting.

    · Dramatic cinematic lighting.

    · Golden sunset light.

    · Clean studio lighting.

    You can also describe the mood:

    · Friendly.

    · Professional.

    · Peaceful.

    · Exciting.

    · Modern.

    · Playful.

    · Inspiring.

    For example:

    Prompt:

    Create a realistic image of a beginner working on a laptop in a modern home office. Use warm natural lighting and a calm, professional mood.

    Choose the Image Shape

    Tell ChatGPT how the image will be used.

    Common image formats include:

    · Square: Suitable for many social media posts.

    · Wide landscape: Suitable for WordPress featured images, presentations and website banners.

    · Portrait: Suitable for posters, mobile content and vertical social media posts.

    For example:

    Prompt:

    Create a wide landscape image for a WordPress article about learning artificial intelligence.

    Including the format helps ChatGPT arrange the subject and background more appropriately.

    How to Generate Your First AI Image Step by Step

    After writing your prompt, you are ready to generate your first image. ChatGPT can create the image directly inside the conversation and allows you to continue refining it with additional instructions. (OpenAI)

    Step 1: Start a New Conversation

    Open ChatGPT and begin a new conversation. Starting a separate conversation helps keep your image project organized and prevents unrelated messages from affecting the instructions.

    You may give the conversation a clear purpose, such as:

    · WordPress featured image.

    · Social media graphic.

    · Product illustration.

    · Educational diagram.

    · Personal creative project.

    Step 2: Decide What the Image Is For

    Before writing the prompt, decide where you will use the image.

    Ask yourself:

    · Is it for a WordPress article?

    · Is it for Facebook, Instagram or another social platform?

    · Is it for an online store?

    · Is it for a presentation?

    · Is it for personal use?

    The purpose affects the image shape, style and amount of detail you should request.

    For example, a WordPress featured image usually works well in a wide landscape format, while a social media profile image may work better as a square.

    Step 3: Write the First Prompt

    Use the simple prompt formula:

    Subject + Setting + Important Details + Style + Lighting + Image Format

    Example prompt:

    Create a realistic image of a beginner learning how to create AI images with ChatGPT. Show the person sitting at a modern desk with a laptop displaying colourful digital artwork. Include a notebook, a coffee cup and indoor plants. Use bright natural lighting, a clean professional style and a wide landscape format.

    Read the prompt once before sending it. Make sure the most important instructions are included.

    Step 4: Send the Prompt

    Click the Send button after reviewing your prompt.

    ChatGPT will begin creating the image. The process may take a few minutes, depending on the complexity of the request. (OpenAI Help Center)

    Avoid sending the same prompt repeatedly while the image is being generated.

    Figure 2. Entering a complete AI image prompt in ChatGPT

    This figure shows a complete AI image prompt entered in the ChatGPT message box before it is sent. It demonstrates how the subject, setting, important details, style, lighting and image format can be combined into one clear request.

    Step 5: Review the Generated Image

    When the image appears, examine it carefully.

    Check:

    · Is the main subject correct?

    · Does the setting match your request?

    · Are the important objects included?

    · Are the colours suitable?

    · Is the lighting appropriate?

    · Does the image have the correct shape?

    · Is there any unwanted text?

    · Are faces, hands and objects displayed correctly?

    · Is the image suitable for its intended purpose?

    The first result does not need to be perfect. Image generation usually works best as a process of creating, reviewing and improving.

    Step 6: Ask for Specific Changes

    When something needs improvement, describe the exact change you want.

    For example:

    · Make the room brighter.

    · Change the laptop to silver.

    · Remove the coffee cup.

    · Add more space above the subject.

    · Use softer colours.

    · Make the person look more natural.

    · Replace the background with a modern office.

    · Change the image to a wide landscape format.

    · Remove all visible text.

    · Make the design simpler and less crowded.

    ChatGPT can refine an image through follow-up instructions, including changes to composition, size, style and visual details. (OpenAI)

    Try to request one or two important changes at a time. This makes it easier to see whether each correction improved the image.

    Step 7: Review the Revised Image

    After ChatGPT generates the revised version, compare it with the previous result.

    Ask:

    · Did the requested change appear?

    · Is the new version better?

    · Did another part of the image change unexpectedly?

    · Does the image now match its purpose?

    You may continue giving follow-up instructions until the result is satisfactory.

    Step 8: Choose the Best Version

    When several versions are available, choose the one that best meets your needs.

    Do not choose an image only because it looks attractive. Also consider:

    · Whether it supports the article or message.

    · Whether the subject is easy to understand.

    · Whether the layout leaves enough space for website cropping.

    · Whether the image looks professional.

    · Whether important details remain visible on smaller screens.

    A Complete Beginner Example

    First prompt:

    Create an image of a person learning AI.

    This prompt may produce a general result because it does not explain the setting, style or intended use.

    Improved prompt:

    Create a realistic wide landscape image for a beginner-friendly WordPress article about learning artificial intelligence. Show an adult sitting at a clean desk and using ChatGPT on a laptop. Include a notebook, a small plant and soft natural lighting. Use a modern, welcoming and professional style. Do not include any visible text.

    Follow-up instruction:

    Make the room brighter, move the person slightly to the right and leave more open space on the left for a website title.

    The follow-up instruction improves the image without requiring you to rewrite the entire prompt.

    Beginner Tip

    Save your original prompt and your successful follow-up instructions. You can reuse the structure later for similar WordPress images, social media graphics or business projects.

    How to Improve an AI-Generated Image with Follow-Up Prompts

    The first generated image may not match your idea perfectly. You may notice that the colours are incorrect, the background is too busy, an object is missing or the image has the wrong shape.

    You do not need to start again immediately. You can continue the conversation and tell ChatGPT exactly what you want changed.

    These additional instructions are called follow-up prompts.

    Ask for One Clear Change at a Time

    A specific instruction is easier for ChatGPT to follow than a general request.

    Unclear instruction:

    Make the image better.

    Clear instruction:

    Make the background brighter and remove the objects from the desk.

    The clear instruction tells ChatGPT what needs to change.

    Useful follow-up prompts include:

    · Make the lighting brighter.

    · Remove the text from the image.

    · Change the background to white.

    · Add more space around the main subject.

    · Move the person to the right side.

    · Change the shirt colour to blue.

    · Replace the laptop with a tablet.

    · Make the design simpler.

    · Use a more realistic style.

    · Change the image to a wide landscape format.

    Change the Main Subject

    You can ask ChatGPT to change the person, object or main focus of the image.

    For example:

    Follow-up prompt:

    Replace the businessperson with an older beginner learning how to use ChatGPT.

    You could also write:

    · Replace the car with a bicycle.

    · Change the robot into a friendly assistant.

    · Add another person beside the main subject.

    · Remove the person and keep only the workspace.

    · Make the product larger and place it in the centre.

    When changing the main subject, explain which parts of the original image should remain unchanged.

    For example:

    Follow-up prompt:

    Replace the person with an older adult, but keep the same office, desk, lighting and wide landscape format.

    Change the Background

    The background affects how professional and focused the image appears.

    You can ask ChatGPT to:

    · Remove distracting objects.

    · Use a plain white background.

    · Replace the room with a modern office.

    · Add a natural outdoor setting.

    · Blur the background slightly.

    · Make the background brighter.

    · Use a simple studio background.

    · Add more open space around the subject.

    For example:

    Follow-up prompt:

    Replace the busy office background with a clean, modern workspace. Keep the person and laptop unchanged.

    A simple background is often better for WordPress featured images because it keeps attention on the main subject.

    Change Colours

    Colour changes can improve readability, mood and brand consistency.

    You may request:

    · A blue and white colour scheme.

    · Softer colours.

    · Brighter colours.

    · Warm neutral colours.

    · A darker background.

    · Less colour saturation.

    · Colours that match your website.

    For example:

    Follow-up prompt:

    Change the colour scheme to blue, white and light grey. Keep the image professional and suitable for a beginner AI website.

    Avoid asking for too many colour changes at the same time. Start with the main colour scheme and review the result.

    Change the Lighting

    Lighting can make an image feel bright, warm, dramatic or professional.

    Examples of lighting instructions include:

    · Use bright natural daylight.

    · Add soft morning light.

    · Use warm indoor lighting.

    · Make the image brighter.

    · Reduce dark shadows.

    · Use clean studio lighting.

    · Create a soft professional atmosphere.

    For example:

    Follow-up prompt:

    Make the image brighter and use soft natural daylight coming through the window.

    Change the Visual Style

    You can keep the same subject while changing the visual style.

    For example:

    · Realistic photography.

    · Digital illustration.

    · Cartoon.

    · Watercolour painting.

    · Three-dimensional design.

    · Minimalist graphic.

    · Children’s-book illustration.

    · Cinematic style.

    Follow-up prompt:

    Keep the same scene, but change the visual style from realistic photography to a clean digital illustration.

    A realistic style may work well for professional articles, while a cartoon or illustration may be more suitable for educational or children’s content.

    Change the Image Shape

    The image shape should match where you plan to use it.

    You can request:

    · Square format.

    · Wide landscape format.

    · Portrait format.

    · Website banner format.

    · Social media format.

    For example:

    Follow-up prompt:

    Change the image to a wide landscape format suitable for a WordPress featured image. Keep the main subject in the centre and leave enough space around the edges for cropping.

    When changing the shape, some parts of the image may be rearranged. Review the new version carefully to make sure important details remain visible.

    Remove Unwanted Text

    AI-generated images may sometimes contain unnecessary, misspelled or unclear text.

    Use a direct instruction such as:

    Follow-up prompt:

    Remove all visible text, letters, labels and logos from the image. Keep the rest of the design unchanged.

    When you need text in an image, it is often better to add it later using Canva, WordPress or another design tool. This gives you more control over spelling, font size and placement.

    Correct Missing or Incorrect Objects

    Check whether all requested objects are present and accurate.

    You may ask ChatGPT to:

    · Add a missing laptop.

    · Remove an extra object.

    · Correct the number of people.

    · Replace an incorrect object.

    · Make the product larger.

    · Place an object in a different location.

    For example:

    Follow-up prompt:

    Remove the extra coffee cup and add a notebook beside the laptop. Keep everything else unchanged.

    Preserve the Parts You Like

    When requesting a change, explain which parts should stay the same.

    For example:

    Follow-up prompt:

    Keep the person, desk and lighting unchanged. Only replace the background with a modern home office.

    This reduces the chance that ChatGPT will change parts of the image you already like.

    Compare Before and After

    After each revision, compare the new image with the previous version.

    Check:

    · Did ChatGPT make the requested change?

    · Did it accidentally remove something important?

    · Are the colours better?

    · Is the subject still clear?

    · Is the image now suitable for its intended use?

    · Did the image shape remain correct?

    You may need several follow-up prompts before the image is ready.

    Figure 3. Improving an AI-generated image with a follow-up prompt

    This figure compares an original AI-generated image with an improved version. The follow-up prompt brightens the room, simplifies the background, moves the person to the right and creates open space on the left. It demonstrates how specific corrections can improve an image without rewriting the original prompt.

    A Complete Improvement Example

    Original prompt:

    Create a realistic image of a beginner using ChatGPT on a laptop in a home office.

    First follow-up prompt:

    Make the room brighter and add a notebook and indoor plant to the desk.

    Second follow-up prompt:

    Move the person slightly to the right and leave more open space on the left.

    Third follow-up prompt:

    Remove all visible text and change the image to a wide landscape format suitable for a WordPress featured image.

    Each follow-up prompt improves one part of the image while preserving the overall idea.

    Beginner Tip

    Use short, specific instructions and review the result after each change. When too many changes are requested at once, ChatGPT may misunderstand which details are most important.

    How to Edit an Existing Image in ChatGPT

    ChatGPT can edit an image that it created, or you can upload an existing image and ask ChatGPT to change it. You can describe the change in the conversation, or use the selection tool to highlight a specific part of the image. (OpenAI Help Center)

    This is useful when you already have an image but need to:

    · Remove an unwanted object.

    · Replace the background.

    · Change a colour.

    · Add a missing object.

    · Improve the lighting.

    · Change the image shape.

    · Make the background transparent.

    · Adjust the position of the main subject.

    · Convert the image into another visual style.

    Edit an Image Created by ChatGPT

    Follow these steps:

    1. Open the conversation containing the generated image.

    2. Select the image you want to edit.

    3. Describe the change you want in the text box.

    4. Send the instruction.

    5. Review the edited image.

    6. Ask for another correction when necessary.

    For example:

    Editing prompt:

    Change the background to a bright modern office. Keep the person, laptop, desk and lighting unchanged.

    The instruction explains both what should change and what should remain the same.

    Upload and Edit an Existing Image

    You can also upload an image from your computer or mobile device and ask ChatGPT to modify it. (OpenAI Help Center)

    Follow these steps:

    1. Start a new ChatGPT conversation.

    2. Select the attachment button near the message box.

    3. Choose the image from your device.

    4. Wait for the image to finish uploading.

    5. Describe the change you want.

    6. Send the request.

    7. Review the edited version.

    For example:

    Editing prompt:

    Remove the objects behind the product and replace the background with a clean white studio background. Keep the product’s shape, colour and position unchanged.

    Use the Selection Tool

    The image editor may include a selection tool that allows you to highlight the part of the image you want to change. You can select an area and then describe the required edit. (OpenAI Help Center)

    For example, you could highlight:

    · A person you want removed.

    · A product whose colour should change.

    · A section of the background.

    · An incorrect object.

    · An area where a new object should be added.

    Follow these steps:

    1. Open the image in the ChatGPT image editor.

    2. Select Select.

    3. Highlight the area you want to edit.

    4. Describe the required change.

    5. Send the instruction.

    6. Review the result.

    7. Select Save when the image is ready.

    The selected area does not always create a perfectly precise boundary. An edit may sometimes affect nearby parts of the image, so review the complete result carefully. (OpenAI Help Center)

    Figure 4. Selecting a specific area of an image for editing

    Explanation:

    The highlighted area shows the specific part of the image selected for editing. In this example, only the coffee cup is selected, and the follow-up instruction asks ChatGPT to remove it while keeping the person, laptop, notebook, plant, background and lighting unchanged. Selecting a specific area helps ChatGPT understand where the correction should be made, although nearby details may sometimes change and should be reviewed carefully.

    Describe the Location Clearly

    When editing a specific area, explain exactly where it appears.

    Examples include:

    · Remove the coffee cup on the left side of the desk.

    · Change the blue chair in the background to grey.

    · Add a small plant beside the laptop.

    · Remove the text near the upper-right corner.

    · Make the wall behind the person white.

    · Replace the object in the person’s right hand with a smartphone.

    Location words help ChatGPT understand which part of the image should change.

    Useful location words include:

    · Left.

    · Right.

    · Upper-left corner.

    · Upper-right corner.

    · Lower-left corner.

    · Lower-right corner.

    · Centre.

    · Foreground.

    · Background.

    · Beside.

    · Behind.

    · Above.

    · Below.

    Explain What Should Stay the Same

    An editing prompt should not only explain what to change. It should also explain which parts must remain unchanged.

    For example:

    Less precise prompt:

    Change the background.

    Better prompt:

    Replace the background with a bright modern office. Keep the person’s appearance, clothing, position, desk, laptop and lighting exactly the same.

    The second prompt reduces the chance of unwanted changes.

    A useful editing formula is:

    Change this + Location + New result + Keep these parts unchanged

    For example:

    Editing prompt:

    Remove the coffee cup from the right side of the desk and replace it with a small green plant. Keep the person, laptop, notebook, background and lighting unchanged.

    Remove an Object

    Use a direct instruction when removing an unwanted object.

    Example prompt:

    Remove the extra chair from the background. Reconstruct the wall and floor naturally, and keep everything else unchanged.

    Another example:

    Example prompt:

    Remove all visible logos and text from the image. Preserve the colours, layout, people and background.

    After the edit, check whether the empty area looks natural.

    Add an Object

    Explain what the new object is, where it should appear and how large it should be.

    Example prompt:

    Add a small closed notebook beside the laptop on the left side of the desk. Make it look naturally placed and match the lighting of the scene.

    Avoid requesting an object without explaining its location.

    Unclear prompt:

    Add a plant.

    Clear prompt:

    Add a small indoor plant in a white pot on the right side of the desk.

    Replace an Object

    You can ask ChatGPT to replace one object with another.

    Example prompt:

    Replace the tablet on the desk with a silver laptop. Keep the same position, angle, size and lighting.

    Another example:

    Example prompt:

    Replace the red travel bag with a blue foldable travel bag. Keep the background, shadows and camera angle unchanged.

    Change a Colour

    Identify the object and the new colour clearly.

    Example prompt:

    Change the person’s shirt from red to dark blue. Keep the face, pose, background and lighting unchanged.

    Another example:

    Example prompt:

    Change the wall colour to light grey while keeping all furniture and decorations unchanged.

    Replace the Background

    Background editing is useful for product images, featured images and social media graphics.

    Example prompt:

    Replace the current background with a clean white photography-studio background. Keep the product’s shape, colour, size and position unchanged. Add a soft natural shadow beneath the product.

    Another example:

    Example prompt:

    Replace the busy room with a simple modern home office. Keep the person and laptop unchanged.

    Make the Background Transparent

    ChatGPT can follow instructions to create or edit an image with a transparent background. (OpenAI Help Center)

    Use a prompt such as:

    Example prompt:

    Remove the entire background and make it transparent. Keep only the product with clean, smooth edges and no text or shadow outside the product.

    Transparent backgrounds are useful for:

    · Website logos.

    · Product images.

    · Icons.

    · Presentation graphics.

    · Social media designs.

    · Canva projects.

    After saving the image, confirm that the file format supports transparency.

    Change the Visual Style

    You can transform an existing image into another visual style.

    For example:

    Editing prompt:

    Convert this realistic photograph into a clean digital illustration. Preserve the same people, composition, objects and background.

    Other possible style changes include:

    · Cartoon illustration.

    · Watercolour painting.

    · Pencil drawing.

    · Three-dimensional design.

    · Children’s-book illustration.

    · Cinematic photography.

    · Minimalist graphic.

    When changing styles, important details may also change. Check faces, hands, objects and text carefully.

    Change the Aspect Ratio

    The image editor may allow you to select another aspect ratio, or you can include the desired shape in your prompt. (OpenAI Help Center)

    For example:

    Editing prompt:

    Change this image to a wide 16:9 landscape format suitable for a WordPress featured image. Keep the main subject fully visible and leave safe space around the edges for cropping.

    You could also request:

    · Square 1:1 format.

    · Portrait 4:5 format.

    · Vertical 9:16 format.

    · Wide 16:9 format.

    Changing the aspect ratio may cause ChatGPT to extend, crop or rearrange parts of the image.

    Review the edges carefully.

    Review Every Edited Version

    After an edit, check:

    · Was the correct area changed?

    · Did any other part change unexpectedly?

    · Does the edited area look natural?

    · Are faces, hands and objects correct?

    · Is the lighting consistent?

    · Are the shadows realistic?

    · Is the image still the correct shape?

    · Is any unwanted text visible?

    · Does the final image remain suitable for its purpose?

    When the result is not correct, describe the problem specifically.

    For example:

    Correction prompt:

    The background is correct, but the laptop changed. Restore the original silver laptop and keep every other part of the current image unchanged.

    Beginner Tip

    Save the original image before making major edits. This gives you a clean version to return to when an edit changes too many details.

    How to Choose the Right Image Size and Aspect Ratio

    The image shape and dimensions should match where you plan to use the image. An image created for a WordPress article may need a different shape from an image designed for Instagram, a website banner or a presentation.

    The relationship between an image’s width and height is called its aspect ratio.

    For example:

    • 1:1 means the width and height are equal.
    • 16:9 means the image is much wider than it is tall.
    • 4:5 means the image is slightly taller than it is wide.
    • 9:16 means the image is designed for a vertical screen.

    Choosing the correct aspect ratio before generating the image can reduce unnecessary cropping later.

    Square Images

    A square image uses a 1:1 aspect ratio.

    Common square dimensions include:

    • 1024 × 1024 pixels.
    • 1080 × 1080 pixels.

    Square images are useful for:

    • Social media posts.
    • Profile images.
    • Product thumbnails.
    • Icons.
    • Simple educational graphics.
    • Online-store collections.

    Example prompt:

    Create a square 1:1 image of a friendly AI assistant helping a beginner use a laptop. Use a clean digital illustration style, a simple background and bright professional colours.

    Keep the main subject near the centre so it remains visible when the image is displayed as a thumbnail.

    Wide Landscape Images

    A wide landscape image is wider than it is tall.

    A common wide format is 16:9.

    Common dimensions include:

    • 1280 × 720 pixels.
    • 1600 × 900 pixels.
    • 1920 × 1080 pixels.

    Wide images are useful for:

    • WordPress featured images.
    • Blog headers.
    • Website banners.
    • YouTube thumbnails.
    • Presentations.
    • Educational diagrams.

    Example prompt:

    Create a wide 16:9 landscape image for a beginner-friendly WordPress article about creating AI images with ChatGPT. Show an adult using a laptop in a bright modern workspace. Leave safe space around the edges for website cropping. Do not include visible text.

    For WordPress featured images, avoid placing important details too close to the edges. Some themes crop featured images differently on desktop computers, tablets and mobile devices.

    Portrait Images

    Portrait images are taller than they are wide.

    A common portrait format is 4:5.

    Common dimensions include:

    • 1080 × 1350 pixels.
    • 1200 × 1500 pixels.

    Portrait images are useful for:

    • Posters.
    • Pinterest graphics.
    • Mobile-friendly social media posts.
    • Book covers.
    • Educational handouts.
    • Product advertisements.

    Example prompt:

    Create a portrait 4:5 educational image showing a beginner learning how to write an AI image prompt. Include a laptop, notebook and simple prompt examples. Use a clean professional illustration style and leave space at the top for a title.

    Vertical Images

    A vertical image commonly uses a 9:16 aspect ratio.

    Common dimensions include:

    • 1080 × 1920 pixels.
    • 720 × 1280 pixels.

    Vertical images are useful for:

    • Instagram Stories.
    • Facebook Stories.
    • TikTok.
    • YouTube Shorts.
    • Mobile advertisements.
    • Smartphone wallpapers.

    Example prompt:

    Create a vertical 9:16 image of a beginner using ChatGPT to create digital artwork on a smartphone. Use a bright modern style and keep the person and phone centred.

    Vertical images should be simple because they are often viewed quickly on small screens.

    Website Banner Images

    Website banners are usually very wide and relatively short.

    Possible dimensions include:

    • 1600 × 600 pixels.
    • 1920 × 700 pixels.
    • 1920 × 800 pixels.

    Banner images are useful for:

    • Homepage headers.
    • Landing pages.
    • Course pages.
    • Promotional sections.
    • Website category pages.

    Example prompt:

    Create a very wide website banner showing artificial intelligence helping people write, study and create images. Use a clean modern style, a blue and white colour scheme and plenty of open space in the centre for a website heading. Do not include any visible text.

    When requesting a banner, explain where the empty space should appear.

    For example:

    • Leave open space on the left.
    • Leave open space in the centre.
    • Place the main subject on the right.
    • Keep the upper area clear for a heading.

    WordPress Featured Images

    A WordPress featured image should clearly represent the article topic and remain understandable when displayed at different sizes.

    A useful prompt may include:

    • The article topic.
    • Wide landscape format.
    • One clear main subject.
    • A simple background.
    • Open space around the edges.
    • No visible text.
    • A professional and beginner-friendly style.

    Example prompt:

    Create a wide landscape featured image for a WordPress article titled “How to Create AI Images with ChatGPT.” Show an older beginner using ChatGPT on a laptop while colourful digital artwork appears on the screen. Use bright natural lighting, a modern home-office background and a clean professional style. Leave safe space around all edges and do not include visible text.

    Avoid including the complete article title inside the generated image. Adding text later in Canva or another design tool usually gives you greater control over spelling, placement and font size.

    Social Media Images

    Different social media platforms may display images differently. Before creating an image, decide

    whether it will appear as:

    • A square post.
    • A portrait post.
    • A vertical story.
    • A video thumbnail.
    • A profile image.
    •  
    • A page banner.

    When one image will be used on several platforms, create separate versions rather than forcing one design to fit every shape.

    For example, you may create:

    1. A wide version for WordPress.
    2. A square version for Facebook.
    3. A portrait version for Pinterest.
    4. A vertical version for Stories.

    This protects the main subject from being cropped.

    Product Images

    Product images often work best as square images because online stores commonly display products in grids.

    A product image should include:

    • One clear product.
    • A simple background.
    • Consistent lighting.
    • Natural shadows.
    • Enough space around the product.
    • No unrelated objects.
    • Accurate product colours and proportions.

    Example prompt:

    Create a square 1:1 studio product image of a blue foldable travel bag on a clean white background. Show the complete product from a slightly elevated front angle. Use soft professional lighting, a natural shadow and no text, logos or additional objects.

    When the image is intended to represent a real product, compare it carefully with the actual product. AI may change the shape, colour, pockets, handles or materials.

    Presentation Images

    Images for presentations should be clear and easy to understand from a distance.

    Wide landscape images usually work well because presentation slides are commonly horizontal.

    Example prompt:

    Create a wide 16:9 educational illustration explaining how a written prompt becomes an AI-generated image. Show three simple stages: written instruction, AI processing and completed image. Use a clean professional design with large visual elements and no small text.

    Avoid crowded details because presentation images may be viewed on a large screen from several metres away.

    Leave Safe Space Around Important Details

    Safe space is the empty area around the main subject.

    Safe space helps prevent important details from being removed when an image is:

    • Cropped by a WordPress theme.
    • Resized for social media.
    • Displayed on a mobile screen.
    • Used as a website banner.
    • Combined with text in Canva.

    Use instructions such as:

    • Leave generous space around the subject.
    • Keep the subject away from the edges.
    • Place all important objects inside the central area.
    • Leave open space above the subject.
    • Leave open space on the left for text.
    • Keep the face and hands away from the crop area.

    Example prompt:

    Create a wide landscape image of a beginner using ChatGPT on a laptop. Place the person slightly to the right and leave clean open space on the left. Keep all important details away from the outer edges.

    Do Not Stretch an Image

    Stretching an image changes its width or height without maintaining the original proportions. This can make people, objects and text look distorted.

    Instead of stretching an image:

    • Crop it carefully.
    • Resize it proportionally.
    • Generate a new version in the correct aspect ratio.
    • Ask ChatGPT to extend the background.
    • Recreate the image for the intended platform.

    Example editing prompt:

    Extend this image into a wide 16:9 landscape format. Preserve the person’s proportions and original appearance. Add natural background space on both sides instead of stretching the image.

    Check the Image After Resizing

    After resizing or cropping an image, check:

    • Is the main subject still fully visible?
    • Are faces and hands intact?
    • Is any text cut off?
    • Are objects distorted?
    • Is the image still sharp?
    • Is there enough space around the edges?
    • Does the image still communicate the intended message?

    This figure can compare square, landscape, portrait and vertical image formats using simple visual examples.

    Figure 5A. Using a detailed prompt to create an image-aspect-ratio infographic

    Explanation

    This figure shows how a detailed image prompt gives ChatGPT instructions about the layout, aspect ratios, dimensions, labels, colours and intended uses. Providing these details helps the AI create a more organized and informative infographic.

    Figure 5B. Common image aspect ratios for websites and social media

    Explanation

    This figure compares four common image aspect ratios. Square images work well for social media posts and product thumbnails, wide landscape images are suitable for WordPress featured images and presentations, portrait images are useful for posters and taller social media posts, and vertical images are designed for Stories and short-form mobile content. Choosing the correct aspect ratio before generating an image helps prevent unwanted cropping and keeps important details visible.

    Beginner Tip

    Choose the image’s purpose and aspect ratio before writing the prompt. Generating the correct shape from the beginning is usually easier than trying to repair the layout later.

    How to Save and Organize AI-Generated Images

    After creating and editing an image, save it carefully so you can find and reuse it later.

    ChatGPT automatically keeps generated images in the Images area. You can open an image and select Save to download it to your computer or mobile device. You may also use Copy or Share when those options are available. (OpenAI Help Center)

    How to Save an Image from ChatGPT

    Follow these steps:

    1. Select the completed image.
    2. Review the image one final time.
    3. Select Save or the download option.
    4. Choose the folder where you want to store it.
    5. Give the image a clear filename.
    6. Confirm that the image opens correctly after downloading.

    Do not rely only on the ChatGPT conversation. Keep a separate copy of every image you plan to publish.

    Use Clear Image Filenames

    Avoid filenames such as:

    • image1.png
    • picture-final.png
    • download.png
    • new-image-2.png

    These names do not explain what the image contains.

    Use descriptive filenames instead.

    For example:

    Poor filename:

    image1.png

    Better filename:

    how-to-create-ai-images-with-chatgpt.png

    A good filename should:

    • Describe the main subject.
    • Use simple words.
    • Use lowercase letters.
    • Separate words with hyphens.
    • Avoid unnecessary numbers and symbols.
    • Match the article or page topic.

    Example Filenames for This Article

    The figures in this guide could use these filenames:

    • open-chatgpt-image-generation-option.png
    • enter-ai-image-prompt-in-chatgpt.png
    • improve-ai-image-with-follow-up-prompt.png
    • select-image-area-for-editing-chatgpt.png
    • common-image-aspect-ratios.png

    The featured image could use:

    how-to-create-ai-images-with-chatgpt-2026.png

    Clear filenames help you identify images before opening them and can also support better website organization.

    Create a Folder for Each Article

    Keep the images for each WordPress article in a separate folder.

    For example:

    Main folder:

    AI Mastery Articles

    Article folder:

    Article 012 – How to Create AI Images with ChatGPT

    Inside that folder, you could create:

    • Article document.
    • Featured image.
    • Figures.
    • Screenshots.
    • Original images.
    • Edited images.
    • WordPress-ready images.

    This prevents images from different articles from becoming mixed together.

    Keep the Original and Final Versions

    Do not replace the original image immediately after editing it

    .

    Save separate versions, such as:

    • ai-image-original.png
    • ai-image-edited.png
    • ai-image-final.png
    • ai-image-wordpress.webp

    Keeping the original version allows you to return to it when an edit creates an unwanted change.

    Use Version Numbers Carefully

    When you create several versions, add simple version numbers.

    For example:

    • featured-image-v1.png
    • featured-image-v2.png
    • featured-image-v3.png
    • featured-image-final.png

    Avoid unclear names such as:

    • final-final.png
    • final-new.png
    • final-corrected-2.png

    A clear numbering system makes comparison easier.

    Save the Successful Prompt

    Store the prompt used to create each important image.

    You may save it:

    • In the article document.
    • In a separate prompt document.
    • In a spreadsheet.
    • In a notes application.
    • Inside the image folder.

    For example:

    Image filename:

    common-image-aspect-ratios.png

    Prompt used:

    Create a clean educational infographic comparing four common image aspect ratios used for websites and social media.

    Saving the prompt helps you recreate or update the image later.

    Record Follow-Up Instructions

    When an image required several corrections, save the most useful follow-up prompts too.

    For example:

    Original prompt:

    Create a wide landscape image of a beginner creating AI images with ChatGPT.

    Follow-up prompt 1:

    Make the room brighter and simplify the background.

    Follow-up prompt 2:

    Move the person to the right and leave open space on the left.

    Follow-up prompt 3:

    Remove all visible text and keep the image in a 16:9 landscape format.

    This creates a useful record of how the final image was produced.

    Choose the Right File Format

    Common image file formats include:

    • PNG.
    • JPEG or JPG.
    • WebP.

    Each format has different advantages.

    PNG

    PNG is useful for:

    • Images with transparent backgrounds.
    • Logos.
    • Icons.
    • Screenshots.
    • Infographics.
    • Images containing sharp lines or text.

    PNG files may be larger than JPEG or WebP files.

    JPEG or JPG

    JPEG is useful for:

    • Photographs.
    • Realistic images.
    • Blog images.
    • Social media graphics.
    • Images without transparency.

    JPEG files are usually smaller than PNG files, but repeated editing and saving may reduce image quality.

    WebP

    WebP is useful for:

    • WordPress images.
    • Website featured images.
    • Blog figures.
    • Product images.
    • Faster-loading webpages.

    WebP often provides good image quality with a smaller file size.

    For your AI Mastery website, WebP is usually a practical choice for finished WordPress images, while PNG can be kept as the original high-quality version.

    Keep a High-Quality Original

    A useful workflow is:

    1. Save the original generated image as PNG.
    2. Edit or resize the image when necessary.
    3. Create a smaller WebP version for WordPress.
    4. Keep both versions in the article folder.

    For example:

    • common-image-aspect-ratios-original.png
    • common-image-aspect-ratios-wordpress.webp

    This gives you a high-quality backup and a website-ready version.

    Check the Image Before Closing ChatGPT

    Before leaving the conversation, check:

    • Is the correct image saved?
    • Is it the final version?
    • Does it have the correct aspect ratio?
    • Is all visible text spelled correctly?
    • Are there any unwanted objects?
    • Is the image clear when opened at full size?
    • Does the filename describe the image?
    • Did you save the prompt?

    Figure 6A. Using a detailed prompt to create an image-saving workflow

    Explanation:

    This figure shows the detailed prompt used to create an infographic about saving and organizing AI-generated images. It demonstrates how instructions about the workflow, filename, folder structure and visual design guide ChatGPT when generating an educational figure.

    Figure 6B. Saving and organizing an AI-generated image

    Explanation:

    This figure shows a simple three-step image-management process. First, the completed image is saved from ChatGPT. Next, it is given a clear, descriptive filename that identifies the article topic. Finally, the image is stored in the correct article folder together with its original version, edited versions, WordPress-ready copy and saved prompts. Following this system makes images easier to locate, update and reuse later.

    Beginner Tip

    Save the image, prompt and edited versions together. A well-organized image folder can save considerable time when you update an article, replace a figure or reuse a design.

    How to Prepare AI-Generated Images for WordPress

    Before uploading an AI-generated image to WordPress, prepare it carefully. A properly prepared image loads faster, looks clearer and is easier for search engines and visitors to understand.

    The preparation process includes:

    • Choosing the correct image.
    • Cropping it to the right shape.
    • Reducing the file size.
    • Using a descriptive filename.
    • Adding alternative text.
    • Adding a title, caption and description.
    • Checking the image on desktop and mobile screens.

    Choose the Best Version

    Review all generated versions before selecting the final image.

    Choose the version that:

    • Clearly represents the article topic.
    • Has the correct image shape.
    • Looks professional.
    • Contains no spelling errors.
    • Has no unwanted text or objects.
    • Shows faces, hands and products correctly.
    • Leaves enough space around important subjects.
    • Matches the visual style of your website.

    Do not upload every generated version to WordPress. Keep the unused versions in your article folder and upload only the final image.

    Crop the Image Correctly

    Cropping removes unnecessary areas and helps the image fit its intended position.

    Before cropping, decide whether the image will be used as:

    • A featured image.
    • An article figure.
    • A website banner.
    • A thumbnail.
    • A social media image.

    For a wide WordPress featured image, a 16:9 landscape format often works well.

    For example:

    • 1600 × 900 pixels.
    • 1280 × 720 pixels.
    • 1200 × 675 pixels.

    Keep important faces, objects and text away from the edges because WordPress themes may crop images differently on smaller screens.

    Resize Large Images

    Very large images can slow down a webpage.

    You usually do not need to upload an extremely large image when it will appear at a much smaller size inside the article.

    For example, an image measuring 4000 × 3000 pixels may be unnecessarily large for a blog post.

    A practical workflow is:

    1. Keep the large original image in your article folder.
    2. Create a smaller copy for WordPress.
    3. Check that the smaller version still looks clear.
    4. Upload only the website-ready version.

    Do not repeatedly resize the same file because repeated editing may reduce image quality.

    Choose a Suitable File Format

    Common formats for WordPress images include:

    • WebP.
    • JPEG or JPG.
    • PNG.

    WebP is often suitable for:

    • Featured images.
    • Article figures.
    • Product images.
    • Website banners.
    • General blog images.

    JPEG is suitable for:

    • Realistic photographs.
    • Images with many colours.
    • Background images.
    • Social media graphics.

    PNG is suitable for:

    • Screenshots.
    • Infographics.
    • Logos.
    • Images with transparent backgrounds.
    • Graphics containing sharp lines.

    For the AI Mastery website, keep the original image as PNG when necessary and create a smaller WebP copy for WordPress.

    Reduce the File Size

    A smaller file can help the article load more quickly.

    Reduce the file size without making the image blurry.

    Check:

    • Is the image still sharp?
    • Is the text readable?
    • Are the colours accurate?
    • Are faces and objects clear?
    • Are there visible compression marks?
    • Is the file size reasonable for a webpage?

    Infographics may require a slightly larger file because small text and icons must remain readable.

    Use a Descriptive Filename

    Rename the image before uploading it to WordPress.

    Avoid filenames such as:

    • image.png
    • download-1.png
    • final-picture.png
    • chatgpt-image-2026-07-21.png

    Use a filename that describes the image.

    For example:

    prepare-ai-generated-images-for-wordpress.webp

    A good filename should:

    • Use lowercase letters.
    • Separate words with hyphens.
    • Describe the image clearly.
    • Avoid unnecessary numbers.
    • Avoid spaces and unusual symbols.
    • Match the article topic.

    Add Alternative Text

    Alternative text, commonly called alt text, describes the image for people who use screen readers. It may also appear when the image cannot load.

    Alt text should explain the image clearly and naturally.

    Poor alt text:

    AI image.

    Better alt text:

    Beginner preparing an AI-generated image for upload to a WordPress article.

    Do not fill the alt text with repeated keywords.

    Describe what the image shows and how it relates to the article.

    Write an Image Title

    The image title helps you identify the file inside the WordPress Media Library.

    For example:

    Preparing AI-Generated Images for WordPress

    The title can be similar to the filename but should be written normally with spaces and capital letters.

    Add a Caption When Needed

    A caption appears below the image inside the article.

    Captions are especially useful for:

    • Figures.
    • Screenshots.
    • Educational diagrams.
    • Infographics.
    • Before-and-after comparisons.
    • Step-by-step illustrations.

    For example:

    Figure 7: Preparing an AI-generated image for WordPress

    A decorative featured image usually does not require a visible caption.

    Add an Image Description

    The description can provide additional information about the image.

    For example:

    Description:

    Educational infographic showing the steps for preparing an AI-generated image before uploading it to WordPress, including resizing, renaming, adding metadata and previewing the final article.

    The description is mainly useful for media organisation and detailed records.

    Example WordPress Image Metadata

    For an image showing the WordPress preparation process, you could use:

    Filename:

    prepare-ai-generated-images-for-wordpress.webp

    Alt text:

    Beginner preparing an AI-generated image for upload to a WordPress article.

    Title:

    Preparing AI-Generated Images for WordPress

    Caption:

    Figure 7: Preparing an AI-generated image for WordPress

    Description:

    Educational infographic showing how to resize, rename, describe and upload an AI-generated image to WordPress.

    Upload the Image to WordPress

    Follow these steps:

    1. Open the WordPress post editor.
    2. Place the cursor where the image should appear.
    3. Add an Image block.
    4. Select Upload or choose the image from the Media Library.
    5. Select the prepared image file.
    6. Add the alt text.
    7. Confirm the title and caption.
    8. Choose the appropriate image size.
    9. Check the alignment.
    10. Preview the article.

    When adding a figure, place the caption directly below the image and the explanation paragraph directly below the caption.

    Set a Featured Image

    A featured image represents the article on:

    • The blog page.
    • Search results within the website.
    • Related-post sections.
    • Social media previews.
    • Homepage article listings.

    To set it:

    1. Open the post settings.
    2. Find the Featured image section.
    3. Select Set featured image.
    4. Upload or choose the prepared image.
    5. Add the image metadata.
    6. Save the selection.
    7. Preview the post.

    Choose a featured image that clearly represents the article topic even when displayed as a small thumbnail.

    Check the Image Alignment

    Article figures are usually easiest to view when centred.

    Check that:

    • The image is not too small.
    • The image does not extend outside the article area.
    • The caption is directly below it.
    • The caption is centred.
    • The explanation follows the caption.
    • There is enough spacing above and below the figure.

    Avoid placing an image in the middle of a sentence or list.

    Preview the Image on Different Screens

    Before publishing, preview the article on:

    • A desktop computer.
    • A tablet.
    • A mobile phone.

    Check whether:

    • The complete image is visible.
    • The text inside an infographic is readable.
    • The image is not stretched.
    • The subject is not cropped incorrectly.
    • The caption remains connected to the image.
    • The page loads properly.
    • The image supports the surrounding text.

    Check Every Image Before Publishing

    Use this checklist:

    • Is the final version uploaded?
    • Is the filename descriptive?
    • Is the file format suitable?
    • Is the image size appropriate?
    • Is the alt text complete?
    • Is the title correct?
    • Is the caption included when needed?
    • Is the description added?
    • Is the image positioned correctly?
    • Is the explanation below the caption?
    • Does the image look correct on mobile?
    • Are all visible words spelled correctly?

    Figure 7. Preparing an AI-Generated Image for WordPress

    Explanation

    This figure shows the four main steps for preparing an AI-generated image for WordPress. The image is first resized and cropped to the correct shape. It is then given a descriptive filename and converted to a suitable website format. Next, alt text, a title, a caption and a description are added. Finally, the image is uploaded and previewed on desktop and mobile screens to confirm that it displays correctly.

    Beginner Tip

    Prepare the filename, dimensions and image metadata before uploading the file. Completing these steps in advance makes WordPress publishing faster and keeps the Media Library organised.

    Common AI Image Problems and How to Fix Them

    AI-generated images can look impressive, but they are not always perfect. The first version may contain incorrect objects, unusual hands, unreadable text, poor lighting or a composition that does not suit your website.

    The best approach is to identify the exact problem and give ChatGPT a clear correction prompt.

    Incorrect Hands or Fingers

    AI-generated hands may sometimes contain:

    • Extra fingers.
    • Missing fingers.
    • Unnatural positions.
    • Objects held incorrectly.
    • Hands that do not match the person’s pose.

    Use a prompt such as:

    Correction prompt:

    Correct the person’s hands so they look natural and anatomically accurate. Show five fingers on each visible hand. Keep the person’s face, clothing, position, laptop, background and lighting unchanged.

    After the correction, zoom in and check both hands carefully.

    Distorted Faces

    A face may appear uneven, blurred or unnatural.

    Use a specific correction prompt:

    Correction prompt:

    Correct the person’s facial features so the face looks natural, symmetrical and realistic. Keep the same age, expression, hairstyle, clothing, pose and background.

    Check:

    • Eyes.
    • Teeth.
    • Ears.
    • Eyeglasses.
    • Skin texture.
    • Facial expression.

    When several people appear in the image, inspect every face separately.

    Misspelled or Unreadable Text

    AI-generated images may contain:

    • Misspelled words.
    • Random letters.
    • Distorted numbers.
    • Incorrect logos.
    • Inconsistent fonts.

    Use this prompt when text is not necessary:

    Correction prompt:

    Remove all visible text, letters, numbers, labels and logos from the image. Keep the people, objects, colours, background and layout unchanged.

    When text is important, it is usually better to generate the image without text and add the wording later in Canva or another design tool.

    Missing Objects

    Sometimes ChatGPT may leave out an object requested in the prompt.

    For example, you may request a laptop, notebook and coffee cup, but the notebook may be missing.

    Use a correction such as:

    Correction prompt:

    Add a closed notebook beside the laptop on the left side of the desk. Match the size, perspective, shadows and lighting of the existing scene. Keep everything else unchanged.

    Describe:

    • What object is missing.
    • Where it should appear.
    • Its approximate size.
    • Its colour.
    • Which parts should remain unchanged.

    Extra Objects

    ChatGPT may add objects that were not requested.

    For example:

    • An extra laptop.
    • Two coffee cups.
    • An unnecessary chair.
    • Random decorations.
    • Additional people.

    Use a prompt such as:

    Correction prompt:

    Remove the extra laptop from the right side of the desk. Reconstruct the desk surface naturally and keep all other objects unchanged.

    Check the revised image to make sure the removed area looks natural.

    Incorrect Number of People or Objects

    The image may include too many or too few people.

    Use an exact instruction:

    Correction prompt:

    Show exactly three adults sitting around the table. Remove any additional people and keep the office, table, laptops and lighting unchanged.

    Words such as exactly, only and no additional can make the instruction clearer.

    Unwanted Background Details

    A busy background can distract from the main subject.

    You may notice:

    • Too many decorations.
    • Random shelves.
    • Unnecessary signs.
    • Crowded furniture.
    • Objects that compete with the main subject.

    Use this correction:

    Correction prompt:

    Simplify the background by removing unnecessary decorations and furniture. Keep a clean modern office with one plant and one bookshelf. Preserve the person, desk, laptop and lighting.

    A simple background often works better for WordPress featured images.

    Poor Lighting

    An image may appear too dark, too bright or unevenly lit.

    Use a prompt such as:

    Correction prompt:

    Brighten the image using soft natural daylight. Reduce dark shadows on the person’s face and desk. Keep the colours, objects and composition unchanged.

    You can also request:

    • Warm morning light.
    • Soft studio lighting.
    • Bright daylight.
    • Reduced shadows.
    • More balanced exposure.
    • Less glare on screens.

    Incorrect Colours

    The colours may not match your website, product or design plan.

    Use a direct instruction:

    Correction prompt:

    Change the colour scheme to blue, white and light grey. Keep the person’s natural skin tone and preserve the existing composition and lighting.

    When editing a real product image, compare the generated colour with the actual product.

    A Cluttered Composition

    An image may include too many subjects or objects.

    A cluttered image can be difficult to understand when displayed as a small thumbnail.

    Use a prompt such as:

    Correction prompt:

    Simplify the composition. Keep only the person, laptop, notebook and small plant. Remove all other objects and leave more open space around the main subject.

    One clear focal point usually produces a stronger featured image.

    Important Details Too Close to the Edges

    WordPress themes and social media platforms may crop the edges of an image.

    Use this prompt:

    Correction prompt:

    Move the person and all important objects toward the centre. Leave generous empty space around all four edges for safe cropping. Keep the same background, lighting and wide 16:9 format.

    After the edit, check the image on desktop and mobile previews.

    The Wrong Aspect Ratio

    ChatGPT may produce an image shape that does not match your intended use.

    Use a correction such as:

    Correction prompt:

    Recreate this image in a wide 16:9 landscape format at approximately 1600 × 900 pixels. Keep the main subject fully visible and extend the background naturally without stretching the person or objects.

    Do not stretch a square image to make it wide. Generate or extend the image in the correct format instead.

    Blurry or Low-Detail Areas

    Some parts of the image may look soft or unclear.

    Use a prompt such as:

    Correction prompt:

    Improve the clarity and detail of the person, laptop and desk. Keep the image realistic and natural. Do not over-sharpen the background.

    Check the image at full size before uploading it to WordPress.

    Inconsistent Shadows or Reflections

    Added or replaced objects may not match the lighting of the scene.

    Use this correction:

    Correction prompt:

    Correct the shadows and reflections so they match the direction and softness of the existing light. Keep the objects, colours and composition unchanged.

    Natural shadows help edited objects look like part of the original image.

    An Edit Changed Too Much

    Sometimes ChatGPT may correct one problem but change other parts of the image.

    For example, it may remove a coffee cup but also change the person’s clothing or laptop.

    Use a corrective follow-up prompt:

    Correction prompt:

    Restore the original person, clothing, laptop and background. Keep only the requested removal of the coffee cup. Do not change any other part of the image.

    Clearly state which change should remain and which parts should return to the previous version.

    When to Start Again

    Continuing to edit an image is not always the best choice.

    Consider starting again when:

    • The main subject is completely wrong.
    • Several faces or hands are distorted.
    • The composition is too crowded.
    • The image style does not match your purpose.
    • Repeated edits create new problems.
    • The aspect ratio is unsuitable.
    • Important product details are inaccurate.

    A new prompt may produce a cleaner result faster than many corrections.

    A Simple Image-Correction Formula

    Use this formula:

    Identify the problem + Describe the correction + Explain the location + State what must remain unchanged

    For example:

    Correction prompt:

    Remove the second coffee cup from the right side of the desk. Reconstruct the desk surface naturally. Keep the person, laptop, notebook, plant, background, lighting and wide landscape format unchanged.

    This formula helps ChatGPT understand both the requested change and the parts that should be preserved.

    Image-Review Checklist

    Before accepting the final image, check:

    • Are all faces natural?
    • Are hands and fingers correct?
    • Are objects complete?
    • Is the number of people correct?
    • Is all visible text correctly spelled?
    • Is the background simple and appropriate?
    • Are the colours suitable?
    • Is the lighting balanced?
    • Are shadows and reflections natural?
    • Is the image sharp?
    • Is the aspect ratio correct?
    • Are important details away from the edges?
    • Does the image support the article topic?
    • Did any part change unexpectedly?

    Figure 8. Common AI image problems and how to correct them

    Explanation

    This figure compares six common AI image problems with improved versions. It shows how clear correction prompts can fix unnatural hands, unreadable text, extra objects, cluttered backgrounds, poor lighting and unsafe subject placement. Reviewing these details before publishing helps ensure that the final image looks clear, professional and suitable for WordPress.

    Beginner Tip

    Correct one or two problems at a time. Specific follow-up instructions are usually more effective than asking ChatGPT to improve the entire image without explaining what is wrong.

    How to Use AI-Generated Images Responsibly

    AI-generated images can support articles, presentations, social media posts, advertisements and creative projects. However, you should review every image carefully before publishing or sharing it.

    Responsible use means being honest about how the image was created, avoiding harmful or misleading content and checking that the image does not copy protected brands, characters or designs too closely.

    Review Every Image Before Publishing

    Do not publish an AI-generated image without checking it carefully.

    Look for:

    • Incorrect or misleading details.
    • Unnatural faces or hands.
    • Misspelled text.
    • Unwanted logos or brand names.
    • Offensive or inappropriate content.
    • Objects that do not exist in real life.
    • People shown in misleading situations.
    • Product details that do not match the real product.

    Even when an image looks professional, it may contain small errors that are easy to miss.

    Do Not Present Fictional Images as Real Events

    An AI-generated image should not be used to falsely suggest that a real event happened.

    For example, avoid creating an image that appears to show:

    • A real person attending an event they never attended.
    • A company releasing a product that does not exist.
    • A natural disaster in a location where it did not occur.
    • A politician making a statement they never made.
    • A customer using a product when no such photograph exists.

    When an image could be mistaken for a real photograph, clearly explain that it is AI-generated or an illustration.

    Avoid Impersonating Real People

    Do not create images that falsely represent real people, especially when the image could damage their reputation or mislead viewers.

    Be careful when creating images involving:

    • Public figures.
    • Business owners.
    • Employees.
    • Customers.
    • Teachers.
    • Medical professionals.
    • Family members.
    • Children.

    For educational articles, it is usually safer to create fictional people rather than copying the appearance of a real individual.

    Do Not Copy Protected Characters or Brands

    Avoid asking ChatGPT to reproduce:

    • Famous cartoon characters.
    • Movie characters.
    • Company mascots.
    • Product packaging.
    • Registered logos.
    • Distinctive brand designs.
    • Artwork created by another person.

    Instead, describe the general visual idea you need.

    Less suitable prompt:

    Create a character that looks exactly like a famous animated superhero.

    Better prompt:

    Create an original friendly superhero character wearing a blue and silver suit. Use a colourful children’s-book illustration style. Do not copy any existing character, logo or costume.

    This helps create a more original image.

    Check Logos and Brand Names

    AI-generated images may accidentally include symbols or text that resemble real brands.

    Before publishing, check:

    • Clothing.
    • Laptop screens.
    • Product packaging.
    • Store signs.
    • Vehicles.
    • Background posters.
    • Watermarks.
    • Small labels.

    When a logo is not necessary, use this instruction:

    Correction prompt:

    Remove all logos, trademarks, brand names and watermarks. Keep the objects, colours, composition and lighting unchanged.

    Be Careful with Product Images

    AI-generated product images may not match the real product accurately.

    The AI may change:

    • Colour.
    • Shape.
    • Size.
    • Materials.
    • Handles.
    • Buttons.
    • Pockets.
    • Accessories.
    • Packaging.

    Do not use an AI-generated image to make customers believe it is an exact photograph of a real product unless the image accurately represents what they will receive.

    For an online store, use real product photographs whenever exact appearance matters.

    AI-generated images may still be useful for:

    • Background concepts.
    • Lifestyle scenes.
    • Advertising ideas.
    • Mood boards.
    • Early design concepts.
    • Decorative article images.

    Protect Personal Information

    Do not include private information inside an image prompt.

    Avoid entering:

    • Home addresses.
    • Personal telephone numbers.
    • Email addresses.
    • Identification numbers.
    • Banking information.
    • Passwords.
    • Medical records.
    • Private family details.
    • Confidential business documents.

    When editing a screenshot, remove personal information before uploading it.

    Be Careful When Using Images of Children

    Images involving children require additional care.

    Avoid creating images that:

    • Place children in unsafe situations.
    • Show personal identifying information.
    • Present children in inappropriate clothing or settings.
    • Suggest a false real-world event.
    • Copy the appearance of a real child without permission.

    For general educational content, use clearly fictional and age-appropriate illustrations.

    Avoid Harmful or Deceptive Content

    Do not use AI image generation to create:

    • Fraudulent documents.
    • Fake evidence.
    • False news images.
    • Misleading product claims.
    • Medical misinformation.
    • Dangerous instructions.
    • Harassment or humiliation.
    • Violent or hateful material.
    • Images intended to deceive vulnerable people.

    AI-generated images should help explain, educate or create—not mislead or harm.

    Explain When an Image Is AI-Generated

    A disclosure may be helpful when viewers could reasonably believe the image is a real photograph.

    Possible disclosure wording includes:

    • AI-generated illustration.
    • Image created with artificial intelligence.
    • Concept image created using ChatGPT.
    • AI-generated visual for educational purposes.
    • Illustrative image; not a real photograph.

    You may place the disclosure:

    • In the caption.
    • In the image description.
    • In the article text.
    • In the social media post.
    • Near the product or promotional image.

    Keep Records of Important Images

    For important website or business images, save:

    • The original prompt.
    • Follow-up prompts.
    • The original image.
    • The edited version.
    • The final published version.
    • The publication date.
    • The page where the image was used.

    Keeping these records makes it easier to explain how the image was created and update it later.

    Responsible-Use Checklist

    Before publishing an AI-generated image, ask:

    • Does the image accurately support the article?
    • Could viewers mistake it for a real event?
    • Does it contain a real person’s likeness?
    • Are there any visible logos or trademarks?
    • Does it copy a protected character or design?
    • Is the product shown accurately?
    • Does it contain private information?
    • Is it suitable for all intended viewers?
    • Could it mislead or harm someone?
    • Should the image be identified as AI-generated?
    • Have I saved the prompt and final image?

    Figure 9. Responsible Use of AI-Generated Images

    Explanation

    This figure summarizes six important responsibilities when working with AI-generated images. It shows the importance of reviewing every detail, avoiding misleading content, respecting privacy, removing unwanted brands, checking product accuracy and saving the prompts and image versions.

    Following these steps helps ensure that published images are clear, honest and appropriate for their intended audience.

    Beginner Tip

    When an AI-generated image could be mistaken for a real photograph, add a simple disclosure such as “AI-generated illustration.”

    Practical Uses of ChatGPT Image Generation

    ChatGPT image generation can support many personal, educational and business projects. The most useful results come from choosing a clear purpose before writing the prompt.

    WordPress Featured Images

    A featured image represents an article on the homepage, blog page and social media previews.

    You can use ChatGPT to create:

    • Article cover images.
    • Tutorial illustrations.
    • Technology-themed visuals.
    • Category banners.
    • Educational diagrams.

    Example prompt:

    Create a wide 16:9 featured image for a beginner-friendly WordPress article about using artificial intelligence. Show an adult learning on a laptop in a bright modern workspace.

    Use a clean professional style, soft blue accents and no visible text. Leave safe space around the edges for cropping.

    A featured image should remain clear when displayed as a small thumbnail.

    Article Figures and Infographics

    Figures can explain information that may be difficult to understand through text alone.

    You can create:

    • Step-by-step diagrams.
    • Before-and-after comparisons.
    • Process illustrations.
    • Feature comparisons.
    • Checklists.
    • Educational infographics.

    Example prompt:

    Create a clean educational infographic showing the four steps of creating an AI image: write a prompt, generate the image, review the result and request corrections. Use simple icons, arrows and a wide landscape layout.

    Keep infographic wording short so the text remains readable.

    Social Media Graphics

    ChatGPT can create images for:

    • Facebook posts.
    • Instagram posts.
    • Pinterest graphics.
    • LinkedIn updates.
    • Stories.
    • Short-video covers.

    Choose the image shape before generating it.

    Example prompt:

    Create a square 1:1 social media image showing a beginner learning how to create AI images. Use a bright modern illustration style, a simple background and clear space at the top for a short title. Do not include visible text.

    Add the final text later in Canva when exact spelling and placement are important.

    Online-Store Product Backgrounds

    AI image generation can help create:

    • Clean studio backgrounds.
    • Lifestyle settings.
    • Seasonal backgrounds.
    • Advertising concepts.
    • Product-category banners.

    Example prompt:

    Create a realistic lifestyle background for a blue foldable travel bag. Show a bright airport waiting area with soft natural lighting and enough open space for the product. Do not include people, logos or visible text.

    For real products, use an accurate product photograph and edit only the background whenever possible.

    Presentations

    Images can make presentations easier to understand.

    ChatGPT can create:

    • Slide illustrations.
    • Process diagrams.
    • Concept images.
    • Simple visual comparisons.
    • Background graphics.

    Example prompt:

    Create a wide 16:9 educational illustration for a presentation explaining how artificial intelligence converts a written prompt into an image. Show three clear stages connected by arrows: written instruction, AI processing and completed artwork.

    Use large visual elements and no small text.

    Keep presentation images simple because viewers may see them from a distance.

    Educational Materials

    Teachers, parents and students can create:

    • Classroom illustrations.
    • Learning diagrams.
    • Flashcards.
    • Activity-sheet graphics.
    • Historical scene concepts.
    • Science illustrations.

    Example prompt:

    Create a colourful children’s-book illustration showing a friendly robot teaching four students about artificial intelligence in a bright classroom. Use an age-appropriate, welcoming style and do not include visible text.

    Always review educational images for accuracy before using them.

    Business Marketing

    Businesses can use AI-generated images for:

    • Marketing concepts.
    • Website banners.
    • Email graphics.
    • Advertisement drafts.
    • Service illustrations.
    • Promotional campaigns.

    Example prompt:

    Create a professional website banner for a small digital-marketing business. Show a business owner reviewing website analytics on a laptop. Use a modern office setting, blue and white colours, soft natural lighting and open space on the left for a heading.

    AI-generated marketing images should not make false claims about products, customers or results.

    Blog and Newsletter Graphics

    Images can make newsletters and blog posts more attractive.

    You may create:

    • Section illustrations.
    • Header graphics.
    • Topic summaries.
    • Seasonal visuals.
    • Call-to-action images.

    Example prompt:

    Create a clean wide illustration for an email newsletter about beginner AI tools. Show simple icons representing writing, images, video and productivity around a laptop.

    Use a professional blue and light-grey colour scheme and no visible text.

    Logo and Branding Concepts

    ChatGPT can help explore early branding ideas.

    You can create concepts for:

    • Logo shapes.
    • Icons.
    • Colour schemes.
    • Brand symbols.
    • Website mascots.

    Example prompt:

    Create three original logo concepts for a beginner AI education website. Use a simple brain-and-circuit idea, blue and silver colours and a modern minimalist style. Do not copy existing brands or include complicated details.

    AI-generated logo concepts should be checked and redesigned carefully before being used as an official business logo.

    Personal Creative Projects

    You can also create images for:

    • Greeting cards.
    • Invitations.
    • Wallpapers.
    • Family activity sheets.
    • Story illustrations.
    • Hobby projects.

    Example prompt:

    Create a peaceful digital illustration of a family having a picnic beside a lake during sunset. Use warm colours, a friendly atmosphere and a wide landscape format.

    Avoid using the exact appearance of real people unless you have permission and understand how the image will be used.

    Create Several Versions for Different Uses

    One image shape may not work everywhere.

    For the same project, you may create:

    1. A wide version for WordPress.
    2. A square version for social media.
    3. A portrait version for Pinterest.
    4. A vertical version for Stories.

    Example follow-up prompt:

    Create a square version of this image for social media. Keep the same subject, colours and visual style, but rearrange the composition so all important details remain visible.

    Choose Images That Support the Message

    An image should help readers understand the topic.

    Before using an image, ask:

    • Does it match the article or campaign?
    • Is the main subject clear?
    • Is the style suitable for the audience?
    • Is the image shape correct?
    • Does it contain unnecessary details?
    • Could it mislead viewers?
    • Does it look professional at a small size?

    Beginner Tip

    Start with one practical purpose, such as a WordPress featured image or article figure. After learning the basic process, you can use the same prompting method for social media, presentations and business projects.

    Benefits of ChatGPT Image Generation

    ChatGPT image generation gives beginners a simple way to create visual content without needing advanced drawing or graphic-design skills.

    It can help individuals, students, bloggers and small-business owners turn written ideas into images more quickly.

    Easy for Beginners to Use

    You can create an image by describing what you want in everyday language.

    For example:

    Prompt:

    Create a realistic image of a beginner learning artificial intelligence on a laptop in a bright home office.

    You do not need to understand complicated design software before starting.

    You can begin with a simple prompt and improve the image through follow-up instructions.

    Saves Time

    Searching for a suitable stock image can take time.

    You may need to:

    • Visit several websites.
    • Compare many images.
    • Check licence conditions.
    • Crop the selected image.
    • Edit the colours.
    • Remove unwanted objects.
    • Resize it for your website.

    With ChatGPT, you can describe the image you need and generate a customised result in one conversation.

    This can be especially useful when creating several figures for one article.

    Creates Images for a Specific Purpose

    A stock photograph may not match your exact topic.

    ChatGPT allows you to describe:

    • The subject.
    • The setting.
    • The objects.
    • The colours.
    • The lighting.
    • The style.
    • The mood.
    • The aspect ratio.
    • The intended use.

    For example:

    Prompt:

    Create a wide educational infographic showing a beginner writing an AI image prompt, generating an image, reviewing the result and requesting a correction. Use a clean white background, soft blue accents and a professional beginner-friendly style.

    This produces an image designed specifically for the article.

    Supports Fast Revisions

    You can ask ChatGPT to revise an image without beginning a completely new project.

    For example:

    • Make the background brighter.
    • Remove the extra object.
    • Change the colour scheme.
    • Move the person to the right.
    • Add more safe space.
    • Change the format to 16:9.
    • Remove all visible text.
    • Use a more realistic style.

    Follow-up prompts make it easier to test different versions.

    Offers Many Visual Styles

    ChatGPT can create different types of visual content.

    Examples include:

    • Realistic photography.
    • Digital illustration.
    • Cartoon artwork.
    • Watercolour painting.
    • Minimalist graphics.
    • Three-dimensional designs.
    • Educational infographics.
    • Children’s-book illustrations.
    • Product concepts.
    • Presentation visuals.

    This allows you to choose a style that matches your website, audience or project.

    Helps Explain Difficult Ideas

    Some topics are easier to understand with a diagram or visual example.

    ChatGPT can help create:

    • Process diagrams.
    • Before-and-after comparisons.
    • Step-by-step illustrations.
    • Aspect-ratio comparisons.
    • Educational charts.
    • Feature summaries.
    • Visual checklists.

    For example, a figure comparing square, landscape, portrait and vertical formats can help beginners understand aspect ratios more quickly than text alone.

    Supports Consistent Article Design

    You can ask ChatGPT to use the same visual style across several figures.

    For example:

    Consistency instruction:

    Use the same clean white background, soft blue accents, realistic illustrations and beginner-friendly educational style as the other figures in this article.

    Repeating the same design instructions can help the article look more organised and professional.

    However, you should still review every figure because small differences may appear.

    Useful for People with Limited Design Experience

    A beginner may know what an image should communicate but may not know how to draw it or build it in design software.

    ChatGPT can help convert the idea into a visual starting point.

    You can then use Canva or another tool to:

    • Add exact text.
    • Adjust spacing.
    • Add your logo.
    • Match your website colours.
    • Resize the image.
    • Correct small layout problems.

    ChatGPT can create the main visual, while another tool can provide final design control.

    Helps Generate New Ideas

    You can ask ChatGPT to create several visual concepts for the same topic.

    For example:

    Prompt:

    Suggest four different visual concepts for a WordPress featured image about creating AI images with ChatGPT. Do not generate the images yet. Explain the subject, setting, style and layout for each concept.

    After reviewing the ideas, choose the strongest concept and ask ChatGPT to generate it.

    This can help when you are unsure how the article image should look.

    Can Create Several Formats

    The same concept can be adapted for different platforms

    For example:

    • Wide landscape for WordPress.
    • Square for Facebook.
    • Portrait for Pinterest.
    • Vertical for Stories.
    • Banner format for a homepage.

    You can ask ChatGPT to maintain the same subject and visual style while changing the layout.

    Follow-up prompt:

    Create a square version of this design for social media. Keep the same person, colours and visual style, but rearrange the objects so nothing important is cropped.

    Can Reduce Dependence on Stock Images

    Stock-image websites are still useful, especially when you need real photography.

    However, ChatGPT can help when:

    • The exact scene is difficult to find.
    • You need an original educational diagram.
    • You want a specific combination of objects.
    • You need several related visuals.
    • You need a customised background.
    • You want a concept image rather than a real photograph.

    AI-generated images should still be reviewed for accuracy and responsible use.

    Supports Personal and Business Projects

    ChatGPT image generation can support:

    • WordPress websites.
    • Online stores.
    • Social media pages.
    • Presentations.
    • Newsletters.
    • Training materials.
    • School projects.
    • Marketing campaigns.
    • Personal creative work.

    The same prompting skills can be used across many different projects.

    The Main Benefits at a Glance

    The main benefits include:

    • Simple text-based instructions.
    • Faster visual creation.
    • Custom images for specific topics.
    • Easy follow-up revisions.
    • Many available visual styles.
    • Support for different image formats.
    • Useful educational illustrations.
    • Consistent article figures.
    • New creative ideas.
    • Less dependence on stock images.

    Human Review Is Still Necessary

    ChatGPT can assist with image creation, but it should not replace human judgement.

    You must still check:

    • Accuracy.
    • Spelling.
    • Faces and hands.
    • Product details.
    • Logos and trademarks.
    • Privacy.
    • Image quality.
    • Suitability for the audience.
    • Whether the image could mislead viewers.

    Limitations of ChatGPT Image Generation

    ChatGPT image generation can create useful and attractive visuals, but it also has limitations.

    Understanding these limitations helps you set realistic expectations and review every image before publishing it.

    The First Result May Not Match Your Idea

    ChatGPT may interpret your prompt differently from what you intended.

    For example, you may request:

    • A modern home office.
    • One person using a laptop.
    • A blue and white colour scheme.
    • A clean background.

    The generated image may include extra furniture, different colours or an unexpected camera angle.

    How to reduce this limitation

    Write a clearer prompt that explains the subject, setting, important details, style, lighting and image shape.

    You can also use follow-up prompts to correct the result.

    Correction prompt:

    Keep one person using a laptop at a clean desk. Remove unnecessary furniture, use a blue and white colour scheme and keep the background simple.

    Images May Contain Incorrect Hands

    AI-generated hands may show:

    • Extra fingers.
    • Missing fingers.
    • Unnatural positions.
    • Incorrect object placement.
    • Unusual shapes.

    This problem is more likely when several people or complicated hand positions appear in the same image.

    How to reduce this limitation

    Use simple poses and avoid showing too many hands.

    You can also request:

    Correction prompt:

    Correct both hands so they look natural and anatomically accurate. Show five fingers on each visible hand and keep everything else unchanged.

    Faces May Look Unnatural

    Faces may appear:

    • Uneven.
    • Blurred.
    • Emotionless.
    • Asymmetrical.
    • Different from one version to another.

    Small faces in the background may contain more errors than the main subject.

    How to reduce this limitation

    Keep the number of people limited and ask for clear, natural facial features.

    Correction prompt:

    Improve the person’s facial features so the face looks natural, symmetrical and realistic. Keep the same age, expression, hairstyle and pose.

    Text May Be Misspelled

    AI image generators may create:

    • Incorrect words.
    • Random letters.
    • Distorted numbers.
    • Inconsistent fonts.
    • Missing punctuation.

    This can be a serious problem for infographics, signs, product labels and educational figures.

    How to reduce this limitation

    Keep text short and simple.

    When exact wording is important, create the image without text and add the wording later in Canva, PowerPoint or another design tool.

    Correction prompt:

    Remove all visible text from the image. Keep the layout, colours, people and objects unchanged.

    Small Details May Be Incorrect

    The image may contain incorrect:

    • Buttons.
    • Pockets.
    • Handles.
    • Cables.
    • Screens.
    • Furniture.
    • Tools.
    • Product features.

    These errors may not be obvious until you examine the image closely.

    How to reduce this limitation

    Zoom in and inspect every important area.

    When accuracy matters, compare the generated image with a real reference photograph.

    Products May Not Match the Real Item

    ChatGPT may change a product’s:

    • Shape.
    • Colour.
    • Size.
    • Materials.
    • Features.
    • Packaging.
    • Accessories.
    • Logo placement.

    This means an AI-generated product image may not accurately represent what customers will receive.

    How to reduce this limitation

    Use real product photographs when exact product appearance matters.

    Use AI mainly for:

    • Backgrounds.
    • Lifestyle scenes.
    • Advertising concepts.
    • Decorative article images.
    • Early design ideas.

    Edits May Change Unrelated Parts

    When you ask ChatGPT to remove or replace one object, it may also change:

    • The person’s face.
    • Clothing.
    • Background.
    • Lighting.
    • Laptop.
    • Furniture.
    • Image composition.

    How to reduce this limitation

    Explain exactly what should change and what must remain unchanged.

    Correction prompt:

    Remove only the coffee cup from the right side of the desk. Keep the person, face, clothing, laptop, notebook, background, lighting and image format unchanged.

    Always compare the edited version with the original.

    The Same Prompt May Produce Different Results

    Using the same prompt more than once may create different:

    • People.
    • Backgrounds.
    • Colours.
    • Camera angles.
    • Object positions.
    • Lighting.

    This can make it difficult to create a perfectly consistent series of images.

    How to reduce this limitation

    Use the same detailed style instructions in every prompt.

    For example:

    Consistency instruction:

    Use the same adult beginner, blue clothing, bright home office, wooden desk, soft natural lighting and clean professional style as the previous figures.

    You should still expect some differences between images.

    Maintaining the Same Character Can Be Difficult

    A person created in one image may look different in another image.

    Changes may appear in:

    • Face shape.
    • Hair.
    • Age.
    • Clothing.
    • Body size.
    • Skin tone.
    • Eyeglasses.

    How to reduce this limitation

    Continue editing inside the same conversation and clearly describe the features that must remain consistent.

    You can also upload the earlier image as a visual reference when appropriate.

    Complex Prompts May Be Partly Ignored

    A very long prompt containing many instructions may cause ChatGPT to overlook some details.

    For example, the prompt may request:

    • Four people.
    • Several objects.
    • Exact colours.
    • Specific text.
    • A detailed background.
    • A particular visual style.
    • Precise object positions.

    The result may include only some of these requirements.

    How to reduce this limitation

    Begin with the main subject and layout.

    Add smaller details through follow-up prompts.

    A useful process is:

    1. Generate the main scene.
    2. Correct the composition.
    3. Adjust colours and lighting.
    4. Add or remove objects.
    5. Review the final details.

    Image Sizes May Not Be Exact

    You may request a specific size such as 1600 × 900 pixels, but the generated image may use different dimensions.

    The image may still have the correct general shape without matching the exact pixel size.

    How to reduce this limitation

    Request the correct aspect ratio first.

    Then resize the final image using an image editor before uploading it to WordPress.

    Cropping May Remove Important Details

    An image may look correct in ChatGPT but become cropped when used as:

    • A WordPress featured image.
    • A social media thumbnail.
    • A website banner.
    • A mobile preview.

    Important faces, hands or objects near the edges may disappear.

    How to reduce this limitation

    Ask for safe space around important details.

    Correction prompt:

    Move the person and laptop toward the centre and leave generous empty space around all four edges for safe website cropping.

    Generated Images May Look Too Artificial

    Some images may appear:

    • Overly smooth.
    • Too perfect.
    • Plastic.
    • Unnaturally bright.
    • Visually repetitive.
    • Similar to common AI-generated designs.

    How to reduce this limitation

    Ask for natural textures, realistic lighting and small imperfections.

    Example prompt:

    Use realistic photography with natural skin texture, soft daylight, believable shadows and a slightly lived-in home office. Avoid an overly polished or artificial appearance.

    Infographics Can Become Too Crowded

    An infographic with too many sections, icons and words may be difficult to read.

    The problem becomes worse when the image is displayed on a mobile screen.

    How to reduce this limitation

    Keep the design simple.

    Use:

    • Short labels.
    • Large text.
    • Clear spacing.
    • Limited colours.
    • Fewer panels.
    • One main idea per section.

    When necessary, divide one complicated infographic into two simpler figures.

    AI Cannot Confirm Every Fact

    ChatGPT may create a convincing diagram that contains inaccurate information.

    This is especially important for:

    • Medical topics.
    • Legal topics.
    • Financial topics.
    • Scientific diagrams.
    • Historical scenes.
    • Technical instructions.
    • Product comparisons.

    How to reduce this limitation

    Verify all important facts using reliable sources before publishing the image.

    Do not assume that an attractive image is automatically accurate.

    Copyright and Brand Concerns May Arise

    A generated image may accidentally resemble:

    • Existing characters.
    • Company logos.
    • Product packaging.
    • Famous artwork.
    • Brand designs.

    How to reduce this limitation

    Use original descriptions and avoid requesting exact copies of protected characters, brands or artistic works.

    Review the final image for accidental similarities before publishing it.

    AI Images Can Be Misleading

    A realistic AI-generated image may appear to show a real:

    • Event.
    • Person.
    • Location.
    • Product.
    • Customer.
    • News story.

    Viewers may misunderstand the image when it is not clearly identified.

    How to reduce this limitation

    Add a disclosure when necessary.

    For example:

    AI-generated illustration

    or:

    Concept image created using artificial intelligence

    Image Generation May Require Several Attempts

    A strong final image may require:

    • Several prompts.
    • Multiple corrections.
    • Different layouts.
    • Manual editing.
    • Text added later.
    • Resizing and compression.

    This means AI image generation does not always save time on the first attempt.

    How to reduce this limitation

    Save successful prompt templates and correction instructions.

    Reuse them for future articles and similar image projects.

    Human Review Is Always Required

    ChatGPT cannot decide whether every image is:

    • Accurate.
    • Ethical.
    • Appropriate.
    • Legally suitable.
    • Clear for beginners.
    • Consistent with your brand.
    • Ready for publication.

    You remain responsible for the final decision.

    The Main Limitations at a Glance

    The main limitations include:

    • Results may not match the prompt exactly.
    • Hands and faces may contain errors.
    • Text may be misspelled.
    • Product details may be inaccurate.
    • Edits may change unrelated areas.
    • Character consistency can be difficult.
    • Complex instructions may be ignored.
    • Exact image dimensions may differ.
    • Cropping may remove important details.
    • Images may look artificial.
    • Infographics may become crowded.
    • Facts may be incorrect.
    • Copyright or branding concerns may arise.
    • Realistic images may mislead viewers.
    • Several attempts may be necessary.

    Limitation-Review Checklist

    Before accepting an AI-generated image, check:

    • Does the image match the prompt?
    • Are the faces and hands correct?
    • Is all visible text accurate?
    • Are the products and objects realistic?
    • Did the edit change anything unexpectedly?
    • Are the colours and lighting suitable?
    • Is the character consistent?
    • Is the aspect ratio correct?
    • Are important details away from the edges?
    • Is the image clear on mobile?
    • Are all facts accurate?
    • Are any logos or protected characters visible?
    • Could the image mislead viewers?
    • Is a disclosure needed?
    • Has a person reviewed the final image?

    Figure 10. Limitations of ChatGPT Image Generation

    Explanation

    This figure summarizes eight important limitations of AI image generation. Results may not follow every instruction, hands and faces may contain errors, text and product details may be inaccurate, and editing one area may affect another.

    Characters can also change between images, cropping may remove important details and every final image requires careful human review before publication.

    Beginner Tip

    Treat the first generated image as a draft. Review it carefully, correct the most important problems and use another design tool when exact text, sizing or product accuracy is required.

    Common Myths About ChatGPT Image Generation

    Beginners may have unrealistic expectations about AI image generation.

    Understanding the difference between common myths and reality can help you use the tool more effectively.

    Myth 1: ChatGPT Always Creates Exactly What You Request

    Reality

    ChatGPT may interpret parts of your prompt differently from what you intended. It may change colours, add extra objects, leave out details or arrange the scene in an unexpected way.

    Clear prompts and specific follow-up instructions can improve the result, but the first image may still require corrections.

    Myth 2: A Longer Prompt Always Produces a Better Image

    Reality

    A detailed prompt can be helpful, but a very long prompt may contain too many instructions. ChatGPT may overlook some details or create a crowded composition.

    Begin with the most important information:

    • Main subject.
    • Setting.
    • Important objects.
    • Visual style.
    • Lighting.
    • Aspect ratio.

    Add smaller details through follow-up prompts when necessary.

    Myth 3: AI-Generated Images Are Always Accurate

    Reality

    An image may look realistic while containing incorrect information.

    Possible errors include:

    • Unnatural hands.
    • Misspelled text.
    • Incorrect product features.
    • Impossible objects.
    • Inaccurate diagrams.
    • Misleading historical details.

    Always review the image carefully and verify important facts before publishing it.

    Myth 4: AI Images Do Not Need Human Editing

    Reality

    Many generated images require additional work.

    You may need to:

    • Remove unwanted objects.
    • Correct spelling.
    • Adjust the composition.
    • Resize the image.
    • Convert it to WebP.
    • Add accurate text in Canva.
    • Prepare metadata for WordPress.

    ChatGPT can create the main visual, but human review and final preparation remain necessary.

    Myth 5: ChatGPT Can Reproduce the Same Character Perfectly

    Reality

    A fictional person may look different across several generated images.

    The AI may change:

    • Facial features.
    • Hair.
    • Clothing.
    • Age.
    • Eyeglasses.
    • Body shape.
    • Skin tone.

    Continuing inside the same conversation and using a reference image may improve consistency, but perfect consistency is not guaranteed.

    Myth 6: AI-Generated Text Is Always Correct

    Reality

    Text inside generated images may be misspelled, incomplete or distorted.

    This is especially common in:

    • Infographics.
    • Signs.
    • Book covers.
    • Product labels.
    • Laptop screens.
    • Posters.

    When exact wording is important, create the visual without text and add the wording later using Canva, PowerPoint or another design tool.

    Myth 7: AI Images Can Replace All Real Photography

    Reality

    AI-generated images are useful for illustrations, concepts, backgrounds and educational figures, but real photography remains important.

    Use real photographs when accuracy is essential, including:

    • Real products.
    • Properties.
    • Employees.
    • Events.
    • Restaurants.
    • Travel destinations.
    • Before-and-after evidence.

    An AI-generated product image should not mislead customers about what they will receive.

    Myth 8: Every AI-Generated Image Is Automatically Safe to Publish

    Reality

    Generated images may contain unwanted logos, protected characters, misleading details or inappropriate content.

    Before publishing, check:

    • Logos and trademarks.
    • Personal information.
    • Real people’s likenesses.
    • Product accuracy.
    • Possible misleading claims.
    • Suitability for the audience.
    • Whether an AI disclosure is needed.

    You remain responsible for the image you publish.

    Myth 9: AI Image Generation Requires No Creativity

    Reality

    AI can create the image, but you must still decide:

    • What the image should communicate.
    • Which subject is most important.
    • What style suits the audience.
    • Which colours match the website.
    • Where the subject should appear.
    • What should be removed.
    • Which version is strongest.

    Good results require planning, judgement and clear communication.

    Myth 10: One Prompt Is Usually Enough

    Reality

    Strong images often require several stages:

    1. Write the first prompt.
    2. Generate the image.
    3. Review the result.
    4. Identify the main problems.
    5. Request specific corrections.
    6. Resize and prepare the final version.
    7. Check it again before publishing.

    Treat image generation as a process rather than a one-step task.

    Myth 11: More Details Always Make an Image More Professional

    Reality

    Too many objects, colours, labels and decorative elements can make an image confusing.

    A professional image usually has:

    • One clear main subject.
    • A simple background.
    • Consistent colours.
    • Balanced lighting.
    • Enough empty space.
    • A clear purpose.

    Removing unnecessary details can improve the final design.

    Myth 12: AI Can Decide Whether an Image Is Appropriate

    Reality

    ChatGPT cannot fully understand every legal, ethical, cultural or business consequence of an image.

    A person must decide whether the image is:

    • Accurate.
    • Respectful.
    • Suitable for the audience.
    • Consistent with the website.
    • Safe to publish.
    • Clear and not misleading.

    Figure 11. Common myths and realities about ChatGPT image generation

    Explanation

    This figure corrects six common misunderstandings about AI image generation. It explains that the first result may require changes, longer prompts are not always better, generated text can contain errors, real photography remains important, characters may change between images and every final image requires human review before publication.

    Beginner Tip

    Treat ChatGPT as a creative assistant. It can help generate and improve images, but you must provide clear instructions, review the results and make the final publishing decision.

    Frequently Asked Questions About ChatGPT Image Generation

    Can Beginners Create Images with ChatGPT?

    Yes. You do not need drawing or graphic-design experience.

    Describe the image you want using clear everyday language. You can then review the result and ask ChatGPT to make specific changes.

    A beginner can start with a simple prompt such as:

    Prompt:

    Create a realistic image of a person learning artificial intelligence on a laptop in a bright home office. Use a clean professional style and a wide landscape format.

    Do I Need a Special Image Prompt?

    You do not need a complicated prompt, but your instructions should explain the most important details.

    A useful image-prompt formula is:

    Subject + Setting + Important Details + Style + Lighting + Image Format

    For example:

    Prompt:

    Create a digital illustration of a friendly robot helping an adult use a laptop in a modern classroom. Use bright natural lighting, blue and white colours and a wide 16:9 format.

    Can ChatGPT Edit an Image I Already Have?

    Yes. You can upload an existing image and describe the changes you want.

    For example:

    Editing prompt:

    Remove the coffee cup from the right side of the desk. Reconstruct the desk naturally and keep the person, laptop, notebook, background and lighting unchanged.

    Review the edited image carefully because nearby details may also change.

    Can I Change Only One Part of an Image?

    Yes. You can identify the object and its location in your editing prompt. When the image editor includes a selection tool, you may also highlight the area that needs changing.

    For example:

    Editing prompt:

    Change only the blue chair in the background to light grey. Keep every other part of the image unchanged.

    Clear location words such as left, right, foreground, background, above and below can help ChatGPT understand the requested edit.

    Can ChatGPT Remove the Background?

    Yes. You can ask ChatGPT to replace or remove the background.

    For example:

    Prompt:

    Remove the current background and replace it with a clean white studio background. Keep the product’s shape, colour, position and natural shadow unchanged.

    You can also request a transparent background when the image will be used as a logo, icon or product graphic.

    Can ChatGPT Add Text to an Image?

    Yes, but generated text may sometimes be misspelled or distorted.

    For short labels, ChatGPT may produce acceptable results. When exact wording is important, generate the visual without text and add the words later using Canva, PowerPoint or another design tool.

    This gives you greater control over:

    • Spelling.
    • Font.
    • Colour.
    • Size.
    • Alignment.
    • Placement.

    What Image Shape Should I Use for WordPress?

    A wide landscape image usually works well for WordPress featured images and article figures.

    A common format is:

    16:9

    Possible dimensions include:

    • 1600 × 900 pixels.
    • 1280 × 720 pixels.
    • 1200 × 675 pixels.

    Leave enough safe space around important subjects because WordPress themes may crop images differently on desktop and mobile screens.

    What File Format Is Best for WordPress?

    WebP is usually a practical choice for WordPress because it can provide good image quality with a smaller file size.

    PNG is useful for:

    • Infographics.
    • Screenshots.
    • Logos.
    • Transparent backgrounds.
    • Graphics containing sharp text or lines.

    JPEG is suitable for realistic photographs and images containing many colours.

    Keep a high-quality original and create a smaller WebP version for your website.

    Can I Use ChatGPT Images for Social Media?

    Yes. You can create images for:

    • Facebook.
    • Instagram.
    • Pinterest.
    • LinkedIn.
    • Stories.
    • Short-video covers.

    Choose the correct shape before generating the image.

    For example:

    • Square 1:1 for many social posts.
    • Portrait 4:5 for taller posts.
    • Vertical 9:16 for Stories and short videos.
    • Wide 16:9 for video thumbnails and website sharing.

    Can I Use ChatGPT Images for My Online Store?

    AI-generated images can help create:

    • Lifestyle backgrounds.
    • Category banners.
    • Marketing concepts.
    • Promotional graphics.
    • Decorative website images.

    However, use real product photographs when customers need to see the exact product they will receive.

    An AI-generated version may change the colour, material, handles, pockets, dimensions or other product details.

    Can I Create a Transparent Background?

    Yes. Use a clear instruction such as:

    Prompt:

    Remove the entire background and make it transparent. Keep only the product with clean edges. Do not include text, logos or additional objects.

    After saving the result, confirm that the selected file format supports transparency.

    PNG is commonly used for transparent images.

    Why Does the Same Prompt Create Different Images?

    AI image generation can produce different results even when the prompt remains the same.

    The following details may change:

    • The person.
    • Camera angle.
    • Background.
    • Lighting.
    • Colours.
    • Object positions.
    • Facial features.

    Use detailed consistency instructions and continue working inside the same conversation when you want related images.

    How Can I Keep the Same Character in Several Images?

    Describe the character consistently in each prompt.

    For example:

    Consistency instruction:

    Use the same fictional older adult beginner with short grey hair, black eyeglasses, a blue shirt and a friendly expression. Keep the same bright home office, wooden desk and soft natural lighting.

    You may also use an earlier image as a visual reference. Even with these instructions, small differences may still appear.

    Why Does ChatGPT Ignore Part of My Prompt?

    A prompt may contain too many details or conflicting instructions.

    When this happens:

    1. Begin with the main subject and layout.
    2. Generate the first image.
    3. Correct the composition.
    4. Adjust the lighting and colours.
    5. Add or remove smaller objects.
    6. Review the final details.

    Breaking the task into stages is often more effective than putting every instruction into one long prompt.

    How Many Corrections Should I Request at Once?

    Request one or two important changes at a time.

    For example:

    Clear follow-up prompt:

    Make the room brighter and remove the extra chair. Keep everything else unchanged.

    Asking for many changes at once can make it harder to determine which instructions ChatGPT followed correctly.

    What Should I Do When an Edit Makes the Image Worse?

    Return to the earlier version and try a more specific instruction.

    For example:

    Correction prompt:

    Restore the original person, laptop, clothing and background. Keep only the removal of the coffee cup. Do not change anything else.

    Saving the original version before editing gives you a clean image to return to.

    Should I Disclose That an Image Was Created with AI?

    A disclosure is helpful when viewers could mistake the image for a real photograph, real event or real person.

    Possible wording includes:

    • AI-generated illustration.
    • Image created using artificial intelligence.
    • Concept image created with ChatGPT.
    • Illustrative image; not a real photograph.

    Place the disclosure in the caption, description or nearby article text when necessary.

    Can I Publish Every Image ChatGPT Creates?

    No. Review every image before publishing it.

    Check:

    • Faces and hands.
    • Spelling.
    • Logos and trademarks.
    • Product details.
    • Private information.
    • Cropping.
    • Image quality.
    • Accuracy.
    • Suitability for the audience.
    • Whether the image could mislead viewers.

    You are responsible for deciding whether the final image is appropriate to publish.

    Do I Still Need Canva or Another Design Tool?

    ChatGPT can create the main visual, but another design tool can help with final adjustments.

    You may use Canva to:

    • Add exact text.
    • Apply your website colours.
    • Add your logo.
    • Adjust spacing.
    • Resize the image.
    • Create several social media formats.
    • Correct small design problems.

    Using ChatGPT and Canva together can provide both creative speed and better control.

    What Is the Best Advice for a Beginner?

    Start with a simple image and one clear purpose.

    For example:

    • One featured image.
    • One article figure.
    • One social media post.
    • One product background.

    Write a clear prompt, review the result and improve it with specific follow-up instructions. Save the successful prompt so you can reuse its structure later.

    Key Takeaways

    ChatGPT image generation allows beginners to create and edit images by describing what they want in ordinary language.

    The most important lessons from this guide are:

    • Begin with a clear purpose for the image.
    • Describe the subject, setting, important details, style, lighting and aspect ratio.
    • Use a wide 16:9 format for many WordPress featured images and article figures.
    • Review the first result carefully instead of expecting it to be perfect.
    • Use specific follow-up prompts to improve one or two details at a time.
    • Explain what should change and what must remain unchanged.
    • Check faces, hands, text, objects, lighting, colours and cropping.
    • Use real product photographs when exact product accuracy matters.
    • Add important text later in Canva when spelling and placement must be exact.
    • Save the original image, edited versions and successful prompts.
    • Give every file a clear, descriptive filename.
    • Prepare images for WordPress by resizing, compressing and adding metadata.
    • Add alt text that clearly describes what the image shows.
    • Disclose that an image is AI-generated when viewers could mistake it for a real photograph or event.
    • Remove unwanted logos, trademarks and personal information.
    • Review every final image before publishing it.

    A simple image-generation workflow is:

    1. Decide what the image is for.
    2. Choose the correct aspect ratio.
    3. Write a clear prompt.
    4. Generate the first image.
    5. Review the result carefully.
    6. Request specific corrections.
    7. Select the best version.
    8. Resize and prepare the image.
    9. Add the filename and WordPress metadata.
    10. Preview the image before publishing.

    ChatGPT can make image creation faster and more accessible, but human judgement remains essential.

    The strongest results come from combining clear prompts, careful review and responsible publishing.

    Final Tip

    Start with a simple image prompt and improve the result gradually.

    Use this three-step method:

    1. Describe clearly. Explain the subject, setting, style, lighting and image shape.
    2. Review carefully. Check the image for incorrect hands, faces, text, objects, colours and cropping.
    3. Correct specifically. Tell ChatGPT exactly what should change and what must remain unchanged.

    For example:

    Original prompt:

    Create a wide featured image of a beginner creating AI images with ChatGPT in a bright home office.

    Specific follow-up prompt:

    Make the room brighter, remove the extra coffee cup and move the person slightly to the right. Leave more open space on the left and keep the person, laptop, clothing and background style unchanged.

    Clear instructions and careful human review are more important than writing one extremely long prompt.

    Continue Learning

    Continue building your AI image-generation skills with these related beginner guides:

    Your next step is to practise creating one simple image for a real purpose. Start with a WordPress featured image, an article figure or a social media graphic. Save the prompt, review the generated result and improve it using specific follow-up instructions.

  • Prompt Engineering for Beginners: Complete Guide (2026)

    Prompt Engineering for Beginners: Complete Guide (2026)

    Estimated Reading Time: 150 minutes
    Last Updated: July 2026

    What You’ll Learn

    By the end of this guide, you’ll be able to:

    • Understand what prompt engineering means.
    • Learn what an AI prompt is.
    • Understand why clear prompts produce better results.
    • Write effective prompts for ChatGPT and other AI tools.
    • Use a simple prompt formula for everyday tasks.
    • Add context, examples, tone, format, and limits to a prompt.
    • Improve weak prompts step by step.
    • Use follow-up prompts to refine an answer.
    • Recognize common prompt-writing mistakes.
    • Understand the benefits and limitations of prompt engineering.
    • Use AI prompts safely and responsibly.

    Introduction

    Artificial Intelligence tools such as ChatGPT, Google Gemini, Claude, Microsoft Copilot, and AI image generators respond to written instructions from users.

    These instructions are called prompts.

    A prompt may be a simple question, such as:

    What is Artificial Intelligence?

    It may also be a detailed instruction, such as:

    Explain Artificial Intelligence to a complete beginner using simple language, one everyday comparison, and three practical examples. Keep the explanation under 500 words.

    Both prompts ask about the same subject, but the second prompt gives the AI clearer guidance about:

    • Who the answer is for.
    • What language level to use.
    • What examples to include.
    • How the response should be organized.
    • How long the answer should be.

    The process of writing, testing, and improving instructions for an AI system is called prompt engineering.

    The word engineering may sound technical, but beginners do not need programming or advanced computer skills. Prompt engineering simply means learning how to communicate clearly with an AI tool so that it can produce a more useful result.

    People use prompts to ask AI tools to:

    • Answer questions.
    • Explain difficult subjects.
    • Write and improve emails.
    • Summarize documents.
    • Generate ideas.
    • Create study notes.
    • Plan projects.
    • Translate languages.
    • Assist with computer code.
    • Create images.
    • Organize information.

    The quality of an AI response depends partly on the quality of the prompt. A vague instruction may produce a general or unsuitable answer, while a clear prompt can provide the AI with useful direction.

    However, even a well-written prompt does not guarantee a perfect result. AI tools can misunderstand instructions, overlook details, or provide incorrect information.

    Users must still review the response, verify important facts, and decide whether the result is appropriate.

    In this beginner-friendly guide, you will learn what prompt engineering is, how prompts work, how to write clearer instructions, and how to improve AI responses step by step.

    Before reading this guide, you may find it helpful to read

    What Is Artificial Intelligence? A Beginner’s Guide (2026)

    What Is Generative AI? A Beginner’s Guide (2026)

    How ChatGPT Works — Explained Simply,

    What Are Large Language Models? A Beginner’s Guide (2026),

    Best ChatGPT Prompts for Beginners (2026).

    These guides explain the technologies and practical skills that support effective prompting.

    What Is Prompt Engineering?

    Prompt engineering is the process of writing, testing, and improving instructions given to an Artificial Intelligence system.

    The instruction you give to the AI is called a prompt.

    A prompt may be:

    • A question.
    • A command.
    • A request for an explanation.
    • A description of a task.
    • A set of step-by-step instructions.
    • A request to create text, images, code, plans, or ideas.

    For example, this is a basic prompt:

    Write an email.

    The AI understands that you want an email, but it does not know:

    • Who the email is for.
    • Why you are writing.
    • What tone to use.
    • How long the email should be.
    • What information to include.

    A clearer prompt would be:

    Write a polite email to my dentist asking to reschedule my appointment from Monday morning to another day next week. Keep the email under 120 words.

    The second prompt gives the AI more useful direction.

    It explains:

    • Task: Write an email.
    • Recipient: The dentist.
    • Purpose: Reschedule an appointment.
    • Current time: Monday morning.
    • Preferred time: Another day next week.
    • Tone: Polite.
    • Length: Under 120 words.

    Prompt engineering means identifying these useful details and presenting them clearly.

    Prompt Engineering Is Not Only for Experts

    The word engineering may make prompt engineering sound complicated, but beginners can use it without programming knowledge.

    You are already practising prompt engineering whenever you:

    • Add more details to a question.
    • Ask the AI to simplify an answer.
    • Request examples.
    • Change the tone.
    • Set a word limit.
    • Ask for a list or table.
    • Correct a misunderstanding.
    • Request another version.
    • Tell the AI who the answer is for.

    For example, suppose you ask:

    Explain climate change.

    The response may be too broad or technical.

    You could improve the prompt:

    Explain climate change to a 12-year-old using simple language and three everyday examples.

    If the answer is still too difficult, you could follow up:

    Make the explanation shorter and avoid scientific terminology.

    Each change improves the instructions and helps guide the AI toward the result you need.

    Prompt Engineering Is a Process

    A good prompt does not always produce the perfect result immediately. Prompt engineering usually follows a simple cycle:

    1. Write a prompt.
    2. Review the AI’s response.
    3. Identify what is missing or incorrect.
    4. Improve the instructions.
    5. Generate another response.
    6. Repeat until the result is useful.

    For example:

    First prompt:

    Give me business ideas.

    This may produce ideas that are too general.

    Improved prompt:

    Suggest five low-cost online business ideas for a complete beginner in Canada. Explain the startup cost, skills needed, and one advantage of each idea.

    The improved prompt gives the AI clearer instructions about the audience, location, budget, number of ideas, and required format.

    An Everyday Comparison

    Prompt engineering is similar to giving directions to another person.

    Imagine telling a taxi driver:
    Take me somewhere downtown.

    The driver may not know your exact destination.

    A clearer instruction would be:

    Take me to the main entrance of the public library on Dundas Street.

    The clearer instruction reduces uncertainty.

    AI tools work in a similar way. They do not automatically know your exact goal, audience, preferred tone, or format. The more clearly you explain these details, the easier it is for the AI to produce a suitable response.

    Prompt Engineering Works with Many AI Tools

    Prompt engineering is not limited to ChatGPT.

    The same basic skill can be used with:

    • Google Gemini.
    • Claude.
    • Microsoft Copilot.
    • Perplexity.
    • AI image generators.
    • AI video tools.
    • AI writing assistants.
    • AI coding tools.
    • Customer-service chatbots.

    However, different tools may respond differently to the same prompt.

    For example, a text-based AI assistant may write an article, while an AI image generator may create a picture from the same subject.

    A prompt for a text assistant might be:

    Explain how solar panels work to a complete beginner.

    A prompt for an image generator might be:

    Create a simple educational illustration showing sunlight reaching rooftop solar panels and being converted into electricity for a home.

    The goal is similar, but the instructions are adjusted for the type of AI tool being used.

    What Prompt Engineering Does Not Mean

    Prompt engineering does not mean using secret words that force the AI to give perfect answers.

    It does not guarantee:

    • Complete accuracy.
    • Current information.
    • Unbiased results.
    • Correct calculations.
    • Reliable legal, medical, or financial advice.
    • Perfect images.
    • Error-free computer code.

    A well-written prompt can improve the response, but the result still requires human review.

    Prompt engineering works best when the user combines clear instructions with fact-checking, good judgment, and follow-up questions.

    Figure 1. A comparison between a vague prompt and a clear, detailed prompt.

    This comparison shows how additional information can improve an AI response. The vague prompt gives the AI very little direction, while the detailed prompt explains the recipient, purpose, tone, timing, and length. Clear instructions help reduce misunderstanding and make the result more useful.

    What Is an AI Prompt?

    An AI prompt is the instruction, question, or description you give to an Artificial Intelligence tool.

    The prompt tells the AI what you want it to do.

    You may use a prompt to ask the AI to:

    • Answer a question.
    • Explain a difficult subject.
    • Write an email.
    • Summarize information.
    • Generate ideas.
    • Create a plan.
    • Translate text.
    • Improve writing.
    • Write computer code.
    • Create an image.
    • Organize information into a list or table.

    For example:

    Explain machine learning.

    This is an AI prompt because it gives the AI a task.

    However, it provides very little information about the audience, level of detail, examples, or desired format.

    A more useful prompt would be:

    Explain machine learning to a complete beginner using simple language, one everyday comparison, and three practical examples.

    The second prompt gives the AI clearer instructions about how the response should be written.

    A Prompt Can Be a Question

    Many prompts are written as questions.

    For example:

    What is Artificial Intelligence?

    How does a solar panel work?

    What are the main benefits of online learning?

    Questions are useful when you want information or an explanation.

    A more detailed question may produce a more focused response:

    What is Artificial Intelligence? Explain it to a complete beginner using simple language and three examples from everyday life.

    A Prompt Can Be a Command

    A prompt may also tell the AI to complete a task.

    For example:

    Write a thank-you email.

    Summarize this article.

    Create a weekly study plan.

    Translate this paragraph into Arabic.

    Commands work better when they include useful details.

    Compare these prompts:

    Basic command:

    Write a social media post.

    Clearer command:

    Write a friendly Facebook post promoting a beginner’s guide to Artificial Intelligence. Keep it under 100 words and include a simple call to action.

    The clearer prompt explains the platform, topic, tone, length, and purpose.

    A Prompt Can Include Information

    Sometimes the AI needs background information before it can complete the task properly.

    For example:

    I am a complete beginner learning Artificial Intelligence. I have 30 minutes available each day. Create a seven-day study plan that begins with basic concepts and includes one practical activity per day.

    The first two sentences give the AI important context:

    • The user is a beginner.
    • The subject is Artificial Intelligence.
    • The available study time is 30 minutes each day.
    • The plan should cover seven days.
    • Each day should include a practical activity.

    Without this information, the AI may create a plan that is too advanced, too long, or unsuitable.

    A Prompt Can Include Content to Work With

    You may provide text, notes, data, or other content and ask the AI to work with it.

    For example:

    Summarize the following paragraph in three bullet points:

    You would then paste the paragraph below the instruction.

    Other examples include:

    • Rewrite this email in a more professional tone.
    • Turn these notes into an organized outline.
    • Check this paragraph for grammar mistakes.
    • Compare these two product descriptions.
    • Create five questions based on this lesson.
    • Extract the main dates from this text.

    The AI uses both the instruction and the provided material to create the response.

    A Prompt Can Describe the Audience

    Telling the AI who the answer is for can greatly improve the result.

    Possible audiences include:

    • A complete beginner.
    • A 12-year-old student.
    • A business owner.
    • A teacher.
    • A customer.
    • A job applicant.
    • An older adult.
    • A technical expert.
    • A general website reader.

    Compare these prompts:

    Explain cloud computing.

    Explain cloud computing to a retired beginner who has basic computer knowledge. Use simple language and one everyday comparison.

    The second prompt helps the AI choose an appropriate level of vocabulary and detail.

    A Prompt Can Specify the Tone

    Tone describes how the response should sound.

    You may ask for a tone that is:

    • Friendly.
    • Professional.
    • Formal.
    • Polite.
    • Encouraging.
    • Persuasive.
    • Neutral.
    • Conversational.
    • Serious.
    • Enthusiastic.

    For example:

    Write a polite and professional email asking a company for a refund.

    The tone instruction helps the AI avoid language that sounds rude, overly casual, or aggressive.

    A Prompt Can Specify the Format

    You can tell the AI how the answer should be organized.

    Possible formats include:

    • A bulleted list.
    • A numbered list.
    • A table.
    • A short paragraph.
    • A step-by-step guide.
    • A checklist.
    • A comparison.
    • A question-and-answer format.
    • An outline.
    • A template.

    For example:

    Compare ChatGPT and Google Gemini in a simple table with four columns: tool, main use, beginner advantage, and possible limitation.

    The requested format makes the result easier to read and compare.

    A Prompt Can Set a Length

    You may ask the AI to keep the response within a certain length.

    Examples include:

    • Under 100 words.
    • In three paragraphs.
    • In five bullet points.
    • In one sentence.
    • In a 10-step guide.
    • In a short summary.
    • In a detailed explanation.

    For example:

    Summarize the benefits of Artificial Intelligence in five bullet points. Keep each point under 20 words.

    A length instruction helps prevent the answer from becoming too long or too brief.

    A Prompt Can Include Examples

    Examples can show the AI what kind of result you want.

    For example:

    Suggest five article titles for a beginner-friendly Artificial Intelligence website.

    Use a style similar to “What Is Machine Learning? A Beginner’s Guide (2026).”

    The example gives the AI a pattern to follow.

    Examples are especially useful when you want:

    • A particular writing style.
    • A specific layout.
    • Consistent article titles.
    • Similar product descriptions.
    • Matching social media posts.
    • Repeated lesson formats.

    A Prompt Can Set Limits

    A prompt may explain what the AI should avoid.

    For example:

    Explain blockchain to a complete beginner. Avoid technical terminology, mathematical formulas, and programming examples.

    Other limits may include:

    • Do not use jargon.
    • Do not mention brand names.
    • Do not exceed 300 words.
    • Do not include medical advice.
    • Do not use tables.
    • Do not repeat the same idea.
    • Do not invent sources.
    • Do not include private information.

    Limits help guide the AI away from unsuitable content.

    A Prompt Can Ask the AI to Take a Role

    You can ask the AI to respond from a particular professional or practical perspective.

    For example:

    Act as a patient computer teacher. Explain how to create a folder in Windows to a complete beginner.

    Other possible roles include:

    • A tutor.
    • An editor.
    • A career adviser.
    • A marketing assistant.
    • A customer-service representative.
    • A travel planner.
    • A study coach.
    • A technical trainer.

    A role can influence the tone, focus, and type of information provided.

    However, assigning a role does not turn the AI into a licensed professional. Important medical, legal, financial, engineering, or safety advice still requires qualified human review.

    Short Prompts and Detailed Prompts

    A short prompt may work well for a simple task.

    For example:

    Translate “Good morning” into French.

    The task is clear and does not require much additional information.

    A detailed prompt is more useful when the task is complex.

    For example:

    Create a beginner-friendly outline for a 2,000-word article about online privacy. Include an introduction, six main sections, common mistakes, frequently asked questions, key takeaways, and a final safety tip.

    The level of detail should match the task.

    A prompt should not be long simply for the sake of being long. It should include the information necessary to produce a useful response.

    The Main Parts of an Effective Prompt

    A useful prompt may include:

    • Task: What should the AI do?
    • Context: What background information does it need?
    • Audience: Who is the answer for?
    • Tone: How should the response sound?
    • Format: How should the answer be organized?
    • Length: How detailed should it be?
    • Examples: Is there a pattern to follow?
    • Limits: What should the AI avoid?

    For example:

    Write a friendly email to a new website subscriber thanking them for joining AI Mastery. The reader is a complete beginner interested in Artificial Intelligence.

    Keep the email under 150 words, use short paragraphs, and include one link encouraging them to explore the beginner tutorials.

    This prompt includes the task, recipient, audience, tone, length, format, and purpose.

    A Simple Prompt Formula

    Beginners can use this basic structure:

    Task + context + audience + format + tone + limits

    For example:

    Explain prompt engineering to a complete beginner. Use simple language, one everyday comparison, and three practical examples. Organize the answer with short headings and keep it under 600 words.

    You do not need to include every part in every prompt.

    Use only the details that help the AI understand your goal.

    Why Prompts Matter

    AI tools do not automatically know:

    • What result you want.
    • Why you need it.
    • Who will read it.
    • How detailed it should be.
    • What tone you prefer.
    • Which format would be most useful.
    • What information should be avoided.

    The prompt provides this direction.

    A clearer prompt reduces guesswork and increases the chance of receiving a useful response.

    However, the AI may still make mistakes. A good prompt improves the instructions, but it does not remove the need for human review.

    Figure 2. The main parts that can be included in an effective AI prompt.

    This infographic shows that a useful prompt may contain more than a basic question or command. Adding information about the task, context, audience, tone, format, length, examples, and limits gives the AI clearer direction and can improve the final response.

    Why Are Good Prompts Important?

    Good prompts are important because they help the AI understand exactly what you need.

    An AI tool cannot read your mind. It only works with the information you provide.

    When a prompt is vague, the AI must guess:

    • What you are trying to achieve.
    • Who the answer is for.
    • How detailed the response should be.
    • What tone to use.
    • Which format would be most helpful.
    • What information to include or avoid.

    A clear prompt reduces this uncertainty.

    Good Prompts Produce More Relevant Answers

    A relevant answer focuses on the user’s actual goal.

    Consider this prompt:

    Tell me about exercise.

    The AI may discuss many types of exercise, including running, weight training, swimming, stretching, and sports.

    But suppose the user needs gentle exercise ideas for an older beginner.

    A better prompt would be:

    Suggest five gentle indoor exercises for an older beginner. Avoid high-impact movements and explain each exercise in simple language.

    The improved prompt is more likely to produce information that matches the user’s needs.

    Good Prompts Save Time

    A vague prompt often leads to an answer that must be rewritten several times.

    For example:

    Write an advertisement.

    The AI may produce an advertisement for the wrong audience, platform, product, or tone.

    A clearer prompt may be:

    Write a short Facebook advertisement for a beginner-friendly online course about Artificial Intelligence. Target adults with no technical experience. Use a friendly and encouraging tone and keep it under 100 words.

    This prompt gives the AI enough information to create a more suitable first draft.

    A better first draft means fewer corrections and less time spent explaining the task again.

    Good Prompts Improve Clarity

    Clear prompts encourage the AI to organize information in a more understandable way.

    Compare these prompts:

    Explain cybersecurity.

    Explain cybersecurity to a complete beginner. Use short paragraphs, simple language, and three examples of common online threats.

    The second prompt gives specific instructions about vocabulary, structure, and examples.

    This can make the answer easier to understand.

    Good Prompts Help Control the Level of Detail

    AI responses may be too short, too long, too simple, or too technical.

    You can guide the level of detail through the prompt.

    For example:

    Explain neural networks in one paragraph for a complete beginner.

    This requests a brief explanation.

    A more detailed version might be:

    Explain neural networks to a complete beginner in approximately 1,000 words. Include an everyday comparison, a simple step-by-step explanation, three real-world uses, and two limitations.

    The best level of detail depends on the task.

    Good Prompts Improve the Format

    The same information can be presented in many ways.

    For example, you might ask the AI to present information as:

    • A paragraph.
    • A table.
    • A checklist.
    • A numbered guide.
    • A comparison.
    • A timeline.
    • A question-and-answer section.
    • A lesson plan.

    Suppose you ask:

    Explain the differences between ChatGPT, Google Gemini, and Claude.

    The AI may write several long paragraphs.

    A more useful prompt could be:

    Compare ChatGPT, Google Gemini, and Claude in a beginner-friendly table. Include columns for main use, beginner advantage, possible limitation, and best use case.

    The table format makes the information easier to scan and compare.

    Good Prompts Help Maintain a Consistent Tone

    Tone is important in emails, articles, advertisements, customer messages, and educational content.

    For example, this prompt:

    Write a message asking for payment.

    could produce language that sounds too formal, too direct, or unfriendly.

    A better prompt would be:

    Write a polite and professional payment reminder for a customer whose invoice is seven days overdue. Keep the tone respectful and avoid threatening language.

    The tone instructions help the AI create a more appropriate message.

    Good Prompts Support Consistent Content

    Prompt engineering is useful when creating multiple pieces of content that need to follow the same structure.

    For example, a website owner may want every beginner article to include:

    • Estimated reading time.
    • What you’ll learn.
    • An introduction.
    • Main sections.
    • Practical examples.
    • Benefits.
    • Limitations.
    • Common myths.
    • Frequently asked questions.
    • Key takeaways.
    • A final tip.

    A reusable prompt can help maintain this structure across many articles.

    For example:

    Create a beginner-friendly article outline about AI video generation. Follow this structure: estimated reading time, what you’ll learn, introduction, main explanation, practical uses, benefits, limitations, common myths, FAQs, key takeaways, and final tip.

    This helps the AI produce a consistent format.

    Good Prompts Reduce Misunderstandings

    AI tools can misunderstand vague instructions.

    For example:

    Make this better.

    The AI may not know whether “better” means:

    • Shorter.
    • More professional.
    • Easier to understand.
    • More persuasive.
    • More detailed.
    • More formal.
    • More accurate.
    • Better organized.

    A clearer prompt would be:

    Rewrite this paragraph in simpler language for a complete beginner. Keep the meaning the same and reduce it to approximately 100 words.

    The improved instruction explains exactly what kind of change is required.

    Good Prompts Help the AI Use Provided Information

    When working with documents, notes, data, or pasted text, a clear prompt tells the AI what to do with the material.

    For example:

    Review the following article and identify repeated ideas, grammar errors, unclear sentences, and missing headings. Present your findings as a checklist.

    This prompt is more useful than simply writing:

    Check this article.

    The clearer version explains what type of review is needed and how the findings should be presented.

    Good Prompts Can Improve Creativity

    AI can help generate creative ideas, but broad prompts often produce predictable results.

    For example:

    Give me blog ideas.

    A more focused prompt would be:

    Suggest ten beginner-friendly blog article ideas about Artificial Intelligence for adults over 50. Avoid highly technical topics and include one sentence explaining why each idea would be useful.

    The clearer prompt gives the AI a defined audience, subject, difficulty level, number of ideas, and explanation requirement.

    This can lead to more suitable and original suggestions.

    Good Prompts Improve Image Generation

    AI image generators also depend heavily on prompts.

    A basic image prompt might be:

    Create a picture of a robot.

    This may produce many different results.

    A more detailed image prompt could be:

    Create a clean horizontal educational illustration of a friendly home-assistant robot helping an older adult use a laptop. Use a bright modern room, natural lighting, a realistic but approachable style, and a blue-and-purple colour theme. Do not include text, logos, or watermarks.

    The detailed prompt gives the image generator clearer instructions about:

    • Subject.
    • Action.
    • Setting.
    • Style.
    • Lighting.
    • Colour.
    • Image orientation.
    • Elements to avoid.

    This increases the chance of receiving an image that matches the intended use.

    Good Prompts Are Useful for Follow-Up Questions

    Prompt engineering does not end after the first response.

    You can use follow-up prompts to improve the result.

    For example:

    • Make the answer shorter.
    • Add three examples.
    • Explain the second point in simpler language.
    • Turn this into a table.
    • Use a more professional tone.
    • Remove repeated ideas.
    • Rewrite it for a 12-year-old.
    • Add a step-by-step checklist.
    • Correct any factual uncertainty.

    Follow-up prompts allow you to refine the answer without starting the entire task again.

    Good Prompts Do Not Guarantee Perfect Results

    A good prompt improves communication, but it does not guarantee that the AI will always be correct.

    The AI may still:

    • Provide outdated information.
    • Misinterpret the request.
    • Invent facts.
    • Omit important details.
    • Make calculation errors.
    • Produce biased or unsuitable content.
    • Use incorrect sources.
    • Generate poor-quality images.
    • Write code that does not work properly.

    For this reason, users should review important responses carefully.

    Good prompt engineering improves the result, but human judgment remains essential.

    Figure 3. Good prompts can improve relevance, clarity, organization, tone, and efficiency.

    This comparison shows why prompt quality matters. A vague prompt leaves many details unclear, while a strong prompt gives the AI useful direction about the task, audience, tone, format, and limits. Better prompts usually reduce misunderstanding and produce more useful first drafts.

    How Does Prompt Engineering Work?

    Prompt engineering works by giving an AI system clear instructions, reviewing the response, and improving the instructions when necessary.

    The process is usually not completed with one perfect prompt. It often involves several steps:

    1. Decide what result you need.
    2. Write the first prompt.
    3. Review the AI’s response.
    4. Identify problems or missing information.
    5. Add clearer instructions.
    6. Ask the AI to revise the response.
    7. Check the final result carefully.

    This repeated process is sometimes called iteration.

    Iteration means improving something through several attempts.

    Step 1: Decide What You Need

    Before writing a prompt, identify your goal.

    Ask yourself:

    • What task do I want the AI to complete?
    • Who will use or read the result?
    • What information should be included?
    • How should the answer be organized?
    • How long should it be?
    • What tone should it use?
    • What should the AI avoid?

    For example, suppose you need an email asking a company about a delayed delivery.

    Your goal is not simply “write an email.”

    Your actual goal may be:

    • Contact customer service.
    • Explain that the order is late.
    • Ask for an updated delivery date.
    • Remain polite and professional.
    • Keep the email short.
    • Include the order number.

    Understanding the goal makes it easier to write an effective prompt.

    Step 2: Write the First Prompt

    After identifying your goal, write a clear initial prompt.

    For example:

    Write a polite email to customer service asking about a delayed delivery. My order number is 45821, and the expected delivery date was July 10. Ask for an updated delivery date and keep the email under 150 words.

    This prompt gives the AI several useful details:

    • The task.
    • The recipient.
    • The problem.
    • The order number.
    • The expected delivery date.
    • The requested action.
    • The tone.
    • The length.

    The AI uses these instructions to generate a response.

    Step 3: The AI Interprets the Prompt

    When you submit a prompt, the AI analyzes the words and patterns in your instruction.

    It attempts to determine:

    • What task you are requesting.
    • What information is important.
    • What type of response is expected.
    • What writing style or format to use.
    • How the different parts of the prompt relate to one another.

    The AI does not understand the request exactly as a human does. It uses patterns learned from large amounts of training material to predict a suitable response.

    For example, when it reads:

    Write a polite email to customer service…

    it recognizes that the response should probably include:

    • A greeting.
    • A short explanation of the problem.
    • A polite request.
    • A closing.
    • Professional language.

    When the prompt includes an order number and delivery date, the AI can place those details in the email.

    Step 4: The AI Generates a Response

    The AI creates its answer step by step.

    For a writing task, it predicts words and sentences that are likely to satisfy the instructions.

    For an image-generation task, the system interprets the description and creates visual elements that are likely to match the prompt.

    For a coding task, it generates code based on the requested programming language, goal, and conditions.

    The quality of the response depends on several factors, including:

    • The clarity of the prompt.
    • The amount of useful context.
    • The complexity of the task.
    • The capabilities of the AI tool.
    • The information available to the system.
    • Whether the instructions conflict with one another.

    Even a detailed prompt may produce an imperfect response.

    Step 5: Review the Response

    After receiving the answer, do not accept it automatically.

    Check whether the AI followed your instructions.

    Ask:

    • Did it complete the correct task?
    • Did it include all important information?
    • Is the answer suitable for the intended audience?
    • Is the tone appropriate?
    • Is the format correct?
    • Is the answer too long or too short?
    • Are any statements unclear?
    • Are there repeated ideas?
    • Are important facts accurate?
    • Is anything missing?

    For the customer-service email, you might notice that the AI:

    • Forgot to include the order number.
    • Used language that sounds too demanding.
    • Made the email too long.
    • Asked for a refund instead of an updated delivery date.

    These problems can be corrected with a follow-up prompt.

    Step 6: Improve the Prompt

    After reviewing the response, explain what needs to change.

    For example:

    Rewrite the email. Include order number 45821 in the first paragraph. Make the tone more polite, remove the request for a refund, and ask only for the updated delivery date.

    This follow-up instruction is more specific because it responds to problems in the first draft.

    You do not always need to rewrite the entire original prompt. You can tell the AI exactly what to change.

    Other follow-up prompts may include:

    • Make the explanation simpler.
    • Add two practical examples.
    • Remove repeated information.
    • Turn the answer into a numbered list.
    • Keep each paragraph under three sentences.
    • Use a more professional tone.
    • Explain the third point in greater detail.
    • Correct the grammar without changing the meaning.
    • Shorten the response to 200 words.
    • Add a warning about possible limitations.

    Step 7: Generate Another Version

    The AI uses the new instructions to revise the answer.

    You then review the new version.

    Sometimes the second result is satisfactory. At other times, another revision may be required.

    For example:

    First prompt:

    Write a product description for a travel bag.

    First response problem:

    The description is too general and does not mention the important product features.

    Follow-up prompt:

    Rewrite the description for a foldable travel bag. Mention that it is lightweight, water-resistant, easy to store, and suitable for short trips. Use a friendly sales tone and keep it under 120 words.

    Second response problem:

    The description makes an unsupported claim that the bag is completely waterproof.

    Second follow-up prompt:

    Replace “completely waterproof” with “water-resistant.” Do not add features that were not provided.

    The prompt improves as the user identifies and corrects problems.

    The Prompt Engineering Cycle

    Prompt engineering can be understood as a repeating cycle:

    Goal → Prompt → Response → Review → Improvement → New Response

    The cycle continues until the result is accurate, useful, and suitable for the intended purpose.

    This does not mean you should keep revising forever.

    Stop when the response:

    • Meets the main goal.
    • Includes the necessary information.
    • Uses the correct tone and format.
    • Does not contain obvious errors.
    • Is suitable for the intended audience.

    Example: Improving an Explanation

    Suppose a beginner asks:

    Explain blockchain.

    The AI may provide a technical explanation containing terms such as distributed ledger, cryptography, consensus mechanism, and decentralization.

    The user could improve the request:

    Explain blockchain to a complete beginner using simple language and one everyday comparison. Avoid technical terminology.

    The response may now be easier to understand, but it may still be too long.

    The user could follow up:

    Shorten the explanation to four paragraphs and add one example of how blockchain is used.

    This process shows how prompt engineering gradually guides the AI toward the desired result.

    Example: Improving an Article Outline

    First prompt:

    Create an article outline about AI images.

    Possible problem: The outline may be too short or poorly organized.

    Improved prompt:

    Create a detailed outline for a beginner-friendly article titled “AI Image Generation for Beginners: Complete Guide (2026).” Include what readers will learn, an introduction, how AI image generation works, popular tools, prompt-writing tips, practical uses, benefits, limitations, myths, FAQs, key takeaways, and a final tip.

    This version provides the title, audience, year, subject, and required sections.

    If the outline still needs improvement, the user could add:

    Place the sections in a logical learning order. Include suggested H2 and H3 headings and avoid repeating the same topic.

    Example: Improving an Image Prompt

    First prompt:

    Create an image of someone using AI.

    Possible problem: The image generator may create an unsuitable person, setting, style, or image orientation.

    Improved prompt:

    Create a clean horizontal 16:9 educational illustration of an older beginner using an AI assistant on a laptop at home. Show a simple prompt box on the screen and visual ideas appearing beside it. Use natural lighting, a modern blue-and-purple colour theme, and a friendly realistic style. Do not include logos, watermarks, or unreadable text.

    This prompt gives the AI clearer visual instructions.

    The user may still need to refine the result:

    Keep the same scene, but make the laptop screen larger and remove the extra person in the background.

    One Prompt Can Contain Several Instructions

    A detailed prompt may include several instructions at once.

    For example:

    Write a beginner-friendly explanation of online privacy. Use simple language, organize the answer under five short headings, include three everyday examples, add one safety checklist, and keep the response under 800 words.

    The AI must identify and follow each requirement:

    • Topic: Online privacy.
    • Audience: Beginners.
    • Language: Simple.
    • Structure: Five headings.
    • Examples: Three.
    • Additional content: Safety checklist.
    • Length: Under 800 words.

    When a response fails to follow one requirement, remind the AI about that specific instruction.

    For example:

    The explanation is useful, but it does not include the safety checklist. Add a five-point checklist at the end without rewriting the other sections.

    Clear Instructions Should Not Conflict

    A prompt becomes difficult to follow when its instructions contradict each other.

    For example:

    Write a complete and highly detailed guide about machine learning, but keep it under 100 words.

    A complete and highly detailed guide is unlikely to fit within 100 words.

    Another conflicting prompt might be:

    Use technical terminology, but make sure the article contains no technical words.

    To avoid confusion, make sure the instructions work together.

    A clearer version could be:

    Write a 150-word beginner summary of machine learning. Cover only the basic definition, one example, and one limitation.

    Breaking Complex Tasks into Smaller Prompts

    Large tasks may produce better results when divided into smaller steps.

    Instead of asking:

    Write a complete 10,000-word guide about Artificial Intelligence.

    You could work section by section:

    1. Create the article outline.
    2. Review and improve the outline.
    3. Write the introduction.
    4. Write the first main section.
    5. Continue with each section.
    6. Review the full article for repetition.
    7. Check headings and formatting.
    8. Add internal links and metadata.

    This approach gives you more control and makes errors easier to identify.

    It is especially useful for:

    • Long articles.
    • Business plans.
    • Courses.
    • Reports.
    • Website content.
    • Research summaries.
    • Marketing campaigns.
    • Large coding projects.

    Context Can Be Added During the Conversation

    You do not need to include every detail in the first prompt.

    You may add information as the conversation continues.

    For example:

    User:

    Create a weekly meal plan.

    AI response: Produces a general plan.

    User:

    Revise it for a family of six.

    User:

    Avoid seafood and include low-cost ingredients.

    User:

    Present the final version as a seven-day table with breakfast, lunch, and dinner.

    Each follow-up adds context and improves the result.

    However, for important tasks, including the main requirements in the first prompt can save time.

    AI Tools May Respond Differently

    The same prompt may produce different results in different AI tools.

    One tool may provide:

    • A longer explanation.
    • A shorter answer.
    • A different writing style.
    • More examples.
    • A different image composition.
    • Different formatting.
    • Different factual details.

    Results may also vary when the same prompt is submitted more than once.

    Prompt engineering therefore involves testing and reviewing, not simply memorizing one perfect sentence.

    Better Prompts Reduce Guesswork

    The main purpose of prompt engineering is to reduce unnecessary guesswork.

    A prompt such as:

    Help me with my website.

    leaves many questions unanswered.

    The AI does not know whether you need help with:

    • Website design.
    • Article writing.
    • Search engine optimization.
    • Navigation.
    • Images.
    • Speed.
    • Security.
    • Domain settings.
    • Categories.
    • Internal links.

    A clearer prompt would be:

    Review the navigation structure for a beginner-friendly Artificial Intelligence education website. The current menu is Home, Tutorials, AI Tools, AI News, About, and Contact. Suggest any improvements, but keep the menu simple.

    The clearer request gives the AI a defined task and useful background information.

    Human Review Is Part of Prompt Engineering

    Prompt engineering is not only about writing instructions.

    It also includes evaluating the result.

    The user must decide:

    • Whether the answer is accurate.
    • Whether the information is complete.
    • Whether the tone is appropriate.
    • Whether private information has been protected.
    • Whether claims require verification.
    • Whether the content is suitable for publication.
    • Whether the result should be revised or rejected.

    AI can assist with the work, but the user remains responsible for the final decision.

    Figure 4. Prompt engineering is a repeating process of writing, reviewing, and improving instructions.

    This process shows that effective prompting usually involves more than submitting one question. The user defines the goal, writes the prompt, reviews the AI’s response, identifies problems, and adds clearer instructions. The cycle continues until the result is suitable for the intended purpose.

    The Main Elements of an Effective Prompt

    An effective prompt gives the AI enough information to understand the task and produce a useful response.

    A prompt does not need to include every possible detail. It should include the details that are important for the specific task.

    The main elements of an effective prompt are:

    1. The task.
    2. The context.
    3. The audience.
    4. The role.
    5. The tone.
    6. The format.
    7. The length.
    8. Examples.
    9. Limits and restrictions.
    10. Quality requirements.

    1. The Task

    The task explains what you want the AI to do.

    It is usually the most important part of the prompt.

    Common task words include:

    • Explain.
    • Write.
    • Summarize.
    • Compare.
    • Rewrite.
    • Translate.
    • Organize.
    • Suggest.
    • Review.
    • Correct.
    • Create.
    • Calculate.
    • Extract.
    • Classify.
    • Plan.

    For example:

    Explain Artificial Intelligence.

    The task is to explain a subject.

    Another example:

    Create a seven-day study plan.

    The task is to create a plan.

    A clear task should use a specific action word.

    Compare these prompts:

    Unclear task:

    Artificial Intelligence for beginners.

    This describes a subject, but it does not clearly tell the AI what to do.

    Clear task:

    Explain Artificial Intelligence to a complete beginner.

    The second prompt gives the AI a direct instruction.

    Be Specific About the Task

    Some task words are too broad unless they include more details.

    For example:

    Help me with this article.

    The AI does not know whether it should:

    • Correct the grammar.
    • Rewrite the introduction.
    • Check the facts.
    • Improve the headings.
    • Remove repetition.
    • Shorten the article.
    • Add examples.
    • Create a conclusion.

    A clearer prompt would be:

    Review this article and identify repeated ideas, unclear sentences, grammar errors, and missing headings.

    The clearer version explains exactly what type of help is required.

    2. The Context

    Context is the background information the AI needs to understand the situation.

    Context may include:

    • Why you need the result.
    • What has already happened.
    • What information is available.
    • What problem you are trying to solve.
    • What type of project you are working on.
    • What limitations you face.
    • What the AI should know before completing the task.

    For example:

    I am creating a beginner-friendly website about Artificial Intelligence. My readers have little or no technical experience. Suggest ten article ideas for the website.

    The first two sentences provide context.

    They explain:

    • The user is building a website.
    • The website teaches Artificial Intelligence.
    • The readers are beginners.
    • The task is to suggest article ideas.

    Without this context, the AI might suggest advanced technical topics that are unsuitable for the audience.

    Useful Context Versus Unnecessary Context

    Include information that affects the result.

    For example, when asking for travel recommendations, useful context may include:

    • Destination.
    • Dates.
    • Budget.
    • Number of travellers.
    • Ages of children.
    • Transportation preferences.
    • Accessibility needs.

    Unnecessary context may make the prompt longer without improving the answer.

    For example, the colour of your suitcase probably does not matter when asking the AI to create a travel schedule.

    A good prompt includes relevant background information, not every personal detail.

    3. The Audience

    The audience is the person or group who will read, use, or receive the result.

    Audience information helps the AI choose:

    • Vocabulary.
    • Level of detail.
    • Examples.
    • Tone.
    • Structure.
    • Explanations.

    Possible audiences include:

    • Complete beginners.
    • Children.
    • Teenagers.
    • Older adults.
    • Students.
    • Teachers.
    • Business owners.
    • Customers.
    • Job applicants.
    • Technical professionals.
    • General website readers.

    Compare these prompts:

    Without an audience:

    Explain machine learning.

    With an audience:

    Explain machine learning to an adult beginner with no programming experience.

    The second prompt helps the AI avoid unnecessary technical language.

    The Same Topic for Different Audiences

    The same subject may need different explanations depending on the audience.

    For a child:

    Explain cloud computing to a 10-year-old using a school-locker comparison.

    For a business owner:

    Explain cloud computing to a small-business owner. Focus on cost, file access, security, and teamwork.

    For a technical reader:

    Explain cloud computing architecture, including virtualization, service models, and deployment models.

    The topic is the same, but the explanation changes because the audiences are different.

    4. The Role

    A role tells the AI what perspective or type of assistance to provide.

    For example:

    Act as a patient computer tutor.

    Act as an editor reviewing a beginner article.

    Act as a customer-service assistant.

    Act as a study coach.

    A role can influence:

    • Tone.
    • Vocabulary.
    • Priorities.
    • Structure.
    • Type of advice.

    For example:

    Act as a patient computer tutor. Explain how to attach a document to an email using simple step-by-step instructions.

    The role encourages the AI to respond in a teaching style.

    Roles Should Be Used Carefully

    A role is useful when it adds meaningful direction.

    However, a role is not always necessary.

    Compare:

    Act as an expert professional world-class email specialist and write an email.

    This role is exaggerated and does not explain the actual purpose of the email.

    A more useful prompt would be:

    Write a polite email to a customer confirming that their refund has been processed. Use a professional tone and keep it under 120 words.

    Specific instructions are usually more useful than impressive-sounding roles.

    A role also does not make the AI a qualified professional.

    For example:

    Act as a doctor.

    This does not give the AI the qualifications, examination results, or professional responsibility of a real doctor.

    Medical, legal, financial, engineering, and safety-related information should still be checked with an appropriately qualified person.

    5. The Tone

    Tone describes how the response should sound.

    Common tone instructions include:

    • Friendly.
    • Professional.
    • Formal.
    • Informal.
    • Polite.
    • Encouraging.
    • Neutral.
    • Persuasive.
    • Respectful.
    • Serious.
    • Enthusiastic.
    • Calm.
    • Confident.
    • Beginner-friendly.

    For example:

    Write a polite and professional email requesting an update on my application.

    The tone instruction helps the AI avoid language that sounds rude or impatient.

    Match the Tone to the Situation

    Different situations require different tones.

    A customer complaint may require a firm but respectful tone:

    Write a firm but polite complaint about a damaged product. Clearly request a replacement without using threatening language.

    A beginner lesson may require an encouraging tone:

    Explain the topic in a friendly and encouraging tone. Reassure the reader that no programming experience is required.

    A business report may require a neutral tone:

    Summarize the results in a neutral and factual tone. Avoid promotional language.

    Avoid Conflicting Tone Instructions

    Do not combine tones that work against each other.

    For example:

    Write a very formal, highly casual message.

    The AI may not know which style to follow.

    A clearer instruction would be:

    Write a professional but friendly message.

    6. The Format

    Format tells the AI how to organize the response.

    Possible formats include:

    • Paragraphs.
    • Bullet points.
    • Numbered steps.
    • A table.
    • A checklist.
    • A template.
    • An outline.
    • A timeline.
    • A comparison chart.
    • Questions and answers.
    • Headings and subheadings.
    • A script.
    • An email.
    • A social media post.

    For example:

    Create a seven-step checklist for publishing a WordPress article.

    The requested checklist format makes the answer easier to follow.

    Another example:

    Compare three AI writing tools in a table with columns for tool name, main use, beginner advantage, and limitation.

    The table format helps readers compare information quickly.

    Specify the Structure

    For longer content, explain how the response should be organized.

    For example:

    Write a beginner-friendly article with the following sections: introduction, definition, how it works, practical uses, benefits, limitations, FAQs, key takeaways, and final tip.

    This reduces the chance that the AI will omit an important section

    You may also request heading levels:

    Use one H1 title, H2 headings for main sections, and H3 headings for subsections.

    Choose a Format That Matches the Task

    Different tasks benefit from different formats.

    Use:

    • A numbered list for steps that should be followed in order.
    • Bullet points for information that does not require a specific order.
    • A table for comparisons.
    • A checklist for tasks that need to be completed.
    • Short paragraphs for explanations.
    • A template for content that will be reused.
    • A timeline for events arranged by date.

    The clearest format is usually better than the most decorative format.

    7. The Length

    Length instructions tell the AI how much information to provide.

    Examples include:

    • One sentence.
    • One paragraph.
    • Three paragraphs.
    • Five bullet points.
    • Under 100 words.
    • Approximately 500 words.
    • A detailed 2,000-word guide.
    • A ten-step process.

    For example:

    Summarize this article in five bullet points.

    Another example:

    Explain neural networks in approximately 600 words.

    Length instructions are especially useful when creating:

    • Emails.
    • Social media posts.
    • Summaries.
    • Advertisements.
    • Product descriptions.
    • Articles.
    • Presentations.
    • Video scripts.

    Use Realistic Length Requirements

    The requested length should match the task.

    For example:

    Write a complete guide to Artificial Intelligence in 50 words.

    This is unlikely to provide enough detail.

    A more realistic request would be:

    Write a 50-word introduction to Artificial Intelligence.

    Similarly, asking for a short email does not require a 1,000-word response.

    Exact Length Versus Approximate Length

    AI tools may not always follow an exact word count perfectly.

    Instead of saying:

    Write exactly 137 words.

    it may be more practical to say:

    Keep the response between 120 and 150 words.

    You should still check the final word count when the limit is important.

    8. Examples

    Examples show the AI what type of result you want.

    They are especially useful when you need:

    • A specific style.
    • A repeated format.
    • Consistent article titles.
    • Similar product descriptions.
    • Matching email templates.
    • A particular tone.
    • A certain type of explanation.

    For example:

    Suggest five article titles using a style similar to “What Is Artificial Intelligence? A Beginner’s Guide (2026).”

    The example gives the AI a pattern.

    It may produce titles such as:

    • What Is Machine Learning? A Beginner’s Guide (2026)
    • What Is Deep Learning? A Beginner’s Guide (2026)
    • What Is Generative AI? A Beginner’s Guide (2026)

    Give More Than One Example When Necessary

    One example may not always show the full pattern.

    For example:

    Create product titles similar to these:

    • Foldable Travel Bag for Weekend Trips
    • Portable Garment Steamer for Travel
    • Lightweight Packing Cubes for Organized Luggage

    Several examples help the AI identify the common style.

    Do Not Ask the AI to Copy Exactly

    Examples should guide the response, not encourage copying protected or private material.

    A safer instruction is:

    Use a similar level of simplicity and organization, but write original content.

    9. Limits and Restrictions

    Limits explain what the AI should not do.

    Useful limits may include:

    • Avoid technical jargon.
    • Do not exceed 300 words.
    • Do not invent statistics.
    • Do not add information that was not provided.
    • Do not mention competitors.
    • Do not include personal information.
    • Do not use tables.
    • Do not repeat ideas.
    • Do not use aggressive language.
    • Do not provide professional medical advice.
    • Do not include logos or watermarks.
    • Do not change the original meaning.

    For example:

    Rewrite this paragraph in simpler language. Keep the original meaning, do not add new facts, and avoid technical terminology.

    The restrictions help protect the accuracy and purpose of the original text.

    Negative Instructions Should Be Clear

    A negative instruction explains what to avoid.

    For example:

    Create an educational image of a person using an AI assistant. Do not include company logos, watermarks, distorted hands, or unreadable text.

    These instructions are common in AI image generation.

    For writing tasks:

    Explain the topic without using mathematical formulas or programming code.

    Clear negative instructions can reduce unwanted content.

    However, too many restrictions may make the prompt difficult to follow. Include only the limits that matter.

    10. Quality Requirements

    Quality requirements describe what a successful response should achieve.

    They may include:

    • Accuracy.
    • Clarity.
    • Originality.
    • Completeness.
    • Logical organization.
    • Correct grammar.
    • Suitable examples.
    • Consistent terminology.
    • Fact verification.
    • Beginner-friendly language.

    For example:

    Review the article for clarity, grammar, repetition, and logical organization. Preserve the beginner-friendly tone.

    Another example:

    Create a comparison table using only the information I provide. Mark any missing information as “Not provided” instead of guessing.

    This quality requirement reduces the risk of invented details.

    Ask the AI to Identify Uncertainty

    For research-related tasks, you may tell the AI how to handle uncertain information.

    For example:

    Do not guess. Clearly identify any statement that requires verification.

    Or:

    Separate confirmed information from assumptions.

    This does not guarantee accuracy, but it encourages a more careful response.

    Ask for a Final Check

    You can include a final review instruction in the prompt.

    For example:

    Before providing the final answer, check that all seven steps are included, the language is suitable for beginners, and the response stays under 800 words.

    This can help the AI notice missing requirements.

    However, you should still complete your own review.

    Putting the Elements Together

    A complete prompt may combine several elements.

    For example:

    Act as a patient computer tutor. Explain how to create a strong password to an older beginner with basic computer knowledge. Use simple language and a friendly tone. Organize the answer as a six-step numbered guide, include two examples of strong passwords using fictional information, and keep the response under 500 words. Do not include real personal information or recommend reusing the same password.

    This prompt contains:

    • Role: Patient computer tutor.
    • Task: Explain how to create a strong password.
    • Audience: Older beginner.
    • Context: Basic computer knowledge.
    • Tone: Friendly.
    • Format: Six-step numbered guide.
    • Examples: Two fictional examples.
    • Length: Under 500 words.
    • Limits: No real personal information and no password reuse.

    Another Complete Prompt Example

    Write a beginner-friendly article introduction about AI image generation. The article is for adults with no technical experience. Use a clear and encouraging tone, explain the topic in simple language, include one everyday example, and keep the introduction between 300 and 400 words. Do not include technical explanations that belong in later sections.

    This prompt contains:

    • Task: Write an introduction.
    • Topic: AI image generation.
    • Audience: Adults with no technical experience.
    • Tone: Clear and encouraging.
    • Format: Introductory section.
    • Example: One everyday example.
    • Length: 300 to 400 words.
    • Limit: Avoid advanced technical explanation.

    Not Every Prompt Needs Every Element

    A simple task may require only a short instruction.

    For example:

    Translate “Thank you for your help” into French.

    The task is clear.

    A detailed prompt is more useful when:

    • The task is complex.
    • The output will be published.
    • Several requirements must be followed.
    • The intended audience is important.
    • The tone must be controlled.
    • The format must be consistent.
    • Accuracy is especially important.

    The goal is not to make every prompt long.

    The goal is to make every prompt clear enough for the task.

    A Practical Prompt Checklist

    Before submitting an important prompt, check:

    • Did I clearly state the task?
    • Did I provide necessary context?
    • Did I identify the audience?
    • Did I specify the tone?
    • Did I request a useful format?
    • Did I set a realistic length?
    • Did I provide examples when needed?
    • Did I explain what to avoid?
    • Did I describe the required quality?
    • Are any instructions conflicting?

    You do not need to answer every question for every prompt. Use the checklist to identify missing information that could affect the result.

    Figure 5. The main elements that can be combined to create an effective AI prompt.

    An effective prompt usually begins with a clear task and then adds the details needed for that situation. Context, audience, tone, format, examples, limits, and quality requirements help reduce uncertainty and guide the AI toward a more suitable response.

    A Simple Prompt Formula for Beginners

    Beginners do not need to memorize complicated prompt-writing methods.

    A simple formula can make most prompts clearer and more useful:

    Task + Context + Audience + Format + Tone + Limits

    This formula helps you decide what information the AI needs before it begins the task.

    You do not need to include every part in every prompt. Use only the elements that are relevant.

    1. Task

    The task explains what you want the AI to do.

    Begin with a clear action word, such as:

    • Explain.
    • Write.
    • Summarize.
    • Compare.
    • Create.
    • Rewrite.
    • Review.
    • Translate.
    • Organize.
    • Suggest.
    • Plan.

    For example:

    Explain machine learning.

    The task is clear: explain a subject.

    Another example:

    Write a customer-service email.

    The task is to write an email.

    A prompt should clearly tell the AI what action to take.

    2. Context

    Context gives the AI background information about the situation.

    For example:

    I am creating a beginner-friendly website about Artificial Intelligence.

    This helps the AI understand the purpose of the task.

    Other useful context may include:

    • What project you are working on.
    • What has already been completed.
    • Why you need the result.
    • What problem you are trying to solve.
    • What information the AI should use.
    • What restrictions or circumstances affect the task.

    For example:

    I am preparing a weekly study plan for someone who can study for only 30 minutes each day.

    This context helps the AI create a realistic plan.

    3. Audience

    The audience explains who will read or use the result.

    For example:

    The explanation is for a complete beginner with no technical experience.

    Audience information helps the AI choose suitable words, examples, and detail.

    Possible audiences include:

    • Children.
    • Teenagers.
    • Adults.
    • Older beginners.
    • Students.
    • Teachers.
    • Customers.
    • Business owners.
    • Job applicants.
    • Technical professionals.
    • General website readers.

    For example:

    Explain online privacy to an older adult who uses email and social media but has limited technical knowledge.

    This is more useful than simply asking:

    Explain online privacy.

    4. Format

    Format explains how the response should be organized.

    You may request:

    • A short paragraph.
    • Bullet points.
    • Numbered steps.
    • A table.
    • A checklist.
    • An outline.
    • A template.
    • A comparison.
    • Questions and answers.
    • Headings and subheadings.

    For example:

    Present the answer as a seven-step numbered guide.

    Another example:

    Compare the tools in a table with four columns.

    A clear format makes the response easier to read and use.

    5. Tone

    Tone explains how the response should sound.

    You may ask for a tone that is:

    • Friendly.
    • Professional.
    • Polite.
    • Formal.
    • Encouraging.
    • Neutral.
    • Persuasive.
    • Calm.
    • Respectful.
    • Beginner-friendly.

    For example:

    Use a friendly and encouraging tone.

    Tone is especially important when creating:

    • Emails.
    • Customer messages.
    • Articles.
    • Advertisements.
    • Social media posts.
    • Instructions.
    • Complaints.
    • Apologies.

    6. Limits

    Limits explain what the AI should avoid or control.

    Possible limits include:

    • Keep the answer under 300 words.
    • Avoid technical terminology.
    • Do not add facts that were not provided.
    • Do not use tables.
    • Do not repeat information.
    • Do not include brand names.
    • Do not use private information.
    • Do not make medical claims.
    • Do not include logos or watermarks.

    For example:

    Keep the answer under 500 words and avoid technical jargon.

    Limits help prevent the response from becoming unsuitable for the task.

    The Complete Formula

    The formula can be written as:

    Task + Context + Audience + Format + Tone + Limits

    Here is a complete example:

    Explain prompt engineering. I am creating a beginner-friendly Artificial Intelligence website. The explanation is for adults with no technical experience. Organize the answer under five short headings, use a friendly and encouraging tone, and keep it under 700 words. Avoid programming terminology.

    This prompt contains:

    • Task: Explain prompt engineering.
    • Context: The content is for an Artificial Intelligence website.
    • Audience: Adults with no technical experience.
    • Format: Five short headings.
    • Tone: Friendly and encouraging.
    • Limits: Under 700 words and no programming terminology.

    The Formula Does Not Need to Follow One Exact Order

    The elements may appear in a different order.

    For example:

    For a complete beginner, create a five-step guide explaining how to write a strong AI prompt. Use simple language, include one example in each step, and keep the guide under 800 words.

    This prompt contains the same important elements even though they appear in a different sequence.

    The order is less important than clarity.

    Example 1: Writing an Email

    Basic prompt:

    Write an email.

    This prompt does not explain the purpose, recipient, tone, or length.

    Using the formula:

    Write an email to my internet provider asking about a recent increase in my monthly bill. Explain that the price increased without a clear notice. Use a polite and professional tone, keep the email under 150 words, and ask for a written explanation of the new charges.

    The improved prompt includes:

    • Task: Write an email.
    • Context: The monthly bill increased.
    • Recipient: Internet provider.
    • Purpose: Request an explanation.
    • Tone: Polite and professional.
    • Length: Under 150 words.
    • Limit: Ask for an explanation rather than making accusations.

    Example 2: Learning a New Subject

    Basic prompt:

    Teach me about cloud computing.

    Using the formula:

    Explain cloud computing to a complete beginner who uses email and online file storage but has no technical training. Use simple language, one everyday comparison, and three real-world examples. Organize the explanation under short headings and keep it under 800 words.

    The improved prompt gives the AI clear guidance about:

    • The learner’s experience.
    • The required language level.
    • The examples.
    • The structure.
    • The length.

    Example 3: Creating a Study Plan

    Basic prompt:

    Create a study plan.

    Using the formula:

    Create a seven-day study plan for a beginner learning Artificial Intelligence. The learner has 30 minutes available each day. Present the plan as a table with columns for day, topic, learning activity, and practice task. Begin with basic concepts and avoid programming activities.

    This prompt includes:

    • Task: Create a study plan.
    • Context: The subject is Artificial Intelligence.
    • Audience: Beginner.
    • Available time: 30 minutes per day.
    • Format: Table.
    • Length: Seven days.
    • Limit: No programming activities.

    Example 4: Summarizing an Article

    Basic prompt:

    Summarize this.

    Using the formula:

    Summarize the following article for a complete beginner. Present the five most important ideas as bullet points. Keep each point under 25 words, use simple language, and do not add information that is not included in the article.

    The AI now knows:

    • What to do.
    • Who the summary is for.
    • How many points to include.
    • How long each point should be.
    • What language level to use.
    • What information to avoid.

    Example 5: Improving a Paragraph

    Basic prompt:

    Make this better.

    The word “better” is unclear.

    Using the formula:

    Rewrite the following paragraph so it is easier for a complete beginner to understand. Keep the original meaning, shorten long sentences, remove repeated ideas, and use a friendly educational tone. Do not add new facts.

    The improved prompt explains exactly what kind of improvement is required.

    Example 6: Creating a Social Media Post

    Basic prompt:

    Write a Facebook post.

    Using the formula:

    Write a Facebook post promoting a new beginner’s guide to prompt engineering. The audience is adults who are curious about Artificial Intelligence but have little technical experience. Use a friendly and encouraging tone, keep the post under 120 words, and end with a clear invitation to read the guide.

    This gives the AI direction about:

    • Platform.
    • Subject.
    • Audience.
    • Tone.
    • Length.
    • Call to action.

    Example 7: Creating an AI Image

    The same formula can be adapted for image generation.

    Basic prompt:

    Create an image about prompt engineering.

    Using the formula:

    Create a clean horizontal 16:9 educational illustration showing an older beginner typing a detailed prompt into an AI assistant on a laptop. Show a clear flow from written instructions to useful results such as an email, a checklist, and an educational image. Use a modern blue-and-purple colour theme, natural lighting, and a professional beginner-friendly style. Do not include company logos, watermarks, distorted hands, or unreadable text.

    For an image prompt, the main elements may include:

    • Subject.
    • Action.
    • Setting.
    • Style.
    • Colour
    • Lighting.
    • Orientation.
    • Objects to include.
    • Elements to avoid.

    Example 8: Comparing Products or Services

    Basic prompt:

    Compare these tools.

    Using the formula:

    Compare ChatGPT, Google Gemini, and Claude for a complete beginner. Present the comparison in a table with columns for main purpose, beginner advantage, possible limitation, and common use. Use neutral language and avoid declaring one tool the best.

    This prompt controls:

    • The tools being compared.
    • The audience.
    • The format.
    • The comparison criteria.
    • The tone.
    • The restriction against an unsupported overall winner.

    Example 9: Planning a Trip

    Basic prompt:

    Plan a trip to Toronto.

    Using the formula:

    Create a one-day family itinerary for Toronto for two adults and two children. The family will travel by car and wants low-cost indoor and outdoor activities. Organize the plan by morning, afternoon, and evening. Include estimated travel time between locations and avoid activities that require advance reservations.

    The improved prompt provides practical information that affects the result.

    Example 10: Reviewing an Article

    Basic prompt:

    Check my article.

    Using the formula:

    Review the following beginner-friendly article about Artificial Intelligence. Identify grammar errors, repeated ideas, unclear sentences, inconsistent headings, and missing internal links. Present the findings as a checklist and do not rewrite the entire article.

    This prompt tells the AI:

    • What type of review to complete.
    • Which problems to look for.
    • How to present the findings.
    • What not to do.

    A Shorter Four-Part Formula

    For simple everyday tasks, beginners can use a shorter formula:

    Task + Details + Format + Limits

    For example:

    Write a polite appointment-cancellation email. Explain that I am unavailable because of a family commitment. Keep it under 100 words and ask to reschedule for next week.

    This includes:

    • Task: Write an email.
    • Details: Cancellation because of a family commitment.
    • Format: Email.
    • Limits: Under 100 words.
    • Required action: Ask to reschedule.

    The shorter formula is useful when the task does not require detailed context or audience information.

    A One-Sentence Prompt Template

    You can use this reusable template:

    Create [task or result] for [audience or purpose]. Include [important information]. Use [format and tone]. Keep it [length] and avoid [unwanted content].

    Example:

    Create a beginner-friendly explanation of cybersecurity for older adults. Include three common online threats and one safety tip for each. Use short headings and a calm, encouraging tone. Keep it under 900 words and avoid technical jargon.

    A Detailed Prompt Template

    For larger tasks, use this template:

    Task:
    What should the AI do?

    Context:
    What background information does it need?

    Audience:
    Who will read or use the result?

    Required content:
    What information must be included?

    Format:
    How should the response be organized?

    Tone:
    How should it sound?

    Length:
    How detailed should it be?

    Limits:
    What should the AI avoid?

    Quality check:
    What should the AI confirm before providing the final answer?

    For example:

    Task: Create an article outline.
    Context: The article is for an Artificial Intelligence education website.
    Audience: Complete beginners.
    Required content: Definition, how it works, examples, benefits, limitations, myths, FAQs, and key takeaways.
    Format: H1 title, H2 main sections, and H3 subsections.
    Tone: Friendly and educational.
    Length: Detailed enough for a 5,000-word article.
    Limits: Avoid advanced programming topics and repeated sections.
    Quality check: Confirm that all required sections are included and placed in a logical order.

    This structured format is useful when the task contains many requirements.

    Start Simple and Add Details

    You do not always need to write a long prompt immediately.

    You can begin with a simple prompt:

    Create an outline for an article about prompt engineering.

    Then add details:

    Make it suitable for complete beginners.

    Then refine the structure:

    Include practical examples, benefits, limitations, myths, FAQs, and key takeaways.

    Then control the format:

    Use H2 headings for main sections and H3 headings for subsections.

    This step-by-step method is useful when you are still deciding what you need.

    However, when your requirements are already clear, including them in the first prompt can save time.

    Do Not Add Details That Do Not Affect the Result

    A prompt should be clear, not unnecessarily long.

    For example:

    I woke up at 7:00 this morning, drank coffee, checked my email, and then decided that I need a Facebook post about my new AI article.

    Most of this information does not affect the task.

    A clearer prompt would be:

    Write a Facebook post promoting my new beginner-friendly article about Artificial Intelligence.

    Add only the details that help the AI produce the correct result.

    Avoid Overloading the Prompt

    Too many instructions can make a prompt difficult to follow.

    For example:

    Write a short, complete, highly detailed, very simple, advanced, professional, casual, formal, humorous, serious article under 100 words.

    Several instructions conflict with one another.

    A clearer prompt would be:

    Write a 100-word beginner introduction to Artificial Intelligence in a professional but friendly tone.

    When the task is large, divide it into smaller prompts rather than placing dozens of requirements into one instruction.

    Check the Response Against the Formula

    After receiving the AI’s answer, review it using the same elements:

    • Did it complete the correct task?
    • Did it use the context properly?
    • Is it suitable for the audience?
    • Did it follow the requested format?
    • Is the tone appropriate?
    • Did it follow the length requirement?
    • Did it respect the limits?

    For example, suppose the prompt requested:

    Five bullet points, each under 20 words.

    Check that:

    • There are exactly five points.
    • The points are formatted as bullets.
    • Each point stays under the requested length.
    • The content matches the subject.

    Prompt engineering includes checking whether the instructions were followed.

    Save Useful Prompt Templates

    When a prompt works well, save it for future use.

    You may create reusable templates for:

    • Article introductions.
    • Email replies.
    • Product descriptions.
    • Social media posts.
    • Study plans.
    • Image-generation prompts.
    • Article reviews.
    • Comparison tables.
    • Frequently asked questions.
    • WordPress publishing checklists.

    For example:

    Write a beginner-friendly introduction about [TOPIC]. Explain why the topic matters, include one everyday example, use short paragraphs and simple language, and keep the introduction between 300 and 400 words.

    Later, replace [TOPIC] with:

    • Machine learning.
    • Deep learning.
    • Generative AI.
    • Prompt engineering.
    • AI image generation.
    • AI video generation.

    Templates improve consistency and save time.

    A Practical Beginner Method

    Use this five-step method:

    1. State the task clearly.
    2. Add the most important context.
    3. Identify the audience.
    4. Request the desired format and tone.
    5. Add necessary limits.

    Example:

    Create a beginner-friendly checklist explaining how to write a strong AI prompt. The checklist is for adults with no technical experience. Include eight steps, use simple and encouraging language, and keep each step under 30 words.

    This method is simple enough for everyday use but detailed enough to improve many AI responses.

    Figure 6. A simple prompt formula beginners can use for everyday AI tasks.

    This formula helps beginners organize their instructions before submitting a prompt. The task tells the AI what to do, while context, audience, format, tone, and limits provide the additional direction needed to produce a more suitable response.

    How to Write Better AI Prompts Step by Step

    Writing a better AI prompt does not require technical knowledge.

    The main goal is to explain your request clearly enough that the AI can understand:

    • What you want it to do.
    • Why you need the result.
    • Who the result is for.
    • What information must be included.
    • How the response should be organized.
    • What the AI should avoid.

    The following step-by-step method can be used for writing, learning, planning, research, image generation, business tasks, and many other activities.

    Step 1: Identify Your Main Goal

    Before writing the prompt, decide what you actually need.

    A vague goal may produce a vague prompt.

    For example:

    Help me with Artificial Intelligence.

    This does not explain the specific task.

    You may actually need the AI to:

    • Explain an AI concept.
    • Recommend learning topics.
    • Create an article outline.
    • Review an article.
    • Generate an image prompt.
    • Create a study plan.
    • Compare AI tools.
    • Write a social media post.

    A clearer goal would be:

    I need a beginner-friendly explanation of how Artificial Intelligence is used in everyday life.

    Once the goal is clear, the prompt becomes easier to write.

    Ask Yourself Three Questions

    Before submitting the prompt,

    ask:

    1. What result do I need?
    2. Who will use the result?
    3. What will I do with it?

    For example:

    • Result needed: An article outline.
    • Audience: Complete beginners.
    • Purpose: Publish it on an AI education website.

    The prompt could then begin:

    Create a detailed outline for a beginner-friendly article about prompt engineering for an Artificial Intelligence education website.

    This is much clearer than:

    Write something about prompts.

    Step 2: Begin with a Clear Action

    Start the prompt with a direct instruction.

    Useful action words include:

    • Explain.
    • Write.
    • Create.
    • Compare.
    • Summarize.
    • Rewrite.
    • Review.
    • Suggest.
    • Organize.
    • Translate.
    • Extract.
    • Plan.
    • Correct.
    • Simplify.
    • Classify.

    For example:

    Explain how machine learning works.

    Write a polite customer-service email.

    Create a seven-day study plan.

    Compare three AI tools.

    A clear action tells the AI what type of response to generate.

    Avoid Unclear Openings

    Prompts such as these may be too vague:

    • Tell me more.
    • Help me.
    • Make this better.
    • Do something with this.
    • What do you think?
    • Fix it.

    Replace them with more specific instructions.

    Instead of:

    Make this better.

    Write:

    Rewrite this paragraph in simpler language, remove repeated ideas, and keep the original meaning.

    Instead of:

    Help me with my website.

    Write:

    Review the navigation menu for my beginner-friendly AI website and suggest improvements that keep it simple.

    Step 3: Add Important Context

    Context explains the situation surrounding the task.

    The AI may need to know:

    • What project you are working on.
    • What has already been completed.
    • Why you need the result.
    • What information should be used.
    • What problem you are trying to solve.
    • What restrictions affect the task.

    For example:

    I am creating an educational website that teaches Artificial Intelligence to complete beginners.

    This context helps the AI understand that the response should not be highly technical.

    Another example:

    I have already written the introduction and first three sections of the article. Review only the remaining sections for repetition.

    This prevents the AI from reviewing or rewriting the wrong part.

    Include Relevant Context Only

    Useful context affects the answer.

    For a travel plan, useful context may include:

    • Destination.
    • Dates.
    • Budget.
    • Number of travellers.
    • Transportation.
    • Children’s ages.
    • Accessibility requirements.

    For an article, useful context may include:

    • Topic.
    • Audience.
    • Website purpose.
    • Existing structure.
    • Word count.
    • Tone.
    • Publication platform.

    Avoid details that do not affect the task.

    Too much unnecessary information can make the prompt harder to understand.

    Step 4: Identify the Audience

    Tell the AI who will read or use the response.

    The same topic may need very different explanations for different audiences.

    Compare:

    Explain prompt engineering.

    Explain prompt engineering to a complete beginner with no technical experience.

    The second prompt guides the AI toward simpler language.

    Possible audience descriptions include:

    • A complete beginner.
    • A 10-year-old student.
    • An older adult.
    • A small-business owner.
    • A university student.
    • A job applicant.
    • A website visitor.
    • A customer.
    • A technical professional.

    Be Specific When the Audience Matters

    Instead of:

    Write this for beginners.

    You could write:

    Write this for adults over 50 who use email and social media but have little experience with Artificial Intelligence.

    This gives the AI a clearer understanding of the reader’s background.

    However, avoid making assumptions about an audience that are not relevant or supported.

    Step 5: Explain What Must Be Included

    List the important information the AI must include.

    For example:

    Explain prompt engineering and include a definition, one everyday comparison, three examples, two benefits, and two limitations.

    This reduces the chance that the AI will omit an important part.

    For an article outline, you might request:

    • Introduction.
    • Definition.
    • How it works.
    • Practical examples.
    • Benefits.
    • Limitations.
    • Common myths.
    • FAQs.
    • Key takeaways.
    • Final tip.

    For an email, you might request:

    • Recipient.
    • Purpose.
    • Important date.
    • Order number.
    • Requested action.
    • Closing.

    Separate Required Information from Optional Information

    Required information must appear in the result.

    Optional information may be included only when helpful.

    For example:

    Include the appointment date and reference number. You may also add a short polite closing.

    This distinction helps the AI prioritize the most important details.

    Tell the AI how the answer should be organized.

    Step 6: Choose the Best Format

    The format should match the task.

    Use:

    • Numbered steps for a process.
    • Bullet points for separate ideas.
    • A table for comparison.
    • A checklist for completed tasks.
    • Paragraphs for explanations.
    • A template for reusable content.
    • Headings for long articles.
    • A timeline for events arranged by date.

    For example:

    Present the instructions as a numbered seven-step guide.

    Another example:

    Compare the three tools in a table with columns for main use, advantage, limitation, and beginner suitability.

    Specify the Heading Structure for Long Content

    For articles and guides, you may say:

    Use one H1 title, H2 headings for main sections, and H3 headings for subsections.

    You may also provide the exact section order.

    For example:

    Organize the article as follows: introduction, definition, how it works, practical uses, benefits, limitations, FAQs, key takeaways, and final tip.

    This helps maintain consistency across multiple articles.

    Step 7: Choose the Tone

    Tell the AI how the response should sound.

    Possible tones include:

    • Friendly.
    • Professional.
    • Polite.
    • Formal.
    • Encouraging.
    • Neutral.
    • Persuasive.
    • Calm.
    • Respectful.
    • Confident.
    • Beginner-friendly.

    For example:

    Use a friendly and encouraging tone.

    For a complaint:

    Use a firm but respectful tone.

    For a report:

    Use a neutral and factual tone.

    For a lesson:

    Use a patient, beginner-friendly teaching tone.

    Avoid Too Many Tone Instructions

    A prompt may become confusing when it requests several conflicting styles.

    For example:

    Make it highly formal, casual, humorous, serious, and emotional.

    A clearer instruction would be:

    Use a professional but friendly tone.

    Step 8: Set a Realistic Length

    Tell the AI how long or detailed the response should be.

    Examples include:

    • One sentence.
    • Three paragraphs.
    • Five bullet points.
    • Under 150 words.
    • Between 500 and 700 words.
    • A detailed 2,000-word guide.
    • A ten-step checklist.

    For example:

    Keep the email under 120 words.

    Another example:

    Write a detailed explanation between 800 and 1,000 words.

    Match the Length to the Task

    A complete guide may require more space than a short introduction.

    Avoid conflicting requests such as:

    Write a complete and detailed guide in 100 words.

    A better instruction would be:

    Write a 100-word overview that introduces the subject without covering advanced details.

    Check the Final Length Yourself

    AI tools may not always follow exact word limits perfectly.

    When the length matters, verify it before using or publishing the content.

    Step 9: Add Limits and Restrictions

    Explain what the AI should avoid.

    Useful restrictions may include:

    • Avoid technical jargon.
    • Do not invent facts.
    • Do not add information that was not provided.
    • Do not repeat ideas.
    • Do not use aggressive language.
    • Do not include personal information.
    • Do not exceed the word limit.
    • Do not include logos or watermarks.
    • Do not change the original meaning.
    • Do not present assumptions as confirmed facts.

    For example:

    Use only the information I provide. Mark missing details as “Not provided” instead of guessing.

    Another example:

    Rewrite this paragraph without changing the meaning or adding new claims.

    Limits can improve control and reduce unwanted content.

    Do Not Add Too Many Restrictions

    A long list of unnecessary restrictions may confuse the AI.

    Include only the limits that affect the result.

    Step 10: Provide an Example When Helpful

    Examples show the AI the style, format, or pattern you expect.

    For example:

    Suggest five article titles using a style similar to “What Is Machine Learning? A Beginner’s Guide (2026).”

    Or:

    Write three product descriptions using the same structure as this example: product name, main benefit, three features, and short call to action.

    Examples are helpful for:

    • Article titles.
    • Repeated content.
    • Email templates.
    • Product descriptions.
    • Social media posts.
    • Lesson formats.
    • Image styles.
    • Tables.

    Ask for Original Content

    When providing examples, make it clear that the AI should follow the pattern rather than copy the wording.

    For example:

    Use the same level of simplicity and organization, but create original text.

    Step 11: Ask the AI to Handle Uncertainty Carefully

    AI tools may sometimes guess when information is missing.

    You can reduce this by adding instructions such as:

    • Do not guess.
    • Identify missing information.
    • Mark uncertain claims clearly.
    • Separate facts from assumptions.
    • State when verification is required.
    • Use only the provided source material.

    For example:

    Use only the information in the document. Do not invent dates, prices, names, or statistics.

    For research tasks:

    Clearly identify any information that may have changed and requires current verification.

    These instructions do not guarantee perfect accuracy, but they help guide the AI toward a more careful response.

    Step 12: Submit the Prompt and Review the Response

    After submitting the prompt, check whether the AI followed your instructions.

    Review:

    • The task.
    • Context.
    • Audience.
    • Required information.
    • Format.
    • Tone.
    • Length.
    • Restrictions.
    • Accuracy.
    • Completeness.

    Ask yourself:

    • Did the AI answer the correct question?
    • Did it include all required points?
    • Is the language suitable for the audience?
    • Is the format correct?
    • Is anything repeated?
    • Is anything unclear?
    • Are important facts verified?
    • Did it invent unsupported details?

    A strong prompt may still produce an imperfect response.

    Human review remains necessary.

    Step 13: Use Follow-Up Prompts

    A follow-up prompt tells the AI how to improve its first response.

    For example:

    Make the explanation shorter.

    A better follow-up would be:

    Shorten the explanation to approximately 300 words. Keep the definition and examples, but remove repeated background information.

    Other useful follow-up prompts include:

    • Add three practical examples.
    • Explain the second point more simply.
    • Change the answer into a table.
    • Use a more professional tone.
    • Remove repeated ideas.
    • Correct the grammar without changing the meaning.
    • Add a five-point checklist.
    • Replace technical terms with plain language.
    • Keep each paragraph under four sentences.
    • Add a conclusion without rewriting the rest.

    Refer to the Exact Problem

    Instead of:

    Try again.

    Write:

    The response is too technical. Rewrite it for a complete beginner and replace technical terms with everyday language.

    Specific feedback produces better revisions.

    Step 14: Revise One Problem at a Time

    When several changes are needed, you may improve the answer in stages.

    For example:

    1. Correct the structure.
    2. Simplify the language.
    3. Remove repetition.
    4. Add examples.
    5. Check the length.
    6. Review facts.

    This can be easier than giving the AI many corrections in one instruction.

    For a long article, you may review section by section.

    For example:

    Review only the introduction for clarity and repetition. Do not change the other sections.

    Then:

    Review the “How It Works” section and identify any technical terms that need simpler explanations.

    This gives you greater control.

    Step 15: Save the Final Prompt as a Template

    When a prompt works well, save it.

    A reusable prompt template can save time and improve consistency.

    For example:

    Write a beginner-friendly introduction about [TOPIC]. Explain what the topic is, why it matters, and how it appears in everyday life. Use simple language, short paragraphs, one practical example, and a friendly educational tone. Keep it between 300 and 400 words.

    Replace [TOPIC] with a new subject each time.

    You can create templates for:

    • Article introductions.
    • Full article outlines.
    • Email replies.
    • Product descriptions.
    • Social media posts.
    • Study plans.
    • Image-generation prompts.
    • Article reviews.
    • Comparison tables.
    • FAQs.
    • WordPress publishing details.

    A Complete Step-by-Step Example

    Suppose you need a beginner-friendly explanation of cybersecurity.

    First Attempt

    Explain cybersecurity.

    Possible result:

    The AI may provide a broad and technical answer.

    Improved Prompt

    Explain cybersecurity to a complete beginner who uses email, online banking, and social media. Use simple language, three everyday examples, and a friendly tone. Organize the answer under short headings and keep it under 800 words. Avoid technical jargon.

    This version includes:

    • Task.
    • Audience.
    • Context.
    • Examples.
    • Tone.
    • Format.
    • Length.
    • Restriction.

    Follow-Up Prompt

    The explanation is useful, but add a five-point safety checklist at the end. Do not rewrite the other sections.

    This follow-up adds one missing requirement without restarting the task.

    Final Review

    Check that:

    • The explanation is suitable for beginners.
    • The examples are relevant.
    • The checklist contains five points.
    • The language is simple.
    • The answer stays close to the requested length.
    • Any security claims are accurate.

    Example: Writing a Better Email Prompt

    Weak Prompt

    Write a complaint.

    This leaves several questions unanswered.

    Better Prompt

    Write a polite but firm complaint email to an appliance retailer. The refrigerator was delivered with a damaged door on July 15. Include order number 78214, request a replacement, and ask for a response within five business days. Keep the email under 180 words and avoid threatening language.

    This prompt explains:

    • The type of message.
    • Recipient.
    • Problem.
    • Date.
    • Order number.
    • Requested solution.
    • Response deadline.
    • Tone.
    • Length.
    • Restriction.

    Example: Writing a Better Article Prompt

    Weak Prompt

    Write an article about AI.

    Better Prompt

    Create a detailed beginner-friendly article about how Artificial Intelligence is used in everyday life. The readers are adults with no technical experience. Include an introduction, six practical uses, three benefits, three limitations, common myths, five FAQs, key takeaways, and a final tip. Use H2 and H3 headings, simple language, and an encouraging educational tone. Avoid programming details and unsupported statistics.

    The improved prompt provides a clear article structure and audience.

    Example: Writing a Better Image Prompt

    Weak Prompt

    Create a technology image.

    Better Prompt

    Create a clean horizontal 16:9 educational illustration of an older beginner using an AI assistant on a laptop at home. Show a prompt box leading to useful results such as an email, a checklist, and an educational image. Use natural lighting, a modern blue-and-purple colour theme, and a realistic but approachable style. Do not include logos, watermarks, distorted hands, or unreadable text.

    The improved prompt describes:

    • Subject.
    • Action.
    • Setting.
    • Orientation.
    • Visual results.
    • Lighting.
    • Colour.
    • Style.
    • Elements to avoid.

    Example: Reviewing a Long Article

    Weak Prompt

    Check this article.

    Better Prompt

    Review this beginner-friendly article for grammar, repeated ideas, unclear sentences, inconsistent headings, broken figure captions, and missing internal links. Present the findings as a checklist organized by section. Do not rewrite the full article.

    This tells the AI exactly what to inspect and how to present the findings.

    Common Mistakes When Writing Prompts Step by Step

    Even when following a method, beginners may make several common mistakes.

    Giving Too Little Information

    Example:

    Create a plan.

    The AI does not know the subject, length, audience, or purpose.

    Better:

    Create a seven-day beginner study plan for learning basic Artificial Intelligence concepts. Allow 30 minutes per day and include one practical activity each day.

    Giving Too Much Unrelated Information

    A long personal story may distract from the main task.

    Keep relevant details and remove information that does not affect the answer.

    Combining Conflicting Instructions

    Example:

    Write a highly detailed article that is under 100 words.

    Better:

    Write a 100-word introductory overview.

    Asking for Several Different Tasks at Once

    A prompt may become difficult to follow when it asks the AI to:

    • Write an article.
    • Design a website.
    • Create a business plan.
    • Generate images.
    • Write advertisements.

    Break large projects into separate prompts.

    Failing to Review the Response

    A well-written answer may still contain:

    • Incorrect information.
    • Repetition.
    • Missing sections.
    • Poor examples.
    • Unsuitable tone.
    • Formatting problems.

    Always review before publishing or using important content.

    A Beginner Prompt-Writing Checklist

    Before submitting your prompt, check:

    • Is the main goal clear?
    • Did I begin with a specific action?
    • Did I add relevant context?
    • Did I identify the audience?
    • Did I explain what must be included?
    • Did I choose a useful format?
    • Did I specify the tone?
    • Did I set a realistic length?
    • Did I explain what to avoid?
    • Did I provide an example when needed?
    • Are any instructions conflicting?
    • Will I review the final response?

    A prompt does not need to answer every question.

    Use the checklist to identify the details that matter for the task.

    Figure 7. A step-by-step process for writing, reviewing, and improving an AI prompt.

    This process begins with a clear goal and continues through writing, testing, and refining the prompt. Each step gives the AI more useful direction, while the review stage helps the user identify errors, missing information, and areas that require improvement.

    Common Prompting Techniques for Beginners

    Prompting techniques are simple methods that help users give clearer instructions to an AI tool.

    You do not need to use every technique in every prompt. Choose the method that best matches the task.

    Common beginner-friendly techniques include:

    • Direct prompting.
    • Context prompting.
    • Role prompting.
    • Audience prompting.
    • Format prompting.
    • Constraint prompting.
    • Example prompting.
    • Step-by-step prompting.
    • Follow-up prompting.
    • Prompt chaining.
    • Comparison prompting.
    • Review and revision prompting.
    • Source-based prompting.
    • Clarification prompting.
    • Negative prompting.

    1. Direct Prompting

    Direct prompting means clearly telling the AI what you want it to do.

    For example:

    Explain the difference between Artificial Intelligence and machine learning.

    The prompt contains a clear task without unnecessary background information.

    Direct prompting works well for simple tasks such as:

    • Asking a factual question.
    • Requesting a definition.
    • Translating a short sentence.
    • Correcting grammar.
    • Creating a short list.
    • Summarizing a paragraph.
    • Rewriting a sentence.

    Direct Prompt Example

    Basic prompt:

    What is cloud computing?

    Improved direct prompt:

    Explain cloud computing to a complete beginner in one short paragraph and include one everyday example.

    The second prompt remains direct but adds the audience, length, and example requirement.

    When to Use Direct Prompting

    Use direct prompting when:

    • The task is simple.
    • The goal is already clear.
    • Little background information is required.
    • The response does not need a complicated structure.

    A short prompt can be effective when the task itself is straightforward.

    2. Context Prompting

    Context prompting means giving the AI background information before asking it to complete the task.

    For example:

    I am creating a beginner-friendly website about Artificial Intelligence. My readers have no technical experience. Suggest ten article topics that should come after an introduction to AI.

    The context explains:

    • The type of website.
    • The subject.
    • The audience.
    • The position of the articles in the learning sequence.

    This helps the AI suggest more suitable topics.

    Context Prompt Example

    Without context:

    Create a study plan.

    With context:

    I am a complete beginner learning Artificial Intelligence. I can study for 30 minutes each evening and do not want programming lessons yet. Create a seven-day study plan.

    The additional information makes the study plan more realistic.

    Useful Types of Context

    You may provide context about:

    • Your goal.
    • Your project.
    • Your audience.
    • Your available time.
    • Your budget.
    • Your level of experience.
    • Work already completed.
    • Problems encountered.
    • Information the AI should use.
    • Restrictions that affect the task.

    Context is especially useful for planning, writing, reviewing, learning, and business tasks.

    3. Role Prompting

    Role prompting means asking the AI to respond from a particular practical perspective.

    For example:

    Act as a patient computer tutor. Explain how to save a document as a PDF to a complete beginner.

    The role helps guide the tone and focus of the answer.

    Common roles include:

    • Tutor.
    • Editor.
    • Study coach.
    • Customer-service assistant.
    • Marketing assistant.
    • Career adviser.
    • Travel planner.
    • Technical trainer.
    • Proofreader.
    • Interviewer.

    Role Prompt Example

    Act as an editor for a beginner-friendly educational website. Review the following introduction for clarity, repetition, grammar, and suitability for readers with no technical experience.

    This role helps the AI focus on editing rather than rewriting the entire article.

    Use Roles Only When Helpful

    A role should provide useful direction.

    An exaggerated role such as:

    Act as the greatest world-famous expert ever.

    does not explain the task clearly.

    Specific instructions are more important than impressive-sounding roles.

    A better prompt would be:

    Act as a beginner-friendly editor. Identify unclear sentences and technical terms that need simpler explanations.

    4. Audience Prompting

    Audience prompting means telling the AI who will read or use the response.

    For example:

    Explain online banking security to an older adult with basic computer knowledge.

    The audience instruction helps control:

    • Vocabulary.
    • Level of detail.
    • Examples.
    • Tone.
    • Structure.

    Audience Prompt Examples

    For a child:

    Explain Artificial Intelligence to a 10-year-old using a school-related example.

    For a beginner:

    Explain neural networks to an adult with no programming experience.

    For a business owner:

    Explain the benefits and risks of using AI for customer service to a small-business owner.

    For a technical reader:

    Explain the main components of a neural network using technical terminology and mathematical notation.

    The subject may stay the same, but the explanation changes depending on the audience.

    5. Format Prompting

    Format prompting means telling the AI how to organize the response.

    You may request:

    • Bullet points.
    • Numbered steps.
    • A table.
    • A checklist.
    • Short paragraphs.
    • Headings and subheadings.
    • Questions and answers.
    • A template.
    • A timeline.
    • A script.
    • An outline.

    Format Prompt Example

    Compare ChatGPT, Google Gemini, and Claude in a table with columns for main use, beginner advantage, possible limitation, and common task.

    The table format makes comparison easier.

    Another example:

    Explain how to create a strong password as a seven-step numbered guide.

    Numbered steps are suitable because the task involves a process.

    Choosing the Right Format

    Use:

    • A table for comparisons.
    • A numbered list for ordered instructions.
    • Bullet points for separate ideas.
    • A checklist for tasks that need verification.
    • Headings for long explanations.
    • A template for repeated content.
    • A timeline for events arranged by date.

    The format should make the information easier to understand and use.

    6. Constraint Prompting

    Constraint prompting means setting limits or rules for the response.

    For example:

    Explain blockchain in under 300 words. Avoid technical jargon and do not include programming examples.

    The constraints control:

    • Length.
    • Language.
    • Content.
    • Tone.
    • Format.
    • Information to avoid.

    Common Constraints

    You may tell the AI:

    • Keep the answer under 200 words.
    • Use no more than five bullet points.
    • Avoid technical terminology.
    • Do not add information that was not provided.
    • Do not repeat ideas.
    • Use only the supplied source.
    • Do not include brand names.
    • Do not use tables.
    • Keep each paragraph under four sentences.
    • Do not change the original meaning.

    Constraint Prompt Example

    Rewrite the following paragraph in simple language. Keep the original meaning, remove repeated ideas, and do not add new facts.

    The limits help protect the meaning of the original text.

    Avoid Too Many Constraints

    Too many rules can make a prompt difficult to follow.

    For example:

    Write a highly detailed, very short, formal, casual, technical, non-technical article in exactly 75 words.

    Several instructions conflict.

    A clearer version would be:

    Write a 75-word beginner-friendly introduction using a professional but friendly tone.

    7. Example Prompting

    Example prompting means showing the AI a sample of the style, structure, or result you want.

    For example:

    Suggest five article titles using a style similar to “What Is Machine Learning? A Beginner’s Guide (2026).”

    The example gives the AI a pattern to follow.

    One-Shot Prompting

    One-shot prompting means providing one example.

    For example:

    Create a title similar in structure to this example: “What Is Deep Learning? A Beginner’s Guide (2026).” The new topic is AI video generation.

    The AI may produce:

    What Is AI Video Generation? A Beginner’s Guide (2026).

    Few-Shot Prompting

    Few-shot prompting means providing several examples.

    For example:

    Create five new beginner article titles using the same general style as these examples:

    • What Is Artificial Intelligence? A Beginner’s Guide (2026)
    • What Is Machine Learning? A Beginner’s Guide (2026)
    • What Is Generative AI? A Beginner’s Guide (2026)

    Several examples help the AI recognize the common pattern.

    Ask for Original Content

    Examples should guide the AI rather than encourage direct copying.

    You may add:

    Follow the same structure and level of simplicity, but create original wording.

    8. Step-by-Step Prompting

    Step-by-step prompting means asking the AI to divide a task or explanation into clear visible stages.

    For example:

    Explain how to create a WordPress post in ten numbered steps.

    This technique is useful for:

    • Instructions.
    • Tutorials.
    • Study plans.
    • Calculations.
    • Troubleshooting.
    • Business processes.
    • Website publishing.
    • Software tasks.

    Step-by-Step Prompt Example

    Create a beginner-friendly step-by-step guide for publishing an article on WordPress. Begin with opening the dashboard and end with checking the live page.

    The AI can organize the process in a logical order.

    Breaking Down Difficult Topics

    You may also ask:

    Explain neural networks in four stages: input, processing, learning, and output.

    This makes a complex topic easier to follow.

    For calculations or factual work, you may ask the AI to show the main method, assumptions, and final result clearly. You should still verify important calculations independently.

    9. Follow-Up Prompting

    Follow-up prompting means improving the AI’s response through additional instructions.

    For example:

    First prompt:

    Explain cybersecurity.

    Follow-up prompt:

    Rewrite the explanation for a complete beginner and add three everyday examples.

    Another follow-up might be:

    Shorten it to 500 words and add a five-point safety checklist.

    Follow-up prompting allows you to improve the existing answer without starting over.

    Useful Follow-Up Prompts

    • Make this easier to understand.
    • Add two examples.
    • Remove repeated information.
    • Use a more professional tone.
    • Turn the answer into a table.
    • Shorten it to 200 words.
    • Expand the third point.
    • Replace technical terms with plain language.
    • Add a checklist at the end.
    • Correct grammar without changing the meaning.
    • Keep the same content but improve the organization.

    Be Specific About the Problem

    Instead of:

    Try again.

    Write:

    The answer is too technical. Rewrite it for a complete beginner and explain each technical term in simple language.

    Specific feedback helps the AI make a more useful revision.

    10. Prompt Chaining

    Prompt chaining means dividing a large task into several connected prompts.

    Each prompt completes one part of the project.

    For example, when creating a long article:

    1. Ask for the article outline.
    2. Review and improve the outline.
    3. Write the introduction.
    4. Write each main section separately.
    5. Create figures and captions.
    6. Review the full article for repetition.
    7. Add internal links.
    8. Prepare the WordPress metadata.

    Each step builds on the previous one.

    Why Prompt Chaining Helps

    Prompt chaining can:

    • Make large tasks easier to manage.
    • Reduce missing sections.
    • Give the user more control.
    • Make corrections easier.
    • Improve consistency.
    • Prevent the AI from producing an overly long response at once.

    Prompt Chaining Example

    Prompt 1:

    Create a detailed outline for a beginner article about AI image generation.

    Prompt 2:

    Review the outline and remove repeated sections.

    Prompt 3:

    Write the introduction using simple language and one everyday example.

    Prompt 4:

    Continue with the section explaining how AI image generation works.

    This method is especially helpful for articles, reports, courses, business plans, and other long projects.

    11. Comparison Prompting

    Comparison prompting means asking the AI to examine two or more options using specific criteria.

    For example:

    Compare online learning and classroom learning for an adult beginner.

    A stronger comparison prompt would be:

    Compare online learning and classroom learning in a table. Include cost, flexibility, interaction, technology requirements, and suitability for working adults.

    The criteria make the comparison more focused.

    Comparison Prompting Examples

    • Compare two AI tools.
    • Compare two training programs.
    • Compare several products.
    • Compare article titles.
    • Compare business ideas.
    • Compare travel options.
    • Compare different writing styles.

    Ask for a Neutral Comparison

    You may say:

    Use neutral language and do not declare one option the best without explaining the criteria.

    This reduces unsupported conclusions.

    12. Review and Revision Prompting

    Review prompting asks the AI to evaluate existing content.

    For example:

    Review this article for grammar, repetition, unclear sentences, inconsistent headings, and missing links.

    Revision prompting asks the AI to improve the content.

    For example:

    Rewrite the unclear sentences while preserving the original meaning.

    Review Prompt Example

    Review the following beginner article. Present the findings as a checklist under grammar, clarity, repetition, formatting, and missing information. Do not rewrite the full article.

    This prompt separates the review from the rewriting stage.

    Revision Prompt Example

    Revise only the introduction. Shorten long sentences, remove repeated ideas, and keep the beginner-friendly tone.

    Limiting the revision to one section gives the user more control.

    13. Source-Based Prompting

    Source-based prompting means giving the AI specific material and asking it to work only with that information.

    The material may include:

    • An article.
    • A report.
    • Notes.
    • A table.
    • A transcript.
    • A policy.
    • A product description.
    • A contract.
    • A lesson.

    For example:

    Summarize the following article in five bullet points. Use only the information in the article and do not add outside facts.

    This technique is useful when accuracy to the supplied text is important.

    Source-Based Prompt Example

    Using only the document below, identify all dates, names, amounts, and required actions. Present them in a table. Mark missing details as “Not provided.”

    This instruction discourages guessing.

    Check the Source

    The AI can summarize or organize incorrect information if the source itself is wrong.

    Always consider:

    • Who created the source.
    • When it was published.
    • Whether it may be outdated.
    • Whether important information is missing.
    • Whether the source is reliable.

    14. Clarification Prompting

    Clarification prompting means asking the AI to identify missing information before completing the task.

    For example:

    Before creating the travel plan, ask me up to five questions about dates, budget, travellers, transportation, and preferred activities.

    This technique is useful when the task depends on details that have not yet been provided.

    Clarification Prompt Example

    I need help writing a complaint email. Ask me the necessary questions before drafting it.

    The AI may ask about:

    • The company.
    • The product or service.
    • What happened.
    • Important dates.
    • The requested solution.
    • Reference numbers.
    • Preferred tone.

    After receiving the answers, the AI can create a more suitable draft.

    Use Clarification Prompting for Complex Tasks

    It is helpful for:

    • Travel planning.
    • Business plans.
    • Job applications.
    • Customer complaints.
    • Website projects.
    • Study plans.
    • Product recommendations.
    • Long writing tasks.

    15. Negative Prompting

    Negative prompting means explaining what the AI should not include.

    For writing tasks, examples include:

    • Do not use technical jargon.
    • Do not invent facts.
    • Do not repeat information.
    • Do not include aggressive language.
    • Do not change the original meaning.
    • Do not use personal information.
    • Do not include unsupported statistics.

    For example:

    Explain Artificial Intelligence to a complete beginner. Do not use programming terminology, mathematical formulas, or unexplained abbreviations.

    Negative Prompting for Images

    Negative instructions are also common in AI image generation.

    For example:

    Create a clean educational illustration of an older beginner using an AI assistant. Do not include logos, watermarks, distorted hands, extra fingers, or unreadable text.

    These instructions help the AI understand which visual problems to avoid.

    Use Negative Instructions Carefully

    A long list of negative instructions may distract from the main goal.

    Begin by clearly describing what you want, then add only the most important exclusions.

    Combining Prompting Techniques

    Many effective prompts combine several techniques.

    For example:

    Act as a patient computer tutor. Explain how to protect an email account to an older beginner with basic computer knowledge. Present the answer as a seven-step checklist, use a calm and encouraging tone, include one practical example in each step, and keep the answer under 800 words. Avoid technical jargon and do not request real passwords or private information.

    This prompt combines:

    • Role prompting.
    • Audience prompting.
    • Format prompting.
    • Example prompting.
    • Tone prompting.
    • Constraint prompting.
    • Negative prompting.

    You do not need to identify the technique names when writing a prompt. Simply include the instructions that help the AI understand the task.

    Example: Combining Techniques for an Article

    Create a detailed outline for a beginner-friendly article titled “AI Video Generation for Beginners: Complete Guide (2026).” The article is for adults with no technical experience. Include an introduction, how it works, popular uses, benefits, limitations, myths, FAQs, key takeaways, and a final tip. Use H2 headings for main sections and H3 headings for subsections. Avoid advanced programming topics and repeated sections.

    This prompt combines:

    • Direct prompting.
    • Context prompting.
    • Audience prompting.
    • Format prompting.
    • Constraint prompting.
    • Negative prompting.

    Example: Combining Techniques for an Email

    Write a polite but firm email to an internet provider about an unexpected increase in my monthly bill. Ask for a written explanation and a review of the charges. Keep the email under 180 words, include a subject line, and avoid threatening language.

    This prompt combines:

    • Direct prompting.
    • Context prompting.
    • Tone prompting.
    • Format prompting.
    • Constraint prompting.
    • Negative prompting.

    Example: Combining Techniques for an Image

    Create a clean horizontal 16:9 educational illustration showing an older beginner writing a detailed AI prompt on a laptop. Show the prompt leading to three useful results: an email, a checklist, and an educational image. Use natural lighting, a modern blue-and-purple colour theme, and a realistic but approachable style.

    Do not include company logos, watermarks, distorted hands, or unreadable text.

    This prompt combines:

    • Direct prompting.
    • Context prompting.
    • Format and orientation instructions.
    • Style instructions.
    • Negative prompting.

    Choosing the Right Technique

    Choose a technique based on the problem.

    Use:

    • Direct prompting for simple tasks.
    • Context prompting when background information affects the answer.
    • Role prompting when a particular perspective is useful.
    • Audience prompting when the reader’s experience matters.
    • Format prompting when organization is important.
    • Constraint prompting when limits must be followed.
    • Example prompting when you need consistent style.
    • Step-by-step prompting for processes and instructions.
    • Follow-up prompting to improve an existing answer.
    • Prompt chaining for large projects.
    • Comparison prompting when evaluating options.
    • Review prompting for checking existing work.
    • Source-based prompting when the AI should use supplied information.
    • Clarification prompting when important details are missing.
    • Negative prompting when unwanted content must be avoided.

    A Practical Beginner Example

    Suppose you want the AI to write an article introduction.

    A basic prompt might be:

    Write an introduction about prompt engineering.

    A stronger version could be:

    Write a beginner-friendly introduction about prompt engineering for adults with no technical experience. Explain what a prompt is, why clear instructions matter, and how prompt engineering can help with everyday tasks. Use simple language, short paragraphs, and a friendly educational tone. Keep the introduction between 300 and 400 words and avoid advanced programming terminology.

    This stronger prompt uses:

    • Direct prompting.
    • Audience prompting.
    • Context prompting.
    • Format prompting.
    • Tone prompting.
    • Constraint prompting.
    • Negative prompting.

    Do Not Make Prompting More Complicated Than Necessary

    Prompting techniques are tools, not strict rules.

    A simple task may need only one sentence.

    For example:

    Translate “Thank you for your help” into French.

    A complex task may require context, examples, formatting, limits, and several follow-up prompts.

    The best prompt is not always the longest prompt.

    The best prompt is the one that gives the AI enough useful direction for the task.

    Figure 8. Common prompting techniques beginners can use for different AI tasks.

    Different prompting techniques provide different types of guidance. A simple question may need only direct prompting, while a complex project may benefit from context, examples, formatting, limits, follow-up instructions, and several connected prompts.

    Common Prompting Mistakes and How to Avoid Them

    Beginners often expect an AI tool to understand exactly what they want from a very short instruction.

    When the result is unclear, incomplete, or unsuitable, the problem may not be the AI tool alone. The prompt may be missing important information.

    Learning to recognize common prompting mistakes can help you produce better results with fewer revisions.

    Mistake 1: Using a Prompt That Is Too Vague

    A vague prompt gives the AI very little direction.

    For example:

    Write something about Artificial Intelligence.

    The AI does not know:

    • What type of content to create.
    • Who the reader is.
    • How long the response should be.
    • What information to include.
    • What tone or format to use.

    A clearer prompt would be:

    Write a 500-word beginner-friendly introduction to Artificial Intelligence for adults with no technical experience. Use simple language, short paragraphs, and three everyday examples.

    How to Avoid This Mistake

    Include the most important details:

    • Task.
    • Topic.
    • Audience.
    • Format.
    • Tone.
    • Length.
    • Required information.

    You do not need to make every prompt long. You only need to provide enough direction for the task.

    Mistake 2: Using Unclear Words

    Words such as better, good, professional, interesting, and improve may mean different things to different people.

    For example:

    Make this article better.

    The AI does not know whether you want it to:

    • Correct grammar.
    • Shorten the article.
    • Add examples.
    • Change the tone.
    • Improve the headings.
    • Remove repeated ideas.
    • Simplify the language.

    A clearer prompt would be:

    Review this article for grammar, repetition, unclear sentences, and inconsistent headings. Present the problems as a checklist without rewriting the full article.

    How to Avoid This Mistake

    Explain exactly what kind of improvement you need.

    Instead of:

    Make this more professional.

    Write:

    Rewrite this email using polite and professional language. Remove casual expressions, keep the message under 150 words, and preserve the original meaning.

    Mistake 3: Leaving Out the Audience

    The AI may use language that is too advanced or too basic when it does not know who the response is for.

    For example:

    Explain neural networks.

    The AI may produce a technical explanation containing programming and mathematical terminology.

    A better prompt would be:

    Explain neural networks to a complete beginner with no programming experience. Use simple language and one everyday comparison.

    How to Avoid This Mistake

    Identify the audience when it affects:

    • Vocabulary.
    • Examples.
    • Detail.
    • Tone.
    • Structure.

    Possible audience descriptions include:

    • Complete beginner.
    • Child.
    • Older adult.
    • Student.
    • Business owner.
    • Customer.
    • Technical professional.

    Mistake 4: Providing Too Little Context

    The AI may not understand the purpose of the task when important background information is missing.

    For example:

    Create ten article ideas.

    The AI does not know the website topic, audience, or articles already published.

    A clearer prompt would be:

    I am creating a beginner-friendly website about Artificial Intelligence. I have already published articles about AI, machine learning, deep learning, generative AI, ChatGPT, large language models, and AI image generation. Suggest ten logical next article topics for complete beginners.

    How to Avoid This Mistake

    Provide context that changes the result.

    Useful context may include:

    • The project.
    • Work already completed.
    • Your goal.
    • Available resources.
    • Restrictions.
    • The intended use of the answer.

    Mistake 5: Providing Too Much Unnecessary Information

    Too much unrelated information can make the main task harder to identify.

    For example:

    I woke up early, had breakfast, checked my email, and then thought about my website. I have been interested in technology for a long time. Please write a Facebook post about my new AI article.

    Most of the background information does not affect the task.

    A clearer prompt would be:

    Write a Facebook post promoting my new beginner-friendly article about prompt engineering. Keep it under 120 words and end with an invitation to read the guide.

    How to Avoid This Mistake

    Ask whether each detail changes the answer.

    Remove information that does not affect:

    • The task.
    • Audience.
    • Format.
    • Tone.
    • Content.
    • Limitations.

    Mistake 6: Combining Too Many Tasks in One Prompt

    A prompt may become difficult to follow when it contains several unrelated tasks.

    For example:

    Write an article, create a business plan, design a logo, prepare a social media campaign, and recommend a website theme.

    The AI may:

    • Skip tasks.
    • Provide shallow answers.
    • Confuse the requirements.
    • Mix unrelated information.

    How to Avoid This Mistake

    Break the project into separate prompts.

    For example:

    1. Create the article outline.
    2. Write the article section by section.
    3. Prepare the featured-image prompt.
    4. Create the WordPress metadata.
    5. Write the social media promotion.

    This method is called prompt chaining.

    Mistake 7: Giving Conflicting Instructions

    Conflicting instructions make it difficult for the AI to know which requirement to follow.

    For example:

    Write a complete, highly detailed guide in under 100 words.

    A detailed guide will usually require more than 100 words.

    Another example:

    Use a formal, casual, humorous, and serious tone.

    These tone requirements may conflict.

    How to Avoid This Mistake

    Check whether all instructions can be followed together.

    Replace:

    Write a complete guide under 100 words.

    With:

    Write a 100-word introductory overview of the topic.

    Replace:

    Use a formal and casual tone.

    With:

    Use a professional but friendly tone.

    Mistake 8: Requesting an Unrealistic Length

    A very short word limit may not allow the AI to cover all required information.

    For example:

    Explain machine learning, deep learning, neural networks, training data, benefits, limitations, and real-world examples in 100 words.

    The response may become rushed or incomplete.

    How to Avoid This Mistake

    Match the length to the task.

    Use:

    • 50 to 100 words for a brief introduction.
    • 150 to 300 words for a short explanation.
    • 500 to 1,000 words for a detailed section.
    • Several thousand words for a complete guide.

    These are general examples, not strict rules.

    The required length depends on the subject and audience.

    Mistake 9: Failing to Specify the Format

    The AI may organize the response in a way that is difficult to use.

    For example:

    Compare ChatGPT, Gemini, and Claude.

    The AI may write several long paragraphs.

    A better prompt would be:

    Compare ChatGPT, Google Gemini, and Claude in a table with columns for main use, beginner advantage, possible limitation, and common task.

    How to Avoid This Mistake

    Choose a format that matches the task:

    • Numbered steps for instructions.
    • Bullet points for separate ideas.
    • A table for comparisons.
    • A checklist for review tasks.
    • Headings for long explanations.
    • A template for repeated content.

    Mistake 10: Asking the AI to Guess Missing Information

    The AI may invent details when important information is missing.

    For example:

    Write a complaint email about my damaged appliance.

    The AI may guess:

    • The purchase date.
    • Product model.
    • Store name.
    • Order number.
    • Type of damage.
    • Requested solution.

    How to Avoid This Mistake

    Provide the necessary information or ask the AI to request clarification.

    For example:

    Before writing the complaint email, ask me for the store name, product, purchase date, damage, order number, and requested solution.

    You may also write:

    Do not invent missing details. Use placeholders such as [ORDER NUMBER] when information is not provided.

    Mistake 11: Assuming a Role Guarantees Expertise

    A user may write:

    Act as a doctor and diagnose my symptoms.

    Assigning a role does not make the AI a licensed medical professional.

    The same applies to:

    • Lawyers.
    • Financial advisers.
    • Engineers.
    • Accountants.
    • Therapists.
    • Safety inspectors.

    How to Avoid This Mistake

    Use roles for style and organization, not as a replacement for professional qualifications.

    For example:

    Explain these general questions I may discuss with my doctor. Do not diagnose a condition or recommend changing medication.

    Important decisions should be reviewed by a qualified professional.

    Mistake 12: Using Exaggerated Role Instructions

    Prompts sometimes include phrases such as:

    Act as the world’s greatest expert.

    Use your maximum intelligence.

    Become the best writer in history.

    These phrases may sound impressive, but they do not clearly explain the task.

    How to Avoid This Mistake

    Use a practical role and specific instructions.

    Instead of:

    Act as the greatest editor ever.

    Write:

    Act as a beginner-friendly editor. Review the article for grammar, repetition, unclear sentences, and inconsistent headings.

    Specific requirements are more useful than exaggerated descriptions.

    Mistake 13: Providing Too Many Negative Instructions

    Negative instructions explain what the AI should avoid.

    They can be useful, but a very long list may distract from the main goal.

    For example:

    Do not use long sentences, do not use short sentences, do not use technical words, do not oversimplify, do not use examples, do not avoid examples, and do not make the article too long or too short.

    These instructions are confusing and contradictory.

    How to Avoid This Mistake

    First explain what you want.

    Then add only the most important restrictions.

    For example:

    Write a 500-word beginner explanation using simple language and three practical examples. Avoid unexplained technical terminology and repeated ideas.

    Mistake 14: Expecting the First Response to Be Perfect

    Even a strong prompt may not produce a perfect result immediately.

    The AI may:

    • Miss a requirement.
    • Use the wrong tone.
    • Repeat information.
    • Misunderstand a detail.
    • Produce an unsuitable example.
    • Make a factual mistake.

    How to Avoid This Mistake

    Treat prompting as a process.

    Use follow-up instructions such as:

    • Add the missing example.
    • Simplify the third paragraph.
    • Remove repeated information.
    • Change the response into a table.
    • Correct the tone without changing the meaning.
    • Revise only the conclusion.

    Prompt engineering includes reviewing and improving the response.

    Mistake 15: Using “Try Again” Without Explaining the Problem

    The instruction:

    Try again.

    does not explain why the first response was unsuitable.

    The AI may produce a similar answer.

    How to Avoid This Mistake

    Identify the exact problem.

    For example:

    The response is too technical. Rewrite it for a complete beginner, explain all abbreviations, and include one everyday comparison.

    Or:

    The email sounds too aggressive. Rewrite it in a firm but respectful tone and remove threatening language.

    Specific feedback produces better revisions.

    Mistake 16: Asking for Too Many Revisions at Once

    A long correction prompt may include dozens of changes.

    The AI may follow some instructions but overlook others.

    For example:

    Shorten the article, add examples, change the tone, fix grammar, reorganize all headings, add internal links, create image prompts, update the title, and prepare metadata.

    How to Avoid This Mistake

    Revise in stages:

    1. Correct the structure.
    2. Remove repetition.
    3. Simplify the language.
    4. Check grammar.
    5. Add examples.
    6. Add links and metadata.

    For long content, review one section at a time.

    Mistake 17: Failing to Provide the Source Material

    A user may ask:

    Summarize the report.

    But the report has not been pasted, uploaded, or linked.

    The AI cannot accurately summarize material it has not received.

    How to Avoid This Mistake

    Provide the source and state how it should be used.

    For example:

    Summarize the attached report in ten bullet points. Use only information from the report and identify any recommendations separately.

    When working with a long source, explain which pages or sections matter most.

    Mistake 18: Not Telling the AI to Stay Within the Source

    When the task is based on a document, the AI may add outside information unless instructed otherwise.

    For example:

    Summarize this policy.

    The response may include general background that is not in the policy.

    How to Avoid This Mistake

    Write:

    Summarize the policy using only the information in the document. Do not add outside facts, and mark unclear points as “Requires clarification.”

    This is especially important for:

    • Contracts.
    • Policies.
    • Financial records.
    • Research reports.
    • Government documents.
    • Product specifications.

    Mistake 19: Asking for Current Information Without Requesting Verification

    Information about prices, laws, software, public officials, product features, and schedules may change.

    An AI response based on older information may be inaccurate.

    How to Avoid This Mistake

    Ask for current verification.

    For example:

    Check the current WordPress.com plan features and use official WordPress sources.

    Or:

    Verify the current price and availability before comparing the products.

    You should still inspect the source and publication date.

    Mistake 20: Trusting Confident Language as Proof

    AI responses may sound confident even when the information is uncertain or incorrect.

    Clear writing is not proof of accuracy.

    How to Avoid This Mistake

    Ask for:

    • Sources.
    • Dates.
    • Assumptions.
    • Uncertain points.
    • Information requiring verification.

    For example:

    Separate confirmed facts from assumptions and identify which claims require current verification.

    For important decisions, check reliable original sources.

    Mistake 21: Sharing Sensitive Personal Information

    Users sometimes include unnecessary private information in prompts.

    Examples include:

    • Passwords.
    • Banking information.
    • Credit-card numbers.
    • Identification numbers.
    • Medical records.
    • Private addresses.
    • Confidential business information.
    • Children’s personal details.

    How to Avoid This Mistake

    Remove or replace sensitive information.

    Use placeholders such as:

    • [FULL NAME]
    • [ACCOUNT NUMBER]
    • [ADDRESS]
    • [ORDER NUMBER]
    • [PHONE NUMBER]

    For example:

    Write a letter using the following placeholders: [NAME], [ACCOUNT NUMBER], and [DATE].

    Share only the information necessary for the task.

    Mistake 22: Asking for Facts Without Checking Them

    An AI may provide incorrect:

    • Dates.
    • Prices.
    • Names.
    • Statistics.
    • Quotes.
    • Legal rules.
    • Product specifications.
    • Medical information.

    How to Avoid This Mistake

    Verify important facts before publishing or acting on them.

    For example:

    Identify every factual claim in this article that should be checked before publication.

    You may also request:

    Do not invent statistics, quotations, or sources.

    Mistake 23: Asking the AI to Create Sources

    A prompt such as:

    Add five research sources even if you cannot find them.

    encourages unreliable information.

    The AI may generate references that look real but do not exist.

    How to Avoid This Mistake

    Write:

    Use only verifiable sources. Do not create titles, authors, quotations, or links.

    Check each source independently before publication.

    Mistake 24: Failing to Check Calculations

    AI tools can make arithmetic and reasoning errors.

    A well-organized answer may still contain an incorrect total.

    How to Avoid This Mistake

    Ask the AI to state:

    • The values used.
    • The formula or method.
    • The units.
    • The final result.

    Then verify important calculations with a calculator, spreadsheet, or qualified person.

    A useful prompt might be:

    Show the calculation clearly, state all assumptions, and check that the units are consistent.

    Mistake 25: Using the Wrong Prompt for the AI Tool

    Different AI tools are designed for different tasks.

    A text assistant may be suitable for writing, while an image generator requires visual descriptions.

    For example, a text prompt might be:

    Explain the parts of an effective prompt.

    An image prompt might be:

    Create an educational infographic showing task, context, audience, tone, format, and limits arranged around a central prompt box.

    How to Avoid This Mistake

    Match the prompt to the tool.

    For image generation, include:

    • Subject.
    • Action.
    • Setting.
    • Style.
    • Orientation.
    • Lighting.
    • Colour.
    • Elements to avoid.

    For writing, include:

    • Task.
    • Audience.
    • Tone.
    • Format.
    • Length.
    • Required content.

    Mistake 26: Making the Prompt Longer Than Necessary

    A long prompt is not automatically a good prompt.

    Repeating the same instruction several times may make the request harder to follow.

    For example:

    Make it simple, very simple, extremely simple, easy, very easy, and not difficult.

    A clearer instruction would be:

    Use simple language suitable for a complete beginner.

    How to Avoid This Mistake

    Remove repeated instructions.

    Keep the prompt focused on details that affect the result.

    Mistake 27: Using Too Many Technical Prompting Terms

    Beginners may feel they need to use technical phrases such as:

    • Zero-shot prompting.
    • Few-shot prompting.
    • Chain prompting.
    • Persona prompting.
    • Context windows.
    • Token optimization.

    These terms can be useful, but they are not required for everyday prompting.

    How to Avoid This Mistake

    Use plain instructions.

    For example:

    Show me three examples before creating the final version.

    Or:

    Break the task into five steps and complete one step at a time.

    Clear communication matters more than technical terminology.

    Mistake 28: Not Saving Successful Prompts

    A useful prompt may be forgotten after the task is completed.

    The user then has to recreate it later.

    How to Avoid This Mistake

    Save successful prompts as templates.

    Create folders for:

    • Article writing.
    • Email drafting.
    • Image generation.
    • Social media posts.
    • Article reviews.
    • Study plans.
    • WordPress publishing.
    • Product descriptions.

    Replace changing details with placeholders.

    For example:

    Write a beginner-friendly introduction about [TOPIC]. Use simple language, one everyday example, short paragraphs, and a friendly educational tone. Keep it between [WORD COUNT] words.

    Mistake 29: Failing to Compare the Result with the Original Goal

    A response may be well written but still fail to solve the actual problem.

    For example, the goal may be to create a short customer email, but the AI produces a long article explaining customer service.

    How to Avoid This Mistake

    After receiving the response, return to the original goal.

    Ask:

    • Did it complete the correct task?
    • Is it suitable for the audience?
    • Can I use it in the intended situation?
    • Did it follow the requested format?
    • Is anything important missing?

    The goal is not simply to receive a polished answer. The goal is to receive a useful answer.

    Mistake 30: Publishing Without a Final Review

    AI-generated content should not be copied directly into a website without checking it.

    Possible problems include:

    • Incorrect facts.
    • Repeated paragraphs.
    • Broken headings.
    • Missing links.
    • Unclear captions.
    • Unnatural wording.
    • Private information.
    • Unsupported claims.
    • Formatting mistakes.
    • Instructions accidentally left inside the article.

    How to Avoid This Mistake

    Before publishing, check:

    • Title.
    • Headings.
    • Grammar.
    • Repetition.
    • Facts.
    • Links.
    • Images.
    • Captions.
    • Category.
    • Tags.
    • Excerpt.
    • Reading time.
    • Mobile appearance.

    Remove any internal working instructions such as:

    • “Say continue.”
    • “Insert image here.”
    • “Rewrite later.”
    • “Add link.”
    • “Check this fact.”

    A Weak Prompt and a Better Prompt

    Weak Prompt

    Write about AI prompts.

    Problems:

    • The task is broad.
    • The audience is missing.
    • The format is missing.
    • The length is missing.
    • The required topics are missing.
    • The tone is missing.

    Better Prompt

    Write a beginner-friendly explanation of AI prompts for adults with no technical experience. Define what a prompt is, explain why clear instructions matter, include three practical examples, and add a five-point checklist. Use simple language, short headings, and a friendly educational tone. Keep the response between 800 and 1,000 words and avoid programming terminology.

    The improved prompt gives the AI clear direction without being unnecessarily complicated.

    A Prompt-Correction Checklist

    When an AI response is unsatisfactory, ask:

    • Was my task clear?
    • Did I provide enough context?
    • Did I identify the audience?
    • Did I request the correct format?
    • Did I specify the tone?
    • Was the length realistic?
    • Did I explain what must be included?
    • Did I include conflicting instructions?
    • Did I ask the AI not to guess?
    • Did I provide the necessary source material?
    • Did I review the answer carefully?
    • Can I correct one specific problem with a follow-up prompt?

    Figure 9. Common prompting mistakes and the simple corrections that can improve AI responses.

    Most prompting problems can be corrected by making the task clearer, adding relevant context, identifying the audience, choosing a useful format, removing conflicting instructions, and reviewing the final response carefully.

    Practical Uses of Prompt Engineering

    Prompt engineering can be used for many everyday, educational, creative, and professional tasks.

    The purpose is not to make every request complicated. It is to give the AI enough direction to produce a response that is more relevant, organized, and useful.

    People commonly use prompt engineering for:

    • Learning new subjects.
    • Writing and improving content.
    • Drafting emails and letters.
    • Summarizing documents.
    • Generating ideas.
    • Planning projects.
    • Creating study materials.
    • Organizing information.
    • Comparing options.
    • Preparing job applications.
    • Creating marketing content.
    • Planning travel.
    • Generating images.
    • Assisting with computer code.
    • Reviewing work before publication.

    The following examples show how prompt engineering can be applied to practical situations.

    1. Learning New Subjects

    AI tools can explain difficult topics at different levels.

    A basic prompt might be:

    Explain machine learning.

    A stronger prompt would be:

    Explain machine learning to a complete beginner with no programming experience. Use simple language, one everyday comparison, and three examples from daily life. Keep the explanation under 700 words.

    The improved prompt helps control:

    • Difficulty level.
    • Vocabulary.
    • Examples.
    • Length.
    • Audience suitability.

    Asking for a Learning Sequence

    Prompt engineering can also help organize a subject into a logical learning order.

    For example:

    Create a four-week beginner learning plan for Artificial Intelligence. Allow 30 minutes per day, begin with basic concepts, and avoid programming during the first two weeks. Present the plan in a table with columns for day, topic, activity, and practice task.

    This prompt provides:

    • Subject.
    • Duration.
    • Available time.
    • Experience level.
    • Topic restrictions.
    • Required format.

    Asking for Simpler Explanations

    When an explanation is too technical, use a follow-up prompt:

    Rewrite the explanation using simpler words. Define every technical term and include one everyday example for each main idea.

    You may also ask:

    • Explain this as if I am 12 years old.
    • Use an everyday comparison.
    • Avoid mathematical formulas.
    • Explain one idea at a time.
    • Add a short summary after each section.
    • Create five review questions.

    Prompt engineering allows the learner to adjust the explanation to match their needs.

    2. Creating Study Materials

    AI can assist with study notes, questions, flashcards, quizzes, and summaries.

    For example:

    Using the lesson below, create ten beginner-friendly review questions. Include seven multiple-choice questions and three short-answer questions. Provide the answers in a separate section.

    This prompt explains:

    • The source material.
    • Number of questions.
    • Question types.
    • Difficulty level.
    • Answer format.

    Creating Flashcards

    Example:

    Create 15 flashcards from the following lesson about Artificial Intelligence. Put the term on the front and a simple definition on the back. Keep each definition under 30 words.

    Creating a Quiz

    Example:

    Create a ten-question beginner quiz about machine learning. Use four answer options for each question, identify the correct answer, and provide a one-sentence explanation.

    Creating Study Notes

    Example:

    Turn the following article into organized study notes. Use H2 headings, short bullet points, definitions of important terms, and a five-point summary at the end. Use only information from the article.

    These prompts help convert long material into formats that are easier to review.

    3. Writing Emails

    Email writing is one of the most practical uses of prompt engineering.

    A basic prompt might be:

    Write an email.

    A stronger prompt would be:

    Write a polite email to my doctor’s office asking to reschedule my appointment from Monday morning to another day next week. Include a clear subject line, keep the message under 120 words, and avoid giving unnecessary medical details.

    The improved prompt controls:

    • Recipient.
    • Purpose.
    • Date.
    • Requested action.
    • Tone.
    • Length.
    • Privacy.

    Common Email Uses

    Prompt engineering can help write:

    • Appointment requests.
    • Customer complaints.
    • Refund requests.
    • Payment reminders.
    • Thank-you messages.
    • Follow-up emails.
    • Job application emails.
    • Meeting confirmations.
    • Delivery inquiries.
    • Subscription cancellations.

    Example: Customer Complaint

    Write a polite but firm complaint email to an appliance retailer. The refrigerator was delivered with a damaged door on July 15. Include order number [ORDER NUMBER], request a replacement, and ask for a reply within five business days. Keep the email under 180 words and avoid threatening language.

    Example: Follow-Up Email

    Write a professional follow-up email asking for an update on a job application submitted one week ago. Keep the message brief, respectful, and under 120 words.

    The prompt can be adjusted until the email sounds appropriate for the situation.

    4. Improving Existing Writing

    AI can help improve grammar, clarity, tone, structure, and readability.

    A vague prompt might be:

    Make this better.

    A clearer prompt would be:

    Rewrite the following paragraph in simpler language for a complete beginner. Shorten long sentences, remove repeated ideas, preserve the original meaning, and do not add new facts.

    This tells the AI exactly what kind of improvement is needed.

    Common Writing Improvements

    You may ask the AI to:

    • Correct grammar.
    • Simplify vocabulary.
    • Shorten sentences.
    • Improve organization.
    • Remove repetition.
    • Change the tone.
    • Add headings.
    • Improve transitions.
    • Correct spelling.
    • Preserve the original meaning.

    Example: Professional Tone

    Rewrite this email in a polite and professional tone. Remove emotional wording, keep the main request, and limit the message to 150 words.

    Example: Beginner-Friendly Language

    Rewrite this technical explanation for adults with no computer training. Replace technical terms with plain language and add one everyday example.

    Example: Shortening Text

    Reduce the following article introduction from 500 words to approximately 300 words. Keep the definition, main example, and purpose of the article. Remove repeated background information.

    Specific revision instructions give the user more control over the final result.

    5. Summarizing Documents

    AI can summarize articles, reports, notes, transcripts, policies, and other documents.

    A basic prompt might be:

    Summarize this.

    A stronger prompt would be:

    Summarize the following report in ten bullet points. Focus on the main findings, important dates, financial amounts, required actions, and deadlines. Use only information from the report and do not add outside facts.

    This prompt explains what information matters most.

    Different Summary Formats

    You may request:

    • A one-paragraph summary.
    • Five key points.
    • A table.
    • A timeline.
    • An executive summary.
    •  
    • A beginner explanation.
    • A list of actions.
    • Questions and answers.

    Example: Meeting Notes

    Summarize the meeting notes below. Organize the result under decisions, assigned tasks, responsible people, and deadlines. Mark any missing deadline as “Not provided.”

    Example: Long Article

    Summarize this article for a complete beginner. Include the definition, main argument, three examples, two limitations, and a five-point takeaway list. Do not include information that is not in the article.

    Review the Summary

    The AI may leave out important details or misunderstand the source.

    Always compare the summary with the original document before using it for important decisions.

    6. Generating Ideas

    AI can help generate ideas for articles, products, lessons, businesses, videos, social media posts, and projects.

    A basic prompt might be:

    Give me ideas.

    A stronger prompt would be:

    Suggest ten beginner-friendly article ideas for an Artificial Intelligence education website. The audience is adults with no technical experience. Avoid advanced programming topics and include one sentence explaining the purpose of each article.

    The improved prompt controls:

    • Number of ideas.
    • Subject.
    • Audience.
    • Difficulty level.
    • Topics to avoid.
    • Explanation requirement.

    Article Ideas

    Example:

    Suggest 15 article ideas that should logically follow a beginner guide to prompt engineering. Organize them under AI prompting, ChatGPT, AI image generation, and productivity.

    Business Ideas

    Example:

    Suggest five low-cost online business ideas for a beginner. For each idea, include estimated startup requirements, skills needed, possible customers, and one major limitation. Avoid businesses that require inventory.

    Video Ideas

    Example:

    Suggest ten short educational video ideas about Artificial Intelligence for beginners. Each idea should be suitable for a video under three minutes and include a suggested title and learning objective.

    AI-generated ideas should be reviewed for practicality, originality, and suitability.

    7. Creating Article Outlines

    Prompt engineering is useful for organizing long articles before writing them.

    For example:

    Create a detailed outline for a beginner-friendly article titled “AI Video Generation for Beginners: Complete Guide (2026).” Include an introduction, definition, how it works, popular tools, practical uses, benefits, limitations, myths, FAQs, key takeaways, and final tip. Use H2 headings for main sections and H3 headings for subsections.

    This prompt gives the AI:

    • Article title.
    • Audience.
    • Required sections.
    • Heading structure.
    • Learning order.

    Improving the Outline

    A follow-up prompt might be:

    Review the outline and remove repeated sections. Place the topics in a logical learning order and identify any important beginner topic that is missing.

    Another follow-up might be:

    Add suggested figure placements and one image concept for each major section.

    Creating the outline first reduces the chance of missing important sections later.

    8. Writing Articles Section by Section

    Long articles often work better when divided into smaller prompts.

    For example:

    1. Create the outline.
    2. Write the introduction.
    3. Write the definition section.
    4. Explain how the technology works.
    5. Add practical uses.
    6. Write the benefits and limitations.
    7. Add myths and FAQs.
    8. Write the key takeaways.
    9. Review the complete article.
    10. Prepare the publishing information.

    A section prompt might be:

    Write the “What Is Prompt Engineering?” section for a complete beginner. Include a clear definition, one everyday comparison, two examples, and one warning about AI accuracy. Use H3 subheadings and keep the section between 800 and 1,000 words.

    This approach gives the user more control over:

    • Length.
    • Structure.
    • Examples.
    • Repetition.
    • Heading levels.
    • Writing style.

    It also makes corrections easier because only one section needs to be revised at a time.

    9. Reviewing Articles Before Publication

    AI can help identify problems before content is published.

    For example:

    Review the following article for grammar errors, repeated ideas, unclear sentences, inconsistent headings, missing figure captions, broken internal links, and accidental writing instructions. Present the findings as a checklist organized by section. Do not rewrite the full article.

    This prompt tells the AI what to inspect.

    Publishing Review Checklist

    You may ask the AI to check:

    • Title.
    • Reading time.
    • Last updated date.
    • H1, H2, and H3 headings.
    • Grammar.
    • Spelling.
    • Repetition.
    • Factual claims.
    • Internal links.
    • Figure captions.
    • Alt text.
    • Category.
    • Tags.
    • Excerpt.
    • Meta description.
    • Mobile readability.

    Removing Working Instructions

    A useful prompt might be:

    Identify any internal drafting instructions that should be removed before publication, including phrases such as “Say continue,” “Insert image here,” “Check this fact,” or “Add link later.”

    The final human review remains essential.

    10. Creating Website Content

    Prompt engineering can assist with website pages such as:

    • Home.
    • About.
    • Contact.
    • Tutorials.
    • Services.
    • Frequently Asked Questions.
    • Privacy explanations.
    • Newsletter introductions.
    • Calls to action.

    Example: About Page

    Write a beginner-friendly About page for an educational website called AI Mastery. Explain that the website helps adults learn Artificial Intelligence in simple language. Use a welcoming but professional tone, include the website’s purpose and topics covered, and keep the page under 700 words. Do not make unsupported claims about qualifications.

    Example: Homepage Introduction

    Write a 150-word homepage introduction for an Artificial Intelligence education website. The audience is complete beginners. Explain what visitors can learn, use short paragraphs, and end with an invitation to explore the tutorials.

    Example: Contact Page

    Write a short Contact page explaining how readers can send questions, corrections, or topic suggestions. Use a friendly and professional tone and do not promise immediate replies.

    Clear prompts help website pages follow the same voice and purpose.

    11. Creating Social Media Content

    AI can help create posts for Facebook, LinkedIn, Instagram, and other platforms.

    A basic prompt might be:

    Write a social media post.

    A stronger prompt would be:

    Write a Facebook post promoting a new beginner’s guide to prompt engineering. The audience is adults interested in learning Artificial Intelligence. Use a friendly and encouraging tone, keep it under 120 words, mention one benefit of the guide, and end with a clear invitation to read the article.

    Creating Several Versions

    You may ask:

    Create three versions of the post: one informative, one encouraging, and one question-based. Keep each version under 100 words.

    Platform-Specific Prompts

    For Linked In:

    Write a professional Linked In post announcing a new beginner guide to AI image generation. Keep it under 180 words, include three key learning points, and avoid exaggerated claims.

    For Instagram:

    Write a short Instagram caption promoting a beginner AI tutorial. Use simple language, include a clear call to action, and suggest five relevant hashtags.

    Review platform rules and audience expectations before publishing.

    12. Creating Marketing Content

    Prompt engineering can assist with:

    • Product descriptions.
    • Advertisements.
    • Landing-page copy.
    • Email campaigns.
    • Promotional headlines.
    • Calls to action.
    • Customer personas.
    • Content calendars.

    Product Description Example

    Write a 120-word product description for a lightweight foldable travel bag. Mention that it is easy to store, suitable for short trips, and water-resistant. Use a friendly sales tone, include three bullet-point features, and do not describe it as fully waterproof.

    This prompt protects against an unsupported product claim.

    Advertisement Example

    Write a short Facebook advertisement for a beginner-friendly online course about Artificial Intelligence. Target adults with no technical experience. Use a positive but realistic tone, keep it under 100 words, and avoid guarantees about employment or income.

    Landing-Page Example

    Write a landing-page headline, subheading, three benefit statements, and one call-to-action button for a beginner prompt-writing course. Use simple language and avoid exaggerated promises.

    Marketing content must still be checked for accuracy, advertising rules, and truthful claims.

    13. Assisting with Customer Service

    AI can help prepare customer-service replies.

    For example:

    Write a polite reply to a customer whose delivery is three days late. Apologize for the delay, explain that the order is being checked, and promise only that an update will be provided within two business days. Keep the reply under 140 words.

    This prompt controls what the message may promise.

    Common Customer-Service Tasks

    • Answering basic questions.
    • Acknowledging complaints.
    • Explaining delays.
    • Requesting additional information.
    • Confirming refunds.
    • Providing return instructions.
    • Following up after service.

    Avoid Inventing Information

    A useful restriction is:

    Do not invent a refund date, delivery date, tracking number, or company policy. Use placeholders where information is missing.

    Customer messages should be reviewed before sending, especially when they involve money, policies, or legal obligations.

    14. Preparing Job Applications

    Prompt engineering can help with:

    • Resumes.
    • Cover letters.
    • Interview questions.
    • Professional summaries.
    • Follow-up emails.
    • Skills descriptions.
    • Job comparison.

    Cover Letter Example

    Write a one-page cover letter for a beginner bookkeeping position. Use the experience and skills provided below. Match the job posting without inventing qualifications. Use a professional tone and include three reasons the applicant is suitable.

    Résumé Review Example

    Review the résumé below for unclear wording, repeated information, weak action verbs, and formatting inconsistencies. Do not add experience or qualifications that are not provided.

    Interview Preparation Example

    Create ten interview questions for an entry-level bookkeeping position. Provide a short explanation of what each question is testing and one sample answer based only on the experience I provide.

    Never allow the AI to invent jobs, education, certifications, achievements, or dates.

    15. Planning Projects

    AI can help divide a large goal into smaller tasks.

    For example:

    Create an eight-week plan for launching a beginner-friendly Artificial Intelligence website. Include weekly goals for website structure, article writing, images, publishing, internal links, quality review, and basic promotion. Present the plan as a table and assume ten hours of work per week.

    This prompt provides:

    • Goal.
    • Duration.
    • Main activities.
    • Available time.
    • Required format.

    Breaking a Project into Tasks

    You may ask:

    Divide the project into tasks that can each be completed in under two hours. Arrange them in the correct order and identify dependencies.

    Creating a Checklist

    Example:

    Create a per-publication checklist for WordPress articles. Include content, formatting, images, links, SEO details, categories, tags, and mobile review.

    AI can help organize a project, but the user must confirm that the schedule is realistic.

    16. Planning Daily and Weekly Tasks

    Prompt engineering can help organize personal or work activities.

    For example:

    Create a weekly schedule for writing one beginner AI article. Allow two hours each morning from Monday to Friday. Include research, outline, drafting, images, editing, WordPress upload, and final review.

    Prioritizing Tasks

    Example:

    Organize the following tasks by urgency and importance. Explain the reason for each priority and create a realistic two-day schedule.

    Creating a Routine

    Example:

    Create a simple daily learning routine for someone studying Artificial Intelligence for 30 minutes. Include 15 minutes of reading, 10 minutes of practice, and 5 minutes of review.

    A schedule created by AI should be adjusted to match real commitments and energy levels.

    17. Comparing Products, Services, or Options

    AI can organize comparisons when the user provides clear criteria.

    For example:

    Compare three online bookkeeping programs in a table. Include program length, delivery format, tuition, admission requirements, certification, and possible limitations. Use current official information and mark unavailable details as “Not confirmed.”

    The quality of the comparison depends on:

    • Accurate source information.
    • Current data.
    • Clear criteria.
    • Neutral language.

    Avoid Asking for the “Best” Without Criteria

    Instead of:

    Which program is best?

    Ask:

    Compare the programs for an adult learner who requires online study, a duration under one year, and low tuition. Explain which option best matches each criterion.

    A recommendation should be connected to the user’s actual needs.

    18. Travel Planning

    Prompt engineering can help create itineraries, packing lists, travel questions, and budget categories.

    For example:

    Create a three-day family itinerary for Toronto for two adults and two children. Include low-cost indoor and outdoor activities, arrange each day by morning, afternoon, and evening, and avoid activities requiring advance reservations.

    Packing List Example

    Create a seven-day summer travel packing list for a family with two adults and two children. Organize it under clothing, documents, electronics, toiletries, medicine, and children’s items.

    Travel Comparison Example

    Compare travelling by car and train between two cities. Include estimated time, comfort, luggage, parking, transfers, and suitability for a family.

    Travel information such as schedules, prices, entry requirements, and closures must be checked using current official sources.

    19. Organizing Information

    AI can turn unstructured notes into an organized format.

    For example:

    Organize the notes below into a table with columns for date, person, issue, action required, deadline, and status. Do not guess missing information.

    This can be useful for:

    • Meeting notes.
    • Expenses.
    • Project tasks.
    • Contact records.
    • Article plans.
    • Research notes.
    • Application requirements.
    • Maintenance records.

    Extracting Specific Details

    Example:

    Extract all names, dates, amounts, reference numbers, and required actions from the text below. Present them in separate sections and quote only short identifying phrases.

    The user should compare the extracted information with the original source.

    20. Translation and Language Assistance

    AI can assist with translation, rewriting, and language practice.

    For example:

    Translate the following English email into Arabic. Preserve the polite professional tone, keep names and reference numbers unchanged, and do not shorten the message.

    Simplifying English

    Example:

    Rewrite the following paragraph in clear everyday English for a reader whose first language is not English. Keep the original meaning and avoid idioms.

    Language Practice

    Example:

    Create a beginner English conversation between a customer and a bank employee. Include ten short exchanges and explain five important vocabulary words.

    Important legal, medical, immigration, and financial translations may require a qualified translator.

    21. Generating AI Images

    Prompt engineering is especially important in image generation.

    A basic prompt might be:

    Create an image of AI.

    A stronger prompt would be:

    Create a clean horizontal 16:9 educational illustration showing an older beginner typing a prompt into an AI assistant on a laptop. Show useful results appearing beside the screen, including an email, a checklist, and an educational image. Use natural lighting, a modern blue-and-purple colour theme, and a realistic but approachable style. Do not include logos, watermarks, distorted hands, or unreadable text.

    This prompt describes:

    • Subject.
    • Action.
    • Setting.
    • Orientation.
    • Visual elements.
    • Lighting.
    • Colour.
    • Style.
    • Elements to avoid.

    Refining an Image

    Follow-up prompts might include:

    • Make the laptop screen larger.
    • Remove the extra person.
    • Use a simpler background.
    • Change the image to a horizontal format.
    • Make the colours softer.
    • Leave empty space for a title.
    • Remove unreadable text.
    • Keep the subject but change the setting.

    AI images should be reviewed for accuracy, quality, suitability, and usage rights.

    22. Assisting with Computer Code

    AI can help explain, write, review, or troubleshoot code.

    For example:

    Explain what the following HTML code does to a complete beginner. Describe each section in simple language and do not assume programming experience.

    Another example:

    Review the following Python code for syntax errors and explain each correction. Do not change the intended output.

    Code-Generation Prompt

    Create a simple HTML contact form with fields for name, email, subject, and message. Include basic labels and comments explaining each section.

    AI-generated code may contain errors, security problems, or outdated methods.

    Always test code in a safe environment before using it on a live website or system.

    23. Creating Checklists and Templates

    Prompt engineering can turn repeated tasks into reusable checklists.

    For example:

    Create a WordPress article publishing checklist for a beginner. Include title, headings, featured image, alt text, captions, internal links, category, tags, excerpt, preview, mobile check, and final update.

    Email Template

    Create a reusable template for requesting an appointment change. Include placeholders for name, original date, preferred dates, and contact information.

    Article Template

    Create a reusable structure for beginner AI articles. Include title, reading time, what readers will learn, introduction, main explanation, examples, benefits, limitations, myths, FAQs, key takeaways, final tip, and continuing-learning links.

    Templates help maintain consistency and reduce repeated work.

    24. Brainstorming and Decision Support

    AI can help list options, questions, advantages, risks, and decision criteria.

    For example:

    Help me evaluate whether to add a new category to my website. List the potential benefits, disadvantages, number of articles needed, navigation impact, and questions I should answer before deciding.

    Decision Matrix Prompt

    Create a simple decision table comparing three website themes. Use the criteria readability, mobile design, customization, speed, beginner suitability, and cost. Do not choose a winner until the criteria are compared.

    AI can organize a decision, but it should not replace the user’s judgment.

    25. Accessibility and Readability

    Prompt engineering can help make content easier to understand.

    For example:

    Review this article for readability. Identify long paragraphs, long sentences, unexplained terms, unclear headings, and sections that may be difficult for a complete beginner.

    Alt Text Example

    Write concise alt text for an educational image showing an older adult using a laptop while an AI assistant turns a written prompt into an email and checklist. Keep the alt text under 125 characters.

    Plain-Language Rewrite

    Rewrite this policy explanation in plain language. Use short sentences, common words, headings, and bullet points. Preserve all important requirements.

    Accessibility work should also be checked against current standards and real user needs.

    26. Preparing Frequently Asked Questions

    AI can help create an FAQ section based on a subject or source.

    For example:

    Create eight beginner-friendly FAQs about prompt engineering. Include questions about what prompts are, whether programming is required, prompt length, follow-up prompts, accuracy, privacy, image prompts, and common mistakes. Keep each answer between 80 and 120 words.

    Source-Based FAQs

    Using only the article below, create six FAQs that answer the most likely beginner questions. Do not introduce topics that are not covered in the article.

    FAQs should add value rather than repeat the same paragraphs from the main article.

    27. Creating Presentation or Video Content

    AI can help prepare:

    • Slide outlines.
    • Speaking notes.
    • Video scripts.
    • Lesson plans.
    • Demonstration steps.
    • Short educational explanations.

    Video Script Example

    Write a three-minute beginner video script explaining what an AI prompt is. Include a short introduction, one weak prompt, one improved prompt, three practical tips, and a closing summary. Use simple spoken language.

    Presentation Outline Example

    Create a ten-slide presentation outline about prompt engineering for beginners. Include a title slide, definition, prompt elements, weak-versus-strong example, practical uses, mistakes, safety, checklist, and final takeaway.

    The final content should be adjusted for the actual speaking time and audience.

    28. Research Assistance

    AI can help develop research questions, organize sources, summarize provided material, and identify areas requiring verification.

    For example:

    Create a research checklist for an article about AI image generation. Include current tools, pricing, copyright questions, privacy, commercial use, accuracy, and accessibility. Separate stable background information from details that require current verification.

    Source Comparison Example

    Compare the claims in the two provided sources. Identify where they agree, where they differ, and which statements require additional evidence.

    AI should not be asked to invent sources or quotations.

    For current or important research, verify the information using reliable primary sources.

    29. Personal Administration

    AI can help draft and organize everyday administrative tasks.

    Examples include:

    • Appointment requests.
    • Subscription-cancellation letters.
    • Service complaints.
    • Document checklists.
    • Moving checklists.
    • Home-maintenance schedules.
    • Questions for service providers.
    • Budget categories.

    Service Inquiry Example

    Write a polite email asking a heating company to confirm the service date, work included, total price, warranty, and payment terms. Use placeholders for personal information and keep the message under 180 words.

    Document Checklist Example

    Create a checklist of documents I should gather before meeting an accountant about self-employment income and expenses. Organize the checklist by income, expenses, banking, taxes, and business registration.

    Important financial, legal, tax, and medical matters still require qualified advice.

    30. Building Reusable Workflows

    One of the most valuable uses of prompt engineering is creating a repeatable process.

    For example, an article workflow may include:

    1. Choose the topic.
    2. Create the outline.
    3. Write each section.
    4. Create figure prompts.
    5. Review the article.
    6. Remove repetition.
    7. Verify facts.
    8. Add internal links.
    9. Prepare metadata.
    10. Upload to WordPress.
    11. Preview on desktop and mobile.
    12. Publish and check the live page.

    A reusable prompt might be:

    Continue my beginner AI article workflow. Follow the established structure, write one section at a time, use H2 and H3 headings, include practical examples and figure prompts, and wait for my instruction before continuing.

    Saving workflows helps keep future projects organized and consistent.

    Prompt Engineering Supports Human Work

    Prompt engineering can help people begin tasks, organize ideas, create drafts, and improve existing work.

    However, AI should be treated as an assistant rather than an automatic final decision-maker.

    Human review is especially important when the content involves:

    • Health.
    • Law.
    • Finance.
    • Taxes.
    • Safety.
    • Employment.
    • Contracts.
    • Current prices.
    • Government rules.
    • Personal information.
    • Public publication.

    The user remains responsible for checking the result and deciding whether it is suitable.

    A Practical Use Checklist

    Before using AI for a task, ask:

    • What result do I need?
    • What information should I provide?
    • Who is the result for?
    • What format would be most useful?
    • What must be included?
    • What should the AI avoid?
    • Does the information require current verification?
    • Does the result contain private information?
    • Will a qualified professional need to review it?
    • Have I checked the final response carefully?

    Prompt engineering becomes more useful when the task, context, audience, and review process are clear.

    Figure 10. Prompt engineering can support learning, writing, planning, creativity, organization, and everyday tasks.

    Prompt engineering is a practical communication skill that can be applied across many AI tools and situations. Clear instructions help the AI understand the user’s goal, while human review ensures that the final result is accurate, appropriate, and useful.

    Benefits of Prompt Engineering

    Prompt engineering helps users communicate more clearly with Artificial Intelligence tools.

    A well-written prompt can improve the usefulness of an AI response by explaining the task, audience, context, format, tone, and limits.

    Prompt engineering does not guarantee a perfect answer, but it can reduce confusion and make the AI more helpful for learning, writing, planning, creativity, and everyday work.

    1. Produces More Relevant Responses

    A clear prompt helps the AI focus on the user’s actual goal.

    For example:

    Explain exercise.

    This may produce a broad answer covering many types of exercise.

    A more relevant prompt would be:

    Suggest five gentle indoor exercises for an older beginner. Avoid high-impact movements and explain each exercise in simple language.

    The second prompt gives the AI information about:

    • The user.
    • The environment.
    • The type of exercise.
    • The difficulty level.
    • Movements to avoid.
    • The required explanation style.

    The response is more likely to match the user’s needs.

    2. Reduces Misunderstandings

    AI tools cannot automatically know what the user is thinking.

    A vague instruction may be interpreted in several ways.

    For example:

    Make this shorter.

    The AI may not know:

    • Which section to shorten.
    • What information must remain.
    • What word count is required.
    • Whether the tone should change.
    • Whether examples should be removed.

    A clearer prompt would be:

    Reduce the introduction from approximately 500 words to 300 words. Keep the definition and main example, but remove repeated background information.

    This instruction reduces uncertainty and gives the AI a specific editing goal.

    3. Saves Time

    A weak prompt may produce an unsuitable first draft that requires many corrections.

    A stronger prompt can reduce the number of revisions.

    For example:

    Write a customer email.

    This may produce the wrong type of message.

    A better prompt would be:

    Write a polite email to a customer confirming that their refund has been processed. Include the refund amount, explain that bank processing may take five to ten business days, and keep the message under 150 words.

    The AI now has enough information to create a more useful draft.

    Saving time does not mean accepting the response without checking it. The user should still review the final result.

    4. Improves Clarity

    Prompt engineering can encourage the AI to explain difficult information more clearly.

    For example:

    Explain neural networks.

    This may result in a technical answer.

    A clearer prompt would be:

    Explain neural networks to a complete beginner using simple language, one everyday comparison, and three practical examples. Define every technical term.

    The instructions help control:

    • Vocabulary.
    • Difficulty.
    • Examples.
    • Explanation style.

    This can make complex subjects easier to understand.

    5. Helps Control the Level of Detail

    Different users need different levels of information.

    A student preparing for an exam may need a detailed explanation, while a website visitor may need only a short overview.

    Prompt engineering allows the user to request the appropriate level.

    For a short response:

    Explain cloud computing in one paragraph for a complete beginner.

    For a detailed response:

    Explain cloud computing in approximately 1,000 words. Include an everyday comparison, service types, practical uses, benefits, limitations, and three examples.

    The user can decide whether the answer should be brief, moderate, or detailed.

    6. Improves Organization

    A prompt can tell the AI how to structure the response.

    For example:

    Explain online privacy.

    The answer may be written as several long paragraphs.

    A more organized prompt would be:

    Explain online privacy using five short headings: what it means, why it matters, common risks, practical safety steps, and key takeaways.

    The requested structure makes the information easier to scan and understand.

    Prompt engineering can also request:

    • Tables.
    • Checklists.
    • Numbered steps.
    • Bullet points.
    • Timelines.
    • Templates.
    • Questions and answers.
    • Headings and subheadings.

    The best format depends on the task.

    7. Supports Different Audiences

    The same information may need to be presented differently for different readers.

    For example, Artificial Intelligence may be explained to:

    • A child.
    • A complete beginner.
    • An older adult.
    • A business owner.
    • A student.
    • A technical professional.

    A prompt can identify the audience.

    For example:

    Explain Artificial Intelligence to a 12-year-old using a school-related example.

    Another version might be:

    Explain Artificial Intelligence to a small-business owner. Focus on customer service, marketing, productivity, and possible risks.

    Prompt engineering helps the AI adjust the vocabulary, examples, and detail to suit the reader.

    8. Helps Maintain the Right Tone

    Tone affects how a message sounds.

    A poorly chosen tone can make an email appear rude, overly casual, aggressive, or unprofessional.

    For example:

    Write a payment reminder.

    A better prompt would be:

    Write a polite and professional payment reminder for a customer whose invoice is seven days overdue. Keep the tone respectful and avoid threatening language.

    The tone instructions help produce a message that is more appropriate for the situation.

    Prompt engineering can request tones such as:

    • Friendly.
    • Professional.
    • Formal.
    • Polite.
    • Encouraging.
    • Neutral.
    • Persuasive.
    • Calm.
    • Respectful.
    • Firm but courteous.

    9. Improves Consistency

    Prompt engineering is useful when creating repeated content.

    For example, a website may use the same article structure for every beginner guide.

    A reusable prompt may request:

    • Estimated reading time.
    • What readers will learn.
    • Introduction.
    • Main explanation.
    • Practical uses.
    • Benefits.
    • Limitations.
    • Common myths.
    • FAQs.
    • Key takeaways.
    • Final tip.
    • Continue Learning links.

    Using the same prompt template helps maintain a consistent structure across many articles.

    Consistency is especially useful for:

    • Website articles.
    • Product descriptions.
    • Email templates.
    • Social media posts.
    • Lesson plans.
    • Customer-service replies.
    • Reports.
    • Business documents.

    10. Supports Better Learning

    Prompt engineering allows learners to control how a subject is explained.

    A learner can ask the AI to:

    • Use simple language.
    • Explain one idea at a time.
    • Provide examples.
    • Create quizzes.
    • Generate flashcards.
    • Build study plans.
    • Ask review questions.
    • Compare related concepts.
    • Repeat difficult explanations in a different way.

    For example:

    Teach me the basics of machine learning over seven days. Allow 30 minutes each day, include one lesson and one practice activity, and avoid programming.

    This prompt turns a broad subject into a manageable learning plan.

    11. Encourages Active Learning

    Instead of only asking the AI for answers, users can ask it to create activities.

    For example:

    Ask me five beginner questions about Artificial Intelligence one at a time. After each answer, explain what I understood correctly and what I should improve.

    This makes the learner participate rather than simply read.

    Other active-learning prompts may include:

    • Test me with multiple-choice questions.
    • Give me a practical exercise.
    • Ask me to explain the concept in my own words.
    • Create a short case study.
    • Give me a problem to solve.
    • Review my answer and provide feedback.

    Prompt engineering can therefore support practice, reflection, and understanding.

    12. Improves Writing Assistance

    AI tools can assist with:

    • Grammar.
    • Clarity.
    • Tone.
    • Organization.
    • Shortening.
    • Expanding.
    • Simplifying.
    • Rewriting.
    • Summarizing.
    • Proofreading.

    The prompt should explain what kind of improvement is required.

    For example:

    Review this paragraph for grammar and clarity. Shorten long sentences, remove repetition, and preserve the original meaning. Do not add new facts.

    This gives the user more control than simply asking:

    Make this better.

    13. Supports Creativity

    Prompt engineering can help generate ideas for:

    • Articles.
    • Videos.
    • Lessons.
    • Businesses.
    • Products.
    • Social media posts.
    • Images.
    • Stories.
    • Marketing campaigns.
    • Website sections.

    For example:

    Suggest ten beginner-friendly article ideas about Artificial Intelligence for adults over 50. Avoid advanced programming topics and explain the purpose of each idea.

    The audience and restrictions help produce more suitable suggestions.

    AI-generated ideas should still be checked for originality, usefulness, and practicality.

    14. Improves AI Image Generation

    AI image tools depend heavily on written descriptions.

    A vague image prompt may produce unpredictable results.

    For example:

    Create an AI image.

    A more useful prompt would be:

    Create a clean horizontal 16:9 educational illustration showing an older beginner typing a detailed prompt into an AI assistant on a laptop. Show useful results appearing beside the screen, including an email, a checklist, and an educational image. Use natural lighting, a blue-and-purple colour theme, and a realistic but approachable style. Do not include logos, watermarks, distorted hands, or unreadable text.

    The detailed prompt controls:

    • Subject.
    • Action.
    • Setting.
    • Orientation.
    • Style.
    • Colour.
    • Lighting.
    • Objects.
    • Elements to avoid.

    This increases the chance of receiving an image that matches the intended purpose.

    15. Helps Break Large Tasks into Smaller Steps

    Large tasks may be difficult for both the user and the AI.

    Prompt engineering can divide the work into manageable stages.

    For example, a long article may be created through:

    1. Topic selection.
    2. Outline creation.
    3. Introduction.
    4. Main sections.
    5. Examples.
    6. Figures.
    7. Benefits and limitations.
    8. FAQs.
    9. Final review.
    10. Publishing details.

    This method gives the user more control and makes errors easier to identify.

    It also reduces the risk that the AI will skip important sections.

    16. Supports Prompt Chaining

    Prompt chaining allows one task to build on another.

    For example:

    Prompt 1:

    Create an outline for an article about prompt engineering.

    Prompt 2:

    Review the outline and remove repeated topics.

    Prompt 3:

    Write the introduction for complete beginners.

    Prompt 4:

    Continue with the definition section.

    Prompt 5:

    Review the full article for repetition and missing headings.

    Each prompt completes one stage of the project.

    Prompt chaining is especially useful for:

    • Articles.
    • Reports.
    • Courses.
    • Business plans.
    • Research projects.
    • Website development.
    • Marketing campaigns.
    • Coding projects.

    17. Makes Revisions Easier

    A user can ask the AI to change one part of a response without rewriting everything.

    For example:

    Keep the article unchanged, but rewrite the second paragraph in simpler language.

    Or:

    Add a five-point checklist after the conclusion without changing the earlier sections.

    This targeted approach can save time and reduce accidental changes.

    It is especially helpful when the user is satisfied with most of the content.

    18. Helps Users Compare Options

    Prompt engineering can organize comparisons using clear criteria.

    For example:

    Compare online learning and classroom learning in a table. Include cost, flexibility, interaction, technology requirements, and suitability for working adults.

    The criteria make the comparison more focused.

    Other comparisons may include:

    • AI tools.
    • Training programs.
    • Products.
    • Services.
    • Travel options.
    • Business ideas.
    • Website themes.

    The user should provide meaningful criteria rather than asking only:

    Which one is best?

    19. Supports Better Decision-Making

    AI can help organize information needed for a decision.

    For example:

    Create a decision table comparing three website themes. Use readability, mobile design, customization, speed, cost, and beginner suitability as the criteria.

    The AI can help identify:

    • Advantages.
    • Disadvantages.
    • Risks.
    • Costs.
    • Missing information.
    • Questions to ask.
    • Criteria to compare.

    However, the AI should support the decision rather than make the final choice automatically.

    20. Helps Identify Missing Information

    A prompt can ask the AI to point out what is missing.

    For example:

    Review this business idea and identify the information still needed about customers, costs, competition, pricing, and marketing.

    Another example:

    Before writing the complaint email, ask me for the product, purchase date, order number, problem, and requested solution.

    This can prevent the AI from guessing important details.

    21. Reduces Unsupported Guessing

    Users can instruct the AI not to invent missing information.

    For example:

    Use only the information I provide. Mark any missing amount, date, or name as “Not provided.”

    This is useful when working with:

    • Contracts.
    • Reports.
    • Policies.
    • Financial records.
    • Applications.
    • Product specifications.
    • Meeting notes.

    The instruction does not guarantee that the AI will never make a mistake, but it encourages more careful handling of the source.

    22. Improves Document Summaries

    Prompt engineering helps the user specify what should be included in a summary.

    For example:

    Summarize this report in ten bullet points. Focus on dates, financial amounts, decisions, deadlines, and required actions. Use only information from the report.

    This is more useful than:

    Summarize this.

    The user can also request:

    • A timeline.
    • A table.
    • A one-paragraph overview.
    • Key findings.
    • Action items.
    • Risks.
    • Questions requiring clarification.

    23. Supports Safer Use of Personal Information

    Prompts can include privacy instructions.

    For example:

    Write the letter using placeholders for the name, address, account number, and phone number. Do not include real personal information.

    Users can replace private details with:

    • [NAME]
    • [ADDRESS]
    • [ACCOUNT NUMBER]
    • [PHONE NUMBER]
    • [ORDER NUMBER]
    • [DATE]

    This helps reduce unnecessary sharing of sensitive information.

    Users should still avoid entering confidential information unless it is necessary and appropriate.

    24. Helps Control What the AI Should Avoid

    Prompt engineering allows users to add restrictions.

    For example:

    Explain online banking safety to a complete beginner. Avoid technical jargon, do not request account information, and do not suggest sharing passwords.

    For images:

    Do not include logos, watermarks, distorted hands, extra fingers, or unreadable text.

    For writing:

    Do not add facts that were not provided.

    For marketing:

    Do not make guarantees about income or results.

    Limits help guide the AI away from unsuitable output.

    25. Improves Accessibility and Readability

    Prompt engineering can help make content easier to understand.

    For example:

    Rewrite this article in plain language. Use short sentences, common words, descriptive headings, and bullet points. Explain all abbreviations.

    It can also assist with:

    • Alt text.
    • Short paragraphs.
    • Clear headings.
    • Simplified explanations.
    • Reading-level adjustments.
    • Descriptions of charts and images.

    Accessibility should still be checked by people and against current standards.

    26. Supports Reusable Templates

    A successful prompt can be saved and reused.

    For example:

    Write a beginner-friendly introduction about [TOPIC]. Explain what it is, why it matters, and one everyday example. Use simple language and short paragraphs. Keep the introduction between 300 and 400 words.

    The user can replace [TOPIC] with:

    • Artificial Intelligence.
    • Machine learning.
    • Deep learning.
    • Generative AI.
    • Prompt engineering.
    • AI image generation.

    Reusable prompts help maintain consistency and reduce repeated work.

    27. Builds Better AI Communication Skills

    Prompt engineering teaches users to think clearly about:

    • Their goal.
    • The information required.
    • The intended audience.
    • The preferred format.
    • The desired tone.
    • The limitations.
    • The quality of the final result.

    These communication skills can be useful beyond Artificial Intelligence.

    They can also improve:

    • Emails.
    • Instructions.
    • Project planning.
    • Customer communication.
    • Teaching.
    • Teamwork.
    • Problem-solving.

    Clear thinking often leads to clearer prompts.

    28. Gives the User More Control

    Without detailed instructions, the AI makes more decisions about the response.

    It may choose:

    • The length.
    • Format.
    • Tone.
    • Examples.
    • Level of detail.
    • Organization.

    Prompt engineering allows the user to control more of these choices.

    For example:

    Write a 600-word beginner explanation using five H3 headings, one everyday comparison, three examples, and a final checklist. Use a friendly educational tone and avoid technical jargon.

    The prompt gives the user greater influence over the final result.

    However, the AI may still fail to follow some requirements, so review remains necessary.

    29. Encourages Human Review

    Good prompt engineering includes checking the AI’s response.

    The user should review:

    • Accuracy.
    • Completeness.
    • Relevance.
    • Tone.
    • Structure.
    • Grammar.
    • Sources.
    • Privacy.
    • Suitability.
    • Possible bias.

    Prompt engineering is not only about asking better questions.

    It also includes judging whether the answer is good enough to use.

    30. Makes AI More Practical for Everyday Users

    Prompt engineering allows people without programming knowledge to use AI for practical tasks.

    A beginner can use clear prompts to:

    • Learn a subject.
    • Write an email.
    • Create a checklist.
    • Plan a project.
    • Summarize a document.
    • Generate ideas.
    • Organize notes.
    • Create an image.
    • Prepare a study plan.
    • Review an article.

    This makes AI tools more accessible to people with different backgrounds and skill levels.

    The Main Benefits at a Glance

    Prompt engineering can help users:

    • Receive more relevant answers.
    • Reduce misunderstandings.
    • Save time.
    • Improve clarity.
    • Control length and detail.
    • Choose the right format.
    • Match the response to an audience.
    • Maintain the correct tone.
    • Create consistent content.
    • Break large tasks into smaller steps.
    • Improve revisions.
    • Reduce unsupported guessing.
    • Protect private information.
    • Build reusable workflows.
    • Review AI output more carefully.

    Prompt Engineering Still Requires Human Judgment

    The benefits of prompt engineering are important, but they do not remove the limitations of AI.

    Even a strong prompt may produce:

    • Incorrect facts.
    • Outdated information.
    • Missing details.
    • Repeated ideas.
    • Biased content.
    • Poor recommendations.
    • Incorrect calculations.
    • Unusable code.
    • Unsuitable images.
    • Invented sources.

    Prompt engineering can improve the instructions, but it cannot guarantee a perfect result.

    The user must still:

    • Review the response.
    • Verify important facts.
    • Protect personal information.
    • Check current sources.
    • Test code.
    • Confirm calculations.
    • Consult qualified professionals when necessary.

    Figure 11. Prompt engineering can improve clarity, relevance, organization, consistency, efficiency, and user control.

    Prompt engineering helps users give AI tools clearer direction and receive more useful first drafts. Its greatest benefit is not automatic perfection, but greater control over the task, audience, format, tone, and review process.

    Limitations of Prompt Engineering

    Prompt engineering can improve the quality of an AI response, but it cannot remove every weakness of Artificial Intelligence.

    A detailed prompt may help the AI understand the task, audience, tone, format, and limits. However, the final response may still contain mistakes, omissions, outdated information, or unsuitable content.

    Understanding these limitations helps users apply prompt engineering realistically and responsibly.

    1. Good Prompts Do Not Guarantee Correct Answers

    A well-written prompt can improve clarity, but it cannot guarantee factual accuracy.

    An AI tool may still provide:

    • Incorrect dates.
    • Wrong names.
    • False statistics.
    • Inaccurate explanations.
    • Incorrect calculations.
    • Invented quotations.
    • Unsupported recommendations.
    • Sources that do not exist.

    For example:

    Explain the current tax rules for a self-employed person in Canada and include all applicable deductions.

    Even when the prompt is clear, tax rules may be complex or recently changed. The AI may overlook an exception or use outdated information.

    How to Reduce This Limitation

    For important topics:

    • Ask for current verification.
    • Use official sources.
    • Check publication dates.
    • Confirm calculations independently.
    • Consult a qualified professional when necessary.
    • Do not rely on the AI response as the only source.

    A better prompt might be:

    Explain the general tax categories that may apply to a self-employed person in Canada. Clearly identify which details require confirmation from the Canada Revenue Agency or a qualified tax professional.

    The revised prompt encourages caution, but verification is still required.

    2. AI Can Invent Information

    AI tools sometimes produce information that sounds believable but is not supported by evidence.

    This may include invented:

    • Sources.
    • Authors.
    • Book titles.
    • Research studies.
    • Quotations.
    • Statistics.
    • Court cases.
    • Product features.
    • Policies.
    • Links.

    This problem is sometimes called an AI hallucination.

    The word does not mean that the AI sees or hears something. It means the system generates information that appears reasonable but may be false.

    For example, a user might ask:

    Provide five academic studies supporting this claim.

    The AI may create study titles or author names that look realistic.

    How to Reduce This Limitation

    Use instructions such as:

    • Do not invent sources.
    • Include only sources that can be verified.
    • Clearly identify uncertainty.
    • State when a reliable source cannot be found.
    • Use only the documents I provide.
    • Do not create quotations.

    Example:

    Use only the sources included below. Do not add studies, quotations, authors, or links that are not present in the provided material.

    This can reduce the risk, but the user should still verify every source.

    3. AI Information May Be Outdated

    Some AI tools may not automatically know the latest:

    • Laws.
    • Prices.
    • Software features.
    • Government programs.
    • Product specifications.
    • Company policies.
    • Travel requirements.
    • Public officials.
    • Schedules.
    • Subscription plans.

    A clear prompt does not automatically make the information current.

    For example:

    Compare the current WordPress.com plans and recommend the best one for a beginner website.

    The AI must use up-to-date official information. Otherwise, it may describe features or prices that have changed.

    How to Reduce This Limitation

    Ask the AI to:

    • Check current information.
    • Use official sources.
    • Include the date checked.
    • Identify details that may change.
    • Separate stable information from current information.

    Example:

    Check the current WordPress.com plan features using official WordPress sources. Include the date verified and identify any features or prices that may change.

    Even after this, the user should inspect the official page before purchasing.

    4. AI May Misunderstand a Clear Prompt

    A prompt may appear clear to the user, but the AI may interpret one part differently.

    For example:

    Create a short article about AI safety for beginners.

    The word short may mean:

    • 300 words.
    • 500 words.
    • 1,000 words.
    • A brief overview.

    The word beginners may also refer to different experience levels.

    How to Reduce This Limitation

    Replace general words with measurable instructions.

    Instead of:

    Write a short article.

    Use:

    Write an article between 600 and 800 words.

    Instead of:

    Make it beginner-friendly.

    Use:

    Write for adults with no technical or programming experience. Define all technical terms and include one everyday example.

    Specific instructions reduce misunderstanding but do not eliminate it completely.

    5. AI May Ignore Part of a Long Prompt

    A prompt containing many requirements may be difficult for the AI to follow completely.

    For example, a user may request:

    • Ten sections.
    • Five examples.
    • Three tables.
    • A specific tone.
    • A word limit.
    • Several restrictions.
    • Exact formatting.
    • Internal links.
    • Image prompts.
    • Metadata.

    The AI may complete most requirements but overlook one or two.

    It may:

    • Forget a section.
    • Use the wrong heading level.
    • Exceed the word limit.
    • Leave out an example.
    • Ignore a restriction.
    • Repeat information.

    How to Reduce This Limitation

    Break large tasks into smaller stages.

    For example:

    1. Create the outline.
    2. Review the outline.
    3. Write one section.
    4. Add examples.
    5. Create figures.
    6. Review the complete article.
    7. Prepare metadata.

    Before providing the final response, check that all eight requirements have been followed.

    However, human review remains necessary.

    6. Longer Prompts Are Not Always Better

    Adding more information can improve a prompt, but unnecessary detail may make the task harder to understand.

    A very long prompt may contain:

    • Repeated instructions.
    • Irrelevant background.
    • Conflicting requirements.
    • Too many examples.
    • Too many restrictions.
    • Several unrelated tasks.

    For example:

    Write a simple, detailed, short, complete, technical, non-technical article that is formal, casual, serious, and humorous.

    This prompt contains several conflicts.

    How to Reduce This Limitation

    Include only the details that affect the result.

    A clearer version would be:

    Write a 700-word beginner article using a professional but friendly tone. Use simple language and avoid programming terminology.

    The goal is not to make the prompt as long as possible.

    The goal is to make it clear enough for the task.

    7. Different AI Tools May Respond Differently

    The same prompt may produce different results in:

    • ChatGPT.
    • Google Gemini.
    • Claude.
    • Microsoft Copilot.
    • Perplexity.
    • AI image generators.
    • AI coding assistants.

    One tool may provide a detailed answer, while another may produce a shorter response.

    The tools may also differ in:

    • Writing style.
    • Available information.
    • Source access.
    • Image quality.
    • Formatting.
    • Safety rules.
    • File handling.
    • Current-data access.

    How to Reduce This Limitation

    Adjust the prompt for the specific tool.

    For example, a text AI prompt might say:

    Explain the parts of an effective prompt using short headings and examples.

    An image-generation prompt might say:

    Create an infographic showing task, context, audience, tone, format, and limits arranged around a central prompt box.

    The subject is similar, but the instructions match the tool.

    8. The Same Prompt Can Produce Different Results

    Submitting the same prompt more than once may produce different wording, examples, organization, or images.

    This can happen because AI generation is not always completely predictable.

    For example, the same image prompt may produce:

    • Different people.
    • Different backgrounds.
    • Different colours.
    • Different object placement.
    • Different facial expressions.
    • Different image quality.

    The same writing prompt may produce:

    • Different examples.
    • Different headings.
    • Different sentence structures.
    • Different levels of detail.

    How to Reduce This Limitation

    When consistency matters:

    • Save the successful output.
    • Save the successful prompt.
    • Provide a sample to follow.
    • Specify the required structure.
    • Ask the AI to preserve approved sections.
    • Request changes only to one specific area.

    Example:

    Keep the approved title, headings, examples, and tone. Rewrite only the final paragraph.

    This reduces unnecessary changes.

    9. AI May Lose Important Context

    During a long conversation, the AI may misunderstand, overlook, or forget earlier instructions.

    For example, the user may have previously explained:

    • The article audience.
    • The website structure.
    • The preferred spelling.
    • The heading format.
    • The file-naming system.
    • The tone.
    • The publication workflow.

    Later responses may not follow every earlier detail.

    How to Reduce This Limitation

    Restate important instructions when beginning a new task.

    For example:

    Continue the beginner AI article. Use Canadian spelling, H2 headings for main sections, H3 headings for subsections, short paragraphs, practical examples, and one figure prompt at the end.

    For long projects, save a reusable project instruction containing:

    • Audience.
    • Tone.
    • Article structure.
    • Formatting rules.
    • Categories.
    • Internal-link rules.
    • Publishing workflow.

    This helps maintain consistency across different sessions.

    10. Prompt Engineering Requires Time and Practice

    Writing, testing, reviewing, and improving prompts can take time.

    A user may need several attempts before receiving a suitable result.

    The process may involve:

    • Rewriting the task.
    • Adding context.
    • Removing conflicts.
    • Adjusting the tone.
    • Correcting the format.
    • Asking for missing information.
    • Reviewing facts.
    • Comparing versions.

    For a simple task, this may take only a few minutes.

    For a long article, business plan, research project, or coding task, it may take much longer.

    How to Reduce This Limitation

    Save successful prompt templates.

    Examples include templates for:

    • Article sections.
    • Email replies.
    • Image prompts.
    • Study plans.
    • Product descriptions.
    • Article reviews.
    • WordPress metadata.
    • Social media posts.

    Templates reduce repeated work, but they still need to be adjusted for each new task.

    11. Prompt Engineering Cannot Replace Subject Knowledge

    A person may write a clear prompt without understanding the topic.

    The AI may produce an answer that appears professional, but the user may not recognize:

    • Incorrect facts.
    • Missing information.
    • Weak reasoning.
    • Unsafe advice.
    • Poor examples.
    • Unsupported claims.

    For example, a beginner may request computer code and receive a polished-looking result.

    Without testing or programming knowledge, the user may not know whether the code is secure or functional.

    How to Reduce This Limitation

    Use AI to assist learning rather than replace understanding.

    Ask the AI to:

    • Explain important terms.
    • State assumptions.
    • Identify uncertainties.
    • Show the method.
    • Provide a checklist for verification.
    • Suggest questions for a professional.

    For important work, ask someone with appropriate knowledge to review the result.

    12. AI Cannot Replace Qualified Professionals

    Prompt engineering does not turn an AI system into a licensed:

    • Doctor.
    • Lawyer.
    • Accountant.
    • Financial adviser.
    • Engineer.
    • Therapist.
    • Pharmacist.
    • Building inspector.
    • Immigration consultant.

    For example:

    Act as a doctor and diagnose my symptoms.

    The role instruction does not give the AI access to a physical examination, medical history, laboratory results, or professional responsibility.

    How to Reduce This Limitation

    Use prompts for general educational support.

    For example:

    Explain general questions I may discuss with my doctor. Do not diagnose a condition or recommend changing medication.

    For legal or financial matters:

    Explain the general concepts and identify which questions should be confirmed with a qualified professional.

    AI may help the user prepare, but it should not replace professional judgment.

    13. AI Can Reflect Bias

    AI systems learn patterns from large collections of human-created information.

    That information may contain:

    • Cultural bias.
    • Social stereotypes.
    • Historical inequality.
    • Incomplete representation.
    • One-sided viewpoints.
    • Outdated assumptions.

    As a result, AI responses may favour certain perspectives or overlook others.

    A strong prompt may reduce some bias, but it cannot guarantee complete neutrality.

    How to Reduce This Limitation

    Ask the AI to:

    • Present several viewpoints.
    • Avoid stereotypes.
    • Use neutral language.
    • Identify assumptions.
    • Explain limitations in the available information.
    • Separate facts from opinions.

    Example:

    Present the main arguments from different perspectives. Use neutral language and clearly identify areas where reliable sources disagree.

    The user should still review the result carefully.

    14. AI May Produce Repetitive Content

    Long AI-generated articles may repeat:

    • Definitions.
    • Examples.
    • Benefits.
    • Warnings.
    • Explanations.
    • Conclusions.

    The repeated ideas may use slightly different wording, making them harder to notice.

    Prompt engineering can reduce repetition, but large documents still require editing.

    How to Reduce This Limitation

    Use prompts such as:

    Review the full article and identify repeated ideas by section. Do not rewrite the article yet.

    Then:

    Remove the repeated explanations while preserving the clearest version of each idea.

    For long articles, review each section and the complete document separately.

    15. AI May Produce Unnatural Writing

    An AI response may be grammatically correct but still sound:

    • Repetitive.
    • Overly formal.
    • Generic.
    • Mechanical.
    • Too enthusiastic.
    • Too promotional.
    • Emotionally inappropriate.
    • Unlike the user’s normal voice.

    For example, marketing content may contain exaggerated phrases such as:

    • Revolutionary.
    • Life-changing.
    • Unmatched.
    • Guaranteed success.
    • The ultimate solution.

    How to Reduce This Limitation

    Describe the desired style clearly.

    For example:

    Use clear, natural language. Avoid exaggerated claims, promotional clichés, and overly enthusiastic expressions.

    You may also provide a sample of your preferred writing style.

    Human editing is often needed to make the content sound natural.

    16. AI May Not Follow Exact Word Counts

    A prompt may request exactly 500 words, but the AI may produce slightly more or less.

    The same problem may occur with:

    • Number of bullet points.
    • Sentence length.
    • Character limits.
    • Table columns.
    • Required examples.
    • Paragraph counts.

    How to Reduce This Limitation

    Use a range instead of an exact count when possible.

    For example:

    Keep the response between 450 and 550 words.

    For strict limits, check the result using:

    • A word counter.
    • TextMaker.
    • WordPress.
    • A spreadsheet.
    • A character-counting tool.

    Do not assume that the AI followed the exact number.

    17. AI May Produce Incorrect Calculations

    A clear prompt does not guarantee correct arithmetic or reasoning.

    The AI may make mistakes involving:

    • Percentages.
    • Taxes.
    • Interest.
    • Currency conversion.
    • Totals.
    • Dates.
    • Unit conversion.
    • Financial projections.
    • Statistical results.

    How to Reduce This Limitation

    Ask the AI to show:

    • Values used.
    • Formula.
    • Units.
    • Assumptions.
    • Intermediate steps.
    • Final result.

    Then verify the calculation with a calculator, spreadsheet, or qualified person.

    For example:

    Show the formula and values used. Check that all units are consistent and clearly identify any assumptions.

    18. AI-Generated Code May Be Unsafe or Incorrect

    AI can help write computer code, but the result may contain:

    • Syntax errors.
    • Security weaknesses.
    • Outdated methods.
    • Missing validation.
    • Incorrect dependencies.
    • Poor performance.
    • Compatibility problems.
    • Hidden assumptions.

    A detailed coding prompt can improve the result, but it cannot guarantee safe code.

    How to Reduce This Limitation

    Ask the AI to:

    • Explain the code.
    • Identify dependencies.
    • Add error handling.
    • Check security concerns.
    • Include testing instructions.
    • State the software version.
    • Avoid changing live systems.

    Test the code in a safe environment before using it on a live website or business system.

    19. AI Image Prompts Do Not Guarantee Perfect Images

    A detailed image prompt may still produce:

    • Distorted hands.
    • Extra fingers.
    • Unnatural faces.
    • Incorrect objects.
    • Unreadable text.
    • Strange shadows.
    • Missing details.
    • Incorrect proportions.
    • Unwanted logos.
    • Poor composition.

    AI image generators may also interpret visual descriptions differently.

    How to Reduce This Limitation

    Specify:

    • Subject.
    • Action.
    • Setting.
    • Orientation.
    • Style.
    • Lighting.
    • Colour.
    • Main objects.
    • Elements to avoid.

    Then refine the image with follow-up instructions.

    For example:

    Keep the same scene, but remove the extra person, enlarge the laptop screen, and simplify the background.

    Every final image should be reviewed before publication.

    20. Negative Prompts May Not Always Work

    A user may write:

    Do not include text, logos, watermarks, extra fingers, or distorted hands.

    The image generator may still include one of these problems.

    Similarly, a writing tool may ignore instructions such as:

    • Do not repeat ideas.
    • Do not use technical terms.
    • Do not exceed 300 words.
    • Do not add outside facts.

    How to Reduce This Limitation

    State clearly what you want before listing what to avoid.

    For example:

    Create a clean educational illustration with one person using a laptop in a simple home office. Do not include additional people, logos, watermarks, or text.

    Review the result and request a revision when necessary.

    21. Prompt Engineering Cannot Guarantee Originality

    AI-generated content may resemble common wording, familiar article structures, or existing ideas.

    The AI may produce:

    • Generic titles.
    • Common phrases.
    • Predictable examples.
    • Similar descriptions.
    • Repeated marketing language.

    A prompt asking for originality does not guarantee that every sentence is unique.

    How to Reduce This Limitation

    Ask for:

    • Original examples.
    • A specific audience.
    • A distinctive angle.
    • A practical local context.
    • Several alternative versions.

    Example:

    Create five original beginner article titles that focus on practical household uses of AI. Avoid common phrases such as “ultimate guide” and “revolutionary.”

    The user should still review the content for similarity and suitability.

    22. Copyright and Ownership Questions Can Be Complex

    Prompt engineering may involve:

    • Summarizing copyrighted material.
    • Rewriting articles.
    • Creating images in a particular style.
    • Reproducing brand elements.
    • Using protected characters.
    • Generating commercial content.

    A clear prompt does not automatically resolve copyright, trademark, or ownership concerns.

    How to Reduce This Limitation

    Use original material and avoid requesting exact copies.

    For example:

    Create an original educational illustration with a clean modern appearance. Do not copy a specific artist, logo, protected character, or brand design.

    For commercial use, check:

    • The AI tool’s current licence.
    • Usage rights.
    • Platform policies.
    • Applicable laws.
    • Source permissions.

    When necessary, obtain professional legal advice.

    23. Privacy Risks Remain

    A user may accidentally include sensitive information in a prompt.

    Examples include:

    • Passwords.
    • Banking details.
    • Credit-card numbers.
    • Government identification.
    • Medical records.
    • Confidential contracts.
    • Private addresses.
    • Customer information.
    • Children’s personal details.

    Prompt engineering does not protect information that should not have been shared.

    How to Reduce This Limitation

    Remove or replace sensitive details.

    Use placeholders such as:

    • [NAME]
    • [ADDRESS]
    • [ACCOUNT NUMBER]
    • [ORDER NUMBER]
    • [PHONE NUMBER]
    • [DATE]

    Before submitting a prompt, ask:

    Does the AI need this information to complete the task?

    Share only what is necessary and appropriate.

    24. AI May Not Understand Personal Preferences Automatically

    The AI may not know the user’s preferred:

    • Writing style.
    • Spelling.
    • Tone.
    • Article structure.
    • Reading level.
    • Image style.
    • File format.
    • Website categories.
    • Business goals.

    A clear prompt must explain these preferences.

    How to Reduce This Limitation

    Create reusable project instructions.

    For example:

    Use Canadian spelling, simple language, short paragraphs, H2 headings for main sections, H3 headings for subsections, and a professional beginner-friendly tone.

    Save the instruction and reuse it for future tasks.

    25. Prompt Templates Can Become Outdated

    A successful prompt template may stop working well when:

    • The AI tool changes.
    • The website structure changes.
    • The audience changes.
    • The article format changes.
    • The user’s goals change.
    • New requirements are added.
    • Old instructions are no longer relevant.

    How to Reduce This Limitation

    Review templates regularly.

    Ask:

    • Does the audience description remain correct?
    • Are the required sections still needed?
    • Are the categories current?
    • Are the instructions conflicting?
    • Does the prompt include outdated tool names or features?
    • Does the final output still match the project?

    Templates should be updated rather than used automatically forever.

    26. Prompt Engineering Can Create False Confidence

    A detailed prompt may make the user feel that the result must be reliable.

    However, a polished response can still be wrong.

    The appearance of:

    • Clear headings.
    • Professional language.
    • Tables.
    • Citations.
    • Calculations.
    • Confident statements.

    does not prove that the information is correct.

    How to Reduce This Limitation

    Judge the evidence, not only the presentation.

    Check:

    • Source quality.
    • Publication date.
    • Official information.
    • Calculations.
    • Missing assumptions.
    • Conflicting evidence.
    • Professional requirements.

    A well-formatted answer is only a draft until it has been verified.

    27. Prompt Engineering Cannot Remove All Safety Restrictions

    AI tools may refuse certain requests or limit the type of assistance they provide.

    Changing the wording of the prompt does not mean the user should attempt to bypass safety protections.

    Safety restrictions may apply to requests involving:

    • Harm.
    • Illegal activity.
    • Dangerous instructions.
    • Privacy violations.
    • Deception.
    • Exploitation.
    • Restricted content.

    How to Work Within This Limitation

    Use AI for safe, lawful, and responsible purposes.

    For example, instead of requesting harmful instructions, ask for:

    • Safety information.
    • Prevention strategies.
    • Legal alternatives.
    • Emergency guidance.
    • Educational explanations.

    Prompt engineering should improve communication, not bypass appropriate safeguards.

    28. The User Must Still Make the Final Decision

    AI can provide:

    • Drafts.
    • Comparisons.
    • Lists.
    • Questions.
    • Explanations.
    • Suggestions.
    • Checklists.
    • Possible options.

    However, it may not understand every personal, financial, legal, cultural, or practical factor affecting the decision.

    How to Reduce This Limitation

    Use AI to support the decision-making process.

    Ask:

    • What information is missing?
    • What assumptions were made?
    • What risks should I consider?
    • Which facts require verification?
    • What questions should I ask a professional?
    • Which criteria matter most?

    The final decision should remain with the user or an appropriately qualified person.

    The Main Limitations at a Glance

    Prompt engineering cannot guarantee:

    • Correct information.
    • Current information.
    • Complete responses.
    • Perfect formatting.
    • Exact word counts.
    • Unbiased results.
    • Original content.
    • Working code.
    • Correct calculations.
    • Perfect images.
    • Valid sources.
    • Safe professional advice.
    • Protection of information voluntarily shared.
    • Identical results every time.

    It improves communication with the AI, but it does not make the AI infallible.

    How to Use Prompt Engineering Responsibly

    Use this practical approach:

    1. Write a clear prompt.
    2. Include only relevant information.
    3. Protect sensitive details.
    4. Review the response carefully.
    5. Check that all instructions were followed.
    6. Verify important facts.
    7. Confirm current information using reliable sources.
    8. Test calculations and code.
    9. Review images for errors.
    10. Consult qualified professionals when needed.
    11. Revise the response rather than accepting it automatically.
    12. Make the final decision yourself.

    A Limitation-Review Checklist

    Before using an AI response, ask:

    • Could any facts be incorrect?
    • Could the information be outdated?
    • Did the AI invent a source, quote, date, or statistic?
    • Were any instructions ignored?
    • Is important context missing?
    • Does the response contain repeated ideas?
    • Is the tone suitable?
    • Are calculations correct?
    • Does the code work safely?
    • Does the image contain visual errors?
    • Is any private information exposed?
    • Does the topic require professional review?
    • Have I compared the result with reliable sources?
    • Is the final response suitable for its intended purpose?

    Figure 12. Prompt engineering can improve AI responses, but it cannot guarantee accuracy, safety, originality, or perfect results.

    Prompt engineering is most effective when clear instructions are combined with human judgment. Users must review the response, verify important information, protect private details, and consult qualified professionals when the situation requires expert advice.

    Common Myths About Prompt Engineering

    Prompt engineering is often described as a powerful way to improve AI responses. However, many misunderstandings have developed around what it can and cannot do.

    Some people believe prompt engineering is highly technical. Others believe there are secret phrases that make AI tools produce perfect answers.

    The following myths explain common misunderstandings and the reality behind them.

    Myth 1: Prompt Engineering Is Only for Programmers

    Some people assume prompt engineering requires coding, mathematics, or advanced computer knowledge.

    Reality

    Most everyday prompt engineering does not require programming.

    A beginner can improve a prompt by adding:

    • A clear task.
    • Relevant context.
    • The intended audience.
    • A useful format.
    • The desired tone.
    • Necessary limits.

    For example:

    Explain Artificial Intelligence.

    can become:

    Explain Artificial Intelligence to a complete beginner using simple language, one everyday comparison, and three practical examples.

    No programming is required.

    Technical knowledge may be useful for advanced tasks such as software development or data analysis, but ordinary users can apply prompt engineering to emails, articles, learning, planning, and image generation.

    Myth 2: Prompt Engineering Requires Special Technical Words

    Some people believe prompts must include terms such as:

    • Zero-shot prompting.
    • Few-shot prompting.
    • Chain-of-thought prompting.
    • Token optimization.
    • Context engineering.
    • Persona prompting.

    Reality

    Technical terms may help describe prompting methods, but they are not required for everyday use.

    A plain instruction such as:

    Give me three examples before creating the final answer.

    may be more useful than using a technical term the user does not fully understand.

    Clear language is more important than advanced vocabulary.

    Beginners can write effective prompts using normal words.

    Myth 3: Longer Prompts Are Always Better

    A common belief is that a long prompt automatically produces a better response.

    Reality

    A long prompt can be useful when the task is complex, but unnecessary details may confuse the AI.

    A prompt may become weaker when it contains:

    • Repeated instructions.
    • Unrelated information.
    • Conflicting requirements.
    • Too many restrictions.
    • Several different tasks.

    For example:

    Write a short, complete, highly detailed, formal, casual, serious, humorous article in under 100 words.

    This prompt is long but unclear.

    A better version would be:

    Write a 100-word beginner introduction in a professional but friendly tone.

    The best prompt is not necessarily the longest. It is the prompt that includes the right details.

    Myth 4: Short Prompts Never Work

    Some people believe every prompt must contain many instructions.

    Reality

    Short prompts can work well when the task is simple and clear.

    For example:

    Translate “Good morning” into French.

    This does not require additional context.

    Another example:

    Correct the spelling in this sentence.

    The necessary instruction is already clear.

    More detail is useful only when it affects the result.

    Simple tasks often need simple prompts.

    Myth 5: There Is One Perfect Prompt for Every Task

    Some websites and social media posts promote “the perfect prompt” for writing, marketing, studying, or business.

    Reality

    A prompt that works well for one person may not work equally well for another.

    The best prompt depends on:

    • The user’s goal.
    • The audience.
    • The AI tool.
    • The required format.
    • The available information.
    • The desired level of detail.
    • The current situation.

    For example, an article prompt for a complete beginner will differ from an article prompt for a technical professional.

    A useful prompt is often improved through testing and revision rather than discovered as one perfect sentence.

    Myth 6: Secret Words Can Unlock Perfect AI Answers

    Some people believe certain phrases can force an AI tool to produce flawless results.

    Examples may include:

    • Use your maximum intelligence.
    • Never make a mistake.
    • Give the perfect answer.
    • Ignore all previous limitations.
    • Act as the greatest expert in the world.

    Reality

    These phrases do not guarantee accuracy, quality, or completeness.

    Specific instructions are more useful.

    Instead of:

    Give me the perfect answer.

    write:

    Explain the topic to a complete beginner, include three examples, identify uncertain claims, and use reliable current sources.

    Clear requirements are more effective than dramatic language.

    Myth 7: Assigning an Expert Role Makes the AI a Real Expert

    A user may write:

    Act as a doctor.

    Act as a lawyer.

    Act as a financial adviser.

    Reality

    A role can guide the style and focus of a response, but it does not give the AI professional qualifications.

    The AI does not automatically have:

    • A professional licence.
    • Full case information.
    • Physical examination results.
    • Legal responsibility.
    • Access to all current rules.
    • Human professional judgment.

    A safer prompt would be:

    Explain the general questions I should discuss with a qualified professional. Do not provide a diagnosis or final legal conclusion.

    Roles are useful for tone and organization, not as substitutes for qualified professionals.

    Myth 8: A Good Prompt Guarantees a Correct Answer

    Some users believe that a detailed prompt makes the response reliable.

    Reality

    Even a strong prompt may produce:

    • Incorrect facts.
    • Outdated information.
    • Invented sources.
    • Calculation errors.
    • Missing details.
    • Biased content.
    • Unsupported recommendations.

    Prompt engineering improves communication, but it cannot guarantee truth.

    The user must still:

    • Check important claims.
    • Review official sources.
    • Confirm calculations.
    • Test code.
    • Inspect images.
    • Consult professionals when required.

    A polished response is not proof of accuracy.

    Myth 9: Prompt Engineering Can Completely Eliminate AI Hallucinations

    A well-written prompt can encourage the AI to avoid guessing.

    For example:

    Do not invent sources or statistics.

    Reality

    This instruction may reduce the risk, but it cannot guarantee that the AI will never produce unsupported information.

    The AI may still generate believable but incorrect details.

    For important work, users should:

    • Use source-based prompts.
    • Request verifiable references.
    • Check every source.
    • Ask the AI to identify uncertainty.
    • Compare the response with reliable original information.

    Prompt engineering can reduce hallucinations, but it cannot remove them completely.

    Myth 10: AI Always Follows Every Instruction

    A prompt may contain ten or more requirements.

    Some users expect the AI to follow all of them perfectly.

    Reality

    The AI may:

    • Forget one requirement.
    • Use the wrong format.
    • Exceed the word limit.
    • Omit an example.
    • Ignore a restriction.
    • Change approved content.
    • Repeat information.

    This is more likely when the prompt is long or contains conflicting instructions.

    The user should compare the response with the original prompt and identify missing requirements.

    For large tasks, divide the work into smaller prompts.

    Myth 11: Prompt Engineering Is Completed After the First Prompt

    Some people believe prompt engineering means writing one detailed instruction and accepting the answer.

    Reality

    Prompt engineering is often an ongoing process.

    The process may include:

    1. Writing the first prompt.
    2. Reviewing the response.
    3. Identifying problems.
    4. Adding clarification.
    5. Requesting a revision.
    6. Checking the improved version.
    7. Repeating the process when necessary.

    Follow-up prompts are an important part of prompt engineering.

    For example:

    The answer is useful, but shorten it to 300 words, keep the examples, and remove repeated background information.

    This targeted instruction improves the original response.

    Myth 12: “Try Again” Is an Effective Follow-Up Prompt

    Some users write:

    Try again.

    when the first response is unsuitable.

    Reality

    This does not explain what was wrong.

    The AI may produce a similar response.

    A better follow-up would be:

    The explanation is too technical. Rewrite it for a complete beginner, define all abbreviations, and include one everyday comparison.

    Specific feedback is more useful than a general request to try again.

    Myth 13: Prompt Engineering Is Only for ChatGPT

    Prompt engineering is often discussed in connection with ChatGPT.

    Reality

    Prompting skills can be used with many AI systems, including:

    • Google Gemini.
    • Claude.
    • Microsoft Copilot.
    • Perplexity.
    • AI image generators.
    • AI video tools.
    • AI writing assistants.
    • AI coding tools.
    • Customer-service chatbots.

    However, the prompt may need to be adjusted for the tool.

    A text AI may need instructions about tone, format, and length.

    An image generator may need instructions about subject, setting, orientation, colour, lighting, and visual style.

    Myth 14: The Same Prompt Produces the Same Result Every Time

    Some users expect identical results when they submit the same prompt again.

    Reality

    AI tools may generate different:

    • Wording.
    • Examples.
    • Headings.
    • Explanations.
    • Images.
    • Layouts.
    • Suggestions.

    This variation is common.

    When consistency matters:

    • Save successful outputs.
    • Save successful prompts.
    • Provide approved examples.
    • Request the same structure.
    • Tell the AI which parts must remain unchanged.

    For example:

    Keep the approved title, headings, and examples. Rewrite only the final paragraph.

    Myth 15: Prompt Engineering Can Replace Human Editing

    Some users believe a strong prompt removes the need for proofreading.

    Reality

    AI-generated content may still contain:

    • Grammar problems.
    • Repeated ideas.
    • Unclear sentences.
    • Incorrect headings.
    • Broken links.
    • Missing captions.
    • Inconsistent spelling.
    • Unsupported claims.
    • Internal drafting instructions.

    A final human review is necessary before publishing.

    The user should check:

    • Accuracy.
    • Clarity.
    • Formatting.
    • Tone.
    • Links.
    • Images.
    • Captions.
    • Reading time.
    • Category and tags.

    Prompt engineering supports editing, but it does not replace it.

    Myth 16: AI-Generated Content Is Automatically Original

    A prompt may ask:

    Create completely original content.

    Reality

    AI output may still resemble:

    • Common internet wording.
    • Familiar article structures.
    • Frequently used examples.
    • Standard marketing phrases.
    • Generic titles.

    Prompting can encourage originality by requesting:

    • A specific audience.
    • A practical angle.
    • New examples.
    • Several alternatives.
    • Avoidance of common clichés.

    However, the user should still review the result and rewrite generic sections where necessary.

    Myth 17: AI Image Prompts Can Guarantee Perfect Images

    A detailed prompt may describe every visual element.

    Reality

    The image generator may still produce:

    • Distorted hands.
    • Extra fingers.
    • Unnatural faces.
    • Incorrect objects.
    • Unreadable text.
    • Unwanted people.
    • Poor proportions.
    • Strange lighting.
    • Missing details.

    Negative instructions may help, but they may not work perfectly.

    AI-generated images require review and often several revisions.

    Myth 18: Negative Prompts Always Remove Unwanted Content

    A user may write:

    Do not include logos, text, watermarks, extra fingers, or distorted hands.

    Reality

    The AI may still include one of these elements.

    Negative prompts guide the tool, but they are not guarantees.

    It is usually better to:

    1. Clearly describe the desired image.
    2. Add the most important exclusions.
    3. Review the result.
    4. Request a targeted correction.

    For example:

    Keep the same scene, but remove the extra person and simplify the background.

    Myth 19: Prompt Engineering Makes Current Information Automatically Accurate

    A user may request:

    Give me the current price.

    Reality

    The AI may not have access to the latest information unless it checks a current source.

    Prices, laws, software features, plans, schedules, and public information may change.

    A better prompt would be:

    Check the current price using the official website and include the date verified.

    Even then, the user should confirm the information before making a decision.

    Myth 20: Prompt Engineering Removes the Need for Reliable Sources

    Some people believe the AI’s explanation is enough.

    Reality

    Important information should be supported by reliable evidence.

    Sources are especially important for:

    • Health.
    • Law.
    • Taxes.
    • Finance.
    • Safety.
    • Government programs.
    • Product specifications.
    • Research.
    • Current events.
    • Software features.

    Prompt engineering can help identify and organize sources, but the user must judge their reliability.

    Myth 21: AI Citations Are Always Real

    An AI response may include professional-looking references.

    Reality

    Some citations may be:

    • Incomplete.
    • Incorrect.
    • Outdated.
    • Unrelated.
    • Invented.

    The user should open and verify each source.

    A useful prompt is:

    Use only verifiable sources and do not invent titles, authors, dates, quotations, or links.

    However, this instruction does not remove the need for verification.

    Myth 22: Prompt Engineering Makes Calculations Error-Free

    A user may provide all the numbers and request a calculation.

    Reality

    The AI may still make mistakes involving:

    • Addition.
    • Percentages.
    • Interest.
    • Taxes.
    • Currency conversion.
    • Dates.
    • Units.
    • Financial projections.

    For important calculations:

    • Ask the AI to show the method.
    • Check the values used.
    • Confirm the units.
    • Verify the result with a calculator or spreadsheet.

    A clear prompt improves the explanation but does not guarantee the arithmetic.

    Myth 23: Prompt Engineering Makes AI-Generated Code Safe

    A detailed coding prompt may produce professional-looking code.

    Reality

    The code may still contain:

    • Errors.
    • Security weaknesses.
    • Outdated functions.
    • Missing validation.
    • Compatibility problems.
    • Poor performance.
    • Incorrect dependencies.

    The code should be reviewed and tested in a safe environment.

    Prompt engineering can improve code generation, but it cannot replace testing and professional review.

    Myth 24: One Prompt Template Works Forever

    A user may save a successful prompt and expect it to remain useful indefinitely.

    Reality

    Prompt templates may become outdated when:

    • The AI tool changes.
    • The audience changes.
    • The project changes.
    • The website structure changes.
    • New requirements are added.
    • Old instructions are no longer needed.

    Templates should be reviewed and updated regularly.

    A good template is reusable, but not permanent.

    Myth 25: Prompt Engineering Is Only About Getting Better Answers

    Prompt engineering is often described only as a method for improving output.

    Reality

    It also helps users think more clearly about:

    • Their actual goal.
    • The audience.
    • Required information.
    • Suitable structure.
    • Important limitations.
    • Questions that remain unanswered.
    • How the result will be checked.

    Prompt engineering is partly a communication skill and partly a planning skill.

    Myth 26: Prompt Engineering Removes the Need to Understand the Subject

    Some users believe they do not need subject knowledge because the AI can provide everything.

    Reality

    Without basic understanding, the user may not recognize:

    • Incorrect information.
    • Missing details.
    • Weak reasoning.
    • Unsafe advice.
    • Poor examples.
    • Misleading conclusions.

    AI can help the user learn, but human knowledge remains important.

    A useful approach is to ask the AI to:

    • Explain important terms.
    • State assumptions.
    • Identify uncertainties.
    • Suggest verification steps.
    • Provide questions for further research.

    Myth 27: Prompt Engineering Can Make AI Completely Unbiased

    A prompt may request:

    Give me a completely unbiased answer.

    Reality

    AI systems may still reflect:

    • Bias in training material.
    • Incomplete representation.
    • Cultural assumptions.
    • Historical inequalities.
    • Differences in source quality.
    • Limitations in available information.

    A better prompt would be:

    Present the main viewpoints, identify assumptions, use neutral language, and explain where reliable sources disagree.

    This may improve balance, but it cannot guarantee complete neutrality.

    Myth 28: Prompt Engineering Can Bypass Every Safety Rule

    Some users believe changing the wording of a request can bypass AI safety restrictions.

    Reality

    Prompt engineering should not be used to evade protections involving:

    • Harm.
    • Illegal activity.
    • Privacy violations.
    • Dangerous instructions.
    • Deception.
    • Exploitation.

    The purpose of prompting is to communicate more clearly, not to bypass responsible safeguards.

    A safer approach is to ask for:

    • Prevention.
    • Protection.
    • Risk awareness.
    • Legal alternatives.
    • Educational information.
    • Emergency guidance.

    Myth 29: Prompt Engineering Is a Temporary Trend

    Some people view prompting as a short-lived technology trend.

    Reality

    AI tools may change, and the way people interact with them may develop.

    However, the underlying skill remains useful:

    • State the goal clearly.
    • Provide relevant context.
    • Identify the audience.
    • Request the right format.
    • Set limits.
    • Review the result.
    • Correct misunderstandings.

    These are general communication and problem-solving skills that remain valuable even as AI systems change.

    Myth 30: Prompt Engineering Makes AI Independent of Human Judgment

    Some users believe the AI can complete the task and make the final decision.

    Reality

    The user remains responsible for deciding whether the result is:

    • Accurate.
    • Safe.
    • Appropriate.
    • Ethical.
    • Legal.
    • Useful.
    • Suitable for publication.
    • Suitable for the intended audience.

    AI can assist with ideas, drafts, organization, and analysis.

    It should not automatically make important personal, professional, legal, medical, or financial decisions.

    The Main Myths at a Glance

    Prompt engineering is not:

    • Only for programmers.
    • Dependent on secret words.
    • Guaranteed to produce perfect answers.
    • A replacement for professional expertise.
    • A replacement for human editing.
    • A guarantee of accurate sources.
    • A guarantee of original content.
    • A guarantee of perfect images.
    • A way to eliminate all AI errors.
    • A method for bypassing safety rules.

    It is a practical method for giving clearer instructions, reviewing results, and improving communication with AI tools.

    A Myth-Checking Checklist

    Before believing a claim about prompt engineering, ask:

    • Does the claim promise perfect results?
    • Does it suggest secret words can control the AI?
    • Does it ignore the need for fact-checking?
    • Does it suggest AI can replace a qualified professional?
    • Does it claim longer prompts are always better?
    • Does it promise the same result every time?
    • Does it ignore privacy or safety risks?
    • Does it treat a polished response as proof of accuracy?
    • Does it suggest human review is unnecessary?
    • Is the claim supported by reliable evidence?

    Figure 13. Common myths about prompt engineering compared with the practical reality.

    Prompt engineering is not based on secret words or perfect formulas. It is a practical process of giving clear instructions, reviewing the AI’s response, correcting problems, and applying human judgment.

    Frequently Asked Questions About Prompt Engineering

    Prompt engineering can sound technical at first, but the basic idea is simple: give the AI clear instructions, review the response, and improve the prompt when necessary.

    The following frequently asked questions address common beginner concerns about prompts, AI tools, accuracy, safety, privacy, and practical use.

    1. What Is Prompt Engineering?

    Prompt engineering is the process of writing, testing, and improving instructions given to an Artificial Intelligence system.

    These instructions are called prompts.

    Prompt engineering may involve:

    • Clearly stating the task.
    • Adding useful context.
    • Identifying the audience.
    • Choosing the tone and format.
    • Setting limits.
    • Providing examples.
    • Reviewing the result.
    • Giving follow-up instructions.

    For example:

    Write an email.

    is a basic prompt.

    A more effective prompt would be:

    Write a polite email to my dentist asking to move Monday’s appointment to another day next week. Keep the email under 120 words.

    The second prompt gives the AI more useful direction.

    2. What Is an AI Prompt?

    An AI prompt is a question, instruction, description, or piece of information given to an AI tool.

    A prompt may ask the AI to:

    • Explain a subject.
    • Write an email.
    • Summarize a document.
    • Generate ideas.
    • Create a plan.
    • Translate text.
    • Review writing.
    • Create an image.
    • Assist with code.
    • Organize information.

    A prompt can be short or detailed, depending on the task.

    For example:

    Translate “Thank you” into French.

    is enough for a simple translation.

    A more complex task usually requires more information.

    3. Do I Need Programming Skills to Use Prompt Engineering?

    No.

    Most everyday prompt engineering does not require programming, mathematics, or technical training.

    Beginners can improve prompts by adding:

    • A clear task.
    • Relevant details.
    • The intended audience.
    • A preferred format.
    • The desired tone.
    • A realistic length.
    • Important restrictions.

    For example:

    Explain cybersecurity to a complete beginner using simple language and three everyday examples.

    This is prompt engineering, even though it does not involve code.

    Programming knowledge becomes relevant only when the task itself involves software development, technical systems, or advanced data work.

    4. Is Prompt Engineering Only Used with ChatGPT?

    No.

    Prompt engineering can be used with many AI tools, including:

    • ChatGPT.
    • Google Gemini.
    • Claude.
    • Microsoft Copilot.
    • Perplexity.
    • AI image generators.
    • AI video generators.
    • AI writing assistants.
    • AI coding assistants.
    • Customer-service chatbots.

    The same basic principles apply, but the prompt should match the type of tool.

    A text assistant may need instructions about:

    • Tone.
    • Length.
    • Audience.
    • Structure.

    An image generator may need instructions about:

    • Subject.
    • Setting.
    • Style.
    • Lighting.
    • Colour.
    • Orientation.
    • Elements to avoid.

    5. Why Do Detailed Prompts Often Produce Better Results?

    Detailed prompts reduce uncertainty.

    Without enough information, the AI may have to guess:

    • What the user wants.
    • Who the response is for.
    • How long it should be.
    • What tone to use.
    • What format is required.
    • Which details should be included.
    • What information should be avoided.

    For example:

    Create a study plan.

    is very broad.

    A stronger prompt would be:

    Create a seven-day study plan for a complete beginner learning Artificial Intelligence. Allow 30 minutes per day, begin with basic concepts, and present the plan in a table.

    The additional details make the goal clearer.

    However, more detail is helpful only when it affects the result.

    6. Are Longer Prompts Always Better?

    No.

    A long prompt may be useful for a complex task, but unnecessary information can make the prompt harder to follow.

    A weak long prompt may contain:

    • Repeated instructions.
    • Unrelated background.
    • Conflicting requirements.
    • Too many examples.
    • Several separate tasks.
    • Too many restrictions.

    A good prompt should be as long as necessary, but no longer.

    For example:

    Write a 150-word professional but friendly email asking for an update on my application.

    is clearer than a long paragraph containing unrelated details.

    7. Can Short Prompts Still Work Well?

    Yes.

    Short prompts can work very well when the task is simple and clear.

    Examples include:

    • Translate this sentence into Arabic.
    • Correct the spelling in this paragraph.
    • Define machine learning in one sentence.
    • List five colours.
    • Convert these notes into bullet points.

    A short prompt becomes less useful when the task requires important context, audience information, formatting, or restrictions.

    The length of the prompt should match the complexity of the task.

    8. What Information Should I Include in a Good Prompt?

    A useful prompt may include:

    • Task: What should the AI do?
    • Context: What background information does it need?
    • Audience: Who is the response for?
    • Format: How should the answer be organized?
    • Tone: How should it sound?
    • Length: How detailed should it be?
    • Examples: Is there a pattern to follow?
    • Limits: What should the AI avoid?
    • Quality requirements: What should the result achieve?

    You do not need to include every element in every prompt.

    Use the details that affect the result.

    9. What Is the Easiest Prompt Formula for Beginners?

    A simple beginner formula is:

    Task + Context + Audience + Format + Tone + Limits

    For example:

    Explain prompt engineering to a complete beginner. Use simple language, short headings, one everyday comparison, and three practical examples. Keep the explanation under 700 words and avoid programming terminology.

    This prompt includes:

    • Task.
    • Audience.
    • Format.
    • Examples.
    • Length.
    • Restriction.

    Another shorter formula is:

    Task + Details + Format + Limits

    For example:

    Write a polite appointment-cancellation email. Explain that I am unavailable because of a family commitment. Keep it under 100 words and ask to reschedule.

    10. What Makes a Prompt Too Vague?

    A prompt is too vague when it does not give the AI enough information to understand the user’s goal.

    Examples include:

    • Help me.
    • Make this better.
    • Write something.
    • Create a plan.
    • Tell me about technology.
    • Fix this.
    • Give me ideas.

    These prompts may produce general or unsuitable responses.

    A clearer version of:

    Make this better.

    would be:

    Rewrite this paragraph in simpler language, remove repeated ideas, and preserve the original meaning.

    Specific instructions help the AI understand what kind of improvement is required.

    11. Can I Ask the AI to Take a Role?

    Yes.

    You may ask the AI to respond from a practical perspective, such as:

    • A patient tutor.
    • An editor.
    • A study coach.
    • A customer-service assistant.
    • A marketing assistant.
    • A travel planner.
    • A technical trainer.

    For example:

    Act as a patient computer tutor. Explain how to attach a file to an email using simple numbered steps.

    The role can influence the tone, focus, and organization of the response.

    However, assigning a role does not make the AI a licensed doctor, lawyer, accountant, engineer, or financial adviser.

    Professional advice still requires qualified human review.

    12. Does Telling the AI to “Act as an Expert” Make the Answer More Accurate?

    Not necessarily.

    The phrase may influence the style of the response, but it does not guarantee:

    • Correct facts.
    • Current information.
    • Professional qualifications.
    • Reliable judgment.
    • Safe recommendations.

    Specific instructions are more useful than exaggerated roles.

    Instead of:

    Act as the world’s greatest expert.

    write:

    Explain the topic using simple language, identify uncertain claims, and state which facts require current verification.

    The quality of the instructions matters more than impressive wording.

    13. What Is a Follow-Up Prompt?

    A follow-up prompt is an additional instruction used to improve or continue an earlier response.

    For example:

    First prompt:

    Explain blockchain.

    Follow-up prompt:

    Rewrite the explanation for a complete beginner and include one everyday comparison.

    Another follow-up might be:

    Shorten the explanation to 300 words and add a three-point summary.

    Follow-up prompts allow users to refine the answer without restarting the entire task.

    14. What Should I Say Instead of “Try Again”?

    Explain exactly what was wrong with the first response.

    Instead of:

    Try again.

    write:

    The explanation is too technical. Rewrite it for a complete beginner, define every abbreviation, and include one everyday example.

    Or:

    The email sounds too aggressive. Rewrite it in a firm but respectful tone and keep it under 150 words.

    Specific feedback gives the AI clearer direction.

    15. What Is Prompt Chaining?

    Prompt chaining means dividing a large task into several connected prompts.

    For example, when creating a long article:

    1. Create the outline.
    2. Review and improve the outline.
    3. Write the introduction.
    4. Write each section separately.
    5. Add figures and captions.
    6. Review the complete article.
    7. Prepare internal links.
    8. Create the WordPress metadata.

    Each prompt completes one stage.

    Prompt chaining is useful for:

    • Articles.
    • Reports.
    • Business plans.
    • Courses.
    • Research projects.
    • Website content.
    • Marketing campaigns.
    • Coding projects.

    It gives the user more control and makes corrections easier.

    16. What Is Example Prompting?

    Example prompting means giving the AI one or more samples of the style or structure you want.

    For example:

    Create five article titles using a style similar to “What Is Machine Learning? A Beginner’s Guide (2026).”

    One example is sometimes called one-shot prompting.

    Several examples are sometimes called few-shot prompting.

    Examples are useful for:

    • Titles.
    • Product descriptions.
    • Email templates.
    • Lesson structures.
    • Social media posts.
    • Repeated website content.

    Ask the AI to follow the general pattern while creating original wording.

    17. Can I Ask the AI to Use a Specific Format?

    Yes.

    You may request:

    • Bullet points.
    • Numbered steps.
    • A table.
    • A checklist.
    • Short paragraphs.
    • Headings and subheadings.
    • A template.
    • A timeline.
    • Questions and answers.
    • An outline.

    For example:

    Compare ChatGPT, Google Gemini, and Claude in a table with columns for main use, beginner advantage, possible limitation, and common task.

    The format should match the purpose.

    Use a table for comparison, numbered steps for a process, and a checklist for tasks that need verification.

    18. Can I Control the Tone of an AI Response?

    Yes.

    You may request a tone that is:

    • Friendly.
    • Professional.
    • Formal.
    • Polite.
    • Encouraging.
    • Neutral.
    • Persuasive.
    • Calm.
    • Respectful.
    • Firm but courteous.

    For example:

    Write a polite but firm complaint email requesting a replacement for a damaged product. Avoid threatening language.

    Tone instructions are especially useful for emails, customer messages, articles, advertisements, and social media posts.

    Avoid combining conflicting tone instructions.

    For example, “highly formal and extremely casual” may confuse the AI.

    19. Can I Ask the AI to Stay Within a Word Limit?

    Yes, but the AI may not always follow an exact word count perfectly.

    You can request:

    • Under 100 words.
    • Between 300 and 400 words.
    • Five bullet points.
    • Three paragraphs.
    • A ten-step guide.

    A range is often more practical than an exact number.

    For example:

    Keep the explanation between 450 and 550 words.

    When the limit matters, verify the final word count using TextMaker, WordPress, or another counting tool.

    20. Can I Tell the AI What Not to Include?

    Yes.

    These are sometimes called negative instructions or constraints.

    Examples include:

    • Do not use technical jargon.
    • Do not add information that was not provided.
    • Do not invent statistics.
    • Do not repeat ideas.
    • Do not use aggressive language.
    • Do not include private information.
    • Do not change the original meaning.
    • Do not include logos or watermarks.

    For example:

    Rewrite this paragraph in simpler language. Preserve the meaning and do not add new facts.

    Negative instructions can improve control, but too many restrictions may make the prompt difficult to follow.

    21. What Is Negative Prompting for AI Images?

    Negative prompting for images means telling the AI image generator which elements to avoid.

    Common instructions include:

    • No logos.
    • No watermarks.
    • No unreadable text.
    • No distorted hands.
    • No extra fingers.
    • No additional people.
    • No cluttered background.
    • No incorrect objects.

    For example:

    Create a clean horizontal educational illustration of an older beginner using a laptop. Do not include logos, watermarks, distorted hands, or unreadable text.

    Negative instructions may reduce unwanted elements, but they do not guarantee a perfect image.

    Every image should still be inspected carefully.

    22. Why Does the AI Sometimes Ignore Part of My Prompt?

    The AI may overlook instructions when:

    • The prompt is very long.
    • Too many tasks are combined.
    • Requirements conflict.
    • Important details are buried.
    • The requested length is unrealistic.
    • The task is too complex.
    • The instructions are unclear.

    To reduce this problem:

    • Put the main task near the beginning.
    • Use short sections or labels.
    • Remove repeated instructions.
    • Break the project into smaller prompts.
    • Review the response against the original requirements.

    For example:

    Before giving the final answer, check that all six requested sections are included.

    Human review is still necessary.

    23. Why Does the Same Prompt Produce Different Answers?

    AI systems do not always produce identical responses.

    The same prompt may result in different:

    • Wording.
    • Examples.
    • Headings.
    • Explanations.
    • Recommendations.
    • Images.
    • Layouts.

    When consistency matters:

    • Save the successful prompt.
    • Save the approved response.
    • Provide a sample to follow.
    • State which parts must remain unchanged.
    • Request changes only to a specific section.

    For example:

    Keep the approved title, structure, and examples. Rewrite only the conclusion.

    24. Can Prompt Engineering Prevent AI Hallucinations?

    It can reduce the risk, but it cannot eliminate it.

    AI may still invent:

    • Facts.
    • Sources.
    • Quotes.
    • Statistics.
    • Product features.
    • Dates.
    • Policies.
    • Links.

    Useful instructions include:

    • Do not guess.
    • Do not invent sources.
    • Use only the provided document.
    • Mark missing information as “Not provided.”
    • Clearly identify uncertainty.
    • Separate confirmed facts from assumptions.

    Every important fact and source should still be checked independently.

    25. Can Prompt Engineering Guarantee Accurate Information?

    No.

    A clear prompt improves communication, but the AI may still provide:

    • Incorrect facts.
    • Outdated details.
    • Weak reasoning.
    • Missing information.
    • Biased content.
    • Calculation errors.
    • Unsupported recommendations.

    Accuracy depends on more than prompt quality.

    For important information:

    • Check official sources.
    • Confirm the date.
    • Review calculations.
    • Compare several reliable sources.
    • Consult a qualified professional when needed.

    26. How Do I Ask for Current Information?

    Clearly state that the information must be current and verified.

    For example:

    Check the current WordPress.com plan features using official WordPress sources. Include the date verified and identify any details that may change.

    This is useful for:

    • Prices.
    • Laws.
    • Government programs.
    • Software features.
    • Travel rules.
    • Product specifications.
    • Schedules.
    • Public officials.
    • Subscription plans.

    The user should still inspect the official source before making an important decision.

    27. Should I Ask the AI for Sources?

    Sources can be useful when the task involves research, current facts, or important claims.

    You may ask:

    Use reliable sources and identify the source for each major factual claim.

    However, AI-generated references may be incomplete, unrelated, outdated, or invented.

    Always verify:

    • The title.
    • Author.
    • Publication date.
    • Website.
    • Quotation.
    • Link.
    • Relevance.

    Do not treat the presence of citations as proof that the response is correct.

    28. Can I Use Prompt Engineering for Medical, Legal, or Financial Questions?

    You may use AI for general educational information and preparation, but it should not replace a qualified professional.

    A safer prompt might be:

    Explain the general questions I should discuss with my doctor. Do not diagnose a condition or recommend changing medication.

    For legal matters:

    Explain the general concepts and identify which questions require confirmation from a qualified lawyer.

    For financial matters:

    Explain the general options, risks, and questions to ask a licensed adviser. Do not make a final investment decision for me.

    High-stakes information requires careful verification.

    29. Is It Safe to Share Personal Information in a Prompt?

    Users should avoid sharing unnecessary sensitive information.

    Do not include:

    • Passwords.
    • Credit-card numbers.
    • Banking credentials.
    • Government identification numbers.
    • Confidential medical records.
    • Private addresses.
    • Customer information.
    • Children’s personal details.
    • Confidential business information.

    Use placeholders such as:

    • [NAME]
    • [ADDRESS]
    • [ACCOUNT NUMBER]
    • [ORDER NUMBER]
    • [PHONE NUMBER]
    • [DATE]

    Before submitting a prompt, ask whether the AI truly needs the information.

    30. Can Prompt Engineering Help Protect Privacy?

    It can encourage safer handling of information.

    For example:

    Write the letter using placeholders for all personal information. Do not include real names, addresses, account numbers, or phone numbers.

    You may also ask the AI to:

    • Remove identifying details.
    • Replace names with initials.
    • Mark confidential sections.
    • Avoid repeating sensitive information.
    • Use only necessary details.

    Prompt instructions can support privacy, but the user must decide what should be shared in the first place.

    31. Can I Use Prompt Engineering to Improve My Writing?

    Yes.

    You may ask the AI to improve:

    • Grammar.
    • Spelling.
    • Clarity.
    • Tone.
    • Organization.
    • Readability.
    • Sentence length.
    • Repetition.
    • Headings.
    • Transitions.

    For example:

    Review this paragraph for grammar and clarity. Shorten long sentences, remove repetition, preserve the meaning, and do not add new facts.

    Be specific about what should change.

    The instruction “make this better” is usually too vague.

    32. Can AI Rewrite My Work Without Changing the Meaning?

    You may request this, but review the result carefully.

    A useful prompt is:

    Rewrite the following paragraph in simpler language. Preserve every factual claim and do not add, remove, or change the meaning.

    The AI may still accidentally alter:

    • Tone.
    • Emphasis.
    • Dates.
    • Conditions.
    • Technical meaning.
    • Legal meaning.

    For contracts, policies, medical information, and other important documents, compare the revised version with the original.

    33. Can Prompt Engineering Help with Long Articles?

    Yes.

    Long articles often work better when created in stages.

    A practical workflow is:

    1. Choose the topic.
    2. Create the outline.
    3. Review the outline.
    4. Write one section at a time.
    5. Add examples and figures.
    6. Review repetition.
    7. Verify facts.
    8. Add internal links.
    9. Prepare metadata.
    10. Complete a final publication review.

    A section prompt might say:

    Write the “Benefits of Prompt Engineering” section for complete beginners. Use H3 subheadings, practical examples, and simple language. Avoid repeating earlier definitions.

    This approach gives the user more control.

    34. How Can I Prevent Repetition in a Long Article?

    Use a separate review step.

    For example:

    Review the complete article and identify repeated ideas by section. Do not rewrite anything yet.

    After identifying the repetition:

    Remove repeated explanations while keeping the clearest version of each idea. Preserve the heading structure.

    You can also tell the AI:

    • Do not repeat definitions already explained.
    • Refer briefly to earlier sections.
    • Use new examples in each section.
    • Review the full article before finalizing.

    Long AI-generated articles still require human editing.

    35. Can Prompt Engineering Help with WordPress Articles?

    Yes.

    AI can assist with:

    • Article outlines.
    • Introductions.
    • Main sections.
    • Figure prompts.
    • Captions.
    • Alt text.
    • Internal links.
    • Categories.
    • Tags.
    • Excerpts.
    • Meta descriptions.
    • Publishing checklists.

    For example:

    Prepare the WordPress publishing package for this beginner AI article. Include the featured-image prompt, filename, alt text, caption, category, tags, slug, excerpt, meta description, and internal-link suggestions.

    The final post should still be checked on desktop and mobile before publication.

    36. Can Prompt Engineering Help with AI Image Generation?

    Yes.

    A strong image prompt may include:

    • Subject.
    • Action.
    • Setting.
    • Orientation.
    • Style.
    • Lighting.
    • Colours.
    • Main objects.
    • Composition.
    • Elements to avoid.

    For example:

    Create a clean horizontal 16:9 educational illustration of an older beginner typing a detailed prompt into an AI assistant on a laptop. Show an email, checklist, and educational image appearing as results. Use natural lighting and a blue-and-purple colour theme. Do not include logos, watermarks, distorted hands, or unreadable text.

    The final image may still require revision.

    37. Why Does an AI Image Sometimes Look Wrong Even with a Good Prompt?

    AI image generators may still produce:

    • Distorted hands.
    • Extra fingers.
    • Unnatural faces.
    • Incorrect objects.
    • Unreadable text.
    • Strange shadows.
    • Poor proportions.
    • Missing details.
    • Unwanted people.
    • Cluttered backgrounds.

    A detailed prompt improves direction, but it does not guarantee perfect visual accuracy.

    Use targeted follow-up instructions such as:

    Keep the same scene, but remove the extra person, enlarge the laptop, and simplify the background.

    Inspect every final image before publishing.

    38. Can Prompt Engineering Help with Computer Code?

    Yes.

    AI can help:

    • Explain code.
    • Create simple code.
    • Identify syntax errors.
    • Suggest improvements.
    • Add comments.
    • Create test cases.
    • Explain dependencies.

    For example:

    Explain the following HTML code to a complete beginner. Describe each section in simple language and identify any errors.

    However, AI-generated code may contain security problems, outdated methods, or hidden errors.

    Test code in a safe environment before using it on a live system.

    39. Can I Save Prompts and Reuse Them?

    Yes.

    Saving successful prompts can improve consistency and save time.

    You may create templates for:

    • Article introductions.
    • Email replies.
    • Image prompts.
    • Social media posts.
    • Product descriptions.
    • Study plans.
    • Article reviews.
    • Comparison tables.
    • WordPress metadata.
    • Publishing checklists.

    For example:

    Write a beginner-friendly introduction about [TOPIC]. Explain what it is, why it matters, and one everyday example. Use simple language and keep it between 300 and 400 words.

    Replace [TOPIC] each time.

    Review templates occasionally because your project or AI tool may change.

    40. How Do I Know Whether My Prompt Is Good?

    A good prompt usually makes the following clear:

    • The task.
    • The purpose.
    • The audience.
    • Important context.
    • Required information.
    • Preferred format.
    • Desired tone.
    • Realistic length.
    • Necessary restrictions.

    After receiving the response, ask:

    • Did the AI complete the correct task?
    • Did it follow the requested format?
    • Is the language suitable for the audience?
    • Is important information missing?
    • Are any facts uncertain?
    • Did it add unsupported details?
    • Is the result useful for its intended purpose?

    A prompt is successful when it helps produce a useful result, not merely a long or polished response.

    41. How Many Times Should I Revise a Prompt?

    There is no fixed number.

    Some simple tasks may require only one prompt.

    More complex tasks may need several revisions.

    Stop revising when the response:

    • Meets the main goal.
    • Includes the required information.
    • Uses the correct tone.
    • Follows the requested format.
    • Is suitable for the audience.
    • Has been checked for important errors.

    Do not continue revising only to make small changes that do not improve usefulness.

    42. What Should I Do When the AI Keeps Producing the Wrong Result?

    Try the following:

    1. Restate the main task.
    2. Remove unnecessary information.
    3. Identify the audience.
    4. Give one clear example.
    5. Specify the format.
    6. Explain what is wrong with the current response.
    7. Correct one problem at a time.
    8. Break the task into smaller prompts.
    9. Start a new conversation with the important instructions summarized.
    10. Review whether the task is suitable for that AI tool.

    For example:

    The previous versions are too technical. Start again with a 300-word explanation for a complete beginner. Use one everyday comparison and avoid programming terms.

    43. Should I Use One Large Prompt or Several Small Prompts?

    Use one prompt for simple, clearly defined tasks.

    Use several connected prompts for:

    • Long articles.
    • Reports.
    • Business plans.
    • Research projects.
    • Website development.
    • Course creation.
    • Coding projects.
    • Large editing tasks.

    Several smaller prompts usually provide:

    • Greater control.
    • Easier review.
    • Fewer missed requirements.
    • Better organization.
    • Simpler corrections.

    This is the reason prompt chaining is useful for large projects.

    44. Can Prompt Engineering Make AI Completely Unbiased?

    No.

    AI systems may reflect bias from:

    • Training material.
    • Cultural assumptions.
    • Incomplete representation.
    • Historical inequalities.
    • Source selection.
    • Outdated information.

    You may request:

    Present several viewpoints, use neutral language, identify assumptions, and explain where reliable sources disagree.

    This may improve balance, but it cannot guarantee complete neutrality.

    Human review remains important.

    45. Can Prompt Engineering Make AI Content Completely Original?

    No prompt can guarantee complete originality.

    AI output may resemble:

    • Common internet language.
    • Standard article structures.
    • Familiar examples.
    • Popular marketing phrases.
    • Frequently used titles.

    You may request:

    • Original examples.
    • A specific audience.
    • A practical angle.
    • Several alternative versions.
    • Avoidance of clichés.

    The final content should still be reviewed and edited.

    46. Does Prompt Engineering Replace Human Creativity?

    No.

    Prompt engineering can support creativity by helping users:

    • Generate ideas.
    • Explore alternatives.
    • Create first drafts.
    • Develop outlines.
    • Test styles.
    • Organize concepts.

    Human creativity remains important for:

    • Choosing the purpose.
    • Adding personal insight.
    • Judging quality.
    • Selecting the best ideas.
    • Creating an authentic voice.
    • Making final decisions.

    AI can assist the creative process, but it should not automatically control it.

    47. Does Prompt Engineering Replace Human Judgment?

    No.

    The user must still decide whether the response is:

    • Accurate.
    • Safe.
    • Ethical.
    • Legal.
    • Useful.
    • Appropriate.
    • Suitable for publication.
    • Suitable for the intended audience.

    AI can provide drafts, comparisons, suggestions, and checklists.

    The final decision belongs to the user or an appropriately qualified professional.

    48. What Is the Most Important Prompting Skill?

    The most important skill is clarity.

    A useful prompt clearly communicates:

    • What you need.
    • Why you need it.
    • Who it is for.
    • How it should be presented.
    • What should be avoided.

    The second important skill is review.

    Even a clear prompt can produce an imperfect response.

    Good prompt engineering combines:

    Clear instruction + careful review + specific revision

    49. What Is the Best Advice for a Complete Beginner?

    Start with a simple task.

    For example:

    Explain Artificial Intelligence to a complete beginner using simple language and three everyday examples.

    Review the answer.

    Then practise follow-up prompts such as:

    • Make it shorter.
    • Add another example.
    • Explain the second point more simply.
    • Turn this into a checklist.
    • Remove technical terms.
    • Add a five-point summary.

    Prompt engineering becomes easier through regular practice.

    50. What Is a Simple Final Checklist Before Submitting a Prompt?

    Before submitting an important prompt, ask:

    • Is my main task clear?
    • Did I provide relevant context?
    • Did I identify the audience?
    • Did I explain what must be included?
    • Did I choose a useful format?
    • Did I specify the tone?
    • Is the requested length realistic?
    • Did I explain what should be avoided?
    • Are any instructions conflicting?
    • Will I review the response before using it?

    A prompt does not need every possible detail.

    It only needs enough clear information for the task.

    Figure 14. Common beginner questions about writing prompts, improving responses, accuracy, privacy, and human review.

    Prompt engineering becomes easier when users understand that there is no secret formula. Clear instructions, relevant details, careful review, and specific follow-up prompts are the main skills needed to communicate more effectively with AI tools.

    Key Takeaways

    Prompt engineering is the process of writing, testing, reviewing, and improving instructions given to an Artificial Intelligence tool.

    The following points summarize the most important lessons from this guide.

    1. A Prompt Is an Instruction Given to an AI Tool

    A prompt may be:

    • A question.
    • A command.
    • A description.
    • A request for an explanation.
    • A task involving writing, planning, images, code, or organization.

    The prompt tells the AI what you want it to do.

    2. Clear Prompts Usually Produce More Useful Responses

    A vague prompt leaves the AI to guess important details.

    For example:

    Write an email.

    A clearer version would be:

    Write a polite email to my dentist asking to reschedule Monday’s appointment to another day next week. Keep it under 120 words.

    The clearer prompt explains the purpose, recipient, tone, timing, and length.

    3. Prompt Engineering Does Not Require Programming

    Beginners can use prompt engineering without technical knowledge.

    The most important skills are:

    • Clear communication.
    • Identifying the goal.
    • Providing relevant details.
    • Reviewing the response.
    • Giving specific follow-up instructions.

    4. Start with a Clear Task

    Use direct action words such as:

    • Explain.
    • Write.
    • Compare.
    • Summarize.
    • Create.
    • Review.
    • Rewrite.
    • Organize.
    • Translate.
    • Plan.

    A clear task helps the AI understand what type of response is required.

    5. Add Relevant Context

    Context explains the situation surrounding the task.

    Useful context may include:

    • The purpose of the request.
    • The project being completed.
    • Work already finished.
    • Available time.
    • Budget.
    • Experience level.
    • Important restrictions.

    Include only information that affects the result.

    6. Identify the Audience

    The audience affects the language, examples, tone, and level of detail.

    For example:

    Explain machine learning to a complete beginner with no programming experience.

    This is more useful than simply asking:

    Explain machine learning.

    7. Choose the Right Format

    Tell the AI how the response should be organized.

    Use:

    • Numbered steps for a process.
    • Bullet points for separate ideas.
    • Tables for comparisons.
    • Checklists for review tasks.
    • Headings for long explanations.
    • Templates for repeated work.

    The format should match the purpose of the task.

    8. Specify the Tone

    Tone helps control how the response sounds.

    You may request:

    • Friendly.
    • Professional.
    • Polite.
    • Formal.
    • Encouraging.
    • Neutral.
    • Calm.
    • Firm but respectful.

    Avoid conflicting instructions such as asking for a message that is both highly formal and extremely casual.

    9. Set Realistic Length Requirements

    You may ask for:

    • One sentence.
    • Three paragraphs.
    • Five bullet points.
    • Under 150 words.
    • Between 500 and 700 words.
    • A detailed multi-section guide.

    The requested length should match the complexity of the task.

    10. Use Limits When Necessary

    Limits explain what the AI should avoid.

    Examples include:

    • Do not use technical jargon.
    • Do not invent facts.
    • Do not add information that was not provided.
    • Do not repeat ideas.
    • Do not include personal information.
    • Do not exceed the word limit.
    • Do not include logos or watermarks.

    Use only the restrictions that are important.

    11. Examples Can Improve Consistency

    Examples help the AI understand the style or structure you want.

    For example:

    Create five article titles using a style similar to “What Is Machine Learning? A Beginner’s Guide (2026).”

    Examples are useful for:

    • Article titles.
    • Product descriptions.
    • Emails.
    • Social media posts.
    • Lesson formats.
    • Repeated website content.

    Ask for original wording rather than exact copying.

    12. Use a Simple Prompt Formula

    A useful beginner formula is:

    Task + Context + Audience + Format + Tone + Limits

    For example:

    Explain cybersecurity to an older beginner with basic computer knowledge. Use simple language, five short headings, and three practical examples. Keep the explanation under 800 words and avoid technical jargon.

    Not every prompt needs every element.

    Use the details that matter for the task.

    13. Follow-Up Prompts Are Important

    The first response may not be perfect.

    Use follow-up prompts to improve it.

    Examples include:

    • Make the explanation shorter.
    • Add three practical examples.
    • Use simpler language.
    • Change the response into a table.
    • Remove repeated ideas.
    • Rewrite only the conclusion.
    • Keep the meaning but improve the grammar.

    Specific feedback is more useful than writing only:

    Try again.

    14. Break Large Tasks into Smaller Prompts

    Complex projects often work better when completed step by step.

    For a long article, you may:

    1. Create the outline.
    2. Review the structure.
    3. Write the introduction.
    4. Write each section separately.
    5. Add figures and captions.
    6. Review repetition.
    7. Verify facts.
    8. Prepare publishing details.
    9. This method is called prompt chaining.

    15. Good Prompts Do Not Guarantee Perfect Results

    Even a detailed prompt may produce:

    • Incorrect facts.
    • Outdated information.
    • Missing details.
    • Repetition.
    • Biased content.
    • Calculation errors.
    • Invented sources.
    • Faulty code.
    • Imperfect images.

    Prompt engineering improves direction, but it does not make AI error-free.

    16. Important Information Must Be Verified

    Check current and high-risk information using reliable sources.

    This is especially important for:

    • Health.
    • Law.
    • Taxes.
    • Finance.
    • Safety.
    • Government programs.
    • Product prices.
    • Software features.
    • Travel requirements.
    • Public information that may change.

    A confident AI answer is not proof that the information is correct.

    17. Protect Personal Information

    Do not include unnecessary sensitive details in prompts.

    Avoid sharing:

    • Passwords.
    • Banking information.
    • Credit-card numbers.
    • Government identification numbers.
    • Confidential medical records.
    • Private addresses.
    • Customer information.
    • Children’s personal details.

    Use placeholders such as:

    • [NAME]
    • [ADDRESS]
    • [ACCOUNT NUMBER]
    • [ORDER NUMBER]
    • [PHONE NUMBER]

    18. Prompt Engineering Works with Many AI Tools

    Prompting is not limited to ChatGPT.

    It can be used with:

    • Google Gemini.
    • Claude.
    • Microsoft Copilot.
    • Perplexity.
    • AI image generators.
    • AI video tools.
    • AI coding assistants.
    • AI writing tools.
    • Customer-service chatbots.

    The prompt should be adjusted for the type of tool.

    19. Save Successful Prompts as Templates

    A useful prompt can be reused.

    For example:

    Write a beginner-friendly introduction about [TOPIC]. Explain what it is, why it matters, and one everyday example. Use simple language and keep it between 300 and 400 words.

    Templates can be created for:

    • Articles.
    • Emails.
    • Image prompts.
    • Social media posts.
    • Study plans.
    • Reviews.
    • Comparison tables.
    • WordPress publishing tasks.

    Review templates regularly and update them when your project changes.

    20. Human Review Is Essential

    Prompt engineering includes evaluating the result.

    Before using or publishing an AI response, check:

    • Accuracy.
    • Relevance.
    • Completeness.
    • Tone.
    • Format.
    • Grammar.
    • Sources.
    • Privacy.
    • Possible bias.
    • Suitability for the audience.

    The user remains responsible for the final decision.

    A Final Prompt-Engineering Checklist

    Before submitting an important prompt, ask:

    • Is the task clear?
    • Did I provide relevant context?
    • Did I identify the audience?
    • Did I explain what must be included?
    • Did I choose a useful format?
    • Did I specify the tone?
    • Is the requested length realistic?
    • Did I explain what should be avoided?
    • Are any instructions conflicting?
    • Will I review and verify the response?

    Prompt engineering becomes easier with practice.

    Start with a clear task, add the details that matter, review the response carefully, and use specific follow-up instructions when improvements are needed.

    What’s Next?

    Now that you understand the basic principles of prompt engineering, the next step is to practise them in real situations.

    You do not need to create complicated prompts immediately. Begin with simple everyday tasks and improve your instructions gradually.

    Start with One Simple Task

    Choose a task you already understand, such as:

    • Writing an email.
    • Summarizing a short article.
    • Creating a checklist.
    • Explaining a new subject.
    • Organizing notes.
    • Generating article ideas.
    • Planning a weekly schedule.
    • Creating an image description.

    For example, begin with:

    Write an email asking to reschedule an appointment.

    Then improve it:

    Write a polite email to my dentist asking to reschedule Monday morning’s appointment to another day next week. Include a subject line and keep the email under 120 words.

    Compare the two responses and notice how the additional details affect the result.

    Practise the Beginner Prompt Formula

    Use the following formula:

    Task + Context + Audience + Format + Tone + Limits

    For example:

    Explain online privacy to an older beginner who uses email and social media. Use simple language, five short headings, and three everyday examples. Keep the explanation under 800 words and avoid technical jargon.

    You do not need to use every element each time. Include only the information that helps the AI understand the task.

    Improve One Prompt at a Time

    When the AI response is not suitable, identify the specific problem.

    Ask:

    • Is the answer too long?
    • Is it too technical?
    • Is an example missing?
    • Is the tone unsuitable?
    • Is the format difficult to read?
    • Did the AI misunderstand the audience?
    • Did it add unsupported information?

    Then write a focused follow-up prompt.

    For example:

    The explanation is too technical. Rewrite it for a complete beginner, define all abbreviations, and add one everyday comparison.

    Specific corrections are more effective than simply asking the AI to try again.

    Create a Personal Prompt Collection

    Save prompts that produce useful results.

    You may organize them into categories such as:

    • Article writing.
    • Email drafting.
    • AI image generation.
    • Study and learning.
    • Social media.
    • Website management.
    • Document summaries.
    • Business tasks.
    • Article reviews.
    • WordPress publishing.

    A saved prompt can be turned into a reusable template.

    For example:

    Write a beginner-friendly explanation of [TOPIC]. Define the subject, explain why it matters, include one everyday comparison and three practical examples, and use simple language. Keep the response between [WORD COUNT] words.

    Replace the bracketed information when using the template again.

    Build a Small Prompt Library

    A beginner prompt library might include:

    1. An explanation prompt.
    2. An email-writing prompt.
    3. A summary prompt.
    4. A comparison prompt.
    5. A study-plan prompt.
    6. An article-outline prompt.
    7. An image-generation prompt.
    8. A proofreading prompt.
    9. A fact-checking prompt.
    10. A final-review prompt.

    Saving these templates can make future tasks faster and more consistent.

    Practise Follow-Up Prompting

    Prompt engineering is not only about the first instruction.

    Practise follow-up requests such as:

    • Explain this more simply.
    • Add three practical examples.
    • Shorten the response to 300 words.
    • Present the information as a table.
    • Remove repeated ideas.
    • Use a more professional tone.
    • Rewrite only the conclusion.
    • Keep the approved structure unchanged.
    • Identify which facts require verification.
    • Do not add information that was not provided.

    Follow-up prompting helps you refine a response without restarting the entire task.

    Practise Prompt Chaining

    For larger tasks, divide the work into connected stages.

    For example, when writing an article:

    1. Select the topic.
    2. Create the outline.
    3. Review the outline.
    4. Write the introduction.
    5. Write each main section.
    6. Add practical examples.
    7. Create figure prompts and captions.
    8. Review the complete article for repetition.
    9. Verify important facts.
    10. Prepare the WordPress publishing information.

    This method provides greater control and makes mistakes easier to correct.

    Test Prompts with Different AI Tools

    The same prompt may produce different results in different AI systems.

    You may compare how tools handle:

    • Explanations.
    • Writing style.
    • Summaries.
    • Tables.
    • Image descriptions.
    • Research questions.
    • Creative ideas.

    When comparing tools, use the same main prompt and evaluate:

    • Accuracy.
    • Clarity.
    • Organization.
    • Usefulness.
    • Tone.
    • Instruction-following.
    • Need for revision.

    Do not assume that one tool will always be best for every task.

    Learn Prompting for Different Purposes

    After mastering the basics, you can practise specialized prompts for:

    • ChatGPT conversations.
    • AI image generation.
    • AI video generation.
    • Business and marketing.
    • Education and study.
    • Website content.
    • Customer service.
    • Productivity.
    • Computer coding.
    • Research and document analysis.

    Each area uses the same basic principles, but the required details may differ.

    For example, a writing prompt may focus on audience, tone, format, and word count.

    An image prompt may focus on subject, composition, orientation, lighting, colours, style, and unwanted elements.

    Review AI Responses More Critically

    As your prompting skills improve, also improve your reviewing skills.

    Before using an AI response, check:

    • Did it answer the correct question?
    • Did it follow all important instructions?
    • Is the language suitable for the audience?
    • Are any important details missing?
    • Are there repeated ideas?
    • Are factual claims supported?
    • Could the information be outdated?
    • Did the AI invent sources or statistics?
    • Is private information included?
    • Does the topic require professional review?

    Better prompting and better reviewing should develop together.

    Continue Learning Beyond Basic Prompting

    After practising beginner prompts, you may explore:

    • Reusable prompt templates.
    • Prompt chains for complex projects.
    • Source-based prompting.
    • Prompting with uploaded documents.
    • Image-prompt structure.
    • Research and verification prompts.
    • Prompts for tables and structured data.
    • Prompts for revising existing content.
    • Prompts for maintaining a consistent writing style.
    • Prompts for automating repeated workflows.

    These skills build on the same foundation introduced in this guide.

    A Simple Seven-Day Practice Plan

    You can practise prompt engineering for a few minutes each day.

    Day 1: Improve one vague question.

    Day 2: Write a prompt that identifies a specific audience.

    Day 3: Ask for information in a table or checklist.

    Day 4: Add tone and length requirements.

    Day 5: Use a follow-up prompt to improve an answer.

    Day 6: Create and refine an AI image prompt.

    Day 7: Save your best prompts as reusable templates.

    Regular practice will help you recognize which details improve a prompt and which details are unnecessary.

    Measure Success by Usefulness

    A successful prompt is not necessarily long, technical, or complicated.

    A successful prompt helps produce a response that:

    • Completes the intended task.
    • Matches the audience.
    • Uses the right format.
    • Includes the necessary information.
    • Respects important limits.
    • Requires fewer corrections.
    • Can be reviewed and used safely.

    The goal of prompt engineering is not to impress the AI with complex language.

    The goal is to communicate clearly enough to receive a useful result.

    Keep Human Judgment at the Centre

    As you continue learning, remember that AI is an assistant.

    You remain responsible for:

    • Defining the goal.
    • Providing appropriate information.
    • Protecting private details.
    • Reviewing the response.
    • Verifying important facts.
    • Correcting mistakes.
    • Making the final decision.

    Prompt engineering becomes most valuable when clear instructions are combined with careful human review.

    Final Tip for Beginners

    Do not try to write a perfect prompt on your first attempt.

    Start with a clear and simple instruction. Review the AI’s response, identify what is missing, and improve the prompt one detail at a time.

    For example, begin with:

    Explain prompt engineering.

    Then improve it:

    Explain prompt engineering to a complete beginner using simple language, one everyday comparison, and three practical examples.

    If the response is still too long, follow up with:

    Shorten the explanation to 400 words and organize it under four short headings.

    This process is more useful than trying to memorize complicated prompt formulas or special technical words.

    Remember these three basic steps:

    1. Ask clearly.
    2. Review carefully.
    3. Improve specifically.

    When correcting a response, explain the exact problem.

    Instead of writing:

    Try again.

    Write:

    The answer is too technical. Rewrite it for a complete beginner, remove unexplained terminology, and add one everyday example.

    The clearer your feedback is, the easier it is for the AI to revise the response.

    Also remember that a confident and well-written AI response may still contain incorrect or outdated information. Check important facts, protect private information, and consult qualified professionals when the subject involves health, law, finance, taxes, or safety.

    Prompt engineering becomes easier through regular practice. Begin with everyday tasks such as writing emails, creating checklists, summarizing short documents, organizing ideas, or improving paragraphs.

    The goal is not to create the longest or most complicated prompt.

    The goal is to give the AI enough clear direction to produce a result that is useful, appropriate, and easy to review.

    Continue Learning

    Prompt engineering is one of the most practical skills for using Artificial Intelligence effectively.

    Now that you understand how to write clearer prompts, improve weak instructions, use follow-up prompts, and review AI responses, continue building your knowledge with these beginner-friendly guides.

    Learn the Foundations of Artificial Intelligence

    Start with the basic concepts behind modern AI:

    These guides explain how AI systems learn from information, recognize patterns, generate content, and respond to written instructions.

    Learn How to Use ChatGPT

    Continue with the practical ChatGPT guides:

    These articles will help you understand the ChatGPT interface, begin conversations, write useful prompts, and improve the answers you receive.

    Learn About AI Image Generation

    Prompt-writing skills can also help you create better AI images.

    Read:

    This guide explains how text-to-image tools work, how image prompts are structured, what details to include, and how to improve images through follow-up instructions.

    When writing an image prompt, describe:

    • The main subject.
    • The action.
    • The setting.
    • The image orientation.
    • The visual style.
    • The lighting.
    • The colours.
    • Important objects.
    • Elements that should not appear.

    Practise with Real Tasks

    Use what you learned in this guide to practise prompts for:

    • Writing an email.
    • Summarizing an article.
    • Creating a study plan.
    • Comparing two options.
    • Organizing notes.
    • Reviewing a paragraph.
    • Creating a checklist.
    • Generating an educational image.
    • Planning a WordPress article.
    • Preparing social media content.

    Begin with a basic prompt, review the result, and then improve the instructions.

    For example:

    First prompt:

    Create a study plan about Artificial Intelligence.

    Improved prompt:

    Create a seven-day Artificial Intelligence study plan for a complete beginner. Allow 30 minutes per day, begin with basic concepts, include one practical activity each day, and present the plan in a table. Avoid programming topics.

    The improved version gives the AI clearer direction about the audience, duration, available time, format, activities, and limits.

    Save Your Best Prompts

    Create a simple prompt library in TextMaker or another document.

    You may organize it under headings such as:

    • Learning prompts.
    • Email prompts.
    • Article-writing prompts.
    • Image-generation prompts.
    • Social media prompts.
    • Business prompts.
    • Review prompts.
    • WordPress publishing prompts.

    Save each successful prompt as a reusable template.

    For example:

    Explain [TOPIC] to [AUDIENCE]. Use [FORMAT], include [REQUIRED INFORMATION], use a [TONE] tone, keep the response within [LENGTH], and avoid [UNWANTED CONTENT].

    Replace the bracketed details for each new task.

  • AI Image Generation for Beginners: Complete Guide (2026)

    AI Image Generation for Beginners: Complete Guide (2026)

    Estimated Reading Time: 22 minutes
    Last Updated: July 2026

    What You’ll Learn

    By the end of this guide, you’ll be able to:

    • Understand what AI image generation is.
    • Learn how AI image generators create pictures.
    • Understand what a text-to-image prompt is.
    • Write clear and effective AI image prompts.
    • Discover popular AI image-generation tools.
    • Learn how AI-generated images are used in everyday life.
    • Understand the benefits and limitations of AI image generation.
    • Recognize common myths about AI-generated images.
    • Use AI image tools more safely and responsibly.

    Introduction

    Artificial Intelligence can now create images from simple written instructions. Instead of drawing a picture yourself or searching through hundreds of photographs, you can describe what you want, and an AI image generator can produce a new image within seconds.

    For example, you could type:

    A friendly robot helping a child study in a bright classroom.

    The AI image generator may then create a picture showing a robot, a child, books, desks, and a cheerful learning environment.

    The written instruction you give to the AI is called a prompt. A prompt may be very short, or it may include details about the subject, background, colours, lighting, camera angle, and artistic style.

    AI-generated images can be used for:

    • Blog posts and websites.
    • Social media graphics.
    • Presentations.
    • Educational materials.
    • Product ideas.
    • Invitations and greeting cards.
    • Stories and creative projects.
    • Marketing materials.

    You do not need to be an artist, photographer, or graphic designer to begin. The most important skill is learning how to describe your idea clearly.

    In this beginner-friendly guide, you will learn what AI image generation is, how it works, how to write useful prompts, where AI-generated images are used, and what limitations and safety concerns you should understand.

    Before reading this guide, you may find it helpful to read What Is Artificial Intelligence? A Beginner’s Guide (2026), What Is Machine Learning? A Beginner’s Guide (2026), What Is Deep Learning? A Beginner’s Guide (2026), and What Is Generative AI? A Beginner’s Guide (2026). These guides explain the basic technologies that make AI image generation possible.

    What Is AI Image Generation?

    AI image generation is the process of using Artificial Intelligence to create pictures from written instructions.

    You describe the image you want, and the AI image generator creates a new picture based on your description.

    For example, you could enter this prompt:

    An elderly man learning to use a laptop with help from a friendly robot in a bright living room.

    The AI may create an image containing:

    • An elderly man sitting beside a laptop.
    • A friendly robot providing assistance.
    • A comfortable living room.
    • Warm lighting and a helpful atmosphere.

    The written instruction is called a prompt. The clearer and more detailed the prompt is, the easier it is for the AI to understand what kind of image you want.

    The most common form of AI image generation is called text-to-image generation.

    This process can be understood simply:

    Written prompt → AI image generator → Generated image

    The user writes the description, the AI processes the words, and a new image is produced.

    AI image generators can create many types of visual content, including:

    • Realistic photographs.
    • Digital paintings.
    • Cartoons.
    • Illustrations.
    • Logos and icons.
    • Fantasy scenes.
    • Product concepts.
    • Educational diagrams.
    • Social media graphics.

    The generated image is not usually taken directly from one existing photograph. Instead, the AI creates a new arrangement of colors, shapes, objects, lighting, and visual styles based on patterns it learned during training.

    However, AI-generated images are not always perfect. The AI may misunderstand part of the prompt or create unusual details, such as incorrect hands, distorted text, missing objects, or unrealistic backgrounds.

    Users can usually improve the image by changing the prompt and generating another version.

    AI Image Editing

    Some AI image tools can also edit an existing photograph or illustration.

    You may be able to ask the AI to:

    • Remove an unwanted object.
    • Replace the background.
    • Add a new person or object.
    • Change colours.
    • Improve lighting.
    • Expand the edges of an image.
    • Turn a photograph into a cartoon or painting.
    • Repair damaged or unclear areas.

    For example, you could upload a photograph of a garden and ask the AI to remove a chair, add colorful flowers, and change the scene from daytime to sunset.

    Figure 1. An AI-generated image created from a written text prompt.

    This example demonstrates the basic text-to-image process. A written description tells the AI which people, objects, setting, lighting, and mood should appear. The AI then combines these instructions to create a new image. Changing the wording of the prompt may produce a different result.

    How Does AI Image Generation Work?

    AI image generation works by turning written instructions into visual content.

    The process may appear instant, but several steps happen behind the scenes.

    Step 1: The AI Reads the Prompt

    The process begins when you type a prompt describing the image you want.

    For example:

    Create a realistic photograph of a small wooden cabin beside a peaceful lake at sunset.

    The AI examines important words and phrases, including:

    • Small wooden cabin.
    • Peaceful lake.
    • Sunset.
    • Realistic photograph.

    These details help the AI understand the subject, location, lighting, mood, and visual style.

    Step 2: The AI Connects Words with Visual Ideas

    During training, the AI studied a very large number of images and their descriptions.

    From this training, it learned relationships between words and visual features.

    For example, it may learn that:

    • The word lake is often connected with water, reflections, and shorelines.
    • The word sunset is often connected with orange, red, pink, and purple skies.
    • The word cabin is often connected with wood, windows, roofs, forests, or mountains.
    • The word realistic usually means the image should look similar to a photograph.

    The AI uses these learned patterns to decide which visual elements should appear.

    Step 3: The AI Starts with Visual Noise

    Many modern AI image generators begin with a random pattern that looks similar to television static or colored noise.

    At first, there is no clear picture.

    The AI gradually changes this random pattern by removing unnecessary noise and adding visual details that match the prompt.

    You can compare this process to watching a blurry image slowly become clearer.

    Step 4: The Image Becomes More Detailed

    The AI repeatedly improves the picture.

    It may gradually add:

    • The shape of the cabin.
    • Trees and mountains.
    • Reflections in the water.
    • Clouds in the sky.
    • Sunset colors.
    • Shadows and lighting.
    • Small details such as windows, doors, and rocks.

    Each step brings the image closer to the written description.

    Step 5: The Final Image Is Produced

    After the AI completes the process, it displays the finished image.

    Many AI image generators produce several versions from the same prompt. Each version may have different colours, angles, backgrounds, or details.

    The user can then:

    • Choose the best version.
    • Generate another image.
    • Change the prompt.
    • Add more details.
    • Ask the AI to edit part of the image.
    • Download or save the final result.

    The same prompt may create a different image each time because the AI begins with a different random pattern.

    An Everyday Comparison

    Imagine giving instructions to an artist.

    You might say:

    Please draw a peaceful beach with palm trees, blue water, and a small boat during sunrise.

    The artist listens to your description and uses their knowledge of beaches, boats, colours, lighting, and composition to create the picture.

    An AI image generator follows a similar process, but it uses learned mathematical patterns instead of human experience and artistic judgment.

    The AI does not imagine, feel, or understand the scene like a human artist. It calculates which visual details are most likely to match the words in the prompt.

    .

    Figure 2. The basic process of creating an AI-generated image from a written prompt.

    This diagram shows the main stages of AI image generation. The user begins by writing a prompt. The AI analyzes the instructions, connects the words with learned visual patterns, and gradually changes random noise into a finished picture. The process happens quickly, but the final result depends greatly on the clarity and detail of the prompt.

    What Is an AI Image Prompt?

    An AI image prompt is the written instruction you give to an AI image generator.

    The prompt tells the AI what kind of image you want it to create. It may describe the main subject, location, colours, lighting, mood, artistic style, and other visual details.

    For example, a simple prompt might be:

    Create an image of a cat sitting beside a window.

    The AI understands that the main subject is a cat and that the scene should include a window.

    However, the prompt does not explain:

    • What the cat looks like.
    • What kind of room it is in.
    • Whether the image should look realistic or artistic.
    • What time of day it is.
    • What mood the image should create.

    Because the instructions are limited, the AI must make many decisions by itself.

    Simple Prompt

    A simple prompt contains only the basic idea.

    For example:

    A dog running through a park.

    This prompt may produce a suitable image, but the result could be very different from what you imagined.

    The AI may choose the dog’s breed, color, size, background, weather, lighting, and image style without additional instructions.

    Detailed Prompt

    A detailed prompt gives the AI more information.

    For example:

    A happy golden retriever running through a green city park on a sunny spring morning, realistic photography, natural lighting, flowers in the background, wide-angle view.

    This prompt explains:

    • Main subject: A golden retriever.
    • Action: Running.
    • Location: A city park.
    • Time and weather: A sunny spring morning.
    • Style: Realistic photography.
    • Lighting: Natural lighting.
    • Background: Green grass and flowers.
    • Camera view: Wide-angle view.

    Detailed prompts usually give the user more control over the final result.

    However, a prompt does not need to be extremely long. The best prompts are clear, specific, and focused on the most important details.

    Main Parts of an AI Image Prompt

    A useful AI image prompt may include several parts.

    Main Subject

    The main subject is the person, animal, object, or place that should appear in the image.

    Examples include:

    • A friendly robot.
    • A family eating dinner.
    • A red sports car.
    • A mountain cabin.
    • A bowl of fresh fruit.

    Action or Activity

    Explain what the subject is doing.

    Examples include:

    • Walking through a forest.
    • Reading a book.
    • Cooking in a kitchen.
    • Driving along a coastal road.
    • Working on a laptop.

    Setting or Background

    Describe where the scene takes place.

    Examples include:

    • In a modern office.
    • Beside a peaceful lake.
    • Inside a bright classroom.
    • On a busy city street.
    • In a garden filled with flowers.

    Image Style

    Tell the AI what visual style you want.

    Examples include:

    • Realistic photography.
    • Watercolor painting.
    • Cartoon illustration.
    • Digital art.
    • Pencil drawing.
    • 3D animation.
    • Vintage poster.

    Lighting

    Lighting can change the appearance and mood of an image.

    Examples include:

    • Soft natural lighting.
    • Bright studio lighting.
    • Warm sunset lighting.
    • Dramatic shadows.
    • Colourful neon lighting.

    Mood or Atmosphere

    Describe how the image should feel.

    Examples include:

    • Peaceful.
    • Cheerful.
    • Professional.
    • Mysterious.
    • Exciting.
    • Relaxing.

    View or Composition

    You may also tell the AI how the scene should be shown.

    Examples include:

    • Close-up view.
    • Wide-angle view.
    • View from above.
    • Eye-level view.
    • Subject centered in the image.
    • Plenty of empty space for text.

    A Simple Prompt Formula

    Beginners can use this basic structure:

    Subject + action + setting + style + lighting + mood

    For example:

    A retired man learning to use a computer in a comfortable home office, realistic photography, warm natural lighting, friendly and encouraging atmosphere.

    You do not need to include every part in every prompt. Add only the details that are important to the image you want.

    Why Clear Prompts Matter

    A vague prompt gives the AI more freedom to make its own decisions.

    A clear prompt gives you more control.

    Compare these two examples:

    Vague prompt:

    Create a picture of a house.

    Clear prompt:

    Create a realistic photograph of a small white house with a red roof, surrounded by green trees, during a bright summer afternoon.

    The second prompt is more likely to produce an image that matches the user’s idea.

      Figure 3. A comparison between a simple AI image prompt and a detailed prompt.

    How to Write a Good AI Image Prompt

     This comparison shows how additional details can give the user more control over an AI-generated image. The simple prompt allows the AI to choose most of the visual elements. The detailed prompt provides clearer instructions about the house, roof, surroundings, lighting, and image style.

    Writing a good AI image prompt means giving the AI clear instructions about what you want to see.

    You do not need to use complicated technical language. A useful prompt simply describes the most important visual details in a clear and organized way.

    Start with the Main Subject

    Begin by identifying the main person, animal, object, or place.

    For example:

    A woman using a laptop.

    This gives the AI a basic subject, but it still leaves many details undecided.

    You can make the subject clearer by adding more information:

    A retired woman using a laptop at a wooden desk.

    The second prompt gives the AI a better understanding of the person and the setting.

    Describe the Action

    Explain what the subject is doing.

    Examples include:

    • Reading a book.
    • Preparing a meal.
    • Walking through a garden.
    • Teaching a class.
    • Working on a computer.
    • Playing with a dog.
    • Driving a car.

    Compare these prompts:

    An elderly man in a kitchen.

    An elderly man preparing a healthy breakfast in a modern kitchen.

    The second prompt creates a clearer scene because it includes an action.

    Add the Setting

    Describe where the scene takes place.

    The setting may include:

    • A comfortable living room.
    • A modern office.
    • A peaceful beach.
    • A busy city street.
    • A bright classroom.
    • A mountain village.
    • A small family kitchen.

    For example:

    A young student reading a book.

    You could improve it by writing:

    A young student reading a book in a quiet school library.

    The additional setting helps the AI create a more complete background.

    Choose the Image Style

    The style tells the AI how the image should look.

    Common styles include:

    • Realistic photography.
    • Cartoon illustration.
    • Digital painting.
    • Watercolor painting.
    • Pencil drawing.
    • 3D animation.
    • Vintage poster.
    • Children’s book illustration.
    • Professional product photography.

    For example:

    A small cottage beside a lake, watercolor painting.

    The words watercolor painting tell the AI to create an artistic image rather than a realistic photograph.

    Describe the Lighting

    Lighting can change the mood and appearance of the image.

    Useful lighting descriptions include:

    • Soft natural lighting.
    • Bright daylight.
    • Warm sunset lighting.
    • Morning sunlight.
    • Dramatic studio lighting.
    • Candlelight.
    • Colourful neon lighting.
    • Soft light coming through a window.

    For example:

    A family eating dinner in a comfortable dining room, warm evening lighting.

    The lighting helps create a welcoming and peaceful atmosphere.

    Add the Mood

    The mood describes how the image should feel.

    Examples include:

    • Friendly.
    • Cheerful.
    • Peaceful.
    • Professional.
    • Exciting.
    • Mysterious.
    • Relaxing.
    • Hopeful.
    • Elegant.

    For example:

    A teacher helping a student in a bright classroom, friendly and encouraging atmosphere.

    The mood helps the AI decide how the people, colors, lighting, and expressions should appear.

    Select the Camera View or Composition

    The composition describes how the subject should be positioned inside the image.

    You can use instructions such as:

    • Close-up view.
    • Wide-angle view.
    • Full-body view.
    • View from above.
    • Eye-level view.
    • Subject centred.
    • Background slightly blurred.
    • Empty space on the left for text.
    • Horizontal website-banner layout.
    • Square social media layout.

    For example:

    A bowl of fresh fruit on a kitchen table, close-up view, soft natural lighting, background slightly blurred.

    These instructions help control how the final image is framed.

    Use a Simple Prompt Structure

    Beginners can follow this structure:

    Main subject + action + setting + style + lighting + mood + composition

    For example:

    A retired man learning to use a laptop in a comfortable home office, realistic photography, warm natural lighting, friendly and encouraging atmosphere, eye-level view.

    This prompt explains:

    • Who should appear.
    • What the person is doing.
    • Where the scene takes place.
    • How the image should look.
    • What lighting should be used.
    • What mood the image should create.
    • How the scene should be framed.

    You do not need to include every part in every prompt. Include only the details that are important to your idea.

    Be Specific, but Avoid Unnecessary Details

    A prompt should be clear, but it does not need to become a long paragraph.

    Too few details may produce an unpredictable result. Too many unrelated details may confuse the AI.

    For example:

    Too vague:

    A business meeting.

    Clearer prompt:

    Four business professionals discussing a project around a conference table in a modern office, realistic photography, bright natural lighting, professional atmosphere.

    The clearer prompt provides enough information without becoming unnecessarily complicated.

    Put Important Details Near the Beginning

    Many AI image generators pay close attention to the first part of the prompt.

    Place the most important subject and action near the beginning.

    For example:

    A friendly white robot teaching two children how to use a computer in a bright classroom, colorful educational illustration.

    The robot and children are introduced first because they are the main focus.

    Use Descriptive Words

    Descriptive words help the AI understand the appearance of the scene.

    Instead of writing:

    A garden.

    Try:

    A colorful flower garden with roses, tulips, green grass, and a stone pathway during a sunny spring morning.

    Useful descriptive words may explain:

    • Size.
    • Color.
    • Age.
    • Material.
    • Shape.
    • Weather.
    • Season.
    • Emotion.
    • Style.
    • Condition.

    For example:

    A small old wooden boat floating on calm blue water during a misty morning.

    Explain What You Do Not Want Carefully

    Some AI image generators support negative prompts. A negative prompt tells the AI which elements should not appear.

    Examples include:

    • No text.
    • No watermark.
    • No people in the background.
    • No distorted hands.
    • No extra objects.
    • No blurry details.

    A complete instruction might be:

    A professional photograph of a modern home office with a laptop, notebook, and coffee cup, soft natural lighting, no people, no visible text, no watermark.

    Not every AI image generator handles negative instructions in the same way. Sometimes it is better to focus on clearly describing what you do want.

    Generate More Than One Version

    The first image may not perfectly match your idea.

    Many AI image tools can create several versions from the same prompt. Review each result and choose the image that best fits your needs.

    Look for problems such as:

    • Missing objects.
    • Unusual faces.
    • Incorrect fingers or hands.
    • Distorted backgrounds.
    • Unreadable text.
    • Objects appearing in the wrong place.
    • Colors that do not match your instructions.

    Generating several options gives you a better chance of finding a suitable image.

    Improve the Prompt Step by Step

    Prompt writing is often a process of testing and improving.

    Suppose your first prompt is:

    A robot in an office.

    The image may be too general.

    You could improve it:

    A friendly white robot working at a laptop in a modern office.

    Then improve it again:

    A friendly white robot working at a laptop in a modern office, realistic photography, soft daylight coming through large windows, professional and welcoming atmosphere, eye-level view.

    Each version gives the AI more direction.

    Change One Detail at a Time

    When an image is close to what you want, avoid rewriting the entire prompt immediately.

    Change one or two details at a time.

    For example:

    • Change the background.
    • Adjust the lighting.
    • Change the clothing color.
    • Request a wider view.
    • Remove an unwanted object.
    • Add empty space for a website title.
    • Change the style from realistic to cartoon.

    This makes it easier to understand which instruction improved the result.

    Check the Final Image Carefully

    Before using an AI-generated image, examine it closely.

    Check:

    • Faces and hands.
    • Words and signs.
    • Clothing and objects.
    • Background details.
    • Shadows and reflections.
    • Logos and brand names.
    • Cultural or historical accuracy.
    • Whether the image matches the intended audience.

    AI-generated images can appear realistic while still containing small mistakes. Careful review is especially important when the image will be used on a website, in educational material, or for business purposes.

    Example: Building a Prompt Step by Step

    Basic idea:

    A man using a computer.

    Add the person:

    A retired man using a computer.

    Add the setting:

    A retired man using a computer in a comfortable home office.

    Add the style and lighting:

    A retired man using a computer in a comfortable home office, realistic photography, warm natural lighting.

    Add the mood and composition:

    A retired man using a computer in a comfortable home office, realistic photography, warm natural lighting, friendly and confident atmosphere, eye-level view, horizontal composition.

    The final prompt gives the AI much clearer instructions while remaining easy to understand.

    Figure 4. Building a clearer AI image prompt by adding useful details step by step.

    This example demonstrates how a basic idea can be improved by adding information about the subject, setting, style, lighting, and mood. Each added detail gives the AI more direction and increases the chance of producing an image that matches the user’s idea.

    Popular AI Image Generation Tools

    Many AI image generators are available today. Some are built into chat assistants, while others are included in graphic-design platforms or specialized creative services.

    These tools may produce different results even when they receive the same prompt. One tool may be better for realistic photographs, while another may be better for illustrations, posters, product concepts, or artistic images.

    There is no single tool that is best for every person or every project. The right choice depends on what you want to create, how much control you need, and how easy you want the tool to be.

    ChatGPT Images

    ChatGPT allows users to create images by describing what they want in ordinary language.

    For example, you could write:

    Create a realistic image of a retired man learning Artificial Intelligence at a laptop in a bright home office.

    After the image is created, you can continue the conversation and request changes such as:

    • Make the room brighter.
    • Change the shirt color.
    • Add a notebook to the desk.
    • Create a wider version for a website.
    • Remove an unwanted object.
    • Turn the image into a cartoon illustration.

    This conversational approach makes ChatGPT suitable for beginners because users can improve an image by simply explaining what they want changed. OpenAI also supports generating original images, creating variations, adjusting composition, and refining existing visual ideas through follow-up instructions.

    Best for:

    • Complete beginners.
    • Blog images.
    • Educational illustrations.
    • Social media graphics.
    • Posters and simple designs.
    • Creating and editing images through conversation.

    Google Gemini

    Google Gemini can generate images from written prompts and help users refine the result through follow-up requests.

    For example:

    Create a colorful illustration of a friendly robot teaching a beginner how to use Artificial Intelligence.

    You may then ask Gemini to change the background, adjust the style, add objects, or create another version.

    Gemini is useful for people who already use Google products and want to create images through a conversational AI assistant. Google also provides image-generation features in some of its productivity applications, although availability can depend on the account, plan, country, and product being used.

    Best for:

    • General image creation.
    • Educational graphics.
    • Creative ideas.
    • Google-product users.
    • Creating and refining images through conversation.

    Adobe Firefly

    Adobe Firefly is a collection of generative AI tools designed for creative work.

    It can help users:

    • Generate images from written prompts.
    • Add or remove parts of an image.
    • Replace backgrounds.
    • Expand an image beyond its original borders.
    • Create text effects.
    • Generate design elements.
    • Edit images using written instructions.

    Firefly is available as a standalone service and is also connected with several Adobe creative applications. This makes it useful for people who want to generate an image and then continue editing it in a professional design program.

    For example:

    Create a professional photograph of a modern home office with a laptop, notebook, indoor plant, and soft natural lighting.

    Best for:

    • Graphic design.
    • Marketing materials.
    • Photo editing.
    • Professional creative projects.
    • Adobe Creative Cloud users.

    Canva AI Image Generator

    Canva includes AI image-generation tools inside its design platform.

    Users can create an image from a prompt and place it directly into:

    • Social media posts.
    • Presentations.
    • Posters.
    • Invitations.
    • Website graphics.
    • YouTube thumbnails.
    • Flyers.
    • Blog images.

    Canva’s Magic Media can turn a text prompt into an image and lets users choose styles and image proportions. Because the image is created inside Canva, users can immediately add headings, icons, shapes, colors, and other design elements.

    For example:

    Create a clean illustration of a person learning AI at home, blue and white colour theme, friendly modern style.

    Best for:

    • Beginners.
    • Social media content.
    • Blog graphics.
    • Presentations.
    • Posters and flyers.
    • People who want image generation and design tools in one place.

    Microsoft Copilot and Bing Image Creator

    Microsoft provides AI image-generation features through Copilot and Bing Image Creator.

    Users can describe an image in natural language and create photographs, illustrations, cartoons, artwork, and other visual styles. Copilot can also help refine or edit an image using follow-up instructions.

    For example:

    Create a cheerful illustration of an older beginner attending an online Artificial Intelligence lesson.

    Microsoft’s image tools may be convenient for people who already use Windows, Microsoft Edge, Bing, or Microsoft 365.

    Best for:

    • Everyday image creation.
    • Presentation graphics.
    • School and personal projects.
    • Microsoft-product users.
    • Beginners looking for a simple text-to-image tool.

    Midjourney

    Midjourney is a specialized AI tool for creating highly detailed and artistic images.

    A user provides a text prompt describing the desired image. Midjourney then generates several visual options that the user can review and refine.

    For example:

    An ancient library filled with glowing books, cinematic lighting, detailed fantasy illustration.

    Midjourney also supports image prompts, style references, editing tools, and other controls that can influence the appearance of the final result. It can be used through its website, and some features are also available through Discord.

    Midjourney can produce impressive results, but beginners may need time to learn its prompts, settings, and controls.

    Best for:

    • Artistic images.
    • Fantasy scenes.
    • Concept art.
    • Detailed illustrations.
    • Creative professionals.
    • Users who want greater control over visual style.

    Which AI Image Generator Is Best for Beginners?

    For someone creating their first AI image, ChatGPT, Canva, Gemini, Microsoft Copilot, or Bing Image Creator may be easier starting points.

    These tools allow users to enter prompts in ordinary language without learning many technical settings.

    Canva may be especially useful when the image will be placed inside a poster, social media post, or presentation.

    ChatGPT or Gemini may be more suitable when the user wants to create an image through conversation and request several changes.

    Adobe Firefly may be a better choice for users who want stronger editing tools or already work with Adobe products.

    Midjourney may suit users who want highly artistic results and are willing to spend more time learning creative controls.

    The Same Prompt Can Produce Different Results

    Consider this prompt:

    A peaceful mountain cabin beside a lake at sunrise, realistic photography.

    Different tools may create:

    • Different cabin designs.
    • Different mountains.
    • Different lighting.
    • Different colors.
    • Different camera angles.
    • Different levels of realism.

    This does not necessarily mean one result is wrong. Each AI tool interprets the prompt using its own technology, training, settings, and creative rules.

    It is often helpful to test the same prompt in more than one tool and compare the results.

    Important Note About Plans and Limits

    Some AI image generators provide limited access without payment, while others require a subscription or offer additional features through paid plans.

    Image limits, available tools, editing options, and subscription rules can change. Before choosing a service, check its current official information and terms.

    Beginners should start with one simple tool rather than opening accounts with many different services. Learn how to write clear prompts, generate several versions, and improve the results. After gaining experience, it becomes easier to compare other tools.

    Figure 5. Different types of AI image-generation tools available to beginners.

    This illustration shows that AI image generators are available in several forms. Some work like conversational assistants, some are built into graphic-design platforms, and others provide advanced artistic controls. The best tool depends on the user’s experience, project, preferred workflow, and desired image style.

    What Can AI Image Generation Be Used For?

    AI image generation can be used for many personal, educational, creative, and business purposes.

    It can help people create visual content more quickly, especially when they do not have professional drawing, photography, or graphic-design skills.

    However, the final image should always be reviewed carefully before it is published or shared.

    Blog Posts and Websites

    AI-generated images can make articles and webpages more attractive and easier to understand.

    They may be used as:

    • Featured images.
    • Section illustrations.
    • Tutorial graphics.
    • Website banners.
    • Background images.
    • Simple educational diagrams.
    • Images for landing pages.

    For example, a beginner writing an article about online learning could use this prompt:

    A retired man attending an online Artificial Intelligence lesson at home, realistic photography, bright natural lighting, friendly atmosphere, horizontal website layout.

    The generated image could be used near the beginning of the article.

    When creating website images, it is helpful to request a horizontal composition and enough empty space around the main subject.

    Social Media Content

    AI images can be used to create visual content for platforms such as Facebook, Instagram, Pinterest, Linked In, and X.

    Examples include:

    • Educational posts.
    • Motivational graphics.
    • Promotional images.
    • Announcements.
    • Holiday greetings.
    • Event graphics.
    • Quote backgrounds.
    • Product previews.

    For example:

    A cheerful illustration of a small business owner using Artificial Intelligence to create social media content, modern flat-design style, blue and purple colors, square layout.

    After creating the image, the user can add text, a logo, or other design elements using Canva or another graphic-design tool.

    Educational Materials

    Teachers, students, parents, and bloggers can use AI-generated images to explain ideas visually.

    Images may be created for:

    • Lessons.
    • Worksheets.
    • Presentations.
    • Study guides.
    • Flashcards.
    • Children’s learning materials.
    • Historical scenes.
    • Scientific illustrations.
    • Language-learning exercises.

    For example, a teacher could request:

    A colorful educational illustration showing the water cycle with clouds, rain, rivers, evaporation, and the sun, simple labels, suitable for children.

    AI can help create the basic visual, but educational facts and labels should always be checked for accuracy.

    Presentations

    AI-generated images can make presentations more engaging.

    They can be used for:

    • Title slides.
    • Section backgrounds.
    • Concept illustrations.
    • Business examples.
    • Training materials.
    • Classroom presentations.
    • Community events

    For example:

    A professional illustration of a team discussing an Artificial Intelligence project in a modern office, clean corporate style, horizontal composition, empty space on the left for presentation text.

    The empty space allows the presenter to add a title without covering the main subject.

    Marketing and Advertising

    Businesses can use AI-generated images to explore marketing ideas and create promotional visuals.

    Possible uses include:

    • Social media advertisements.
    • Email banners.
    • Product campaigns.
    • Website promotions.
    • Seasonal offers.
    • Poster concepts.
    • Brand mood boards.
    • Advertising ideas.

    For example:

    A professional promotional image of a modern travel bag beside a passport and sunglasses on a clean airport bench, realistic product photography, bright lighting, empty space for advertising text.

    Businesses should check the rules of the AI tool before using generated images commercially. They should also avoid creating images that copy protected brands, characters, artwork, or living artists too closely.

    Product Ideas and Concept Images

    AI image generation can help people visualize a product before it is manufactured.

    It may be used to explore ideas for:

    • Furniture.
    • Clothing.
    • Packaging.
    • Electronics.
    • Home decorations.
    • Toys.
    • Jewelry.
    • Vehicles.
    • Website designs.

    For example:

    A modern reusable water bottle with a built-in digital temperature display, blue and silver design, professional product photography, white studio background.

    The result is a concept image, not a technical manufacturing plan. Engineers, designers, and manufacturers still need to confirm whether the product can be built safely and realistically.

    Stories and Creative Writing

    Writers can use AI-generated images to visualize characters, settings, and important scenes.

    Images may be created for:

    • Short stories.
    • Children’s books.
    • Fantasy worlds.
    • Comic concepts.
    • Poetry.
    • Character ideas.
    • Book covers.
    • Storyboards.

    For example:

    A curious young explorer entering a glowing underground library filled with ancient books, detailed children’s-book illustration, warm magical lighting.

    Writers should keep the appearance of characters consistent across multiple images by repeating important details in every prompt.

    Invitations and Greeting Cards

    AI-generated images can be used for personal occasions such as:

    • Birthdays.
    • Weddings.
    • Anniversaries.
    • Graduations.
    • Baby showers.
    • Religious celebrations.
    • Holiday greetings.
    • Thank-you cards.

    For example:

    An elegant birthday card background with blue flowers, gold decorations, soft lighting, empty space in the center for a message.

    The image can then be placed into Canva or another design program, where the user can add the event details.

    YouTube Thumbnails

    AI image generators can help create attention-grabbing images for YouTube videos.

    A useful thumbnail image should usually include:

    • One clear main subject.
    • Strong facial expressions when appropriate.
    • Bright lighting.
    • Good contrast.
    • A simple background.
    • Empty space for a short title.

    For example:

    A surprised older beginner looking at an AI-generated picture on a laptop screen, bright studio lighting, colorful background, wide YouTube-thumbnail layout, empty space on the right for text.

    Text is often added afterward in Canva because AI image generators may create misspelled or distorted words.

    Logos and Brand Concepts

    AI can help generate ideas for logos, symbols, colour combinations, and brand styles.

    For example:

    A simple modern logo concept showing a human brain combined with digital circuits, blue and purple colour palette, clean flat-vector style, white background.

    AI-generated logo ideas should be treated as starting points.

    Before using a logo professionally, check that it does not resemble an existing trademark. A final logo may also need to be recreated as a clean vector file by a designer.

    Personal and Family Projects

    People can use AI image generation for enjoyable personal projects.

    Examples include:

    • Family calendars.
    • Custom wallpapers.
    • Recipe illustrations.
    • Hobby projects.
    • Home-decoration ideas.
    • Garden designs.
    • Travel posters.
    • Family greeting cards.
    • Personalized story images.

    For example:

    A peaceful backyard garden with raised vegetable beds, colorful flowers, a small seating area, and a stone pathway, realistic landscape design.

    The image can help a homeowner visualize possible ideas before making changes.

    Restoring and Editing Images

    Some AI tools can improve or modify existing pictures.

    They may help users:

    • Remove unwanted objects.
    • Repair damaged areas.
    • Improve lighting.
    • Sharpen unclear details.
    • Replace a background.
    • Add missing space around an image.
    • Colorize an old black-and-white photograph.
    • Create a different artistic version.

    AI editing should be used carefully with important family photographs. Always keep the original file because AI may accidentally change faces, clothing, objects, or historical details.

    Creating Several Ideas Quickly

    One of the most useful applications of AI image generation is creating several visual ideas in a short time.

    For example, a blogger preparing a featured image could generate:

    • A realistic version.
    • A cartoon version.
    • A digital-painting version.
    • A simple educational illustration.
    • A clean professional version.

    The blogger can then compare the options and select the image that best matches the article and audience.

    Important Reminder

    AI-generated images should not automatically be treated as accurate photographs of real events.

    A realistic-looking image may show a scene that never happened.

    Users should avoid presenting AI-generated images as genuine evidence, news photography, historical records, medical results, or proof of an event.

    When necessary, clearly state that an image was created or edited using Artificial Intelligence.

    Figure 6. Common personal, educational, creative, and business uses of AI image generation.

    This infographic shows that AI-generated images can support many different activities. They can help beginners create visual content for websites, lessons, presentations, marketing, stories, product concepts, and personal projects. The final image should still be checked for mistakes, accuracy, and suitability before it is used.

    Benefits of AI Image Generation

    AI image generation offers many benefits for beginners, creators, students, teachers, bloggers, and businesses.

    It can make visual content easier to create, reduce the time needed to develop ideas, and help people communicate concepts that may be difficult to explain with words alone.

    Saves Time

    Traditional image creation may require photography, drawing, graphic-design software, or searching through stock-image websites.

    AI image generators can produce several visual ideas within seconds.

    For example, a blogger preparing an article about online learning could quickly generate:

    • A realistic home-learning scene.
    • A cartoon classroom illustration.
    • A simple educational graphic.
    • A website banner.
    • A social media image.

    This allows the user to compare several options before choosing the best one.

    Helps Beginners Create Visual Content

    A person does not need advanced drawing or design skills to begin using an AI image generator.

    The main requirement is the ability to describe an idea clearly.

    For example:

    A friendly robot helping an older beginner learn Artificial Intelligence at home, colorful digital illustration, warm and encouraging atmosphere.

    The AI handles much of the visual creation process while the user provides the idea and instructions.

    Makes Ideas Easier to Visualize

    Sometimes an idea is clear in your mind but difficult to explain to another person.

    AI image generation can turn that idea into a visual example.

    This may be useful when planning:

    • A room design.
    • A garden.
    • A product.
    • A logo concept.
    • A website layout.
    • A book character.
    • A marketing campaign.
    • A presentation.

    The generated image can help other people understand the idea more quickly.

    Encourages Creativity

    AI image generators can help users explore new styles, settings, colors, and visual concepts.

    A person can test several versions of the same idea.

    For example, the prompt:

    A small cabin beside a lake.

    could be created as:

    • Realistic photography.
    • Watercolor painting.
    • Pencil drawing.
    • Children’s-book illustration.
    • Fantasy artwork.
    • Vintage travel poster.
    • 3D animation.

    Trying different styles may lead to creative ideas that the user had not considered before.

    Produces Several Versions Quickly

    AI image tools can usually generate more than one image from the same prompt.

    Each version may have a different:

    • Camera angle.
    • Background.
    • Color combination.
    • Lighting style.
    • Facial expression.
    • Object arrangement.
    • Level of detail.

    Users can compare the results and select the image that best matches their needs.

    Supports Learning and Education

    Visual examples can make difficult subjects easier to understand.

    AI-generated images may support lessons about:

    • Science.
    • History.
    • Geography.
    • Technology.
    • Language learning.
    • Art.
    • Business.
    • Everyday life.

    For example, a teacher could generate an illustration showing how solar panels collect energy from sunlight.

    However, educational images should always be checked carefully because AI may create incorrect labels, inaccurate objects, or misleading details.

    Reduces Dependence on Stock Images

    Stock-image websites contain many useful photographs, but it may be difficult to find an image that matches a very specific idea.

    An AI image generator can create a customized scene based on the user’s instructions.

    For example, it may be difficult to find a stock photograph showing:

    A retired beginner learning Artificial Intelligence with help from a friendly robot in a bright Canadian home office.

    An AI image generator can attempt to create that exact combination.

    Users must still review the image and check the tool’s usage rules before publishing it.

    Allows Easy Experimentation

    AI image generation makes it easier to test ideas without completing a full design project.

    A user can quickly change:

    • The background.
    • The clothing.
    • The lighting.
    • The color theme.
    • The image style.
    • The position of the subject.
    • The size or shape of the image.
    • The mood of the scene.

    This allows people to explore several possibilities before spending more time or money on a final design.

    Supports Different Image Sizes and Layouts

    Many AI image tools can create images for different purposes.

    Examples include:

    • Square images for social media.
    • Horizontal images for websites.
    • Vertical images for posters or Pinterest.
    • Wide images for presentation slides.
    • Banner images for webpages.
    • Portrait images for characters.

    Users should mention the desired composition in the prompt.

    For example:

    A professional illustration of a person learning AI at a laptop, horizontal website-banner layout, subject on the right, empty space on the left for a title.

    Can Help Small Businesses

    Small businesses may use AI-generated images to explore marketing ideas without immediately hiring a photographer or designer for every early concept.

    Possible uses include:

    • Social media posts.
    • Product mock-ups.
    • Advertising ideas.
    • Website banners.
    • Email graphics.
    • Seasonal promotions.
    • Presentation visuals.
    • Brand mood boards.

    AI images should not replace professional photography or design in every situation. Important campaigns, product images, packaging, and logos may still require experienced professionals.

    Supports Personalization

    AI image prompts can be adjusted for a particular audience, event, or message.

    For example, the same educational concept could be presented as:

    • A colorful image for children.
    • A simple diagram for beginners.
    • A professional image for business users.
    • A large-print design for older adults.
    • A friendly illustration for social media.

    Personalization can make visual content more relevant and easier for the intended audience to understand.

    Helps Overcome Creative Blocks

    Sometimes a person knows they need an image but does not know where to begin.

    AI image generation can provide a starting point.

    A user might ask:

    Create four visual ideas for a beginner-friendly article about Artificial Intelligence.

    The results may help the user choose a direction, improve the prompt, or develop a completely new idea.

    Can Improve Accessibility

    AI-generated visuals can help make information easier to understand for people who prefer visual learning.

    They may also support:

    • Simple illustrations for difficult topics.
    • Step-by-step diagrams.
    • Clear visual examples.
    • Large and uncluttered designs.
    • Images designed for a particular reading level.

    However, accessibility also requires proper alt text, readable contrast, clear labels, and simple layouts. The image alone is not enough.

    Works Best with Human Judgment

    The greatest benefit of AI image generation is not that it replaces people.

    Its real value is that it helps people create, explore, and communicate ideas more efficiently.

    The user still needs to:

    • Write the prompt.
    • Review the result.
    • Identify mistakes.
    • Choose the best image.
    • Confirm that the image is suitable.
    • Edit the final design.
    • Check copyright and usage rules.
    • Decide whether the image should be published.

    AI image generation works best as a creative assistant rather than a replacement for human judgment.

     Limitations of AI Image Generation

    AI image generation is powerful, but it is not perfect.

    An image may look impressive at first glance while still containing mistakes, misleading details, or problems that make it unsuitable for publication.

    Understanding these limitations helps beginners use AI image generators more safely and responsibly.

    Images May Contain Strange Details

    AI image generators sometimes create objects that look unusual or physically impossible.

    Common problems may include:

    • Extra fingers or missing fingers.
    • Unnatural hands or feet.
    • Uneven eyes or facial features.
    • Objects joined together incorrectly.
    • Clothing that changes shape.
    • Incorrect shadows or reflections.
    • Buildings with impossible doors or windows.
    • Background objects that appear distorted.

    For example, an image of a family eating dinner may look realistic until you notice that one person has an extra hand or that a fork appears to pass through the table.

    Always examine the entire image carefully, including small background details.

    AI May Misunderstand the Prompt

    The AI may not interpret your instructions exactly as you intended.

    For example, you might request:

    A woman holding a red umbrella beside a blue car.

    The AI may create:

    • A blue umbrella.
    • A red car.
    • No car at all.
    • More than one person.
    • The woman standing inside the car.
    • An incorrect arrangement of the objects.

    The user may need to rewrite the prompt, move important instructions to the beginning, or generate several versions.

    Text Inside Images May Be Incorrect

    AI image generators often have difficulty creating accurate written text.

    A sign, label, book cover, poster, or product package may contain:

    • Misspelled words.
    • Random letters.
    • Missing words.
    • Repeated characters.
    • Unreadable symbols.
    • Incorrect numbers.

    For example, asking the AI to create a shop sign that says AI Mastery may produce text that looks similar but is spelled incorrectly.

    A better approach is often to create the image without text and add the correct wording later in Canva, PowerPoint, TextMaker, or another design program.

    Results Can Be Inconsistent

    The same prompt may produce a different image each time.

    The AI may change:

    • The person’s face.
    • Clothing colors.
    • Hairstyle.
    • Background.
    • Lighting.
    • Object placement.
    • Camera angle.
    • Artistic style.

    This can be a problem when creating several images for the same character, story, course, or advertising campaign.

    To improve consistency, repeat the important details in every prompt. You may also use reference-image features when the tool provides them.

    Even then, perfect consistency is not guaranteed.

    AI Does Not Truly Understand the Scene

    An AI image generator does not understand people, objects, emotions, culture, or physical reality in the same way humans do.

    It recognizes visual patterns and uses those patterns to generate an image.

    Because of this, the AI may create:

    • Unsafe product designs.
    • Impossible machinery.
    • Incorrect body positions.
    • Unrealistic architecture.
    • Inaccurate historical clothing.
    • Misleading scientific diagrams.
    • Objects that could not work in real life.

    A realistic-looking image is not proof that the scene is correct or possible.

    Educational Images May Be Inaccurate

    AI-generated educational diagrams may contain errors.

    For example, the AI may:

    • Place labels in the wrong position.
    • Show an incorrect number of objects.
    • Misrepresent a scientific process.
    • Create an inaccurate map.
    • Mix details from different historical periods.
    • Show unsafe equipment or procedures.

    Teachers, students, and bloggers should verify educational images before using them.

    Important diagrams may need to be recreated manually or reviewed by someone knowledgeable about the subject.

    Bias and Stereotypes May Appear

    AI systems learn from large collections of existing images and descriptions.

    These materials may contain social, cultural, occupational, gender, age, or racial stereotypes.

    For example, an AI tool may repeatedly show:

    • Certain jobs as belonging mainly to men or women.
    • Business leaders from only one background.
    • Older adults as weak or unable to use technology.
    • Families in only one traditional form.
    • Particular cultures through inaccurate clothing or settings.

    Users should review whether the generated image represents people fairly and appropriately.

    Prompts can be improved by describing the people, age groups, abilities, cultures, and settings that should be represented.

    Copyright and Ownership Can Be Complicated

    Rules for using AI-generated images may depend on:

    • The AI tool.
    • The user’s subscription plan.
    • The image content.
    • The country where the image is used.
    • Whether the image is used personally or commercially.
    • Whether protected characters, logos, artwork, or brands appear.

    Users should not assume that every AI-generated image can automatically be used for any purpose.

    Before publishing or selling an image:

    • Read the tool’s current usage terms.
    • Avoid copying protected characters or brands.
    • Avoid requesting an exact copy of another creator’s work.
    • Check whether commercial use is permitted.
    • Keep records of the prompt and tool used.
    • Seek professional advice when ownership is important.

    AI May Create Images That Resemble Existing Work

    An AI-generated image may unintentionally resemble an existing photograph, illustration, logo, character, or artistic style.

    This is especially important when creating:

    • Logos.
    • Book covers.
    • Product packaging.
    • Advertising materials.
    • Clothing designs.
    • Artwork for sale.

    A generated image should be reviewed before commercial use.

    Logos and brand symbols may also require a trademark search before they are adopted by a business.

    Images Can Be Used to Mislead People

    AI can create realistic pictures of events that never happened.

    It may be possible to generate false images of:

    • Public events.
    • Natural disasters.
    • Products.
    • Buildings.
    • News stories.
    • Historical scenes.
    • People in places they never visited.

    These images can confuse or deceive viewers when they are presented as real photographs.

    Users should not use AI-generated images as false evidence or present fictional scenes as genuine events.

    When an image could reasonably be mistaken for a real photograph, it may be appropriate to state that it was generated or edited using Artificial Intelligence.

    Privacy Can Be a Concern

    Some AI tools allow users to upload personal photographs for editing.

    Before uploading an image, consider whether it contains:

    • Children.
    • Private family members.
    • Home addresses.
    • Vehicle license plates.
    • Identification documents.
    • Medical information.
    • Confidential business material.
    • Customer information.
    • School or workplace details.

    Do not upload sensitive or confidential images unless you understand how the service handles uploaded content.

    Always review the tool’s privacy settings and terms.

    AI Images May Not Represent a Real Product

    AI can create attractive product concepts, but the result may include impossible or misleading features.

    For example, an AI-generated travel bag may show:

    • Zippers that do not open.
    • Handles attached incorrectly.
    • Compartments that could not exist.
    • Materials that cannot be manufactured.
    • A size that does not match the real product.

    Businesses should not use an AI-generated product image in a way that misleads customers about what they will receive.

    Actual products should normally be shown using accurate photographs or clearly identified concept images.

    High-Quality Results May Require Practice

    Although AI image generators are easy to begin using, creating a precise and professional image may require several attempts.

    The user may need to learn how to control:

    • Prompt wording.
    • Image style.
    • Lighting.
    • Composition.
    • Aspect ratio.
    • Background.
    • Character consistency.
    • Editing instructions.
    • Negative prompts.

    The first result is rarely the final result.

    Good AI image creation usually involves generating, reviewing, correcting, and trying again.

    Some Features May Cost Money

    Certain AI image tools offer limited access, while advanced features may require payment.

    Possible limitations include:

    • A restricted number of images.
    • Lower image quality.
    • Slower generation.
    • Watermarks.
    • Limited editing tools.
    • Restricted commercial usage.
    • Fewer image sizes.
    • Subscription requirements.

    Plans, prices, limits, and features may change. Users should check the current terms before subscribing.

    Beginners should avoid paying for several tools at once. It is usually better to learn one tool first.

    Large Images May Lose Quality

    Some AI tools create images at a limited resolution.

    An image may look good on a computer screen but become blurry when it is:

    • Printed as a large poster.
    • Enlarged for a banner.
    • Cropped heavily.
    • Used in a high-resolution design.

    An image may need to be regenerated at a larger size or improved using an image-up scaling tool.

    Up scaling can improve sharpness, but it cannot always repair incorrect details.

    Editing One Part May Change Another Part

    When you ask an AI tool to change one object, it may unexpectedly modify other parts of the image.

    For example, asking the AI to change a shirt from blue to red might also alter:

    • The person’s face.
    • The background.
    • The lighting.
    • The position of the hands.
    • Nearby objects.

    Keep the original image before making edits so that you can return to it if the result becomes worse.

    AI Cannot Replace Professional Judgment

    AI image generation can help with ideas, drafts, and simple visual projects, but it cannot replace professional expertise in every situation.

    Professional help may still be necessary for:

    • Brand identity.
    • Medical illustrations.
    • Engineering diagrams.
    • Legal evidence.
    • Architectural plans.
    • Product photography.
    • Safety instructions.
    • Major advertising campaigns.
    • Historically accurate materials.

    AI can support the creative process, but a qualified person must remain responsible for the final result.

    Human Review Is Always Necessary

    Before publishing an AI-generated image, check:

    • Does it match the prompt?
    • Are the faces, hands, and objects correct?
    • Is any visible text accurate?
    • Could the image mislead viewers?
    • Does it contain a protected logo or character?
    • Is it respectful and appropriate?
    • Is it suitable for the intended audience?
    • Is the image quality high enough?
    • Are you permitted to use it for your purpose?
    • Should it be labeled as AI-generated?

    The safest approach is to treat AI-generated images as drafts that require human inspection.

    AI can create the picture, but the user remains responsible for deciding whether the image is accurate, appropriate, and safe to publish.

    Figure 7. Common limitations and problems that users should check in AI-generated images.

    This infographic highlights several weaknesses of AI image generation. Images may contain distorted details, unreadable words, inaccurate objects, inconsistent characters, or misleading scenes. Careful human review is necessary before an AI-generated image is published, shared, printed, or used for business.

    Common Myths About AI Image Generation

    AI image generation is becoming more popular, but many people still misunderstand what these tools can and cannot do.

    Learning the facts helps beginners use AI-generated images more safely, realistically, and responsibly.

    Myth 1: AI Image Generators Understand Pictures Like Humans

    Reality: AI image generators do not see, imagine, or understand pictures in the same way humans do.

    They recognize patterns learned from large collections of images and descriptions. They then use mathematical calculations to create visual details that are likely to match the prompt.

    An AI tool may create a realistic-looking kitchen without truly understanding how the appliances work or whether every object is positioned correctly.

    Myth 2: AI Images Are Always Accurate

    Reality: An AI-generated image may look convincing while still containing incorrect details.

    Possible mistakes include:

    • Distorted hands.
    • Incorrect shadows.
    • Impossible buildings.
    • Unreadable signs.
    • Historically inaccurate clothing.
    • Objects that could not work in real life.

    Realistic appearance does not guarantee factual or physical accuracy.

    Myth 3: The First Generated Image Will Be Perfect

    Reality: The first result often needs improvement.

    Users may need to:

    • Rewrite the prompt.
    • Add more details.
    • Remove unclear instructions.
    • Generate several versions.
    • Correct objects or colours.
    • Adjust the image style.
    • Edit the final image manually.

    Creating a useful AI image is usually a process of generating, reviewing, and improving.

    Myth 4: Longer Prompts Always Produce Better Images

    Reality: A longer prompt is not automatically better.

    A good prompt should be clear, specific, and focused. Too many unnecessary or conflicting details may confuse the AI.

    For example, this prompt may be too complicated:

    A realistic, cartoon, watercolor, black-and-white, colorful photograph of a modern ancient house during day and night.

    The instructions conflict with one another.

    A clearer prompt would be:

    A small stone cottage beside a lake at sunset, realistic photography, warm natural lighting.

    Clarity is more important than length.

    Myth 5: AI Image Generators Simply Copy Existing Pictures

    Reality: AI image generators usually create new visual arrangements based on patterns learned during training rather than selecting and displaying one existing image.

    However, generated results may sometimes resemble existing artwork, photographs, characters, logos, or visual styles.

    Users should still review images carefully, especially before using them commercially.

    Myth 6: Every AI-Generated Image Is Free to Use

    Reality: Usage rights depend on the tool, account type, content, local laws, and intended purpose.

    An image may create problems if it contains:

    • A protected character.
    • A company logo.
    • A recognizable trademark.
    • A copied product design.
    • A famous person’s likeness.
    • Artwork that closely resembles another creator’s work.

    Users should read the tool’s current terms and check whether commercial use is permitted.

    Myth 7: AI Can Create Perfect Written Text Inside Images

    Reality: Many AI image generators still have difficulty producing accurate text.

    Words may be:

    • Misspelled.
    • Repeated.
    • Reversed.
    • Incomplete.
    • Replaced with random symbols.
    • Difficult to read.

    For important titles, labels, dates, or prices, it is usually safer to generate the picture without text and add the correct wording afterward using Canva or another design tool.

    Myth 8: AI Images Are Real Photographs

    Reality: An AI-generated image may look like a photograph even though the people, objects, and event never existed.

    For example, an AI tool could create a realistic picture of a city, product, meeting, or natural disaster that never occurred.

    AI-generated images should not be presented as genuine news photographs, historical evidence, product proof, or documentation of real events.

    When viewers could mistake an image for reality, it may be appropriate to identify it as AI-generated.

    Myth 9: AI Image Generation Requires Professional Design Skills

    Reality: Complete beginners can create images using ordinary language.

    A simple prompt such as:

    A peaceful garden with colorful flowers and a wooden bench, realistic photography, soft morning light. may be enough to produce a useful starting image.

    Design knowledge can improve the final result, but it is not required to begin.

    Myth 10: AI Will Replace Every Artist and Designer

    Reality: AI may change how some creative tasks are completed, but it cannot replace every artist, photographer, illustrator, or designer.

    Professional creative work often requires:

    • Original ideas.
    • Human emotion.
    • Cultural understanding.
    • Brand knowledge.
    • Client communication.
    • Technical skill.
    • Ethical judgment.
    • Consistency across a project.
    • Responsibility for the final result.

    AI is most useful as a tool that supports human creativity rather than replacing it completely.

    Myth 11: More Detail Always Gives More Control

    Reality: Adding useful details can improve a prompt, but too many instructions may produce a crowded or confusing image.

    A prompt should focus on the most important elements:

    • Main subject.
    • Action.
    • Setting.
    • Image style.
    • Lighting.
    • Mood.
    • Composition.

    The user can add or change smaller details after reviewing the first result.

    Myth 12: AI Can Create Any Image Without Restrictions

    Reality: AI image tools usually have rules that limit certain types of content.

    A tool may refuse requests involving harmful, deceptive, illegal, private, or otherwise restricted material.

    Different platforms may apply different safety rules, and these rules may change over time.

    Users should respect the platform’s policies and avoid trying to create misleading or harmful images.

    Myth 13: AI-Generated Product Images Can Replace Real Product Photos

    Reality: AI can help create product concepts, backgrounds, or advertising ideas, but it may not represent the real product accurately.

    An AI-generated product may show:

    • Features the real item does not have.
    • Incorrect colours or materials.
    • Impossible parts.
    • A misleading size.
    • Accessories that are not included.

    Businesses should not use AI images in a way that gives customers a false impression of the actual product.

    Myth 14: AI Images Do Not Need Human Review

    Reality: Every AI-generated image should be inspected before it is published, printed, sold, or shared.

    The user should check:

    • Faces and hands.
    • Written text.
    • Background details.
    • Accuracy.
    • Image quality.
    • Bias or stereotypes.
    • Copyright concerns.
    • Whether the image could mislead viewers.
    • Whether it suits the intended audience.

    The AI creates the image, but the person using it remains responsible for the final decision.

    Myth 15: Expensive AI Tools Always Produce the Best Results

    Reality: A paid tool may offer more images, higher resolution, faster generation, or advanced editing features, but price alone does not guarantee a better image.

    The quality of the result also depends on:

    • The clarity of the prompt.
    • The type of image requested.
    • The selected style.
    • The tool’s strengths.
    • The user’s review and editing.
    • The number of versions generated.

    Beginners can often learn the basic skills using a simple tool before deciding whether a paid service is necessary.

    Understanding these myths helps users develop realistic expectations. AI image generators are powerful creative assistants, but they still require clear instructions, careful review, responsible use, and human judgment.

    Frequently Asked Questions About AI Image Generation

    What Is AI Image Generation?

    AI image generation is the process of using Artificial Intelligence to create pictures from written instructions.

    The user describes what they want to see, and the AI generates an image based on the words in the prompt.

    For example:

    Create a realistic photograph of a small wooden cabin beside a peaceful lake at sunset.

    The AI may create a new image containing the cabin, lake, trees, reflections, and sunset lighting.

    What Is an AI Image Prompt?

    An AI image prompt is the written instruction given to an AI image generator.

    A prompt may describe:

    • The main subject.
    • The action.
    • The setting.
    • The image style.
    • The lighting.
    • The mood.
    • The camera view.
    • The image layout.

    Clear and specific prompts usually produce more suitable results.

    Do I Need Drawing or Graphic-Design Skills?

    No. Complete beginners can create AI images using ordinary language.

    You do not need to know how to draw, take professional photographs, or use advanced design software.

    However, basic knowledge of colour, layout, lighting, and composition can help you create better images.

    How Long Does It Take to Generate an AI Image?

    Many AI image generators can create an image within seconds or a few minutes.

    The exact time may depend on:

    • The AI tool.
    • The complexity of the prompt.
    • The number of images requested.
    • The image size.
    • Internet speed.
    • Current demand on the service.
    • Whether the user has a free or paid plan.

    Creating the first image may be quick, but improving it may require several attempts.

    Why Does the AI Ignore Part of My Prompt?

    An AI tool may misunderstand, overlook, or combine some instructions incorrectly.

    This can happen when:

    • The prompt contains too many details.
    • Instructions conflict with one another.
    • The most important subject is not clearly identified.
    • Several people or objects are described.
    • The prompt uses vague language.
    • The requested scene is unusually complicated.

    Try simplifying the prompt and placing the most important details near the beginning.

    For example:

    A friendly white robot helping an elderly man use a laptop in a bright home office.

    After the main scene is correct, add smaller details one at a time.

    Why Do AI-Generated Hands Sometimes Look Strange?

    Hands are difficult for AI image generators because they can appear in many positions, angles, and shapes.

    The AI may create:

    • Extra fingers.
    • Missing fingers.
    • Fingers joined together.
    • Unnatural hand positions.
    • Hands mixed with nearby objects.

    AI image technology continues to improve, but users should still inspect hands, faces, and small details carefully.

    Can AI Image Generators Create Accurate Written Text?

    Sometimes, but the text may still contain mistakes.

    AI-generated words may be misspelled, incomplete, repeated, or replaced with random symbols.

    For important wording, it is usually better to:

    Generate the image without text.

    Open the image in Canva or another design program.

    Add the correct title, label, date, or message manually.

    This gives you better control over spelling, font, size, and placement.

    Can I Edit an Existing Photograph with AI?

    Yes. Some AI image tools allow users to upload and edit an existing photograph.

    Depending on the tool, you may be able to:

    • Remove an object.
    • Replace the background.
    • Change colors.
    • Improve lighting.
    • Expand the image.
    • Add an object.
    • Repair a damaged area.
    • Convert the photograph into an illustration.

    Always keep the original file because AI editing may unexpectedly change faces, objects, or background details.

    Can I Use AI-Generated Images on My Website?

    AI-generated images may be used on websites when the tool’s terms and applicable rules permit that use.

    They may be suitable for:

    • Featured images.
    • Article illustrations.
    • Website banners.
    • Educational graphics.
    • Social media promotions.
    • Background images.

    Before publishing, check that the image:

    • Does not contain distorted details.
    • Does not include protected logos or characters.
    • Is suitable for your audience.
    • Has sufficient quality.
    • Does not mislead readers.
    • Includes appropriate alt text in WordPress.

    Can I Use AI-Generated Images for Business?

    Commercial use may be allowed, but the rules depend on the AI service, account plan, image content, and applicable laws.

    Before using an image commercially:

    • Review the tool’s current terms.
    • Confirm whether commercial use is permitted.
    • Avoid protected characters and logos.
    • Avoid misleading product representations.
    • Check whether the image resembles an existing brand or artwork.
    • Keep a record of the prompt and tool used.
    • Obtain professional advice when ownership is important.

    An AI-generated image should not be assumed to be legally risk-free simply because the user created the prompt.

    Who Owns an AI-Generated Image?

    Ownership rules are complicated and may differ between countries and AI services.

    Important factors may include:

    • The tool’s terms.
    • The amount of human creative work involved.
    • Whether the image contains protected material.
    • How the image will be used.
    • The laws of the country involved.

    For simple personal projects, this may not create a major problem. For logos, products, advertising campaigns, books, or images sold commercially, users should review the relevant terms and obtain legal advice when necessary.

    Are AI-Generated Images Copyright-Free?

    Not automatically.

    An AI-generated image may still create concerns if it contains or closely resembles:

    • A protected character.
    • A company logo.
    • A recognizable product.
    • Existing artwork.
    • A photograph.
    • A trademark.
    • A celebrity or other real person.

    Users should review images carefully before publishing, selling, or using them commercially.

    Can I Ask AI to Copy a Famous Artist’s Style?

    Some AI tools may accept style-related prompts, while others may limit requests involving living artists or protected work.

    A safer approach is to describe general visual qualities instead of requesting an exact imitation.

    For example, instead of naming a particular artist, you could request:

    A colorful landscape painting with visible brushstrokes, soft natural light, and a peaceful atmosphere.

    This describes the desired appearance without asking for a direct copy of one person’s work.

    Are AI-Generated Images Real?

    No. AI-generated images are created by software and may show people, objects, places, or events that never existed.

    Even when the image looks like a photograph, it should not automatically be treated as evidence of a real event.

    Users should never present a fictional AI-generated image as genuine news, historical proof, medical evidence, or documentation of something that actually happened.

    Should I Label an Image as AI-Generated?

    Labelling may be appropriate when viewers could mistake the image for a real photograph or when transparency is important.

    For example, disclosure may be useful for:

    • News-related content.
    • Educational materials.
    • Historical scenes.
    • Product concepts.
    • Realistic fictional people.
    • Before-and-after demonstrations.
    • Heavily edited photographs.

    A simple statement may say:

    This image was created using Artificial Intelligence.

    The exact requirement may depend on the platform, purpose, and applicable rules.

    Can AI Generate Images of Real People?

    Some AI tools can create or edit images involving real people, but this requires care.

    Users should not create deceptive, harmful, embarrassing, or unauthorized images of another person.

    Extra caution is needed with:

    • Children.
    • Private individuals.
    • Public figures.
    • Sensitive situations.
    • Political or news-related content.
    • Advertising endorsements.
    • Images that could damage someone’s reputation.

    A realistic AI image should never be used to falsely suggest that a person did, said, supported, or attended something that did not happen.

    Is It Safe to Upload Personal Photographs?

    Before uploading a personal photograph, review the service’s privacy terms and consider what the image contains.

    Avoid uploading photographs that reveal:

    • Identification documents.
    • Financial information.
    • Medical records.
    • Home addresses.
    • Vehicle license plates.
    • Confidential business material.
    • Private information about children.
    • Customer or employee information.

    Only upload images that are safe and appropriate for the service being used.

    Can AI Images Be Used for School Assignments?

    AI-generated images may be useful for presentations, diagrams, stories, and educational projects.

    However, students should follow the school’s rules regarding Artificial Intelligence.

    They should also:

    • Check the image for accuracy.
    • Identify AI-generated content when required.
    • Avoid presenting fictional images as real evidence.
    • Verify educational labels and facts.
    • Give credit when the teacher or institution requires it.

    AI should support learning rather than replace the student’s own effort.

    What Is the Best AI Image Generator for Beginners?

    The best tool depends on the user’s needs.

    A beginner may prefer a tool that:

    • Accepts ordinary conversational instructions.
    • Produces images without complicated settings.
    • Allows follow-up changes.
    • Offers simple editing.
    • Works inside a familiar design platform.
    • Provides clear usage information.

    It is usually better to learn one tool properly before paying for or testing several different services.

    Why Does the Same Prompt Create Different Images?

    AI image generators often begin with a random visual pattern.

    Because the starting pattern changes, the same prompt may produce different:

    • Faces.
    • Backgrounds.
    • Colors.
    • Camera angles.
    • Lighting.
    • Object positions.
    • Artistic details.

    This variation can be useful because it gives the user several creative options.

    How Can I Keep a Character Consistent Across Several Images?

    Character consistency can be difficult.

    To improve it:

    • Repeat the same physical description in every prompt.
    • Keep the clothing and colours consistent.
    • Use the same style and lighting.
    • Describe the character’s age, hairstyle, and important features.
    • Use a reference image when the tool allows it.
    • Change only the action or background.
    • Save successful prompts for later use.

    Even with these steps, the character may change slightly between images.

    What Should I Do When the Image Is Almost Correct?

    Do not rewrite the entire prompt immediately.

    Change one or two details at a time.

    For example:

    • Remove the extra chair.
    • Change the shirt from blue to green.
    • Make the background brighter.
    • Move the subject to the right.
    • Add empty space for a title.
    • Use a wider composition.

    Small changes make it easier to improve the image without losing the parts that already work.

    Do AI Image Generators Replace Photographers and Designers?

    No. AI tools can help create concepts, drafts, illustrations, and simple visual content, but professional photographers and designers provide skills that AI cannot reliably replace.

    Professionals contribute:

    • Creative direction.
    • Brand consistency.
    • Technical knowledge.
    • Accurate product representation.
    • Client communication.
    • Ethical judgment.
    • Cultural understanding.
    • Responsibility for the final work.

    AI image generation is most effective as an assistant within the creative process.

    What Is the Most Important Rule for Beginners?

    Never publish the first image without checking it carefully.

    Review:

    • Faces.
    • Hands.
    • Written words.
    • Objects.
    • Backgrounds.
    • Shadows.
    • Accuracy.
    • Image quality.
    • Copyright concerns.
    • Whether the image could mislead viewers.

    A strong prompt is important, but careful human review is even more important.

    Key Takeaways

    Remember these important points:

    • AI image generation uses Artificial Intelligence to create pictures from written instructions.
    • The written instruction given to the AI is called a prompt.
    • Clear and specific prompts usually produce better results than vague instructions.
    • A useful image prompt may include the subject, action, setting, style, lighting, mood, and composition.
    • AI image generators can create realistic photographs, illustrations, cartoons, paintings, product concepts, educational graphics, and many other visual styles.
    • Popular AI image tools include ChatGPT, Google Gemini, Adobe Firefly, Canva, Microsoft Copilot, Bing Image Creator, and Midjourney.
    • AI-generated images can be used for blog posts, websites, social media, presentations, lessons, marketing, stories, invitations, and personal projects.
    • AI image generation can save time, support creativity, help beginners create visual content, and make ideas easier to understand.
    • The first generated image may not be perfect. Users often need to improve the prompt, generate more versions, or edit the result.
    • AI-generated images may contain distorted hands, incorrect objects, unreadable text, unusual backgrounds, or unrealistic details.
    • A realistic-looking AI image is not proof that the people, product, place, or event is real.
    • AI-generated educational diagrams, historical scenes, and product images should always be checked for accuracy.
    • Images should not be used to deceive people or falsely represent real events, products, or individuals.
    • Copyright, commercial-use, and ownership rules may depend on the tool, subscription, image content, country, and intended use.
    • Users should avoid creating or publishing images that copy protected characters, logos, trademarks, or another creator’s work too closely.
    • Personal photographs and confidential images should be uploaded only after reviewing the tool’s privacy rules.
    • Important written text should usually be added afterward in Canva or another design program because AI-generated lettering may contain mistakes.
    • Every image should be checked carefully before it is published, printed, shared, or used for business.
    • AI image generation works best as a creative assistant rather than a replacement for photographers, artists, designers, teachers, or other professionals.
    • The user remains responsible for deciding whether the final image is accurate, appropriate, respectful, and safe to use.

    What’s Next?

    Congratulations! You have completed this beginner’s guide to AI image generation.

    You now understand what AI image generation is, how it turns written prompts into pictures, and how clear instructions can improve the final result.

    You have also learned:

    • How AI image prompts work.
    • How to write better prompts.
    • Which AI image tools are popular.
    • How AI-generated images can be used.
    • The benefits and limitations of AI image generation.
    • Common myths about AI-created images.
    • Why every image should be reviewed before it is published.

    AI image generation is one of the most practical ways for beginners to experience Artificial Intelligence.

    With a simple written description, you can create visual ideas for blog posts, presentations, social media, education, marketing, stories, and personal projects.

    However, successful image creation requires more than pressing a button. You still need to write clear prompts, check the result carefully, correct mistakes, and decide whether the image is suitable for your audience.

    The next step is to practice with a simple AI image generator.

    Begin with an easy prompt, such as:

    Create a friendly illustration of a complete beginner learning Artificial Intelligence on a laptop at home, bright natural lighting, simple modern style.

    Generate several versions and compare the results.

    Then try changing one detail at a time:

    • Change the image style.
    • Add a different background.
    • Adjust the lighting.
    • Move the subject.
    • Request a wider layout.
    • Add empty space for a title.

    This simple practice will help you understand how prompt wording affects the final image.

    After learning the basics, you will be ready to explore more detailed guides about individual AI image tools, including ChatGPT Images, Canva AI, Adobe Firefly, Microsoft Copilot, Google Gemini, and Midjourney.

    Final Tip for Beginners

    Do not try to create the perfect image with one prompt.

    Start with a simple idea, generate the first image, review the result, and improve it step by step.

    For example, instead of beginning with a very long prompt, start with:

    A retired man learning Artificial Intelligence on a laptop at home.

    Then add useful details:

    A retired man learning Artificial Intelligence on a laptop in a bright home office, realistic photography, warm natural lighting, friendly and confident atmosphere, horizontal composition.

    After generating the image, check what needs improvement.

    You might ask the AI to:

    • Make the room brighter.
    • Change the clothing colour.
    • Remove an unwanted object.
    • Add a notebook to the desk.
    • Move the person to the right.
    • Add empty space for a website title.
    • Create a wider version.
    • Change the style from realistic to illustration.

    Save prompts that produce good results. They can become useful templates for future blog images, presentations, social media graphics, and other projects.

    Most importantly, never assume that an image is correct simply because it looks realistic.

    Check faces, hands, written words, objects, backgrounds, shadows, and small details before publishing it.

    The best results come from combining clear instructions, repeated practice, careful review, and human judgment.

    AI can generate the image, but you remain responsible for deciding whether it is accurate, appropriate, and ready to use.

    Continue Learning

    Ready to continue your AI journey?

    Explore these beginner-friendly guides to strengthen your understanding of Artificial

    Intelligence and learn how to use AI tools more confidently:

    → Explore More AI Tutorials

    New beginner-friendly AI tutorials will be added regularly. Check back for practical examples, step-by-step instructions, and simple explanations of important Artificial Intelligence tools and concepts.

    Thank you for reading. Keep experimenting with prompts, review every generated image carefully, and enjoy discovering how Artificial Intelligence can help turn your ideas into visual content.