

Estimated reading time: 40 minutes
Last updated: August 2026
Introduction
Google Gemini can help beginners create new images from written descriptions and edit existing images with natural-language instructions. You can use it to create realistic scenes, illustrations, simple infographics, website graphics, or visual concepts. You can also upload an image and ask Gemini to remove or replace an object, change a background, improve lighting, adjust colours, correct visible text, or make another focused change.
The most important beginner lesson is that image generation and image editing are not automatic one-click tasks. A clear prompt gives Gemini direction, but the result can still contain misspelled text, distorted hands or objects, duplicated details, changed faces, incorrect proportions, unexpected background changes, or other errors. Every image should be reviewed before it is downloaded, published, printed, shared, or used for business.
Google identifies its current Gemini image-generation system in the uploaded source as Nano Banana 2. The source also describes Nano Banana 2 Lite for quicker basic work and Nano Banana Pro as an option that may be available to paid subscribers for regenerating images with additional detail. Model names, menus, eligibility rules, limits, and availability can change, so check the current Gemini interface and official Google documentation when a specific feature matters.
This guide focuses on a practical workflow: plan the image, write a clear prompt, create or upload the image, make one focused edit at a time, review the complete result, protect privacy and permissions, save an approved master, and prepare the final file for WordPress or another publishing destination.
Before Learning
You do not need professional design experience to use this guide. You should be comfortable opening Gemini in a supported browser or app, signing in when required, and saving files on your device. For image editing, use only images you own or have permission to upload and modify.
What You’ll Learn
The difference between creating a new image and editing an existing image.
How to prepare an image project before opening Gemini.
How to write a clear image-generation prompt.
How to upload and edit an existing image with one focused change at a time.
How to remove, add, or replace objects and change backgrounds.
How to improve lighting, colours, composition, and visible text.
How to combine several reference images while reducing unwanted mixing.
How to use follow-up prompts and decide when to regenerate instead.
How to review weak results and troubleshoot common problems.
How to protect privacy, permissions, copyright, and responsible use.
How to download, name, and prepare a final image for WordPress.
Image Creation and Image Editing Are Different Tasks
Image creation begins with an idea. You describe the complete scene that Gemini should generate. A creation prompt normally explains the subject, setting, activity, composition, lighting, style, colours, aspect ratio, and important details.
Image editing begins with an existing image. Instead of describing the whole scene again, explain the exact change you want, where it should happen, what the corrected area should look like, and what must remain unchanged.
A simple creation formula is: Action + Subject + Setting + Activity + Composition + Lighting + Style + Aspect Ratio + Required Details + Quality Controls.
A simple editing formula is: Exact Change + Location + Replacement or Repair + Preserve + Quality Controls.
Beginner Tip: For creation, describe the complete scene. For editing, describe only the exact change and clearly state what should remain unchanged.

Figure 1. Google Gemini can create a new image from a detailed written prompt or edit selected parts of an existing image while preserving the details that should remain unchanged.
Explanation: Image creation requires a complete scene description, while image editing requires a precise change, a clear location, preservation instructions, and quality controls.
What You Need Before Creating or Editing Images
A short preparation check prevents many common problems. You do not need a 24-point checklist before every image; focus on the items that materially affect the result.
Access and eligibility: confirm that the required image feature is available on your account and that you meet any applicable age or administrator requirements.
A clear goal: decide whether the image is a featured image, article figure, social graphic, presentation visual, concept image, or edited photograph.
The final format: choose the approximate aspect ratio and composition before generation, such as 16:9 for most AI Mastery article images.
A safe source image: when editing, use the highest-quality correct source and keep an unchanged backup.
Permission and rights: confirm that you have the right to upload, edit, combine, and publish the source material.
Privacy: remove or minimize unnecessary names, addresses, account details, documents, screens, identification information, or other private content before uploading.
A focused editing plan: decide exactly what should change and what must stay the same.
Time to review: expect more than one attempt and plan to inspect the final result carefully.
Because usage limits and feature availability can change, rely on the current information shown in Gemini rather than an old fixed quota or menu screenshot.

Figure 2. Before creating or editing an image with Gemini, confirm account access, age requirements, the image goal, aspect ratio, composition, permissions, privacy protection, source quality, editing instructions, and review plan.
Explanation: Preparation reduces failed requests, accidental edits, privacy exposure, copyright problems, incorrect dimensions, missing details, and the risk of publishing an unreviewed image.
How to Create an Image with Google Gemini
The exact menu can change by account, device, and interface version. The uploaded source describes image creation through an Images area or an Add files → Create image option. If your screen looks different, look for the current image-generation control rather than forcing an old menu path.
Step 1: Open Gemini
Open Gemini, sign in with the correct Google Account when required, and start a new chat or image project. A fresh chat can reduce confusion from unrelated earlier instructions.
Step 2: Start with a Clear Action
Begin with a direct action such as “Create,” “Generate,” “Draw,” “Design,” or “Illustrate.” This makes the request clearly about image creation.
Step 3: Describe the Main Subject
State the most important person, object, place, or idea. Include only the appearance details that matter to the project.
Step 4: Add the Setting and Activity
Explain where the subject appears and what is happening. Keep the setting simple when the subject is more important than the background.
Step 5: Plan the Composition
State where the subject should appear and where you need open space. For a featured image, you might place the person and laptop on the right and leave the left side uncluttered for title text.
Step 6: Add Lighting, Style, and Mood
Use one main visual style and describe the lighting in practical terms, such as soft natural daylight with gentle shadows. Avoid conflicting directions such as “minimalist but highly crowded.”
Step 7: State the Aspect Ratio
Request the format that matches the final use, such as 16:9 landscape, 1:1 square, 4:5 portrait, or 9:16 vertical.
Step 8: List Required Details and Exclusions
Include only necessary objects and add quality controls such as natural hands, readable text, safe margins, correct proportions, and no unwanted logos, watermarks, duplicated objects, or private information.
Step 9: Generate and Review
Submit the prompt, then inspect the complete image rather than looking only at the attractive parts. Check the subject, objects, lighting, background, text, proportions, and edges.
Step 10: Correct or Regenerate
If one small detail is wrong, use a focused follow-up prompt. If the subject, style, composition, aspect ratio, or many details are fundamentally wrong, rewrite the prompt and regenerate instead of stacking many repairs on a weak result.
Example Image-Creation Prompt
Create a realistic 16:9 landscape image of an adult beginner seated at a modern desk and using a laptop to create an AI image. Show a written image prompt beside a polished image preview on the laptop screen. Place the person and laptop on the right side and leave clean open space on the left for article text. Use soft natural daylight, a professional welcoming mood, and blue, white, light-grey, and subtle green colours. Keep hands natural, object proportions realistic, and important details away from the edges. Do not include company logos, watermarks, private information, unreadable text, duplicated objects, or decorative clutter.
Beginner Tip: Build the prompt in layers: subject and setting first, then composition, lighting, style, aspect ratio, required details, and quality controls.

Figure 3. Creating a clear Gemini image prompt involves defining the subject, setting, activity, composition, camera view, lighting, style, mood, colours, aspect ratio, required elements, and quality controls.
Explanation: A layered prompt gives Gemini more useful visual direction than a short vague request. The generated image must still be reviewed for missing details, distorted objects, incorrect text, privacy concerns, and publishing suitability.
How to Upload and Edit an Existing Image
Editing is safest when you work from an unchanged original and request one main change at a time. The uploaded source states that Gemini can edit an uploaded image, edit an image created in Gemini, or use several uploaded images to create a new result.
Step 1: Prepare the Source
Use the correct highest-quality image, save an unchanged backup, remove unnecessary private information, and confirm permission to edit it.
Step 2: Upload the Correct File
Attach the image and confirm that the correct source appears in the prompt area. Descriptive filenames reduce mistakes when several similar files exist.
Step 3: Confirm What Gemini Sees
For an important edit, ask Gemini to describe the image before changing it. If Gemini misidentifies the subject or cannot see the relevant detail, use a better source image.
Step 4: Request One Exact Change
Name the object or area, give its location, and explain the desired result. Avoid “make it better” or “fix everything.”
Step 5: State What Must Remain Unchanged
List important people, facial features, clothing, objects, text, lighting, camera angle, composition, and dimensions that must be preserved.
Step 6: Add Quality Controls
Explain how the repair should match the existing perspective, texture, lighting, shadows, colours, and style. State what must not be added or altered.
Step 7: Compare the Entire Result
Review the edited area and the rest of the image. A local edit can change a face, text, background, object, shadow, or crop elsewhere.
Step 8: Save the Approved Version
If the edit is correct, save it as a new version. If quality has drifted, return to the original rather than continuing to edit a damaged version.
Reusable Image-Editing Prompt
Edit the uploaded image by [exact change] at [specific location]. Replace or repair it with [desired result]. Match the existing scale, perspective, texture, lighting, shadows, colours, and style. Preserve [important people, objects, text, background, composition, aspect ratio, and dimensions]. Do not [crop, alter people, add unrelated objects, change text, distort elements, or make other unwanted changes].

Figure 4. A reliable Gemini image-editing workflow uploads the correct source, confirms the image, identifies one exact change, describes the replacement, preserves important details, and compares the edited result with the original.
Explanation: Precise location, replacement, preservation, and quality-control instructions reduce accidental changes, but every edited image must still be reviewed completely.
How to Remove, Add, or Replace Objects
Object editing works best when the request identifies one exact object and location. The replacement or repaired area should match the surrounding scale, perspective, texture, lighting, and shadows.
Remove an Object
Example: Remove the small plastic bottle beside the chair in the lower-right corner. Reconstruct the wooden floor naturally using the surrounding grain, perspective, lighting, and shadows. Keep the chair, desk, person, laptop, background, colours, camera angle, and 16:9 dimensions unchanged. Do not add another object or crop the image.
Add an Object
Example: Add a small healthy green plant in a plain white ceramic pot on the empty shelf behind the desk. Match the existing room perspective, soft daylight, scale, and shadow. Keep every other object unchanged.
Replace an Object
Example: Replace the black chair beside the desk with a simple light-grey office chair. Keep approximately the same size, position, and orientation. Match the room perspective, natural lighting, floor shadow, and realistic style. Preserve the person, desk, laptop, wall, plant, colours, and composition.
When an object overlaps a person, reflection, shadow, patterned surface, or fine edge, inspect the repair closely. A manual image editor may be more suitable when precise reconstruction is essential.
Beginner Tip: Describe the exact object, its location, the desired result, the background that must be reconstructed, and every important detail that must remain unchanged.

Figure 5. Reliable object editing identifies one exact object and location, describes the removal, addition, or replacement, matches the surrounding perspective and lighting, preserves important details, and reviews the complete image.
Explanation: Object edits can affect backgrounds, textures, shadows, reflections, nearby objects, and people. Comparing the result with the original helps reveal unintended changes.
How to Change an Image Background
Background replacement can simplify a scene, remove distractions, create open space, or move a subject into a different setting. It can also unintentionally change the subject, foreground objects, lighting, shadows, camera angle, text, or image dimensions.
1. Describe the existing background that should be replaced.
2. Describe a simple new background with only the details that matter.
3. State exactly which subject and foreground details must remain unchanged.
4. Match the original perspective, lighting direction, colour temperature, depth, and shadows.
5. Preserve the composition and aspect ratio, including any open space required for article text.
6. Review hair edges, glasses, clothing edges, hands, reflections, shadows, and fine details after the edit.
Example Background Prompt
Replace the dark office background with a clean modern workspace containing a light-grey wall, one simple shelf, and one small green plant. Keep the person’s identity, facial features, hair, clothing, pose, hands, desk, laptop, camera angle, lighting direction, open space on the left, and 16:9 dimensions unchanged. Match the new background to the existing perspective, depth, soft daylight, and natural shadows. Do not add extra people, logos, random text, or clutter.

Figure 6. A reliable background edit identifies the existing setting, describes a simple replacement, preserves the main subject and foreground objects, matches perspective and lighting, and compares the complete result with the original.
Explanation: Background replacement can unintentionally alter people, objects, text, shadows, composition, and image dimensions. Precise preservation instructions and complete review are therefore essential.
How to Improve Lighting and Colours
Lighting and colour changes should be specific. A broad request such as “make the image look better” can change the person, skin tone, clothing, background, object colours, shadows, text, and composition.
Identify the exact problem: too dark, too bright, too yellow, too blue, uneven lighting, harsh shadows, weak contrast, or an incorrect object colour.
Limit the change to the affected area when possible.
Describe the desired light direction and intensity, such as soft daylight from the left.
Preserve natural shadows instead of flattening the entire scene.
Protect skin tone, product colours, labels, and visible text when they matter.
Use subtle colour adjustments rather than extreme saturation unless the project requires a stylized result.
Example Lighting Prompt
Brighten the person’s face and upper body slightly using soft natural daylight from the left. Reduce heavy shadows under the eyes while preserving natural skin texture and realistic facial features. Keep the person’s identity, clothing, pose, background, desk, laptop, colours, camera angle, and image dimensions unchanged. Do not flatten all shadows or create an artificial glow.
Example Colour Prompt
Change only the dark-blue wall behind the person to a soft light-grey. Preserve the wall texture, lighting gradient, shadows, furniture, person, clothing, skin tone, camera angle, and image dimensions. Do not change any other colours.

Figure 7. Reliable lighting and colour editing identifies the exact problem area, defines the desired adjustment, preserves natural skin tones and important colours, maintains realistic highlights and shadows, and compares the edited result with the original.
Explanation: Lighting and colour adjustments can improve clarity and consistency, but they may also alter people, products, text, shadows, or background details. Focused prompts and complete review reduce these risks.
How to Crop, Resize, and Change Composition
Cropping, resizing, changing the aspect ratio, and recomposing are related but different. Cropping removes part of an image. Resizing changes its dimensions. Changing the aspect ratio changes its overall shape. Recomposition moves or rearranges important visual elements. Expanding generates new visual space beyond the original edges.
Gemini may regenerate content while changing the layout rather than applying a mathematically exact crop or resize. For exact pixel dimensions, print preparation, or guaranteed scaling, use a dedicated image editor after downloading the image.
Choose the final platform and aspect ratio first.
State the subject position, such as right third, centred, or upper-middle.
Define any required open space for a title or caption.
Protect important content from being cropped.
Keep safe margins around text, icons, and subjects.
When expanding, tell Gemini what background should continue into the new area and what must not be added.
Check the actual downloaded file dimensions rather than assuming the prompt produced an exact pixel size.
Example Recomposition Prompt
Recompose the image into a wide 16:9 landscape format. Keep the adult beginner and laptop on the right side and leave the left 40 percent as clean open space for article text. Preserve the person’s identity, face, hair, clothing, pose, desk, laptop, lighting, colours, background style, and visible objects. Extend the background naturally where needed. Do not crop the person, stretch objects, add new objects, or change visible text.

Figure 8. A reliable composition workflow selects the final aspect ratio, positions the main subject, creates safe open space, preserves important details, extends the background naturally, and checks the downloaded image dimensions.
Explanation: Gemini may re-create parts of an image while changing its layout, so users must check for cropping, stretching, altered people, incorrect text, duplicated objects, and unnatural generated background areas.
How to Add and Correct Visible Text
Gemini can create headings, labels, signs, captions, numbers, and short instructions inside images. The source describes improved text rendering in Nano Banana 2 and the possibility of using Nano Banana Pro for additional detail when available. Even so, text must be checked character by character.
Keep wording short. Short labels are easier to render and review than long paragraphs.
Prepare the exact wording before generation and put important text in quotation marks.
State that spelling, capitalization, punctuation, and order must remain exact.
Specify where each text item should appear and keep text away from image edges.
Use large, high-contrast, simple text rather than decorative fonts or tiny labels.
After every later edit, recheck all visible words because unrelated changes can alter existing text.
Example Text-Correction Prompt
Replace only the incorrect word “Imges” with “Images.” Keep the exact same location, font style, size, colour, alignment, spacing, card, background, icons, and all other visible text unchanged. Do not add or remove any other wording.
For long paragraphs, legal wording, prices, contact information, detailed tables, or precise brand typography, generate the visual design first and add the final text in a dedicated design or image-editing tool.
Accessibility Note: Important information should also appear in the article text, caption, or explanation instead of existing only inside an image.

Figure 9. Reliable text generation uses short exact wording, clear placement instructions, large readable type, strong contrast, consistent alignment, and character-by-character review after every image edit.
Explanation: Gemini may render text more accurately than earlier image systems, but spelling, order, punctuation, meaning, alignment, and factual accuracy must still be checked before publishing.
How to Combine Multiple Images and Maintain Consistency
Gemini can use several uploaded images as references. This can help combine a subject from one image with a background, colour palette, composition, or visual style from another. It can also help create a recurring character or visual series. Multiple references can also cause mixed faces, changed clothing, copied text, inconsistent objects, or unwanted style blending.
1. Use only reference images that are necessary and that you have permission to upload and use.
2. Give each image one clear role, such as Image 1 for the person, Image 2 for the background, and Image 3 for the colour palette.
3. Choose one primary reference when the sources could conflict.
4. Describe the new scene completely instead of assuming the references explain the final image.
5. State which characteristics must remain consistent and which details may change.
6. Prevent unwanted blending by telling Gemini not to mix faces, clothing, text, logos, or unrelated objects from the wrong reference.
7. For a recurring series, create each new scene from the same approved master reference instead of repeatedly editing the newest version.
Example Multiple-Image Prompt
Use Image 1 for the adult beginner’s general appearance, clothing, and pose. Use Image 2 only for the modern office background and lighting. Use Image 3 only for the blue, white, light-grey, and subtle green colour palette. Create a new 16:9 realistic editorial illustration showing the adult beginner seated at a desk and creating an AI image on a laptop. Do not blend faces, add extra people, copy visible text, include logos, or add unrelated objects.

Figure 10. A reliable multiple-image workflow assigns each reference one clear role, selects a primary source, preserves defining subject details, prevents unwanted blending, and compares every new result with the approved master image.
Explanation: Multiple references can help combine subjects, settings, colours, and styles, but they can also cause mixed faces, altered clothing, copied text, inconsistent objects, and visual drift. Clear source roles and side-by-side review reduce these problems.
How to Write Better Image Prompts
A strong prompt is specific without becoming unnecessarily complicated. It tells Gemini what matters and avoids contradictory instructions.
A Complete Prompt Formula
Action + Subject + Setting + Activity + Composition + Camera View + Lighting + Style + Mood + Colours + Aspect Ratio + Required Details + Quality Controls + Exclusions
You do not need every element in every prompt. Use the parts that materially affect the result. A simple diagram may not need a camera view or mood, while a realistic featured image often benefits from both.
Weak Prompt
Create a nice office image.
Improved Prompt
Create a realistic 16:9 image of an adult beginner seated at a clean modern desk and using a laptop. Use soft natural daylight, a light-grey office background, one small green plant, and a professional welcoming mood. Place the person on the right and leave open space on the left. Do not include logos, watermarks, unreadable text, distorted hands, duplicated objects, or extra people.
Prompt-Writing Rules That Matter Most
Use specific nouns and precise position words.
Keep backgrounds simple when the subject is the focus.
Avoid too many subjects and unrelated required objects.
Avoid conflicting instructions.
Use reference images for one clearly defined purpose.
For editing, always include what must remain unchanged.
Treat the prompt as direction, not a guarantee; human review remains necessary.

Figure 11. A strong Gemini image prompt combines a clear action, subject, setting, activity, composition, camera view, lighting, style, mood, colours, aspect ratio, required details, quality controls, and exclusions.
Explanation: Detailed prompts provide clearer visual direction, but they do not guarantee perfect images. Every result must still be reviewed for accuracy, text errors, distortions, privacy concerns, and publishing suitability.
How to Use Follow-Up Prompts
Use a follow-up prompt when the image is mostly correct and one or two details need repair. Do not use endless follow-up prompts to rescue a fundamentally wrong image.
Start from the last approved version, not simply the newest version.
Identify one exact problem and its location.
Describe the corrected result.
List the approved details that must remain unchanged.
Compare the entire new version with the approved image.
If repeated edits create visual drift, return to the approved master and make the correction again from there.
Example Follow-Up Prompt
Keep the complete image unchanged, but move the person and laptop slightly farther to the right to create more open space on the left. Preserve the person’s face, hair, clothing, pose, desk, background, lighting, colours, visible text, and 16:9 dimensions.
When to Regenerate Instead
Regenerate when the wrong subject was created, the visual style is incorrect, the composition is unusable, the aspect ratio is wrong, several required elements are missing, many objects are distorted, or most visible text is incorrect. A cleaner new foundation is often faster than repairing a poor one.

Figure 12. A reliable follow-up workflow starts with the last approved image, identifies one exact problem, requests one focused correction, preserves approved details, compares the complete result, and returns to the master when visual drift appears.
Explanation: Follow-up prompts are most effective for small corrections. Repeated edits can gradually change people, objects, text, lighting, or composition, so the approved master should remain unchanged.
How to Review and Improve Weak Results
A polished-looking image can still be wrong. Review images systematically instead of asking Gemini to “make it better.”
Use a Three-Level Review
High priority: wrong person, misleading content, privacy exposure, incorrect essential text, major distortion, or an unusable composition.
Medium priority: lighting mismatch, background clutter, inconsistent colours, weak spacing, or a distracting object.
Low priority: small decorative differences that do not affect meaning, accuracy, accessibility, or publishing quality.
Review the Image at Several Sizes
Inspect the full-size image for hands, faces, text, textures, reflections, and fine details. Then view it at the approximate WordPress display size and thumbnail size to check whether the main idea remains clear.
Keep the Last Approved Version
Save approved versions with descriptive filenames instead of overwriting the same file. If a new edit creates more problems than it solves, return to the approved version immediately.

Figure 13. A reliable image-review process checks the subject, composition, people, objects, background, lighting, colours, text, dimensions, privacy, and permissions before deciding whether to correct one problem or regenerate.
Explanation: Systematic review is more reliable than repeatedly asking Gemini to improve an image without identifying the specific problem.
How to Download and Prepare Gemini Images for Publishing
Once an image is approved, download the full-size result available to your account rather than relying on a screenshot. The source notes that download resolution can vary with account access and plan. Check the actual file properties after downloading.
1. Download the approved image and keep the original downloaded file unchanged as a master.
2. Check the actual width, height, aspect ratio, and file type.
3. Open the image outside Gemini and inspect it at full size.
4. Create a separate web copy if you need to resize or compress it for WordPress.
5. Use a descriptive filename that begins with the article number when preparing AI Mastery assets.
6. Add appropriate WordPress alt text, image title, caption, and description.
7. Preview the image on desktop, tablet, and mobile because themes can crop or scale images differently.
8. Keep the master image, prompts, permissions, licences, and approved versions in your project records.
Choosing a File Format
PNG is useful when text, diagrams, or crisp graphic elements need to remain sharp.
JPEG can be suitable for photographic images when a smaller file is needed.
WebP can be useful for web delivery when your publishing workflow supports it.
Changing a filename extension does not convert the image. Use an image editor or conversion tool when you need a different format.
WordPress Featured-Image Reminder
For this article, the approved featured image is 1600 × 900 pixels. Keep the article title and important visual details inside safe margins so the image remains useful when WordPress creates different preview sizes.

Figure 14. A reliable publishing workflow downloads the full-size approved image, checks its format and dimensions, preserves a master file, creates a web copy, prepares accessibility information, previews the image, and keeps project records.
Explanation: Publishing preparation should preserve image quality while also checking file size, dimensions, text accuracy, accessibility, and the final WordPress display.
Privacy, Copyright, Safety, and Responsible Image Use
The ability to generate or edit an image does not automatically give you the right to upload, alter, publish, or use every source image commercially. Rights and permissions depend on the source, licence, people shown, intended use, and applicable terms.
Protect Privacy
Before uploading an image, remove unnecessary private information such as names, addresses, telephone numbers, email addresses, identification cards, financial information, medical information, licence plates, computer screens, school records, customer information, passwords, security codes, or confidential documents. Do not assume that an edited or blurred result automatically removes every privacy risk.
Get Permission When Real People Are Involved
Consider whether you have permission to upload, edit, combine, or publicly use a photograph of another person. Take particular care with children, students, patients, employees, customers, private individuals, and people in sensitive situations. Avoid deceptive or harmful edits and impersonation.
Check Copyright and Licence Conditions
A file that can be downloaded from the internet is not automatically free to edit or republish. Verify the licence and any commercial-use conditions for photographs, illustrations, stock assets, templates, fonts, music-related artwork, or other third-party material you use as a reference.
Do Not Treat Synthetic Images as Evidence
A realistic AI image is not proof that an event occurred or that a place, product, document, or person looked that way in reality. Verify factual information separately, especially in diagrams, maps, product images, safety instructions, or other visuals where mistakes could mislead readers.
AI Disclosure
Use clear AI disclosure when viewers could reasonably mistake synthetic or heavily altered content for real footage or a real event, or when a platform, publisher, client, or policy requires disclosure. Requirements can change, so check the current rules for the destination where you publish.
General Education Notice: This section provides general educational information and is not legal advice. For a high-stakes copyright, privacy, licensing, or commercial-use question, obtain appropriate professional advice.

Figure 15. Responsible Gemini image use requires authorized sources, permission from people shown, protection of private information, copyright and licence review, accurate and non-deceptive editing, appropriate AI disclosure, and saved records.
Explanation: Responsible use means checking both the visual result and the rights, privacy, permissions, factual accuracy, and disclosure obligations connected with the image.
Common Mistakes to Avoid
Starting with a vague prompt such as “make something nice.”
Trying to fix many unrelated problems in one editing request.
Continuing to edit a damaged version instead of returning to the approved master.
Assuming “keep everything else unchanged” guarantees perfect preservation.
Publishing visible text without checking every word and number.
Using too many reference images without giving each one a clear role.
Uploading private or copyrighted material without checking permission first.
Assuming a high-resolution image must be accurate.
Using screenshots instead of downloading the approved image when a proper download is available.
Failing to preview the final image in WordPress before publishing.
How to Avoid This Mistake: Work from a simple plan, make one main change at a time, keep an approved master, and review the complete result after every generation or edit.
Troubleshooting Common Problems
The image option does not appear
Confirm the correct account, feature availability, age or administrator restrictions, device, language, and current Gemini interface. Features can vary and change.
Gemini writes text instead of generating an image
Use a direct image action such as “Create an image…” and open the current image-generation control if one is available.
The request remains loading
Check the connection, retry in a new chat, simplify the prompt, and confirm that you have not reached a usage limit.
Gemini creates the wrong subject
Rewrite the subject and setting more specifically and remove unnecessary details that compete with the main idea.
Hands or faces look distorted
Request one focused repair while preserving identity, pose, clothing, and the rest of the image. If the person changes significantly, return to the original.
An object is duplicated or missing
Identify the exact object and location, then ask for one correction. If several objects are wrong, regenerate from a clearer prompt.
Background replacement looks artificial
Match the perspective, lighting direction, colour temperature, depth, contact shadows, and fine edges to the original.
Visible text is wrong
Correct one short label at a time. If many labels are wrong, use shorter text or add the final wording in another tool.
The aspect ratio or downloaded dimensions are wrong
Recompose for the desired aspect ratio, then check the actual downloaded file dimensions. Use a dedicated editor for exact pixel output.
Quality declines after repeated edits
Stop. Return to the last approved master and make the next correction from that version instead of continuing the degraded chain.
Beginner Tip: Start troubleshooting with the simplest checks: account and feature availability, usage limits, prompt clarity, correct source file, and one focused correction.

Figure 16. A reliable troubleshooting process checks the account, feature availability, usage limits, device, prompt, source image, requested edit, and final output before correcting one problem or returning to the approved source.
Explanation: Troubleshooting is easier when you isolate one cause at a time instead of changing the account, source image, prompt, composition, and editing request simultaneously.
Benefits of Creating and Editing Images with Google Gemini
Natural-language control makes image creation approachable for beginners who do not know professional image-editing tools.
The same conversation can be used for generation, review, and focused follow-up edits.
Uploaded-image editing can simplify common tasks such as removing objects, changing backgrounds, or adjusting lighting.
Multiple references can help explore consistent characters, scenes, colour palettes, and visual series.
Prompt-based workflows make it easy to preserve written instructions and reproduce a project approach later.
Gemini can help create concepts and drafts that can then be refined in a dedicated design or image-editing tool.
Reality: These benefits improve convenience, not certainty. Every result still requires human review, and exact design control may require another tool.

Figure 17. Google Gemini can help beginners turn written ideas into images, make focused edits, explore visual alternatives, combine references, create related designs, and prepare concepts for further publishing work.
Explanation: Gemini is useful for fast visual exploration and natural-language editing, but its output still needs review and sometimes further work in a dedicated editor.
Limitations You Should Understand
Gemini may omit, duplicate, distort, or redesign objects even when the prompt is clear.
A small local edit can change unrelated parts of the image.
Real people and recurring characters may not remain perfectly consistent.
Visible text, numbers, labels, and factual diagrams can still contain errors.
Changing aspect ratio or size may regenerate content rather than perform an exact mathematical resize.
Generated expansion or reconstructed areas are invented content, not recovered evidence of what was outside or behind the original image.
Usage limits, model availability, account requirements, menus, and download resolution can change.
A polished image can still be factually wrong, misleading, improperly licensed, or unsuitable for a particular use.
How to Reduce This Limitation: Keep projects simple, use an approved master, make focused edits, verify text and facts, check file properties after download, and use another tool when exact control is required.

Figure 18. Gemini image limitations include missing or duplicated details, distorted people and objects, incorrect text, unintended editing changes, inconsistent references, uncertain dimensions, usage limits, and the need for human review.
Explanation: Understanding the limitations helps beginners decide when to retry, regenerate, use a dedicated editor, or stop using a result that cannot be verified.
Common Myths and Reality
Myth: A longer prompt always creates a better image.
Reality: A prompt is useful when it is clear and relevant. Extra or conflicting detail can make the request harder to follow.
Myth: “Keep everything else unchanged” guarantees preservation.
Reality: Unrelated details can still change, so compare every result with the approved source.
Myth: The newest version is always the best version.
Reality: Repeated edits can introduce visual drift. The last approved version may be better.
Myth: Higher resolution means the image is accurate.
Reality: Resolution affects detail and size, not factual correctness, anatomy, spelling, or permissions.
Myth: A paid plan guarantees perfect images.
Reality: Additional access or detail does not eliminate generation errors or the need for review.
Myth: If Gemini accepts an image, you have permission to use it.
Reality: Upload acceptance does not establish copyright, licence, privacy, or consent rights.
Myth: AI-generated images are automatically copyright-free or commercially permitted.
Reality: Rights and permitted uses depend on the applicable terms, source material, jurisdiction, and intended use.
Myth: A realistic AI image proves something happened.
Reality: Synthetic content can look realistic without documenting a real event.
Myth: Gemini can replace every professional image editor.
Reality: Dedicated tools are often better for exact pixels, layers, typography, transparency, print production, or precise local control.
Myth: Gemini will always work the same way.
Reality: Models, menus, limits, plans, and availability can change.
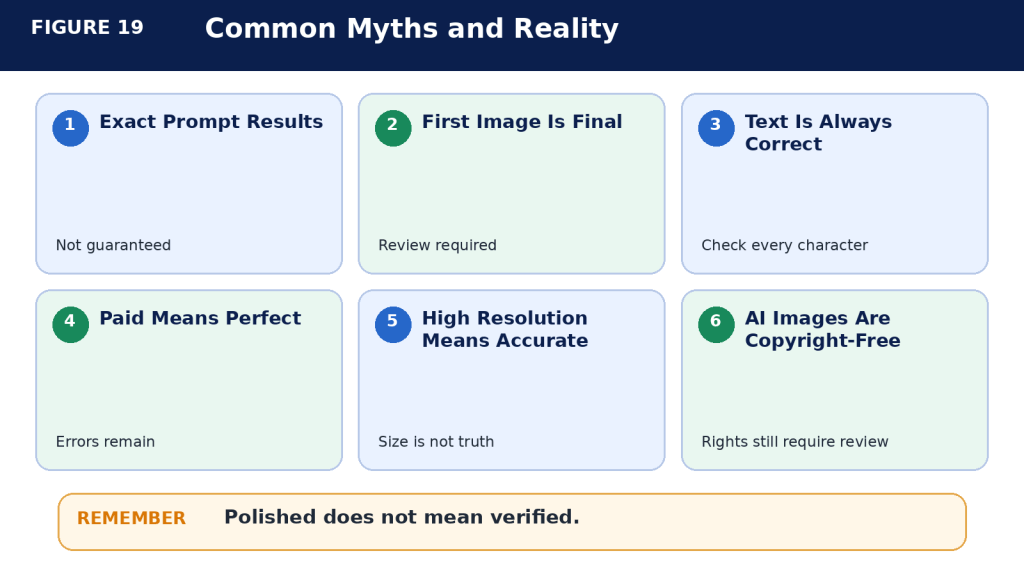
Figure 19. Common Gemini image myths include believing that every prompt is followed exactly, local edits preserve everything else, higher resolution guarantees accuracy, paid access provides perfect results, and generated content is automatically safe to use.
Explanation: A more reliable approach is to treat every generated or edited image as a draft that requires visual, factual, privacy, permission, and publishing review.
Frequently Asked Questions
Can Gemini create images from written prompts?
Yes. The source describes creating new images from natural-language prompts when the image feature is available to the account.
Can Gemini edit an image I upload?
Yes, when image editing is available. Use a precise request that identifies the change, location, desired result, and details to preserve.
Can I upload more than one image?
The source states that Gemini can use multiple uploaded images as references. Give each source one clear role to reduce unwanted blending.
Can Gemini keep the same person or character across several images?
It can improve consistency, but exact identity or character preservation is not guaranteed. Use one approved master reference and compare every new result.
Can Gemini remove, add, or replace objects?
Yes, but the background, shadows, reflections, and nearby details may also need repair. Review the complete result.
Can Gemini change a background?
Yes. Preserve the subject explicitly and match perspective, lighting, depth, and shadows.
Can Gemini crop or change the aspect ratio?
It can respond to composition and format instructions, but it may regenerate content. Use a dedicated editor for exact cropping or dimensions.
Can Gemini add or correct text inside an image?
Yes, but text can still be misspelled, reordered, duplicated, or altered during later edits. Check every character.
Why did another part of my image change during a small edit?
Image editing can regenerate nearby or unrelated content. Preservation instructions help but do not guarantee identical details.
Should I make several corrections in one prompt?
Usually no. One focused correction at a time is easier to verify.
When should I regenerate instead of edit?
Regenerate when the basic subject, style, layout, aspect ratio, or many required details are wrong.
Are image generations unlimited?
The source states that limits depend on account, plan, model, feature, demand, and other factors. Check the current limit shown in Gemini.
Can I use Gemini images commercially?
Do not assume automatic permission. Review current service terms, licences, source rights, and any client or platform requirements for the intended use.
Do AI images need disclosure?
Disclosure may be appropriate or required when synthetic content could be mistaken for real content or when a platform or policy requires it.
What should I do if Gemini repeatedly fails?
Simplify the request, start from the original source, reduce the number of references, make one main request, or use another tool when the task requires exact control.

Figure 20. Common beginner questions about Gemini images involve generation, uploaded-image editing, multiple references, text accuracy, dimensions, downloads, usage limits, permissions, privacy, disclosure, and the need for human review.
Explanation: The safest answer to most image questions is to combine clear prompts with current account information, careful review, saved originals, and verified rights and permissions.
Best Practices
Define the image goal and final format before opening Gemini.
Keep one clear main idea per image.
Use a reusable prompt formula instead of starting from scratch every time.
Keep backgrounds simple and use specific position words.
Prepare exact visible text before generation and keep it short.
Give every reference image one clear role.
Make one main edit at a time.
State what must remain unchanged.
Save the original source and the last approved master.
Compare the complete image after every edit.
Use another tool when exact typography, transparency, layers, pixel dimensions, or professional production control is required.
Download the full-size approved image and check its actual properties.
Use descriptive filenames and keep project versions organized.
Protect privacy before uploading and confirm copyright and permission before publishing.
Verify factual content and disclose AI use when appropriate or required.
Prepare useful alt text, captions, and explanatory text for accessibility.

Figure 21. A reliable Gemini image workflow plans the goal and format, writes a focused prompt, uses one edit at a time, preserves an approved master, reviews every result, checks rights and privacy, and prepares the final file for publishing.
Explanation: Best practices reduce avoidable mistakes by separating planning, generation, editing, review, rights checks, and publishing into clear stages.
Key Takeaways
Create new images by describing the whole scene; edit existing images by describing one exact change.
Plan the goal, aspect ratio, composition, permissions, privacy, and review process before generating.
Use clear prompts with specific subjects, settings, positions, lighting, style, required details, and exclusions.
Make one main edit at a time and preserve an approved master image.
Check people, objects, backgrounds, lighting, colours, text, dimensions, and edges after every edit.
Do not confuse higher resolution with higher accuracy.
Do not assume generated content is automatically copyright-free, private, factual, or commercially permitted.
Use a dedicated editor when exact control matters.
Download the final image, verify its actual properties, add accessibility information, and preview it before publishing.
Final Tip: Treat Gemini as a visual assistant, not as the final approval authority. The strongest workflow combines clear instructions, saved originals, careful human review, verified rights, and a final publishing check.

Figure 22. A successful Gemini image workflow plans the purpose and format, writes a clear prompt, makes focused edits, preserves an approved master, checks every result, verifies rights and privacy, prepares the publishing file, and keeps records.
Explanation: The workflow is more important than any single prompt because it provides a repeatable way to create, correct, review, and publish images responsibly.
Conclusion
Google Gemini can make image creation and editing easier for beginners because you can describe visual work in ordinary language instead of learning every control in a professional image editor first. It can help turn an idea into a draft image, make focused changes, explore several visual directions, combine references, and prepare content for a website or other project.
The quality of the result still depends on the workflow around the tool. Plan before generating. Use one clear prompt. Keep the main idea simple. Make focused edits. Preserve an approved master. Review every visible word and every important object. Check privacy, permission, copyright, factual accuracy, and disclosure. Use another tool when the project requires exact control.
Most importantly, do not publish an image merely because it looks polished. A useful AI image is one that has also been checked for accuracy, appropriateness, rights, accessibility, and the needs of the audience.

Figure 23. A complete Gemini image workflow plans the purpose and format, confirms source rights, writes a clear prompt, creates and reviews the image, makes focused edits, preserves an approved master, prepares the publishing file, and saves the project record.
Explanation: Following the workflow from planning through publishing helps beginners use Gemini images more consistently while reducing avoidable quality, privacy, permission, and accuracy problems.
Sources and References
The following official Google resources are the sources listed in the original Article 039 source package. Gemini is an evolving service, so recheck current official documentation before publishing instructions that depend on a specific model, menu, limit, account rule, or feature.
1. Generate and edit images with Gemini Apps
2. Gemini Apps limits and upgrades for Google AI subscribers
4. Manage and delete your activity in Gemini Apps
5. Generative AI Prohibited Use Policy
6. Verify AI-generated images, videos, and audio
7. Report Google AI policy violations that involve your likeness
8. Download your Gemini Apps data
9. Upload and analyze files in Gemini Apps
Source Review Reminder: Readers do not need to reread every policy before every image. Check the current official information when first using a feature, after an important plan or feature change, after receiving a policy-update notice, and periodically when maintaining the article.
Continue Learning
After learning how to create and edit images with Google Gemini, continue with related AI Mastery guides:
How to Edit Images with ChatGPT: Beginner Step-by-Step Guide (2026)
AI Image Generation for Beginners: Complete Guide (2026)
How to Write Better AI Image Prompts: Beginner Guide (2026)
Best AI Image Prompts for Beginners: 50 Examples to Copy and Customize (2026)
Prompt Engineering for Beginners: Complete Guide (2026)
How to Create Images with ChatGPT: Beginner Guide (2026)
Add internal links only after confirming that each related article is published and using its permanent AI Mastery URL.


Leave a comment