

Estimated reading time: 75–95 minutes
Last updated: July 28, 2026
Before Learning
These guides provide useful background before you compare AI video tools:
• ChatGPT Basics for Beginners: Complete Guide (2026)
• Prompt Engineering for Beginners: Complete Guide (2026)
• AI Image Generation for Beginners: Complete Guide (2026)
What You’ll Learn
By the end of this guide, you will know:
• What an AI video tool is and what it can do
• The difference between text-to-video, image-to-video, video-to-video, and AI-assisted editing
• Which features beginners should compare before selecting a tool
• Which AI video tools are easiest for complete beginners
• Which tools are suitable for social media, YouTube, education, websites, and business marketing
• How video quality, duration, resolution, and aspect ratio differ between tools
• How free plans, trials, credits, and paid plans generally work
• How to check commercial-use rights before publishing a generated video
• How to protect personal information and uploaded images
• How to compare the strengths and limitations of each tool
• How to select the best AI video generator for your needs and budget
Modern services may offer several video-generation models inside one workspace. For example, Adobe Firefly currently supports its own video model and multiple partner models, while Canva offers prompt-based video clips with synchronized audio. Features and availability can change, so this article will rely on current official information rather than outdated tool lists. [4][3][18]
Introduction
AI video tools can create short moving clips from written prompts, still images, or existing footage. Some platforms also include editing features that allow users to trim clips, replace backgrounds, adjust lighting, add sound, or combine several scenes into a longer video. [1]
The number of available tools has grown quickly. Some services focus on realistic cinematic video, while others are designed for social media, advertising, animation, product demonstrations, or professional production. Certain platforms now provide access to several video-generation models inside one workspace, allowing users to compare results without opening a separate service for every model. [3][4]
This variety is useful, but it can also confuse beginners. A tool may produce impressive demonstrations while still being too complicated, expensive, slow, or limited for an ordinary beginner. The most advanced tool is not automatically the best choice.
A beginner should consider practical questions such as:
• Is the interface easy to understand?
• Can it generate video from text, images, or both?
• Does it support the required aspect ratio?
• How long are the generated clips?
• Does it include editing and audio features?
• How many credits does each generation use?
• Can the finished video be used commercially?
• What happens to uploaded images and videos?
• Does the tool place a watermark on exported clips?
Some platforms provide simple prompt-based generation, while others offer detailed controls for camera movement, reference images, resolution, visual style, and editing. Adobe Firefly, for example, currently supports text-to-video, image-to-video, camera controls, multiple aspect ratios, and access to Adobe and partner video models. Runway supports text-to-video, image-to-video, video-to-video, and prompt-based editing of existing footage. [1]
Current Information Note: AI video features, model names, prices, credits, free trials, output limits, and account availability can change frequently. Always check the provider’s official website before paying for a plan or beginning an important project.
This guide will compare the leading beginner-friendly AI video tools using practical criteria rather than promotional claims. The goal is to help you choose a tool that matches your experience, budget, and intended type of video.

Figure 1. The main factors beginners should compare when choosing an AI video tool.
Figure 1 shows that choosing an AI video generator involves more than comparing visual quality. Beginners should also consider ease of use, supported creation methods, editing features, output formats, costs, privacy, and commercial-use conditions.
What Is an AI Video Tool?
An AI video tool is software that uses artificial intelligence to create, animate, transform, or edit video content.
Instead of filming every scene with a camera, you may provide the tool with:
• A written description
• A still image
• An existing video
• A script
• A reference image
• Instructions describing movement, camera direction, lighting, or style
The tool processes these instructions and produces a video clip or modifies existing footage.
Different AI video tools perform different jobs. Some focus on generating realistic scenes, while others specialize in avatars, animation, editing, advertising, or social media content.
AI Video Generators
An AI video generator creates new moving footage from text or images.
For example, you could enter:
Create a six-second cinematic video of a small fishing boat moving across a calm lake at sunrise. Add gentle mist, slow water movement, and a smooth forward camera motion.
A text-to-video tool attempts to create the entire scene from that description.
With image-to-video, you upload a still image and describe how it should move. Adobe Firefly currently supports video generation from text prompts and static images, while Runway’s generative-video models also support text-to-video and image-to-video workflows. [1][2]
AI Video Editing Tools
AI-assisted editing tools work with footage that already exists.
Depending on the platform, they may help you:
• Remove backgrounds
• Change the visual style
• Add captions
• Remove pauses
• Improve audio
• Resize the video
• Extend a clip
• Remove or replace objects
• Create shorter clips from longer footage
Runway’s current Edit Studio uses Aleph 2.0 for prompt-based editing of existing footage. Older Gen-3 Alpha and Turbo video-to-video workflows were retired in July 2026. [14]
These tools do not always create an entire video from nothing. Instead, they reduce the time and technical skill required to edit an existing video.
AI Avatar Video Tools
AI avatar tools create a digital presenter who speaks a supplied script.
You normally:
1. Select an avatar.
2. Enter or upload a script.
3. Choose a voice and language.
4. Generate the presentation.
5. Add supporting images, titles, or background elements.
Avatar videos are commonly used for:
• Training
• Product explanations
• Business presentations
• Online courses
• Customer instructions
• Social media announcements
Some platforms combine avatar creation with templates and traditional editing. Dedicated avatar platforms such as Synthesia focus on scripts, presenters, voices, captions, and multilingual delivery. [21]
Multi-Model AI Video Platforms
A multi-model platform allows users to access more than one AI video model from the same workspace.
This can be useful because one model may be better at:
• Realistic movement
• Animation
• Camera control
• Character consistency
• Product scenes
• Fast generation
• Stylized video
The user can test different models without creating a separate editing project each time. Adobe Firefly, for example, provides access to Adobe’s own video technology and selected partner models. [3][4]
However, different models may use different numbers of credits, support different settings, or have different commercial-use conditions. Always check which model is selected before generating a clip.
The Difference Between a Video Platform and a Video Model
Beginners often use the words tool, platform, and model as though they mean the same thing, but there is an important difference.
AI video platform:
The website or application where you enter prompts, upload files, organize projects, generate clips, and edit or download the results.
AI video model:
The artificial-intelligence system that interprets your instructions and produces the video.
One platform may provide access to several models. Changing the selected model may change:
• Video quality
• Generation speed
• Clip duration
• Prompt interpretation
• Available aspect ratios
• Camera controls
• Credit usage
• Commercial-use conditions
Therefore, when comparing AI video tools, check both the platform and the specific model being used.
What an AI Video Tool Does Not Guarantee
Even a powerful tool cannot guarantee:
• A perfect result on the first attempt
• Completely natural hands or body movement
• Accurate text inside the video
• Consistent characters across every scene
• Exact product details
• Stable backgrounds
• Correct lip synchronization
• Automatic permission to use every output commercially
AI video creation normally involves generating, reviewing, revising, and editing several versions. The best tool is not the one that promises perfection. It is the one that gives you enough control to correct weak results.
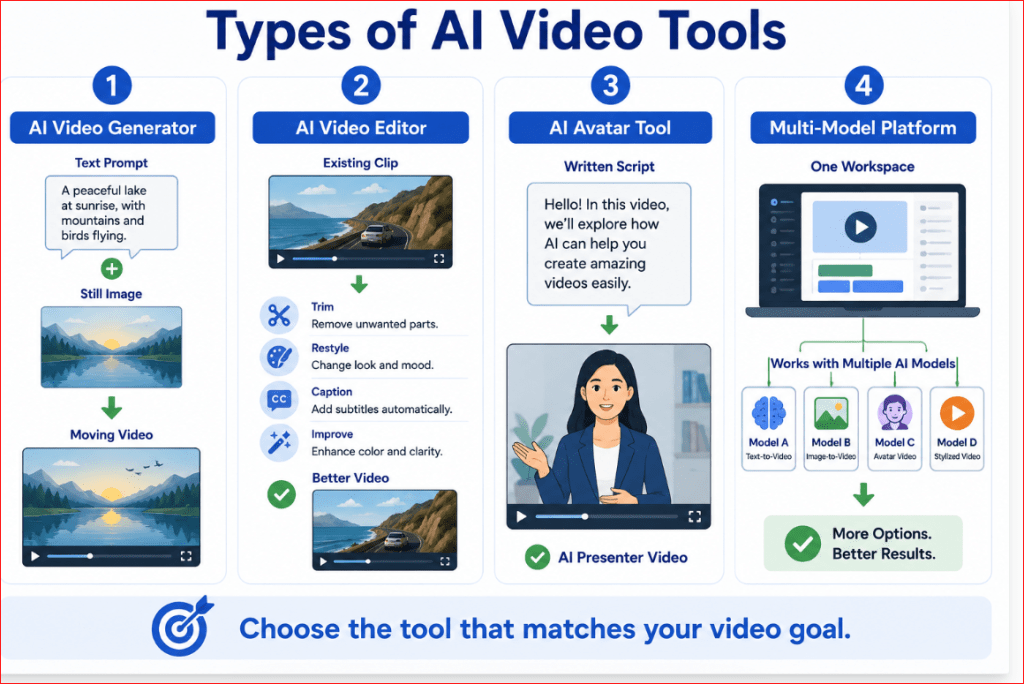
Figure 2. The main types of AI video tools and the tasks they perform.
Figure 2 separates AI video tools into four practical groups: generators, editors, avatar tools, and multi-model platforms. Understanding these differences helps beginners avoid selecting a tool that does not support the type of video they want to create.
Features Beginners Should Compare Before Choosing an AI Video Tool
AI video tools can look similar on the surface, but their capabilities may differ considerably. Before paying for a plan, compare the features that affect the kind of video you want to create.
Do not choose a tool only because its demonstration videos look impressive. A practical beginner tool should be understandable, affordable, and suitable for your intended platform.
Ease of Use
A beginner-friendly tool should have a clear workspace with understandable controls.
Look for:
• A visible prompt box
• Simple upload controls
• Clearly labelled video settings
• An easy-to-find Generate button
• A preview window
• Basic editing controls
• A clear download or export option
• Helpful instructions or examples
An advanced platform may provide more control, but it can also require more time to learn. A simpler platform may be a better starting point when your main goal is to create short social media, website, or educational videos.
Before subscribing, test whether you can complete these basic actions without confusion:
1. Start a new project.
2. Enter a prompt.
3. Upload an image.
4. Choose the video format.
5. Generate a clip.
6. Review the result.
7. Download or edit the video.
A tool that makes these actions difficult may not be the best choice for a complete beginner.
Supported Creation Methods
Check how the tool can create video.
The most useful options include:
• Text-to-video
• Image-to-video
• Video-to-video
• Script-to-avatar video
• AI-assisted editing
• Video extension
• First-frame or last-frame control
A tool does not need every feature to be useful. It only needs the features required for your project.
For example:
• Choose text-to-video when you want the AI to design the entire scene.
• Choose image-to-video when you already have a strong starting image.
• Choose video-to-video when you want to transform existing footage.
• Choose an avatar tool when you need a digital presenter.
• Choose AI-assisted editing when you already have footage that needs improvement.
Adobe Firefly currently supports text-prompt video generation, image-guided generation, reference frames, resolution settings, aspect ratios, and multiple Adobe or partner video models. The exact controls can change according to the selected model. [3][1][2][4]
Text-to-Video Quality
Text-to-video quality refers to how well the tool converts written instructions into a moving scene.
When testing a tool, examine whether it correctly follows:
• The main subject
• The location
• The action
• The camera movement
• The lighting
• The visual style
• The requested mood
• The aspect ratio
• Stability instructions
Do not judge quality from one attractive frame. Watch the entire clip.
A video may begin well but develop problems such as:
• Objects changing shape
• Background flickering
• Unnatural movement
• Sudden camera changes
• Incorrect lighting
• Extra objects
• Character inconsistency
Use the same simple test prompt with several tools when possible. This gives you a fairer comparison than using a different prompt for every platform.
Image-to-Video Control
Image-to-video tools should let you upload a still image and describe how it should move.
Check whether the platform allows you to control:
• Subject movement
• Background movement
• Camera movement
• Motion strength
• Clip duration
• Starting frame
• Ending frame
• Aspect ratio
• Image cropping
• Subject consistency
Some tools allow only a starting image. Others allow both first and last keyframes, which can provide greater control over how the clip begins and ends. Adobe Firefly currently allows images to guide the first frame, last frame, or both in supported workflows. [3][2]
A good image-to-video tool should animate the requested elements without unnecessarily changing the person, product, background, clothing, or composition.
Video Resolution
Resolution affects the number of pixels in the generated video.
Common options may include:
• 540p
• 720p
• 1080p
• 4K on selected models or workflows
Higher resolution can produce a sharper image, but it may also:
• Use more credits
• Take longer to generate
• Produce a larger file
• Require a higher-priced plan
• Be unavailable on some models
For learning and testing, a lower resolution may be sufficient. For a finished website, YouTube, presentation, or business video, higher resolution is generally preferable when the tool and budget permit it.
Adobe states that its available resolutions and credit consumption vary according to the selected video model. Some partner-model options support resolutions up to 1080p or 4K, while other workflows default to 720p. [2][3][5]
Do not assume that selecting the highest resolution will correct poor motion or an inaccurate prompt. Resolution improves image sharpness; it does not automatically fix generation errors.
Aspect Ratio Options
Aspect ratio describes the shape of the video.
The most useful formats include:
• 16:9 landscape: YouTube, websites, presentations, and standard video
• 9:16 vertical: YouTube Shorts, Instagram Reels, TikTok, and mobile-first content
• 1:1 square: Square social media posts and advertisements
• 4:5 portrait: Instagram and Facebook feed posts
• 21:9 ultra-wide: Selected cinematic or creative projects
Choose the aspect ratio before generating the video. Changing it later may crop the subject or remove important parts of the composition.
Different models inside the same platform may support different aspect ratios. Adobe’s documentation shows that available video formats can vary by model, with some supporting widescreen, square, vertical, portrait, landscape, or ultra-wide options. [1][3]
For your AI Mastery website, 16:9 landscape is normally the strongest format for article demonstrations, featured visuals, YouTube videos, and desktop viewing.
Clip Duration
Many AI video tools generate short clips rather than complete long videos.
A tool may offer clips of:
• Four seconds
• Five seconds
• Eight seconds
• Ten seconds
• Twelve seconds
• Longer durations in selected models or plans
Available duration often depends on:
• The selected model
• The subscription plan
• The output resolution
• The generation method
• Whether audio is included
Adobe Firefly’s own video workflows commonly use five-second generations, while selected partner models available through Firefly may provide options such as five, eight, or ten seconds. [3][5]
Short clips are not necessarily a weakness. Beginners can often produce a more stable longer video by generating several short scenes and combining them in an editor.
Camera and Motion Controls
Camera controls help determine how the viewer sees the scene.
Useful options may include:
• Static camera
• Zoom in
• Zoom out
• Pan left
• Pan right
• Camera moving forward
• Camera moving backward
• Camera following the subject
• Shot size
• Camera angle
• Motion strength
• First-frame and last-frame guidance
Some tools allow these controls through menus. Others require you to describe them in the prompt.
Adobe Firefly currently offers camera-related controls such as shot size, shot angle, and motion presets in supported Firefly Video workflows. The available controls depend on the selected model. [3][1][2]
For beginners, one slow camera movement is usually easier to control than several movements in the same short clip.
Reference Images and Consistency Controls
Reference images can help the AI understand the desired:
• Character
• Product
• Clothing
• Setting
• Colour palette
• Composition
• Visual style
• First frame
• Final frame
Reference controls are especially useful when creating several scenes that should look connected.
However, uploading the same reference image does not guarantee perfect consistency. Check whether the tool also allows you to repeat descriptions, save styles, reuse settings, or control starting frames.
For product videos, examine whether the generated clip preserves:
• Shape
• Colour
• Packaging
• Buttons
• Labels
• Materials
• Size and proportions
Do not use a generated product video for an advertisement when the tool changes important commercial details.
Audio Generation
Some platforms generate silent clips, while others can produce:
• Dialogue
• Ambient sound
• Sound effects
• Music
• Narration
• Synchronized audio
Canva currently promotes prompt-generated video clips that may include synchronized audio, dialogue, and sound effects. Its workspace also provides editing features for refining the generated result. [18]
Built-in audio can save time, but it should still be reviewed carefully.
Listen for:
• Incorrect words
• Poor pronunciation
• Unnatural voices
• Music that is too loud
• Audio that does not match the action
• Poor lip synchronization
• Sudden changes in volume
• Unwanted background sounds
A visually strong platform may still require a separate editor or narration tool for professional audio.
Editing Features
A complete video normally needs editing after generation.
Useful built-in editing features include:
• Trimming
• Splitting clips
• Rearranging scenes
• Adding captions
• Adding titles
• Resizing
• Removing backgrounds
• Applying filters
• Adjusting colour
• Adding narration
• Adding music
• Adding transitions
• Exporting different formats
Canva combines AI-generated video with its broader editing workspace, including visual elements, filters, effects, templates, background tools, and other design features. [18]
A generator with basic visual quality but strong editing tools may be more useful to a beginner than a generator with excellent clips but no practical way to assemble or correct them.
Generation Speed
Generation speed can vary according to:
• Model demand
• Clip duration
• Resolution
• Audio generation
• Server traffic
• Subscription priority
• Number of requested versions
Do not select a tool based only on the fastest result. A clip generated quickly is not useful if the movement is unstable or the scene does not follow the prompt.
During a trial, record:
• How long one clip takes
• Whether the tool displays progress
• Whether you can work on another project while waiting
• Whether failed generations still use credits
• Whether higher plans receive priority processing
Credits and Usage Limits
Many AI video platforms use credits instead of offering unlimited generation.
A credit system may charge differently according to:
• The selected model
• Video duration
• Resolution
• Number of variations
• Audio generation
• Text-to-video or image-to-video mode
• Standard or priority processing
Adobe states that different resolutions and partner models may consume different amounts of generative credits. [2][4][5]
Before paying, calculate the practical cost of creating one usable video—not merely one generation.
For example, one scene may require:
1. An initial test
2. A revised version
3. A corrected version
4. A higher-resolution final version
A plan that appears inexpensive may become costly when several attempts are required for every scene.
Free Plans and Trials
A free plan or trial is useful for learning the interface, but it may include:
• Very few generations
• Lower resolution
• Watermarked exports
• Limited models
• Slower processing
• Restricted commercial use
• No advanced camera controls
• Limited storage
• Shorter clips
Use the free access to test:
• Prompt understanding
• Motion stability
• Image upload quality
• Aspect-ratio support
• Export process
• Ease of editing
Do not begin a large project until you understand how quickly the available credits are consumed.
Watermarks and Export Conditions
Check whether the downloaded video contains:
• A visible platform watermark
• A small model label
• Metadata identifying AI generation
• Resolution restrictions
• Export-format limitations
A watermark may be acceptable while practising, but it may not be suitable for a professional website, advertisement, presentation, or client project.
Also check whether the tool exports:
• MP4
• MOV
• GIF
• Separate audio
• Captions
• Transparent backgrounds where supported
• Different resolutions
For most beginners, MP4 is the most practical standard video format.
Privacy and Uploaded Files
When using image-to-video or video-to-video, you may upload personal or business material.
Before uploading, check:
• Whether files are stored
• How long they are retained
• Whether they may be used to improve the service
• Whether private projects are available
• Whether files can be deleted
• Whether other users can view generations
• Whether the provider offers business-level privacy controls
Avoid uploading:
• Private family photographs
• Identification documents
• Confidential business information
• Medical records
• Financial information
• Client materials without permission
• Photographs of other people without consent
• Copyrighted material you are not allowed to use
A creative tool should never receive sensitive information unless you understand and accept its current privacy terms.
Commercial-Use Rights
Do not assume that paying for a plan automatically gives unlimited commercial rights.
Check:
• Whether commercial use is permitted
• Whether rules differ by plan
• Whether partner models have separate conditions
• Whether uploaded source material must belong to you
• Whether generated music and voices have separate licences
• Whether recognizable brands or characters are restricted
• Whether the tool offers protection or indemnification
• Whether local copyright laws affect ownership
Save a copy of the applicable terms or record the date you checked them. Platform rules can change.
Customer Support and Learning Resources
A beginner may need help with:
• Failed generations
• Credit charges
• Upload problems
• Incorrect cropping
• Account access
• Watermarks
• Export errors
• Commercial-use questions
Look for:
• Official help pages
• Tutorials
• Prompt examples
• Community forums
• Email or chat support
• Clear billing information
• Cancellation instructions
Good support can be more valuable than one additional advanced feature.
A Practical Beginner Test
Before choosing a paid plan, use the same small project to test every shortlisted tool.
Try creating:
A six-second realistic video of a red bicycle beside a wooden fence on a quiet country road at sunrise. Grass moves gently in the breeze while the camera slowly moves toward the bicycle. Keep the bicycle and background stable. Use 16:9 landscape format, smooth motion, no people, no text, no logos, and no duplicated objects.
Compare the results using these questions:
1. Did the tool understand the subject?
2. Did it follow the requested movement?
3. Was the camera stable?
4. Did the bicycle retain its shape?
5. Did the background remain consistent?
6. Was the aspect ratio correct?
7. Was the clip easy to download?
8. How many credits were used?
9. Could the result be edited easily?
10. Would you feel comfortable using the tool again?
The strongest tool is the one that meets your practical needs consistently—not necessarily the one with the most complicated feature list.
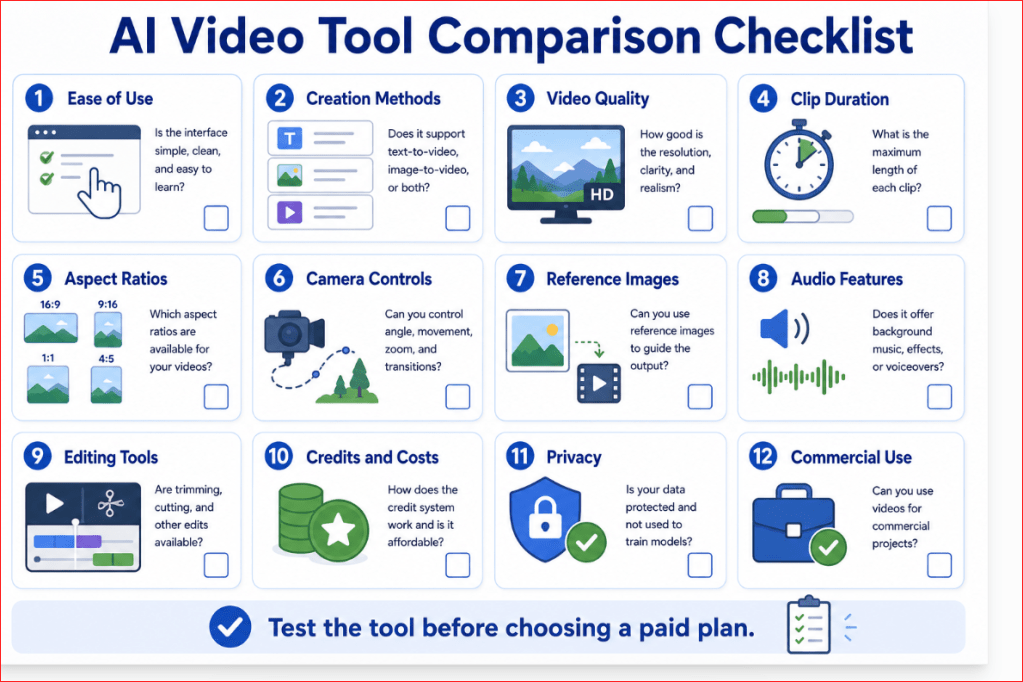
Figure 3. The essential features beginners should compare before selecting an AI video tool.
Figure 3 provides a practical comparison checklist covering creation methods, video quality, formats, controls, audio, editing, costs, privacy, and usage rights. Testing these areas helps beginners choose a tool based on real project requirements rather than advertising demonstrations.
Best AI Video Tools for Beginners in 2026
There is no single AI video tool that is best for every beginner. The right choice depends on the type of video you want to create.
A person making short social media clips has different needs from someone creating employee training, YouTube explanations, cinematic scenes, or business presentations.
The following shortlist focuses on tools that provide a practical combination of:
• Beginner-friendly controls
• Useful AI-generation features
• Editing options
• Clear export workflows
• Different video styles and purposes
• Official learning and support resources
The tools are not ranked only by visual quality. They are compared according to how useful they are for a particular beginner workflow.
Beginner Comparison at a Glance
| AI video tool | Best suited for | Main strength | Important consideration |
| Canva | Complete beginners, social media, presentations, and simple marketing videos | Easy generation and editing in one familiar workspace | Advanced camera and consistency controls may be limited |
| Adobe Firefly | Beginners who want cinematic clips, image animation, and several model choices | Text-to-video, image-to-video, camera controls, and model selection | Controls, output options, and credit use vary by selected model |
| Runway | Creative users who want more precise motion and camera control | Strong prompt interpretation and advanced generative-video controls | The larger feature set may require more learning |
| Synthesia | Training, education, presentations, and presenter-led business videos | AI avatars, scripts, voiceovers, captions, and multilingual video | It is primarily designed for structured presenter-led content |
| InVideo AI | YouTube, faceless videos, explainers, and complete videos from a topic or script | Automatically prepares scripts, visuals, narration, subtitles, and music | Generated videos require careful review for accuracy and originality |
| CapCut | Shorts, Reels, TikTok, advertisements, and social media editing | Combines AI generation with a strong short-form editing workflow | Features, models, and availability can differ between devices and regions |
Canva — Best for Complete Beginners
Canva is one of the easiest starting points for people who already use it for featured images, social media graphics, presentations, or WordPress visuals. [18]
Its Create a Video Clip feature can turn a written prompt into a short AI-generated clip with synchronized audio, including dialogue and sound effects. The generated clip can then be refined using Canva’s existing video-editing tools, filters, transitions, graphics, cropping, and background features. [18]
Canva is especially suitable for:
• Social media videos
• Simple article demonstrations
• Website introductions
• Short promotional clips
• Presentation backgrounds
• Reels and Shorts
• Videos that combine generated clips with text and graphics
Its main advantage is simplicity. A beginner can generate a clip, add titles and other visual elements, arrange scenes, and export the finished video without moving between several complicated programs.
However, Canva may not provide the same level of detailed motion, reference, or camera control as a platform designed primarily for advanced generative video.
Best beginner use: Creating a short AI-generated scene and combining it with titles, music, captions, and other Canva elements.
Adobe Firefly — Best for Creative Generation and Multiple Models
Adobe Firefly is a strong choice for beginners who want more generation control while remaining inside a visual, browser-based workspace.
Firefly supports video generation from text prompts and still images. Its supported workflows include camera controls, visual styles, different formats, prompt-based editing, and a browser video editor for arranging generated and uploaded clips. Adobe also provides access to its own Firefly Video model and selected partner models from the same platform. [3]
Firefly is especially suitable for:
• Cinematic B-roll
• Landscape and nature scenes
• Product concepts
• Website video backgrounds
• Marketing experiments
• Storyboards
• Image-to-video animation
• Creative visual effects
Adobe describes videos generated with its own Firefly Video model as commercially safe. This statement should not automatically be applied to every partner model available inside Firefly because different models may have separate terms and conditions. [3][4][6]
Firefly’s multi-model approach is useful because beginners can test different video systems without opening a completely separate workspace for each one. However, model selection also makes credit use and available controls more complicated.
Best beginner use: Generating polished B-roll or animating an existing image while controlling the framing, movement, and overall visual style.
Runway — Best for Advanced Creative Control
Runway is better suited to beginners who are ready to move beyond basic one-click generation and learn more detailed creative controls.
Its Gen-4.5 model supports both text-to-video and image-to-video creation. Runway states that the model can follow detailed instructions involving camera movement, scene composition, event timing, and environmental changes. Supported generations currently range from two to ten seconds, with the available aspect ratios depending on the generation method. [9]
Runway is especially suitable for:
• Cinematic experiments
• Detailed camera choreography
• Stylized scenes
• Visual storytelling
• Image animation
• Creative advertising concepts
• Video transformation and editing
Its advantage is control. Users can describe not only what appears but also how the action develops and how the camera behaves.
The disadvantage is that the interface, model choices, credit system, and detailed prompting requirements may feel less comfortable to a complete beginner than Canva.
Best beginner use: Moving to more controlled cinematic generation after learning the basic prompt structure in a simpler platform.
Synthesia — Best for Avatar and Training Videos
Synthesia is designed primarily for videos in which a digital presenter communicates a script.
Users can begin with a prompt, script, document, presentation, web page, or uploaded material. Synthesia can structure the content into scenes, add an AI avatar and voiceover, generate captions, and translate the video into more than 160 languages. Its editor is organized similarly to presentation slides, making it approachable for people who are not experienced video editors. [21]
Synthesia is especially suitable for:
• Training videos
• Educational explanations
• Employee onboarding
• Business presentations
• Product instructions
• Multilingual communication
• Online courses
• Presenter-led marketing
It can also add AI-generated B-roll to presenter-led videos. However, its central strength remains structured communication rather than unrestricted cinematic filmmaking.
Best beginner use: Turning an article, lesson, presentation, or business script into a video delivered by an AI presenter.
InVideo AI — Best for Complete Videos from an Idea or Script
InVideo AI is designed to turn a topic, prompt, or prepared script into a more complete video.
The platform can prepare a script, select or generate visuals, create a voiceover, add subtitles and music, and arrange the material into scenes. Users can also make changes using written editing instructions, such as deleting a scene, changing a voice, or adjusting the introduction. [23]
InVideo AI is especially suitable for:
• Faceless YouTube videos
• Educational explainers
• List videos
• Social media content
• Marketing videos
• Narrated articles
• Script-based presentations
• Videos combining stock and generated media
Its main advantage is automation. Instead of generating each short clip separately, a beginner can request a more complete first draft.
Its main limitation is the need for careful human review. Automatically selected visuals, scripts, factual statements, pronunciation, subtitles, and music may not always match the creator’s intention.
Best beginner use: Turning a finished article outline or script into a narrated first-draft video.
CapCut — Best for Social Media Creation and Editing
CapCut combines generative features with an editing environment widely focused on short-form and social media content.
Its current AI-video workflows can create video from words or images using different video models. The generated material can then be refined with captions, overlays, voiceovers, templates, scene timing, and other editing controls. [24]
CapCut is especially suitable for:
• TikTok videos
• Instagram Reels
• YouTube Shorts
• Product promotions
• Social media advertisements
• Captioned videos
• Fast mobile editing
• Vertical content
Its main advantage is the connection between generation and practical social media editing. Users can create a first draft and immediately improve its pacing, captions, audio, and presentation.
However, available AI models, tools, credits, and features may vary between the web version, desktop application, mobile application, subscription level, and geographic location.
Best beginner use: Creating or importing an AI-generated clip and turning it into a polished vertical social media video.
Which Tool Should a Complete Beginner Try First?
A practical starting order is:
1. Canva for the easiest overall learning experience.
2. Adobe Firefly for standalone cinematic or image-to-video clips.
3. CapCut for social media editing and vertical videos.
4. InVideo AI for complete narrated videos from a topic or script.
5. Synthesia for avatar-led teaching and business presentations.
6. Runway when greater camera, movement, and generation control is needed.
This is not a permanent ranking. Tool capabilities change quickly, and a platform that is best for one project may be unsuitable for another.
For an AI Mastery beginner article or demonstration, Canva is usually the easiest place to begin. Adobe Firefly is a stronger next step when the goal is to generate more cinematic visual scenes. CapCut can then be used when the finished clip requires social media captions, timing adjustments, music, or vertical formatting.
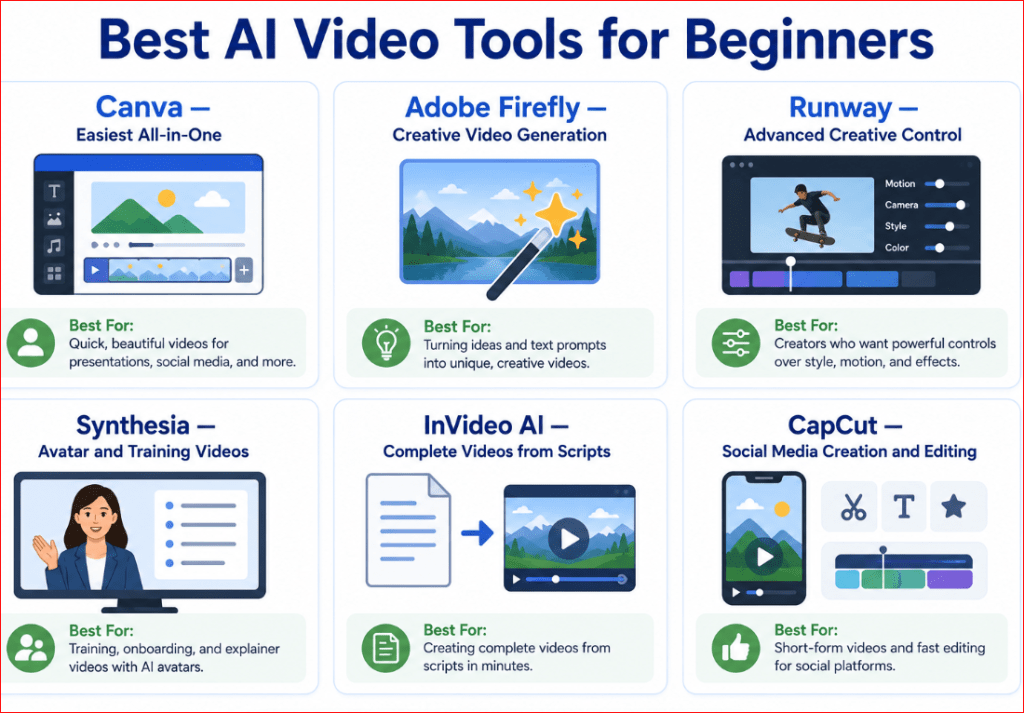
Figure 4. Six beginner-friendly AI video tools matched to their strongest use cases.
Figure 4 helps beginners select a starting tool according to the type of video they want to create. Canva supports simple all-in-one projects, Firefly focuses on creative generation, Runway offers greater control, Synthesia creates presenter-led videos, InVideo AI builds complete videos from scripts, and CapCut specializes in social media production and editing.
Which AI Video Tool Is Best for Your Project?
The best AI video tool depends on the finished result you want—not simply which platform has the longest feature list.
Begin by identifying your main goal:
• A short social media clip
• A cinematic generated scene
• A narrated YouTube video
• A presenter-led lesson
• A product demonstration
• An animated still image
• A complete business or educational video
Once the goal is clear, selecting a suitable tool becomes much easier.
Best for Complete Beginners: Canva
Canva is a practical starting point for beginners who want generation and editing inside one familiar workspace.
Choose Canva when you want to create:
• Short article demonstrations
• Social media posts
• Presentation videos
• Website introductions
• Reels or Shorts
• Simple promotional content
• Videos combining clips, text, graphics, and music
Canva’s Create a Video Clip feature currently generates a 16:9 clip of up to eight seconds from a written prompt, with synchronized audio that may include dialogue, sound effects, and music. The result can then be edited using Canva’s standard design and video tools. [18]
Canva is particularly useful when the generated video is only one part of a larger design. You can place the clip inside a presentation, advertisement, article graphic, or social media layout without moving it to a separate program.
Choose Canva when: ease of use and all-in-one editing matter more than advanced camera controls.
Best for Cinematic Scenes and Website B-Roll: Adobe Firefly
Adobe Firefly is suitable when you want to generate visually polished scenes from text or animate an existing image.
Choose Firefly for:
• Cinematic landscapes
• Website background clips
• Product concepts
• Atmospheric B-roll
• Creative advertisements
• Storyboard scenes
• Image-to-video animation
• Controlled camera movement
Firefly supports text-to-video and image-to-video creation. Supported workflows allow users to describe settings, emotions, camera angles, and camera movement. Adobe also offers its own Firefly Video model and selected partner models within the Firefly workspace. [1]
Adobe states that videos created with the Adobe Firefly Video Model are designed to be safe for commercial use. Do not automatically apply that statement to every partner model available through Firefly; check the conditions associated with the model you select. [1]
Choose Adobe Firefly when: you want creative generation, image animation, camera controls, and several model options.
Best for Greater Camera and Motion Control: Runway
Runway is a stronger choice for users who are ready to learn more detailed prompting and generation controls.
Choose Runway for:
• Cinematic experiments
• Complex camera movement
• Stylized storytelling
• Visual effects
• Image animation
• Creative advertising concepts
• Controlled action sequences
• Video transformation
Runway’s current Gen-4.5 workflow supports text-to-video and image-to-video. Its official prompting resources emphasize descriptions of subject action, camera behaviour, timing, composition, and environmental movement. [9][10]
Runway may take longer to learn than Canva because effective results often depend on more deliberate prompting and careful review.
Choose Runway when: you are comfortable learning additional controls in exchange for greater creative flexibility.
Best for Presenter-Led Education and Training: Synthesia
Synthesia is appropriate when the video’s main purpose is to have a digital presenter explain information.
Choose Synthesia for:
• Beginner lessons
• Employee training
• Online courses
• Business presentations
• Product instructions
• Customer-support videos
• Multilingual communication
• Presenter-led tutorials
Synthesia can generate structured videos containing scenes, voiceover, an AI avatar, and captions. Its current text-to-video offering supports voiceovers in more than 160 languages. [21]
This approach is different from generating a cinematic landscape or fictional scene. The main focus is clear communication by a digital speaker.
Choose Synthesia when: your script and presenter are more important than cinematic visual generation.
Best for Complete Narrated Videos: InVideo AI
InVideo AI is useful when you want the platform to prepare most of the first draft automatically.
Choose InVideo AI for:
• Faceless YouTube videos
• Narrated articles
• Educational explainers
• List videos
• Marketing videos
• Script-based presentations
• Social media stories
• Topic-based videos
A user can provide an idea or script, and InVideo AI can prepare a script, visuals, voiceover, subtitles, music, and transitions. It also supports written editing commands for revising parts of the generated result. [23]
The automation can save considerable time, but every generated element must be checked. Review:
• Factual accuracy
• Script wording
• Chosen visuals
• Pronunciation
• Captions
• Music
• Scene order
• Copyright and permissions
Choose InVideo AI when: you want a complete narrated first draft rather than generating every short clip separately.
Best for Reels, Shorts, and Mobile Editing: CapCut
CapCut is suitable for people creating short-form content that requires captions, music, pacing changes, overlays, and vertical formatting.
Choose CapCut for:
• TikTok videos
• Instagram Reels
• YouTube Shorts
• Mobile advertisements
• Product promotions
• Captioned social media videos
• Vertical video editing
• Fast clip assembly
CapCut provides text-to-video and image-to-video workflows through selected AI models. Generated material can remain inside CapCut for further editing, including captions, pacing changes, effects, and colour adjustments. [24]
Because CapCut features may vary between its web, desktop, and mobile versions, confirm that the required generator and editing options are available on the device you intend to use.
Choose CapCut when: the final video is intended mainly for social media and requires substantial short-form editing.
Best for Animating an Existing Image
For image-to-video projects, start by comparing:
• Adobe Firefly
• Runway
• CapCut
• Canva, when its available workflow supports your required image animation
Adobe Firefly offers dedicated image-to-video generation with motion and camera controls. Runway’s image-to-video prompting focuses on describing the movement that should occur while the uploaded image provides the visual foundation. [2]
Image-to-video is usually preferable when you already have:
• A strong AI-generated image
• A product image
• A character design
• A landscape
• A website illustration
• A clearly composed photograph you are permitted to use
The starting image should already look close to the desired final scene.
Best for Commercial Business Content
For business use, do not select a platform only because it can produce attractive video.
Check:
• Commercial-use permissions
• Model-specific conditions
• Privacy controls
• Watermarks
• Export resolution
• Rights to generated audio
• Rights to uploaded materials
• Whether product details remain accurate
Adobe positions its own Firefly Video Model as commercially safe and explains that the model is trained using licensed and public-domain material. However, partner models offered through the same platform may operate under separate conditions. [3]
Regardless of the platform, you remain responsible for ensuring that:
• Your reference material is permitted
• The video does not misuse brands or protected characters
• Product details are not misleading
• Music and voices are licensed appropriately
• Real people have provided permission
• The finished video follows the publishing platform’s rules
Best for YouTube
The suitable tool depends on the kind of YouTube video.
| YouTube project | Practical starting tool |
| Short cinematic clip | Adobe Firefly or Runway |
| Complete faceless video | InVideo AI |
| Presenter-led lesson | Synthesia |
| YouTube Short | Canva or CapCut |
| Article demonstration | Canva |
| Animated featured image | Adobe Firefly or Runway |
| Final editing and captions | Canva or CapCut |
AI-generated videos may be uploaded to YouTube, but they must follow the platform’s policies. YouTube requires creators to disclose altered or synthetic content when it appears realistic and could be mistaken for a real person, place, scene, or event. [27]
AI generation alone does not guarantee monetization. Videos should include meaningful original work such as:
• Original explanations
• Human review
• Useful editing
• Commentary
• Educational value
• A clear purpose
• Accurate information
Mass-producing highly similar automated videos with minimal changes can create policy and quality problems. [28]
Best Choice by Goal
Use this simplified decision guide:
• Choose Canva for the easiest all-in-one beginner workflow.
• Choose Adobe Firefly for cinematic clips, B-roll, and image animation.
• Choose Runway for greater camera, motion, and creative control.
• Choose Synthesia for avatar-led education, training, and presentations.
• Choose InVideo AI for complete narrated videos from a topic or script.
• Choose CapCut for social media editing, captions, and vertical videos.
Do not pay for all six platforms. Select one tool that matches your immediate project, use its free access or smallest suitable plan, and test it with a simple video first.
Recommended Starting Point for AI Mastery
For the AI Mastery website, the most practical workflow is:
1. Use ChatGPT to plan the video, storyboard, narration, and prompts.
2. Use Canva for the simplest first experiments and article demonstrations.
3. Use Adobe Firefly when a more cinematic generated scene or image-to-video clip is required.
4. Use CapCut or Canva to add captions, music, titles, and final edits.
5. Consider InVideo AI later when converting complete AI Mastery articles into narrated YouTube videos.
6. Consider Synthesia when creating presenter-led lessons.
7. Move to Runway when you need more advanced motion and camera control.
This approach avoids unnecessary subscriptions while providing a clear path from beginner creation to more advanced production.
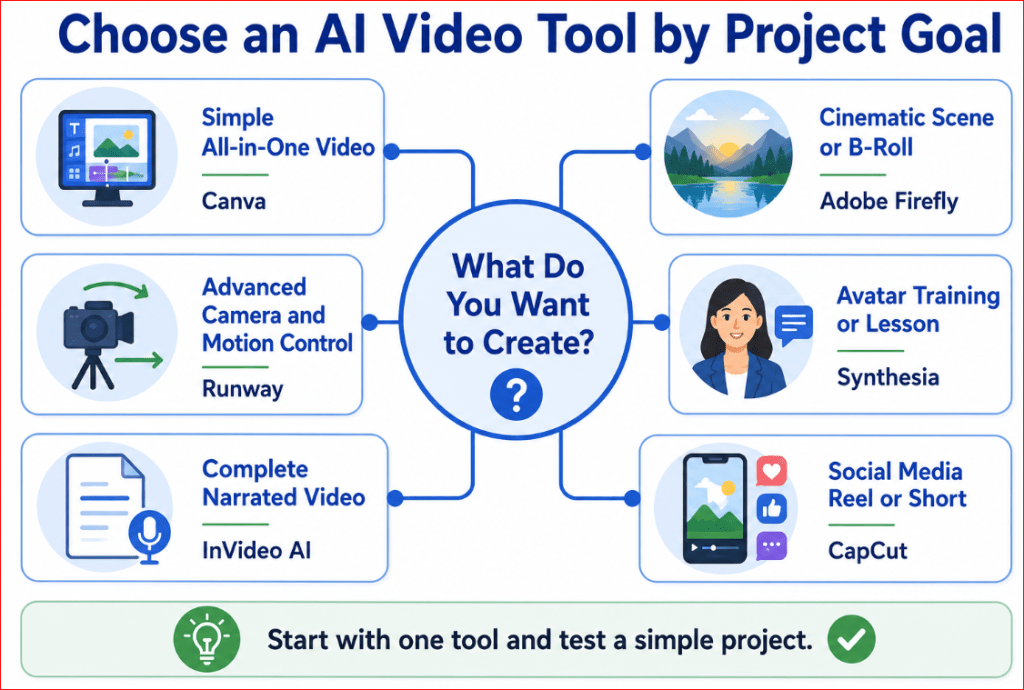
Figure 5. A beginner decision guide for choosing an AI video tool according to the project goal.
Figure 5 connects common video goals with suitable starting tools. It helps beginners choose a platform for simple editing, cinematic generation, presenter-led lessons, complete narrated videos, social media production, or advanced creative control.
Free Plans, Credits, and the Real Cost of AI Video
AI video generation usually costs more than AI image generation because each video contains many frames that must remain visually consistent.
A free plan can help you test a platform, but it may not provide enough generations to complete a finished project. Beginners should understand how subscriptions, credits, generation limits, and failed attempts affect the real cost.
Current Information Note: Prices, credits, free allowances, model access, and promotional offers can change frequently. The information below reflects official provider information available in July 2026. Always check the final checkout page before subscribing.
Free Access Is Mainly for Testing
Free access is most useful for learning how a platform works.
It may allow you to:
• Explore the interface
• Enter a few prompts
• Upload a reference image
• Test one or more models
• Generate short clips
• Examine video quality
• Learn how credits are calculated
• Check whether the workflow feels comfortable
However, free plans may include:
• A small one-time credit allowance
• Daily limits
• Watermarked videos
• Lower resolution
• Limited model selection
• Slower processing
• Restricted download options
• Limited commercial features
Do not assume that a platform described as “free” provides unlimited video creation.
How AI Video Credits Work
Credits are units that a platform deducts when you use an AI feature.
The number of credits required may depend on:
• The selected video model
• Clip duration
• Resolution
• Text-to-video or image-to-video mode
• Whether audio is included
• Number of generated versions
• Processing speed
• Use of partner models
• Upscaling or enhancement
For example, Runway currently charges its Gen-4.5 model at 12 credits for each second of generated video. A five-second generation therefore uses 60 credits, while a ten-second generation uses 120 credits. [11]
This means that the number displayed beside a plan does not directly tell you how many finished videos you can create. You must compare the credits supplied with the cost of the model you intend to use.
One Generation Is Not the Same as One Finished Clip
A beginner may assume that one prompt will produce one usable video. In practice, the first generation may contain:
• Unnatural movement
• Incorrect framing
• Changing objects
• An unstable background
• Distorted hands
• The wrong camera direction
• Poor lighting
• Unwanted text
• Incorrect cropping
A single finished scene may require:
1. An initial test
2. A slower-motion version
3. A corrected-camera version
4. A version with a more stable background
5. A higher-resolution final generation
Therefore, calculate the likely cost of several attempts rather than the cost of one generation.
Current Free and Entry-Level Options
The following summary is intended as a starting guide rather than a permanent price list.
| Tool | Current beginner access | Important limitation |
| Canva | Some AI video features may be available through Canva’s plans and limited AI allowances | Availability and usage limits depend on the account, plan, and region |
| Adobe Firefly | Limited free access to selected standard and premium features | Free access may not be enough for repeated video testing |
| Runway | A one-time free allocation of 125 credits | Credits do not renew, free videos contain a watermark, and only selected models are available |
| Synthesia | A free Basic plan with a monthly usage allowance | Download, avatar, branding, and advanced features differ from paid plans |
| InVideo AI | Free access is available for testing the workflow | Exports and AI-generation capacity may be restricted |
| CapCut | Many basic editing features are free; selected AI operations use credits or require membership | Features and prices may differ by device, platform, region, and account |
Adobe currently offers limited free access to selected standard and premium generative features. Its paid Firefly plans include monthly generative credits for premium video, audio, and partner-model features. [5]
Runway’s Free plan currently includes 125 one-time credits. Those credits do not renew, and generated videos on the Free plan include a Runway watermark. [12]
Synthesia currently offers a free Basic plan with 1,200 monthly credits, described as usable for up to ten minutes of video per month or a limited number of AI-generated video assets. Paid plans provide additional avatars, downloads, branding controls, and other capabilities. [21]
CapCut uses credits for selected AI-powered features. Its official guidance explains that credits and subscriptions serve different purposes: a subscription unlocks eligible tools and benefits, while credits may be consumed when particular AI actions are performed. [25]
Adobe Firefly Credit Example
Adobe’s current individual Firefly plans include:
• Firefly Free: Limited access to selected standard and premium features
• Firefly Standard: 2,000 monthly generative credits
• Firefly Pro: 4,000 monthly generative credits
• Firefly Pro Plus: 10,000 monthly generative credits
• Firefly Premium: 50,000 monthly generative credits
Adobe’s current Firefly plans include 2,000 monthly credits for Standard, 4,000 for Pro, 10,000 for Pro Plus, and 50,000 for Premium. Video credit use depends on the selected model, resolution, duration, and feature, so the number of clips available from a plan can vary. [5]
This example shows why beginners should check the selected model before pressing Generate. A partner model may consume a different number of credits from Adobe’s own video model.
Runway Credit Example
Runway’s current plans include different monthly credit amounts: [11][13]
• Free: 125 one-time credits
• Standard: 625 credits per month
• Pro: 2,250 credits per month
• Max: 9,500 credits per month
Runway’s official pricing page estimates that 625 credits can provide approximately 52 seconds of Gen-4.5 video when all credits are used only with that model. The same credits can produce a different amount when another model is selected. [13]
Standard and Pro monthly credits normally do not roll over. The Max plan allows up to one month of unused credits to roll into the following month, while separately purchased credits do not expire under Runway’s current policy. [11]
Synthesia Usage Example
Synthesia measures usage through a shared credit system covering AI features.
Its current paid individual plans include different video allowances, avatar selections, branding options, and collaboration features. The Starter plan currently provides capacity described as up to 120 minutes of video or AI dubbing per year when billed annually, while the Creator plan provides a larger yearly allowance and additional features. [21]
Because Synthesia is mainly designed for presenter-led content, its minutes should not be compared directly with the short cinematic clips generated by Runway or Firefly. The products perform different jobs.
CapCut Credits and Subscriptions
CapCut’s system can be confusing because a Pro subscription and AI credits are not identical.
A CapCut subscription may provide:
• Premium editing tools
• Templates and media
• Cloud storage
• Higher-quality exports
• Watermark-related benefits
• A monthly AI-credit allowance
Credits may then be deducted when using specific AI operations, such as AI generation, script-to-video, premium voice features, or other advanced processing. [25]
CapCut advises users to check the current subscription page because final prices and available plans can vary by region, platform, account, promotion, and applicable taxes. [25]
Watch for Credits That Expire
Before subscribing, determine whether unused credits:
• Expire at the end of each month
• Roll over into the next billing period
• Remain permanently
• Expire after a stated number of months
• Disappear when the subscription is cancelled
• Are shared with other members of a workspace
Do not purchase a large plan only because it contains many credits. Expiring unused credits provide no value.
Runway currently states that Standard and Pro monthly credits expire on the billing date, whereas separately purchased credits do not expire. [11]
Check Whether Failed Generations Use Credits
A generation may fail because of:
• A server error
• A content-policy restriction
• An unsupported file
• A technical problem
• An interrupted connection
• An unavailable model
Before paying, review the provider’s policy for failed generations.
Check whether:
• Credits are deducted immediately
• Failed generations are automatically refunded
• You must contact support
• Refunds depend on the reason for the failure
• Cancelled generations still consume credits
Keep screenshots or transaction records when a substantial number of credits disappears unexpectedly.
Monthly Versus Annual Billing
Annual plans are often advertised using a lower monthly equivalent. However, the entire annual amount may be charged at once.
Before selecting an annual plan, confirm:
• The total amount charged today
• Whether the displayed price is monthly or annual
• Whether the plan renews automatically
• The cancellation deadline
• The refund policy
• Whether credits are provided monthly or annually
• Whether unused credits expire
• Whether changing plans affects the remaining balance
Do not choose annual billing until you have tested the platform and confirmed that it matches your workflow.
Avoid Buying Several Plans at Once
A beginner does not need subscriptions to every AI video tool.
A sensible approach is:
1. Test the free version of one platform.
2. Create one simple five- to eight-second clip.
3. Review its motion, quality, and prompt accuracy.
4. Test image-to-video when available.
5. Check the export and watermark.
6. Calculate the credits used.
7. Purchase the smallest suitable plan only when needed.
Complete one small project before adding a second subscription.
Calculate the Cost of a Finished Project
Suppose you want to make a 30-second video containing five six-second scenes.
If each scene requires three attempts, the project may involve:
• Five initial generations
• Five corrected generations
• Five final generations
• Fifteen generations in total
The editing stage may also require:
• Upscaling
• Narration
• Music
• Captions
• Additional stock media
• A separate editing application
The true cost includes the complete workflow, not merely the advertised price of one generation.
A Simple Cost-Tracking Method
Create a small table for every project:
| Item | Amount used |
| Number of scenes | 5 |
| Generations attempted | 15 |
| Credits consumed | Record actual total |
| Usable clips produced | 5 |
| Editing cost | Record if applicable |
| Audio or narration cost | Record if applicable |
| Total project cost | Calculate after completion |
This information helps you compare platforms fairly and estimate future expenses.
Best Budget Strategy for a Beginner
Use this practical sequence:
1. Start with free access.
2. Use one simple test prompt.
3. Generate at a lower resolution while experimenting.
4. Correct one problem at a time.
5. Save every usable version.
6. Use higher resolution only for the final clip.
7. Avoid unnecessary variations.
8. Combine short clips in an editor.
9. Track every credit used.
Upgrade only when the free or entry plan prevents you from completing a real project.
For the AI Mastery website, begin with free tests in Canva or Adobe Firefly. Purchase a plan only when you are ready to produce a specific article demonstration, website video, or YouTube project.
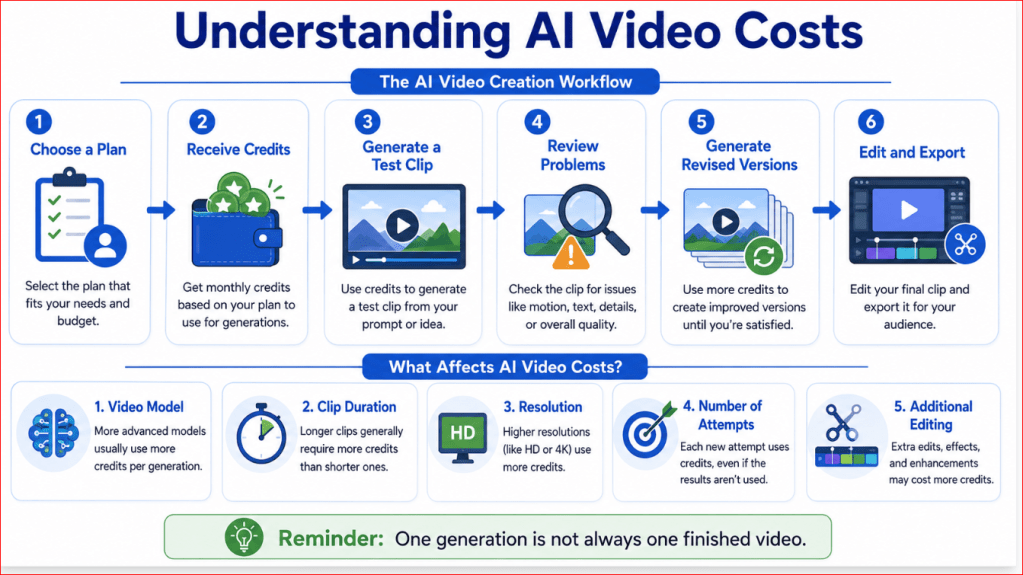
Figure 6. How credits, repeated attempts, resolution, and editing affect the real cost of an AI video.
Figure 6 shows that the advertised cost of one generation is not the complete project cost. Beginners should account for repeated attempts, model selection, clip duration, resolution, audio, editing, and credits that may expire.
Privacy, Copyright, and Commercial-Use Checks
AI video tools may require you to upload photographs, product images, scripts, voices, or existing footage. Before uploading anything, confirm that you have permission to use it and understand how the platform handles your content. This section provides general educational information and is not legal advice.
A visually impressive video is not useful when it creates privacy, copyright, or commercial-use problems.
Protect Personal and Private Information
Do not upload sensitive material simply because the tool allows file uploads.
Avoid uploading:
• Identification documents
• Financial information
• Medical records
• Private family photographs
• Confidential business documents
• Customer or employee information
• Passwords or account details
• Unreleased product information
• Client material without permission
• Images of children without appropriate consent
Even when a provider offers strong privacy controls, the safest practice is to remove unnecessary personal information before uploading a file.
For example, crop out:
• Names
• Addresses
• Email addresses
• Phone numbers
• Account numbers
• Licence plates
• Private computer screens
• Documents visible in the background
Check Whether Uploaded Content May Improve AI Features
Different providers handle user content differently.
Canva states that users can manage whether their content may be used to improve AI-powered features through their privacy settings. Its explanation includes uploaded media and text as user content, so beginners should review those settings before uploading private or business material. [20]
Adobe states that it does not train its Firefly generative models on Creative Cloud subscribers’ personal content. Adobe also states that user content is not used to train generative AI partner models offered through its creative applications. [4][6]
Do not assume that every platform follows the same policy. Read the current privacy and AI-product terms for the specific service you use.
Check Whether Your Generations Are Public
Some services include:
• Public galleries
• Community feeds
• Shared workspaces
• Discover pages
• Reusable community prompts
• Public project links
Before generating private business content, check whether your project is:
• Private by default
• Public by default
• Visible to team members
• Shared when you publish it to a community
• Searchable by other users
• Included in an inspiration gallery
Adobe explains that submitting work to the Firefly community allows the generated image and prompt to appear in community or marketing areas. Submission is separate from ordinary private generation, so do not publish confidential work to a community gallery. [6]
Use Only Material You Have Permission to Upload
You should own the source material or have clear permission to use it.
Suitable material may include:
• Photographs you created
• AI-generated images you are permitted to use
• Licensed stock images
• Original illustrations
• Your own product images
• Videos you recorded
• Music you created or licensed
• Voices used with consent
• Customer material covered by an agreement
Do not upload:
• Copyrighted films
• Television scenes
• Music videos
• Other people’s photographs
• Celebrity images for misleading uses
• Branded advertising material
• Protected characters
• Artwork copied from another creator
• Client files without authorization
Purchasing access to an AI platform does not give you rights to material owned by someone else.
Commercial Use Does Not Mean Unlimited Use
A provider may allow commercial use of generated outputs, but that does not remove your other responsibilities.
You must still check:
• The rights to your uploaded source material
• Whether recognizable people gave permission
• Whether the video contains protected brands
• Whether generated music has separate terms
• Whether partner models have different rules
• Whether the output makes misleading claims
• Whether the publishing platform requires disclosure
• Whether the content violates local laws
Adobe currently states that outputs from commercially released Firefly features may be used in commercial projects. It also states that outputs from Adobe Firefly models are intended to be commercially safe because those models are trained on licensed and public-domain content. [4][6]
However, Adobe separately warns that users are responsible for determining whether outputs from partner models are suitable for their projects. Therefore, always note which model created the video.
Commercial Safety Is Not a Legal Guarantee
Terms such as commercially safe do not guarantee that every generated result is legally risk-free.
AI output may still:
• Resemble existing artwork
• Include an unexpected logo
• Produce a similar character
• Contain inaccurate product details
• Reproduce a protected design
• Generate misleading people or events
• Be similar to another user’s output
Adobe notes that generative outputs may not be unique and that different users may create the same or similar results. [6]
Review every frame before using the video in:
• Paid advertising
• Product packaging
• Client campaigns
• Course materials
• Business websites
• Monetized YouTube videos
• Commercial social media posts
Do Not Assume You Own Every Generated Element
Copyright treatment of AI-generated material differs between countries and may depend on the amount of meaningful human creative contribution. [31]
Your contribution may include:
• Developing the concept
• Writing and revising prompts
• Selecting and arranging scenes
• Editing the footage
• Adding original narration
• Creating music
• Adding graphics
• Controlling pacing
• Combining generated and original material
Keep records of your creative process, especially for important commercial projects.
Save:
• The original idea
• Prompts
• Revised prompts
• Reference images
• Generated versions
• Editing decisions
• Narration scripts
• Music licences
• Dates of generation
• The model and platform used
• Relevant terms checked at the time
Be Careful with Real People
Do not create a realistic video of a real person doing or saying something without permission, particularly when the video could harm, embarrass, impersonate, or mislead viewers.
Avoid creating:
• False endorsements
• Fake interviews
• Fabricated statements
• Political misinformation
• Misleading medical advice
• Fraudulent business announcements
• Sexualized or humiliating portrayals
• Videos intended to damage someone’s reputation
When using an avatar, cloned voice, or likeness, obtain clear consent and explain how the material will be used.
Protect Children
Images and videos involving children require additional care.
Do not upload or generate realistic material involving a child unless:
• You have appropriate permission
• The purpose is legitimate
• The content is safe and respectful
• No private information is visible
• The platform permits the intended use
• The finished content will not expose or embarrass the child
For a public website, consider using a generic illustration or licensed stock image rather than a personal family photograph.
Check Product Accuracy
AI video tools may alter:
• Packaging
• Buttons
• Labels
• Colours
• Product dimensions
• Ingredients
• Logos
• Safety features
• Accessories
Do not use generated footage to demonstrate the exact operation of a product unless every detail is verified.
For commercial advertising, use real footage when accuracy is essential.
A generated product concept should be clearly presented as a concept rather than a faithful demonstration of the real item.
Review Generated Audio Separately
Audio may have separate ownership, consent, and licensing concerns.
Check:
• Who owns the generated voice
• Whether voice cloning is permitted
• Whether the speaker consented
• Whether generated music may be used commercially
• Whether the music resembles a protected song
• Whether the tool places restrictions on downloads
• Whether attribution is required
Do not ask a generator to imitate a specific living singer, actor, public figure, or private person without authorization.
Check Platform Disclosure Rules
Some publishing platforms require creators to disclose realistic altered or synthetic content.
Disclosure may be needed when a video:
• Makes a real person appear to speak
• Alters a real event
• Shows a realistic event that never occurred
• Could be mistaken for genuine footage
• Discusses elections, emergencies, war, health, or finance
• Contains a cloned voice
• Uses a realistic synthetic presenter
The safest practice is to disclose AI use when viewers could reasonably misunderstand the content.
A simple disclosure may say:
This video includes visuals created or modified using artificial intelligence.
Do not use disclosure as an excuse for misleading content. A clearly labelled false claim can still cause harm.
Read the Rules for the Exact Model
A multi-model platform may provide several video models under one subscription.
Before generating, record:
• Platform name
• Model name
• Model version
• Date used
• Commercial-use terms
• Privacy terms
• Credit cost
• Whether the feature is beta
• Whether Content Credentials are added
Adobe attaches Content Credentials to exported content that includes Firefly-generated material, supporting transparency about how the asset was created. [7]
Partner models may follow different training, privacy, and licensing conditions, even when accessed inside the same platform.
A Beginner Safety Checklist
Before uploading or publishing, confirm:
1. I own the source material or have permission to use it.
2. No private information is visible.
3. Real people have consented to the intended use.
4. I checked whether the project is private or public.
5. I reviewed the platform’s current AI and privacy terms.
6. I recorded the platform and model used.
7. I checked the commercial-use conditions.
8. I reviewed every frame for brands, protected material, and inaccuracies.
9. I verified music, narration, and voice rights.
10. I added an AI disclosure when appropriate.
11. I saved the prompts, source files, licences, and final version.
12. I checked the rules of the website or platform where the video will appear.

Figure 7. A beginner checklist for protecting privacy, respecting copyright, and using AI-generated videos commercially.
Figure 7 reminds beginners that responsible AI video creation begins before a file is uploaded and continues after the video is generated. Source permissions, privacy settings, model terms, human consent, audio rights, accuracy checks, disclosure, and record keeping should all be reviewed before publication.
Common Mistakes Beginners Make When Choosing an AI Video Tool
Choosing the wrong tool can waste credits, time, and money. Most problems happen because beginners subscribe before testing whether the platform fits their actual project.
Choosing a Tool Only Because the Demonstration Looks Impressive
Promotional videos usually show a platform’s strongest results. They may not show:
• Failed generations
• Repeated prompt revisions
• Credit usage
• Editing time
• Character inconsistencies
• Watermarks
• Lower-quality free exports
Reality: A beautiful demonstration does not prove that the tool will reliably create your type of video.
How to Avoid This Mistake: Test the platform using your own simple prompt before paying for a plan.
Buying an Annual Plan Before Testing the Tool
Annual plans may appear cheaper when shown as a monthly equivalent. However, the full annual amount may be charged immediately.
A beginner may later discover that:
• The interface is difficult
• The required model is unavailable
• Credits are consumed too quickly
• Videos contain a watermark
• The tool does not support the required format
• The cancellation policy is restrictive
How to Avoid This Mistake: Begin with free access or the smallest monthly plan. Consider annual billing only after completing at least one real project successfully.
Comparing Subscription Prices Instead of Finished-Video Costs
A lower-priced plan is not always cheaper in practice.
One usable scene may require:
1. An initial generation
2. A revised prompt
3. A corrected-motion version
4. A stable-background version
5. A higher-resolution export
Reality: The real cost is the amount spent to produce a usable finished video, not the advertised cost of one generation.
How to Avoid This Mistake: Record how many attempts and credits each finished scene requires.
Choosing the Most Advanced Tool First
Advanced platforms may provide detailed controls for camera movement, keyframes, references, motion strength, model selection, and editing.
These features are valuable, but they can overwhelm a complete beginner.
How to Avoid This Mistake: Start with a simpler tool that allows you to learn prompting, reviewing, and basic editing. Move to an advanced platform when you know which controls you actually need.
Paying for Several Tools at the Same Time
Beginners may subscribe to multiple platforms because each appears to offer something different.
This can lead to:
• Several monthly charges
• Unused credits
• Confusing workflows
• Files spread across many accounts
• Difficulty learning any one platform properly
How to Avoid This Mistake: Choose one main generator and one editor only when needed. Complete a small project before adding another subscription.
Ignoring the Difference Between the Platform and the Model
A platform may offer access to several video models.
Each model may have different:
• Credit costs
• Clip lengths
• Resolutions
• Aspect ratios
• Prompt behaviour
• Commercial-use conditions
• Privacy terms
• Camera controls
Selecting a different model can produce very different results inside the same platform.
How to Avoid This Mistake: Record the platform, model name, model version, settings, and date used for every important clip.
Assuming Every Tool Supports the Same Aspect Ratios
Some tools support landscape, vertical, square, and portrait video. Others offer only selected formats.
Generating in the wrong format and cropping later may remove:
• A person’s head
• Important products
• Captions
• Background details
• On-screen graphics
How to Avoid This Mistake: Choose the publishing platform and aspect ratio before generating the first clip.
Ignoring Watermarks and Export Restrictions
Free plans may allow video generation but restrict professional use through:
• Visible watermarks
• Lower resolution
• Limited downloads
• Restricted file formats
• Missing commercial-use permissions
How to Avoid This Mistake: Generate and download one test clip before starting a full project. Check the exported file—not only the preview shown inside the platform.
Assuming Higher Resolution Means Better Video
A 1080p or 4K export may look sharper, but higher resolution does not automatically correct:
• Distorted movement
• Changing objects
• Incorrect hands
• Unstable backgrounds
• Poor prompt interpretation
• Inaccurate product details
Reality: Resolution affects sharpness, while prompt quality and model performance affect the content.
How to Avoid This Mistake: Test at a lower resolution first. Use higher resolution only after the scene, motion, and composition are correct.
Using Complicated Prompts During the First Test
A long prompt containing several characters, locations, actions, camera movements, and lighting changes may produce a confusing result.
This makes it difficult to determine whether the problem comes from:
• The tool
• The selected model
• The prompt
• The uploaded image
• The settings
How to Avoid This Mistake: Test every platform with one subject, one location, one action, and one camera movement.
Ignoring Image-to-Video Quality
A tool may produce attractive text-to-video clips but perform poorly when animating uploaded images
Image-to-video quality is especially important when creating:
• Product clips
• Character scenes
• Website illustrations
• Animated article images
• Consistent multi-scene videos
How to Avoid This Mistake: Test both text-to-video and image-to-video when you expect to use both methods.
Ignoring Editing Requirements
Generated clips usually need trimming, captions, narration, music, transitions, or colour correction.
A beginner may choose a powerful generator but later discover that it does not provide practical editing tools.
How to Avoid This Mistake: Decide whether you want:
• Generation and editing in one platform
• A separate AI generator and video editor
• A complete automated script-to-video workflow
Include editing time and cost in your decision.
Forgetting About Audio
Some tools generate silent clips. Others create dialogue, sound effects, music, or narration.
Generated audio may contain:
• Incorrect words
• Poor pronunciation
• Unnatural timing
• Excessive volume
• Weak lip synchronization
• Music that does not fit the scene
How to Avoid This Mistake: Listen to the complete clip with headphones. Be prepared to replace or edit the audio separately.
Ignoring Privacy Settings
Uploading a photograph or business file without reviewing privacy settings can expose sensitive material.
A beginner may not notice that:
• A project is public
• A community-sharing option is enabled
• Uploaded material is retained
• Team members can access the file
• Content settings permit broader service use
How to Avoid This Mistake: Review privacy, storage, sharing, and deletion settings before uploading personal or commercial material.
Assuming Commercial Use Is Automatically Permitted
A paid subscription does not automatically guarantee unrestricted commercial use.
Restrictions may depend on:
• The selected plan
• The selected model
• Uploaded source material
• Generated audio
• Real-person consent
• Protected brands
• Publishing-platform rules
How to Avoid This Mistake: Check the current commercial-use terms for both the platform and the exact model used.
Failing to Save Successful Prompts and Settings
A beginner may generate a strong clip but fail to record how it was created.
Later, the result may be difficult to reproduce.
Save:
• The prompt
• The uploaded image
• The platform
• The model
• The resolution
• The aspect ratio
• The duration
• The motion setting
• The generation date
• The final filename
How to Avoid This Mistake: Create one organized project folder and keep a simple generation record.
Expecting a Perfect Result on the First Attempt
AI video generation is normally an improvement process.
A weak first result does not necessarily mean the platform is unsuitable. The prompt or settings may need adjustment.
How to Avoid This Mistake: Identify the largest problem, revise one instruction, and generate another version. Changing everything at once makes it difficult to learn what improved the result.

Figure 8. Common mistakes beginners should avoid when selecting and testing an AI video tool.
Figure 8 highlights the decisions that commonly lead to wasted credits, unsuitable subscriptions, privacy risks, and disappointing results. Testing one simple project, checking the exact model and terms, and recording costs and settings can prevent most of these problems.
Step-by-Step: Test an AI Video Tool Before Paying
A short practical test can reveal more than promotional videos, feature lists, or reviews. Before purchasing a subscription, use the same simple project to test each tool you are considering.
The goal is not to create a perfect video. The goal is to determine whether the platform is easy to use, follows your instructions, produces stable results, and offers reasonable value.
Step 1: Define One Simple Test Scene
Choose a scene containing:
• One main subject
• One location
• One clear action
• One camera movement
• Simple lighting
• No dialogue
• No visible text
For example:
A vintage red bicycle rests beside a wooden fence on a quiet country road at sunrise. Grass moves gently in the breeze while the camera slowly moves toward the bicycle.
Avoid testing a platform with several characters, locations, or complicated actions. A simple scene makes it easier to identify whether a problem comes from the tool or the prompt.
Step 2: Decide Where the Video Will Be Used
Choose the intended publishing platform before generating the clip.
For example:
• YouTube or website: 16:9 landscape
• YouTube Shorts, TikTok, or Instagram Reels: 9:16 vertical
• Square social media post: 1:1
• Portrait feed post: 4:5
This ensures that you test the correct aspect ratio instead of judging a format you will not use.
Step 3: Prepare One Standard Prompt
Use the same prompt when comparing several tools.
For example:
Create a six-second realistic cinematic video of a vintage red bicycle resting beside a wooden fence on a quiet country road at sunrise. Grass moves gently in the breeze while the camera slowly moves toward the bicycle. Use soft golden natural lighting, stable framing, smooth motion, and a peaceful atmosphere. Keep the bicycle, fence, road, and background unchanged. Use 16:9 landscape format. No people, no text, no logos, no camera shake, and no duplicated objects.
Using the same prompt creates a fairer comparison.
Do not rewrite the prompt to favour one platform unless the tool requires a different format.
Step 4: Record the Starting Conditions
Before pressing Generate, record:
• Platform name
• Model name
• Date
• Generation method
• Clip duration
• Resolution
• Aspect ratio
• Motion setting
• Credits available
• Credits required
• Free or paid account
• Estimated processing time, when shown
This information helps you understand why two results may differ.
Step 5: Generate Only One Version First
Do not request several variations immediately.
Generate one clip and watch it from beginning to end.
Check:
• Did the subject appear correctly?
• Did the action follow the prompt?
• Was the camera movement correct?
• Did the background remain stable?
• Did the bicycle retain its shape?
• Did any new objects appear?
• Was the lighting appropriate?
• Was the aspect ratio correct?
• Did the clip contain a watermark?
• Was the video easy to download?
One careful test is more useful than generating several versions without reviewing them.
Step 6: Review the Entire Clip Slowly
Do not judge the video only from the first frame or preview image.
Watch:
• The beginning
• The middle
• The final second
• The clip at normal speed
• The clip frame by frame when possible
Look for:
• Flickering
• Object transformation
• Sudden movement
• Cropping
• Background changes
• Lighting changes
• Extra objects
• Camera shake
• Distorted shapes
• Unwanted text
Many AI-video problems appear near the end of a clip.
Step 7: Identify the Largest Problem
Choose the most important weakness.
For example:
• The camera moves too quickly.
• The bicycle changes shape.
• The background flickers.
• The grass moves unnaturally.
• The scene is too dark.
• The subject is cropped.
• Extra objects appear.
Do not revise every instruction at the same time.
Changing one main detail makes it easier to determine whether the tool responds well to corrections.
Step 8: Revise the Prompt Once
Add a specific correction.
For example:
Keep the bicycle completely unchanged throughout the video. Use a slower camera movement and reduce the grass motion. Keep the fence, road, lighting, and background fixed and stable.
Generate a second version using the revised prompt.
Compare whether the platform:
• Followed the correction
• Improved the main problem
• Introduced new problems
• Used additional credits reasonably
• Preserved the original visual style
A tool that responds well to revisions may be more useful than one that occasionally produces an impressive first result but ignores corrections.
Step 9: Test Image-to-Video
When you expect to animate images, upload a simple high-quality reference image.
Use an image with:
• One main subject
• Clean edges
• Good lighting
• A simple background
• Enough space around the subject
• No important objects cut off
Use a motion prompt such as:
Animate this image into a six-second realistic video. Keep the bicycle, fence, road, lighting, colours, and background unchanged. Add only gentle grass movement and a slow camera push forward. Use smooth natural motion, stable framing, no new objects, no text, no logos, and no sudden changes.
Check whether the platform preserves the original image instead of redesigning it unnecessarily.
Step 10: Test the Editing Workflow
A generated clip will normally require some editing.
Check whether you can easily:
• Trim the beginning and end
• Adjust the clip length
• Add captions
• Add a title
• Add narration
• Add music
• Change the aspect ratio
• Arrange several clips
• Export the finished video
A generator may produce strong footage but still be unsuitable when the editing process is difficult or requires another expensive service.
Step 11: Download a Test Export
Do not judge the platform only from its internal preview.
Download the video and check:
• File format
• Resolution
• Watermark
• Audio quality
• File size
• Playback quality
• Colour changes
• Compatibility with your editor
• Whether the clip plays correctly on your computer
For most beginner projects, an MP4 export is practical and widely supported.
Step 12: Check the Mobile and Desktop Experience
When the platform offers web, desktop, and mobile versions, features may not be identical.
Check whether:
• Your projects appear on every device
• The required AI model is available
• Uploaded images remain accessible
• Editing tools are included
• Exports use the expected quality
• Credits are shared correctly
• The interface remains readable
Use the version you expect to rely on for your actual project.
Step 13: Review Privacy and Sharing Settings
Before uploading personal or commercial files, locate the platform’s privacy controls.
Confirm:
• Whether projects are private
• Whether generations appear in a public gallery
• Whether public sharing is optional
• How uploaded files can be deleted
• Whether project links can be disabled
• Whether team members can see the content
• Whether AI-training preferences can be changed
Do not test privacy-sensitive material. Use a generic image until you understand the platform’s settings.
Step 14: Review the Commercial-Use Terms
For business, monetized, or client work, check:
• Whether commercial use is allowed
• Whether the rule differs by plan
• Whether the selected model has separate terms
• Whether watermarked exports may be used publicly
• Whether generated audio has additional restrictions
• Whether attribution is required
• Whether uploaded source material must belong to you
Save the date on which you checked the terms.
Step 15: Calculate the Cost of One Usable Clip
Record:
• Number of generations
• Credits consumed
• Number of usable results
• Resolution
• Clip duration
• Editing time
• Extra services required
• Watermark-removal requirements
• Subscription cost
For example:
| Test result | Record |
| Generations attempted | 2 |
| Usable clips | 1 |
| Total credits used | Enter actual amount |
| Finished duration | 6 seconds |
| Watermark | Yes or no |
| Separate editor needed | Yes or no |
| Approximate creation time | Enter actual time |
This provides a more realistic measure than comparing subscription prices alone.
Step 16: Score the Tool
Use a score from 1 to 5 for each category.
| Category | Score |
| Ease of use | /5 |
| Prompt accuracy | /5 |
| Motion quality | /5 |
| Background stability | /5 |
| Image-to-video quality | /5 |
| Editing tools | /5 |
| Export quality | /5 |
| Generation speed | /5 |
| Credit value | /5 |
| Privacy controls | /5 |
| Commercial-use clarity | /5 |
| Overall suitability | /5 |
Do not select the platform only because it receives the highest total score. Some categories may matter more for your project.
For example:
• A social media creator may prioritize editing, captions, and vertical formats.
• A business user may prioritize privacy and commercial-use clarity.
• A filmmaker may prioritize camera control and visual quality.
• An educator may prioritize avatars, narration, captions, and language support.
Step 17: Make a Practical Decision
After testing, choose one of these outcomes:
Use the free version:
Suitable for learning and occasional simple projects.
Buy the smallest monthly plan:
Suitable when the free limits prevent completion of a real project.
Continue testing another platform:
Suitable when the tool ignores prompts, consumes credits too quickly, or lacks required features.
Do not use the platform:
Suitable when privacy, commercial-use terms, watermarks, exports, or costs are unacceptable.
Avoid subscribing simply because you have already spent time testing the tool. A failed test can save you from a poor long-term purchase.
Recommended Test for AI Mastery
For the AI Mastery website, use this sequence:
1. Create one six-second 16:9 video.
2. Use a simple educational or technology-related scene.
3. Test one text-to-video generation.
4. Test one image-to-video generation.
5. Review prompt accuracy and stability.
6. Download the final clip.
7. Check whether it works in Canva, CapCut, or your preferred editor.
8. Record the credits used.
9. Confirm commercial-use conditions.
10. Purchase a plan only when a specific article or YouTube project requires it.
This controlled test prevents unnecessary subscriptions and creates a repeatable evaluation process for future AI tools.
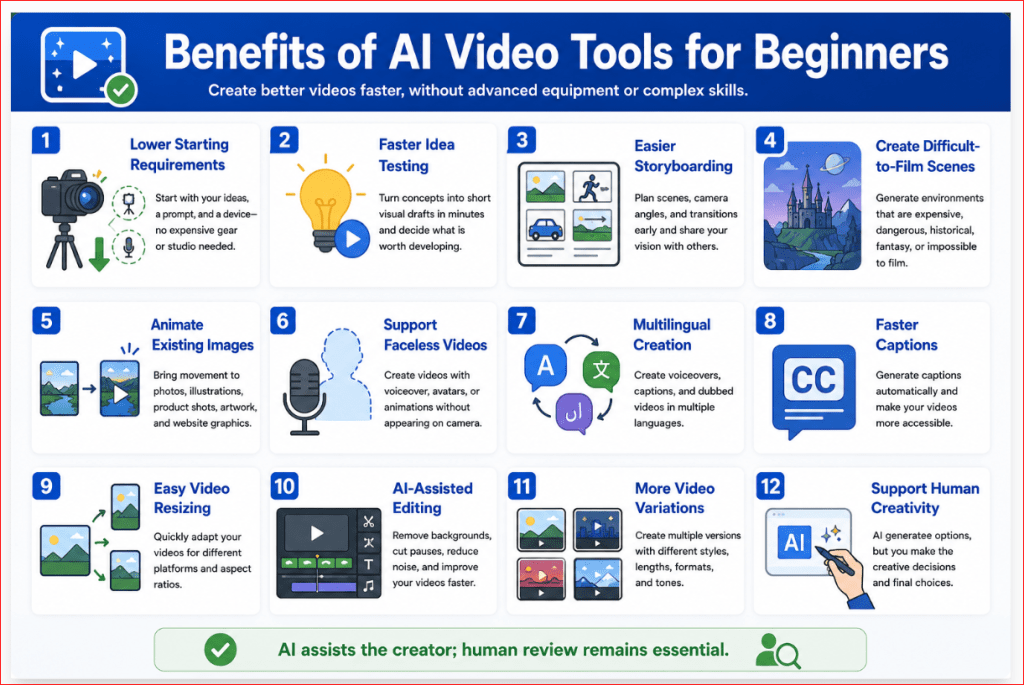
Figure 9. A step-by-step process for testing an AI video tool before purchasing a subscription.
Figure 9 shows how beginners can evaluate an AI video platform using one simple prompt, two controlled generations, an image-to-video test, an export check, and a cost review. This process helps users compare practical results instead of relying on promotional demonstrations.
Benefits of Using AI Video Tools for Beginners
AI video tools do not remove the need for planning, creativity, or editing. However, they can make video production more accessible to people who do not own professional equipment or have advanced editing experience.
The greatest benefit is not simply speed. It is the ability to test ideas, create visual drafts, and improve videos without beginning every project with filming.
Lower Starting Requirements
Traditional video production may require:
• A camera
• Lighting equipment
• Microphones
• Actors or presenters
• Filming locations
• Video-editing software
• Technical production skills
• Considerable preparation time
AI video tools can reduce some of these requirements.
A beginner may start with:
• A written idea
• A prompt
• A reference image
• A script
• A computer or mobile device
• Internet access
• A suitable AI video platform
This makes it possible to experiment with video before investing in expensive equipment.
Faster Idea Testing
A written concept can be turned into a short visual draft within minutes.
For example, a small-business owner could test:
• A product-advertisement idea
• A website background
• A social media scene
• A course introduction
• A promotional concept
• A story opening
• A presentation sequence
The first version does not need to be published. It can act as a visual prototype that helps the creator decide whether the idea is worth developing further.
Easier Storyboarding
A storyboard shows what happens in each scene before the full video is produced.
AI tools can help create:
• Opening scenes
• Camera-angle examples
• Character references
• Product concepts
• Location ideas
• Lighting tests
• Scene transitions
• Final-shot options
This is useful even when the finished project will eventually use real filming.
A generated storyboard can help a creator explain the intended video to:
• A client
• A designer
• A video editor
• A teacher
• A business partner
• A production team
Access to Scenes That Are Difficult to Film
Some scenes may be expensive, dangerous, impossible, or impractical to record.
Examples include:
• Futuristic cities
• Historical environments
• Space scenes
• Fantasy landscapes
• Extreme weather
• Underwater environments
• Large-scale transformations
• Abstract educational concepts
• Imaginary products
• Animated data visualizations
AI can create a visual concept without requiring a physical location or complex production setup.
However, generated scenes should not be presented as genuine footage when viewers could be misled.
Faster Creation of Short Clips
Short clips are useful for:
• Website headers
• Social media posts
• Article demonstrations
• Presentation backgrounds
• YouTube introductions
• Advertising concepts
• Online lessons
• Product ideas
A beginner can create several short clips and combine them in an editor rather than filming an entire video from beginning to end.
This scene-by-scene method also makes weak sections easier to replace.
Easier Image Animation
Image-to-video tools can bring movement to:
• AI-generated images
• Illustrations
• Landscapes
• Product photographs
• Character designs
• Artwork you are permitted to use
• Website graphics
• Educational diagrams
For example, a still image of a forest could be animated with:
• Gentle leaf movement
• Drifting mist
• Moving clouds
• Flowing water
• A slow camera push forward
This can make an existing image more engaging without redesigning the entire scene.
Support for People Who Are Not Comfortable on Camera
Some people have useful knowledge to share but do not want to appear in a video.
AI tools can support:
• Narrated screen presentations
• Faceless educational videos
• Avatar-led lessons
• Animated explainers
• Text-based video stories
• Product demonstrations
• Voice-over presentations
The creator can focus on the script and information rather than personal on-camera performance.
Multilingual Video Creation
Some AI video platforms support:
• Multiple languages
• Translated scripts
• AI narration
• Captions
• Dubbing
• Avatar speech
• Subtitle generation
This can help creators communicate with audiences who speak different languages.
However, every translation and pronunciation should be reviewed by someone who understands the language. Automated translation may produce incorrect wording, unsuitable tone, or mispronounced names.
Easier Caption Creation
Captions improve accessibility and help viewers who:
• Watch videos without sound
• Have hearing difficulties
• Speak a different first language
• Are in a noisy environment
• Need extra support understanding narration
AI-assisted editors may generate captions automatically.
The creator should still check:
• Spelling
• Punctuation
• Timing
• Speaker names
• Technical terms
• Line length
• Placement on the screen
Automatic captions are a starting point, not a final quality guarantee.
Faster Video Resizing
A single video may need several formats:
• 16:9 for YouTube and websites
• 9:16 for Shorts, Reels, and TikTok
• 1:1 for square social media posts
• 4:5 for portrait feed posts
AI-assisted editing tools can help resize or reframe a video.
Some tools attempt to keep the main subject visible automatically. Nevertheless, every resized version should be checked because important people, products, captions, or background details may be cropped.
Easier Removal of Unwanted Material
AI-assisted editing may help:
• Remove backgrounds
• Remove pauses
• Reduce noise
• Delete unwanted objects
• Replace selected areas
• Improve framing
• Extend backgrounds
• Separate a subject from the scene
These features can reduce manual editing time.
They may also introduce errors, so review the edited area frame by frame before publishing.
Faster Creation of Video Variations
A creator may need several versions of the same idea.
For example:
• A calm version
• An energetic version
• A landscape version
• A vertical version
• A version with narration
• A silent version
• A business version
• A social media version
AI tools can make these variations easier to prepare.
Do not generate variations without a reason. Every extra version may consume credits and increase review time.
Useful Support for Small Businesses
Small businesses may use AI video tools for:
• Website introductions
• Product concepts
• Social media promotions
• Educational demonstrations
• Presentation backgrounds
• Event announcements
• Customer instructions
• Early advertising drafts
AI can help produce a first version before the business invests in professional filming.
For important product claims, customer testimonials, safety instructions, or exact demonstrations, real footage may still be the better choice.
Support for Teachers and Course Creators
Educators may use AI video tools to create:
• Lesson introductions
• Topic summaries
• Visual examples
• Animated explanations
• Presenter-led training
• Course announcements
• Scenario demonstrations
• Background visuals
A visual explanation can help make an unfamiliar topic easier to understand.
The educational content must still be checked for accuracy. A polished video can communicate incorrect information just as effectively as correct information.
Helpful for Creators with Limited Editing Experience
Some platforms combine generation with:
• Templates
• Captions
• Music
• Narration
• Transitions
• Stock media
• Simple timelines
• Automatic resizing
This can reduce the number of separate applications a beginner must learn.
A simple all-in-one platform may be more practical than an advanced generator that requires several additional services.
Encourages Experimentation
AI video tools make it easier to test creative choices such as:
• Lighting
• Camera angles
• Colour palettes
• Visual styles
• Subject movement
• Scene duration
• Narration tone
• Background design
Experimentation helps beginners understand what makes a video clear, stable, and engaging.
Keep successful prompts and settings so that useful experiments can be repeated.
Supports Human Creativity Rather Than Replacing It
The tool generates material, but the creator still decides:
• The purpose
• The audience
• The message
• The script
• The scene order
• The visual direction
• Which results to keep
• What needs correction
• How the final video is edited
• Whether the video is appropriate to publish
The strongest results usually combine AI assistance with human judgment.
A Practical View of the Benefits
AI video tools are most useful when they help you:
• Test an idea quickly
• Reduce unnecessary filming
• Create visual prototypes
• Animate existing images
• Prepare short supporting clips
• Improve accessibility
• Produce several formats
• Organize a scene-by-scene workflow
They are less suitable when a project requires:
• Exact evidence
• Genuine testimony
• Precise product operation
• Authentic documentary footage
• Guaranteed factual accuracy
• A real person’s verified actions or statements
Use AI when flexibility and creative experimentation are valuable.
Use real filming when authenticity and exact accuracy are essential.
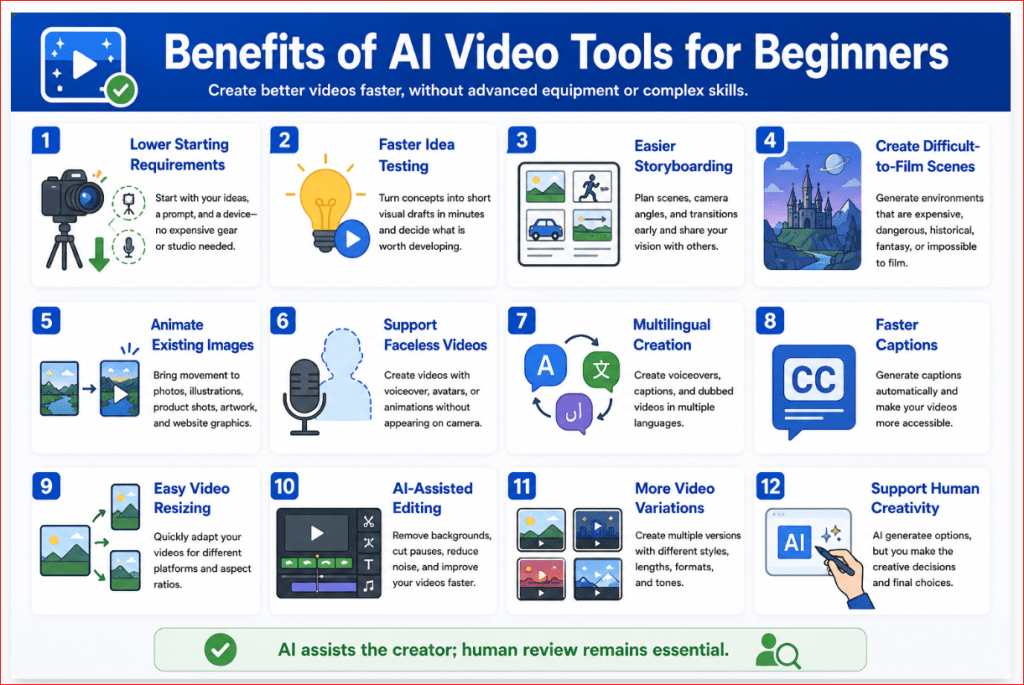
Figure 10. The main benefits AI video tools can provide to beginners, educators, creators, and small businesses.
Figure 10 summarizes how AI video tools can lower starting requirements, speed up idea testing, animate images, support multilingual and accessible content, simplify editing, and help users create visual prototypes. These benefits are strongest when AI supports human planning and review rather than replacing them.
Limitations of AI Video Tools for Beginners
AI video tools can produce impressive results, but they are not automatic replacements for filming, editing, or human judgment.
Beginners should understand the limitations before using generated video for education, advertising, websites, YouTube, or business projects.
Results May Change Between Generations
Entering the same prompt more than once may produce different:
• Subjects
• Backgrounds
• Camera angles
• Lighting
• Colours
• Movements
• Compositions
This variation can be useful when exploring ideas, but it makes exact reproduction difficult.
Even when a platform provides a seed or similar control, changing the prompt, reference image, or settings may affect the result. Adobe explains that a seed can help produce a similar asset, but changes to generation properties can still alter the output.
How to Reduce This Limitation: Save the prompt, seed, model, settings, reference image, date, and best generated version.
Characters May Look Different Between Scenes
A character’s:
• Face
• Hair
• Clothing
• Age
• Body shape
• Skin tone
• Accessories
may change between separately generated clips.
Using several permitted reference images from different angles can reduce, but not eliminate, identity changes across separate generations. [9]
How to Reduce This Limitation: Create several clear reference images of the character from different angles. Repeat the same character description in every scene prompt.
Generated Clips Are Often Short
Many generative-video workflows create short segments rather than a complete long-form video.
A practical way to create a longer video is to generate shorter clips and combine them through video editing. [15]
How to Reduce This Limitation: Divide the complete video into short scenes. Generate and review each scene separately, then arrange the clips in an editor.
Longer Stories Require Additional Planning
A complete story may involve:
• Several characters
• Multiple locations
• Dialogue
• Scene changes
• Cause-and-effect events
• Consistent clothing and products
• Matching lighting
• Continuous narration
The AI may not remember all these details automatically across separate generations.
How to Reduce This Limitation: Create a storyboard, scene list, character sheet, environment sheet, and consistency checklist before generating clips.
Text-to-Video May Provide Less Consistency
Text-to-video gives the model considerable freedom to design the scene. This is useful for B-roll, backgrounds, and creative exploration, but it may be less suitable when exact character or scene consistency is important.
Text-to-video gives the model more freedom to invent the scene, so it may be less suitable when precise character or scene consistency is essential. [9][10]
How to Reduce This Limitation: Use image-to-video or reference-based workflows when the person, product, setting, or composition must remain recognizable.
Image Cropping May Change the Composition
An uploaded reference image may be cropped to match the dimensions required by the selected model.
When an uploaded image does not match the selected video format, cropping may remove material near the edges. [2]
Important details may disappear, including:
• A person’s head
• A product
• Text
• Background objects
• Space intended for captions
• Parts of a logo or design
How to Reduce This Limitation: Prepare the image in the required aspect ratio before uploading it. Leave enough space around the main subject.
Hands, Faces, and Complex Actions May Be Unstable
AI-generated people may show:
• Unnatural fingers
• Changing facial details
• Stiff expressions
• Incorrect body movement
• Objects passing through hands
• Inconsistent walking or running
• Poor interaction between characters
Actions involving writing, eating, handling small objects, or several people interacting can be especially difficult.
How to Reduce This Limitation: Use simple, slow movements. Avoid unnecessary close-ups of complicated hand actions, and inspect the entire clip carefully.
Products May Change Shape or Details
Generated product footage may alter:
• Size
• Shape
• Colour
• Packaging
• Buttons
• Materials
• Labels
• Accessories
• Safety features
A visually attractive clip may therefore be unsuitable for an accurate advertisement or product demonstration.
How to Reduce This Limitation: Use real product footage when exact accuracy matters. AI-generated product video is better suited to early concepts, mood boards, and visual prototypes.
Visible Text May Be Incorrect
Signs, labels, screens, packages, and clothing may contain:
• Misspelled words
• Random symbols
• Distorted letters
• Changing text
• Unreadable sentences
Some platforms provide text-generation controls, but the result must still be checked. Adobe currently allows quoted text instructions in supported Generate Video workflows, but this does not remove the need for manual verification. [1]
How to Reduce This Limitation: Generate the scene without important visible text. Add accurate titles, captions, product labels, and calls to action later in a video editor.
Generated Audio May Need Replacement
AI-generated audio may contain:
• Incorrect pronunciation
• Unnatural pacing
• Weak emotion
• Poor lip synchronization
• Music that does not match the scene
• Sudden volume changes
• Repetitive sound effects
• Incorrect spoken words
How to Reduce This Limitation: Review narration, dialogue, music, and sound effects separately. Replace weak audio and balance all sound levels during editing.
Availability May Differ by Device, Browser, Account, or Region
A feature shown in a tutorial may not be available in every account.
Adobe states that video-generation availability can vary according to geographic location, user type, plan, and regulatory requirements. Its video workflows also have specific browser and operating-system requirements. [3]
Adobe’s Firefly video editor currently has additional compatibility and import limitations, including browser support and limits on file size, duration, and resolution. [8]
How to Reduce This Limitation: Confirm the feature on the exact device, browser, account, and plan you intend to use before paying.
Editing Tools May Have Technical Limits
A built-in editor may not support every file or workflow.
For example, Adobe currently states that animated GIF and WebP files may display only their first frame when added to the Firefly video-editor timeline. It also lists limits for imported file size, duration, and resolution. [8]
How to Reduce This Limitation: Download a test export and open it in your preferred editor before beginning a large project. Keep a separate local copy of every important file.
Credits Can Be Consumed Quickly
Video generation commonly requires several attempts because the first result may contain movement, framing, consistency, or cropping problems.
A project containing several scenes may therefore use substantially more credits than expected.
How to Reduce This Limitation: Generate one version at a time, review it carefully, and identify the main problem before generating again.
Built-In Avatars May Have Usage Restrictions
Avatar platforms may restrict how stock presenters can be used.
Synthesia currently limits stock-avatar use to approved general and brand-safe content. Certain endorsements, sensitive topics, opinions, and representations of specific organizations may require a personal or studio avatar instead. [22]
How to Reduce This Limitation: Review the avatar-use and content-moderation rules before writing the final script.
Commercial Use Still Requires Human Review
Commercial-use permission does not guarantee that every generated clip is:
• Accurate
• Original
• Free of protected material
• Suitable for advertising
• Properly licensed
• Safe from misleading claims
A generated scene may unintentionally contain a recognizable brand, inaccurate product feature, or visual resemblance to protected content.
How to Reduce This Limitation: Review every frame, verify the source material, confirm the selected model’s terms, and keep records of your creative process.
AI Cannot Decide Whether the Video Is Appropriate
AI cannot reliably determine whether every generated scene is:
• Fair
• Accurate
• Respectful
• Ethical
• Suitable for children
• Appropriate for the audience
• Compliant with current platform rules
• Potentially misleading
The creator remains responsible for the final decision to publish.
How to Reduce This Limitation: Conduct a complete human review of the visuals, narration, captions, music, permissions, disclosures, and factual claims.
When AI Video May Not Be the Right Choice
Use real filming instead when the project requires:
• Genuine customer testimony
• Documentary evidence
• Exact product operation
• A real event
• Safety instructions
• Medical or legal demonstrations
• Verified actions by a real person
• Precise proof of results
AI video is strongest for creative concepts, visual explanations, B-roll, prototypes, animation, and scenes that are clearly presented as generated or illustrative.
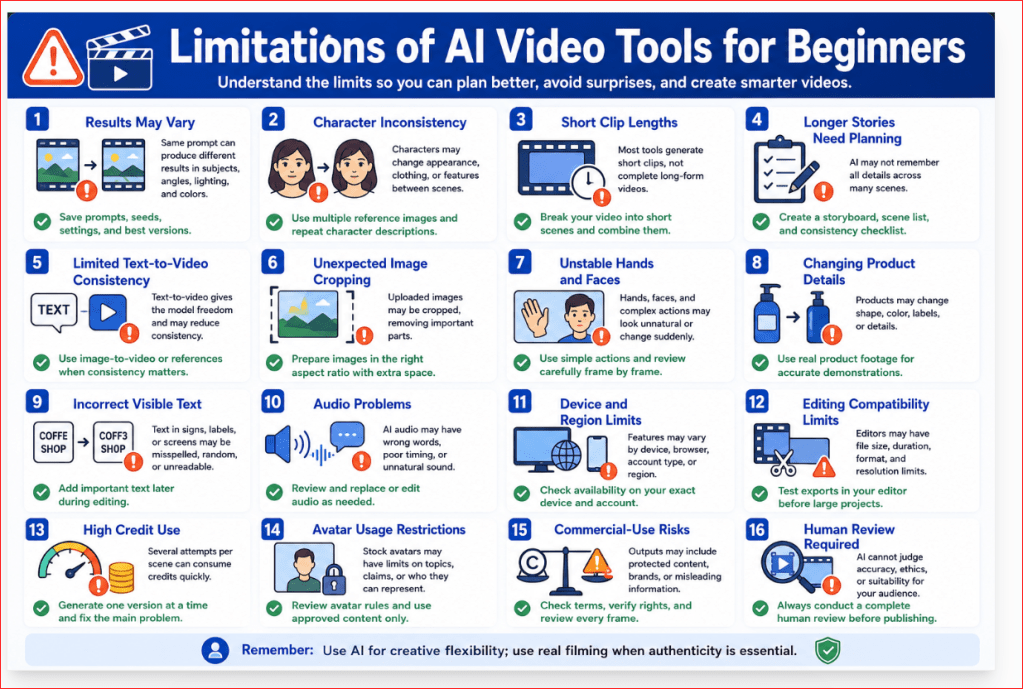
Figure 11. The main limitations beginners should consider before choosing and using an AI video tool.
Figure 11 shows that AI video tools may produce short clips, inconsistent characters, unstable movement, inaccurate text, altered products, unexpected cropping, and additional editing costs. Understanding these limitations helps beginners choose realistic projects and avoid using generated video when exact authenticity is required.
Common Myths About AI Video Tools
AI video tools are often promoted as effortless, automatic, and capable of replacing traditional video production. These claims can create unrealistic expectations for beginners.
Understanding the difference between marketing promises and practical results helps you choose tools more carefully and avoid wasting credits.
Myth 1: AI Creates a Perfect Video from One Prompt
Reality: The first generation may contain unstable movement, incorrect framing, changing objects, distorted hands, or an unsuitable visual style.
A usable result may require:
• Revising the prompt
• Reducing movement
• Changing the reference image
• Selecting another model
• Regenerating the scene
• Editing the final clip
Treat the first result as a draft rather than a finished video.
Myth 2: The Most Expensive Tool Produces the Best Results
Reality: A higher-priced plan may provide more credits, models, storage, or advanced controls, but it does not guarantee better results for your project.
A simpler platform may be more useful when you need:
• Easy editing
• Captions
• Templates
• Social media formats
• Quick exports
• A straightforward interface
The best tool is the one that reliably performs the task you need.
Myth 3: Longer Prompts Always Produce Better Videos
Reality: A longer prompt may confuse the model when it contains too many subjects, actions, locations, lighting styles, or camera movements.
A strong prompt should be detailed but focused.
Begin with:
• One main subject
• One setting
• One action
• One camera movement
• One lighting style
• One visual mood
Add more information only when it improves the result.
Myth 4: AI Video Requires No Editing
Reality: Generated clips commonly need trimming, captions, sound adjustments, titles, transitions, colour correction, or scene arrangement.
Editing is especially important when combining several generated clips into one complete video.
AI creates the raw visual material. Editing turns that material into a finished project.
Myth 5: High Resolution Fixes Generation Problems
Reality: Higher resolution improves sharpness but does not correct:
• Unnatural movement
• Incorrect hands
• Changing faces
• Unstable backgrounds
• Poor composition
• Incorrect product details
• Weak prompt interpretation
Correct the content first. Upscale or regenerate at a higher resolution only after the scene is satisfactory.
Myth 6: ChatGPT Generates Every AI Video Directly
Reality: ChatGPT can help plan the idea, write prompts, prepare storyboards, create narration, and improve weak instructions.
The moving video is normally generated by a dedicated AI video model or platform.
This distinction is important because the video generator—not ChatGPT alone—determines:
• Available clip lengths
• Resolution
• Aspect ratios
• Motion quality
• Credit use
• Export conditions
• Commercial-use terms
Myth 7: Text-to-Video Is Always Better Than Image-to-Video
Reality: The better method depends on the project.
Use text-to-video when:
• You want the AI to design the entire scene
• Exact character consistency is not essential
• You need creative exploration
• You are generating backgrounds or B-roll
Use image-to-video when:
• You already have a strong starting image
• The subject should remain recognizable
• Composition matters
• You want greater control over the first frame
• Several scenes should share a similar visual style
Neither method is automatically superior.
Myth 8: More Motion Makes the Video More Impressive
Reality: Excessive motion can cause:
• Camera shake
• Distorted bodies
• Changing backgrounds
• Altered products
• Unnatural speed
• Unwanted object movement
Slow, controlled movement often looks more professional than dramatic movement.
For beginners, one clear subject action and one camera movement are usually sufficient.
Myth 9: AI-Generated Text Will Be Correct
Reality: Text displayed on signs, packages, screens, clothing, or buildings may be misspelled or distorted.
Even when a tool supports text instructions, every word must be checked.
For important text:
1. Generate the visual scene without the wording.
2. Add the correct title, caption, label, or call to action during editing.
Myth 10: A Paid Plan Automatically Gives Full Commercial Rights
Reality: Commercial-use conditions may depend on:
• The platform
• Subscription level
• Selected model
• Uploaded source material
• Generated voice or music
• Use of real people
• Protected brands or characters
• The publishing platform
Paying for access does not provide rights to copyrighted material uploaded without permission.
Always review the current terms for the exact model and account used.
Myth 11: AI Videos Are Automatically Original
Reality: Different users may generate similar scenes, compositions, characters, or visual styles.
The output may also unintentionally resemble:
• Existing artwork
• Commercial designs
• Recognizable brands
• Protected characters
• Another generated result
Human editing, original narration, scene arrangement, and meaningful creative decisions can make the final project more distinctive.
Myth 12: AI Video Can Replace All Real Filming
Reality: AI video can replace or support some creative scenes, prototypes, backgrounds, animations, and visual concepts.
Real filming remains more appropriate when the project requires:
• Genuine testimony
• Documentary evidence
• Accurate product operation
• A real event
• Verified actions
• Safety instructions
• Exact demonstrations
• Authentic human emotion
Use AI when creative flexibility is valuable. Use real footage when authenticity is essential.
Myth 13: One Reference Image Guarantees Character Consistency
Reality: A single image may not show enough information about the person or character.
The model may change:
• Facial features
• Hairstyle
• Clothing
• Body shape
• Age
• Accessories
For stronger consistency, use several permitted reference images showing different angles and repeat the same character description in every scene prompt.
Myth 14: Free AI Video Tools Are Completely Free
Reality: Free access may include:
• Limited credits
• Watermarks
• Lower resolution
• Slower processing
• Restricted models
• Fewer exports
• Limited commercial features
Free access is usually best for testing rather than producing a complete multi-scene project.
Myth 15: AI Automatically Understands the Creator’s Intention
Reality: The model only receives the prompt, uploaded files, and selected settings.
It does not automatically know:
• Your audience
• Your business goal
• Which details are essential
• Which objects must remain unchanged
• What should not appear
• Where the video will be published
Clear instructions remain necessary.
Myth 16: Human Creativity Is No Longer Needed
Reality: AI can generate options, but the creator still decides:
• What the video should communicate
• Which scenes are appropriate
• Which results should be kept
• What needs correction
• How clips should be arranged
• Whether the information is accurate
• Whether the video should be published
AI can accelerate production, but it cannot replace responsible creative judgment.
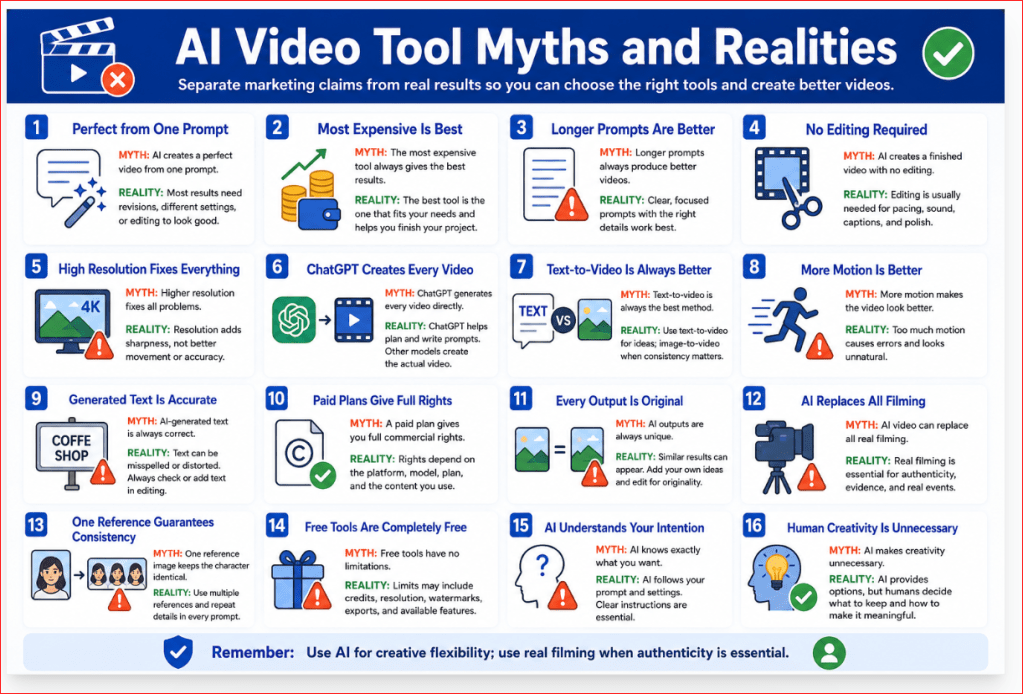
Figure 12. Common myths and realities about choosing and using AI video tools.
Figure 12 corrects common misunderstandings about AI video tools. It reminds beginners that useful results still require focused prompts, controlled movement, editing, appropriate rights, realistic expectations, and human creative judgment.
Frequently Asked Questions About AI Video Tools
What Is the Best AI Video Tool for a Complete Beginner?
For a complete beginner, Canva is usually the easiest starting point because it combines AI video features with templates, captions, graphics, music, resizing, and basic editing in one workspace. Adobe Firefly is a practical next step for users who want stronger text-to-video, image-to-video, and camera controls.
The best choice still depends on the project:
• Canva for simple all-in-one creation
• Adobe Firefly for cinematic clips and image animation
• CapCut for social media editing
• Synthesia for avatar-led lessons
• InVideo AI for complete narrated drafts
• Runway for greater motion and camera control
Start with one tool and complete a small test before subscribing.
Can I Create AI Videos for Free?
Yes, some platforms provide limited free access. Free plans are mainly suitable for testing the interface, prompt accuracy, motion quality, and export process.
Free access may include:
• Limited credits or generations
• Short clips
• Lower resolution
• Restricted models
• Watermarked exports
• Slower processing
• Limited editing or download options
Adobe Firefly offers limited free video generation, while Runway’s plans use model-based credits. Synthesia also provides entry access with usage limits. Current allowances can change, so check the provider’s official plan page before starting a project.
Do I Need More Than One AI Video Tool?
Not at the beginning.
One platform may be enough when it combines generation and editing. For example, Canva and Adobe Firefly provide generation alongside broader editing workflows.
A separate editor becomes useful when the generator does not provide the captions, audio, transitions, resizing, or scene-arrangement controls you need.
A practical beginner setup is:
1. One AI video generator
2. One video editor, only when necessary
3. ChatGPT for planning, scripts, storyboards, and prompts
Avoid paying for several subscriptions until one project clearly requires them.
Can ChatGPT Generate the Finished Video Directly?
For this workflow, use ChatGPT to develop the idea, write the prompt, prepare the storyboard, draft narration, and improve weak instructions. Create the moving clip with a currently available dedicated video platform.
OpenAI discontinued the Sora web and app experiences on April 26, 2026. The Sora API is scheduled for discontinuation on September 24, 2026. [26]
Because AI products change, always check the tools currently available through your account instead of relying on an older tutorial.
Should I Use Text-to-Video or Image-to-Video?
Use text-to-video when you want the AI to design the complete scene from a written description.
Use image-to-video when:
• You already have a suitable image
• The subject should remain recognizable
• The composition is important
• You need greater control over the opening frame
• Several clips should share a similar style
Adobe Firefly and Runway currently support both text-to-video and image-to-video workflows.
For beginners, image-to-video may provide a more controlled starting point because the uploaded image establishes the subject, colours, composition, and background.
How Long Should My First AI-Generated Clip Be?
Begin with approximately five to eight seconds and one simple action.
Short clips are generally easier to review and correct. They also reduce the risk of characters, products, or backgrounds changing as the scene continues.
Current tools vary by model. Runway Gen-4.5 supports different generation durations and charges credits according to the number of seconds generated. Adobe Firefly workflows also commonly focus on short generated clips.
Create longer videos by combining several short scenes in an editor.
How Many Attempts Will I Need?
There is no fixed number.
A simple scene may produce a usable result after one or two attempts. A scene involving people, hands, products, dialogue, or complex movement may require several revisions.
Use this improvement process:
1. Generate one version.
2. Watch the entire clip.
3. Identify the largest problem.
4. Change one instruction.
5. Generate again.
6. Compare the results.
Changing one instruction at a time makes it easier to understand what improved the video.
Will a Higher Resolution Produce a Better Video?
Higher resolution makes the image sharper, but it does not automatically correct:
• Unnatural movement
• Changing faces
• Distorted hands
• Unstable backgrounds
• Incorrect products
• Weak prompt interpretation
• Poor composition
Test the scene at a lower or standard resolution first. Use a higher-resolution generation or upscale only after the subject, motion, camera, and composition are satisfactory.
Available resolutions and credit costs vary according to the platform and selected model.
Can I Use AI-Generated Videos on WordPress?
Yes. You can upload an exported video to WordPress or embed it from a supported video-hosting service.
Before uploading:
• Export the video in a common format such as MP4
• Compress the file for web use
• Confirm that you have the necessary rights
• Add a descriptive title
• Include captions when narration is important
• Check playback on desktop and mobile
• Avoid excessively large files that slow the page
For a long or high-resolution video, hosting it on a dedicated video platform and embedding it may reduce the load placed on the WordPress website.
Can I Use AI-Generated Videos on YouTube?
Yes, provided the video follows YouTube’s policies and you have the necessary rights to its visuals, music, narration, voices, and source material.
YouTube requires disclosure when content is meaningfully altered or synthetically generated and appears realistic—for example, when it makes a real person appear to do something they did not do or depicts a realistic event that never occurred. The disclosure setting is available during the YouTube Studio upload process. [27]
For monetization, videos should be original and non-repetitious. AI generation does not remove the need for meaningful narration, editing, commentary, education, or other original creative value.
Do I Always Need to Disclose AI Use?
Not every minor edit requires disclosure. Disclosure becomes more important—and may be required—when the content:
• Looks realistic
• Involves a real person
• Uses a cloned voice
• Alters a real event or location
• Shows something that never happened
• Could reasonably mislead viewers
• Covers a sensitive subject
YouTube currently requires disclosure for realistic, meaningfully altered or synthetic content. [27]
A simple general disclosure can say:
This video includes visuals created or modified using artificial intelligence.
Always check the rules of the platform where the video will be published.
Can I Use AI Videos for Commercial Projects?
Possibly, but commercial-use rules depend on:
• The platform
• The selected model
• The account or plan
• Uploaded source material
• Generated music or voices
• Real-person consent
• Brands and protected characters
Adobe states that videos created using its own Firefly Video Model are designed for commercial use, while partner models available within Firefly may have different conditions. [4][6]
Commercial permission from the AI provider does not give you rights to copyrighted photographs, music, trademarks, or other source material that you were not permitted to upload.
Will a Paid Plan Remove Every Watermark?
Not necessarily.
Watermark and export conditions vary by:
• Platform
• Subscription plan
• Selected model
• Generation method
• Export resolution
Check the downloaded test file before paying for a large project. Runway’s free access and paid plans differ in available credits, models, and export conditions.
Do not rely only on the clean preview shown inside the platform.
How Can I Protect My Privacy?
Before uploading photographs, scripts, videos, or business material:
• Remove personal information
• Confirm whether projects are private
• Review storage and deletion settings
• Check whether content may appear publicly
• Review AI-training preferences
• Obtain permission from recognizable people
• Avoid confidential client or business material
Use a generic test image until you understand the provider’s privacy controls.
What Is the Best Tool for the AI Mastery Website?
For the current AI Mastery workflow:
• Use ChatGPT for planning, prompts, scripts, and narration.
• Begin with Canva for simple creation and editing.
• Use Adobe Firefly for cinematic scenes and image-to-video.
• Use CapCut for captions, social media formatting, and final short-form edits.
• Consider InVideo AI when converting complete articles into narrated videos.
• Consider Synthesia for presenter-led lessons.
• Use Runway after you need more advanced camera and motion control.
Do not subscribe to all of them. Complete a small test in one platform and expand only when a real project requires another tool.
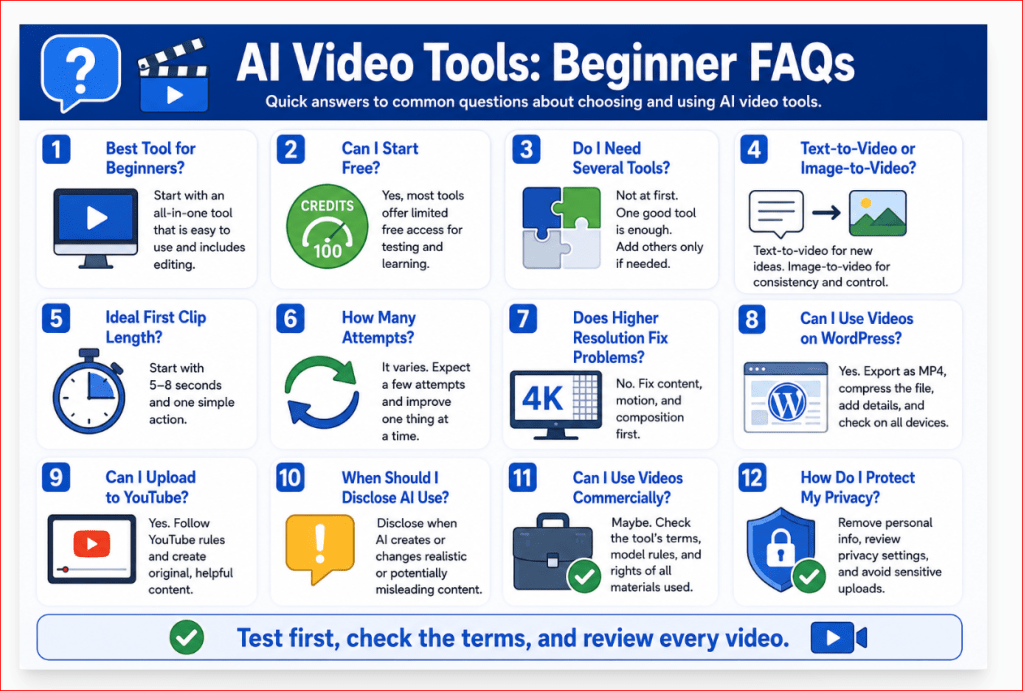
Figure 13. Quick answers to common beginner questions about choosing and using AI video tools.
Figure 13 summarizes the practical questions beginners ask most often, including free access, tool selection, clip duration, WordPress and YouTube use, disclosure, commercial rights, privacy, and the recommended AI Mastery workflow.
Key Takeaways
• AI video tools can create, animate, transform, or edit video from prompts, images, scripts, or existing footage.
• The best tool depends on the project. Canva is practical for simple all-in-one creation, Adobe Firefly for cinematic clips and image animation, Runway for advanced control, Synthesia for avatar-led lessons, InVideo AI for complete narrated drafts, and CapCut for short-form social media editing.
• Beginners should test one simple scene before purchasing a subscription.
• Use the same prompt when comparing tools so that the results can be judged fairly.
• Compare ease of use, prompt accuracy, motion stability, aspect ratios, resolution, editing features, audio, privacy, watermarks, commercial-use terms, and credit consumption.
• One generation does not always produce one usable video. Several attempts may be required.
• Start with short clips containing one subject, one action, one setting, and one camera movement.
• Text-to-video is useful for creating new scenes, while image-to-video provides greater control when you already have a suitable starting image.
• Higher resolution improves sharpness but does not fix unstable movement, changing objects, distorted hands, or weak prompt interpretation.
• AI-generated clips usually need human editing, captions, audio review, and final quality checks.
• Do not assume that a paid plan provides unlimited commercial rights.
• Check the terms for the exact platform, model, plan, music, voice, and source materials used.
• Protect private information and obtain permission before uploading images or videos of real people.
• Disclose AI use when realistic synthetic content could confuse or mislead viewers.
• Save prompts, settings, reference images, model names, licences, generated versions, and final files.
• AI video tools are strongest for creative concepts, B-roll, animation, prototypes, educational visuals, and short supporting scenes.
• Real filming remains preferable when authenticity, evidence, exact product operation, genuine testimony, or verified events are required.
• AI assists the creative process, but the creator remains responsible for accuracy, permissions, quality, and the decision to publish.
Final Tip
Do not begin by searching for the most powerful AI video tool. Begin with one simple project.
Choose a tool that allows you to:
• Understand the interface
• Create one short clip
• Review the result carefully
• Correct one problem at a time
• Download the video successfully
• Edit it without unnecessary difficulty
• Use it under terms you understand
A beginner often learns more from completing one six-second video than from opening accounts with several advanced platforms.
For your first project:
1. Choose one clear subject.
2. Use one simple action.
3. Select one camera movement.
4. Generate one version.
5. Review the entire clip.
6. Correct the largest problem.
7. Generate one improved version.
8. Edit and save the strongest result.
Keep a record of the prompt, selected model, settings, credits used, and final filename. This creates a repeatable workflow and prevents you from starting from zero with every new project.
For the AI Mastery website, the practical starting strategy is:
• Use ChatGPT for planning, prompts, narration, and troubleshooting.
• Begin with Canva or Adobe Firefly for your first controlled test.
• Use Canva or CapCut for captions, titles, music, and final editing.
• Add another paid platform only when a real project requires features your current tool cannot provide.
The goal is not to collect AI tools. The goal is to learn one reliable workflow that produces useful, accurate, and responsible videos.

Figure 14. A practical beginner workflow for choosing, testing, and using an AI video tool.
Figure 14 summarizes the safest starting process for beginners. It begins with one simple project, continues through controlled generation and review, and ends with editing, record keeping, and responsible publication.
Conclusion
AI video tools have made video creation more accessible to beginners, educators, website owners, content creators, and small businesses. They can turn written prompts, still images, scripts, and existing footage into short video clips without requiring professional cameras or advanced production skills.
However, choosing the right tool requires more than watching impressive demonstrations. Beginners should compare:
• Ease of use
• Text-to-video and image-to-video support
• Video quality and stability
• Aspect ratios and clip duration
• Editing and audio features
• Credits and subscription costs
• Watermarks and export conditions
• Privacy protections
• Commercial-use terms
• Customer support and learning resources
There is no single platform that is best for every project.
Canva may be the easiest starting point for simple creation and editing. Adobe Firefly may be more suitable for cinematic scenes and image animation. Runway may provide stronger creative controls. Synthesia is designed for presenter-led lessons and training. InVideo AI can prepare complete narrated drafts, while CapCut is practical for social media editing and vertical videos.
The best choice is the tool that matches your immediate goal, budget, experience, and publishing platform.
Before paying for a subscription:
1. Define one simple project.
2. Test one short clip.
3. Use the same prompt when comparing platforms.
4. Review the entire result carefully.
5. Correct one problem at a time.
6. Test the export and editing process.
7. Record the credits consumed.
8. Check privacy and commercial-use terms.
9. Confirm that the tool works on your device.
10. Subscribe only when a real project requires additional access.
AI video generation should be treated as a creative and technical workflow rather than a one-click solution. Useful results normally come from planning, controlled prompting, repeated review, editing, and responsible publishing.
ChatGPT can support the process by helping you develop ideas, prepare scene plans, write detailed prompts, create narration, and troubleshoot weak results. A dedicated AI video platform then generates or edits the moving footage.
The creator remains responsible for checking:
• Accuracy
• Permissions
• Privacy
• Product details
• Captions
• Audio
• Commercial rights
• AI disclosure
• Publishing-platform rules
Start with one tool, one simple scene, and one clear purpose. Learn what works, keep organized records, and expand your workflow only when the project genuinely requires another platform.
With realistic expectations and careful human review, AI video tools can become valuable assistants for creating educational content, website visuals, social media clips, presentations, prototypes, and small-business marketing videos.
Sources and References
Citations in square brackets refer to the numbered official sources below. These pages were reviewed on July 28, 2026. Features, model names, prices, credits, limits, policies, and plan conditions may change. Check the current official page when first using a tool, changing plans or features, receiving a policy-update notice, and periodically before important or commercial work.
[1] Adobe Help Center. Generate Videos Using Text Prompts. Explains text-to-video prompting, available controls, model-dependent settings, and generation workflow. Accessed July 28, 2026.
[2] Adobe Help Center. Generate Videos Using Images. Explains image-guided video, keyframes, crop controls, formats, generation settings, and download options. Accessed July 28, 2026.
[3] Adobe Help Center. Generate Video Using Firefly Models. Describes Firefly video models, model selection, generation controls, and browser-based editing workflows. Accessed July 28, 2026.
[4] Adobe Help Center. Partner Models in Adobe Products. Explains that partner models are not developed by Adobe and that users must assess model-specific suitability and terms. Accessed July 28, 2026.
[5] Adobe Help Center. Generative Credits FAQ. Lists current Firefly plan credits and explains how generative credits and premium features are used. Accessed July 28, 2026.
[6] Adobe Help Center. Adobe Firefly FAQ. Provides current information about Firefly models, training, user content, commercial use, and product conditions. Accessed July 28, 2026.
[7] Adobe Help Center. Content Credentials Overview. Explains how Content Credentials can add tamper-evident information about how qualifying assets were created or edited. Accessed July 28, 2026.
[8] Adobe Help Center. Known Limitations in Firefly Video Editor. Lists current browser, import, media, size, duration, resolution, GIF, WebP, and workflow limitations. Accessed July 28, 2026.
[9] Runway Help Center. Creating with Gen-4.5. Lists Gen-4.5 inputs, durations, aspect ratios, output resolution, prompting guidance, and credit cost. Accessed July 28, 2026.
[10] Runway Help Center. Text-to-Video Prompting Guide. Explains the visual and motion components of effective text-to-video prompts. Accessed July 28, 2026.
[11] Runway Help Center. How Do Credits Work?. Lists current monthly credit amounts, Gen-4.5 credit use, rollover rules, and expiration conditions. Accessed July 28, 2026.
[12] Runway Help Center. Free Plan Details. Describes the one-time free credit allocation, available tools, export limits, and watermark conditions. Accessed July 28, 2026.
[13] Runway. Plans and Pricing. Provides current plan allowances and model-specific estimates. Prices and plan names can change. Accessed July 28, 2026.
[14] Runway Help Center. Creating with Edit Studio. Explains current prompt-based editing of uploaded footage using Edit Studio and Aleph 2.0. Accessed July 28, 2026.
[15] Runway Help Center. How to Create Longer Videos and Films. Explains planning and combining shorter generated clips into longer video projects. Accessed July 28, 2026.
[16] Runway Help Center. Usage Rights. Provides Runway-specific information about use of uploaded and generated content. Source rights must still be checked. Accessed July 28, 2026.
[17] Runway Help Center. Understanding Runway’s Security and Privacy Standards. Provides Runway-specific information about uploaded assets, privacy, and security controls. Accessed July 28, 2026.
[18] Canva. AI Video Generator. Describes Create a Video Clip, synchronized audio, dialogue, sound effects, and Canva editing. Accessed July 28, 2026.
[19] Canva. AI Product Terms. Provides current conditions for Canva AI products and user responsibilities. Accessed July 28, 2026.
[20] Canva Trust Center. Privacy. Provides privacy information and controls relevant to user content and AI-powered features. Accessed July 28, 2026.
[21] Synthesia. Pricing and Plan Features. Lists current free and paid plan credits, video allowances, avatars, downloads, and supported languages and voices. Accessed July 28, 2026.
[22] Synthesia Help Center. Guidelines for Using Stock and Personal Avatars in Videos. Explains avatar-use limitations and content-moderation requirements. Accessed July 28, 2026.
[23] InVideo Help Center. How Can I Create a Video Using My Script?. Explains script-based video creation using media, music, subtitles, voice, and language settings. Accessed July 28, 2026.
[24] CapCut. AI Video Tools. Provides information about CapCut AI video creation and editing workflows. Accessed July 28, 2026.
[25] CapCut Help Center. What Are Credits in CapCut?. Explains the relationship between credits, subscriptions, and credit-based AI operations. Accessed July 28, 2026.
[26] OpenAI Help Center. What to Know About the Sora Discontinuation. Provides the discontinuation dates for the Sora web and app experiences and Sora API. Accessed July 28, 2026.
[27] YouTube Help. Disclosing Use of GenAI Content. Explains when creators must disclose realistic, meaningfully generated, or altered content. Accessed July 28, 2026.
[28] YouTube Help. YouTube Channel Monetization Policies. Explains originality, repetitive or mass-produced content, reused content, and monetization requirements. Accessed July 28, 2026.
[29] WordPress.com Support. Video Block. Explains how to upload or embed video, select a poster image, add text tracks, and configure playback. Accessed July 28, 2026.
[30] W3C Web Accessibility Initiative. Captions/Subtitles. Explains that captions provide synchronized text for speech and important non-speech audio. Accessed July 28, 2026.
[31] U.S. Copyright Office. Copyright and Artificial Intelligence, Part 2: Copyrightability. Discusses human authorship and copyrightability of works containing AI-generated material. This guide provides general education, not legal advice. Accessed July 28, 2026.
Continue Learning
Continue building your AI video skills with these related guides:
• How to Create AI Videos with ChatGPT: Beginner Step-by-Step Guide (2026)
• Prompt Engineering for Beginners: Complete Guide (2026)
• AI Image Generation for Beginners: Complete Guide (2026)
• How to Create AI Videos from Images: Beginner Guide (2026)
• How to Edit AI-Generated Videos: Beginner Step-by-Step Guide (2026)
• How to Add Voice, Music, and Captions to AI Videos (2026)
 AI Mastery