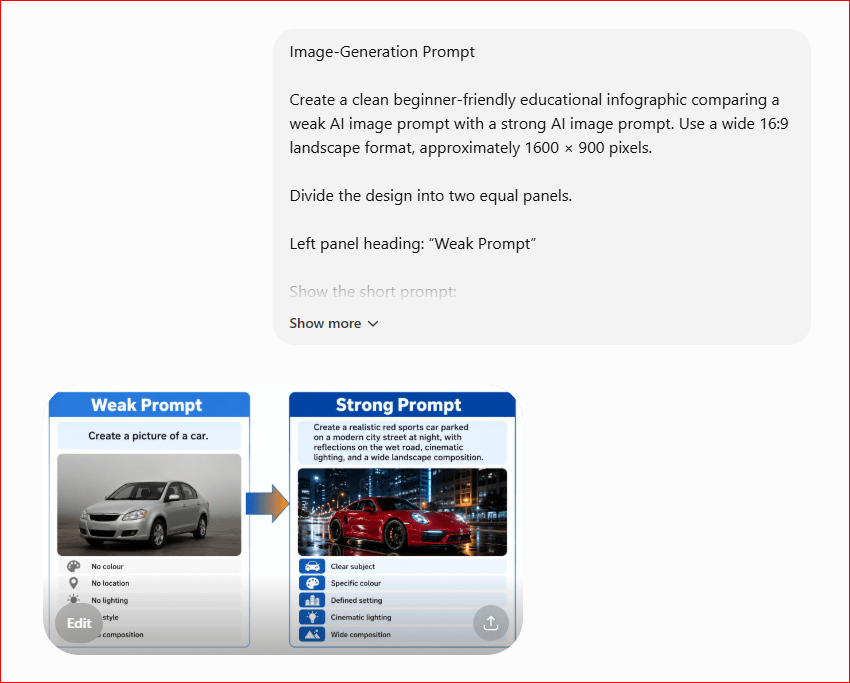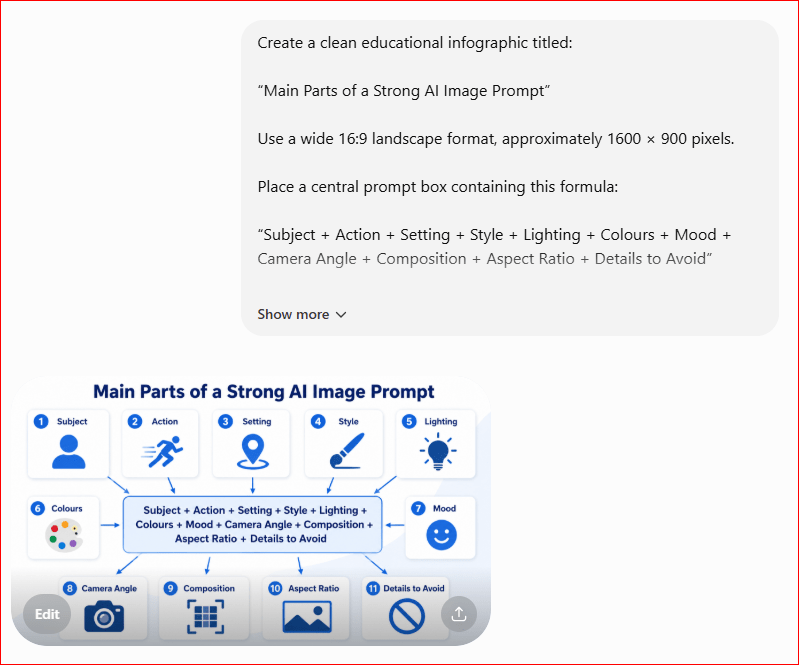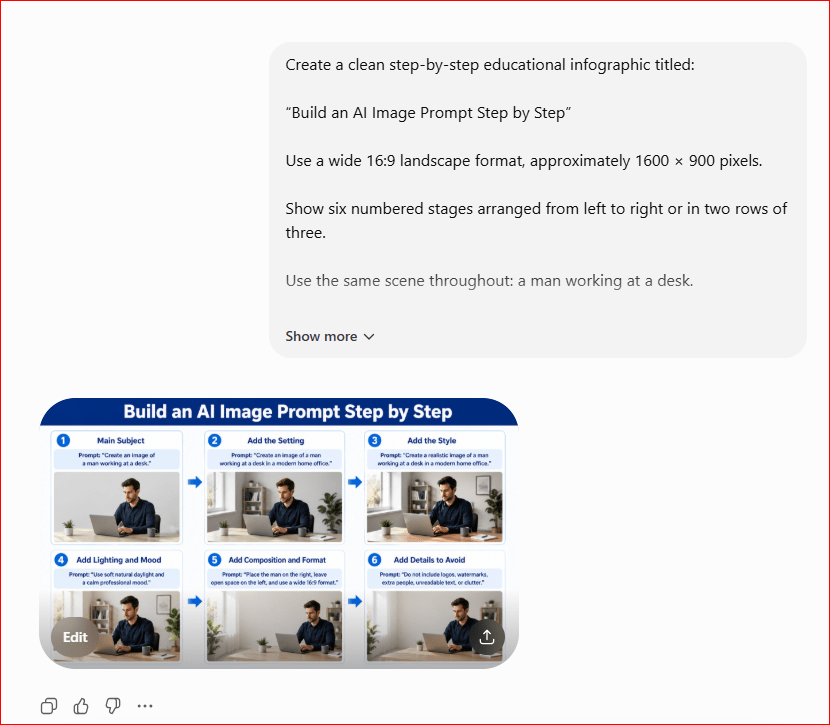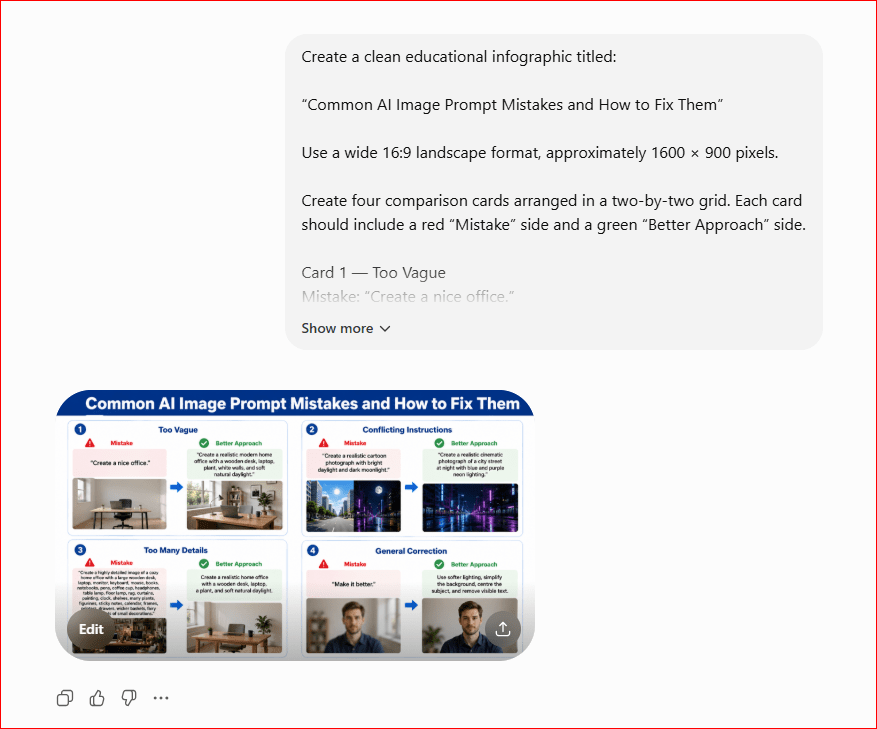
Estimated Reading Time: 28 minutes
Last Updated: August 4, 2026
Before You Start: How to Use the 50 Claude Prompts
A prompt is the instruction or question you give to Claude. It may be a short request, a detailed set of requirements, source text to analyze, a file to review, or a follow-up correction.
The 50 examples in this guide are designed for complete beginners. Copy the prompt that matches your task, replace every item inside square brackets, remove instructions that do not apply, and review the final prompt before sending it.
Claude can help with writing, learning, document analysis, planning, research, spreadsheets, coding, Projects, Artifacts, file creation, and connected services. Available features, plan limits, and interfaces may change, so current feature information should be checked on official Anthropic or Claude pages.
Square brackets identify information you should replace. For example, change [topic] to “online privacy” and [audience] to “a complete beginner.”
Use this reusable prompt formula:
• Task: What Claude should do.
• Context: Relevant background.
• Audience: Who will use the result.
• Source: The information Claude may use.
• Format: How the result should be organized.
• Limits: What Claude must not add, change, reveal, or assume.
• Verification: What must be checked.
Review every response before sending, publishing, submitting, or using it for an important decision. Remove unnecessary private information and choose the correct Claude tool for the task.
How to Customize a Claude Prompt Before Sending It
1. Identify the exact result you need.
2. Replace every placeholder inside square brackets.
3. Add only the context that affects the task.
4. Identify the audience.
5. Name the source Claude may use.
6. Specify the output format.
7. Set a realistic length.
8. Choose a consistent tone.
9. State important limits.
10. Define what a successful result includes.
11. Remove unnecessary instructions.
12. Separate instructions from source material.
13. Resolve conflicting requirements.
14. Remove unnecessary private information.
15. Select the correct Claude tool.
16. Read the complete prompt once before sending it.
Before customization:
Explain [topic] to [audience].
After customization:
Explain cloud storage to an adult beginner. Use simple language, compare it with a filing cabinet, include three benefits and three limitations, and finish with a five-point summary.
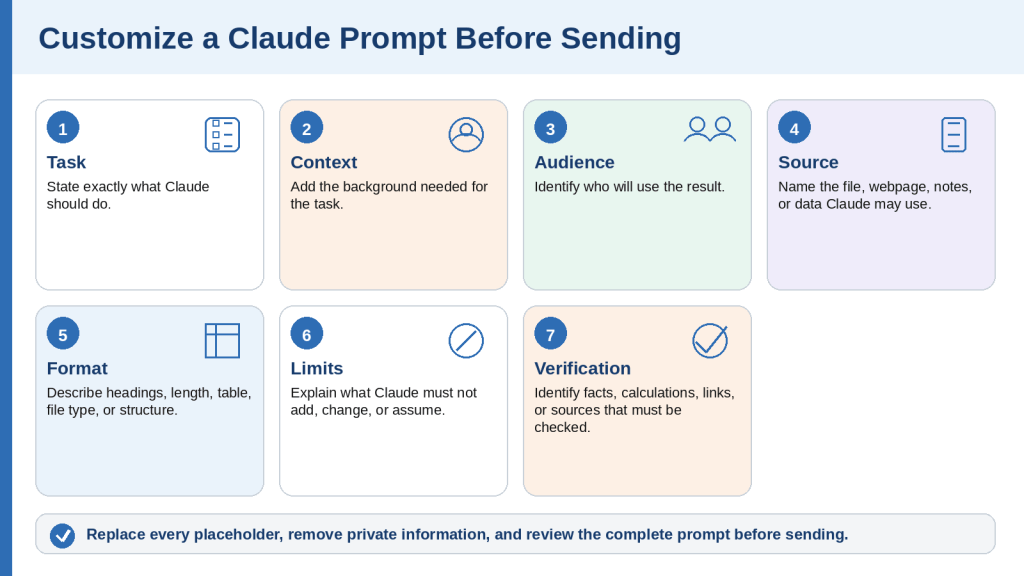
Figure 1. The main steps for customizing a Claude prompt before sending it.
Explanation: A reusable prompt becomes more effective after placeholders are replaced and the task, context, audience, source, format, limits, and verification requirements are made clear.
Prompts 1-5: Everyday Questions and Explanations
These prompts help with common questions, explanations, comparisons, and practical instructions. Add web search when the answer depends on recent or location-specific information.
Prompt 1: Explain a Topic to a Complete Beginner
Copy and customize this prompt:
Explain [topic] to a complete beginner. Use simple language, define every important term, avoid unexplained abbreviations, and include three everyday examples. Finish with a five-point summary and three questions I can ask next.
Example:
Explain artificial intelligence to an adult beginner using a helpful everyday example. Define “algorithm,” “model,” and “training data,” and finish with a five-point summary.
When to Use
• Learning a new subject
• Understanding an unfamiliar term
• Preparing beginner educational content
How to Customize
• Replace the topic and audience
• Choose the number and type of examples
• State the desired length and reading level
Useful Follow-Up Prompts
Explain the second point using a different example.
Which part should I learn before continuing?
What to Check
• Definitions are accurate
• Examples support the explanation
• Important limitations are not hidden
Prompt 2: Compare Two Things
Copy and customize this prompt:
Compare [option A] and [option B] for [purpose and audience]. Use a table covering [criteria]. Then explain the most important similarities, differences, benefits, limitations, and missing information. Do not recommend an option until the important facts are verified.
Example:
Compare cloud storage and external hard drives for a complete beginner. Use criteria for internet access, cost, privacy, backup, portability, and ease of use.
When to Use
• Choosing between services or methods
• Understanding similar concepts
• Preparing decision questions
How to Customize
• Name the two options and decision purpose
• List only criteria that matter
• Require current sources when facts can change
Useful Follow-Up Prompts
Add a column for information that still needs verification.
Explain which criteria matter most for a beginner.
What to Check
• Equivalent information is compared
• Missing information is labelled
• The conclusion follows the stated criteria
Prompt 3: Simplify a Complicated Explanation
Copy and customize this prompt:
Rewrite the text below for [audience]. Preserve its meaning and every factual detail. Use shorter sentences, define difficult terms, remove repetition, and do not add new claims, dates, numbers, or advice.
Text: [paste text]
Example:
Rewrite a technical explanation of two-factor authentication for an adult beginner. Preserve every warning and condition.
When to Use
• Policies
• Technical explanations
• Official notices
• Educational material
How to Customize
• Set the audience and reading level
• Name wording that must remain unchanged
• Set a maximum paragraph length
Useful Follow-Up Prompts
Show the original and rewritten versions side by side.
List any meaning that may have changed.
What to Check
• Meaning remains unchanged
• Warnings and exceptions remain
• No unsupported facts were added
Prompt 4: Create Step-by-Step Instructions
Copy and customize this prompt:
Create step-by-step instructions for [task] using [device, software, or environment]. Write for [audience]. Begin with what is needed, then provide numbered steps in the correct order, expected results, common problems, and a final completion check. Do not assume access to tools I did not mention.
Example:
Create step-by-step instructions for saving a DOCX file from TextMaker on Windows 10 and attaching it to an email. Write for a complete beginner.
When to Use
• Software tasks
• Applications
• Website publishing
• Home or workplace procedures
How to Customize
• State the device and software version
• Identify the starting point
• Explain what a successful result looks like
Useful Follow-Up Prompts
Explain step four using simpler language.
Add a troubleshooting section for a missing button.
What to Check
• Steps are in correct order
• Menus and buttons match the environment
• No destructive action is hidden
Prompt 5: Answer an Everyday Question Carefully
Copy and customize this prompt:
Answer this question for [audience]: . Begin with the direct answer, then explain the reasoning, important assumptions, limitations, and what should be verified. Use current reliable sources when the answer may have changed or when the consequences are significant.
Example:
Can I use a public Wi-Fi network for online banking? Answer for a complete beginner and explain the safer options and limitations.
When to Use
• General questions
• Safety decisions
• Product or service questions
• Questions requiring uncertainty
How to Customize
• Add the location and date when relevant
• State whether web search is required
• Ask for a professional-review warning when appropriate
Useful Follow-Up Prompts
Which part of the answer is most uncertain?
What should I verify before acting?
What to Check
• The direct answer is qualified appropriately
• Assumptions are visible
• High-risk advice is not presented as certainty
Quick Review of Prompts 1-5
• Explain a Topic to a Complete Beginner
• Compare Two Things
• Simplify a Complicated Explanation
• Create Step-by-Step Instructions
• Answer an Everyday Question Carefully
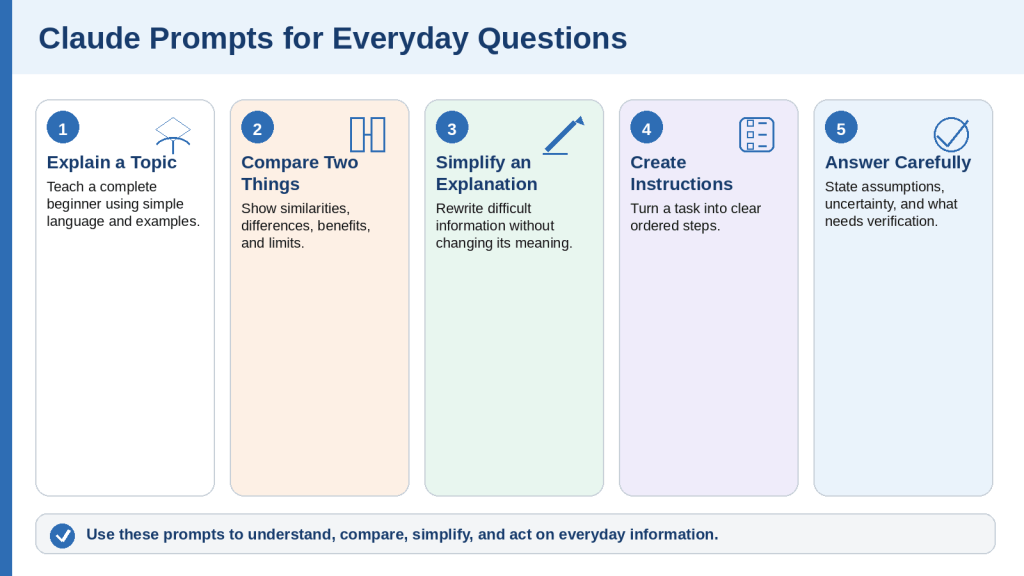
Figure 2. Five Claude prompt types for everyday questions and beginner explanations.
Explanation: These prompts help beginners understand a topic, compare choices, simplify difficult information, create instructions, and receive qualified answers. Current or high-risk information still needs reliable verification.
Prompts 6-10: Writing and Rewriting
Claude can create new content or improve text you already wrote. State which facts, tone, structure, and wording must remain unchanged, and treat the result as a draft.
Prompt 6: Create a First Draft from Notes
Copy and customize this prompt:
Create a first draft of [type of content] using the notes below. Write for [audience] using a [tone] tone. Organize it with [required structure]. Preserve every confirmed fact, clearly identify missing information, and do not invent names, dates, statistics, quotations, or results.
Notes: [paste notes]
Example:
Create a beginner-friendly article introduction from notes about Claude prompts. Use three short paragraphs followed by five key points.
When to Use
• Articles
• Reports
• Proposals
• Instructions
• Announcements
How to Customize
• Name the content type, audience, tone, and structure
• Provide only approved notes
• Set a word range and missing-information label
Useful Follow-Up Prompts
Expand the second section using only my notes.
List the information needed before the draft is complete.
What to Check
• No unsupported facts were added
• The draft matches the audience
• The structure follows the request
Prompt 7: Rewrite Text for Clarity
Copy and customize this prompt:
Rewrite the text below to make it clearer and easier to understand. Preserve its meaning and every factual detail. Use shorter sentences, remove repetition, define difficult terms, and improve paragraph order when necessary. Write for [audience]. Do not add new claims or remove warnings, conditions, names, dates, or numbers.
Text: [paste text]
Example:
Rewrite a complicated service notice for a complete beginner. Keep each paragraph under four sentences.
When to Use
• Complicated paragraphs
• Formal notices
• Website content
• Business documents
How to Customize
• Set reading level and paragraph length
• List terms that must remain unchanged
• State whether headings may be added
Useful Follow-Up Prompts
Explain the main changes you made.
Simplify the third paragraph further.
What to Check
• The meaning remains unchanged
• Conditions and dates remain
• No new advice was introduced
Prompt 8: Change the Tone While Preserving Facts
Copy and customize this prompt:
Rewrite the text below using a [desired tone] tone. Preserve all confirmed facts, requests, deadlines, and commitments. Do not make the message more aggressive, apologetic, emotional, or legally certain than the original. Keep it under [word limit] words.
Text: [paste text]
Example:
Rewrite a service complaint using a calm, polite, and professional tone. Keep the request and deadline unchanged.
When to Use
• Customer messages
• Workplace communication
• Requests
• Public announcements
How to Customize
• Identify the recipient and relationship
• Choose one consistent tone
• State commitments that must not change
Useful Follow-Up Prompts
Make the request more direct but keep it polite.
Remove wording that sounds accusatory.
What to Check
• The main request remains
• No promise or admission was added
• The tone suits the recipient
Prompt 9: Shorten Text Without Losing Key Points
Copy and customize this prompt:
Shorten the text below to approximately [length]. Preserve the purpose, main conclusion, important facts, warnings, deadlines, conditions, and required actions. Remove repetition and minor background information first. Do not add new information.
Text: [paste text]
Example:
Shorten an article introduction to 150 words while preserving the purpose, audience, main benefit, and safety warning.
When to Use
• Excerpts
• Emails
• Introductions
• Presentation text
• Website sections
How to Customize
• Set the target length
• List information that must remain
• State whether headings may be removed
Useful Follow-Up Prompts
List the information you removed.
Reduce the result by another 30 words without changing the meaning.
What to Check
• Exceptions and warnings remain
• No essential action was removed
• The shortened version is accurate
Prompt 10: Expand an Outline into Polished Text
Copy and customize this prompt:
Expand the outline below into [type of content] of approximately [length]. Use a [tone] tone for [audience]. Preserve the outline order and approved facts. Add explanations, transitions, and examples only when supported by the supplied information. Mark missing details instead of inventing them.
Outline: [paste outline]
Example:
Expand a five-point article outline into an 800-word beginner section. Use only the supplied notes and mark unsupported statistics as [Source Needed].
When to Use
• Article sections
• Reports
• Lessons
• Proposals
• Speeches
How to Customize
• State the required length and headings
• Identify approved examples
• Explain whether research is permitted
Useful Follow-Up Prompts
Expand only the example, not the explanation.
Show which sentences require source verification.
What to Check
• The outline order is preserved
• Added detail is supported
• No facts or quotations were invented
Quick Review of Prompts 6-10
• Create a First Draft from Notes
• Rewrite Text for Clarity
• Change the Tone While Preserving Facts
• Shorten Text Without Losing Key Points
• Expand an Outline into Polished Text
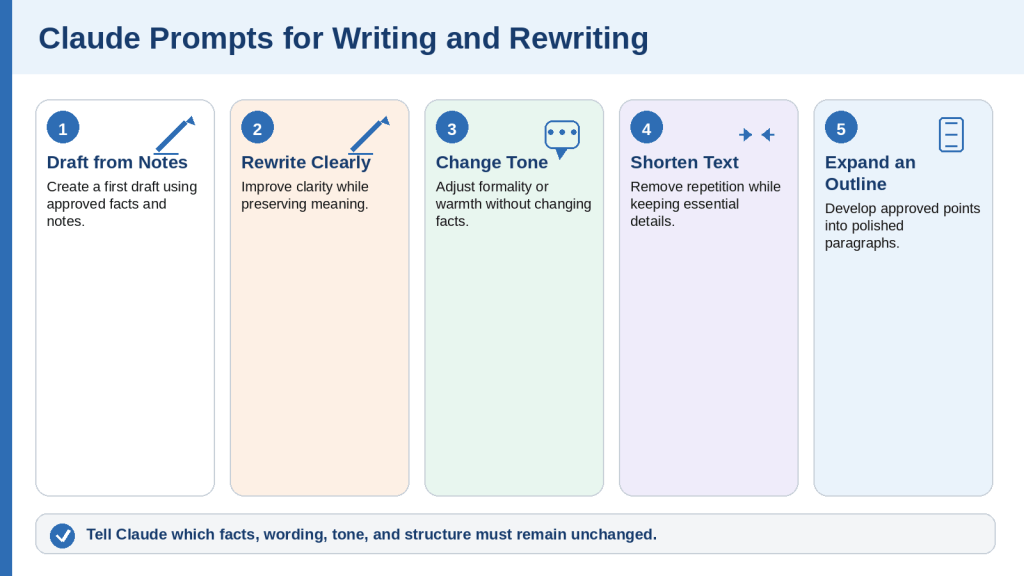
Figure 3. Five Claude prompts for drafting, rewriting, shortening, and expanding text.
Explanation: Claude can create and improve written material, but the user should identify which facts, tone, formatting, and structure must remain unchanged and compare the result with the original.
Prompts 11-15: Emails and Professional Messages
Claude can draft emails and professional messages, but it should not invent recipients, dates, attachments, promises, agreements, or previous communication.
Prompt 11: Write a Professional Email
Copy and customize this prompt:
Write a professional email to [recipient or role] about [subject]. The purpose is to [purpose]. Include [important details]. Use a polite, clear, and professional tone. Keep it under [word limit] words and end with a courteous request for [action]. Do not invent names, dates, promises, or previous communication.
Example:
Write to an internet provider about repeated connection problems and request a service appointment. Do not invent an account number or repair date.
When to Use
• Customer service
• Workplace communication
• Appointments
• Business enquiries
How to Customize
• Name the recipient role and purpose
• List confirmed facts and desired action
• State whether an attachment is included
Useful Follow-Up Prompts
Make the requested action clearer.
Shorten the email to 120 words.
What to Check
• Recipient and subject are correct
• No false reference number or promise was added
• Private information is necessary and accurate
Prompt 12: Reply to an Email
Copy and customize this prompt:
Draft a reply to the email below. Acknowledge the main point, answer using only the confirmed information I provide, and state the next action. Use a [tone] tone and keep the reply under [word limit] words. Do not invent facts, commitments, dates, attachments, or approvals.
Email received: [paste]
Confirmed information: [paste]
Example:
Reply to a customer who reports a duplicate charge. Ask for the invoice and do not promise a refund or completion date.
When to Use
• Questions
• Complaints
• Meeting requests
• Document requests
How to Customize
• Paste the relevant message
• List confirmed facts and available actions
• Remove unnecessary personal information
Useful Follow-Up Prompts
Add a clear request for the missing document.
Remove wording that suggests the outcome is guaranteed.
What to Check
• The main question is answered
• No unapproved promise was added
• The next action is clear
Prompt 13: Write a Polite Complaint
Copy and customize this prompt:
Write a polite but firm complaint to [company or role] about [problem]. Include confirmed facts, relevant dates, steps already taken, and the resolution requested. Use a calm professional tone. Do not exaggerate, threaten, admit fault, or make legal claims. Keep it under [word limit] words.
Example:
Write to a delivery company about a damaged package that arrived on August 2, 2026. Mention that photographs are available and request replacement or refund-review instructions.
When to Use
• Damaged products
• Billing errors
• Delayed services
• Subscription problems
How to Customize
• List what happened and when
• Name available evidence
• State the requested resolution
Useful Follow-Up Prompts
Add a short timeline of events.
Remove any sentence that sounds accusatory.
What to Check
• Evidence and dates are accurate
• No legal threat was invented
• The requested resolution is specific
Prompt 14: Write a Follow-Up Message
Copy and customize this prompt:
Write a polite follow-up about [earlier request]. Mention that I contacted [person or organization] on [date or period], briefly restate the request, and ask for an update or next step. Use a respectful concise tone. Do not sound impatient, accusatory, or demanding. Keep it under [word limit] words.
Example:
Follow up on a training-program application submitted last week and ask whether anything else is needed. Do not imply approval.
When to Use
• Applications
• Service problems
• Interviews
• Approval requests
How to Customize
• State the original request and date
• Include a reference number only when confirmed
• Avoid invented deadlines
Useful Follow-Up Prompts
Make the update request clearer.
Create a two-sentence version for a messaging app.
What to Check
• Previous communication is described accurately
• The tone remains respectful
• No agreement or deadline was invented
Prompt 15: Write a Professional Request
Copy and customize this prompt:
Write a professional request to [recipient or role] asking for [information, document, meeting, approval, or action]. Explain why it is needed, include any relevant deadline, and list the required information or documents. Use a polite direct tone. Do not imply that approval is guaranteed.
Example:
Ask a training provider for programme length, online schedule, tuition, admission requirements, funding information, deadlines, and the official webpage.
When to Use
• Information requests
• Document requests
• Meetings
• Approvals
• Technical help
How to Customize
• Identify the required response format
• List all requested items
• State whether urgency is real or optional
Useful Follow-Up Prompts
Turn the requested information into bullets.
Remove wording that suggests urgency.
What to Check
• The request is complete
• No attachment or approval was invented
• The recipient can understand the next step
Quick Review of Prompts 11-15
• Write a Professional Email
• Reply to an Email
• Write a Polite Complaint
• Write a Follow-Up Message
• Write a Professional Request

Figure 4. Five Claude prompt types for emails, replies, complaints, follow-ups, and professional requests.
Explanation: Claude can organize and improve professional messages, but every fact, date, attachment, request, and commitment should be confirmed before the message is sent.
Prompts 16-20: Learning and Study
Claude can explain lessons and prepare study material. Students should follow their institution’s artificial-intelligence rules and complete required independent work honestly.
Prompt 16: Explain a Lesson Step by Step
Copy and customize this prompt:
Teach me [topic] as a complete beginner. Begin with the basic idea, define every important term, explain it in small steps, and use one everyday example after each main point. Finish with a summary and three questions to check my understanding.
Example:
Teach the difference between income, expenses, profit, and cash flow using a small grocery shop example.
When to Use
• Mathematics
• Science
• Business
• Computer skills
• Languages
How to Customize
• State what you already understand
• Choose suitable examples
• Request formulas or diagrams only when useful
Useful Follow-Up Prompts
Explain the second step using a different example.
Give me one easy practice problem.
What to Check
• Definitions are correct
• No important step was skipped
• The examples match the lesson
Prompt 17: Turn Notes into Study Material
Copy and customize this prompt:
Turn the notes below into organized study material for [subject]. Use only my notes. Create clear headings, short explanations, key terms with definitions, important facts, and a final summary. Clearly label incomplete or unclear information instead of guessing.
Notes: [paste]
Example:
Turn beginner bookkeeping notes about assets, liabilities, and equity into a study guide.
When to Use
• Class notes
• Lecture transcripts
• Course handouts
• Research notes
How to Customize
• State the learning level
• Preserve page references
• Decide whether outside examples are allowed
Useful Follow-Up Prompts
Create a one-page revision sheet.
List where my notes appear incomplete.
What to Check
• No outside facts were added
• Definitions remain accurate
• Uncertainty is labelled
Prompt 18: Create a Practice Quiz
Copy and customize this prompt:
Create a practice quiz about [topic] for [level]. Include [number] multiple-choice, [number] true-or-false, and [number] short-answer questions. Place the answer key and short explanations after all questions. Use only [specified source].
Example:
Create a beginner online-privacy quiz from the attached lesson with ten multiple-choice, five true-or-false, and three short-answer questions.
When to Use
• Lessons
• Chapters
• Training modules
• Policies
• Vocabulary
How to Customize
• Set number and difficulty
• Name the source
• Choose whether answers appear immediately or later
Useful Follow-Up Prompts
Give me the questions one at a time.
Focus the next quiz on topics I answered incorrectly.
What to Check
• Questions have clear answers
• The answer key matches
• The quiz tests only taught material
Prompt 19: Create Flashcards
Copy and customize this prompt:
Create [number] study flashcards about [topic] using the material below. Put one question, term, or concept on the front and a short answer or definition on the back. Keep each answer concise and do not add unsupported facts.
Study material: [paste or attach]
Example:
Create twenty flashcards about beginner artificial intelligence terms using the attached lesson.
When to Use
• Definitions
• Vocabulary
• Dates
• Formulas
• Processes
How to Customize
• Choose the number of cards
• Set an answer-length limit
• Request categories or reversed cards
Useful Follow-Up Prompts
Remove duplicate cards.
Add one simple example to each answer.
What to Check
• Definitions are accurate
• Cards are not repetitive
• Important qualifications were not removed
Prompt 20: Create a Realistic Study Plan
Copy and customize this prompt:
Create a realistic study plan for learning [subject] over [time period]. I can study for [time] on [days]. My current level is [level] and my goal is [goal]. Divide the subject into manageable stages, include review and practice, and leave time for missed sessions. Do not assume I can study every day.
Example:
Create an eight-week beginner-bookkeeping plan with ninety-minute sessions on Monday, Wednesday, and Saturday.
When to Use
• Courses
• Certifications
• Software learning
• Language learning
How to Customize
• Add your starting level, goal, schedule, and deadline
• Mention preferred resources and difficult topics
• Include catch-up time
Useful Follow-Up Prompts
Turn the first week into a checklist.
Suggest how to recover after missing one week.
What to Check
• The plan fits available time
• Review and flexibility are included
• No guaranteed outcome is promised
Quick Review of Prompts 16-20
• Explain a Lesson Step by Step
• Turn Notes into Study Material
• Create a Practice Quiz
• Create Flashcards
• Create a Realistic Study Plan
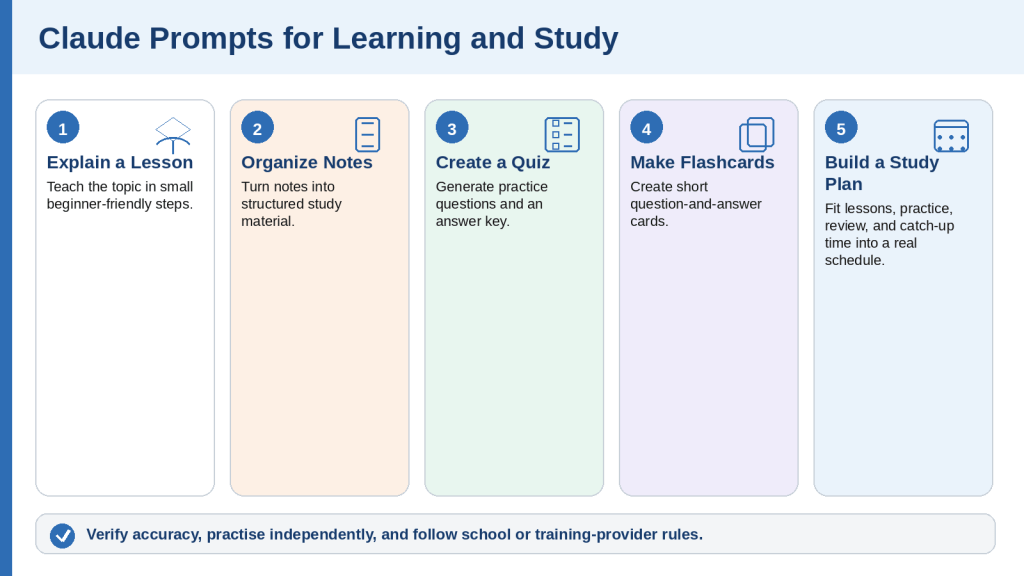
Figure 5. Five Claude prompt types for explanations, study notes, quizzes, flashcards, and study planning.
Explanation: Claude can help learners understand difficult subjects and prepare study material. Students should verify the content, practise independently, and follow their institution’s rules for artificial intelligence.
Prompts 21-25: Summarizing and Analyzing Documents
Claude can summarize, question, extract, analyze, and compare supported files. Keep original documents and verify important dates, amounts, quotations, conditions, and page references.
Prompt 21: Summarize a Document
Copy and customize this prompt:
Summarize the attached document titled “[document name]” for [audience]. Use only the document. Begin with an overview, followed by [number] key points, important dates, required actions, and unresolved questions. Define difficult terms, include page references when available, and do not guess.
Example:
Summarize “Community Programme Information” for a complete beginner and preserve eligibility requirements, dates, and required actions.
When to Use
• Reports
• Policies
• Course materials
• Government letters
• Manuals
How to Customize
• Name the file and audience
• Set length and required sections
• Require page references and source limits
Useful Follow-Up Prompts
Create a one-page checklist based only on the document.
List the sections I should read in full.
What to Check
• Conditions and exceptions remain
• Dates and amounts are accurate
• No outside conclusion was added
Prompt 22: Ask Questions About a Document
Copy and customize this prompt:
Answer the numbered questions using only the attached document titled “[document name].” For each answer, include the supporting section and PDF page when available. Write “The document does not provide this information” when missing. Do not guess or use outside information.
Questions: [list]
Example:
Ask whether a programme is online, its length, tuition, admission requirements, funding references, and deadline.
When to Use
• Deadlines
• Fees
• Eligibility
• Responsibilities
• Procedures
How to Customize
• Ask one clear question per item
• Use viewer page numbers
• State whether quotations are needed
Useful Follow-Up Prompts
Quote the sentence supporting answer three.
Turn the answers into an action checklist.
What to Check
• Each answer matches the question
• Page references support the answer
• Missing information was not guessed
Prompt 23: Extract Specific Information
Copy and customize this prompt:
Extract [required items] from the attached document. Present a table with Item, Extracted Information, Source Section, PDF Page, and Verification Notes. Copy names, dates, amounts, reference numbers, and quotations exactly. Write “Not found” when missing and do not interpret unless requested.
Example:
Extract every deadline, amount, eligibility requirement, required document, contact method, and action from a programme guide.
When to Use
• Names
• Dates
• Amounts
• Requirements
• Terms and conditions
How to Customize
• List exact fields
• Request source pages
• Explain privacy redaction rules
Useful Follow-Up Prompts
Sort the dates chronologically.
Show which requested items were not found.
What to Check
• Names, dates, amounts, and units match
• No rows were combined
• Tables and scanned text were checked manually
Prompt 24: Analyze a Document
Copy and customize this prompt:
Analyze the attached document for [purpose]. Use only the document unless outside research is explicitly allowed. Organize the response under Purpose, Main Claims, Evidence, Assumptions, Strengths, Limitations, Missing Information, Contradictions, and Questions Requiring Verification. Include page references and separate source facts from interpretation.
Example:
Analyze a business proposal before a review meeting, including financial claims that require verification.
When to Use
• Proposals
• Reports
• Research papers
• Policies
• Plans
How to Customize
• Explain the purpose and perspective
• Add relevant review categories
• Require page references and fact/interpretation separation
Useful Follow-Up Prompts
Identify the five most important assumptions.
Which claims have weak support?
What to Check
• Facts and interpretation are separated
• Limitations are not hidden
• No professional conclusion exceeds the document
Prompt 25: Compare Two or More Documents
Copy and customize this prompt:
Compare the attached documents titled “[A]” and “[B].” Use only the files. Create a table comparing [criteria], then list matching information, important differences, information found in only one file, possible contradictions, and items requiring manual verification. Include file names and page references.
Example:
Compare two supplier proposals using price, tax, delivery, payment terms, warranty, support, cancellation, and exclusions.
When to Use
• Proposals
• Contracts
• Policies
• Course descriptions
• Document versions
How to Customize
• List exact comparison criteria
• Identify original and revised files
• Do not assume missing information means “no”
Useful Follow-Up Prompts
Quote the wording supporting each cancellation term.
Create questions for both suppliers.
What to Check
• Statements are attributed correctly
• Equivalent information is compared
• No unsupported recommendation was made
Quick Review of Prompts 21-25
• Summarize a Document
• Ask Questions About a Document
• Extract Specific Information
• Analyze a Document
• Compare Two or More Documents
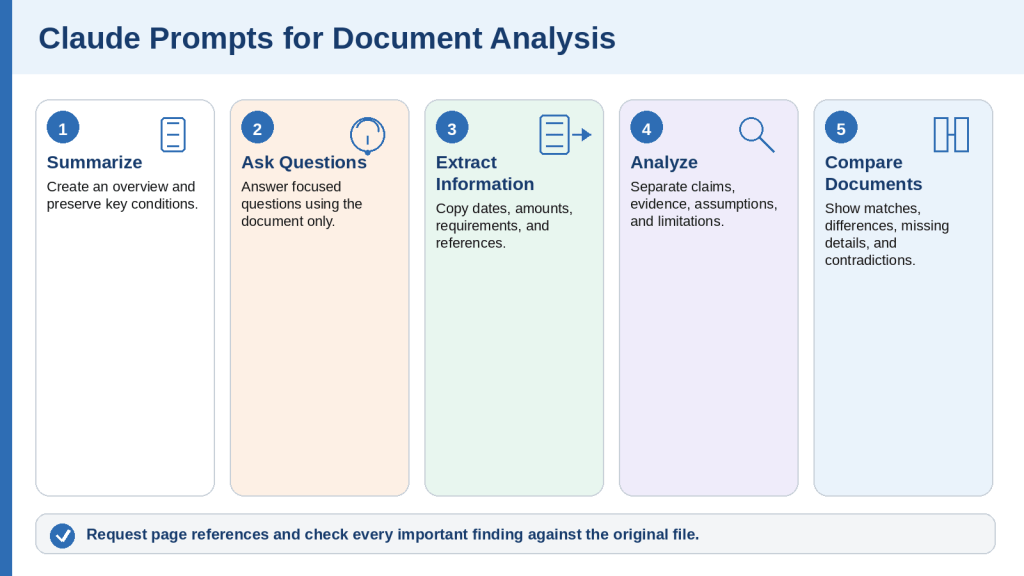
Figure 6. Five Claude prompt types for summarizing, questioning, extracting, analyzing, and comparing documents.
Explanation: Claude can organize information from supported files, but important findings must be checked against the original documents. Focused questions, source limits, and page references make verification easier.
Prompts 26-30: Brainstorming and Planning
Claude can help turn broad goals into ideas, outlines, action plans, comparisons, and schedules. Adjust every suggestion to your real circumstances.
Prompt 26: Brainstorm Ideas
Copy and customize this prompt:
Brainstorm [number] ideas for [goal]. The ideas are intended for [audience]. Organize them from easiest to most advanced. For each, include a short description, main benefit, required resources, and one limitation. Avoid duplicate, unsafe, unrealistic, or overly expensive suggestions.
Example:
Brainstorm fifteen beginner article ideas about online privacy for adults with limited technical knowledge.
When to Use
• Articles
• Lessons
• Events
• Projects
• Marketing
How to Customize
• Set number, audience, budget, and exclusions
• Request categories
• Require current verification for availability or prices
Useful Follow-Up Prompts
Remove ideas that are too similar.
Identify which ideas require research.
What to Check
• Ideas are meaningfully different
• Budget and audience are respected
• Current claims are not invented
Prompt 27: Create an Outline
Copy and customize this prompt:
Create a detailed outline for [article, report, presentation, lesson, or project] about [topic]. It is intended for [audience]. Begin with the purpose and key message. Use [required structure] and include main points, supporting information, examples, and a conclusion. Identify research needs instead of inventing facts.
Example:
Create an H1-H2-H3 outline for a beginner article about Claude Projects, including setup, uses, privacy, limits, mistakes, FAQs, and checklist.
When to Use
• Articles
• Reports
• Presentations
• Lessons
• Proposals
How to Customize
• Set audience, length, structure, required topics, and exclusions
• Identify source policy
• State final format
Useful Follow-Up Prompts
Move the safety section earlier.
Identify which sections need current sources.
What to Check
• The order is logical
• Every required topic appears
• The outline fits the intended length
Prompt 28: Create an Action Plan
Copy and customize this prompt:
Create a practical action plan for [goal]. My starting situation is [current state]. I have [time, budget, tools, or help]. The deadline is [date or period]. Divide the work into stages and include tasks, priorities, resources, obstacles, dependencies, and a completion check. Do not assume resources or approvals I did not mention.
Example:
Create an action plan for publishing a WordPress article that still needs figures, final review, DOCX preparation, metadata, publication, and live-page review.
When to Use
• Publishing
• Courses
• Applications
• Websites
• Events
How to Customize
• State starting point and completed work
• Add constraints, dependencies, and approvals
• Define completion evidence
Useful Follow-Up Prompts
Turn the first stage into a detailed checklist.
Add a recovery plan for a one-week delay.
What to Check
• The plan starts from reality
• Dependencies are ordered
• Funding or approval is not assumed
Prompt 29: Create a Decision-Making Comparison
Copy and customize this prompt:
Help me compare [options] for [purpose]. Use these criteria: [list]. Create a table showing benefits, limitations, cost considerations, required effort, risks, best use, and missing information. Do not recommend an option until important facts are verified.
Example:
Compare online bookkeeping programmes in Ontario using length, delivery, tuition, admission, schedule, credential, funding, and deadline.
When to Use
• Courses
• Software
• Services
• Project approaches
• Suppliers
How to Customize
• List only criteria that affect the decision
• Request current official sources when necessary
• Ask for missing-information questions
Useful Follow-Up Prompts
Add a column for facts still needing verification.
Rank criteria by importance without choosing an option.
What to Check
• Equivalent information is compared
• Missing information is labelled
• The recommendation, if any, follows the criteria
Prompt 30: Create a Schedule or Timeline
Copy and customize this prompt:
Create a realistic schedule for completing [project] between [start] and [deadline]. I can work for [time] on [days]. Include stages, tasks, reviews, dependencies, and extra time for delays. Do not schedule unavailable days or assume every task can start immediately.
Example:
Create a four-week schedule for preparing and publishing five beginner website articles with drafting, fact-checking, figures, DOCX files, metadata, publication, and live review.
When to Use
• Content production
• Study
• Applications
• Events
• Research
How to Customize
• Provide dates and availability
• Add review requirements and rest days
• State task dependencies
Useful Follow-Up Prompts
Turn the schedule into a weekly checklist.
Show which tasks depend on earlier work.
What to Check
• Dates and days are correct
• Review time is included
• The workload is realistic
Quick Review of Prompts 26-30
• Brainstorm Ideas
• Create an Outline
• Create an Action Plan
• Create a Decision-Making Comparison
• Create a Schedule or Timeline
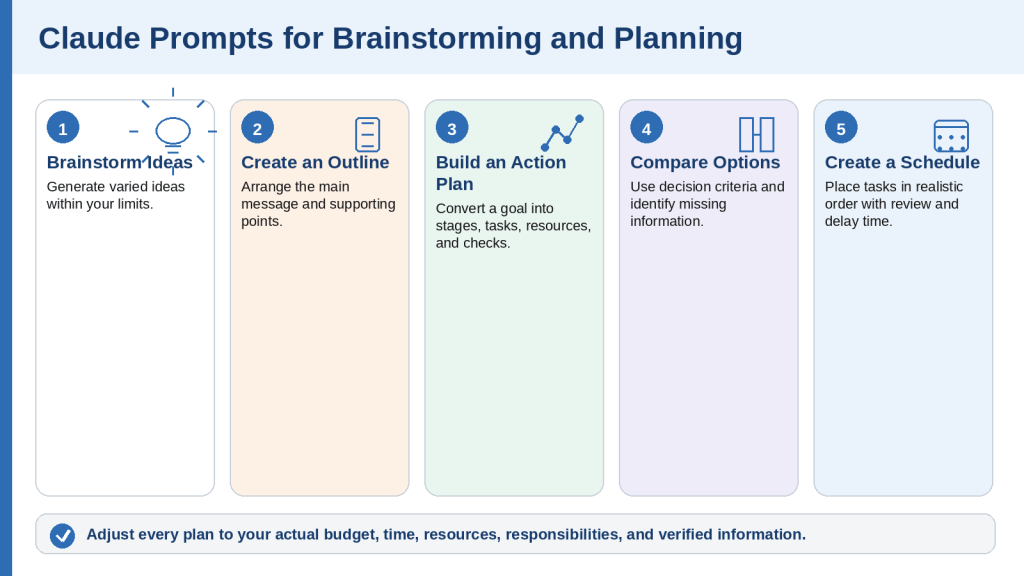
Figure 7. Five Claude prompt types for brainstorming ideas, creating outlines, planning actions, comparing choices, and building schedules.
Explanation: Claude can organize ideas and plans quickly, but suggestions must be adjusted to match the user’s actual time, budget, resources, responsibilities, and verified information.
Prompts 31-35: Web Search and Research
Use web search for focused current questions and Research for broader multi-source investigations. Open cited sources and confirm the information yourself.
Prompt 31: Find Current Information Using Official Sources
Copy and customize this prompt:
Search the web for current information about [topic]. Prioritize official sources from [authority]. Include a citation for every important factual claim, state the date checked, and identify details that vary by location, account, plan, or circumstances. Avoid blogs, advertisements, forums, and social media unless no authoritative source exists.
Example:
Find the current Canadian passport-renewal requirements using only official Government of Canada sources.
When to Use
• Government services
• Software features
• Prices
• Travel rules
• Course information
How to Customize
• Name the topic, location, date, and authoritative source
• Set the required sections
• Exclude sponsored or reseller pages
Useful Follow-Up Prompts
Which source is most authoritative?
List what I should verify immediately before applying.
What to Check
• Sources are official and current
• Effective dates and exceptions are included
• Claims match the citations
Prompt 32: Verify a Claim or Statement
Copy and customize this prompt:
Search the web and verify this claim: “[claim].” Use reliable primary sources whenever possible. Classify it as Confirmed, Partly Confirmed, Unsupported, Outdated, or Incorrect. Include evidence, source dates, qualifications, and citations. Do not count repeated copies of the same original information as independent confirmation.
Example:
Verify whether a named Claude plan includes a specific feature as of August 4, 2026, using official Anthropic sources.
When to Use
• Social-media claims
• Product features
• News headlines
• Statistics
• Quotations
How to Customize
• Copy the exact claim and its date
• Add country and plan context
• Request the original source for quotations
Useful Follow-Up Prompts
Show the exact supporting passage.
Create a corrected version of the claim.
What to Check
• The original source was sought
• The claim date and current date are separated
• Unresolved information is not labelled false
Prompt 33: Conduct Deeper Research
Copy and customize this prompt:
Use Research to investigate . Focus on [location, audience, industry, or date range]. Use reliable primary sources and independent sources when appropriate. Organize the report under Executive Summary, Confirmed Findings, Evidence, Disagreements, Missing Information, Risks, and Next Steps. Cite every important factual claim and separate source facts from interpretation.
Example:
Research current fully online bookkeeping programmes available to Ontario residents and compare length, admission, tuition, funding, and deadlines.
When to Use
• Provider comparisons
• Industry trends
• Policy research
• Technology comparisons
• Literature reviews
How to Customize
• Define the exact question, location, dates, sources, and comparison criteria
• Exclude unsupported promotional claims
• State whether a recommendation is allowed
Useful Follow-Up Prompts
Which findings rely on only one source?
Identify disagreements between sources.
What to Check
• Requested date range was followed
• Primary sources were used
• Missing and conflicting evidence is visible
Prompt 34: Compare Current Products, Services, or Plans
Copy and customize this prompt:
Search the web and compare [options] for [purpose and audience]. Use current official sources and check all information as of [date]. Compare [criteria] in a table, including confirmed features, limitations, pricing or cost considerations, compatibility, availability, privacy, and missing information. Do not recommend until important facts are verified.
Example:
Compare selected AI assistant plans for an adult beginner in Canada using official provider sources and the same review date.
When to Use
• AI services
• Software plans
• Training programmes
• Website platforms
• Subscriptions
How to Customize
• List the options and decision criteria
• State currency, billing period, device, and location
• Separate free and paid features
Useful Follow-Up Prompts
Add an official-source column.
Create questions I should answer before choosing.
What to Check
• Information was checked on the same date
• Prices and availability apply to the location
• Missing information is clearly labelled
Prompt 35: Analyze and Summarize a Webpage
Copy and customize this prompt:
Open and analyze this webpage: [address]. Identify the title, publisher, publication or update date, purpose, key claims, supporting evidence, important conditions, and links to original sources. Summarize for [audience] and identify promotional language, unsupported claims, outdated information, and details requiring verification.
Example:
Analyze an official training-program page and extract delivery method, length, tuition, admission, deadline, credential, and contact method.
When to Use
• Official programme pages
• Documentation
• Government notices
• News reports
• Terms
How to Customize
• State exactly what information to locate
• Separate publication date from event date
• Ask Claude to follow official links when necessary
Useful Follow-Up Prompts
Open the source behind the main claim.
Which details are missing from the page?
What to Check
• The correct webpage and publisher were identified
• Dates are not confused
• Promotional wording is not treated as evidence
Quick Review of Prompts 31-35
• Find Current Information Using Official Sources
• Verify a Claim or Statement
• Conduct Deeper Research
• Compare Current Products, Services, or Plans
• Analyze and Summarize a Webpage
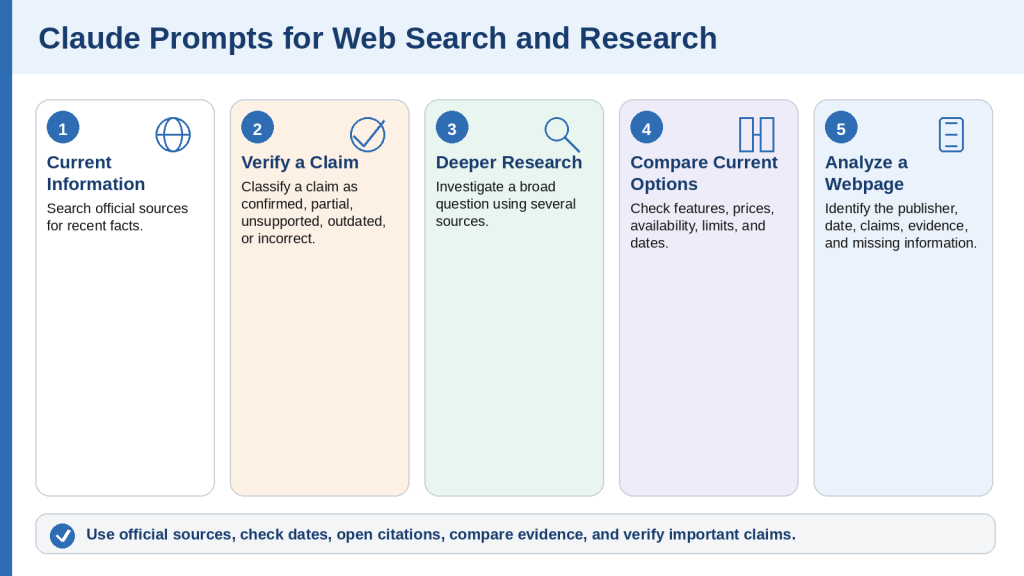
Figure 8. Five Claude prompt types for current information, fact verification, deeper research, comparisons, and webpage analysis.
Explanation: Claude can search current webpages and conduct broader research, but users should specify reliable sources, locations, and date ranges and check every important citation and conclusion.
Prompts 36-40: Data, Tables, and Spreadsheets
Claude can organize data, inspect spreadsheets, suggest formulas, and produce charts. Keep original files unchanged and verify every calculation, range, and conclusion.
Prompt 36: Organize Information into a Table
Copy and customize this prompt:
Organize the information below into a table with these columns: [columns]. Preserve every name, date, amount, unit, and description exactly. Write “Not provided” when missing. Do not guess, calculate, combine records, or add outside information.
Information: [paste]
Example:
Organize expense notes into Date, Supplier, Description, Category, Amount, Payment Status, and Notes.
When to Use
• Expenses
• Requirements
• Meeting actions
• Inventory
• Research findings
How to Customize
• List exact columns
• Define missing-value wording
• Request source pages or privacy redaction
Useful Follow-Up Prompts
Sort the table by date without changing values.
Identify duplicate records but do not remove them.
What to Check
• Values are in the correct columns
• No records were merged
• Units and currencies remain unchanged
Prompt 37: Analyze a Spreadsheet
Copy and customize this prompt:
Analyze the attached spreadsheet titled “[filename].” Explain the purpose of each worksheet and column, then identify totals, trends, missing values, duplicate records, unusual values, and possible data-quality problems. Separate observations from interpretations, do not change the original, and include worksheet names and cell ranges for important findings.
Example:
Analyze “website-expenses-2026.xlsx” and calculate monthly and category totals while flagging missing and unusual values.
When to Use
• Budgets
• Sales
• Inventory
• Surveys
• Project tracking
How to Customize
• Name the worksheet and date range
• Identify columns and excluded rows
• State whether charts or edits are allowed
Useful Follow-Up Prompts
Show the formula used for each total.
List every row containing missing values.
What to Check
• The correct sheet and range were used
• Blanks and negatives are handled correctly
• Conclusions match the data
Prompt 38: Clean and Check Spreadsheet Data
Copy and customize this prompt:
Review the attached spreadsheet for data-quality problems. Identify blank required cells, duplicates, inconsistent dates, capitalization, spelling variations, invalid values, mismatched categories, and possible formula errors. Do not correct anything yet. Create a table with worksheet, cell or row, problem, suggested correction, and reason.
Example:
Review a customer-enquiry spreadsheet without repeating customer contact details in the report.
When to Use
• Pre-report checks
• Data imports
• Dashboard preparation
• Workbook sharing
How to Customize
• Define valid formats and category lists
• State which fields are sensitive
• Require approval before corrections
Useful Follow-Up Prompts
Group problems by severity.
Create a cleaned copy after approved corrections only.
What to Check
• Legitimate duplicates were not deleted
• Blanks were not guessed
• Codes and leading zeros remain intact
Prompt 39: Create or Check Spreadsheet Formulas
Copy and customize this prompt:
Help create or verify formulas for the attached spreadsheet. Required calculations: [list]. For each formula, show worksheet, destination cell, exact formula, included cells, and plain-language explanation. Do not change the workbook until I approve the formulas. Identify missing or unsuitable data.
Example:
Create monthly totals, category totals, tax, annual expenses, average monthly expenses, and budget variance formulas.
When to Use
• Totals
• Averages
• Percentages
• Balances
• Conditional calculations
How to Customize
• State headers and data rows
• Explain blanks, tax, negatives, exclusions, and rounding
• Request sample tests
Useful Follow-Up Prompts
Test each formula using three sample rows.
Check whether any formula excludes the final row.
What to Check
• Cell ranges and references are correct
• Percentages and rounding are checked
• Formulas continue correctly when rows are added
Prompt 40: Create a Chart and Data Summary
Copy and customize this prompt:
Analyze the attached data and create a [chart type] showing [comparison or trend]. Use [field] for the horizontal axis and [value] for the vertical axis. Include a clear title, labels, units, and readable values. Explain why the chart type is suitable and summarize patterns without claiming that correlation proves causation. Save it as [format].
Example:
Create a bar chart of total website expenses by category and a short cautious summary.
When to Use
• Category comparisons
• Monthly trends
• Progress reporting
• Data presentations
How to Customize
• Specify data range, units, dates, missing-data treatment, and output format
• Request a table of chart values
• Ask for a chart recommendation when unsure
Useful Follow-Up Prompts
Confirm the exact cells used.
Remove conclusions not directly supported by the data.
What to Check
• Axes and units are correct
• Values match the spreadsheet
• The scale and summary are not misleading
Quick Review of Prompts 36-40
• Organize Information into a Table
• Analyze a Spreadsheet
• Clean and Check Spreadsheet Data
• Create or Check Spreadsheet Formulas
• Create a Chart and Data Summary

Figure 9. Five Claude prompt types for organizing tables, analyzing spreadsheets, checking data, creating formulas, and producing charts.
Explanation: Claude can help organize and analyze spreadsheet information, but users must verify the source data, formulas, totals, cell ranges, charts, and written conclusions.
Prompts 41-45: Coding and Technical Help
Claude can explain code and help create or review small programs. Remove secrets, keep backups, inspect commands, and test changes safely.
Prompt 41: Explain Computer Code to a Beginner
Copy and customize this prompt:
Explain the code below to a complete beginner. First describe its overall purpose, then explain it section by section. Define technical terms, identify the language, describe expected input and output, and point out anything that may fail or create a security risk. Do not change the code unless asked.
Code: [paste]
Example:
Explain a short Python script that totals a list of prices and prints the result.
When to Use
• Programs
• Web code
• Scripts
• Configuration files
• AI-generated code
How to Customize
• Name the language and environment
• State which section is relevant
• Request line-by-line detail or a diagram
Useful Follow-Up Prompts
Explain the function using an everyday example.
List the assumptions the code makes.
What to Check
• The language and purpose are correct
• Missing files or functions were not invented
• Security-sensitive values are not repeated
Prompt 42: Understand and Troubleshoot an Error
Copy and customize this prompt:
Help me understand and troubleshoot the error below. I use [operating system, software, language, version]. Explain it simply, list likely causes in order, and provide safe diagnostic steps that do not delete or overwrite files. Do not recommend reinstalling, disabling security, or administrator commands without explaining risks and safer alternatives.
Task: [describe]
Exact error: [paste]
Relevant code or command: [paste]
Example:
Troubleshoot a Python FileNotFoundError on Windows 10 when opening expenses.csv.
When to Use
• Programming errors
• Installation problems
• Website errors
• Missing-file problems
• App crashes
How to Customize
• Provide the exact error and environment
• Describe expected and actual results
• Remove passwords, keys, and private paths
Useful Follow-Up Prompts
Which diagnostic step should I try first?
Explain how to reverse the proposed change.
What to Check
• Instructions do not delete data
• Commands and administrator access are explained
• Package sources are trusted
Prompt 43: Create a Small Program or Script
Copy and customize this prompt:
Create a small [language] program that [task] on [environment]. Before coding, restate requirements and identify assumptions. Provide complete code with comments, input validation, error handling, and safe testing instructions. Prefer standard features and do not include secrets, hidden connections, destructive commands, or unnecessary packages.
Example:
Create a Windows 10 Python program that reads a CSV file and totals amounts by category without modifying the source.
When to Use
• Calculators
• Converters
• File tools
• Quizzes
• Reporting scripts
How to Customize
• Specify language, input, output, file rules, packages, and filename
• Require a preview and test cases
• Ask for a confirmation before file changes
Useful Follow-Up Prompts
Create five test cases.
Remove the external package and use built-in features.
What to Check
• File deletion and overwrite commands are absent or explained
• Network connections and packages are clear
• Sample data is used before real data
Prompt 44: Review and Improve Existing Code
Copy and customize this prompt:
Review the code below for correctness, clarity, security, reliability, accessibility, and maintainability. Explain what it does, then create a prioritized table with issue, severity, location, reason, and recommended correction. Do not rewrite yet. Separate confirmed problems from optional improvements and uncertain concerns.
Environment: [details]
Code: [paste]
Example:
Review a simple HTML, CSS, and JavaScript page for correctness, accessibility, and security.
When to Use
• Programs
• Websites
• Macros
• Configuration files
• AI-generated code
How to Customize
• List review priorities and environment
• Limit the scope when necessary
• Preserve interfaces and file structure
Useful Follow-Up Prompts
Correct only high-severity issues.
Create tests that demonstrate each confirmed problem.
What to Check
• Problems are distinguished from preferences
• Required behaviour is preserved
• New packages or security weaknesses were not introduced
Prompt 45: Create a Simple Webpage or Interactive Tool
Copy and customize this prompt:
Create a simple [webpage, calculator, quiz, checklist, planner, or tool] for [purpose and audience]. Include [functions]. Use a responsive layout, large readable text, clear labels, keyboard-accessible controls, helpful errors, and sufficient contrast. Keep the code simple and explain testing. Do not collect personal information, use tracking, connect to external services, or load untrusted code.
Example:
Create a self-contained suspicious-email quiz with ten questions, explanations, final score, restart button, and safety checklist.
When to Use
• Quizzes
• Calculators
• Checklists
• Planners
• Demonstrations
How to Customize
• State required functions, inputs, accessibility, storage, and connections
• Request one self-contained HTML file
• Define test cases
Useful Follow-Up Prompts
Test with normal, empty, and invalid inputs.
Improve keyboard focus indicators.
What to Check
• Buttons, calculations, and errors work
• Mobile and keyboard use are tested
• No unexpected storage or network request exists
Quick Review of Prompts 41-45
• Explain Computer Code to a Beginner
• Understand and Troubleshoot an Error
• Create a Small Program or Script
• Review and Improve Existing Code
• Create a Simple Webpage or Interactive Tool
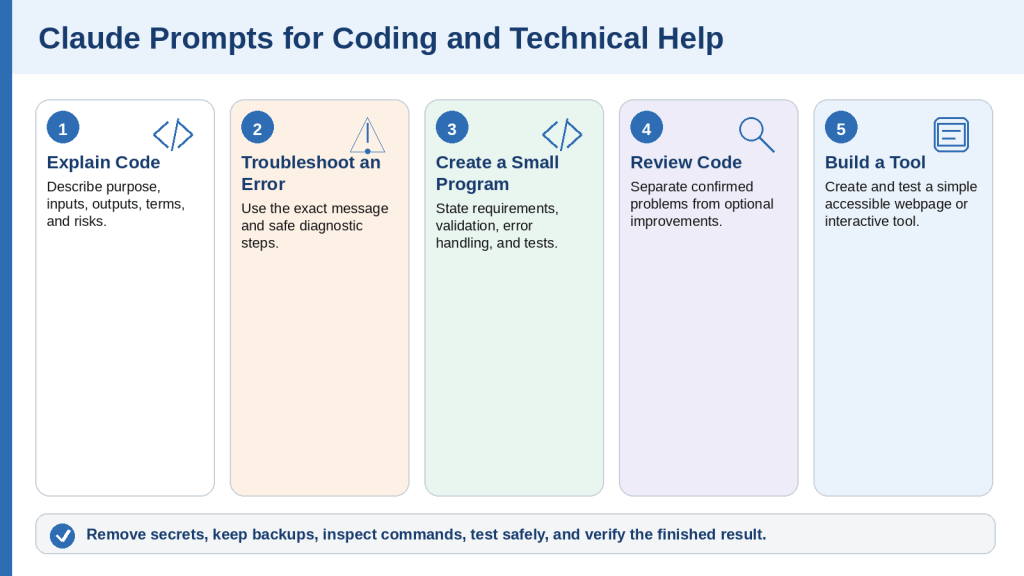
Figure 10. Five Claude prompt types for understanding code, troubleshooting errors, creating programs, reviewing code, and building interactive tools.
Explanation: Claude can explain and generate code, while Claude Code can work more directly with larger software projects. In both cases, users should protect secrets, keep backups, inspect commands, and test every change.
Prompts 46-50: Projects, Artifacts, Files, and Connected Tools
Projects, Artifacts, downloadable files, and connectors support larger workflows. Restrict permissions and require approval before any important external change.
Prompt 46: Create and Organize a Claude Project
Copy and customize this prompt:
Help me plan a Claude Project for [purpose]. Recommend a clear name, knowledge-base content, Project instructions, conversation categories, filename system, and review process. Do not include confidential information or assume every Project chat automatically knows the content of other chats.
Example:
Plan an “AI Mastery Website” Project with research, drafting, figures, document preparation, and WordPress-publishing conversations.
When to Use
• Websites
• Courses
• Research
• Business plans
• Software projects
How to Customize
• Explain the purpose, audience, repeated work, files, outputs, and review process
• Separate permanent and temporary instructions
• Identify information that should remain outside Claude
Useful Follow-Up Prompts
Turn the Project instructions into ready-to-paste text.
Create a monthly maintenance checklist.
What to Check
• Permanent rules and temporary requests are separated
• Duplicate and sensitive files are excluded
• The plan includes external backups
Prompt 47: Create Project Instructions and a Knowledge-Base Plan
Copy and customize this prompt:
Create Project instructions for [purpose]. Claude should write for [audience], use [tone and language], follow [formatting], prioritize [sources], protect [privacy], and complete [workflow]. Also create a table listing knowledge-base documents, why needed, review frequency, and excluded information.
Example:
Create instructions for a beginner AI-education website using simple language, Canadian spelling, official current sources, approved heading rules, image rules, and publishing workflow.
When to Use
• Brand style
• Research policy
• Publishing workflows
• Coding standards
• Teaching approaches
How to Customize
• List audience, tone, headings, source, privacy, naming, and deliverables
• Remove contradictory rules
• Add version and review date
Useful Follow-Up Prompts
Shorten the instructions without removing important rules.
Identify conflicts between instructions.
What to Check
• Instructions are clear and consistent
• Only approved current documents are included
• Claude is not expected to remember unsaved information
Prompt 48: Create and Revise an Artifact
Copy and customize this prompt:
Create an Artifact containing [document, webpage, diagram, calculator, quiz, checklist, planner, or tool]. It is for [audience and purpose]. Include [content and features]. Use clear layout, readable text, accessible controls, and sufficient contrast. Keep it self-contained and do not collect personal information, connect services, publish, or share until approved.
Example:
Create an interactive article-review checklist covering facts, sources, headings, images, alt text, privacy, links, mobile layout, and final approval.
When to Use
• Documents
• Checklists
• Diagrams
• Calculators
• Interactive learning
How to Customize
• State Artifact type, functions, visual layout, accessibility, storage, connections, and publication rules
• Require testing before sharing
• Explain what becomes public
Useful Follow-Up Prompts
Test every control and list problems.
Add a print-friendly version.
What to Check
• Content and calculations are accurate
• Mobile and keyboard use work
• Private information and sharing settings are reviewed
Prompt 49: Create a Downloadable Document, Spreadsheet, Presentation, or PDF
Copy and customize this prompt:
Create a downloadable [DOCX, XLSX, PPTX, PDF, or supported file] for [purpose and audience]. Use only . Include [content, sections, worksheets, slides, formulas, charts, or images]. Follow [formatting]. Do not invent missing facts or alter approved information. Save as “[filename]” and review the complete file for missing content, errors, broken links, layout, and compatibility.
Example:
Create a TextMaker-compatible DOCX with the approved article, featured image, figures, captions, explanations, linked sources, Arial 12-point body text, and no footer.
When to Use
• Documents
• Spreadsheets
• Presentations
• PDF reports
• Handouts
How to Customize
• State file type, source, formatting, filename, compatibility, and review requirements
• Request formula audits or link tests
• Keep original sources unchanged
Useful Follow-Up Prompts
Correct only the listed formatting problems.
Create a separate ZIP containing embedded images.
What to Check
• The file opens in the intended application
• Fonts, links, images, and page breaks are correct
• The content matches the approved source
Prompt 50: Use a Connector or Connected Service Carefully
Copy and customize this prompt:
Use the available connection to [service] for [task]. Access only necessary information. Before action, explain what information is needed, which tool will be used, and whether the task is read-only or changes external data. Do not send, delete, move, publish, share, or modify anything without explicit approval. Afterward, list what was accessed and how to verify it in the original service.
Example:
Search an authorized cloud drive for documents related to a website-publishing checklist without editing, moving, sharing, or deleting files.
When to Use
• Cloud storage
• Calendars
• Work messaging
• Code repositories
How to Customize
• Name the service, task, date range, and permitted items
• Make read-only limits explicit
• Require verification in the original service
Useful Follow-Up Prompts
Show the items found before opening them.
Draft the proposed change without applying it.
What to Check
• The correct account and permissions were used
• No external change occurred without approval
• The result is visible in the original service
Quick Review of Prompts 46-50
• Create and Organize a Claude Project
• Create Project Instructions and a Knowledge-Base Plan
• Create and Revise an Artifact
• Create a Downloadable Document, Spreadsheet, Presentation, or PDF
• Use a Connector or Connected Service Carefully
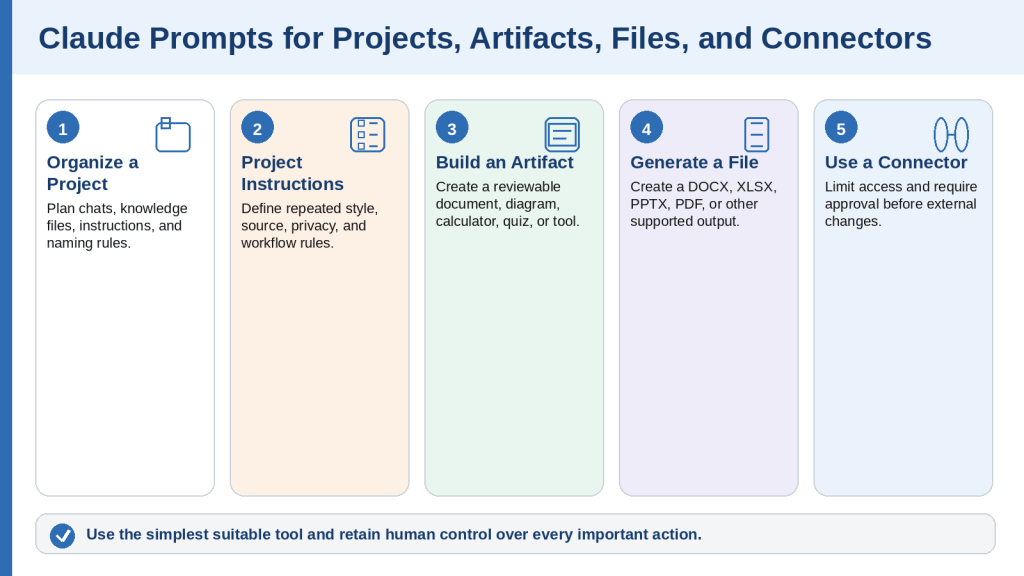
Figure 11. Five Claude prompt types for Projects, Project instructions, Artifacts, downloadable files, and connected services.
Explanation: Projects, Artifacts, file creation, and connectors can support complex work, but users should restrict access, approve external changes, test outputs, and verify completed actions in the original service.
Common Claude Prompt Mistakes and How to Correct Them
Even a detailed template can produce a weak result when it is customized incorrectly. The following mistakes are common among beginners.
Mistake 1: Sending a Prompt Without Replacing Placeholders
Replace every [topic], [audience], [filename], and other placeholder before sending.
Mistake 2: Describing the Subject but Not the Task
Begin with a clear action such as explain, summarize, compare, rewrite, analyze, verify, organize, or create.
Mistake 3: Assuming Claude Knows Your Situation
Add relevant audience, purpose, location, device, software, or document context.
Mistake 4: Combining Several Unrelated Tasks
Use separate prompts or conversations for unrelated work and stages for complex related work.
Mistake 5: Providing Too Little Source Information
Attach or paste the correct source and state whether outside information is allowed.
Mistake 6: Providing Too Much Unorganized Information
Use labelled sections for Task, Context, Audience, Source, Format, Limits, and Verification.
Mistake 7: Using Conflicting Instructions
Resolve requirements that cannot both be followed and state which one has priority.
Mistake 8: Requesting a Format Without Describing Its Contents
Define headings, rows, columns, slides, sections, or file requirements.
Mistake 9: Requesting Current Information Without Search
Enable web search and request current official sources, dates, and citations.
Mistake 10: Searching When Only Supplied Text Should Be Used
State “Use only the text below. Do not search or add outside information.”
Mistake 11: Asking Claude to Guess Missing Information
Require “Not provided,” “Not found,” or a clear uncertainty label.
Mistake 12: Treating a Detailed Answer as an Accurate Answer
Check original sources, calculations, quotations, dates, amounts, and conditions.
Mistake 13: Requesting a Recommendation Without Criteria
Provide the decision purpose and the criteria that matter to you.
Mistake 14: Restarting Everything When One Part Is Wrong
Preserve approved content and request a focused correction.
Mistake 15: Writing Only “Make It Better”
Describe the exact change in clarity, tone, length, structure, facts, or format.
Mistake 16: Failing to Explain What Finished Means
Provide acceptance criteria and the complete list of expected deliverables.
Mistake 17: Requesting a Very Long Answer in One Step
Divide long work into sections and continue from the last completed heading.
Mistake 18: Using Advanced Reasoning for Every Simple Task
Use ordinary chat for routine work and advanced tools only when the task benefits from them.
Mistake 19: Uploading Unnecessary Private Information
Redact identities, account details, keys, private addresses, and confidential records.
Mistake 20: Sending or Publishing the First Response
Review, correct, verify, and save only the approved version.
Final Prompt-Quality Checklist
• The task begins with a clear action.
• Every placeholder has been replaced.
• The necessary context and audience are included.
• The permitted source and current-search requirements are clear.
• The output format and realistic length are specified.
• Important limits and missing-information rules are included.
• Conflicting instructions and unnecessary private information have been removed.
• The correct Claude tool is selected.
• Claude knows what a successful result includes.
• The finished response will be reviewed before use.
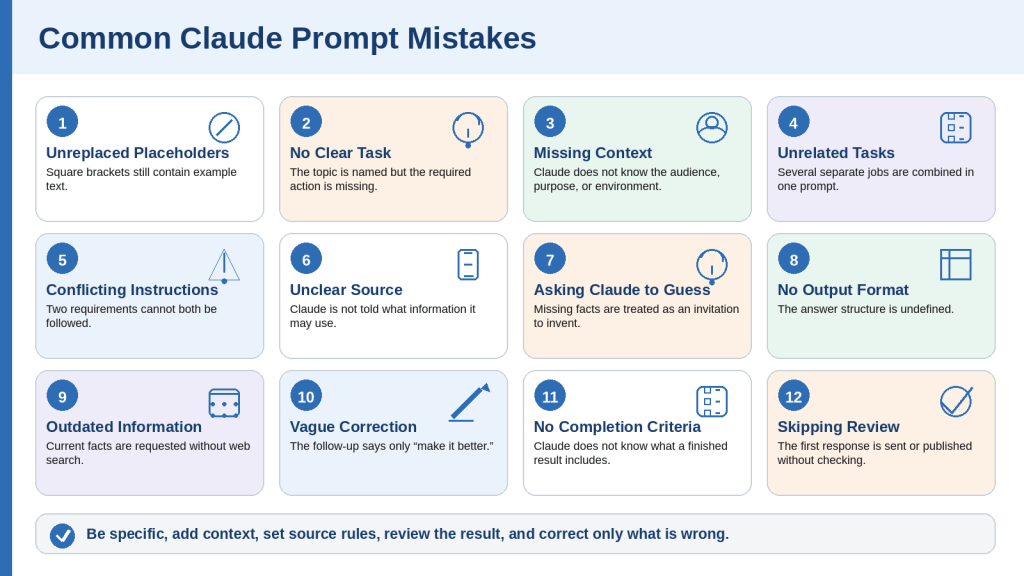
Figure 12. Common Claude prompt mistakes and the main ways to correct them.
Explanation: Weak responses often result from missing context, unclear tasks, conflicting instructions, unsuitable tools, or insufficient review. Correct the specific problem instead of restarting approved work.
How to Improve Claude’s First Response with Follow-Up Prompts
A follow-up prompt tells Claude how to correct, expand, shorten, reorganize, or verify its previous response. It should identify what is already correct, the exact problem, the required change, what must remain unchanged, and how the revision will be checked.
1. Simplify the Answer
Keep the confirmed facts but use shorter sentences, define terms, and add an everyday example.
2. Add More Detail
Expand only the named section and add specified explanations, examples, limits, or checklist items.
3. Shorten the Response
Preserve the conclusion, facts, warnings, dates, conditions, and actions while removing repetition.
4. Correct a Specific Error
Name the exact error and replacement and instruct Claude not to change anything else.
5. Preserve More Original Writing
Correct only grammar, punctuation, repeated words, and genuinely unclear sentences.
6. Change the Tone
State the desired tone and what must not become more aggressive, emotional, apologetic, or certain.
7. Change the Structure
Keep approved content but reorganize it into the requested headings, table, checklist, or numbered steps.
8. Use Only the Approved Source
Remove unsupported statements, add page references, and label missing information.
9. Verify Important Claims
Check current official sources or compare dates, amounts, quotations, and conditions against the source.
10. Separate Facts from Interpretation
Create distinct sections for source facts, Claude’s interpretation, and information requiring verification.
11. Show What Changed
Provide the revised version and a concise table of major changes and reasons.
12. Check the Previous Response
Audit the response against the original requirements before rewriting it.
13. Provide Alternatives
Create clearly different options only when tone or wording is a matter of preference.
14. Continue Without Repetition
Continue from the named heading or final complete sentence.
15. Convert to Another Format
Preserve approved wording while converting it to a table, checklist, slides, or file.
A Simple Three-Step Revision Method
1. Identify the approved content that must remain unchanged.
2. Describe the exact error, omission, tone, length, structure, or source problem.
3. Define the focused correction and the final check.
Reusable follow-up formula:
Keep: [approved content]
Problem: [exact problem]
Change: [required correction]
Limits: [what must not change]
Final check: [what Claude should verify]
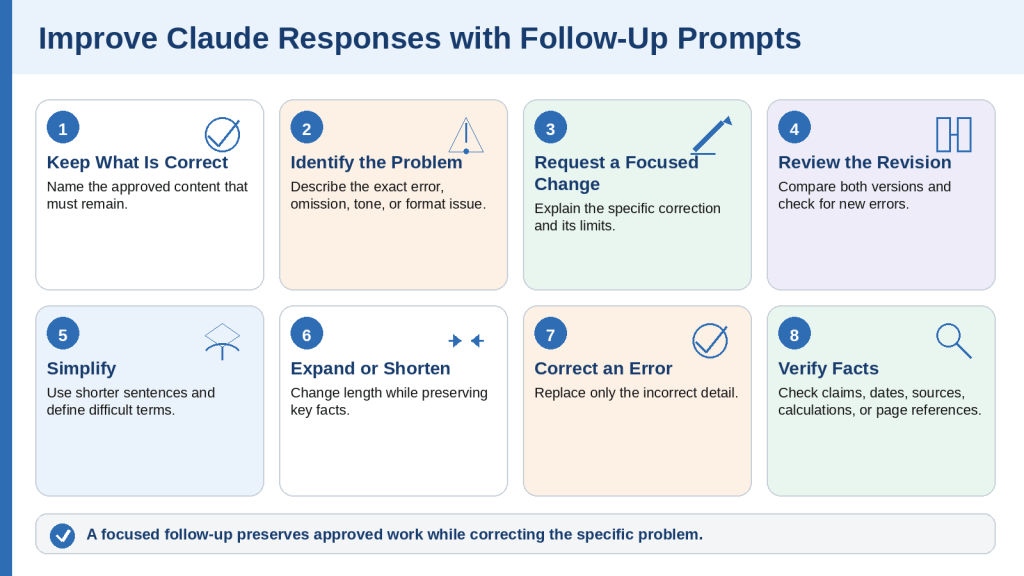
Figure 13. A focused follow-up prompt preserves approved content while correcting a specific problem.
Explanation: Claude’s first response does not need to be discarded when only one part is unsuitable. A good follow-up identifies approved content, the exact problem, the required change, and what must remain unchanged.
How to Save, Organize, and Reuse Your Best Claude Prompts
A prompt library is an organized collection of reviewed prompts that can be copied, updated, and reused. Store it in a trusted document, spreadsheet, notes application, Project knowledge file, or organized folder.
Save only prompts that produce the intended result, contain no private information, identify the audience and source, define the output, explain how missing information should be handled, and work in a new conversation.
Give every prompt a descriptive name and organize prompts by category. Use a consistent filename such as [category]-[task]-v[version]-[date].
Keep the reusable template separate from its example, preserve square-bracket placeholders in the master copy, record testing notes, and create a new version when the prompt changes significantly.
Review prompts when Claude tools, product features, publishing requirements, policies, or your workflow changes. Mark unsuitable prompts as Retired and keep a backup outside Claude.
Reusable Prompt-Library Entry
Template:
Prompt Name: [descriptive name]
Category: [category]
Purpose: [what it accomplishes]
Best Used For: [suitable tasks]
Required Input: [text, file, data, webpage, or details]
Claude Tool Required: [chat, web search, Research, Project, Artifact, Code, or connector]
Expected Output: [format and contents]
Important Limits:
Version: [number]
Last Reviewed: [date]
Status: [Draft, Testing, Approved, Review Needed, or Retired]
Reusable Prompt: [paste]
Testing Notes: [record results]
Prompt-Library Review Checklist
• The name describes the task.
• The purpose, category, and required input are clear.
• Placeholders, source rules, output format, and privacy limits are included.
• The correct Claude tool is identified.
• Version, review date, status, and testing notes are recorded.
• The prompt works in a new conversation.
• Outdated prompts are marked for review or retirement.
• A backup copy exists.
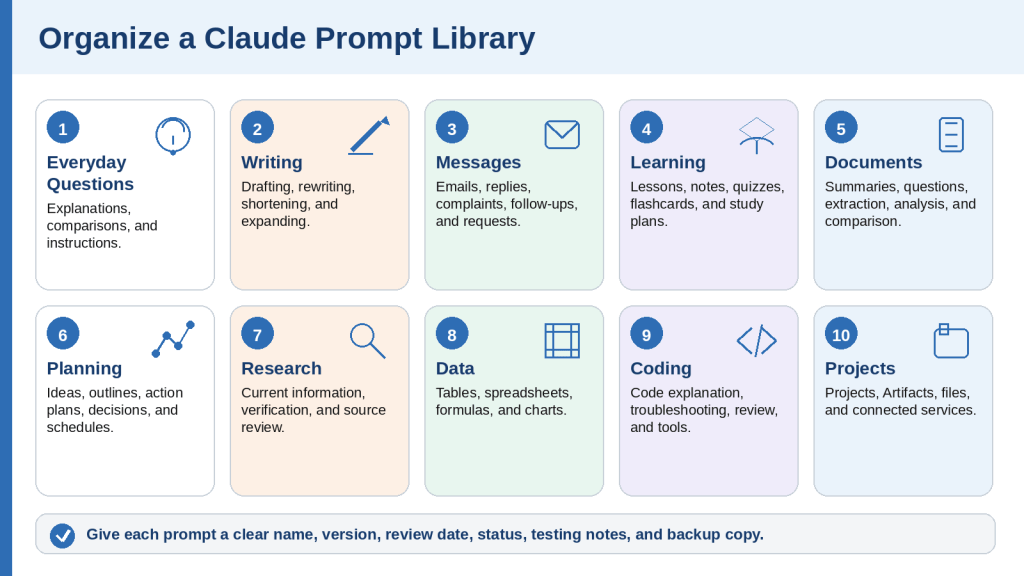
Figure 14. A prompt library organizes reviewed Claude prompts by purpose, version, and review status.
Explanation: A saved prompt is more useful when it has a descriptive name, clear placeholders, testing notes, version information, a review date, and an external backup.
Claude Prompt Safety and Privacy Checklist
Protect Personal Information
Remove unnecessary names, addresses, contact details, dates of birth, identification numbers, financial data, account numbers, and other personal information. Use neutral labels when possible.
Remove Passwords, Keys, and Login Information
Never paste passwords, verification codes, API keys, access tokens, database credentials, or recovery codes.
Review Documents Before Uploading
Check comments, tracked changes, hidden worksheets, properties, embedded files, signatures, identification numbers, and confidential notes. Use a redacted copy when possible.
Use Only the Minimum Information Required
Upload only the pages, fields, or sections required for the task.
Protect Information About Other People
Follow privacy, workplace, school, contractual, and legal requirements before uploading another person’s records or messages.
Be Careful with High-Risk Subjects
Use current official sources and qualified professional review for legal, medical, tax, financial, security, immigration, benefits, employment, and other high-impact matters.
Do Not Ask Claude to Invent Evidence
Do not request fabricated quotations, citations, research, reviews, work history, statistics, records, or supporting documents.
Check Copyright and Permission
Use material you created or have permission to use, summarize rather than reproduce large protected passages, and describe broad style traits instead of imitating a living author exactly.
Review Web Research Carefully
Prefer official sources, check dates, open citations, confirm conditions, and compare reliable sources when appropriate.
Review Calculations and Data
Check units, currencies, cell ranges, formulas, blanks, negative values, chart scales, and assumptions.
Review Generated Code Before Running It
Keep backups, inspect commands, verify packages, use sample information, and avoid destructive or unexplained administrator actions.
Control Connected-Service Actions
Require explicit approval before sending messages, changing events, deleting or moving files, changing permissions, publishing, or modifying external systems.
Reusable Safety Instruction
Safety and verification requirements:
Use only the information necessary for this task. Do not reveal, repeat, or infer private information unnecessarily. Do not invent missing facts, quotations, references, dates, amounts, or approvals. Clearly identify uncertainty. Preserve the original source unchanged. Flag high-risk matters for qualified human review. Treat the result as a draft until checked.
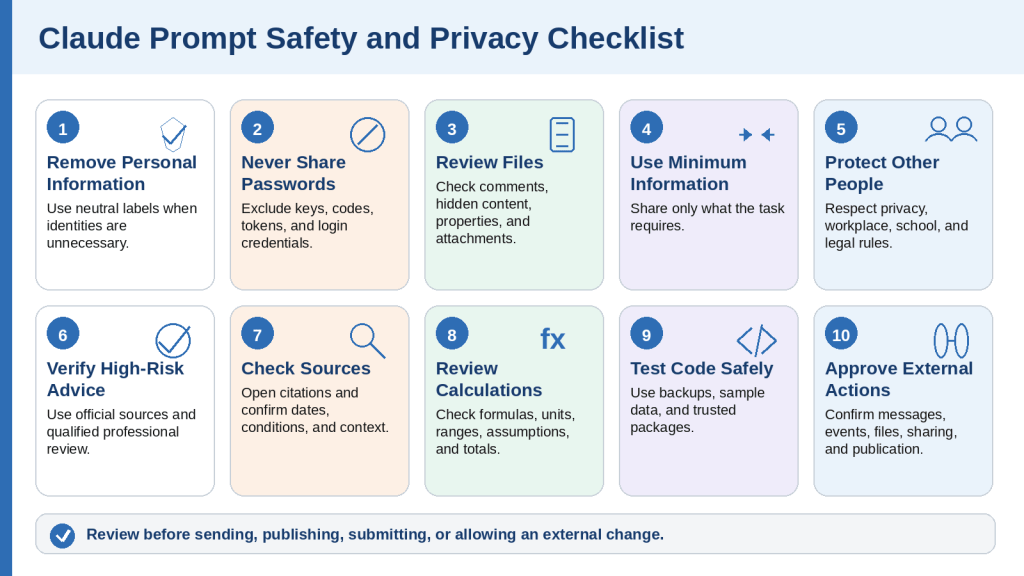
Figure 15. Essential privacy, safety, verification, and approval checks for Claude prompts.
Explanation: Safe prompting requires more than removing passwords. Users should minimize personal information, review uploaded files, verify important claims, test calculations and code, and approve external actions carefully.
Frequently Asked Questions About Claude Prompts
What is a Claude prompt?
A prompt is any question, instruction, source material, file, or follow-up message sent to Claude.
Do prompts need to be long?
No. Use as much detail as the task requires and remove information that does not help.
What information should a prompt include?
Many prompts benefit from Task, Context, Audience, Source, Format, Limits, and Verification.
Can I copy the 50 prompts exactly?
Yes, but replace placeholders and remove instructions that do not apply.
Can I reuse a prompt?
Yes. Update the topic, source, audience, date, requirements, and examples first.
Why can the same prompt produce different answers?
Context, files, tools, models, settings, and ambiguity can change the result.
Should I start a new conversation?
Continue related work in the same chat; use a new chat for unrelated work, clean testing, or outdated context.
How do I stop Claude from adding information?
State the permitted source and require a missing-information label instead of guessing.
How do I request current information?
Enable web search, name official sources, state the location and date, and request citations.
How do I make the writing beginner-friendly?
Request short sentences, defined terms, no unexplained abbreviations, and practical examples.
How do I preserve my meaning?
Tell Claude to preserve facts, names, dates, numbers, requests, warnings, and conditions.
How do I stop excessive rewriting?
Limit the edit to grammar, punctuation, duplicated words, and unclear sentences.
What should I do when Claude misunderstands?
Explain what is correct, what was misunderstood, the exact correction, and what must remain unchanged.
Can Claude create files?
Claude can create supported downloadable files when the required capabilities are available; every file still needs review.
Can Claude read every part of every file?
No. Scans, small text, tables, embedded visuals, hidden content, protection, and unusual formatting can reduce accuracy.
Can I upload confidential documents?
Only when permitted and necessary, after redacting unnecessary information and checking hidden content.
Can Claude replace professional advice?
No. High-risk legal, medical, financial, tax, security, or other matters require reliable sources and qualified review.
Should I trust citations?
Open the original source and confirm that it supports the claim, applies to your location, and is current.
How many tasks belong in one prompt?
Several related tasks can form one workflow; unrelated tasks should be separated.
Does polite wording or perfect grammar matter?
Politeness is fine and perfect grammar is not required; clarity and complete instructions matter more.
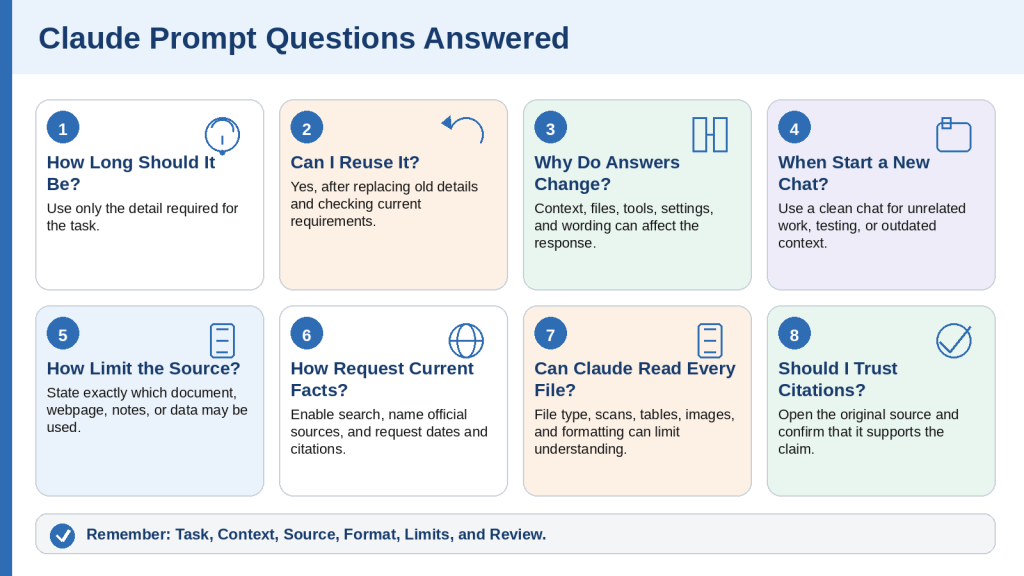
Figure 16. Common beginner questions about writing, reusing, correcting, and checking Claude prompts.
Explanation: Claude prompts do not need to be complicated, but they should identify the task and important limits. Reusable prompts still require customization, and every response, file, calculation, and citation should be reviewed.
Key Takeaways
1. Begin with a clear task.
2. Add only relevant context.
3. Replace every placeholder.
4. Identify the permitted source.
5. Request current sources when information may have changed.
6. Describe the required output.
7. Set important limits.
8. Protect private information.
9. Break complicated work into stages.
10. Use focused follow-up prompts.
11. Select the correct Claude tool.
12. Check uploaded documents carefully.
13. Verify calculations, formulas, and code.
14. Review citations and original sources.
15. Keep human control over external actions.
16. Treat the first response as a draft.
17. Save prompts that work well.
18. Update saved prompts when tools change.
19. Use Claude to support decisions rather than replace judgment.
20. Seek qualified help for high-risk matters.
A Reusable Beginner Prompt Formula
Formula:
Task: [Explain exactly what Claude should do.]
Context: [Add relevant background.]
Audience: [Identify who will use the result.]
Source: [State which information Claude may use.]
Format: [Describe how the response should be organized.]
Limits: [Explain what Claude must not add, change, reveal, or assume.]
Verification: [Identify what must be checked.]
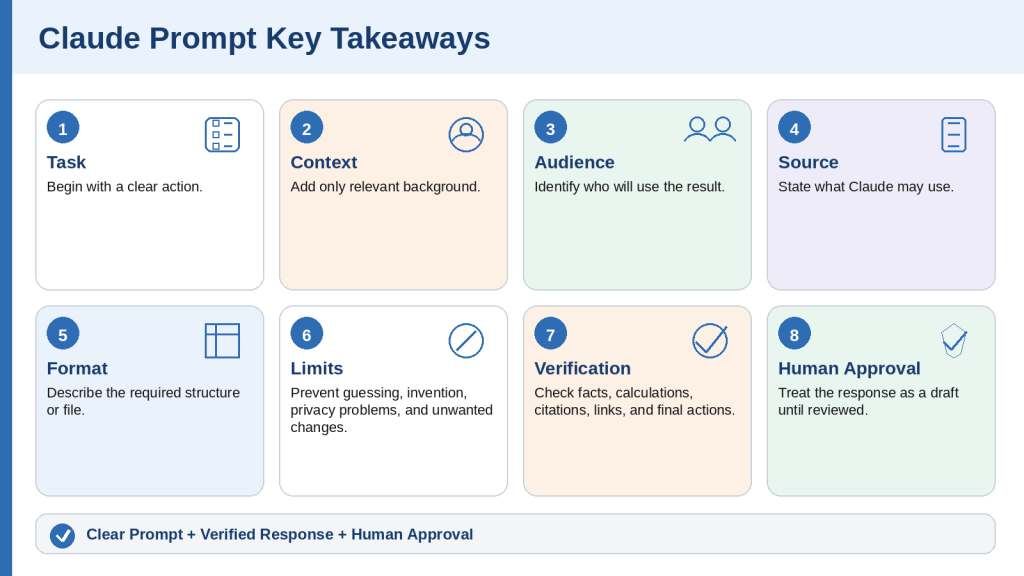
Figure 17. The essential elements of a clear, safe, and reusable Claude prompt.
Explanation: Effective Claude prompts identify the task, context, audience, source, format, limits, and verification requirements. The user should customize the template, protect private information, review the response, and approve the result.
Conclusion
Claude can help beginners write, learn, research, analyze documents, organize information, work with spreadsheets, understand code, create files, and manage larger projects. The quality of the result depends heavily on the instructions and source material provided.
The 50 prompts in this guide are starting points. Replace placeholders, explain the purpose and audience, identify the permitted source, request a suitable format, and tell Claude how to handle missing or uncertain information.
When the first response is unsuitable, use a focused follow-up that preserves approved content and clearly identifies the required change.
Before sending, publishing, submitting, or relying on Claude’s work, check facts, names, dates, amounts, quotations, calculations, formulas, code, citations, links, privacy, formatting, and completeness.
Clear instructions, reliable sources, careful verification, and human approval are the foundation of safe and effective prompting.
Continue Learning
Claude AI for Beginners: Complete Guide (2026)
Learn what Claude is, how to access it, its main tools, limitations, and beginner safety practices.
Prompt Engineering for Beginners: Complete Guide (2026)
Learn how context, examples, formats, and limits improve instructions for AI assistants.
Best ChatGPT Prompts for Beginners (2026)
Explore practical ChatGPT prompt examples and compare reusable prompting principles.
ChatGPT vs Google Gemini: Beginner Comparison (2026)
Compare two widely used assistants and learn why the suitable tool depends on the task and available features.
Sources and References
Source Review Date: August 4, 2026
The following official Anthropic and Claude resources were used to review the article. Product features, account limits, interfaces, and plan availability may change, so verify current details before relying on them.
1. Introduction to Prompt Design – Claude Help Center
2. Get Started with Claude – Claude Help Center
3. My Prompt Is Not Giving Me a Helpful Answer – Claude Help Center
4. Claude’s Response to My Prompt Is Too Brief – Claude Help Center
5. Claude Is Providing Incorrect or Misleading Responses – Claude Help Center
6. Upload Files to Claude – Claude Help Center
7. Enable and Use Web Search – Claude Help Center
8. Use Research on Claude – Claude Help Center
9. When Should I Use Web Search, Extended Thinking, and Research? – Claude Help Center
10. How Can I Create and Manage Projects? – Claude Help Center
11. What Are Projects? – Claude Help Center
12. What Are Artifacts and How Do I Use Them? – Claude Help Center
13. Publish and Share Artifacts – Claude Help Center
14. Create and Edit Files with Claude – Claude Help Center
15. Use Connectors to Extend Claude’s Capabilities – Claude Help Center
16. Manage Claude’s Tool Access – Claude Help Center
17. Claude Code User FAQ – Claude Help Center
18. Claude Code: Common Developer Use Cases – Claude Help Center
19. How Do Usage and Length Limits Work? – Claude Help Center